

Well hello! Sorry for the long quiet spell, I have been hard at work writing not one, but two books. The manuscripts have been handed in and the usual service can resume. I did keep the podcast going though, so if you’ve not heard the new episodes, listen below:
The books are about baking and puddings, and I’ll tell you more about them later in the year. As I was researching and writing them, I realised that there are recipes I have been meaning to write for you, but, for one reason or another, I have never got around to. Well, I aim to rectify this over the next few months. Top of my pile is the very delicious Chelsea bun, my favourite of the sticky bun tribe.
I recently asked Twitter[1] which was better, cinnamon or Chelsea buns. In my hubris, I expected the Chelsea bun to win easily. It did not, and the main reason it wasn’t picked was that folk didn’t know what one was. Well, today I give you my recipe which I have been working on and I think perfected (I hope you agree).

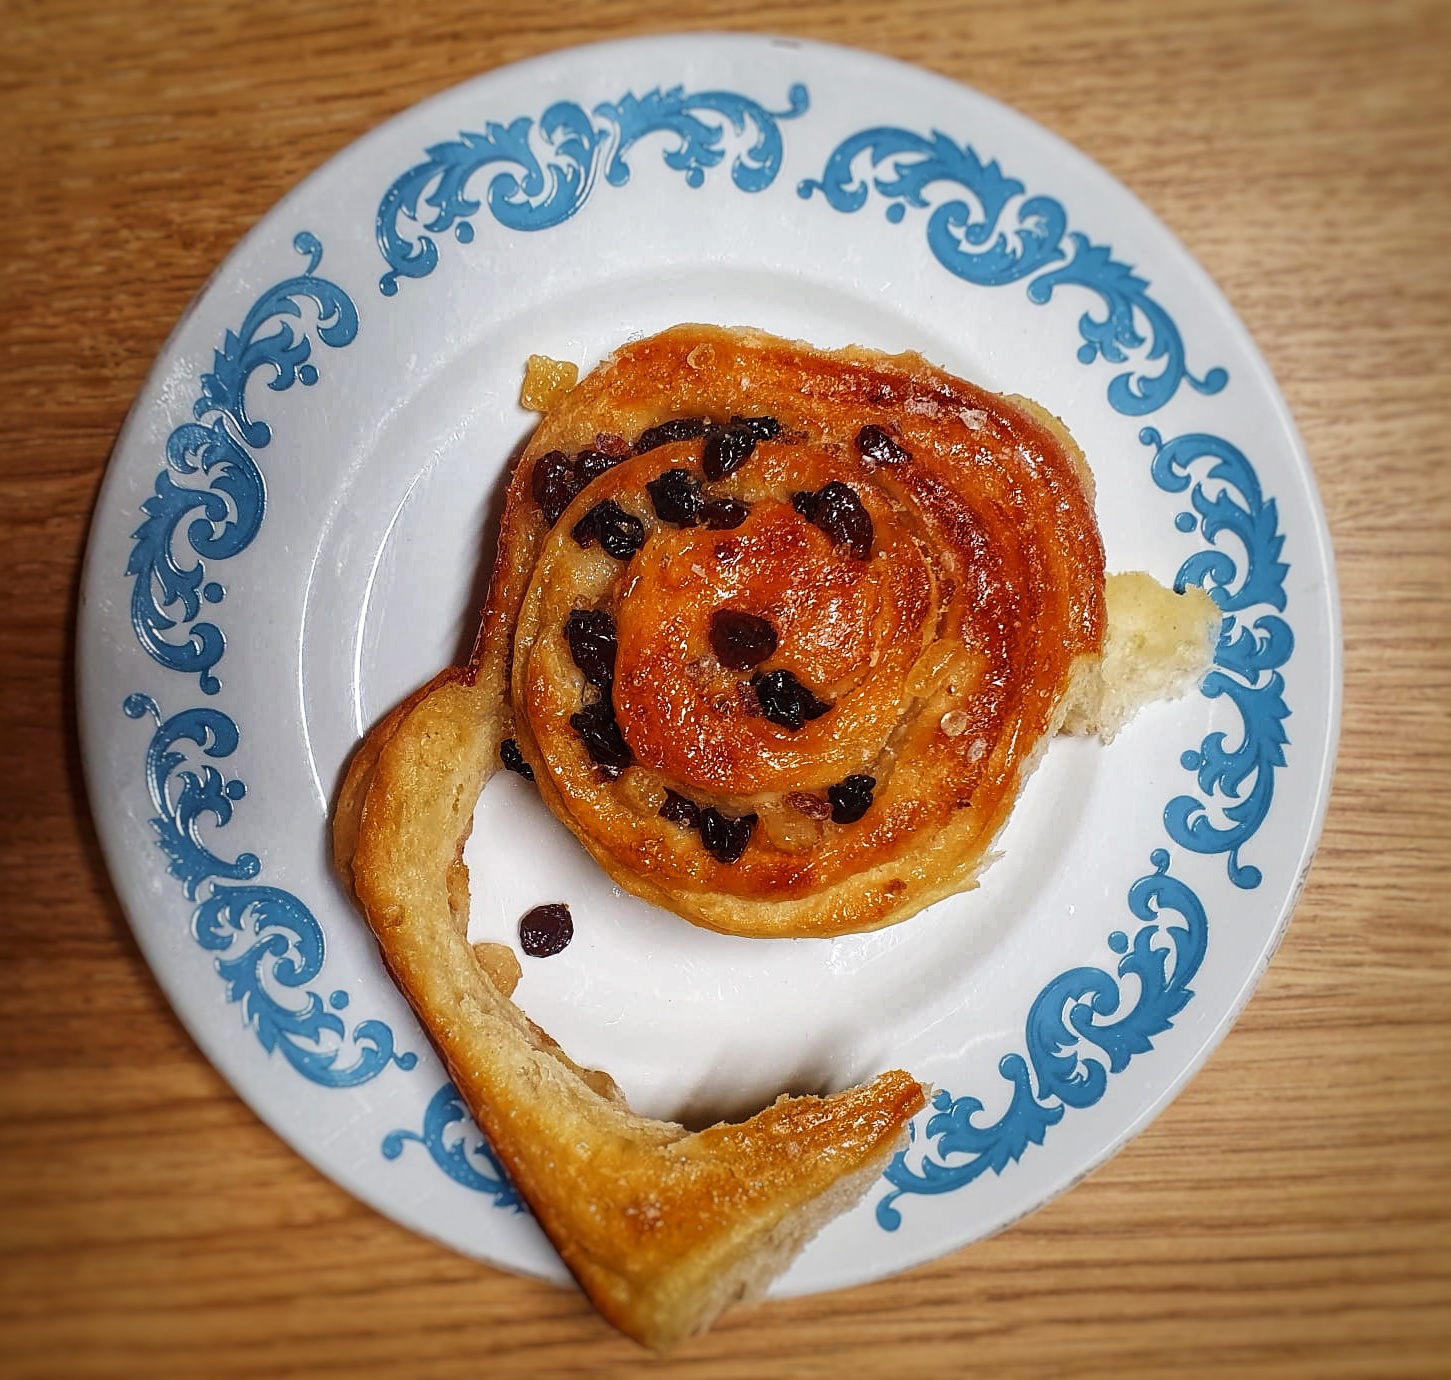
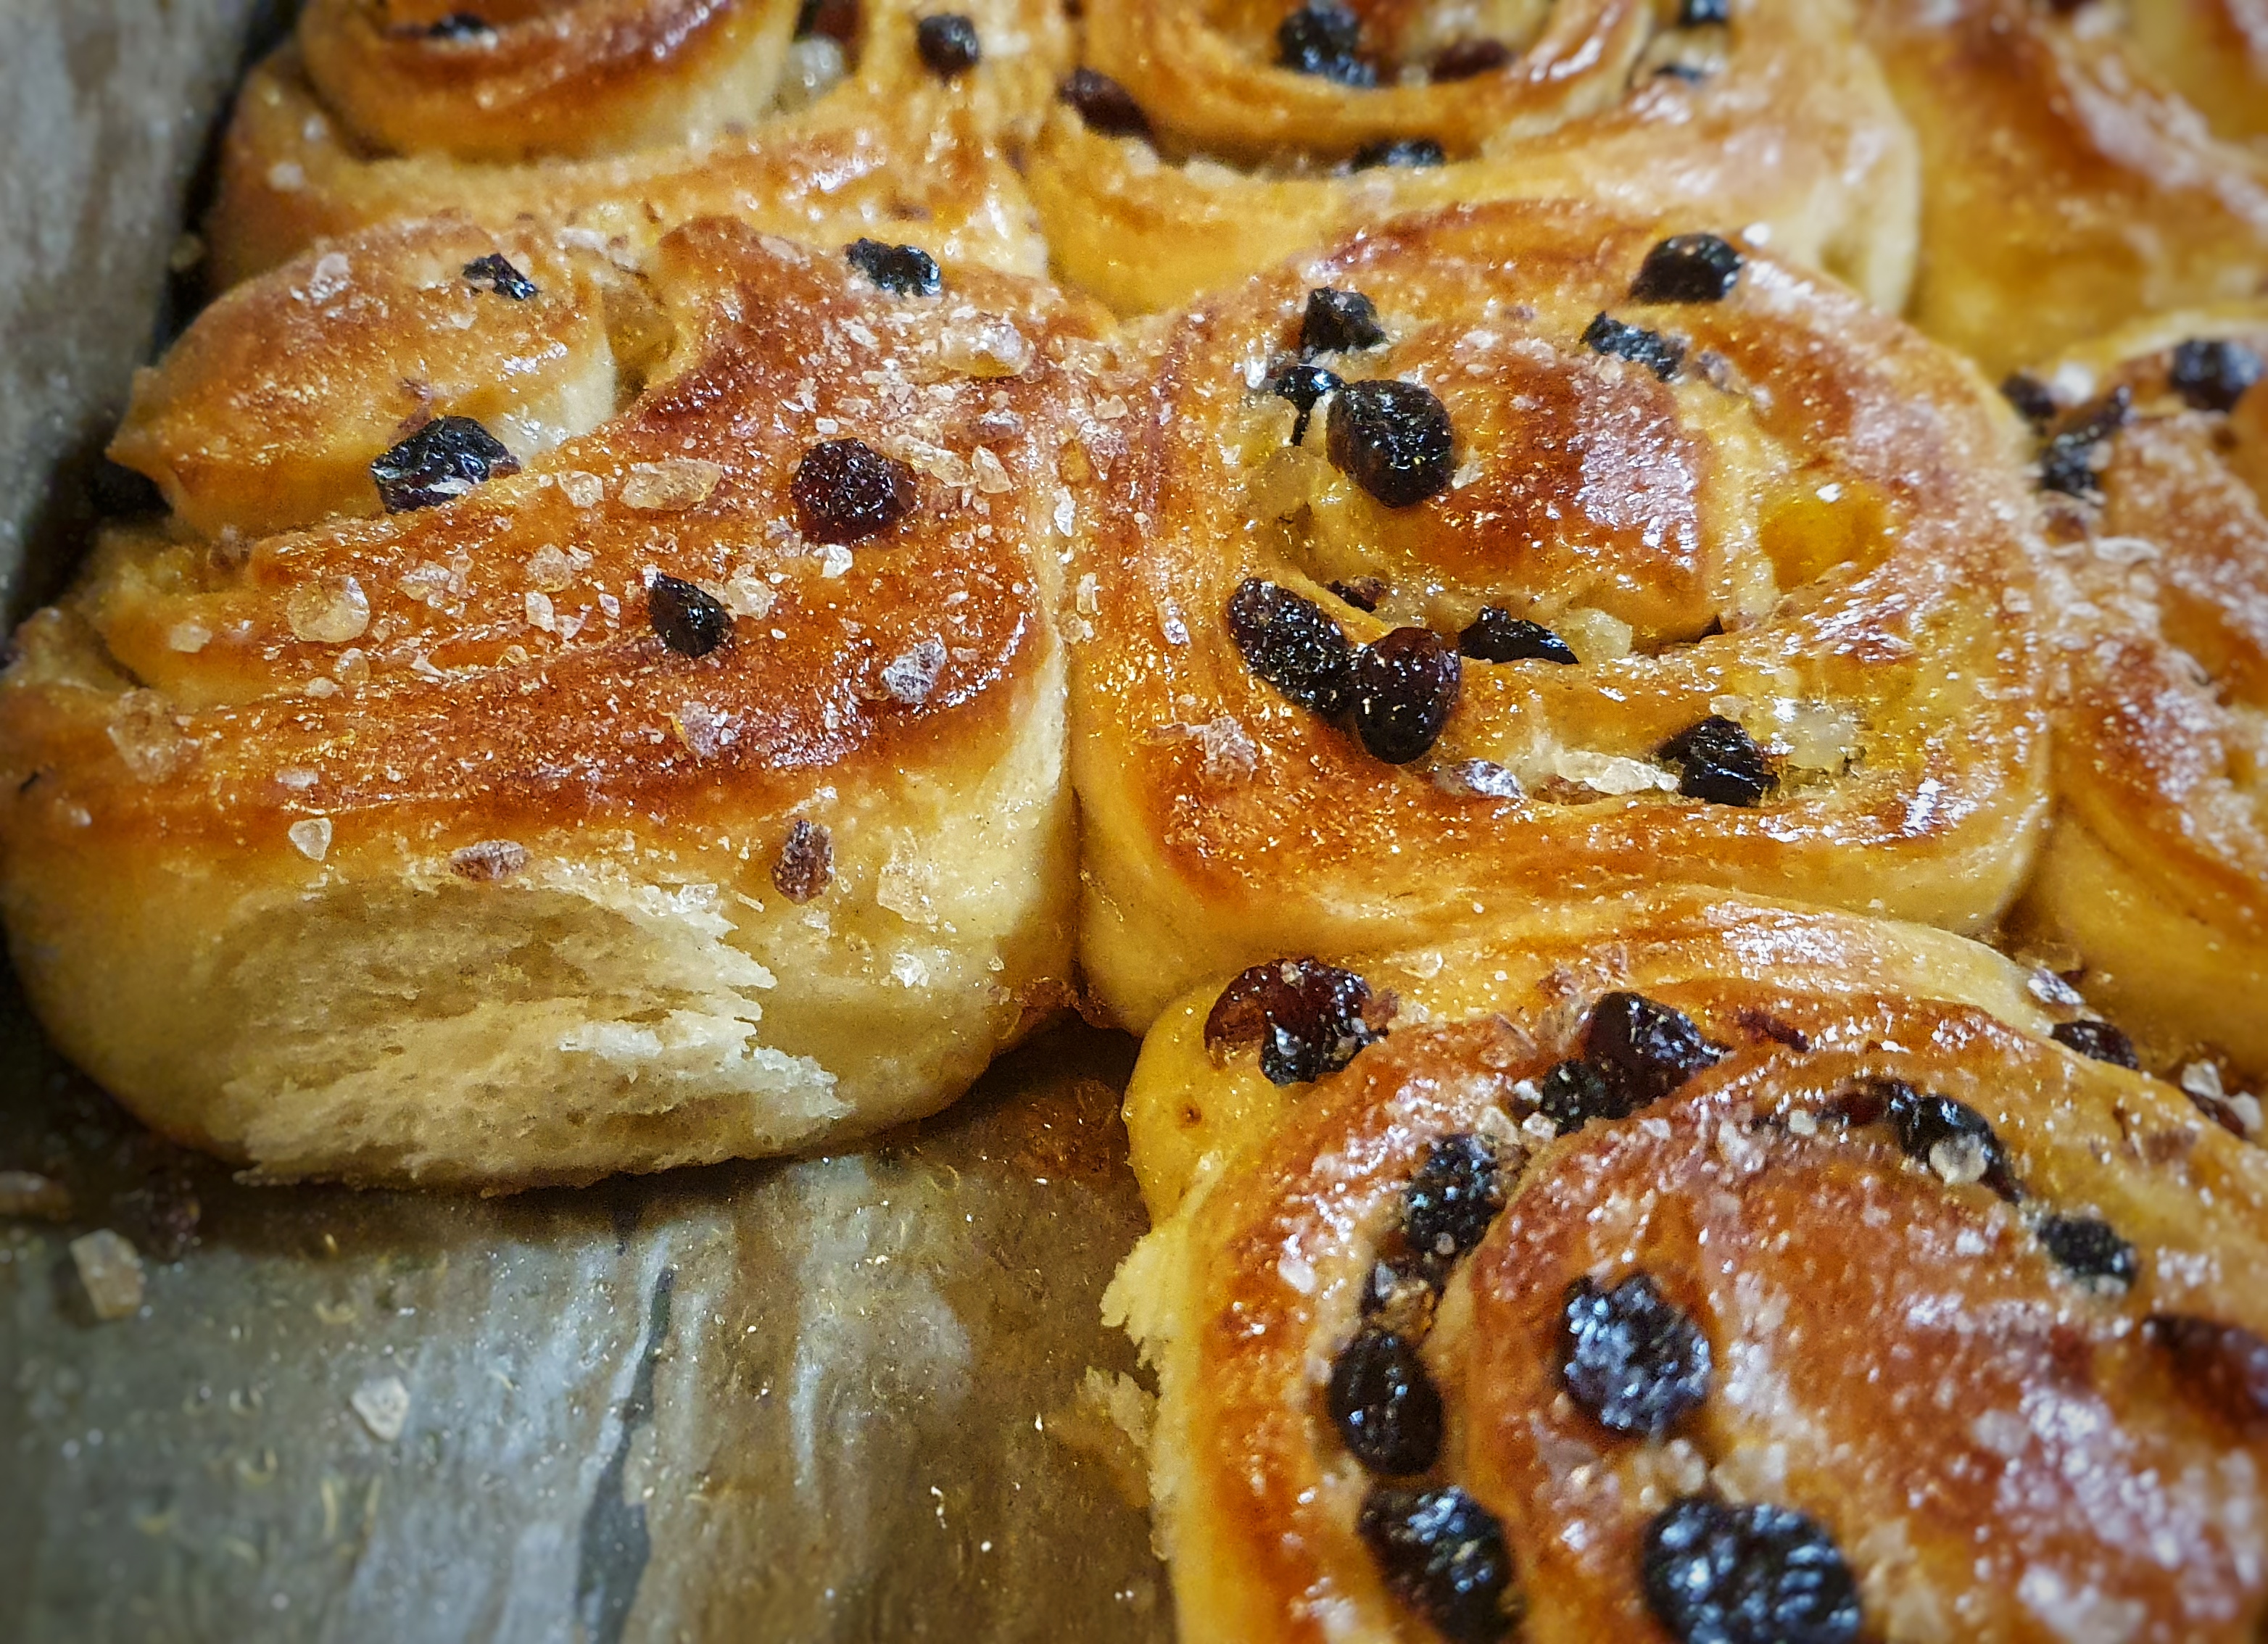
For those not in the know, a Chelsea bun is a coil of enriched dough filled with butter, sugar and dried fruit. They are batch-cooked together so as they grow, they touch, filling the tin, producing buns that are soft on the sides, gooey at the bottom and brown on the top. They are finished with a sticky glaze and adorned with crunchy sugar. Decadent deliciousness. Jane Grigson wrote that they are ‘[t]he best of all the buns, on account of their buttery melting sweetness, and the fun of uncoiling them as you eat them.’[2]

They were first made at the Bun House in Chelsea at the start of the 18th century, the earliest mention of them cropping up in the 1710s.[3] The buns fell out of favour sometime in the early 20th century and are hard to track down, so if you want to try one, you’ll have to make it.[4]
If you like the blogs and podcast I produce and would to start a £3 monthly subscription, or would like to treat me to virtual coffee or pint: follow this link for more information. Thank you.
Recipe
The dough for these buns is sticky and difficult to knead, and I would advise using the dough hook attachment on a stand mixer. Hand-kneading is perfectly possible, it’s just a messy business.
Enriched doughs take longer to prove, so if there is somewhere warm to prove your dough, so much the better.
Makes 12 buns
For the bun dough:
500g strong white flour
5g/1tsp instant yeast
10g/2 level tsp salt
60g sugar (caster or brown)
90g softened butter
250ml warm milk, or half-milk-half-water
1 beaten egg
For the filling:
60g melted butter
90g sugar (caster or brown)
90g raisins and/or currants
40g candied peel
Egg wash
For the glaze:
50ml water
50g caster sugar
Crushed lump sugar (optional)
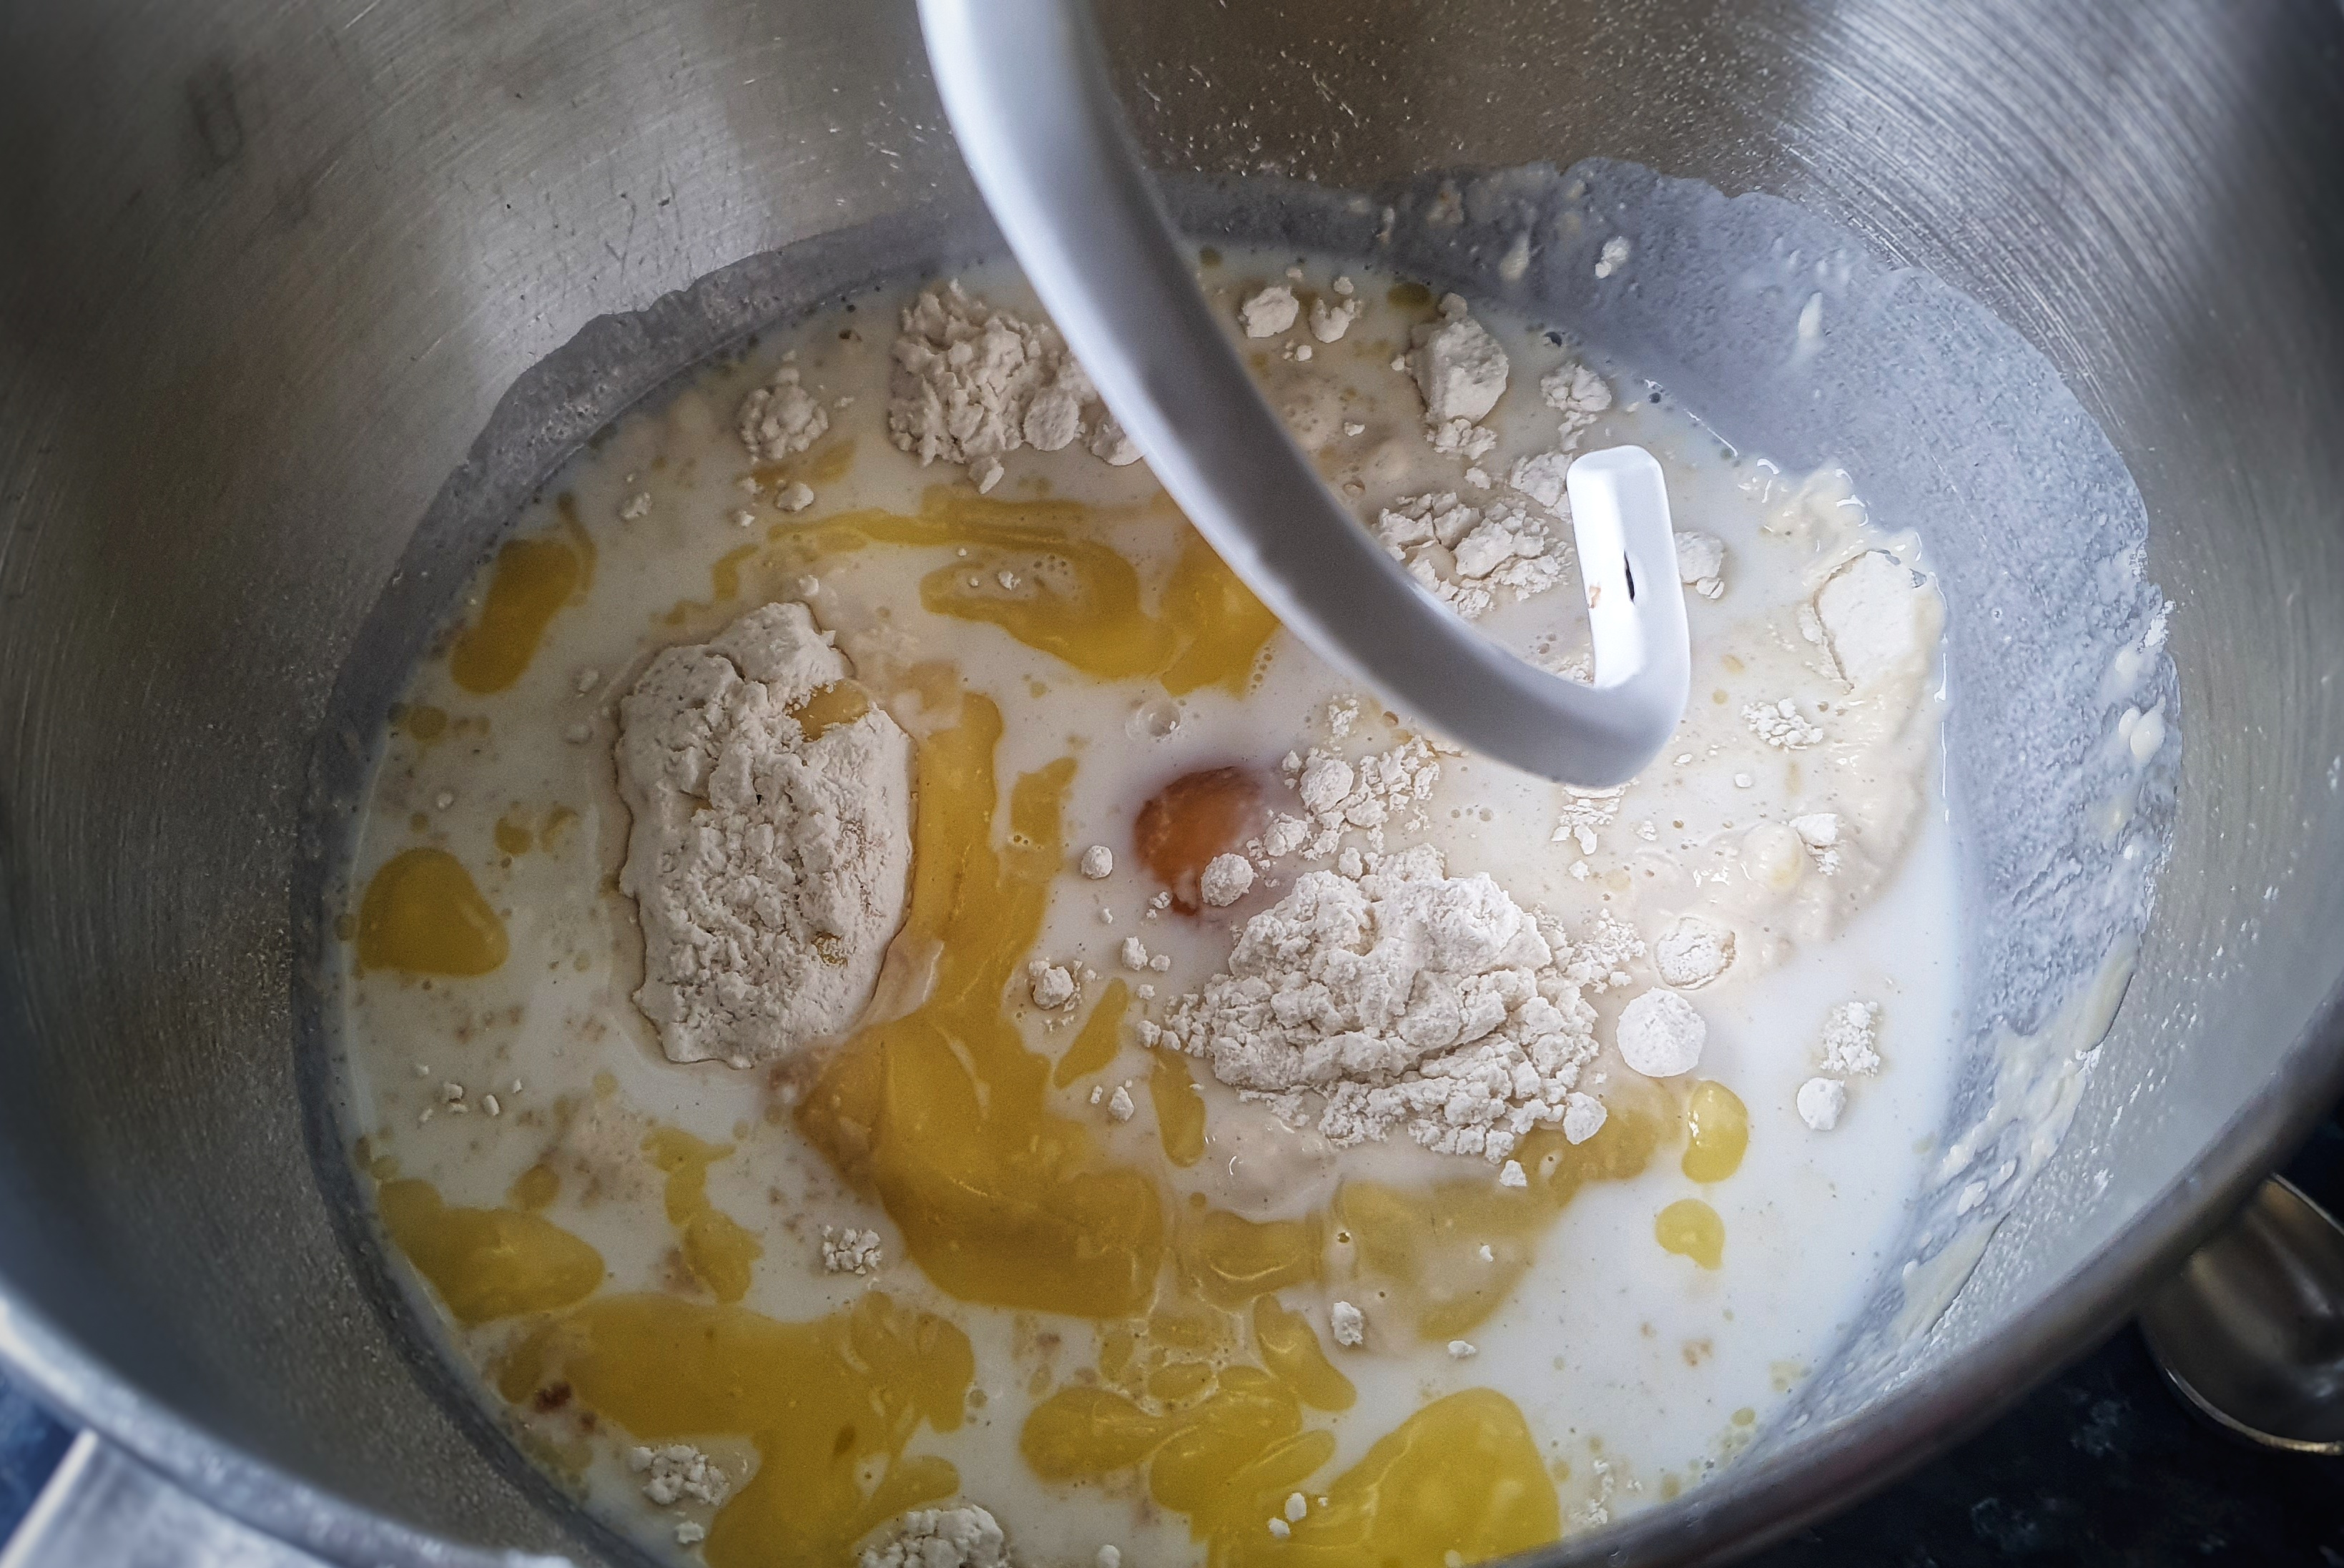
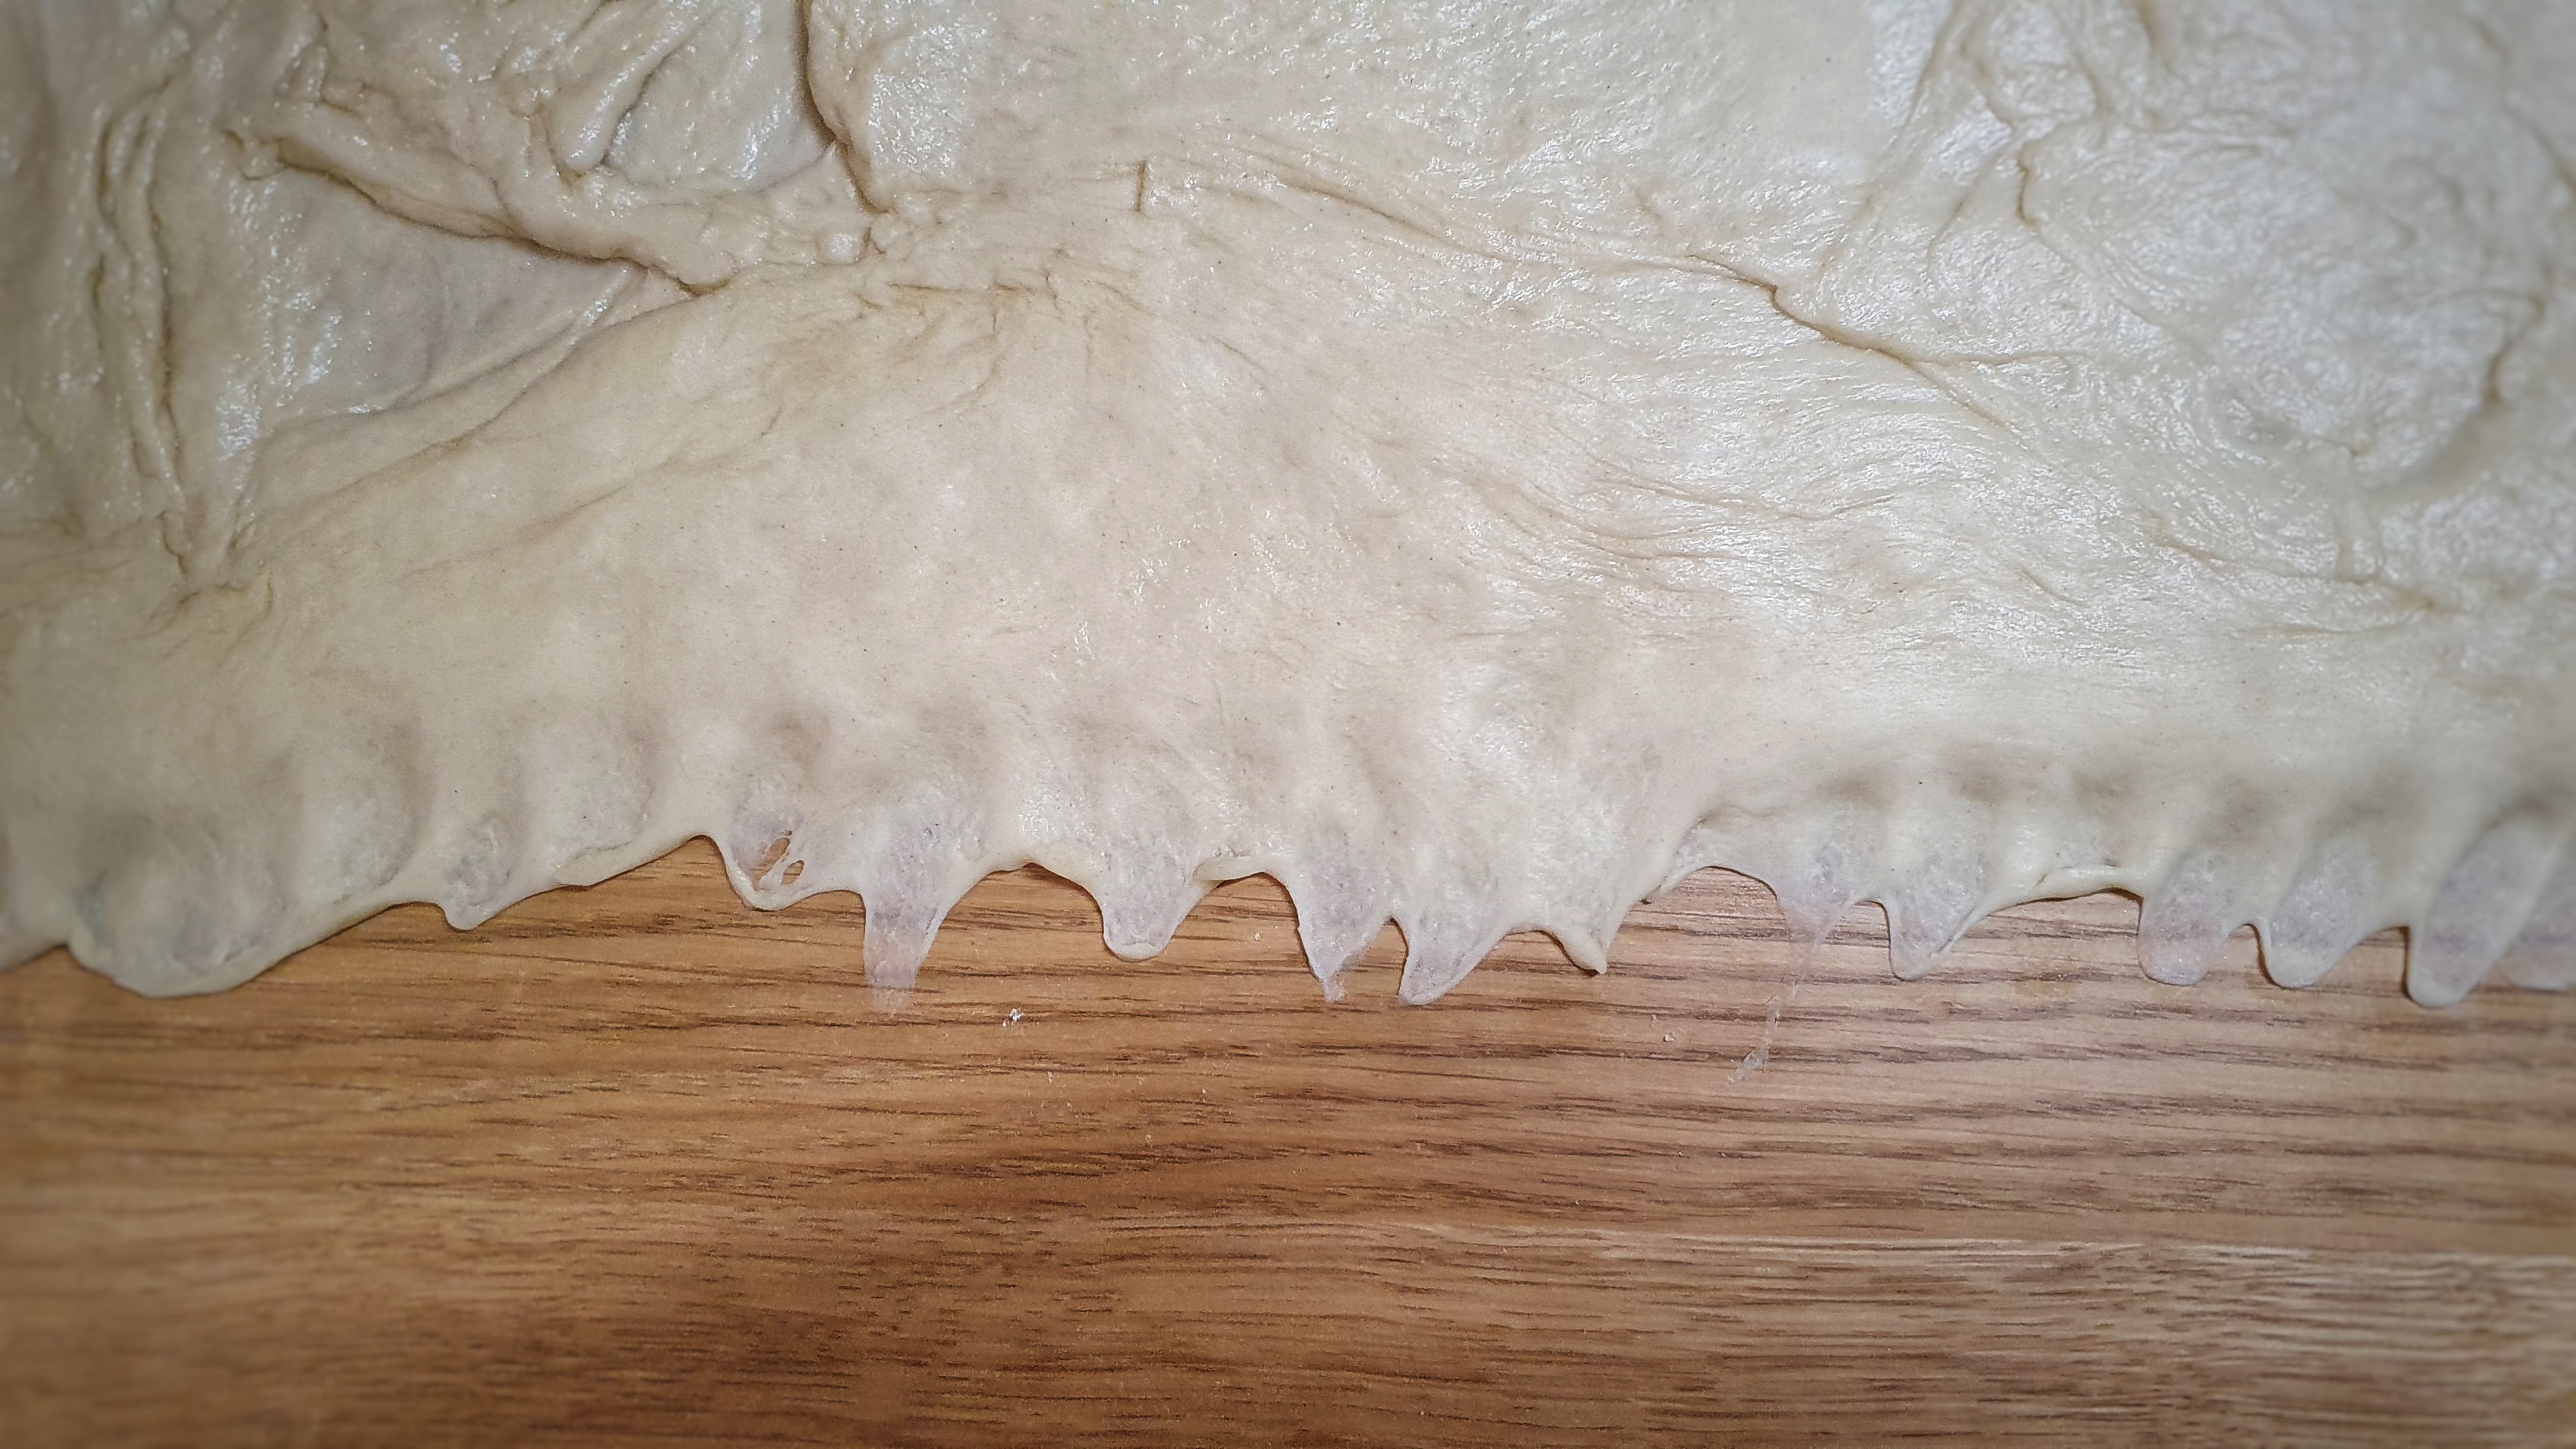
Make the dough using a stand mixer, if possible: first, mix all of the dry ingredients in a mixing bowl. Next, make a well in the centre and add the butter, liquid and egg. Mix to combine the ingredients and then knead with a dough hook on a slow-medium speed for around 10 minutes until smooth and the stickiness of the mixture has much reduced. Lightly oil another bowl (and your hands) and turn out the dough, tightening it up into a ball. Cover and prove until at least double in size. I proved mine at room temperature and it took 90 minutes.

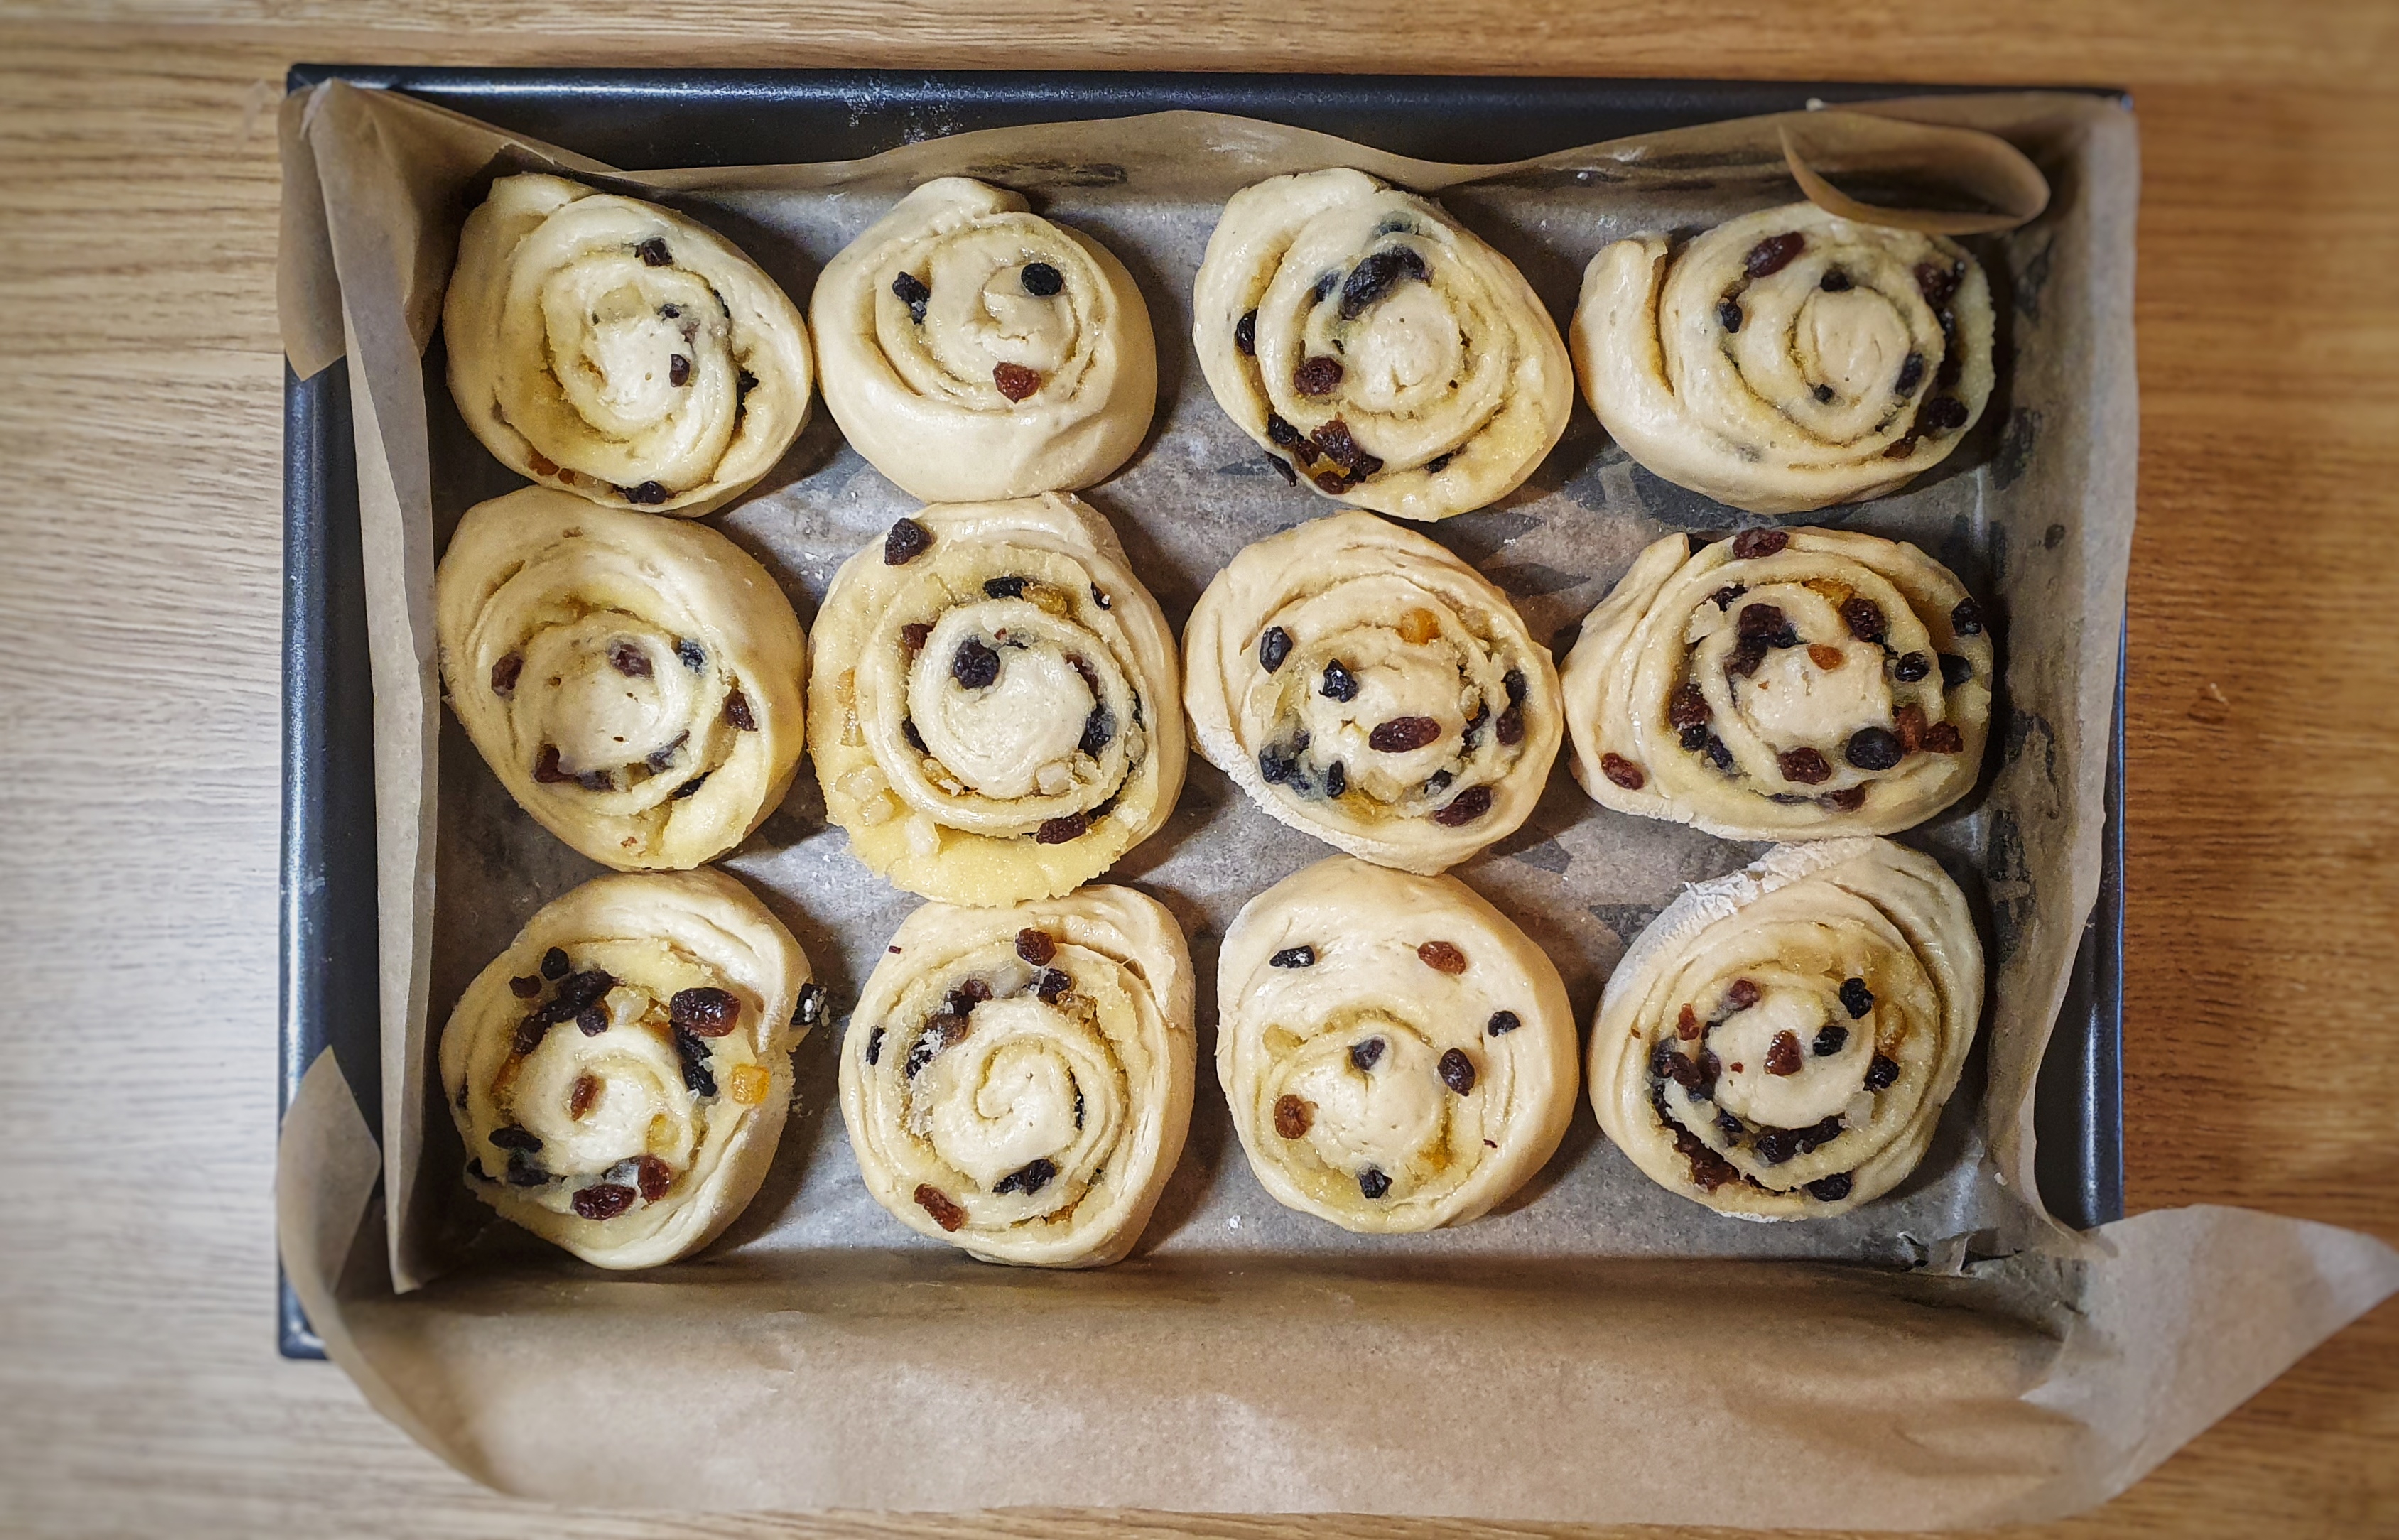
As you wait, line a 24 x 34 cm deep-side tray with greaseproof paper, fixing it in place with dots of oil or butter.
Fix the side closest to you by pressing and spreading the doughy edge to the worktop.
When doubled in size, roll or press out the dough out on a lightly-floured surface – it’s still sticky so make sure you reapply flour to your worktop regularly – until you make a rectangle measuring approximately 40 x 60 cm, the dough with its long side facing you. Have patience and try to make the dough of even thickness.

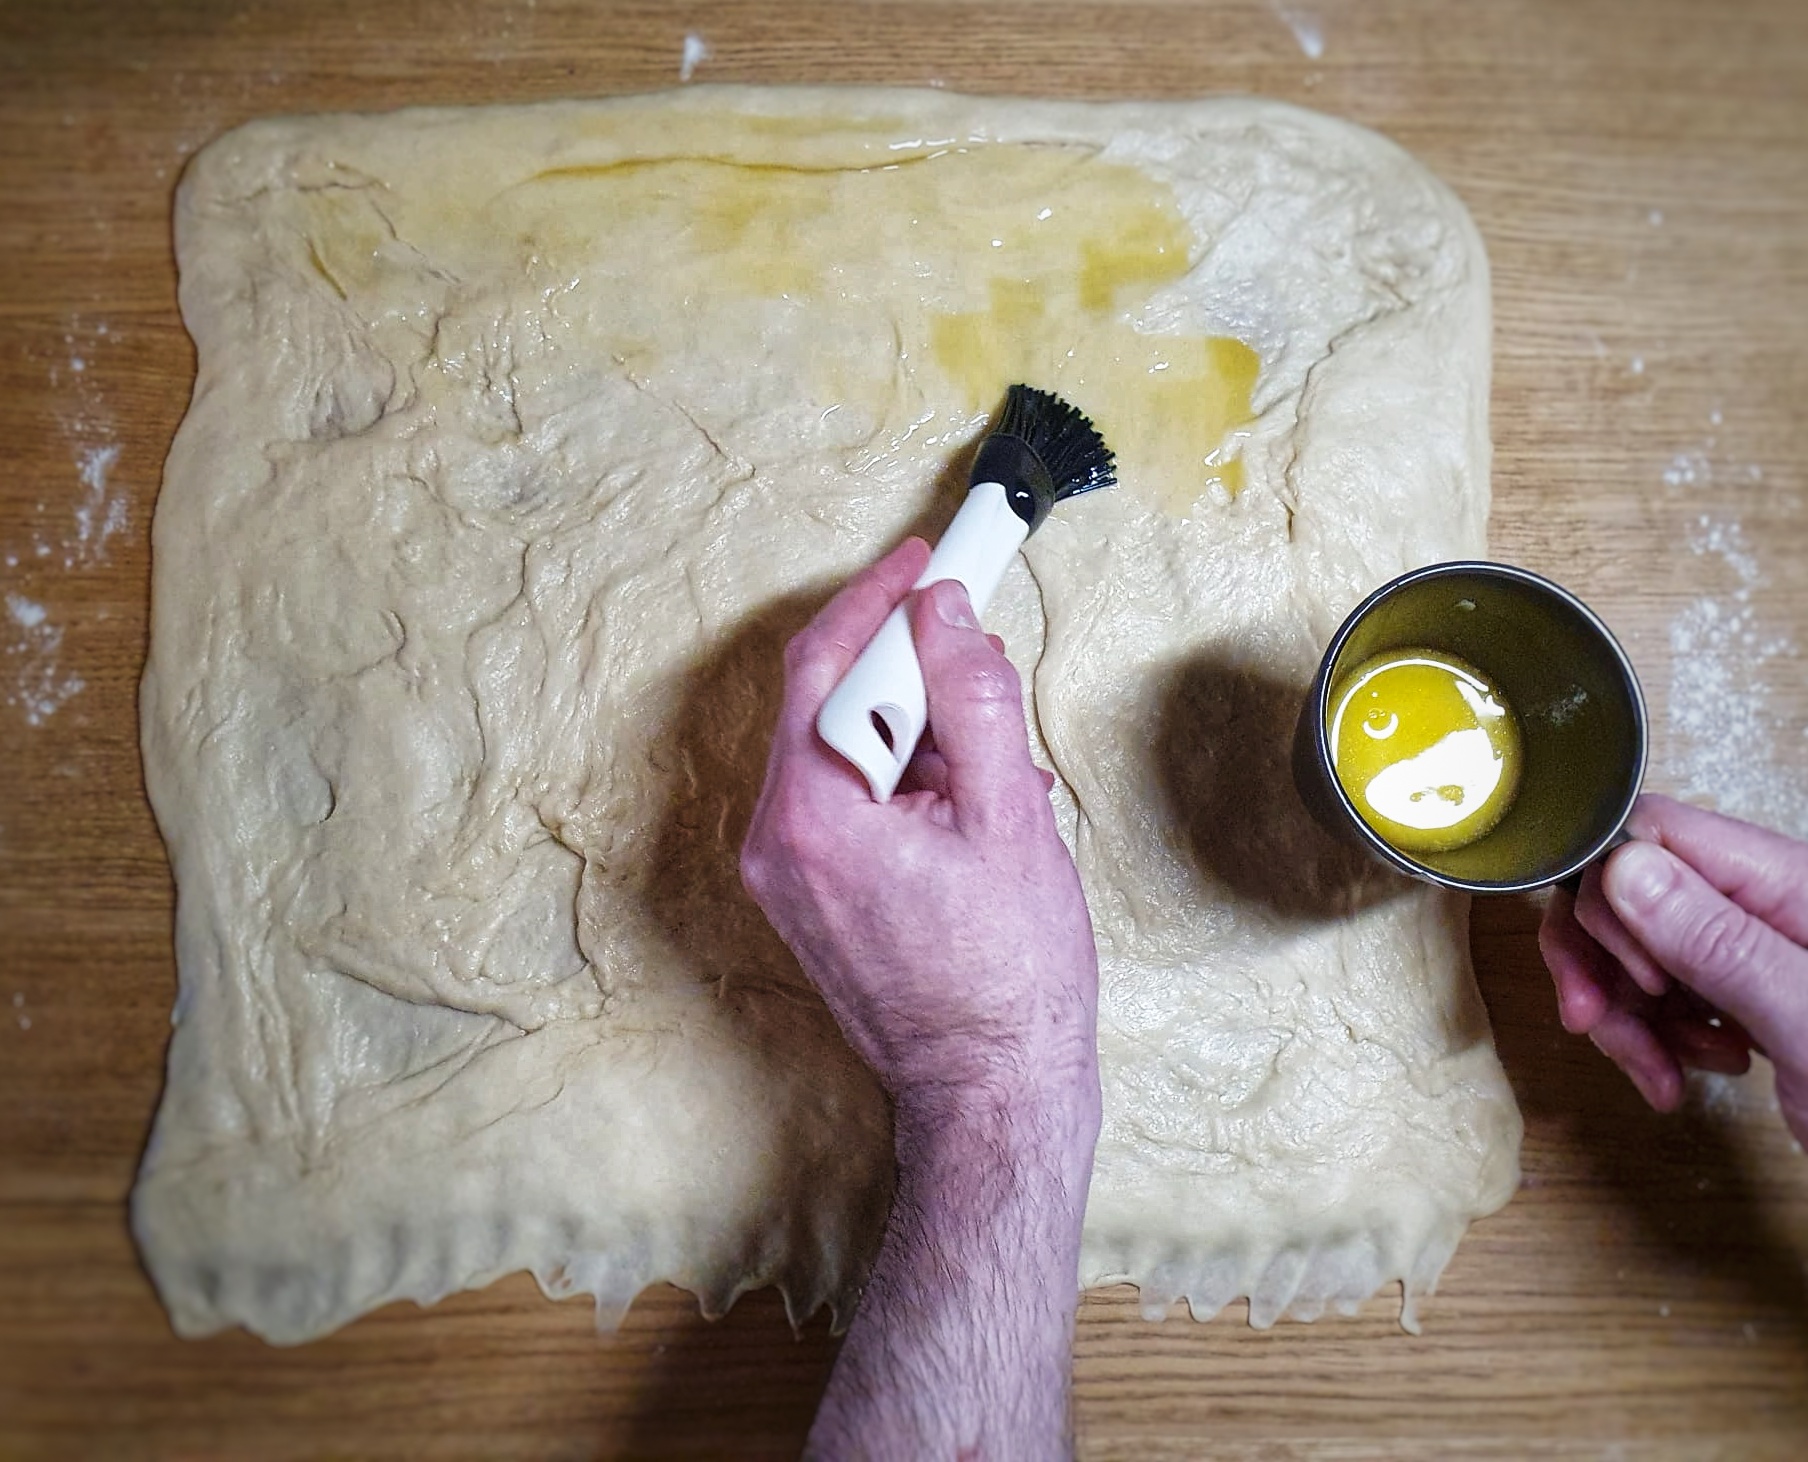
Now apply the filling: lavishly brush the dough with the melted butter, go right up to the back edge, but leave a 1-cm gap on the side edges and 2-cm on the edge facing you.
Next, sprinkle the sugar evenly, then the dried fruit and candied peel.


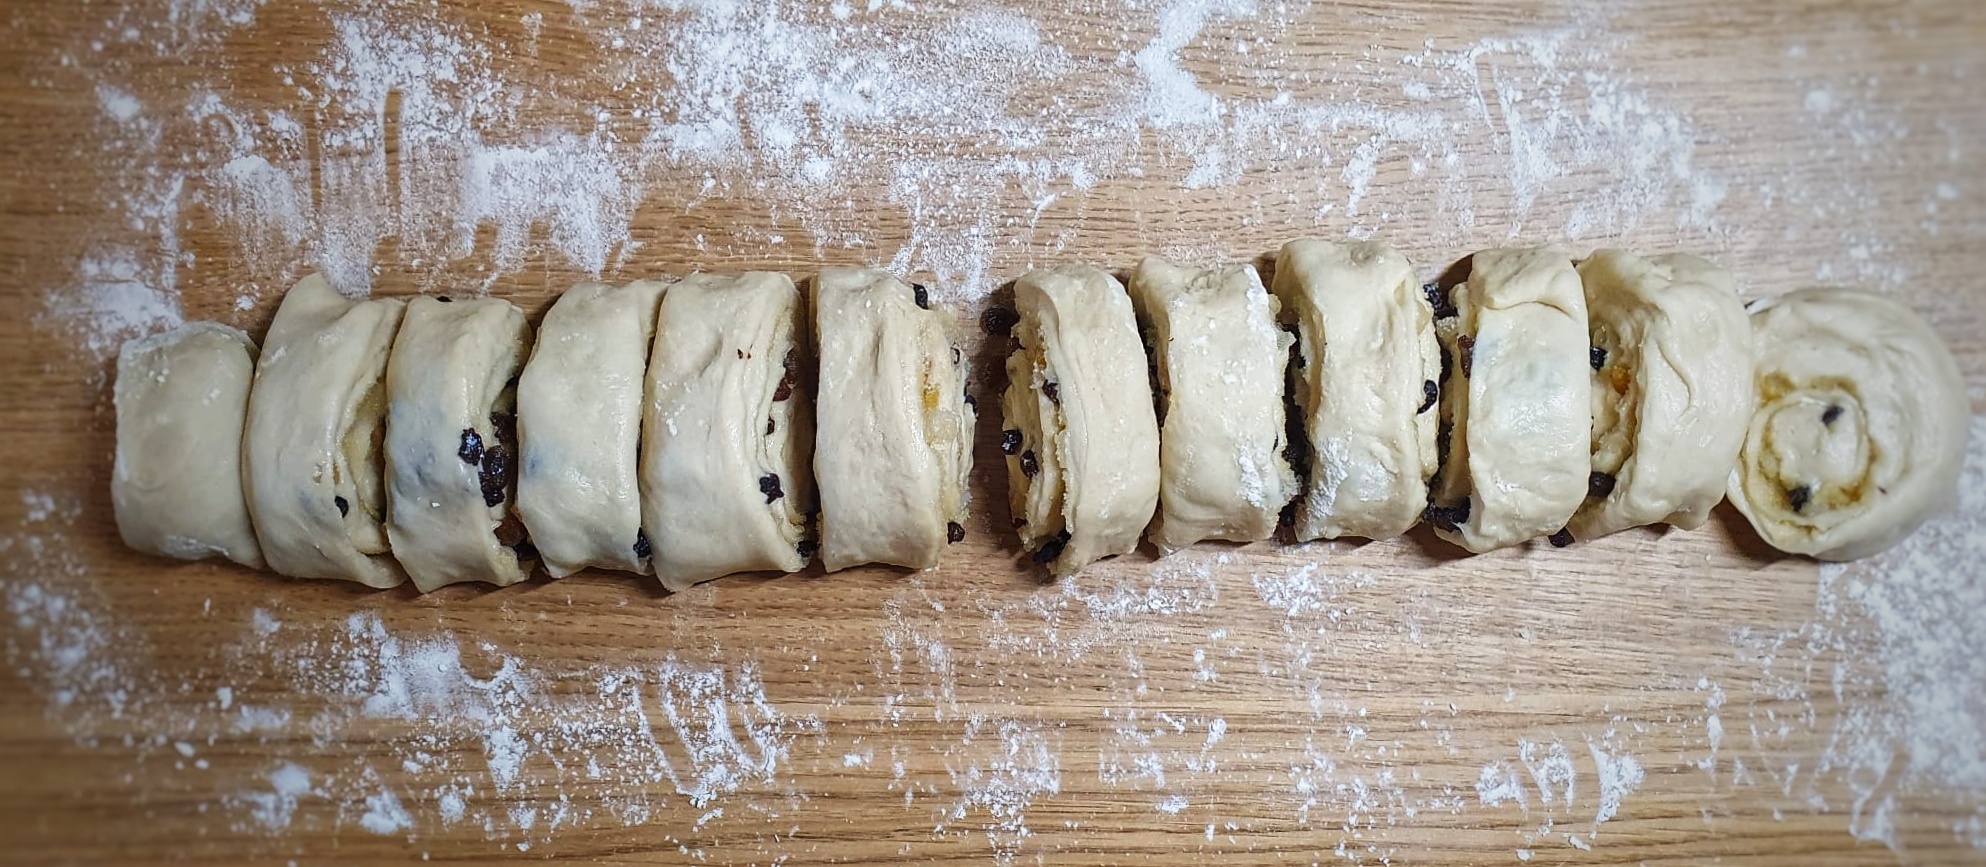
Now the fun bit: fold the further edge over and start to roll up the dough by lifting and stretching gently before rolling, keeping the coil tight. It is easiest to do this in sections. Keep going until the dough is almost rolled up, then lightly brush the facing edge with a little water.
Using a sharp knife, cut off the two ends[5] – I like a serrated knife for this job – then cut the dough into 9 or 12 pieces. If the knife presses the edges a bit and flattens the coils, don’t worry, they can be easily reshaped by hand.
Arrange your buns in your prepared tin, leaving a good and even gap between them. Cover and allow to prove again: for me, this took 60 minutes.

When they are almost proved, preheat your oven to 200°C. When ready, brush each bun with beaten egg. Slide into the oven and bake for 25 to 3- minutes if baking 12 buns. It’s worth investigating them to check they have baked all the way through.
When they come out of the oven, sit them on a cooling rack in their tin.
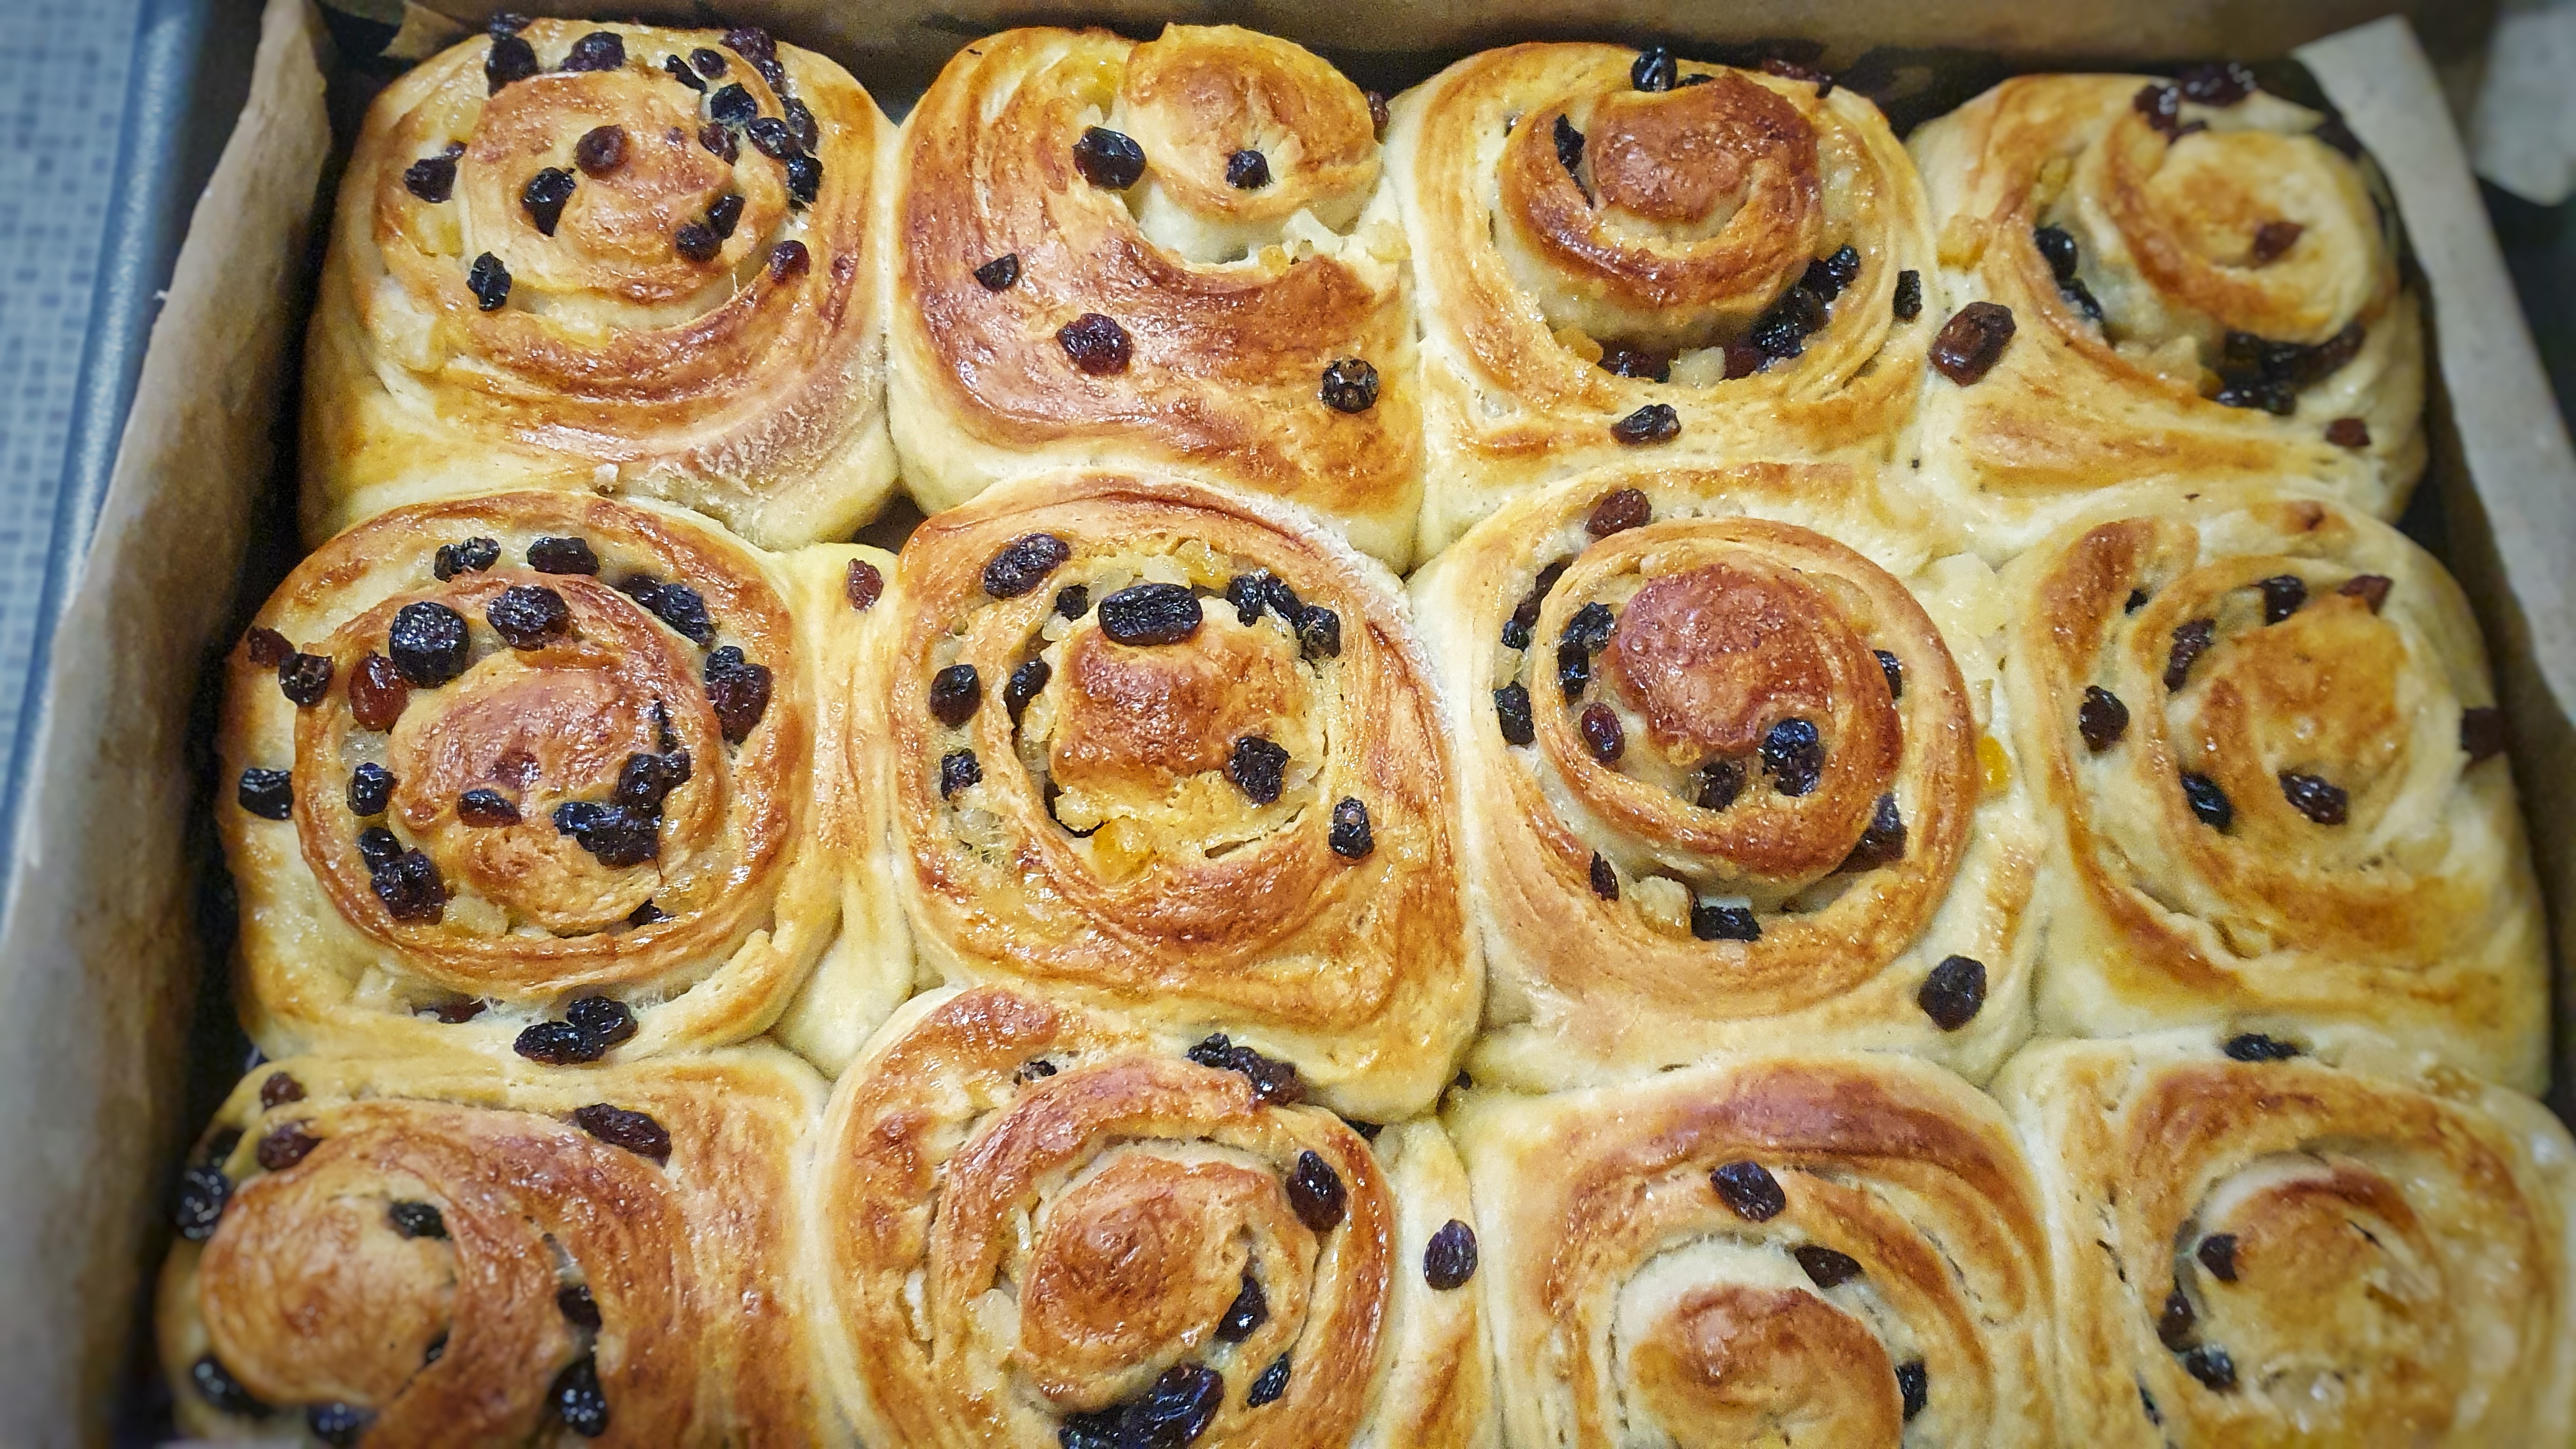
Make the glaze by mixing the sugar and water in a pan over a medium heat. Stir to dissolve, increase the heat and bring to a boil, and let it bubble away for 30 seconds. Take off the heat and brush the buns: be lavish. It might take a couple of coats to use up all the glaze. If you like, sprinkle with crushed lump sugar.
[1] I refuse to call it X.
[2] Grigson, J. (1992) English Food. Third Edit. Penguin.
[3] David, E. (1977) English Bread and Yeast Cookery. Grub Street.
[4] Mason, L. and Brown, C. (1999) The Taste of Britain. Devon: Harper Press.
[5] Don’t throw these away: cook them separately and have with a cup of tea – baker’s perk!
