Category Archives: cooking

To Make Chelsea Buns

Well hello! Sorry for the long quiet spell, I have been hard at work writing not one, but two books. The manuscripts have been handed in and the usual service can resume. I did keep the podcast going though, so if you’ve not heard the new episodes, listen below:

The books are about baking and puddings, and I’ll tell you more about them later in the year. As I was researching and writing them, I realised that there are recipes I have been meaning to write for you, but, for one reason or another, I have never got around to. Well, I aim to rectify this over the next few months. Top of my pile is the very delicious Chelsea bun, my favourite of the sticky bun tribe.

I recently asked Twitter[1] which was better, cinnamon or Chelsea buns. In my hubris, I expected the Chelsea bun to win easily. It did not, and the main reason it wasn’t picked was that folk didn’t know what one was. Well, today I give you my recipe which I have been working on and I think perfected (I hope you agree).

For those not in the know, a Chelsea bun is a coil of enriched dough filled with butter, sugar and dried fruit. They are batch-cooked together so as they grow, they touch, filling the tin, producing buns that are soft on the sides, gooey at the bottom and brown on the top. They are finished with a sticky glaze and adorned with crunchy sugar. Decadent deliciousness. Jane Grigson wrote that they are ‘[t]he best of all the buns, on account of their buttery melting sweetness, and the fun of uncoiling them as you eat them.’[2]

They were first made at the Bun House in Chelsea at the start of the 18th century, the earliest mention of them cropping up in the 1710s.[3] The buns fell out of favour sometime in the early 20th century and are hard to track down, so if you want to try one, you’ll have to make it.[4]


If you like the blogs and podcast I produce and would to start a £3 monthly subscription, or would like to treat me to virtual coffee or pint: follow this link for more information. Thank you.


Recipe

The dough for these buns is sticky and difficult to knead, and I would advise using the dough hook attachment on a stand mixer. Hand-kneading is perfectly possible, it’s just a messy business.

Enriched doughs take longer to prove, so if there is somewhere warm to prove your dough, so much the better.

Makes 12 buns

For the bun dough:

500g strong white flour

5g/1tsp instant yeast

10g/2 level tsp salt

60g sugar (caster or brown)

90g softened butter

250ml warm milk, or half-milk-half-water

1 beaten egg

For the filling:

60g melted butter

90g sugar (caster or brown)

90g raisins and/or currants

40g candied peel

Egg wash

For the glaze:

50ml water

50g caster sugar

Crushed lump sugar (optional)

Make the dough using a stand mixer, if possible: first, mix all of the dry ingredients in a mixing bowl. Next, make a well in the centre and add the butter, liquid and egg. Mix to combine the ingredients and then knead with a dough hook on a slow-medium speed for around 10 minutes until smooth and the stickiness of the mixture has much reduced. Lightly oil another bowl (and your hands) and turn out the dough, tightening it up into a ball. Cover and prove until at least double in size. I proved mine at room temperature and it took 90 minutes.

As you wait, line a 24 x 34 cm deep-side tray with greaseproof paper, fixing it in place with dots of oil or butter.

Fix the side closest to you by pressing and spreading the doughy edge to the worktop.

When doubled in size, roll or press out the dough out on a lightly-floured surface – it’s still sticky so make sure you reapply flour to your worktop regularly – until you make a rectangle measuring approximately 40 x 60 cm, the dough with its long side facing you. Have patience and try to make the dough of even thickness.

Now apply the filling: lavishly brush the dough with the melted butter, go right up to the back edge, but leave a 1-cm gap on the side edges and 2-cm on the edge facing you.

Next, sprinkle the sugar evenly, then the dried fruit and candied peel.

Now the fun bit: fold the further edge over and start to roll up the dough by lifting and stretching gently before rolling, keeping the coil tight. It is easiest to do this in sections. Keep going until the dough is almost rolled up, then lightly brush the facing edge with a little water.

Using a sharp knife, cut off the two ends[5] – I like a serrated knife for this job – then cut the dough into 9 or 12 pieces. If the knife presses the edges a bit and flattens the coils, don’t worry, they can be easily reshaped by hand.

Arrange your buns in your prepared tin, leaving a good and even gap between them. Cover and allow to prove again: for me, this took 60 minutes.

When they are almost proved, preheat your oven to 200°C. When ready, brush each bun with beaten egg. Slide into the oven and bake for 25 to 3- minutes if baking 12 buns. It’s worth investigating them to check they have baked all the way through.

When they come out of the oven, sit them on a cooling rack in their tin.

Make the glaze by mixing the sugar and water in a pan over a medium heat. Stir to dissolve, increase the heat and bring to a boil, and let it bubble away for 30 seconds. Take off the heat and brush the buns: be lavish. It might take a couple of coats to use up all the glaze. If you like, sprinkle with crushed lump sugar.


[1] I refuse to call it X.

[2] Grigson, J. (1992) English Food. Third Edit. Penguin.

[3] David, E. (1977) English Bread and Yeast Cookery. Grub Street.

[4] Mason, L. and Brown, C. (1999) The Taste of Britain. Devon: Harper Press.

[5] Don’t throw these away: cook them separately and have with a cup of tea – baker’s perk!

4 Comments

Filed under baking, bread, Britain, cooking, food, General, history, Recipes, Teatime, Uncategorized

Edward Kidder’s Early 18th Century Mince Pies


This post complements the 2023 Christmas special of The British Food History Podcast called ‘Mince Pies’:


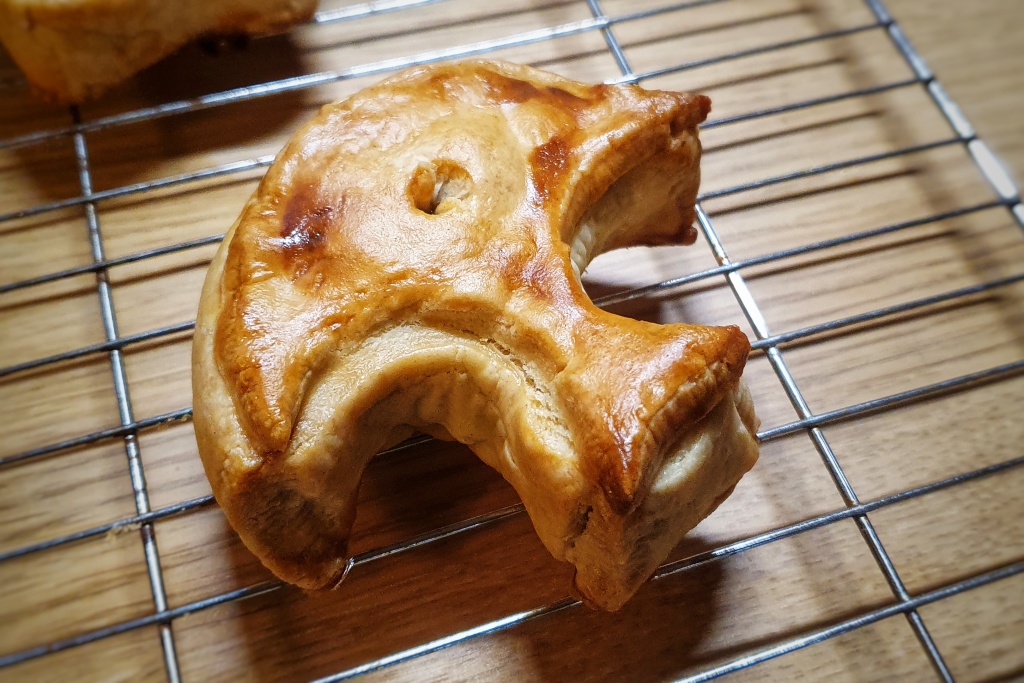
As promised on this year’s Christmas episode of the podcast, all about mince pies, here is my pastry recipe and method for making the shaped-mince pies in E. Kidder’s Receipts of Pastry and Cookery. It was originally published in 1721, but I used the 1740 edition of the book (here’s a link to the document). If you go to the end of the book, you will see lots of different minced pie templates, just like the ones below. The idea was that you rolled out your pastry and cut a shape out, then made pastry walls, filled them with mincemeat, placed on lid on top and baked it. Really beautiful, but fiddly-looking shapes, I’m sure you’ll agree.

I felt a little nervous making them, so let me at this point, say a massive thank you to Ivan Day for the advice he gave me on shaping these pies. Ivan has an excellent blog with a fascinating article about mince pies (click this link to read it).

In the Christmas episode, I considered making some of the pie designs in Robert May’s The Accomplisht Cook (first published in 1660), but I found Edward’s designs much easier to extrapolate into three-dimensional pies! However, here are a few from May’s book to give you an idea of the sorts of minced pies he was making:

The Materials

The first thing you need to do is get organised with your templates. I simply took screenshots of the book, printed them out and cut them out. You can make them any size you like. My shapes were around 10cm wide, and I went for the ones that looked the easiest!

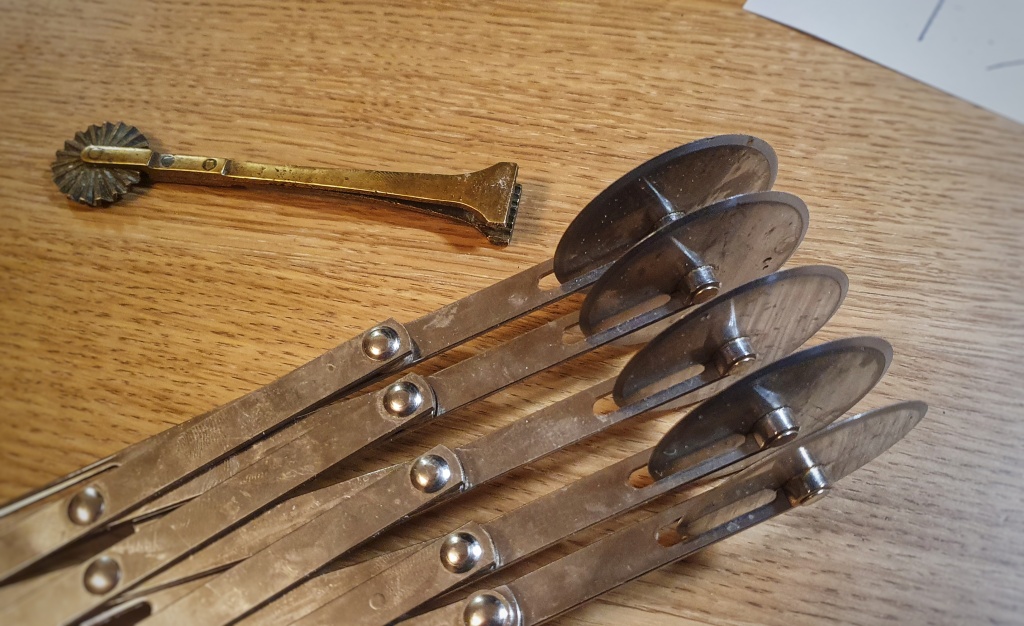
Then you need the correct tools for the job. I have collected over the years various pastry tools, both antique and modern. The wheels are called jiggers, which are used for cutting pastry. The antique ones usually come with a crimping tool attached, and these are used to fuse two pieces of pastry. The one I own with what looks like a flat pair of tweezers was particularly helpful for the pies I made here. I used a paring knife to cut out the shapes – the jiggers weren’t appropriate for these smaller pies.

Jiggers do come in handy for cutting out the pastry walls – essentially strips of pastry – I have a tool that’s made up of 5 jiggers on one expandable frame so you can cut several strips of the same thickness in one go.

That’s the tools of the trade, but now let’s look at our ingredients: we need mincemeat (I used the lamb mincemeat, recipe here) but you can use any you like.[1] Then we need some pastry that is mouldable (we don’t want the walls collapsing in the oven!) yet edible.


If you like the blogs and podcast I produce and would to start a £3 monthly subscription, or would like to treat me to virtual coffee or pint: follow this link for more information. Thank you.


Mouldable Hot Water Pastry

I came up with the following recipe, based on one given by Jane Grigson in English Food.[2] It’s very good for moulding, but not particularly delicious, I made a few changes and I think it’s pretty good. It is simple to make, and this was enough for 8 to 10 pies, depending upon how large your templates are (you could, of course, make one large one!)

500 g plain flour

125 g salted butter, diced

125 g lard, diced

75 ml hot water

2 tbs icing sugar

First, rub the butter into the flour until it resembles breadcrumbs. Put the lard in a saucepan and pour the hot water over it. Heat gently, but be careful – you don’t want it to boil and splutter. Stir in the icing sugar and when it is dissolved, make a well in the centre of the flour-butter mixture and pour into it three-quarters of the hot liquid. Cut the liquid in with a knife, then pour the remaining hot liquid to pour over any dry patches that remain. Once all of the water has been added, give the pastry a knead (leave it to cool a little if you need to). It should be smooth, pliable and waxy. Cover with cling film and allow to cool completely, but do not refrigerate.

Constructing the Pies

Now you can roll out a third of the pastry thinly – aim for the thickness of a pound coin, 2 to 3 millimetres – and cut out your bases. Now roll out another third into a long strip, long enough to go around the perimeter of your shapes. To do this, use a piece of string to trace around the shape. When the appropriate length, use a ruler to cut your strips at your desired thickness. I went for 2 cm, but I could have gone thicker than that, I think.

Now the fiddly bit: brush the edges of the bases with plain water and glue the sides on. Use your finger and thumb to pinch them together, and then crimp them with a crimper tool if you have one. Repeat with all of your shapes and place in the fridge for a few hours to firm up. When firm, roll out the final third of the pastry and cut out your lids.

Fill your pies with your chosen mincemeat, brush the rims of your pies with water and fix on the lids in the same way as you did the bases. Make a steam hole and place back in the fridge for 30 minutes to firm up again. Meanwhile, preheat your oven to 200°C.

If you like, brush your pies with an egg wash before you bake them for 25 minutes, or until a good golden-brown colour. If you are making large pies, turn the heat down to 175°C and cook longer: you should see or hear the filling bubbling, telling you it is ready!


Notes:

[1] Though it is best to use a low-sugar recipe, not a gloopy one from the supermarket shelves. I recommend Jane Grigson’s orange mincemeat or Mrs Beeton’s traditional mincemeat.

[2] See Oldbury Gooseberry Tarts on the other blog.

Leave a comment

Filed under baking, Britain, cooking, Eighteenth Century, food, General, history, Recipes, Teatime, Uncategorized

Westmorland Sweet Lamb Pie


This post complements the 2023 Christmas special of The British Food History Podcast called ‘Mince Pies’:


I have written several times about mince pies and mincemeat over the years on the blog. There are my two go-to mincemeat recipes: Jane Grigson’s Orange mincemeat, and Mrs Beeton’s traditional mincemeat, along with instructions on how to make small, individual mince pies. This year, however, I wanted to make an old-fashioned sweet lamb pie, once eaten in  Westmorland in the Northwest of England, a defunct county now making up parts of Cumbria and North Yorkshire. It was one of the last areas of the country to carry on putting meat in its mincemeat mixtures.[1] Like all mince pies of the past, they were not eaten only at Christmas, but much of the year, though because of the dried fruit content, they were associated with wintertime.

I was first introduced to this pie by Jane Grigson, and I made it many moons ago, for the Neil Cooks Grigson blog, I really liked it and have been meaning to revisit it.[2] These pies were not of the small individual type, but large plate pies, baked in a pie plate made of earthenware, tin or enamel.[3]

I’ve based the recipe on hers, but I did make some changes inspired by other recipes found on the Foods of England Project website.[4] The mincemeat isn’t cooked, but because of the booze and sugar content, it keeps very well. Don’t be put off by the meat content, it makes the filling succulent – and you can taste it, but this blurring of sweet and savoury is most delicious, something I have come to embrace after so many years of making historical British food.


If you like the blogs and podcast I produce and would to start a £3 monthly subscription, or would like to treat me to virtual coffee or pint: follow this link for more information. Thank you.


The filling:

This makes around 2 ¼ litres of well-packed filling, but I do intend to make two large pies at least and lots of smaller ones, so scale down if need be. It keeps for months if left somewhere dark, dry and cool; and remember mince pies are for life, not just for Christmas.

500 g lean lamb

200 g lamb or beef suet, membrane and sinew removed (packet stuff is acceptable if fresh is unavailable)

350 g apples, peeled and cored

120 g almonds

250 g each currants, raisins and sultanas

300 g soft, dark brown sugar

100 g chopped candied peel

Juice and zest of 2 oranges

120 ml dark rum

1 tsp salt

½ tsp ground black pepper

1 tsp each ground mace and cinnamon

½ freshly grated nutmeg

To make a truly ‘minced’ meat, you need to chop the meat, suet, apples and almonds quite finely. (You can, of course, use minced lamb, slivered almonds and grated apple and suet).

My ‘minced’ lamb and suet

Mix everything together in a large bowl and pack tightly into sterilised jars.[5] Leave to mature for at least a week before using.

The pie:

These pies were made on pie plates, but you can make them in any flan or pie tin you like. For my 26 cm diameter pie plate I used the following amounts, though the pastry was quite thin, so you may want to proportion things up in line with perhaps 360 g flour. I will leave it to you to judge size and thinness. There are instructions on how to make small, individual mince pies here.

300 g plain flour

150 g butter, or 75 g each butter and lard

75 g caster or icing sugar

80-100 ml cold water

Egg wash: 1 egg beaten with ½ tsp salt

Dice the fat and rub into the flour until breadcrumbs are formed (or use the flat beater on a machine, set to slow), then add the sugar, mix, and add the water slowly mixing and stirring. Bring everything together to form a firm dough. You might not need all of the water. Knead briefly to smooth the dough, cover and then leave to rest in the fridge for around 30 minutes.

Roll out two-thirds of the dough into a round, lift and lay it over the plate neatly. Prick the base with a fork. Spoon the filling in. Again, go with your gut – do you want a thin amount or loads? I added enough to come up to the lip of my plate.

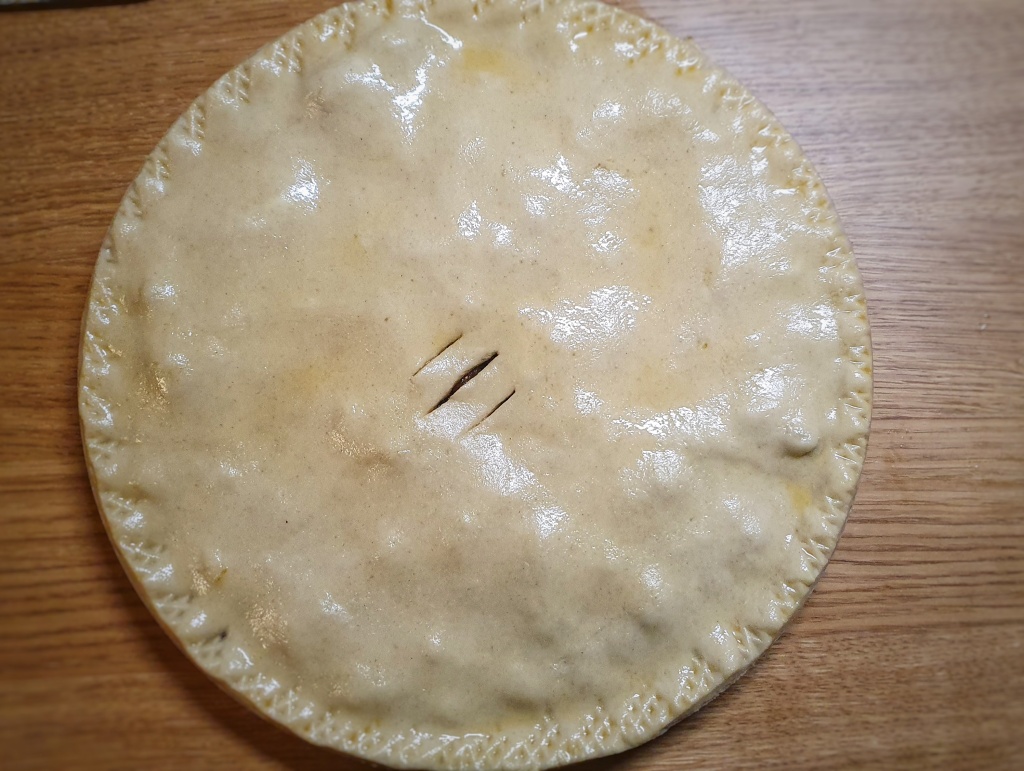
Roll the remaining third of the pastry out into a round. As it rests, wash the rim of the pie plate and place the lid on top, securing it with a crimping tool or fork prongs or with your thumb or forefinger. Cut a steam hole and brush with egg. You can sprinkle a little sugar over the top if you fancy.

Place in the fridge to firm up and preheat the oven to 200°C. When the oven has come up to heat, slide the pie onto the centre shelf and cook for around 35 minutes, or until a good golden-brown colour and you can see the filling bubble through the steam hole.

Best eaten warm with thick cream, or rum butter.

I ate my first piece so quickly, I forgot to photograph it. This is my seconds.

[1] Mason, L. and Brown, C. (1999) The Taste of Britain. Devon: Harper Press.

[2] Read the original post here: http://neilcooksgrigson.com/2014/01/02/388-sweet-lamb-pie-from-westmorland/

[3] Grigson, J. (1992) English Food. Third Edit. Penguin.

[4] Hughes, G., ‘North Country Sweet Pie’, The Foods of England Project. http://www.foodsofengland.co.uk/northcountrysweetpie.htm

[5] To sterilise jars, heat them in the oven for 25 minutes at 120°C. Any rubber seals – or lids with rubber seals, can be sterilised in very hot water.

1 Comment

Filed under baking, Britain, Christmas, cooking, food, Fruit, General, history, Preserving, Recipes, Uncategorized

To Roast a Haunch of Venison

Christmas isn’t too far away and the chances are you are probably already discussing what meats you will be roasting on the big day. Well, I am going to stick my neck out and suggest venison. Game used to be a very important part of the Christmas feasting, especially in the countryside, making an excellent centrepiece to the day’s feasting.

Regular readers will know that I love cooking with game, but it has been a while since I cooked some up for the blog. I got the opportunity to cook a nice haunch of venison because I was sent some from Farm Wilder to try out, and my gosh it was good. Apart from the meat being tender and delicious, the deer that make their venison are culled as an important part of land management in Southwest England. Without any natural predators, their numbers are increasing and pretty as they may be, they are very damaging to woodland habitats – in short, they are a menace![1]

A medium-rare roasted haunch of Farm Wilder venison

For more information about Farm Wilder and their venison, click this link.

The important thing when buying a roasting joint is to buy as large a one as possible; large joints always roast juicier and more evenly. Bear in mind that any excess venison can be chopped and made into a hunter’s pie – essentially a shepherd’s pie but with lamb swapped for venison. I’ve suggested a 2 kg haunch but don’t worry if yours is a different weight, I have included a formula for calculating the roasting time in the method. The haunch is the equivalent of beef topside, but I think it is a much superior joint in both tenderness and flavour.

Venison is best marinated before cooking; it adds a complexity of flavour to the meat and makes it even more tender. Many recipes go into great detail about how this should be done using cooked marinades, but I think the best is also the simplest: red wine, red wine vinegar, olive oil and some herbs and spices.

Folk also make a big deal about the meat drying out in cooking (venison being a very lean meat) and there are – again – complex methods to keep the meat moist: larding it with needles or tying sheets of pork backfat or skin around it. These work, but I have found that smearing the joint with plenty of butter and covering it all with smoked streaky bacon works perfectly, adding more depth of flavour; and you get to eat some crispy bacon with your dinner.

I chose to serve my venison with potatoes and parsnips roasted in duck fat, Brussels sprouts, gravy and a fruit jelly: redcurrant is the easiest to get hold of from the shops, but quince or medlar jelly can be used too.

Serves 8:

2 kg haunch of venison

½ bottle red wine

125 ml red wine vinegar

125 ml olive oil

Around one dozen black peppercorns and juniper berries

A bunch of herbs: e.g., rosemary, thyme, marjoram or winter savoury sprigs, 3 or 4 fresh bay leaves

2 carrots, peeled and sliced

2 sticks celery, trimmed and sliced

1 leek or onion, trimmed and sliced

75 g salted butter, softened

Salt and pepper

6 to 8 rashers of smoked streaky bacon

2 tbs of redcurrant, quince or medlar jelly

2 or 3 tsp cornflour

500 ml beef stock

The day before you want to cook the venison, place it in a tub only slightly larger than the joint itself along with the wine, vinegar and olive oil. Lightly crush the spices, tie the herbs with some string and add those too. Make sure the venison is covered – or mostly covered – by the wine mixture then cover and refrigerate. Turn the meat once or twice if it is not completely submerged.

Next day, take the tub out of the fridge a few hours before you want to cook the meat, so it can come up to room temperature. Preheat your oven to 225°C. Calculate your cooking time: for rare meat roast for 15 mins per 500 g of meat plus 15 minutes; for medium 18 mins per 500 g plus 15 minutes.[2]

Now prepare the meat. Spread your vegetables in the centre of the tray and place the venison on top. Dab it dry with some kitchen paper then smear the top with the butter, season well with salt and pepper, then cover the top with the bacon, making sure each rasher overlaps the next slightly.

Oven-ready haunch of venison

Ladle around half of the marinade into the tin and slide the meat into the oven. Roast for 15 minutes and then turn the heat down to 180°C. Baste the venison every 15 to 20 minutes or so, adding more marinade if it starts to dry up.

For the last 15 minutes of the cooking time, turn the heat back up to 225°C, remove the bacon, give the meat one more baste, and let it crisp up at the edges. Take the tin out, remove the meat to a board or dish and cover with kitchen foil. It will sit very happily there as you roast your potatoes and cook your veg.

Now make the gravy. Strain the contents of the tin into a jug and spoon or pour a couple of tablespoons (approximately) of the buttery olive oil layer into a saucepan. Discard the rest of the fat. Put the pan over a medium heat and stir in 2 teaspoons of cornflour. Once incorporated, cook for a minute before adding the juices. Mix to blend, before adding the beef stock, mix again and then add the remaining marinade. Cook for 10 minutes, then add the jelly and season with salt and pepper. If the gravy isn’t as thick as you’d like, slake another teaspoon of cornflour in a little cold water and stir it in. When ready, strain into a warm jug.

Remove the outer mesh covering the joint, slice and serve with the gravy, the crisp bacon rashers and extra jelly on the side.


If you like the blogs and podcast I produce and would to start a £3 monthly subscription, or would like to treat me to virtual coffee or pint: follow this link for more information. Thank you.


Notes:

[1] It is for this reason that I consider venison a vegan-friendly food: we’d have to cull them whether we ate meat or not, so we may as well.

[2] If you like your meat well done, I can’t help you.

Leave a comment

Filed under Britain, Christmas, cooking, food, Game, General, Meat, nature, Recipes

Free Zoom talk in collaboration with the Museum of Royal Worcester, 15 Nov 2023

Hello everyone. Just a very quick post to let you know that I am giving a talk as part of the Museum of Royal Worcester’s Winter Online Talk series. The title of my talk is ‘Navigating Nineteenth-century English Meals – changing manners and fashions explored through Worcester porcelain’.

The talk is free and can be viewed online via Zoom. It’s on 15 November 2023 at 6pm (UK time). Click here to book your place.

It’s been really fun writing it and looking through the museum’s collection to find some interesting specimens to show and tell.

I do hope you can make it.

I’ll be talking about this item, amongst many others, but what is it? Find out on 15 November! (pic: Museum of Royal Worcester)

Leave a comment

Filed under Britain, cooking, food, General, history, The Victorians

Book review: A. Cook’s Perspective by Clarissa F. Dillon & Deborah J. Peterson

A. Cook’s Perspective is an investigation into the work of the rather obscure and eccentric 18th-century cook and cookery writer Ann Cook, her methods and her infamous hatred of the popular cookery writer, and her contemporary, Hannah Glasse and her book The Art of Cookery Made Plain and Easy. The book is essentially a transcript of Cook’s Professed Cookery garnished liberally with comments and insights into Ann and Hannah’s recipes, their cooking methods as well as Ann’s state of mind. The book is authored by experienced food historians and historical cooks Clarissa F. Dillon and Deborah J. Peterson who investigate Cook’s spleen-venting by cooking her and Hannah’s recipes to understand whether Cook’s vitriolic take-down of Glasse has any grounding.

A. Cook’s Perspective is a very useful book – firstly because it’s an edited transcription of Cook’s work (including her bizarre preface which attacks Hannah Glasse in rhyming couplets and long-form poetry) which is very handy for those who prefer to read a book over a digitised PDF. But the book adds so much more than that because Dillon and Peterson really get to work on fact-checking and inspecting the minutiae of Cook’s methodologies by making the recipes themselves – and it’s a mixed bag, sometimes landing in favour of Cook, other times Glasse. Their work also exposes Mrs Cook as a vindictive, petulant, embittered woman, and it gives this reader more insight into the bizarre one-sided acrimony (it is unknown whether Hannah Glasse ever met, or even knew, Ann Cook) which I had previously thought was generally in agreement of Cook’s assessment. The reality is – as usual – much more complex. Having a physical book in my hand allowed me to read Cook’s work more closely (something difficult to do when reading digitised texts online), and it shed light on the evolution and pedigree of some dishes. For example, I spotted elements of Cook’s recipe ‘To make a White Fricassey of Rabbets’ in Elizabeth Raffald’s recipe ‘Rabbits Surprized’, a dish I thought to be totally unique to Raffald.

Dillon and Peterson’s approach of writing comments beneath original prose is a good one: it helps us to understand how some recipes work, and how the writers go about interpreting them. They also demonstrate the importance and benefit of cooking the recipes oneself, rather than simply reading them. There are several occasions too where the authors are at a loss as to Ann’s meaning or point in some of her comments, many of which seem to be nonsensical or simply ‘whining’. By criticising Ann Cook’s own criticisms we do glean an extra layer of understanding of 18th-century cooking.

As someone with an interest in the cookery writers of the 18th century, I would have liked to have seen the introduction, i.e. the backstory, fleshed out a lot more: the two ladies’ biographies, achievements and inter-relatedness. Photos of the food would have helped bring the dishes to life, as would some images, say contemporary artwork, of 18th-century foods being served or prepared.

Overall, A. Cook’s Perspective is a worthy addition to the home library of anyone interested in 18th-century cookery because it provides us with practical knowledge of cooking at this point in history, but it also gives us an almost voyeuristic view of Ann Cook’s psyche and her deep-seated, intense dislike of a cookery icon at a time when the personal thoughts and feelings of female cookery writers are so rarely captured.

A. Cook’s Perspective: A Fascinating Insight into 18th-century Recipes by Two Historic Cooks by Clarissa F. Dillon & Deborah J. Peterson is out now and is published by Brookline Books.


If you like the blogs and podcast I produce and would to start a £3 monthly subscription, or would like to treat me to virtual coffee or pint: follow this link for more information. Thank you.


1 Comment

Filed under Books, Britain, cooking, Eighteenth Century, food, General, history

Sustainable Meat Cookery Part 1: Central Nervous System

This post complements the special podcast episode I made for my £3 monthly subscribers on the topic of sourcing and cooking the organs of the central vervous system – brain, spinal cord and eyes – a most taboo topic. Inside you will find the episode itself as well as my method to prepare brains for cooking as well as a few recipes – should you get your hands on any.

If you are not a subscriber, you can become one on the Support the Blogs and Podcast tab of the blog, where you will access all of my Easter eggs, premium blog content and receive my weekly newsletter AND help support the running of everything too!

Subscribe to get access

Read more of this content when you subscribe today.

Leave a comment

Filed under Britain, cooking, food, General, Meat, Recipes, Uncategorized

A Guild of Food Writers’ Award win!

I have some very exciting news: A Dark History of Sugar did not only get nominated for the Guild of Food Writers’ Awards 2023 in the Best First Book category, but it also won! Bloody hell!

The other nominees in the category were Chocolate Cake for Imaginary Lives by Genevieve Jenner and Cooking: Simply and Well, for One or Many by Jeremy Lee; both brilliant books so I certainly did not expect to win.

Some past podcast guests were there at the ceremony: Diane Purkiss, who appeared on the podcast recently to talk about her book English Food: A People’s History won her category Best Food Book. Nominated in that same category was Felicity Cloake for her brilliant breakfast Odyssey Red Sauce, Brown Sauce. Scroll to the foot of the post to listen to those podcast episodes.

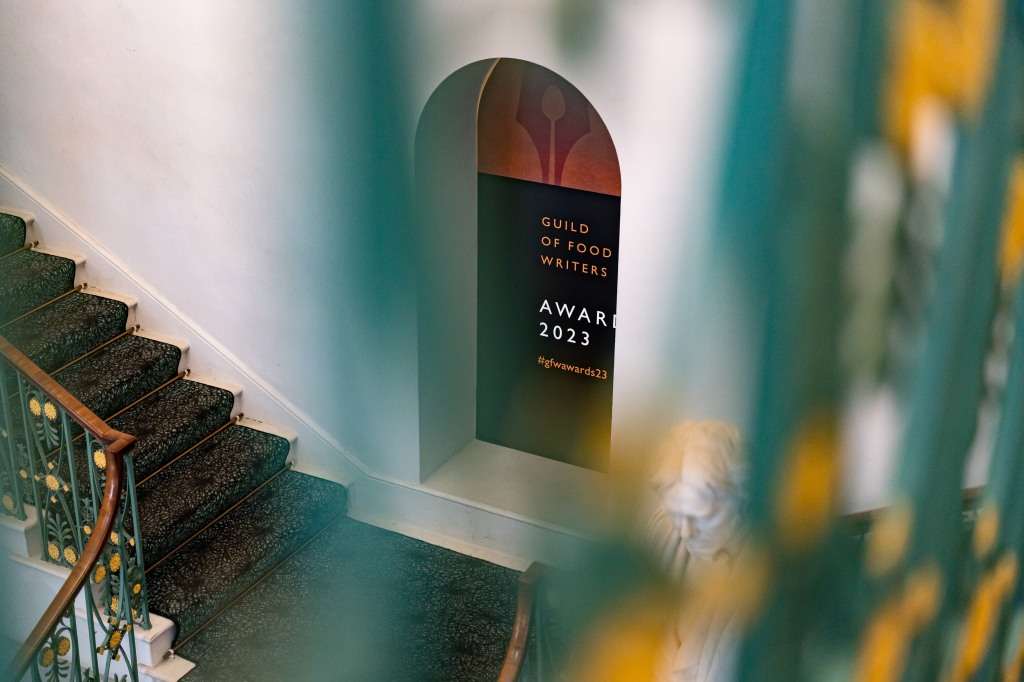
It was a fantastic night. The awards were hosted by chef and Saturday Kitchen presenter Matt Tebbutt, and the award itself was sponsored by the excellent Sea Sisters. Collecting the award was all a bit of a blur as the adrenaline was pumping somewhat, but the guild just released the official photographs (taken by Martin Behrman) so there is actual evidence of it occurring! There were some food-writing royalty at the ceremony too in the shape of Dames Mary Berry and Delia Smith. I was starstruck, let me tell you.

Although I am still reeling, I need to crack on with writing the current book. One shouldn’t rest on one’s laurels now, should they? I’ll be back with a proper blog post soon. Cheerio! x

6 Comments

Filed under Books, cooking, food

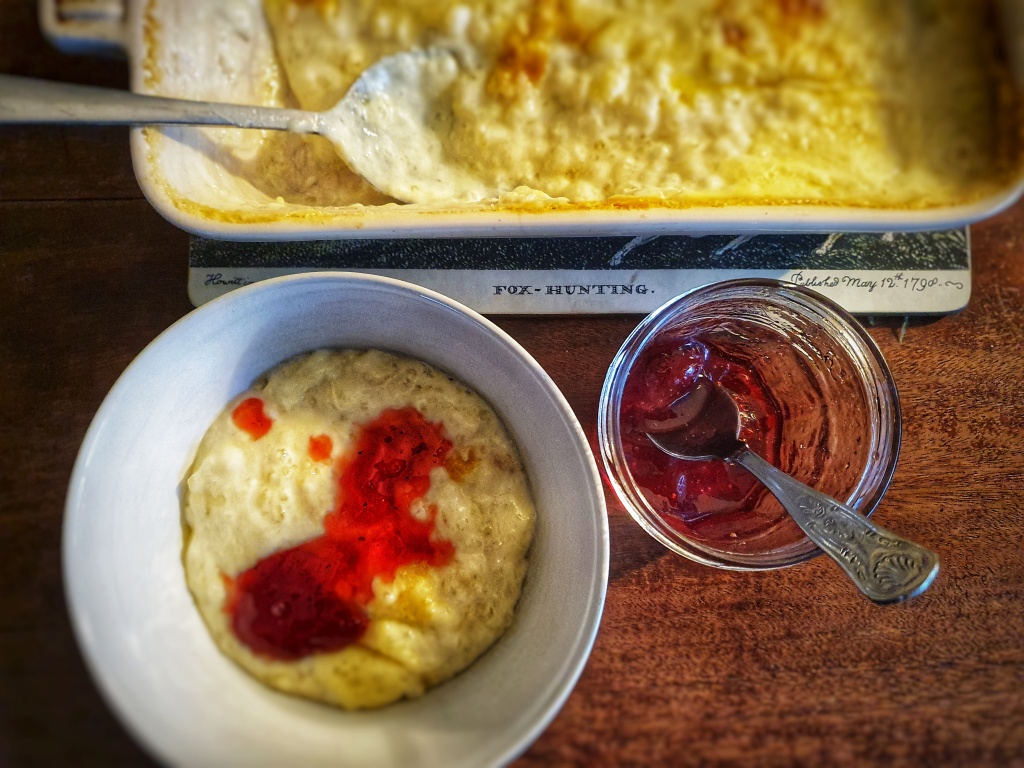
Sago and Tapioca Pudding


This post complements the episode of The British Food History Podcast called ‘The School Meals Service with Heather Ellis’:


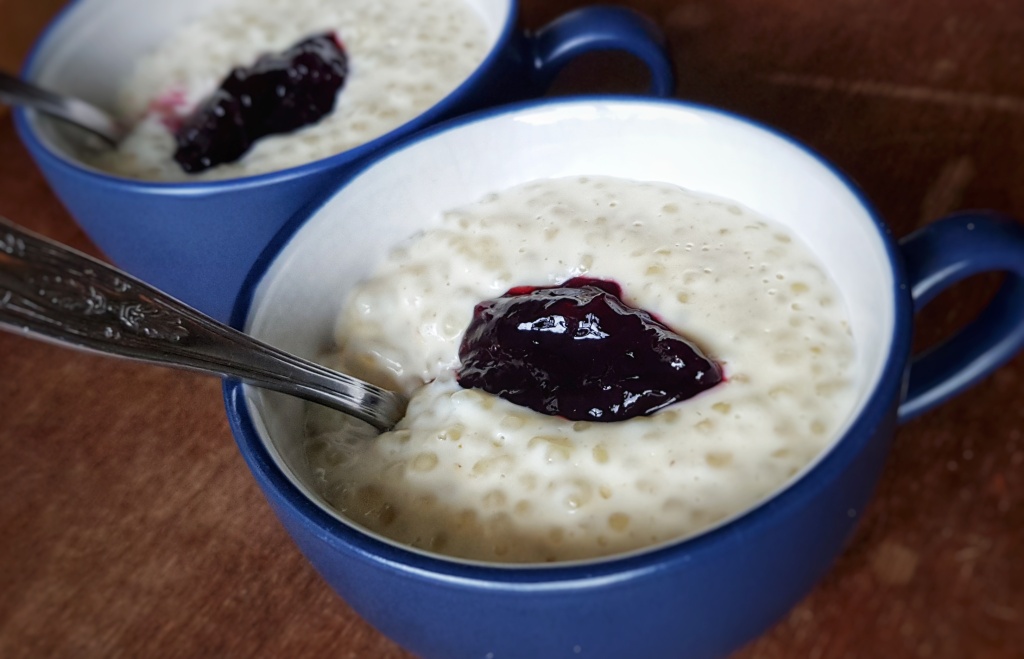
Speaking with Heather Ellis on the podcast about the School Meals Service and school dinners really fired off some food memories, good and bad. If it has in you too, please let the School Meals Project know about them – and let me know about them too – there’s a postbag episode of the podcast coming in just two or three weeks’ time. Three stuck in my mind: sago or tapioca pudding, pink sponge and custard, and Spam fritters. Of those, my favourite is sago/tapioca pudding – it genuinely is one I cook at home regularly. I know it was called frogspawn by children across the country, but if made well, it is delicious. Honest.

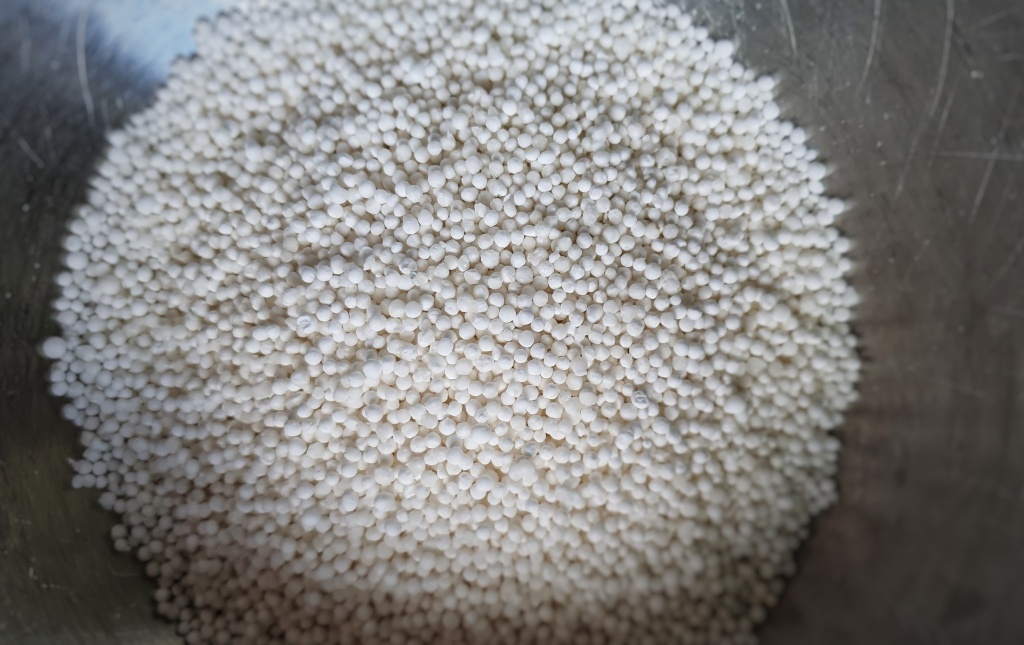
For anyone unfamiliar with it, it is one of a tribe of puddings known as milk puddings which are essentially a starchy ingredient cooked in milk and sweetened with sugar, but in my opinion, they need to also contain cream and flavourings such as bay leaves, vanilla or lemon rind. The best-known of these is rice pudding, but there are also semolina, macaroni and arrowroot puddings. They became popular in schools because they were an excellent way of providing children with their calcium. Sago and tapioca come in the form of small balls or pearls, which turn translucent when cooked in liquid – tapioca pearls are used to make the ‘bubbles’ in bubble tea.

Sago and tapioca can be used interchangeably in recipes and taste the same, but there is a difference between the two; sago comes from the sago palm and tapioca from the cassava plant. The former is found in India and some parts of East Africa, and the latter in the Americas. The starch is extracted from the plants’ pithy centres by grating and squeezing. It is then suspended in a little water to make a paste, which is then passed through a colander to form little pellets that are then dried.[1]

Both are very much associated with Empire, and recipes using sago begin to appear in 18th-century cookery books. In Sarah Harrison’s The House-keeper’s Pocket-book sago is simmered in water and flavoured with sugar, cinnamon and lemon.[2] Elizabeth Raffald has a complex, red-coloured sago pudding containing red wine, sugar, bone marrow and egg yolks. She does have a simpler version closer to what we would recognise today: sago simmered in milk and cream, and flavoured with sack, sugar, eggs and nutmeg.[3] Through the 18th and 19th centuries, the typical way to prepare the pudding would be to cook it on the hob and then bake it in pastry. Mrs Beeton uses sago in two more recipes: a sweet sago sauce for desserts and a sago soup.[4]

If you are unsure about making sago or tapioca pudding (or returning to it after eating the runny school kind of years past), the great food historian Alan Davidson provides some words of encouragement: ‘[I]t is sometimes despised by the ignorant, that is to say, persons who have no knowledge of how good they are when properly made.’ He casts down a caveat, however: ‘[The] texture delights a few cognoscenti in Britain but is repellent to the majority and has no doubt contributed to the virtual disappearance of the pudding from British tables.’[5] And I say that it is a crying shame. It is rarely included in cookery books anymore, not even those specialising in puddings. Justin Gellatly is a fan though, and there are a couple of recipes in Helen Thomas’s excellent Pudding Book, but that’s about it.[6]


If you like the blogs and podcast I produce and would to start a £3 monthly subscription, or would like to treat me to virtual coffee or pint: follow this link for more information. Thank you.


The typical way to cook the pudding these days is to either bake it I the oven or cook it on the hob, and I provide methods for both, though I prefer the latter. It is quick to make and, despite what other recipes say, requires no soaking – just a careful swish in some cold water.

I’ve left the amount of sugar to you. If you intend to eat the pudding with sweet jam, go for around 90 grams, if you are eating it on its own, or with tart fruit like rhubarb or gooseberry, perhaps use 120 grams of sugar.

Serves 6 to 8 people, depending upon greediness. If more appropriate, half the amounts.

Around 30 g butter (if baking)

120 g sago or tapioca pearls

90–120 g caster sugar

1 litre full-fat milk

150 ml double cream

Flavourings: 3 or 4 strips of pared lemon rind, a lightly-crushed fresh bay leaf, a few drops of vanilla extract (or replace caster sugar with vanilla sugar), almond extract, cocoa, etc.

Oven method:

Preheat the oven to 160°C. In a baking dish of 1¼ litre capacity dot the bottom with small knobs of butter. Place the sago pearls in a jug and pour over plenty of cold water to release any starch. Pour through a sieve and then scatter the sago over the base of the dish with the sugar, milk, cream and flavourings. If using cocoa powder, whisk it into the milk before pouring into the dish. Place in the oven and bake for 60-90 minutes, stirring every now and again to disperse lumps. When the time is up, and you want a browner top, you could place it under a hot grill for a few minutes. Leave the pudding to stand for 10 minutes before serving.

Hob method:

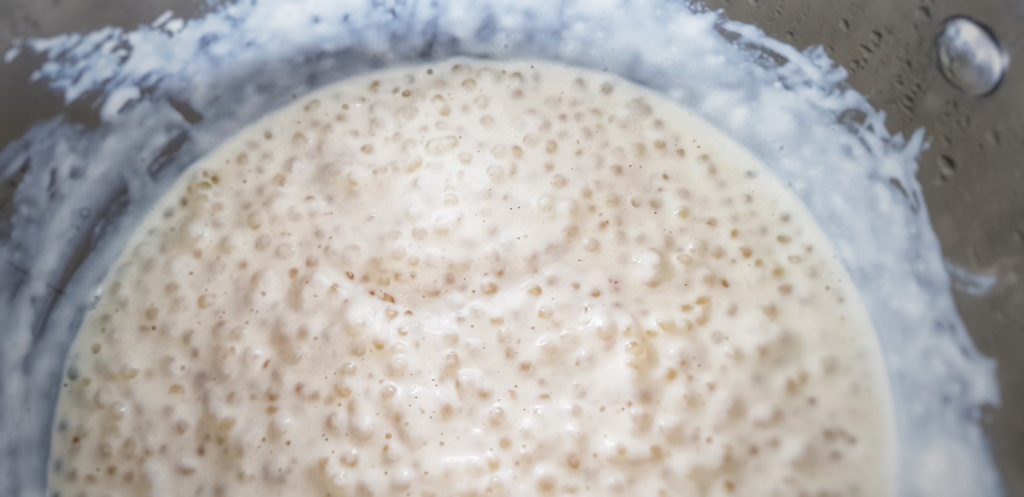
Wash the sago pearls as described above and place them in a saucepan with the remainder of the ingredients, bar the butter. Bring slowly to a simmer, stirring gently. Leave to simmer for around 15 minutes, stirring occasionally. After the 15-minute mark, keep a closer eye on it: cook a further 10 to 15 minutes, but stir more frequently, scraping any stuck bits from the base. Sago pearls stick and catch easily!

Stop cooking when the pearls are soft and gelatinous. Let the pudding stand for 10 minutes before serving. If it seems a little on the thick side, stir a little more milk through it.


References

[1] Beeton, I. (1861). The Book of Household Management. Lightning Source; Davidson, A. (1999). The Oxford Companion to Food. Oxford University Press.

[2] Harrison, S. (1751). The House-keeper’s Pocket-book And Compleat Family Cook (5th ed.). R. Ware.

[3] Raffald, E. (1769). The Experienced English Housekeeper (First Edit). J. Harrop.

[4] Beeton (1861)

[5] Davidson (1999)

[6] Gellatly, J. (2016). Bread, Cake, Doughnut, Pudding: Sweet and Savoury Recipes from Britain’s Best Baker. Penguin Books Limited; Thomas, H. (1980). The Pudding Book. Hutchinson & Co.

Leave a comment

Filed under baking, Britain, cooking, Desserts, food, General, history, Podcast, Puddings, Recipes, Uncategorized

Malt Loaf

I have been meaning to give you this recipe for that most beloved of teatime treats, the humble malt loaf for ages; indeed, I have had a jar of malt syrup sitting in my food cupboard for at least three years I bought especially for this post. Well, hopefully, it’s a case of ‘the best things come to those who wait’.

For those of you unaware of this stalwart of the British teatime spread, let me explain what it is. It is a member of a tribe of baked goods known as tea loaves. They are tea loaves because they’re eaten at teatime, but also because they contain tea. They are easy to make and also contain dried fruit, and usually do not contain any butter, and should instead be eaten spread liberally with it. They are loaf-shaped but are a type of cake. A malt loaf specifically is made with malt syrup and black treacle, and like Yorkshire parkin, it needs to be left awhile to turn nice and sticky. Before we get to the recipe, let’s have a look at the history.

Looking into the origins of the malt loaf has been rather difficult; I can find a recipe for malt loaf in the June 1930 edition of the Derbyshire Times and Cheshire Herald. It sounds like a malt loaf: dark and sticky, but black treacle is used not malt syrup.1 It seems to be called a ‘malt’ loaf because of the brown, malted flour used, which is not the same. Other malt loaves certainly contained malt syrup; beloved British brands Hovis and Allinson made them. However, these loaves were of the regular sort: loaves of white bread ‘improved’ by the addition of malt syrup.2,3 The malt syrup improved the colour and flavour and produced a moister loaf. Again, not the same.

John Sorenson’s original Beswick shop (pic: Manchester Libraries)

And so, we must turn to the iconic Soreen malt loaf, which has been baked in Manchester since the 1930s. The recipe, which has supposedly never changed, was invented by Danish immigrant John Rahbak Sorenson who lived in Hulme, Manchester. He first opened a business selling bakery equipment, before starting his own bakery in Beswick, where he sold his ‘Sorenson Malt Loaf’. He sold the business in 1938, but the loaf continued to be baked, the only thing that changed was its name.4 Today, the factory resides in Trafford Park (home to Manchester United FC), where it cranks out 300,000 loaves of Soreen per day.5

Their recipe is a secret, but we do know that they use wholemeal flour; in fact, it is because of the inclusion of wholemeal flour that Soreen is marketed as a health food.4 That it is sticky with sugary syrups undoes this claim somewhat, but the combination of easily digested sugars and slow-release complex carbohydrates apparently make Soreen a favourite food for athletes.

Well, their recipe is a secret, but mine is not and it’s a tried-and-tested one. I used to make these sticky loaves for my little traditional market stall back in the day, and the recipe is based on one which appears in Gary Rhodes’ excellent book New British Classics.6 It is easy to make, but I must advise you about the flour: it must be sifted. It’s one of my most hated kitchen tasks, and I avoid it whenever possible, but in this case it is necessary. Wholemeal flour does tend to clump in the bag and seeing that the wet and dry ingredients need only the briefest of mixing, you need to be sure your flour is lump-free. That said, don’t forget to tip the bran left behind in the sieve back into the sifted flour.

Subscribe to get access

This recipes is for my £3 monthly subscribers. Read more of this content when you subscribe today and support the blogs and podcast. Subscribers get access to special blog posts, Easter eggs from my podcast, and a monthly newsletter. You can become a subscriber by following this link.

References

  1. Hughes, G. Malt Loaf. The Foods of England Project; http://www.foodsofengland.co.uk/maltloaf.htm.
  2. Oddy, D. J. From Plain Fare to Fusion Food: British Diet from the 1890s to the 1990s. (Boydell Press, 2003).
  3. David, E. English Bread and Yeast Cookery. (Grub Street, 1977).
  4. Hovis: Our Story. http://www.soreen.com/our-history/.
  5. Greer, S. Inside the Soreen malt loaf factory in Manchester. Manchester Evening News (2018).
  6. Rhodes, G. New British Classics. (Random House, 2006).

11 Comments

Filed under baking, bread, Britain, cake, cooking, food, General, history, Recipes, Teatime, Twentieth Century, Uncategorized