Tag Archives: preserving

Saltpetre and Salt Prunella

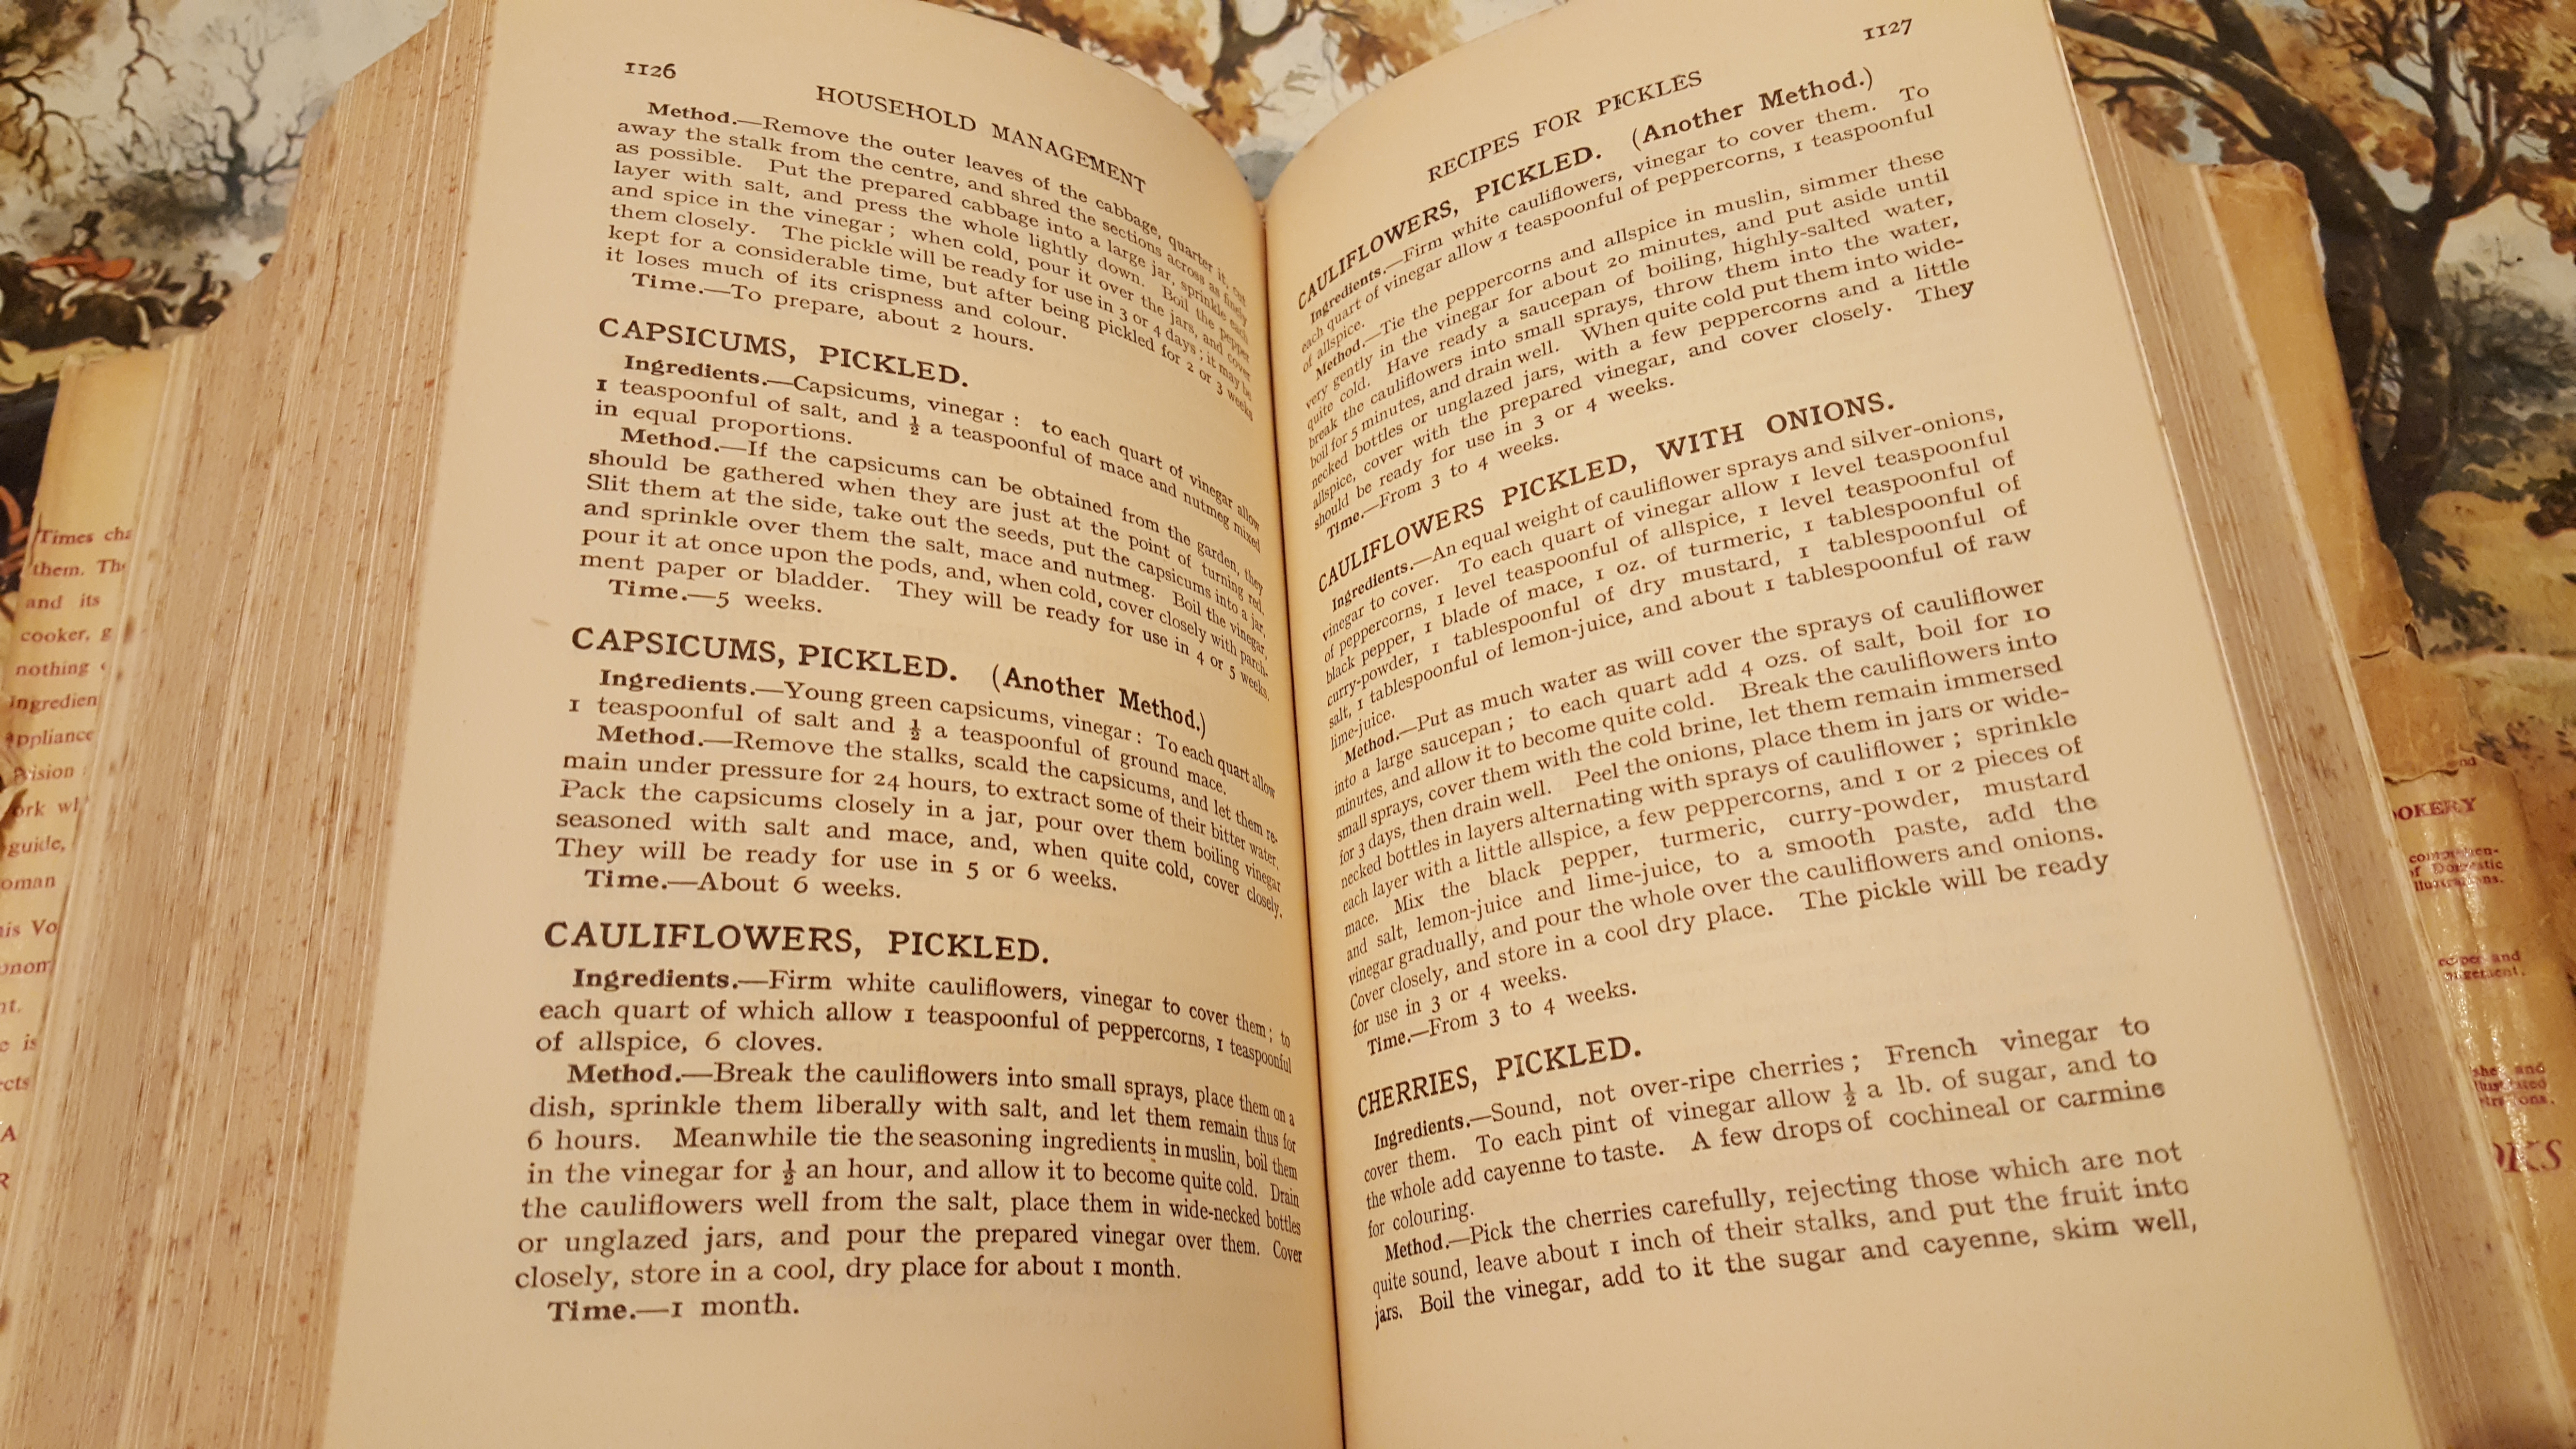
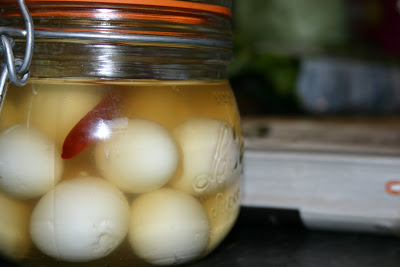
On my Jane Grigson blog I recently completed a recipe, the 441st, Smoking Meat. It wasn’t so much a recipe, more a bit of advice, and the advice was: don’t bother. However, I wanted to have a go at curing and smoking my own bacon, so took this as an opportunity, and because there was no recipe in English Food, I could do my own thing with respect to the recipe (see The Premise). All of Jane’s cured meats contain a combination of salt and saltpetre – also known as potassium nitrate – which has a bad rep these days because it has been implicated as a causative agent in diseases associated with eating processed meat products (more on that later). So, with my bacon, I thought it a good opportunity to see if leaving out the saltpetre would have any observable detrimental effects. SPOILER ALERT! My bacon is still completely fine three months after making it, stored at room temperature – there isn’t the merest trace of mould – and it got me thinking about its use in meat curing and processing and whether it needs to be included.

Pure Potassium chloride

Just what is the function of saltpetre? Everyone does agree that the pink colour saltpetre gives the meat is attractive. However, there is certainly disagreement out there as to its efficacy in preservation. According to Jane Grigson saltpetre ‘no preservative value’1 and Elizabeth David is of the belief that it is simply ‘the cosmetic of the preserved meat industry.’2

On the other side of the argument Larousse Gastronomique reckons it a ‘powerful bactericide [that] has been used since ancient times to preserve food.’3 Harold McGee concurs, adding that it is particularly effective against the bacteria that causes botulism.4

In conclusion: I don’t know what to think.

It seems that it hasn’t been used since ‘ancient times’ either; according to Peter Brears, ‘there appears to be no evidence for the use of saltpetre, sugar or smoking in medieval meat preparation, only salt.’5

Natural deposits of saltpetre pic: William Haun

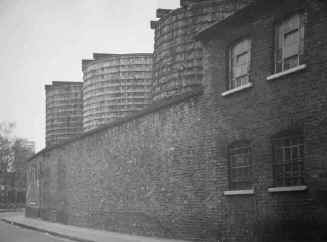
Saltpetre can be found deposited naturally as veins in rocks – indeed, saltpetre literally means salt stone. Houses built on foundations dug into rocks containing the mineral sometimes find saltpetre can be found in crystalline forms in damp cellars. It is relatively rare, but it was in demand in the Middle Ages, not for its preserving powers but as an ingredient in gunpowder. In the sixteenth century a method of production was devised after an alchemist found that after boiling the water from urine the crystalline material left behind was highly flammable.6 With further refining of the process, urine was combined with faeces and lime on an industrial scale. It was said that the best urine for the job was ‘Bishops’ piss’; not because it was the urine of a holy man, but because of the large volume of wine that Bishops drank. The process even makes an appearance in the Canterbury Tales:

Chalk, quicklime, ashes and the white of eggs,

Various powders, clay, piss, dung and dregs,

Waxed bags, saltpetre, vitriol and a whole

Variety of fires of wood and coal.7

Everyone was well aware how saltpetre was made, and people – as you might expect – did not want to use a product derived from human waste in their food and continued to use saltpetre from natural sources at great expense. Today it is made from ammonium nitrate and potassium chloride.

An engraving showing equipment used to extract saltpetrefrom ‘soil’. From The Laws of Art and Nature, in Knowing, Judging, Assaying, Fining, Refining and Inlarging Bodies of Confin’d Metals (1683) by Lazarus Erckern (pic: science photo library)

When saltpetre comes into contact with meat, the nitrate part of the molecule reacts with haemoglobin (in the blood) and myoglobin (in the muscle) to form a nitrite, which reacts further to form nitric oxide. It is the nitrite and globin molecules reacting that form the pink colour. The products of reduction are stable away from oxygen in the air, however if one takes a slice from the meat to reveal the pink meat within, the nitrites oxidise back into nitrates and the meat loses its rosy tinge.

Some recipes ask for salt prunella, which is simply saltpetre that’s been formed into little balls and dissolve at a slower rate that regular saltpetre. It also contains a small proportion of potassium nitrite to help kick-start the chemical processes in the meat. Again sources disagree as to the truth of this.

Saltpetre is used in very small amounts – when I used it in the past, I used approximately a teaspoon or two to every 500 g salt. You can purchase it on the internet, but it is much better to buy salt mixes for curing that contain salt and nitrates already mixed and measured.

Pre-mixed pink curing salt

This brings us to health – this chemical which is added in small amounts is getting the blame for causing heart disease and bowel cancer in those who eat processed meat products. Well, there is certainly a correlation between consumption of processed meats and cancer. But let’s not jump on nitrates as the causative agent: correlation is not causation, after all. Remember when red wine was supposedly good for your heart? It wasn’t true – there was a correlation, sure, but only because folk who drink red wine tend to be middle class, and therefore tend to also exercise regularly and eat a heathier diet. Nothing to do with wine.* I suspect there is something similar going on with nitrates: they are used in processed meats, which are cheap and much more likely to be consumed by poorer families, who in turn, are less likely to eat fewer fresh fruit and vegetables, and less likely to own a gym membership. As it turns out, nitrates may actually be beneficial in that they help lower blood pressure.

The jury then is still out. And in the case of my own homemade, nitrate-free bacon, leaving out the nitrates hasn’t caused the meat to go bad, and it stayed relatively pink too. Removing it might not improve the nation’s health, but at least it removes a chemical that’s been produced from nasty chemicals which can only be good for the environment.

Do you have any thoughts on the matter? Let me know them in the comments.


If you like the blogs and podcast I produce, please consider treating me to a virtual coffee or pint, or even a £3 monthly subscription: follow this post for more information.


My home-made bacon

*In fact it has been demonstrated that there is no safe minimum alcohol levels – it’s all bad, sorry!

References

1.           Grigson, J. Charcuterie and French Pork Cookery. (Grub Street, 1969).

2.           David, E. Spices, Salt and Aromatics in the English Kitchen. (Penguin, 1970).

3.           Larousse Gastronomique. (Hamlyn, 2001 edition).

4.           McGee, H. On Food and Cooking: The Science and Lore of the Kitchen. (Allen and Unwin, 1984).

5.           Brears, P. Cooking & Dining in Medieval England. (Prospect Books, 2012).

6.           Beach, H. By the Sword Sundered. (Authorhouse, 2014).

7.           Chaucer, G. The Canterbury Tales. (Translated by Nevill Coghill, Penguin, 1951).

Advertisement

14 Comments

Filed under Britain, food, General, history, Meat, Uncategorized

Gooseberry Jam


If you like the blogs and podcast I produce, please consider treating me to a virtual coffee or pint, or even a £3 monthly subscription: follow this link for more information.


I was kindly given part of a large crop of gooseberries by my friends Kit and Ellie, their two bushes have been prolific this year. Earlier in the summer, I used some of their underripe berries to make a sauce to accompany mackerel, but now they were large and quite sweet.

I made the lion’s share of them into gooseberry jam and thought I would give you a recipe, as it is so easy to make, and you are unlikely to find it in the shops. If you don’t know of any gooseberry bushes, try a greengrocer – I have spotted them in quite a few shops this year.

The great thing about gooseberry jam is that the gooseberries change in colour, adopting an appetising warm pinkish hue with the intense heat of jam-making. This change is apparently due to the anthocyanins in the gooseberries interacting with metal ions leached from the cooking vessel itself.

Gooseberries are not as juicy as their red, white and blackcurrant relatives so they need a bit of extra added water to help dissolve the sugar. Gooseberries are high in pectin, especially when young, so there should be enough to set the jam. However, if they are late season and ripe, you might want to replace a small proportion of the sugar with jam sugar, which contains pectin, to give them a helping hand.

The jam I made is simple: gooseberries, sugar and water, but if you have any of the extras in the ingredients list below, feel free to add them if you like.

The jam makes a great roly-poly or Victoria sponge filling.

The quantities below makes around 1 litre of jam, and it is easy to scale up or down depending upon the amount of gooseberries you have to hand.

1 kg gooseberries, washed, topped and tailed

1 kg granulated sugar (or 800 g granulated and 200 g jam sugar, if the gooseberries are ripe

500 ml water

Optional extras: A dozen elderflower heads wrapped in muslin, a good bunch of sweet cicely tied with twine or replace 250 ml of the water with Muscat wine.

Before you start, place a saucer in the freezer.

Place all the ingredients in a large, heavy based saucepan on a medium heat.

Stir occasionally and when all of the sugar has dissolved, turn the heat up to bring the gooseberries to a really good boil. After around 15 minutes – by now they should have a pinkish tinge about them – test to see if you have got a set. Either take the jam’s temperature with a temperature probe and see if it is 105°C, or take a teaspoon of the mixture and place a few drops on your very cold saucer you had stored in the fridge, let it cool for a minute and see if the drops wrinkle when you push them with a finger.

You can use a candy thermometer instead of a probe, but I find them imprecise. However, if you have a trusty one, by all means slot it down the inside of jam before you start to boil it.

Leave the jam to cool for 15 minutes and skim any scum with a large spoon or ladle.

Have some sterilised jars ready and ladle in the jam. A jam funnel is helpful here. Alternatively, pour the jam into a Pyrex or stainless-steel jug rinsed out with scalding water and carefully fill your jars. Seal when still very hot.

I have written at length about setting points and sterilisation, so if you are unsure, have a look at this post here for a walk-through.

3 Comments

Filed under Blogs, cooking, food, Fruit, Preserving, Recipes

Two Easy Pickle Recipes

My previous post on pickling went on a bit, so I’ve added these two simple recipes as a separate one. The methods are not particularly comprehensive, so if you haven’t pickled before read the previous post for hints and tips.

Pickled Red Cabbage

As with many recipes for preserving, it’s difficult to come up with precise amounts. It all depends upon how much produce you have and the size and shape of your jars . A certain amount of guesswork is required. If you don’t make enough pickling liquor, you can quickly make more, and if you make too much, keep it in a sterilised jar; you can always use it pickle something else, or use it in salad dressings.

It is a good example of a system rather than of a recipe, but I reckon a good-sized red cabbage will need a litre of liquor. Oh and it’s a two-day affair, so don’t start this the day before a fortnight’s holiday or something:

Day 1:

1 red cabbage, sliced thinly, centre removed

Sea or rock salt

Scatter your sliced cabbage into a colander placed on a deep plate or large bowl and strew with plenty of salt. Cover with a tea towel and leave overnight for the water to drain.

Day 2:

1 litre of cider, wine or distilled vinegar

1 tsp peppercorns

1 chilli

1 tsp Allspice berries

50 g sugar

1 star anise

1 tsp Mustard seeds

Boil the vinegar with the spices and sugar, simmering for 5 minutes. Rinse the salt from the cabbage and pack into sterilised jars. Strain the hot vinegar and fill the jars with the piping hot liquor. Pop the chilli and star anise into the jars and a few of the seeds and berries (for prettiness). Put on lids and leave to mature for four weeks.

  1. Cover cabbage with salt for 24 hours.
  2. Next day, rinse away the salt and pack into sterilised jars.
  3. Boil up the remaining ingredients. Simmer 5 minutes and pour over the cabbage.

If you like the blogs and podcast I produce, please consider treating me to a virtual coffee or pint, or even a £3 monthly subscription: follow this link for more information.


Delia Smith’s Quick Pickled Onions

from her Complete Cookery Course, 1982

“I’m afraid I have neither the strength nor the patience of endure long pickling sessions…so I always use the method below” says Delia.

No faffing about with this one: onions usually need brining or dry-salting. Delia skips this stage, but be warned: they don’t keep as long as regular pickled onions as the excess water isn’t drawn out by the salting process. They’ll keep 4 months maximum.

In her recipe, Delia asks for pickling spice, which you can buy already blended, but have a go at making your own; a keen cook will probably have most of the spices needed anyway! See the previous post for an example.

2 kg pickling onions [or shallots]

1.75 l of malt vinegar (Sarson’s is best)

25 g pickling spice

The first task is to peel the onions. Put them in a bowl and cover with boiling water straight from the kettle, drain and get peeling. The skins should now be relatively loose from their hot water treatment.

Half-fill your jars with onions – 4 1-litre jars will be enough – and share out half of the pickling spices between them, scattering nicely. Top up with the remainder of the onions, and then the rest of the spices. Pour the vinegar in (no need to heat it) and screw the lids on tightly. Leave the onions 8 weeks before eating them.

6 Comments

Filed under Blogs, food, General, Preserving, Uncategorized

Pickling at Home

Pickling is a form of food preservation that uses either vinegar or brine to keep food from spoiling. Good cooks in all households, rich or poor, throughout history had to know what they were doing if they were to get maximum yield and minimum waste from their home-grown produce, whether a tiny veg patch or a large kitchen garden. Therefore, if we’re to cook historical recipes, we too need to know what we’re doing.

Pickling in brine is essentially curing with salt and I’ll tackle that subject in a different post (this is not be confused with the brining some veg goes through before being pickled in vinegar (see below).

I thought that I’d go through how to make your own pickles at home as I got some good feedback on my previous preserving post: fruit jelly preserves. Pickling is easy and doesn’t require any expensive specialist equipment, so if you have never tried your hand at home-preserving, give it a go. A similar method is used to make flavoured vinegars, so I’ll write a little post on those too.


If you like the blogs and podcast I produce, please consider treating me to a virtual coffee or pint, or even a £3 monthly subscription: follow this link for more information.


The ingredients

Vinegars: any vinegar can be used, however for long-term preservation a vinegar that is 5% acetic (ethanoic) acid is required. When it comes to choosing the correct, go for your personal preference. Malt vinegar packs the strongest punch and goes best with onions and shallots in my humble opinion. The cider and wine vinegars have a fresher, subtler flavour and are pretty much universal. Distilled or spirit vinegar is vinegar in its purest form, essentially just acid and water and can be used to pickle anything. It can be a little harsh so requires flavouring with aromatic herbs and spices.

Balsamic, Champagne and sherry vinegars can do the job of pickling perfectly well but are far too expensive for your glut of allotment red cabbage, though a touch of balsamic vinegar added to another does work well.

Pickled quails’ eggs

Herbs & Spices: Though not strictly essential, herbs and spices do give your pickles an extra aromatic dimension and take the edge off that often harsh vinegar astringency. Most herbs can be used with great effect: thyme, rosemary, bay, savory, oregano, dill and fennel all work very well.

Pretty much any whole spice can be used successfully here: fresh ginger, peppercorns, mustard seeds, allspice berries, cinnamon sticks, fennel seeds, dried or fresh chillies and dill seeds are the usual suspects. Use whatever you like, but a general rule for spice mixes is to add up to 25g of spice to each litre of vinegar. A good general spice mix:

1 tbs allspice berries

1 tbs mustard seeds

1 cinnamon stick

2 tsp black or white peppercorns

1 tsp fennel seeds

1 or 2 dried chillies

I’m going a little mediaeval and including sugar as a spice: the deliciousness of a pickle can be heightened immensely with a seasoning of sugar. This is especially important when pickling fruit such as pears or strawberries.

Salt: Many vegetables need to be salted in some way before pickling. The salting process draws water from the veg both firming it up and taking away water that would otherwise leach out and dilute the vinegar. Use either rock or sea salt for this, never table salt; it is far too harsh and inevitably some salt ends up in the final pickle, so a nice complex salt is best.

There are two types of salting: dry salting is where salt is sprinkled over vegetables and left overnight to drain. The other way is by brining, where the veg is immersed in a strong salt solution for 12 to 24 hours. A typical brine contains 85g of salt per litre of water.

The produce: these are the fruit, vegetables or eggs you want to pickle! They need to be a good size, unbruised and not overripe. Some vegetables need to be salted or cooked, some neither! When preparing your produce, make sure the pieces are a good size for when you come to eat them, and that they of a good size and shape to be packed well into jar. It’s important to remember that the produce needs to be completely covered and that there needs to be a decent space, around one centimetre, between the vinegar and the jar rim.

The Equipment

Aside from your regular kitchen pots, pans and jugs, there is little specialist equipment required.

Muslin & string: used to tie herbs and spices to infuse into the vinegar. Not essential though, as you always pass the vinegar through a sieve.

Jars & lids: obviously this is a must-have. I tend to use stocky hardwearing Kilner jars where I can, but I also hang on to any decent-sized jars that come my way. Make sure the metal lids of jars have a layer of white plastic under them; this makes them vinegar-proof.

Just part of my jar collection!

How to Pickle

This is a four-stage process:

Preparing the produce: Sometimes there is no prep, sometimes there’s cooking or salting. Check the recipe before you embark on your preserving as some veg needs a full 24 hours salting!

Preparing the pickle: The vinegar is simmered with its herbs and spices for 5-10 minutes, depending on the pungency required. This can be strained if a muslin bag wasn’t used. The pickling liquor is used hot or cold depending upon the recipe.

Potting: sterilised jars need to be packed quite tightly with your produce before the vinegar is poured in. Make sure everything is covered and pop the lid on tightly. Give the jar a jiggle to remove air bubbles. See this post if you don’t know how to sterilise jars.

Maturing: Leave your pickles for a month before eating them so that the vinegar can penetrate the veg. Waiting also matures the flavour making it more rounded and less harsh. Patience, dear readers, is a virtue.

Alright, that’s the basics…I’ll post recipes soon. If you can’t wait for me to post, see this previous pickled egg and this pickled beetroot recipe.

Pickled white beetroot

6 Comments

Filed under cooking, food, General, Preserving

A Trip to the Sarson’s Vinegar Factory

SARSONS-LOGO

A couple weeks ago I was invited by the iconic British condiment company, Sarson’s, to have a look around their factory and see the process of vinegar-making. They contacted me as they had noticed my little blog and thought I might be interested in seeing what they do because they make vinegar in the traditional way; and we’re all about tradition here at British Food: A History.

The word vinegar comes from the French words vin meaning wine of course, and aigre meaning sour or sharp, so when we talk about British malt vinegar, it’s actually a bit of a misnomer. What is in your bottle of Sarson’s used to be called alegar: sour ale! I think the word should be brought back (I’ll pop a note through to Mr and Mr Sarson).

Vinegar – aka ethanoic or acetic acid – is produced when specialist bacteria called acetobacteria metabolise normally deadly alcohol (ethanol) and harness energy from it. It takes a real specialist to use this killer chemical as a food source. Vinegar is, of course, an excellent preservative itself.

It is thought that vinegar and alcohol fermentation were discovered and refined in tandem, and the earliest example of vinegar-making goes right back to the ancient Babylonians who were brewing it from their beer and wine in 4000 BC! The ancient Romans refined methods somewhat, using wooden barrels to age and develop flavour.

The rear of the original London factory (Southwark Local Studies Library)

There are there are many types of vinegar, but malt vinegar, which is made from barley, is uniquely British, although these days it does travel a bit. Barley was a very important crop in Britain as it was grown to eat, but also to make ale. The average person in mediaeval England would drink around a litre of ale a day and it was the main source of calories for many (and much safer to drink than the water). Our love of ale meant there was plenty spare knocking about to transform into alegar. Sarson’s are the only company still making it in the traditional way and they have been producing it since 1794.

Before I had even arrived, I was greeted a delicious sweet and sour malt smell, and when the taxi pulled up outside the Manchester factory I was greeted again by the lovely folk who run the place. I donned my lab coat, safety glasses, hard hat and beard snood, and looking altogether pretty damn sexy I headed over the see the initial steps in the process.

I had always assumed that when malt vinegar was made, ale would be bought in and then fermented, but this is not the case! Sarson’s do the whole process from start to finish, including making the ale itself. It is truly made from scratch.

Barley grains

The first step is to lightly mill the barley so that the grains can crack open. It is then soaked in spring water and heated up in mash tuns: huge metal vats that constantly stir the barley and the water is collected. This process of mashing extracts the sugars.

Swishing away the sweetwort

I was allowed a little taste of the sugary liquid – or sweetwort – and couldn’t believe how sweet and delicious it was (when I got home, I looked in a few old books and found that home-made barley water was produced in essentially the same way).

The cooled sweetwort now enters the first round of fermentation: yeast is added so it can get to work anaerobically turning sugar into alcohol. This six-day process produces a barley ale that is a whopping 9.5% alcohol.

Now the alcohol can be converted into vinegar in the second round of fermentation. It was this part of the process that I found to be truly amazing: I assumed that to make a product and attain perfect consistency between batches, Sarson’s would have to seed the ale with a mother (or mother-of-vinegar to give her full title, a of plug acetobacteria) that had been carefully selected over years or even decades, to produce a unique strain (wine and beer makers do this with their yeasts). What Sarson’s actually do is simply add the shavings of the bark from the larch tree, which naturally harbours a community of acetobacteria species. This all happens in wooden tubs called acetifiers and it takes seven days for the larch bacteria to do their magic.

The huge physics-defying oak barrels!

For the last stage, the vinegar is stored in huge 40 000 litre barrels – some 100 years old – to be standardised to the correct strength (5% ethanoic acid).

Standardising the final product

The vinegar is heated up to kill the bacteria and it is piped through to the very noisy and exciting bottling room. I loved watching the bottles rattling around on the conveyor belts. It was as though I had literally stepped through the arch window on Playschool!

Then, to top it all off, they handed me my very own personalised bottle of malt vinegar!

Many thanks to Sarson’s for asking me to come to their place and let me be a nosey parker for an afternoon – I will certainly be paying the malt vinegar I put on my fish and chips in even higher regard from now on!

Next post, I’ll write a little bit about how we use – and used vinegar in the home.


If you like the blogs and podcast I produce, please consider treating me to a virtual coffee or pint, or even a £3 monthly subscription: follow this link for more information.


13 Comments

Filed under Brewing, Britain, business, food, General, history, Preserving

The Original (Quince) Marmalade

As I mentioned in my previous post about Seville oranges that the original marmalade was in fact made from quinces and not oranges, I thought I would give you a recipe that I have recently used for the stall. It’s a recipe that appears in Eliza Acton’s 1845 book Modern Cookery. It’s an easy recipe that would be a good one to start with if you have never made a sweet preserve as you don’t need to mess about with sugar thermometers and setting points. One of the great things about making preserves with quinces is the glorious colour they go. A relatively brief boil transforms them from a pale apple-yellow to a vibrant orange-coral.

The tricky thing is getting your hands on some quinces they are available from October, but I have recently seen some organic ones in the Manchester organic grocers Unicorn. If your local greengrocer doesn’t have them on their shelves, it is worth asking if they can get them. My grocer was very happy to get me a full tray for just a tenner, so I was very pleased with that.

I have recently found another slightly more complicated version of this recipe but I have not tried it – we’ll have to wait for next autumn for that one!


If you like the blogs and podcast I produce, please consider treating me to a virtual coffee or pint, or even a £3 monthly subscription: follow this link for more information.


Eliza Acton’s Quince Marmalade

2kg (4 1/2 lbs) quinces

water

granulated sugar

Wash and scrub any fluff of the quinces, then peel and core them. Place them in a large pan and pour over enough water to almost cover. Turn up the heat and when it begins to boil, turn heat down to a simmer and stew 35-45 minutes until the fruit is soft. Strain and pass fruit through a mouli-legumes.

2012-11-19 23.49.01

Put the pulp back in the pan with the strained juice and add 280g sugar for every 500ml juice or, 1 ½ lbs sugar for every pint of juice). Stir and dissolve under low heat then, simmer until it resembles ‘thick porridge’ and begins to leave the side of the pan when you stir it.

2012-11-20 00.37.10

Pour the marmalade into sterilised pots. It is very good as a jam on toast, with cheese or as an accompaniment to hot or cold meats.

2012-11-20 00.52.23

26 Comments

Filed under Britain, cooking, food, Fruit, General, history, Nineteenth Century, Preserving, Recipes, Uncategorized

Seville Oranges and Seville Orange Marmalade

The weather outside may be miserable and the evenings still long, but luckily there is a little fleeting  sunny surprise popping up in grocers around the country that can perk us up no end; at least if you know where to find them. It is Seville orange season and a small window of just a few weeks is all we have to cook with this delicious fruit.

FxCam_1357492834789

The Seville orange is very bitter and is only really grown in Spain for us British to make our Oxford marmalade. What a treat home-made marmalade is; oranges, water and sugar that is all that are needed to produce such a delightful, very British preserve. If you have never made your own, have a go before they are all disappear again.

Like all citrus fruits, the Seville orange comes originally from China. It was imported on trade routes via Italy, to the Mediterranean countries of Europe. All of these original orange trees were bitter in flavour like the Seville. In the first half of the 17th century, sweet orange trees were delivered to the Portuguese coast by ship. These sweet oranges quickly superseded the bitter ones, that is for that small area of Spain that still grows them.

The flowers of Seville oranges are also used to make orange flower water, another of my favourite ingredients.

Seville and game painting

Rabbit with Red Legged Partridge and Seville Orange by Jean-Baptiste Chardin 1728-29

Below is a recipe for  Seville orange marmalade, but it is useful to know that the zest and juice of these oranges go very well with game and some shellfish such as scallops as the above painting shows.


If you like the blogs and podcast I produce, please consider treating me to a virtual coffee or pint, or even a £3 monthly subscription: follow this link for more information.


Seville Orange Marmalade

Oddly enough, marmalade was not made from Seville or any other orange at first, but quince (a knobbly cousin of apples and pears). It did come from Spain though, in fact the Spanish word for quince is marmalada. Every day’s a school day.

This recipe is Jane Grigson’s and it is a good strong bittersweet ‘Oxford’ style marmalade.

Ingredients

3 ¼ litres water

1 ½ (3 lb) Seville Oranges

3 kg (6 lb) granulated sugar

Give your oranges a good scrub and place them in a preserving pan or large stockpot with the water. Bring to a boil and simmer for about 1 ½ hours until the oranges are tender.

FxCam_1357499871481

Take them out with a slotted spoon. They will probably collapse in on themselves, but don’t worry about that. Let them cool a little, then halve them and scoop out their innards. Tie up the scooped-out pulp in a piece of muslin. If you want a soft set, just put the bag of pulp straight into the pan, if you want it well set, give it a good squeeze to get as much pectin out of the pith and into the liquor as possible (I’m a soft set man).

FxCam_1357502382790

Next, shred the peel, you can be as careful as you want, and you can cut them as thick as you want. You can do this by hand or in the food processor by blitzing them using the pulse setting – be careful though, you don’t want a load of slurry. I’m usually dead against using food processors for this sort of thing, but I quite like the irregular pieces you get with this method. Tip them into the pan along with the sugar. Over a medium heat, stir until the sugar dissolves.

FxCam_1357505465756

Now you need to be brave and bring it to a full rolling boil for at least 15 minutes , you need it very hot so that the marmalade can set. You have several options to test for a set, but I use a combination of a sugar thermometer and the wrinkle test. Pectin – a chemical that essentially glues plant cell walls together – will set to a gel at 105⁰C (221⁰F), so a thermometer is crucial if you want to know if you are getting close. It can take a while because water needs to evaporate to get five degrees above boiling point. Keep a close eye on it and when it gets close do the wrinkle test. For this test put a side plate in your freezer a little while before you want to make your marmalade, and when you’ve achieved 105⁰C (221⁰F), turn off the heat and spoon out a little of it onto your cold plate. Return it to the freezer for a couple of minutes. Push the jelly; if it wrinkles up, your pectin is set. If not, boil up again and retest after 10 minutes.

FxCam_1357586951956

When ready, turn off the heat and allow it to cool for 15 minutes – this important step will stop your peel from floating to the top in a single layer – then pot into sterilized jars (bake them and their lids for 25 minutes at 125⁰C or 250⁰F).

IMG_2702

31 Comments

Filed under cooking, food, Fruit, General, history, Preserving, Recipes, Uncategorized

Jane Grigson’s Orange Mincemeat

It’s just occurred to me that I haven’t put on a Christmas recipe and it is only just over two weeks until the special day. This month has flown by at a scarily quick pace.

Luckily two weeks is just enough time to make this delicious orange flavoured mincemeat. Last year I gave you Mrs Beeton’s recipe, but this one comes from the wonderful Jane Grigson. It is very moist and because of the brandy, orange juice and orange liqueur. It is also vegetarian if you want it to be; the suet can be the vegetable-based sort, or you can leave it out altogether. Give it a go.

Jane Grigson

Jane Grigson

It is extremely easy to make: there is no cooking required so all you need to be able to do is chop, grate, mix and weigh. When you pot the mincemeat, it is very important you sterilise your jars. To do this first wash them in soapy water, then rinse and allow them to dry. Place the jars on a tray, with their lids sat beside them, facing upwards and pop them in the oven for 30 minutes at around 130⁰C. Let them cool a little before potting. If this seems a lot to make in one go, you can easily reduce the amounts as you see fit.


If you like the blogs and podcast I produce, please consider treating me to a virtual coffee or pint, or even a £3 monthly subscription: follow this link for more information.


Click here for the recipe I use for making mince pies.

Ingredients

250 g (8 oz) chopped candied peel

1 kg (2 lb) peeled, cored and grated apples

500 g (1 lb) suet (fresh or packed is fine, but fresh is best)

500 g (1 lb) currants

500 g (1 lb) raisins

500 g (1 lb) sultanas

500 g (1 lb) soft dark brown sugar

1 freshly grated nutmeg

125 g (4 oz) slivered almonds

Juice and zest of 2 oranges

4 tbs brandy

6-8 tbs orange liqueur

Mix all the ingredients together in a huge mixing bowl, then pot into sterilised jars. Store somewhere dark and cool, but not the fridge! Leave the mincemeat to mature for at least together before using it.

IMG_2519

7 Comments

Filed under baking, Britain, Christmas, cooking, Desserts, Festivals, food, Fruit, General, Preserving, Recipes, Teatime

Beetroot

Hello there everyone. Here’s just a quick post to prove that I am not dead, but still alive and kicking! I have had such a crazy couple of months getting this business of the ground whilst working at the University of Manchester and Manchester Metropolitan University. Phewee! There’s no rest for the wicked as they say (and if it is true then I must be extremely wicked indeed).

Anne Swan Beetroot

Ann Swan’s beautiful vegetable art

One vegetable that ranks very highly in my favourite foods is the humble beetroot; it would certainly be in my Top 10. Jane Grigson wrote a fantastic book called Good Things in which each chapter focusses on her favourite ingredients. If I were to write my own version, beetroot would be included. It’s that mixture of sweetness and earthiness that you can’t really get from anything else. Some people shudder at the thought of it as a vegetable in its own right – too much overcooked purple mush at school has not done it any favours – and only really eat it as a pickle.

It is actually a very versatile vegetable; you can boil it, roast it, pickle it, and by virtue of its sweetness, use it as a cake ingredient that surpasses the carrot.

Beetroot has been cultivated for centuries and its ancestor is the sea beet Beta marinama a rather common plant found around the coasts of Eurasia, especially along the Mediterranean Sea. It is from this plant we get today’s red beet (plus several other varieties like the golden beetroot) as well as sugar beet and the less well-known mangel-wurzel or mangold. The latter is used mostly as animal fodder, though it has been a food crop for people too in the past (for those of you that remember it, the scarecrow Wurzel Gummidge had a head made from mangel-wurzel). The history of sugar beet is very interesting and deserves a post all to its own. Oddly enough, the beet plant wasn’t cultivated for its sweet tap roots at first, but its leafy greens. Indeed, our Swiss chard is also of the same species as beetroot and sugar beet. Eating the root didn’t catch on until the 16th century.

There is loads of beetroot hanging around at the moment and it should be reasonably cheap in the greengrocer’s shop this time of year, so you should jump at the chance to having a go at preserving them. I got a huge batch from Manchester Veg People.

IMG_2525

I have already provided a recipe for curried beetroot chutney, but I thought I’d give you the recipe I use to pickle beetroot as well. I first came across it in Good Things (1932) by Florence White, who mentions that the recipe must be very old, though she mentions neither when it was written or by whom. I did find an almost identical recipe as I was flicking through a copy of Mrs Beeton’s Book of Household Management (1861; which can be read online; see this link here).

It is the inclusion of an infusion of black peppercorns and allspice that really makes this pickle special. You’ll never go back to buying jars of it ever again! It’s important to remember to not peel the beetroots before you cook them, otherwise their wonderful colour will be lost to the cooking water.

Pickled Beetroot

2 kg (4 ½ lbs) beetroot

1 ¼ litres (2 pints) cider vinegar

15 g (½ oz) peppercorns

15 g (½ oz) allspice berries

Top and tail but do not peel the beetroot, then simmer them in plain water for around 30 minutes until tender. Very large ones may take over an hour to cook. Meanwhile, boil up the vinegar with the spices and simmer for 10 minutes then strain. Let the beetroots and vinegar cool completely before peeling and slicing the beetroots.

IMG_2532

Put into sterilised jars and cover with the strained, cooled vinegar. In two weeks they’ll be ready to enjoy.

IMG_2533

If you like the blogs and podcast I produce, please consider treating me to a virtual coffee or pint, or even a £3 monthly subscription: follow this link for more information.


7 Comments

Filed under cooking, food, history, Preserving, Recipes, Vegetables

Know Your Onions

It is an exciting time for those that grow their own onions because onion season is in mid-flow. It was probably a while ago that the onions themselves were picked, but they generally grow through a short period of drying before they are used in the kitchen or put into storage over the wintertime.

I’ve never grown them myself, but I feel that when it comes to cooking and eating onions, I really know my, er, onions. (Funny saying that; there is one theory that it was invented by etymologists working on the Oxford English Dictionary who coined it in great admiration of one of the best and most knowledgeable grammarians of the day, a certain C T Onions. How I wish it were true, but it seems that is actually American. Oh well.)

I love onions and they are one of the most loved vegetables, they are certainly the most used vegetable in the world – there is not a single cuisine I can think of that doesn’t use them. In Western cookery, onions make up one of the trinity of stock vegetables alongside carrots and celery; and there are countless recipes that begin with slicing or chopping an onion before browning in butter or oil. They are a universal seasoner of foods, a ubiquitous seasoning that is not always detectable, but if it were to be omitted you would miss them.

And I do, for I recently found out that I have an onion ‘intolerance’, or at least my alimentary canal does. Finding a replacement has been tricky, but I have recently adopted using the finely sliced green parts of a leek along with a clove of garlic. It is strange that I essentially turn myself inside out after eating a cheese and onion sandwich and yet I can happily tuck into the remainder of the onion family: garlic, leeks and chives and not suffer even the mildest discomfort. Anyway, you don’t want to know about all that – I sound like an old woman!

Allium, the Onions

There are around 500 species of plant that belong to the Genus Allium, and botanically speaking they are all members of the lily family, though only a score are important as foods worldwide, and even fewer that are important to the British, though the onion, garlic and leek were all eaten in Ancient Egypt and even appear in the Old Testament of The Bible.

Below is a lovely illustration from the wonderful book Food in England by Dorothy Hartley showing the ‘Most Common or Garden Onions’. Chives and leeks have been omitted as they are suitably different to be considered standalone vegetables/herbs. There are familiar and unfamiliar onions here, and some that have been omitted, like mild white onions. Two that I have never sampled are the Welsh Holtzers and the strange Egyptian, or tree, onion.

I am going to stick to the familiar brown onion that we all know and love in this post. At the foot of the above drawing it is mentioned that onions, bread and cheese ‘are spoken together as Field Fare in our earliest manuscripts’. These three food items would have been bagged up or kept in the pocket of a ploughman or other farm worker for much-needed sustenance throughout the long working day. The original ploughman’s lunch that dates to not too long after the first century when onions were first introduced to Britain by the Romans.

Two Onion Recipes

So many recipes use onions, but so few of them show them off as the star of the show and we forget that onions can be served as vegetables in their own right. Here are two recipes that I think do them justice.

Baked Onions, or Orbs of Joy

This is a very old recipe that has recently been given a second wind by Fergus Henderson the great ‘nose to tail’ chef at St John in London. Looking at his recipe and one written in 1954 by Dorothy Hartley, there is only one difference and that is the type of onion used – a stoic brown onion or a prettier red onion. Use whichever you grow or prefer. Serve with roast game, chicken, goose or beef, using the appropriate stock.

Ingredients

butter

one good-sized onion per person

chicken, beef or vegetable stock

salt and pepper

Smear some healthy knobs of butter on the bottom of a deep ovenproof dish. Peel your onions, cut off the rooty part and sit them in the dish. Pour in enough hot stock almost to cover. Season the tops with salt and pepper. Bake uncovered in a moderate oven, around 160⁰C, until the onions are tender within and caramelised without. Test their doneness with a skewer. If you only have a little stock, cover the dish and only remove it toward the end of the cooking time so they can ‘brown becomingly’.


If you like the blogs and podcast I produce, please consider treating me to a virtual coffee or pint, or even a £3 monthly subscription: follow this link for more information.


Onion Marmalade

I imagined that onion marmalade had been around for ages but only seems to date back to the latter half of the last century. Who knew? This is a recipe of my own concoction and is a top-seller on my stall. There are plenty of dark sweet flavours as well as tart vinegar. I use cider or wine vinegar as well as Balsamic vinegar in mine. Feel free to alter the ratio of the two to your own liking. It makes about 1 litre (2 pints) of marmalade. Have it in a cheese sandwich, with bangers and mash, or with some nice potted chicken livers.

Ingredients

2 kg (4.5 lbs) onions, halved and thinly sliced

5 tbs olive oil

100 g (4 oz) granulated sugar

100 g (4oz) soft dark brown sugar

1 tbs chopped thyme leaves

4 bay leaves

1 ½ tsp salt and ½ tsp ground black pepper

250 ml (9 fl oz)  cider or wine vinegar (red or white)

50 ml (2 fl oz) balsamic vinegar

Heat the olive oil in a large pan. Turn up the heat and add the onion. Using a wooden spoon, coat the onions well in the oil. Add the sugars, thyme, salt and pepper, then turn heat down to medium and mix until the sugars have dissolve. Simmer uncovered for at least 50 minutes on a medium-low heat, until the onions have become deliciously brown and mushy. Take your time, be as slow as possible. If you don’t have 50 minutes or more to spare, wait for a time you do!

Pour in the vinegars and simmer for a further 30 minutes until the liquids have reduced to about one-quarter and are good and syrupy. Let the marmalade cool for 10 minutes then jar as normal.

7 Comments

Filed under Britain, cooking, food, history, Preserving