Category Archives: Teatime

Wigs / Whigs / Wiggs / Whiggs

Wigs – whichever way you spell them – were a type of enriched, leavened teacake. They reached a peak in popularity in the eighteenth century but may have been cooked up as early as the fifteenth.[1] It seems that they were eaten up until 1900,[2] though as with many foods, they changed their form somewhat.

Elizabeth Raffald included a recipe ‘To make Light Wigs’ in her 1769 book The Experienced English Housekeeper,[3] so I thought I would devise an updated recipe for them using modern kitchen equipment, weights and measures.

This is her recipe taken from the first edition:

As is often the case, her recipes are a mixed bag of precision and vagueness, and this one is no different: we have proportions – the most important thing, I suppose – but little else concerning mixing, shaping and baking. And what are the seeds she mentions? Luckily, by cross-referencing other recipes and others’ research, we can build up a good idea of what they were like.

Let’s dissect the recipe sentence by sentence:

  1. First of all, we have to make a simple dough of flour, milk and barm and prove it somewhere warm. Barm is the frothy yeast skimmed from fermenting vats of beer; it is from here we get our leaven. The bubbles of gas in low-gluten flour doughs with little elasticity (as would have been the case here) tend to pop quickly, so we have to assume that the dough was kneaded to develop what gluten was present.
  2. Once proved, add the butter and sugar. It’s very common, even in modern recipes, to add the enriching ingredients after the first prove. Ingredients such as these get in the way of entangling gluten strands, and their heaviness slow proving even further. These days however with our robust fast-action yeasts, I find dough rises well with all of the ingredients mixed right from the start – though I hedge my bets a little by using a mix of plain and strong white flours.
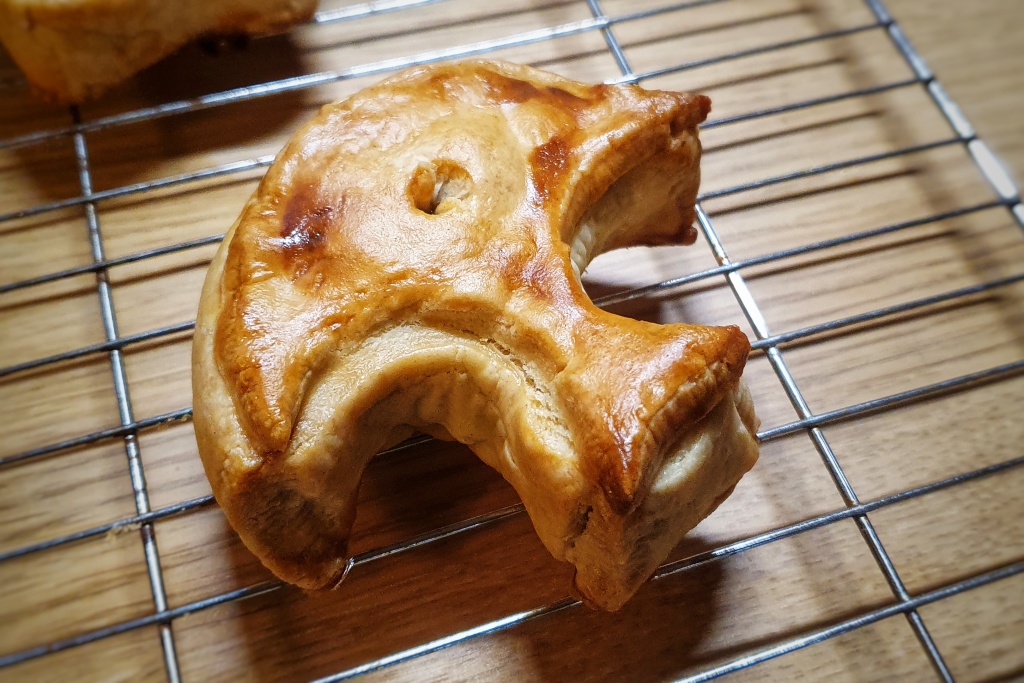
  3. Elizabeth tells us to ‘make it into Wigs’ which isn’t useful for those of us in the twenty-first century. It does inform us that they were common enough in 1769 for Elizabeth to assume we would all know the correct shape. Another recipe given in Florence white’s Good Things in England says to make wigs ‘into any shape you please’.[4] Elizabeth David helps us out here by spotting that the word wig comes from the Dutch weig, meaning wedge-shaped.[5] She thinks the round of dough would be split into sixteenths, but I think sixths or eighths would be better.
  4. As for the seeds; all other recipes state caraway seeds for wigs. I like them so much I put them in and on the dough before baking.

There are richer versions of this basic recipe. Hannah Glasse’s ‘light Wigs’ are very similar to Elizabeth’s, but she also includes a richer version (‘very good Wigs’) containing egg, cream, spices and sack.[6] Some recipes ask you to egg wash the wigs and sprinkle coarsely crushed lumps of sugar over them.[7] I opt for a milk wash and granulated sugar.


If you like the blogs and podcast I produce and would to start a £3 monthly subscription, or would like to treat me to virtual coffee or pint: follow this link for more information. Thank you.


Wigs can be eaten buttered, and when cold eat like very sweet scones, when warm they are softer and stodgier, though not in a bad way. Elizabeth suggests toasting them and pouring stewed cheese over them – a recipe for which can be found in my book Before Mrs Beeton.

My recipe makes 1 round that can be divided into 6 or 8 wigs:

5g/1 tsp yeast

5g/1 level tsp salt

180g strong white flour

180g plain white flour

120g caster sugar

1 tbs caraway seeds

120g softened salted butter

200ml warm milk, plus extra for brushing

A smear of sunflower oil

Granulated sugar for sprinkling

In a bowl, mix the yeast, salt, flours, caster sugar, and most of the caraway seeds (keep a few behind to sprinkle on the top). Make a well in the centre and add the butter and milk. Mix preferably with the dough hook of a food mixer, if not a wooden spoon – the mixture is very sticky indeed, a good 7 or 8 minutes, or until the dough is smooth.

Oil a clean bowl and place the dough inside. Cover and allow to prove in a warm place for between 60 and 90 minutes. The dough is so enriched that it doesn’t double in volume like regular bread or bun dough, but it does need to have increased in volume noticeably.

As you wait, line a 21 cm/8 inch cake tin with greaseproof paper. Elizabeth asks us to shape the wigs ‘with as little Flour as possible’, but I find that a good strewing of flour is best. The dough needs to be brought into a tight dough ball; again not as tight as is usually possible, due to all of that sugar and butter. I find a couple of dough scrapers helped a great deal at this point.

Once gathered, plop the dough into the lined tin, cover and allow to prove for 30 to 45 minutes. Using a well-floured dough scraper split the dough into 6 or 8 wedges.

It was tricky to make the cuts: flour your dough scraper very well

When the proving time is almost up, preheat your oven to 175°C and place an ovenproof dish at the bottom of the oven. When the wigs are ready to go in, put the kettle on. When boiled, finish preparing the wigs by brushing the top with milk and scattering the reserved caraway seeds and a little granulated sugar over the top, then place on a baking tray.

Open the oven door, slide the wigs onto the centre shelf, then gingerly pull out the hot ovenproof dish and pour in a good amount of hot water, then quickly but carefully slide it back in and close the oven door.

Bake for around 45 minutes until well-risen and golden brown on top. Cool on a wire rack in its tin. Serve cold or warm with butter and sliced or toasted cheese.


Notes

[1] David, E. English Bread and Yeast Cookery. (Grub Street, 1977).

[2] By this point, wigs had become a fruit cake or scone, leavened with baking powder and sweetened with candied angelica, citron peel and glacé cherries. Hartley, D. (1954) Food in England. Little, Brown & Company.

[3] Raffald, E. (1769) The Experienced English Housekeeper. First Edit. J. Harrop. Available at: https://archive.org/details/experiencedengl01raffgoog.

[4] White, F. (1932) Good Things in England. Persephone.

[5] David (1977).

[6] Glasse, H. (1747) The Art of Cookery Made Plain and Easy. Prospect Books.

[7] David (1977).

Advertisement

1 Comment

Filed under baking, bread, Britain, cake, cooking, Eighteenth Century, food, General, history, Recipes, Teatime, Uncategorized

Black bun (Scotch Bun) Part 2: Recipe

My traditional yeast-leavened black bun

As promised, and carrying on from my last post, here is my recipe for the traditional yeast leavened black bun (Scotch bun). I must say I was really surprised with how well it turned out: it was enriched with so much stuff and was so huge, I thought the poor little yeast cells wouldn’t be able to do their job. I was wrong, but it did take two days to do two provings required before baking.

The white dough is essentially a sweet brioche made without eggs. When it was time to knock it back after its first rising, I was encouraged by the network of small yeasty bubbles that had formed inside the dough.

The tiny bubbles in my enriched basic dough

The bun was huge and made quite the centrepiece (though if you wanted to reduce the quantities and make a smaller one, go ahead). The cake inside was deliciously moist, and the brioche dough wonderfully buttery and thin and in such contrast with the treacle-black centre.


If you like the blogs and podcast I produce and would to start a £3 monthly subscription, or would like to treat me to virtual coffee or pint: follow this link for more information. Thank you.


It may have been big, but it kept well and was perfectly delicious well over a week after baking.

For the basic dough:

450 g plain white flour

450 g strong white bread flour

160 g caster sugar

10 g dried fast-action yeast

20 g salt

160 g softened butter

400 ml hand-hot full-fat milk

A smidge of flavourless oil

For the centre:

750 g basic dough

100 ml black treacle

400 g currants

400 g raisins

100 g candied peel

100 g slivered almonds

1 tsp mixed spice

½ tsp each ground cinnamon and allspice

2 eggs, plus 1 more for glazing

Butter for greasing

Granulated sugar

Two days before you want to bake your black bun, in the evening, make the basic dough. This is best done with an electric mixer, however don’t let me stop you attempting this by hand. Mix the dry ingredients – flours, yeast, sugar and salt – in your mixing bowl, make a well and add the butter and milk. Mix slowly with a dough hook until everything is mixed together, then turn the speed up a little and knead until smooth. Because it’s a low-gluten mixture and there’s all of that butter and sugar, it won’t be very elastic, but when it’s really smooth, you are done. It should take 8 to 10 minutes.

Paint the inside of a bowl with oil, then bundle up the sticky dough as best you can and cover with cling film. Leave to prove until around double in size. This took 18 hours: I use a low amount of yeast on purpose that the yeast ferments slowly. It may take less time for you if you used more yeast, and if your home is warmer than mine.

Knock back the dough and place 750 g of the dough in your food mixer, then add the treacle, dried fruits, candied peel, almonds, spices and eggs. Mix with a flat beater for a couple of minutes until everything looks smooth and like a Christmas cake batter. Set aside.

Take the remaining dough, form into a ball, place on a floured work surface and roll out into a large circle 32-35 cm in diameter. Make sure your pin is floured too; this will prevent sticking. With slightly wet hands, scoop the dark sticky dough and pop it in the centre of your circle. Now gather the dough so that the centre is completely covered – rather like a giant Eccles cake.

Cut away bits of the dough that have bunched up too much and glue any edges with a thin coat of beaten egg. Don’t worry if it looks a bit messy. Turn the bun over and flatten it with your hands, smoothing away any bulging bits to make a nice round shape.

Now liberally grease a 25 cm flan ring with butter and place on a baking sheet lined with greaseproof paper and then dusted with flour, and place the bun in the centre. Press the bun or lightly roll it with your rolling pin so that is just a centimetre off from touching the edge. Paint the top with egg and scatter over a little granulated sugar, then stab holes in the top with a thin, pointed knife right down to its base – this keeps it flat as it rises. Cover with a large plastic bag[1] and allow to prove until it has grown large enough to fill the ring. For me, this took 12 hours.

Preheat your oven to 175°C and place a heatproof tin on the bottom of the oven. When it’s time to bake the bun boil the kettle, then open the oven and slide your bun onto the middle shelf, gingerly slide the tin out enough so that you can pour in the hot water, slide it back in and close the door.

Bake at this temperature for an hour, then turn the heat down to 140°C and bake for a further 2½ hours. If the top is getting too brown, cover it with some kitchen foil.

Remove from the oven, and slide onto a cooling rack. Remove the ring when the bun is just warm.

The black bun will keep for weeks in an airtight box or tub. It is delicious eaten with sharp cheese.


Notes:

[1] I find a supermarket ‘bag for life’ is best for this task. I have one that I use only for proving things like this. Turn it over and turn up the edges, as you would your trousers to make it a sturdy shape and hey presto!

2 Comments

Filed under baking, bread, Britain, cake, Christmas, Festivals, food, General, history, Recipes, Scotland, Teatime, Uncategorized

Cobnuts, Filberts & Hazelnuts (& Cobnut Cake)

One of my favourite seasonal foods are fresh Kentish cobnuts, and they are in season right now, so I thought I’d write a little post about them in case you see them at your local greengrocer’s shop. In the north of England they are difficult to get hold of, and when you do see them they cost a small fortune, but luckily for me, I was in London last weekend and spotted a fruit seller outside Borough Market selling big punnets at just £3.50 a pop. Up North, I’d have had to remortgage.

Cobnut season runs from late August to October in the UK, and they can – or, at least, their wild cousins can – be found growing on wild hazel trees all around the country – in fact they grow in abundance near me in Manchester. Unfortunately, the squirrels beat me to them every year. Nutting season traditionally started on 20 August on St Philibert’s Day.1

Wild, unripe Mancunian hazel/cobnuts

There’s a little confusion regarding nomenclature here, as is so often the case, some call these nuts cobnuts, others filberts, and some call them simply hazelnuts. Are there any real differences between the three or are they just regional names for the same thing? Well that all depends upon whom you ask, and when in time you ask.

Let’s start with the wild tree, the hazel, or to give its Latin name Corylus arellana. These nuts are hazels, or hazelnuts, they are elongate and flatter that the supermarket variety, but they still have the same smooth shells. This is what many people today would call a cobnut. This common tree produces nuts that was an important foodstuff for Neolithic humans, and they have been cultivated since Roman times.2,3 These cultivated trees were bred for greater yields and larger nuts changing making them more spherical in shape. These round nuts were called cobs, or cobnuts, and they are what we would call hazelnuts today. They grow so well in Kent that at one point 7000 acres of land was put aside for their cultivation, plenty to export a significant number to the United States.3

Okay, let’s, for the sake of argument, say that hazels are the wild nuts and cobnuts are their cultivated cousins, where do filberts fit in? Well, these are a larger cultivated nut from a completely different species of hazel (C. americanus).4 They were regarded as a rather upmarket orchard fruit, whilst cobnuts were considered more suitable for the hedgerow (or did they mean hazels!?).3

Today, cobnuts appear to be a catch-all term for any of the elongate forms of hazelnuts. The great thing about getting them fresh is that they have a lovely crisp, refreshing flavour, rather like water chestnut but with a mild hazelnut flavour. They are still covered in their green protective coats (shucks) and sometimes even the shell is still green. They store well and can be dried and eaten months later. An alternative to drying is to shell the fresh kernels and store them in honey. I expect the fresh kernels would make very successful pine nut replacement in pesto.


If you like the blogs and podcast I produce, please consider treating me to a virtual coffee or pint, or even a £3 monthly subscription: follow this link for more information.


Kentish Cobnut Cake

The best known traditional food made with cobnuts is Kentish cobnut cake. A dense cake flavoured with ginger and sweetened with some kind of unrefined sugar or honey. Some are made like a sponge cake by creaming butter and sugar, others are made by melting butter and syrup/sugar together. I go for the latter method. I found a few recipes that include a good dollop of double cream in the mix, so I’ve added it my recipe. This produces a dense cake, which I prefer, but if you want to make a lighter one, mix a teaspoon of baking powder into the flour and swap the cream for around half its volume of milk (i.e. 80 ml). Being a syrupy cake, it benefits from a couple of days’ maturing time in an air-tight box. You can use any syrup you like, or indeed any unrefined sugar. Honey works very well, especially if you have stored within it some cobnut kernels. As far as the nuts go: hazels, cobnuts or filberts all work equally well.

Makes one 8 inch/23 cm cake.

180 g butter

120 g golden syrup or honey

80 g Demerara, or any brown sugar

150 ml double cream (or 80 ml milk, if going for the lighter option)

3 knobs preserved ginger, chopped

2 eggs, beaten

240 g self-raising flour

1 tsp baking powder (optional; use if going for the lighter option)

1 ½ tbs ground ginger

100-150 g whole cobnuts, shelled weight

Preheat oven to 160°C and line a 20 cm round cake tin.

Melt the butter, syrup or honey and sugar in a saucepan, stirring until sugar is dissolved. Take off the heat and mix in the cream (or milk), chopped preserved ginger and then the eggs.

Mix the baking powder, if using, into the flour, then mix in the ground ginger and cobnuts. Make a well in the centre and pour in the butter-sugar mixture, stirring slowly with a whisk until the batter is smooth.

Pour into the lined cake tin and bake for anywhere between 1 and 1 ¼ hours. Test it is ready using a skewer. Cool in the tin.

References

1.           Wright, J. River Cottage Handbook No.7: Hedgerow. (Bloomsbury, 2010).

2.           Vaughan, J. G. & Geissler, C. A. The New Oxford Book of Food Plants. (Oxford University Press, 2009).

3.           Mason, L. & Brown, C. The Taste of Britain. (Harper Press, 1999).

4.           Johnson, O. & More, D. Collin’s Tree Guide. (Collins, 2004).

5 Comments

Filed under baking, Britain, cooking, food, foraging, General, history, Recipes, Teatime

To Make a Seed Cake

Miss Lavinia and Miss Clarissa partook, in their way, of my joy. It was the pleasantest tea-table in the world. Miss Clarissa presided. I cut and handed the sweet seed-cake – the little sisters had a bird-like fondness for picking up seeds and pecking at sugar; Miss Lavinia looked on with benignant patronage, as if our happy love were all her work; and we were perfectly contented with ourselves and one another.

Charles Dickens, David Copperfield, 1849


I do love a seed cake, once a key element of a British teatime table. Sadly, it’s largely either forgotten, or worse, ignored in our modern world of ‘instagrammable’ drizzle cakes, or multi-coloured creations slathered with luxurious buttercreams and frostings. With that sort of competition, the poor old seed cake doesn’t get a look in, bless it. As a result, the only way you are going to taste is to make one.

For those in the dark as to what I’m banging on about, a seed cake is a plain, rather dry cake flavoured subtly with caraway. It’s texture is similar to that of a madeira cake; dry enough so that it is perfect to have with a nice cup of tea for your elevenses. It has just the right amount of clack, as we northerners say; a tendency to stick to the roof of your mouth. Don’t let this put you off – it’s plainness is what makes it perfect. Super-sweet cakes covered with their myriad fillings are fine, but often a little too much to take.

Hannah Glasse had several seed cake recipes

Seed cakes appear in cookbooks from the seventeenth century, but only really became a cornerstone of the tea table in the eighteenth. They were a different beast then; sugary cakes also said something of both your status and sensibilities, so other things were added. Hannah Glasse added allspice, cinnamon and ambergris in one of her recipes.1 It was a time before chemical raising agents too, so cakes at this time were made light by the action of live yeast. Seed cake, therefore, was reserved for those who had a taste for the finer things in life, such as Parson Woodforde, diarist and great lover of cakes, puddings, pies and confectionary. He loved listing what he’d had for dinner. Take this entry from 17 August 1778:

7 p.m. Hot hash, or cold mutton pies. Saturday night an addition of good seed-cake of one pound, covered with sugar and a quart of good beer poured over it.2

Fast-forward a century and we see that the seed cake is pretty much what we would expect to see; the only difference being that a splash of brandy, rather than milk, is used to slacken the mixture.3

A seed cake cannot be made with any other seed than caraway. Sure, you could swap them for poppy seeds or some such, but you will have made a cake with seeds in it, not a seed cake! What’s so special about caraway then? Well, caraway was used to flavour all sorts of foods ever since ancient times, because unlike the other spices* it grew happily throughout Europe. It is an essential flavouring in German sauerkraut for example. In Britain, folk seemed to prefer to use in sweet foods, as Elizabeth David noted: “Apart from seed cake, (why were those cakes always so dry?) once the great English favourite, and caraway sweets and comfits, caraway appears little in English cooking.”4


If you like the blogs and podcast I produce, please consider treating me to a virtual coffee or pint, or even a £3 monthly subscription: follow this post for more information.


Elizabeth’s quote eludes as to why this cake fell out of favour – it’s viewed as boring, dry, stale perhaps, but I disagree. It is light, and because it contains very little liquid compared to, say, a moist Victoria sponge, it is paramount that the butter and sugar are well creamed together, the flour is carefully folded in without over-mixing, and that it is not over-baked. This is where I fear folk may go wrong: baking an extra ten minutes, just to be on the safe side, will produce a dry, boring cake. Done well, however, a seed cake can be as superlative as any Proustian madeleine.

175 g salted butter, softened

175 g caster sugar

3 eggs

250 g self-raising flour

1 tbs ground almonds

1 tbs caraway seeds

 Around 3 tbs milk (or brandy)

Preheat your oven to 180°C and line a 2 pound loaf tin (usually around 23 cm long) with greaseproof paper, keeping it in place with a smear of butter or cooking oil.

In a mixing bowl cream the softened butter until pale and fluffy. Add an egg and one tablespoon of the flour and beat in until smooth. Repeat with all of the eggs. Mix the remaining flour with the ground almonds and caraway seeds and tip into the mixture.

Fold in carefully and when combined, add the milk (or brandy) to loosen the batter slightly – unlike a regular sponge, you are not looking for a dropping consistency with seed cake, so don’t go overboard: start with two tablespoons and see how it looks.

Spoon into the tin and smooth the top – you don’t have to be fastidious here, as the batter cooks it levels out all on its own.

Bake for around an hour – this will depend on the dimensions of your tin, in my wide one, it took just 55 minutes. Test with a skewer if it is ready – I’ll say it again: it’s important not to overbake seeing as the batter is on the dry side.

Let it cool in its tin for 15 minutes before removing and cooling on a rack. These sorts of cakes are best eaten on the day, or the day after, they are baked.

*Mustard also grows in Europe, hence its heavy use in British recipes throughout history.

References:

1.           Glasse, H. The Art of Cookery Made Plain and Easy. (Prospect Books facsimile of the 1747 original).

2.           Woodforde, J. The Diary of a Country Parson Volume 2. (Oxford University Press, 1924).

3.           Beeton, I. The Book of Household Management. (Lightning Source, 1861).

4.           David, E. Spices, Salt and Aromatics in the English Kitchen. (Penguin, 1970).

15 Comments

Filed under baking, Britain, cake, cooking, Eighteenth Century, food, General, history, Recipes, Teatime, Uncategorized

To Make (English) Muffins

Here we go…the third part in my trilogy of posts about muffins and crumpets.

Of the two, muffins do seem to be the most labile of the tea cakes: sometimes they are a crumpet in all but name, and other times they are somewhere in between, and because I am a total geek, I have decided to illustrate this observation in a table.

In the columns are six characteristics of muffins and crumpets and then compared old recipes and given them a score out of six for each match. Full marks means it is what we would call a classic muffin today, zero marks means it’s a crumpet and I have put these in the first two rows as controls. As you can see, muffins are all over the shop, achieving the full gamut of scores:

Muffin recipe100%
strong flour
Added egg?Added butter?Dough is cut out
or made into rolls?
Cooked in rings?A batterMuffin score
/6
Proper muffins (2020)YYYYNN6/6
Proper crumpets (2020)NNNNYY0/6
Delia Smith (1983)YNYYNN5/6
Elizabeth David (1977)YYYYNN6/6
Florence Jack (1914)NYYNYY2/6
Mrs Beeton (1861)NNNYNN2/6
Elizabeth Hammond (1817)NYYYNN5/6
Hannah Glasse (1747)NNNNYY0/6

The oldest recipe I found appears to actually be a crumpet, but for the next one we seem to have a proper muffin – it doesn’t quite achieve full marks because plain flour is used, but 200 years ago strong flours were much less common than today, so I’m prepared to forgive that one. As we move up the table there’s a bit of a wobble, settling down again in the 1970s to become proper muffins once more.

One thing that has changed is the amount of liquid used for the dough, in the nineteenth century, it was so soft that it required a seasoned professional: “Practice and judgement are required to make one proficient in muffin-making” said Robert Wells in the Bread and Biscuits Assistant 1929.

The dough was almost batter, and it had to be deftly formed into blobs that were then set to prove inside dimples made in thickly spread flour. They were then gingerly lifted onto an iron griddle, bakestone or oven bottom.

A muffin man c. 1910. Muffin men were a dying breed at this time

In the Victorian era, the muffin was the essential teacake for teatime and they often bought from the muffin man who would ring his bell a little before tea, summoning the occupants of the houses who would rush out to purchase some of his muffins (or where they crumpets!?) “well swathed in flannel” to keep them warm. Then, in the 1840s a Parliamentary Act was passed prohibiting ‘costermongering’ by the beating of a drum or ringing of a bell. I’m pleased to say that no one took a blind bit of notice and a clandestine trade in warm muffins continued unabashed. By the 1910s the muffin was seen as old-fashioned by many:

“Muffins are essentially an old-fashioned fare…They are not now regarded as essentials on the tea tables of the present generation…The ordinary baker sells so few that it is not worth his while to keep a hot-plate for their manufacture”

John Kirkland, The Modern Baker, Confectioner and Caterer, 1907

Doughs became easier to handle in the twentieth century, requiring less skill and labour, and in the days of mass-manufacture they became more bread-like.


If you like the blogs and podcast I produce, please consider treating me to a virtual coffee or pint, or even a £3 monthly subscription: follow this link for more information.


To Toast a Muffin:

Of course you can eat your muffin as soon as it comes of the griddle, but should you wish to toast them later it is important you get it right: “I should like to draw attention to the old method of toasting the muffin in the North of England” says a Mr Dupois Brown in 1931, who suggests “slightly opening its joint all around before toasting it both front and back; then tearing open and buttering the inside halves liberally…but in all the teashops where I have ordered muffins it was toasted on the inside, thus causing it to be tough, leathery and indigestible.” You have been warned.

Circumferential incision made ready for toasting!

My recipe uses more liquid that other muffin recipes out there, but the dough can still be rolled and cut out with relative ease – you’ll need a mixer for kneading the dough though as it is very soft and sticky. One batch makes between 8 and 12 muffins depending upon the size of cutter you prefer. As Jane Grigson notes, it is very satisfying to watch them “rise and swell rather like a puffball fungus.”

500 g strong white flour

2 tsp instant yeast

1 ½ tsp salt

30 g softened butter

1 egg

330 ml milk, warmed

A little sunflower oil

Semolina or polenta for dusting

Mix the flour, salt and yeast in a bowl, make a well and add the butter, egg and milk. Then mix to combine. It is best to use a dough hook attachment on a food mixer for this; start on a slow speed, and then once fully incorporated, turn up the speed to knead until smooth and elastic, around 6 minutes.

Smear a little oil on the inside of a bowl then oil your hands and gather up the soft dough and pop it in. Cover with cling film or a damp tea towel and leave to rise in a warm place; because of the added butter and egg it will take a little longer than for a regular bread dough, about 90 minutes.

Lay out a piece of greaseproof paper or a tray and scatter with the semolina or polenta.

Knock back the dough and roll out on a floured surface to a centimetre’s thickness, then cut out. I wanted quite large ones, so I went with a 9 cm one, but feel free to use whatever size you like. Because the dough is soft, it’s a good idea to dip the cutter in flour between cuts to prevent sticking.

Lay the muffins on the polenta/semolina and turn them over so that both sides get a coating. Knead the trimmings together and cut out more muffins. Cover them and leave to prove for 30 minutes.

Heat your pan or griddle over a medium-low heat and cook the muffins in batches. Cook on one side for around 10 minutes until golden brown, and then turn over and cook for a further 6 to 8 minutes.

Eat straight away or cool on a rack and store in a tin or tub.

References

English Bread and Yeast Cookery (1977) by Elizabeth David

English Food, Third Edition (1992) by Jane Grigson

Good Things in England (1932) by Florence White

8 Comments

Filed under baking, bread, Britain, cooking, food, General, history, Recipes, Teatime, Uncategorized

To Make Crumpets


If you like the blogs and podcast I produce, please consider treating me to a virtual coffee or pint, or even a £3 monthly subscription: follow this link for more information.


Last week I published a post all about how muffins and crumpets lie on a rather fluid continuum when you look at the from an historical perspective: names, methods and ingredients have all changed and been swapped which is very confusing for something that is rather straight forward today.

Last post I said that a crumpet today is:

  • Made from a pourable batter like a thick pancake
  • Slowly cooked on a bakestone
  • Slightly rubbery in texture, especially prior to toasting
  • Has characteristic bubble holes on one side

I’ve looked through many recipes and I have found that there are three things that do still vary: the liquid used is milk or water, or a mix – milk makes a soft crumpet and water makes a crisper one; plain or strong flour is used (or a mix) – the former makes a rubbery crumpet and latter makes one that’s a bit more pudding-like. The balance needs to be ‘just right’, but everybody’s Goldilocks zone is different, so feel free to alter the proportions in my recipe below, the resulting griddlecake will still be a crumpet so it comes down to personal taste. The third difference is to do with raising agents; should you add yeast alone or add some bicarbonate of soda too? Personally, I think the bicarb is a necessity because it gives you many pronounced bubbles – and therefore increased butter absorbency – which is what we have all come to expect from a modern-day crumpet.

Anatomy of a crumpet

Throughout the centuries crumpets seem to have been fairly constant: some ‘crumpets’ turn out to be pikelets from time to time, but if it’s called a crumpet you can be fairly sure it is a crumpet. This minor confusion is easy to bear but just you wait for the muffin post next week – they’re all over the shop!

Elizabeth David called supermarket crumpets a “travesty”, but I must confess to love them dearly; home-made ones are a very different beast, more golden in colour, and more crisp on the outside and softer on the inside. They do tend to become rather stodgy in the centre, which could be because of too high a ratio of milk-to-water and plain-to-strong flour, but in my experience it comes from overfilling the rings: a one centimetre depth is all you need. Another reason they might be stodgy is that you turn them over too quickly: crumpets are griddle cakes that cannot be rushed, they need a gentle bake on the griddle and to be turned at the right time. I used to turn them too soon, but then I received some good advice from Gary Rhodes in his classic book Great British Classics; he tells us they are ready to turn when “small holes appear and the top has started to dry.” Much more helpful than timings.

To make crumpets you need crumpet rings, but if you don’t have any you can use shallow mousse/chefs’ rings, and if there really is nothing at all suitable in your kitchen cupboards, you can go free-form and make pikelets.

How to eat a crumpet

Almost every writer seems to think that to experience crumpet perfection, one needs to eat them fresh off the griddle. I disagree and firmly believe they are best cooled on a rack, then stored in a tin or tub and toasted the next day. Each to their own, I suppose. They must be toasted until crisp on the outside yet soft on the inside which occurs very rapidly compared to supermarket ones, so watch out!

To butter a crumpet, take a knob of butter (salted, preferably) and paint the pitted surface all over with it. Home-made crumpets are always less holey than shop-bought and as a consequence the butter takes a little longer to absorb, so the best strategy is to butter the remaining crumpets – because no one ever has just one – and then return to the first for a second dousing.

The best topping for a crumpet is butter and just the tiniest trickle of honey.

Makes 18-20 crumpets

250 g plain flour

250 g strong white bread flour

2 tsp instant yeast

1 ½ tsp salt

250 ml milk

500 ml warm water

½ tsp bicarbonate of soda

A little butter

A little sunflower oil or lard

Mix the flours, yeast and salt in a bowl and make a large well in the centre of the flour. Mix the milk and water, reserving around 50 ml. Whisk the mixture well and when smooth, cover with a damp tea towel or some cling film and leave for around 90 minutes until very bubbly.

Dissolve the bicarbonate in the reserved water and whisk into the batter. Cover again and allow to bubble for another 30 minutes.

Place a thick based griddle or pan over a medium-low heat.

Grease your rings well with butter (or lard) then use just a tiny amount of lard or oil to lightly grease the griddle. Place the rings on the griddle and pour a small ladleful of batter in each ring: just a centimetre’s depth as they rise in the rings. After a while, large bubbles will appear on the top and as they pop, you will see the batter magically transformed into crumpet. Very satisfying.

Almost – but not quite – ready for turning

Allow to gently cook for around 20 minutes or until the tops have dried out, then remove from the rings (use a palette knife to help), turn over and cook on the other side for a further 5 minutes.

Remove and cool on a rack, regrease the rings and continue in this way until all of the batter is used up.

If you don’t have rings, you can instead make pikelets, which take half the time to cook due to their thinness.

References

English Bread and Yeast Cookery (1977) by Elizabeth David

Great British Classics (2001) by Gary Rhodes

‘How to cook the perfect…crumpets’ (2013) by Felicity Cloake, The Guardian, https://www.theguardian.com/lifeandstyle/wordofmouth/2013/mar/21/how-to-cook-perfect-crumpets

10 Comments

Filed under baking, Blogs, bread, cooking, food, General, history, Recipes, Teatime, Uncategorized

A Cottage Loaf

It is as hard to achieve the right shape and texture, crust and crumb, of an authentic cottage loaf as it is to reproduce true French baguette bread.

Elizabeth David, English Bread and Yeast Cookery, 1977

The cottage loaf is a vintage classic, and as far as I can see, a bread unique to England. I would say that most people have heard of one but have never clapped eyes on one in real life. I don’t think I have, my only interaction being with the salt dough loaf one that was part of the play shop my infant school teacher Mrs Bareham put together in the early 1980s. If you are not familiar with one, a cottage loaf is made up of two cobs – i.e. ball-shaped loaves – stacked one on top of the other, the upper loaf around half the size of the bottom one. The shape is curious, making even slicing difficult, which I suppose wouldn’t matter if you are just tearing off rustic chunks to dunk in your stew.

I’ve been meaning to have a go making one for years, but Elizabeth David writing in her classic tome English Bread and Yeast Cookery talked of how fiendishly difficult it is to make and impossible to reproduce at home. That is, unless you are Virginia Woolf, who made an excellent one. These days we have rather more time at home than usual, so I thought it wouldn’t be too much of a waste of time if it turned out to be a disaster. Then, I saw a tweet alluding to its trickiness from Foods of England, so I considered the gauntlet to have officially been thrown down.

The interior of a brick oven (photo: TripAdvisor.com)

I had a look into the history of it with a little trepidation, half expecting it to be a food with no vintage at all like the Ploughman’s Lunch. I needn’t have worried – it turns out to be an invention of the early nineteenth century at least, and a picture of one a little later in Mrs Beeton’s Book of Household Management (1861). They were originally baked directly on the bottom of low, flat brick bread ovens like many cobs, muffins and breadcakes are still baked today. There were no shelves in these ovens, unlike modern combi-ovens, meaning one was rather restricted in the area one could bake crusty cobs. That’s where the upper loaf comes in for it made a larger loaf – two really – without taking up extra precious space on the oven bottom. It all makes perfect sense now.


If you like the blogs and podcast I produce, please consider treating me to a virtual coffee or pint, or even a £3 monthly subscription: follow this link for more information.


The trick to making a cottage loaf is to keep that top piece from falling off during proving and baking, though it does need to lean slightly to one side, says Ms David, like a jaunty hat. But, you can’t just sit one on top of the other, you have to fix it in place by taking floured fingers and plunging them through the top and bottom cobs two or three times. That’s what Paul Hollywood says anyway, Elizabeth David does the same, but proves the two loaves separately then attaches them in a similar way but includes extra cuts, crosses and a lot of manhandling. No wonder she found it difficult. Seeing as her baking recipes are hit-and-miss at the best of times, went for the Hollywood method.

I used my basic cobb recipe, but used 500 g of flour instead of 400 g.

For one loaf:

500 g strong white bread flour

10 g salt

10 g easy bake “instant” yeast

25 g oil or softened butter

320 ml warm water.

Place the flour in a bowl, add the salt and the yeast, then make a well in the centre of the flour. Pour the warm water into the well along with the butter or oil.

Mix together with a wooden spoon and then bring the dough together with your hands. Alternatively, you can use the dough hook on a mixer to bring it together. Knead well until the dough becomes tight and springy, around 5 minutes in a mixer, or 10 or so minutes if kneading by hand. It will be sticky, but persevere; sprinkle a little flour or a smear a little olive oil on your work surface if you like. Bundle the dough into a tight ball and place in an oiled bowl and cover to allow it to double in volume in a warm place.

When ready, press out the air and cut away a third of the dough. On a lightly-floured work surface, make the cob shape by forming a ball with the dough by tucking your hands under it, tightening the dough. If you twist the ball of dough slightly as you do this, it will be extra tight. Repeat with the other piece of dough.

Dust a baking sheet with flour and set aside.

Sit the small loaf directly on top of the large one, flour the first three fingers of one hand and plunge them right down through the dough right to worktop surface. Repeat one more time and your two pieces should be well-fused together.

At this point you can make some cuts with a sharp serrated knife, but to do so you have to pick it up, so avoid this step if you think it might be too risky. Sit in on the floured baking tray and cover with a large bag and leave to prove again, until twice the size and springy to the touch.

To achieve a really good crust, set your oven to 220°C as you wait for the loaf to prove and sit a roasting tin on the bottom of the oven. When the loaf is ready to go in, boil the kettle and place the loaf on the middle shelf, pull out the roasting tin a little and pour in the water – careful of the steam! – and quickly shut the door.

Bake for 30 to 35 minutes, and cool on a wire rack.

As it turns out it’s not that tricky in the end, and it even leaned to one side without falling off just like Beeton’s!

References:

English Bread and Yeast Cookery (1977), Elizabeth David

‘Cottage Loaf’, Foods of England website http://www.foodsofengland.co.uk/cottageloaf.htm

How to Bake (2012), Paul Hollywood

Mrs Beeton’s Book of Household Management (1861), Isabella Beeton

The Taste of Britain (2006), Laura Mason & Catherine Brown

The cracked crisp crust

22 Comments

Filed under baking, bread, Britain, cooking, food, General, history, Recipes, Teatime, The Victorians

Irish Treacle Bread

As I write this, we are still in the midst of the Covid-19 lockdown. Everyone is baking bread and I must say it is lovely to see people making time to bake during these strange times. Many home bakers have resorted to making sourdough because one of the most difficult items to get hold of at the moment is bakers’ yeast. This is infuriating to regular bakers, as is the lack of string bread flour, but there is more than one way to skin a cat. Delicious Irish soda bread requires neither bread flour nor yeast, instead regular plain flour and a chemical raising agent. it’s perfect if the thought faffing about with sourdough starters is too much to bear. There are no proving stages and it is made in a trice, baking in just a little over half an hour.

Irish soda breads originated in eighteenth century America when settlers discovered that potash made an excellent instant chemical leavening agent. Forever ingenious, the early Americans worked out a way to refine the process easily and instead used bicarbonate of soda (baking soda). It caught on big time, especially because it meant travelling folk could made bread quickly and easily without the need to for long fermentations. It wasn’t before long that news of this magic raising agent got to Britain and Ireland.

Up until that point, the Irish and Scottish were used to dealing with very low gluten flours such as oat and barley, because they grow well in northern latitudes. Even flour made from wheat grown in Southern England had a low gluten content (our modern plain flour) and although great for pastry, it was never going to make the pillowy fluffy loaves that we think of as standard today; for that, high gluten flours imported from Canada were required. This lack of stretch from their doughs and batters prevented the slow-release bubbles produced by yeast from growing and remaining stable; it made much more sense to make unleavened breads and griddle cakes. These new baking soda leavened breads however, suited their low-gluten flours very well, and they were infinitely adaptable.

Soda breads are different to regular breads, they very crumbly, so a sandwich would be disaster, but they are great with soup, especially when still a little warm.

A cousin to soda bread is treacle bread which I think this is much superior so I thought I would share with you my recipe for it because I think it’s the best of all soda breads, and I have been making it a lot over the last couple of months.

With this treacle bread, you get a mild bitter sweetness and a lovely brown colour from the treacle, and a good nutty chew from the oats. It’s like a giant delicious cakey digestive biscuit and it goes excellently with a good farmhouse Cheddar or Stilton cheese.

It is easy to make, and it is easy to make substitutions too: buttermilk is tricky to get hold of in the United Kingdom at the best of times, so go for a mixture of milk and yogurt, or just milk. If you can’t find plain flour, use self-raising and add just one teaspoon of bicarbonate of soda to the mix. Medium-ground oatmeal can also be substituted for porridge oats.

Makes one large round

250 g plain flour

250 g medium oatmeal

1 tsp salt

2 tsp bicarbonate of soda

2 tbs black treacle

250 ml buttermilk, or 200 ml milk and 50 ml yoghurt

Preheat your oven to 200°C and line a baking tray with a sheet of greaseproof paper

This could not be simpler: mix the flour, oats, salt and bicarbonate of soda in a mixing bowl, make a well and add the treacle then the liquid(s). Mix with a wooden spoon and when you have brought it together, tip onto a floured surface and knead just once or twice.

Make into a round, place on the baking tray and cut a deep cross in the dough going from edge to edge. Quickly slide into the oven on the centre shelf and bake until golden brown, around 30 to 40 minutes. Give it a little rap on the base with your knuckle – if it sounds hollow, it is done.

Cool on a rack.


If you like the blogs and podcast I produce, please consider treating me to a virtual coffee or pint, or even a £3 monthly subscription: follow this post for more information.


13 Comments

Filed under baking, bread, Britain, food, General, history, Ireland, Recipes, Teatime

Clotted Cream

There’s nothing more Cornish than a good blob of clotted cream on a lovely cream tea. Unless you are from Devon of course, then there’s nothing more Devonian than a good blob of clotted cream on a lovely cream tea.

For those not in the know, clotted cream is a very thick cream with a much higher butterfat content than double (heavy) cream; weighing in at 64% and 48% respectively (for comparison, single cream is 18% fat, and full-fat milk is around 4%).

Clotted cream has a long history in Devon and Cornwall, and it is reckoned that it was first introduced to England by Phoenician settlers around 2000 years ago. Phoenicia was on the eastern Mediterranean coast in, what is now Syria, Lebanon and northern Isreal. The clotting of cream was a way of preserving buffalo milk. By removing the watery liquid, leaving mainly butterfat, the growth of spoilage organisms is retarded. The folk of Devonshire knew of its efficacy in this area; it was said that not even a witch’s breath could turn it sour.

If you have ever tried it, you will know that clotted cream – aka clouted cream or scalded cream in older books – is absolutely delicious and is well worth buying. It is possible to make your own and there is a recipe at the end of the post of you would to try your hand at it.

The best thing about it is the buttery, nutty crust that forms on the top as part of the manufacturing process. It is made by gently heating rich milk or cream in large shallow pans to a temperature of 80 to 90°C, the heat traditionally coming from cinders or charcoal. Once the buttery crust had formed, it was carefully but quickly moved to a cool place and sat upon some slate so make the cooling process as rapid as possible; the cold shocking the thin skimmed milk into sinking quickly and making a layer underneath the thick cream. These days, it’s all done with centrifuges, which is rather less romantic.

Once completely cooled, the clotted cream was lifted away with cold, wet hands and mixed in cold, wet wooden bowls to remove the last of the watery milk. It was then layered up in pots. I found a 1755 home recipe from an Elizabeth Cleland who recommended sprinkling rose water and sugar between the layers – the result must have been delicious!

The left-over skimmed milk, by the way, was taken away and either drank or used to make scones or Devonshire splits.

From the point of view of butterfat extraction, clotted cream is a much more efficient method than basic skimming techniques. The reason it is not the standard technique, I assume, is that double skimming requires no heating or centrifuges, tipping the balance of economy in double cream’s favour. Couple this with the fact that modern refrigeration and pasteurisation is doing the lion’s share of the preserving today means that the process of clotting cream is no longer required for that purpose. We eat it for the sheer love of it (ditto smoked fish and meat).

Mrs Beeton’s Book of Household Management says that there are two types of clotted cream: Devonshire and Dutch. She goes on to explain the difference – Dutch clotted cream is thick enough to stand a spoon up in. Now, in my (humble) opinion, it ain’t clotted cream unless you can stand a spoon up in it, so I can only conclude that English clotted cream – at least from a Victorian Londoner’s point of view – was relatively runny compared to that of today’s

Clotted cream is used to make ice cream, some biscuits and as a topping to the old-fashioned pudding Devonshire junket, a sweetened milk dessert set with rennet, producing curds and whey. It can be used to enrich sauces and soups too but use with caution – things can end up too rich.

Rodda’s is the largest producer of clotted cream and is based in Cornwall. There is much debate between the folk of Devon and Cornwall as to whether the cream should be added before or after the jam. Nick Rodda reckons his grandfather knew why:

We always put our cream on top because we are proud of it, Devonians are slightly ashamed of theirs, so they cover it up with their jam.

I must confess to siding with the Devonians on this one. It’s all down to what you think the buttery cream’s role is. The argument goes something like this:

The Cornish: it is the cream, and you wouldn’t put cream under your fruit salad/trifle/fruit tart etc, now would you?

The Devonians: it is the butter, and you wouldn’t spread butter over the jam on your toast/crumpet/muffin etc, now would you?

Your choice.


If you like the blogs and podcast I produce, please consider treating me to a virtual coffee or pint, or even a £3 monthly subscription: follow this link for more information.


Home-Made Clotted Cream

All you need to make your own is some double cream, an oven and patience.

Before…

Preheat your oven to 80°C. Pour around 1 litre of double cream into a wide, shallow ovenproof dish, place it in the oven and leave in there for 12 hours. If you are really patient, leave for 18 hours to achieve a darker, more delicious caramel-flavoured crust.

…after

Carefully remove from the oven, cover with kitchen foil and pop straight into the fridge to cool quickly and undisturbed.

Once fully chilled, lift the clotted cream from the dish and layer up in pots. I filled three good-sized ramekins with mine. The amount of skimmed milk at the bottom will vary depending upon how long you left the cream in the oven for.

The cream keeps for 7 days in the fridge.

References:

Clotted Cream, RS Chavan, A Kumar & S Bhatt, 2016, In Encyclopedia of Food and Health

The Complete Housewife, Elizabeth Cleland, 1755

How do you take your cream tea?, BBC Cornwall website, 2010 http://news.bbc.co.uk/local/cornwall/low/people_and_places/newsid_8694000/8694384.stm

Mrs Beeton’s Book of Household Management, Isabella Beeton, 1861

My Devonshire Book, Henry Harris, 1907

William’s Practical Butter Book, Xerxes Addison Willard, 1875

16 Comments

Filed under baking, Britain, cooking, Desserts, food, General, history, Preserving, Puddings, Recipes, Teatime

Forgotten Foods #6: Pease Bread

I often frequent the excellent vegan cooperatively-run supermarket Unicorn in Chorlton, south Manchester, to fill my food cupboards both at home and at the restaurant. One day, a couple of months ago, I spotted a very mediaeval ingredient: green pea flour. I had come across ‘peasemeal’ in several old books, but didn’t expect to ever see it for sale. (Another popular mediaeval ingredient is almond milk, used particularly on fasting days; it’s funny how these old ingredients are having a comeback as health foods.)

One of the mediaeval small-holder’s most important crops was his pea crop – they were not eaten as young sweet garden peas, but were left in the pods to mature and dry. The peas became starchy and packed with protein; an excellent nutritional source for the winter months. We use those dried peas today for mushy peas or split peas. Then, they were mainly used in pease porridge/pottage.

The pease were often ground to make peasemeal to thicken stews, and to make bread for cattle. People only ate it themselves in times of winter famine, and this peasebread was hated by all.

Peasebread and peasemeal stopped being produced in most of the UK, but it did live on until the mid-20th Century in the very North of Scotland and Orkneys, where very few crops can be grown in abundance (rye and oats are the only others really). Folk enjoyed pease scones, bannocks (flatbreads) and breads, but it was still associated with poverty.

Peasemeal is considered easy to digest, partially due to its lack of gluten, and is high in protein and carbohydrates. I quite like how some of these mediaeval ingredients are being re-examined during a time of vegan and paleo-dieting. It is strange to think how the poor were eating healthy vegetables with little fat, red meat, salt and sugar, considered then to have no nutritional value. Meanwhile, the bunged-up rich were chowing down almost entirely on meat, spice, white bread and sugar, in the belief they were eating properly. I bet their bedchambers sank in the morning.

I had to have a go at the derided peasebread, just to see how bad it was. I did cheat a little bit and mixed the peasemeal with some strong bread flour. It was pretty straight-forward to make, though the dough was very sticky was hard to knead. The resulting bread was dense and a little crumbly, but had a delicious sweet pea flavour, with hints of roasted peanut butter. Probably too dry to eat on its own, it was great toasted, buttered and dunked in soup.


If you like the blogs and podcast I produce, please consider treating me to a virtual coffee or pint, or even a £3 monthly subscription: follow this link for more information.


So, here’s my recipe for peasebread. It made two flattened cobs.

(Notice all my liquid measurements are in grams rather than millilitres; for greater accuracy, it’s much easier to weigh your liquids, a tip from Elizabeth David.)

250g green pea flour

250g strong white bread flour

10g salt

10g instant yeast

30g sunflower or olive oil, or softened butter or lard

330g hand-hot water

In a wide mixing bowl mix together the two flours. To one side of the bowl place the salt, and place the yeast to the opposite side. Make a well in the centre and pour in the oil/fat and the water. Mix with your hands to form a dough. Leave to settle for ten minutes.

Spread a little oil on a work surface and knead until smooth. This is pretty tricky because it is so sticky, so use a dough scraper to help.

Oil a bowl and place in the dough inside and cover. Leave to rise until it has doubled in size, about 2 hours. Knock back the dough, divide into two pieces and form in to two taught, round cobs. To do this, roll into balls with oiled/floured hands, then tuck in the dough underneath whilst turning the ball, tautening the surface. Place on greased baking trays, flour generously and cut a cross in the centre. Cover with large plastic bags and leave to rise again for about an hour.

Place the cobs in a cold oven, then set the temperature to 230⁰C and bake for 40 minutes. Cool on a rack.

19 Comments

Filed under baking, bread, Britain, cooking, food, history, Recipes, Teatime, Uncategorized