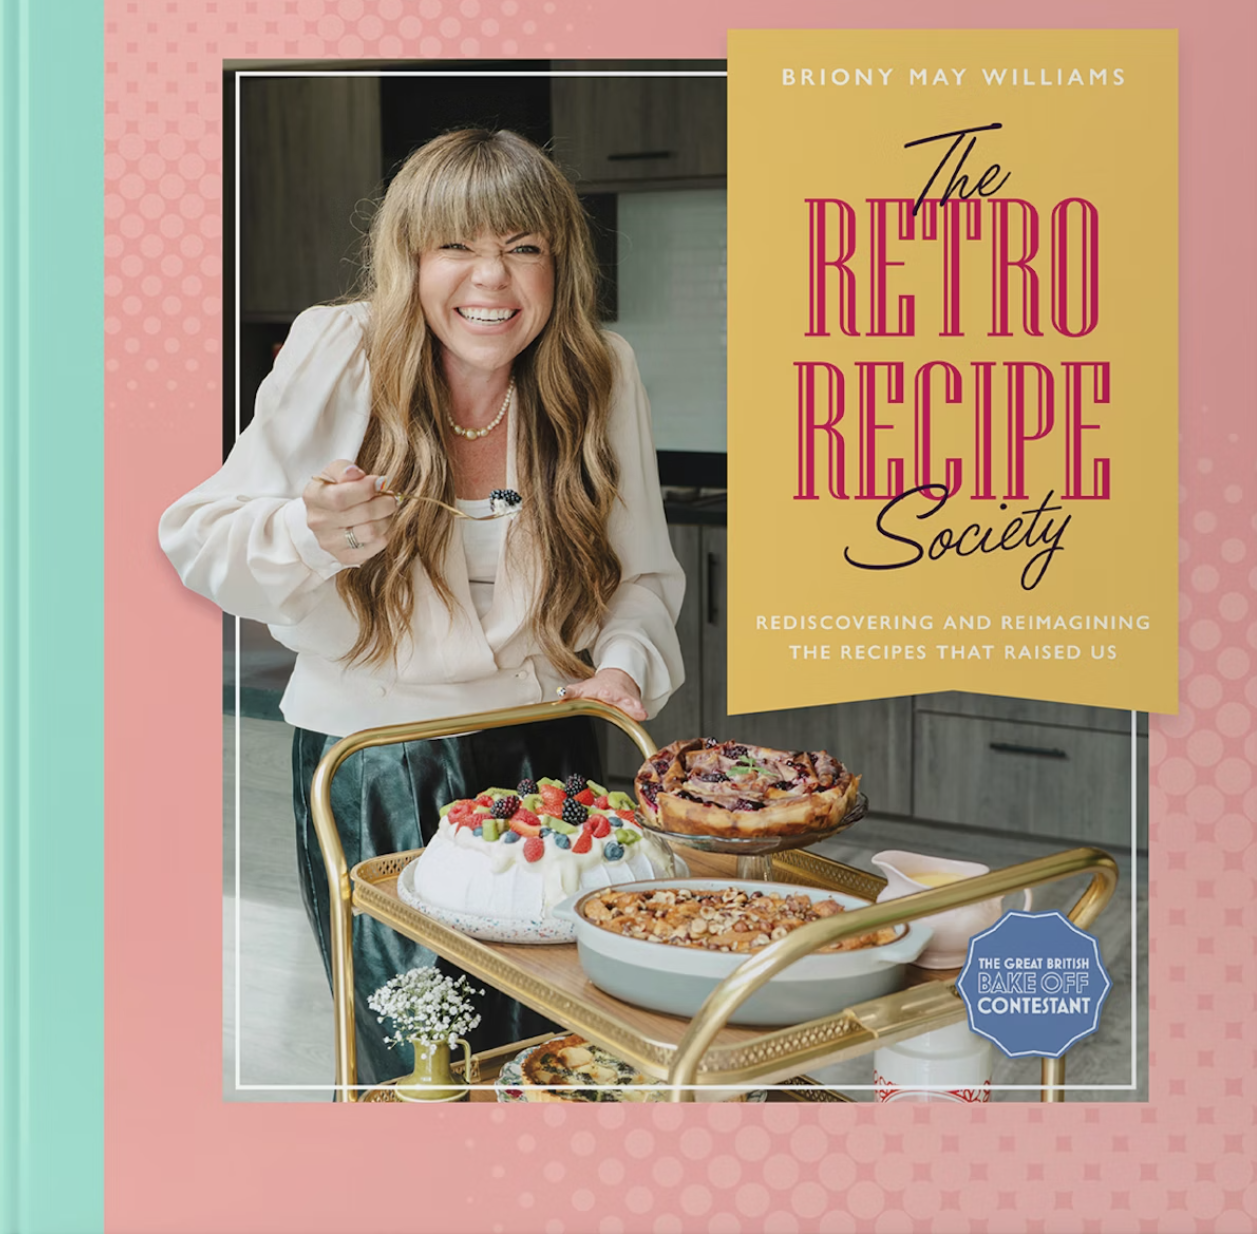
Welcome back to the British Food History Podcast. In today’s episode, I am speaking with Great British Bake Off alumnus Briony May Williams about retro foods. She’s on a mission to bring back some of the foods of the 21st century that are maybe not being enjoyed as much as they should be in the 21st. I am very much in agreement with this – obvs.
We talk about how Briony became interested in retro foods and historical cooking (we all have an origin story, don’t we?), memories of Bake Off, puddings as comfort food, Waldorf salads, our shared appreciation of frozen peas and Kitchen Aids, plus the infamous banana candle salad.
Listen on your favourite podcast app, or stream the episode via this Spotify embed:
Season 10 of the podcast is sponsored by Netherton Foundry, makers of high-quality kitchen and outdoor cookware. Netherton Foundry ships to several countries outside of the UK, including the USA and Canada. Visit www.netherton-foundry.co.uk to find out more about their wonderful products – approved not just by me but by folk such as Tom Parker-Bowles, Diana Henry and Nigella Lawson.
Sam Bilton’s banana candle salad
If you can, support the podcast and blogs by becoming a £3 monthly subscriber, and unlock lots of premium content, including bonus blog posts and recipes, access to the easter eggs and the secret podcast, or treat me to a one-off virtual pint or coffee: click here.
Don’t forget, there will be postbag episodes in the future, so if you have any questions or queries about today’s episode, or indeed any episode, or have a question about the history of British food please email me at neil@britishfoodhistory.com, or leave a comment below.
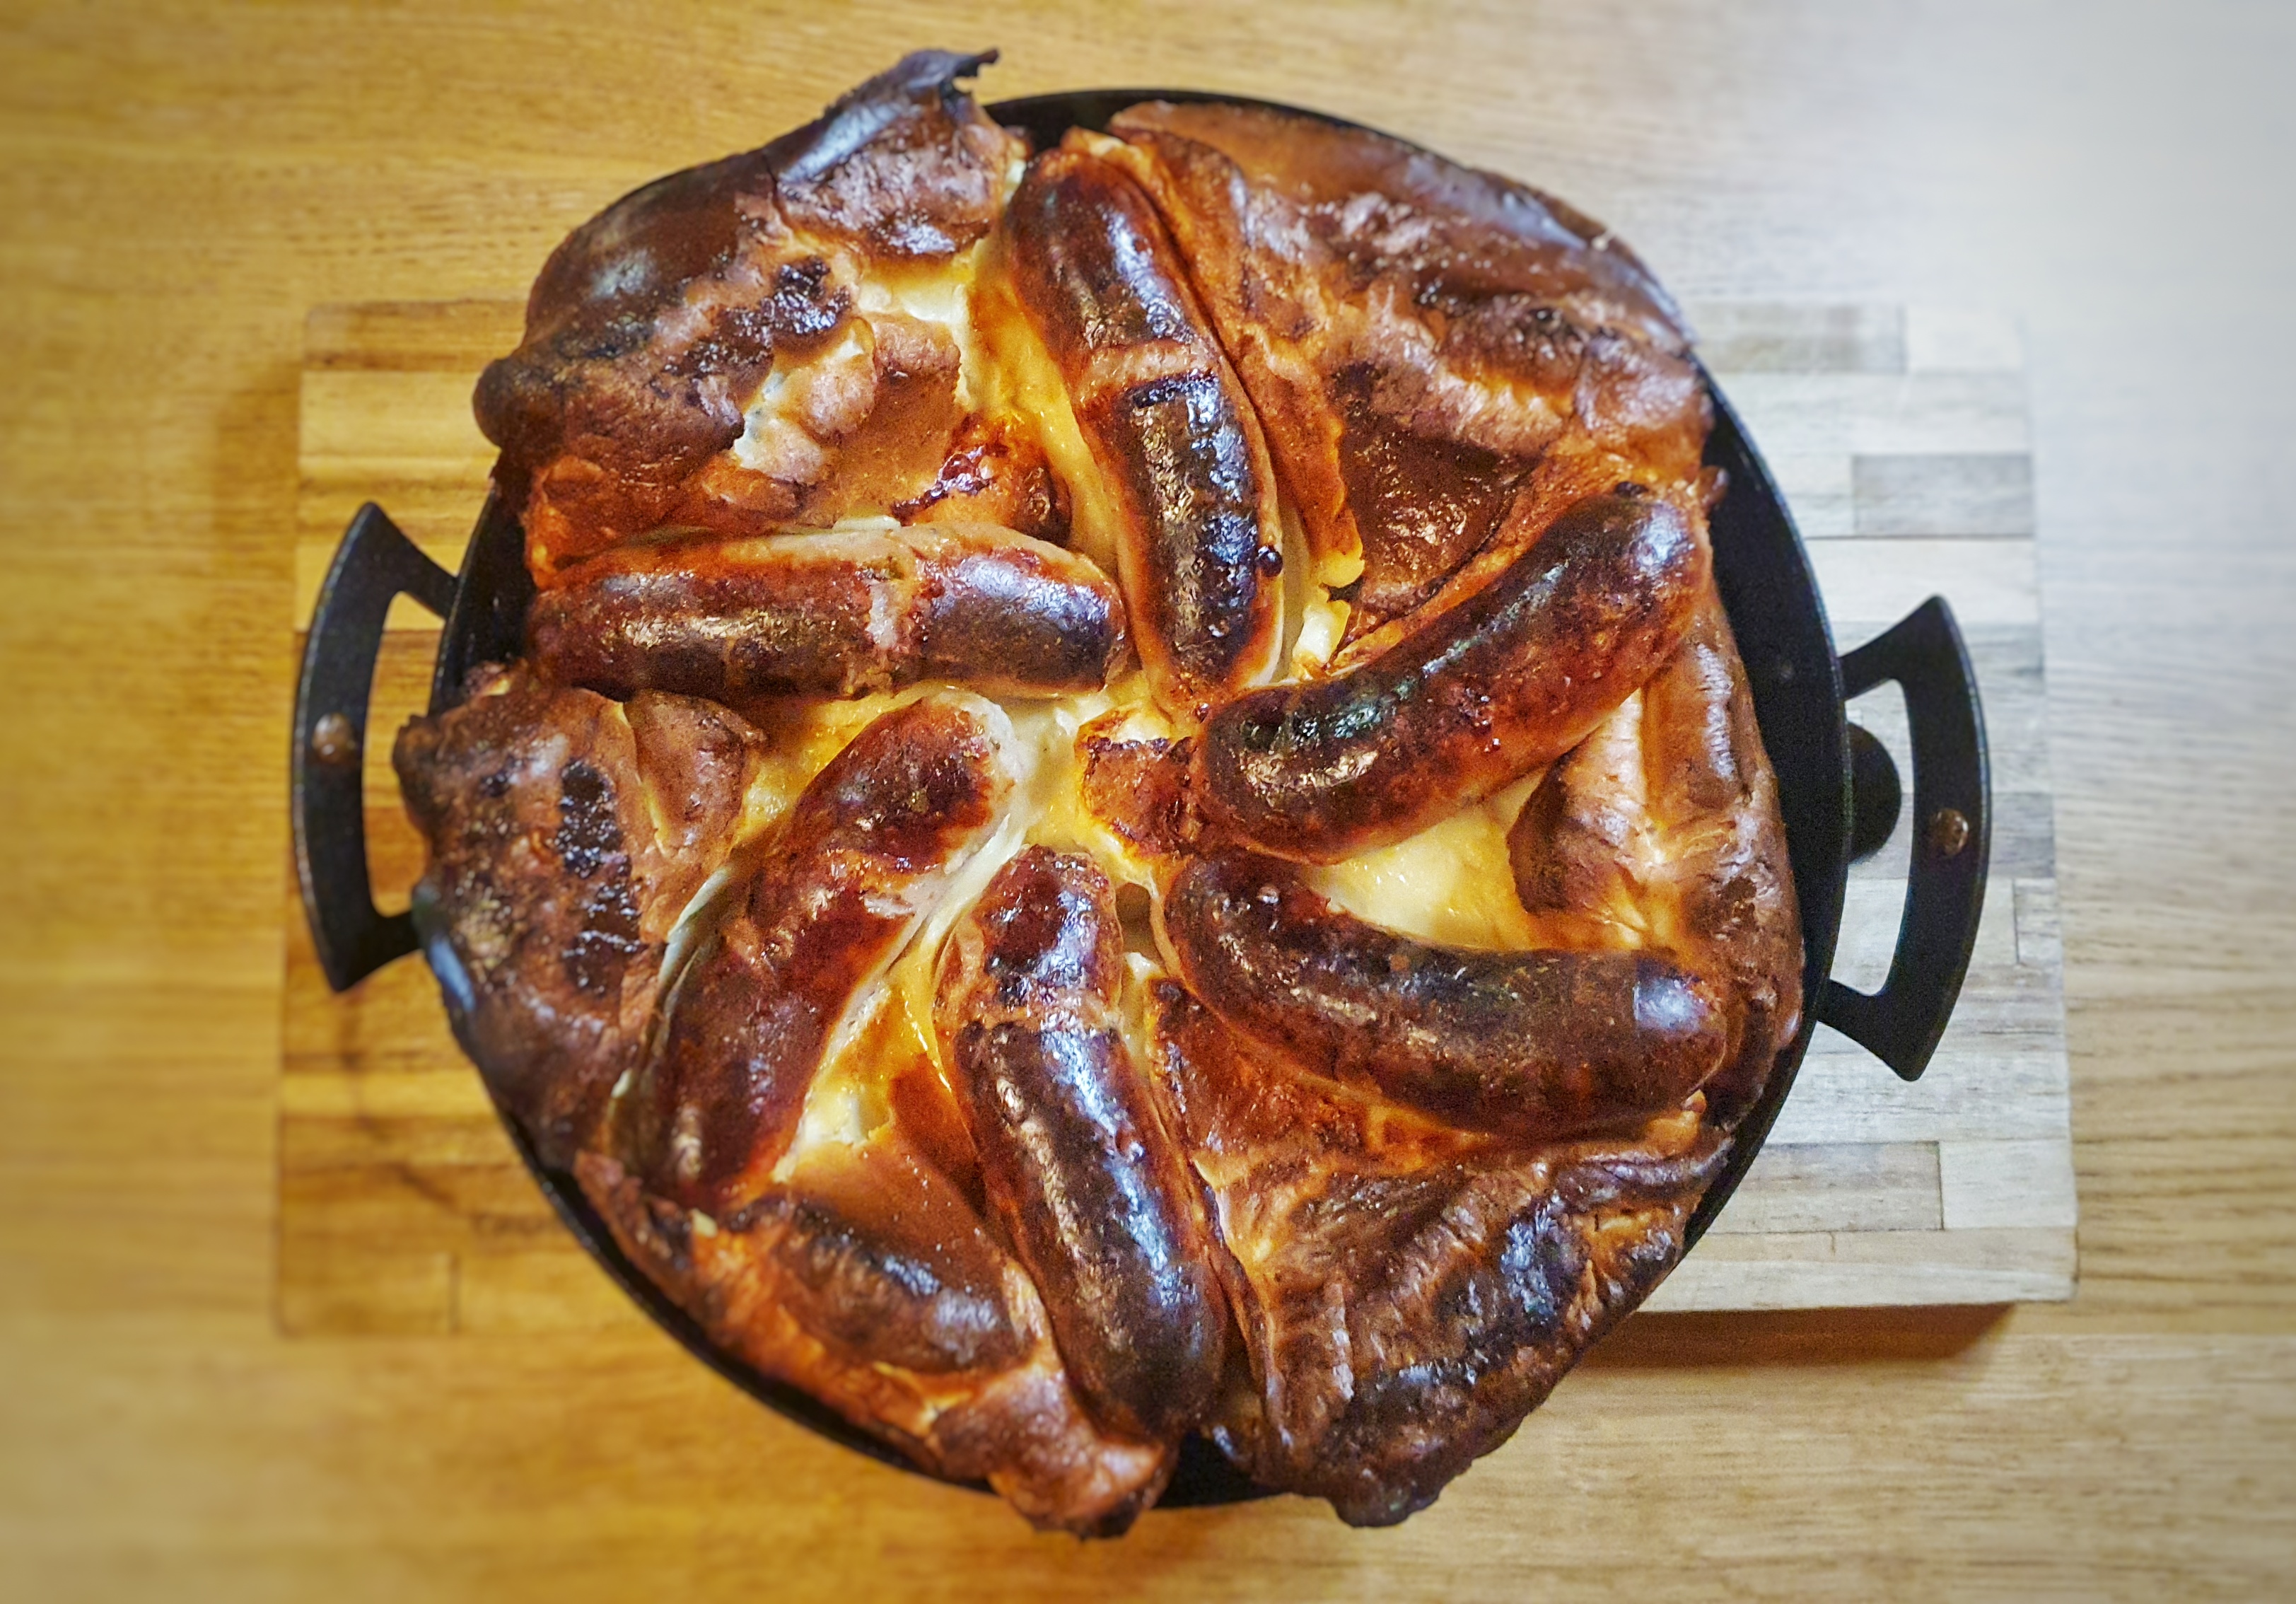
Toad-in-the-hole is a stone-cold classic British dish, and one I make often. It occurred to me recently that I’ve never written up my recipe, so I thought I should rectify this! It is considered by other nations to be one of those ‘weird’ British foods – I’ve no idea why, it’s roasted sausages in a Yorkshire pudding. What’s not to like? Do folk think there is a real toad in there?
Find out more about Yorkshire puddings and toad-in-the-hole in this previous podcast episode.
Well, naysayers, don’t knock it till you’ve tried it: it’s a delicious, simple, hearty and economical pleasure, as most British food is, and I think it is a meal most Brits would rate very highly. It wasn’t always the case, as Jane Grigson points out in English Food, the ‘toads’ were pieces of leftover boiled or roasted meat or poor quality sausages which ‘gave Toad-in-the-Hole a bad name as one of the meaner English dishes.’[1] Economical should never be made equivalent to mean.
Looking into the history of toad-in-the-hole presents us with a quandary, because it is rather difficult to pin down when it first appears in print. Why? Well, it depends on your criteria. Let’s start with what is widely regarded to be the first recipe with that name (well, actually it’s called toad-in-a-hole, but let’s not split hairs), which crops up in Richard Briggs’ The English Art of Cookery, published in 1788:
Mix a pound of flour with a pint of and a half of milk and four eggs into a batter, put in a little salt, beaten ginger, and a little grated nutmeg, put it into a deep dish that you intend to send it to table in, take a veiny piece of beef, sprinkle it with salt, put it into the batter, bake it two hours, and send it up hot.[2]
So, here we have a single large toad in the form of a piece of beef. This makes sense; the dish is called toad-in-the-hole, not toads-in-the-hole. In The Tavern Cook, Marc Meltonville does make the point that it is baked,[3] which is important because the earliest mention of toad-in-the-hole actually comes the year before in Francis Grose’s Provincial Glossary, where it is described as ‘meat boiled in a crust’.[4] Are either of these really toad-in-the-hole recipes? There is a better contender in my book. It’s not a recipe, but a good description of one, and it can be found within the pages of the diary of shopkeeper Thomas Turner, dated Saturday, 9th of February 1765:
I dined on a sausage batter pudding baked (which is this: a little flour and milk beat up into a batter with an egg and some salt and a few sausages cut into pieces and put in it and baked)…[5]
This – I hope you agree – is a modern toad-in-the-hole in all but name!
Find out more about Richard Briggs and his book in this previous podcast episode.
We can go even further than this: some food historians think that the original recipe actually goes back another 20 years to Hannah Glasse’s 1747 classic The Art of Cookery Made Plain and Easy.[6] The recipe is for ‘Pigeons in a Hole’. Here, pigeons are buttered and seasoned, popped into a dish and a batter is poured over them and baked.[7] Is this the winner? Well it all depends what you are counting as toad-in-the-hole, of course, but I hope this gives you an overview of the dish’s evolution.
In the 19th century, various other ‘toads’ were used: Mrs Beeton gives recipes using beef steak and pieces of kidney. She also suggests adding mushrooms or oysters, and also recommends using leftover, underdone meat.[8] According to Sheila Hutchins, even whole, boned chickens have played the part of the toad.[9] I must say that this sounds most appealing!
If you can, support the podcast and blogs by becoming a £3 monthly subscriber, and unlock lots of premium content, including bonus blog posts and recipes, access to the Easter eggs, a monthly newsletter and the secret podcast, or treat me to a one-off virtual pint or coffee: click here.
Recipe
I used my 10-inch Netherton Foundry Prospector Pan throughout because it can be used on the hob and in the oven. It’s also round, which makes portioning much easier when it comes to serving time. The amounts given for the batter are the same as for my Yorkshire pudding recipe, so you could make the toad-in-the-hole in a rectangular tray or even a sturdy cake tin. Colour the sausages in a frying pan first and then transfer them to your chosen receptacle!
¾ cup/180 ml plain flour
½ tsp salt
¾ cup/180 ml eggs (around 4 medium eggs)
¾ cup milk
60 g beef dripping or lard, or 60 ml sunflower or rapeseed oil
6 good quality sausages
Mix the flour and salt together, make a well in the centre and add the eggs. Beat well until smooth, then beat in the milk. Set aside for an hour (you don’t have to do this, but you do get a slightly better rise this way).
Preheat your oven to 230°C.
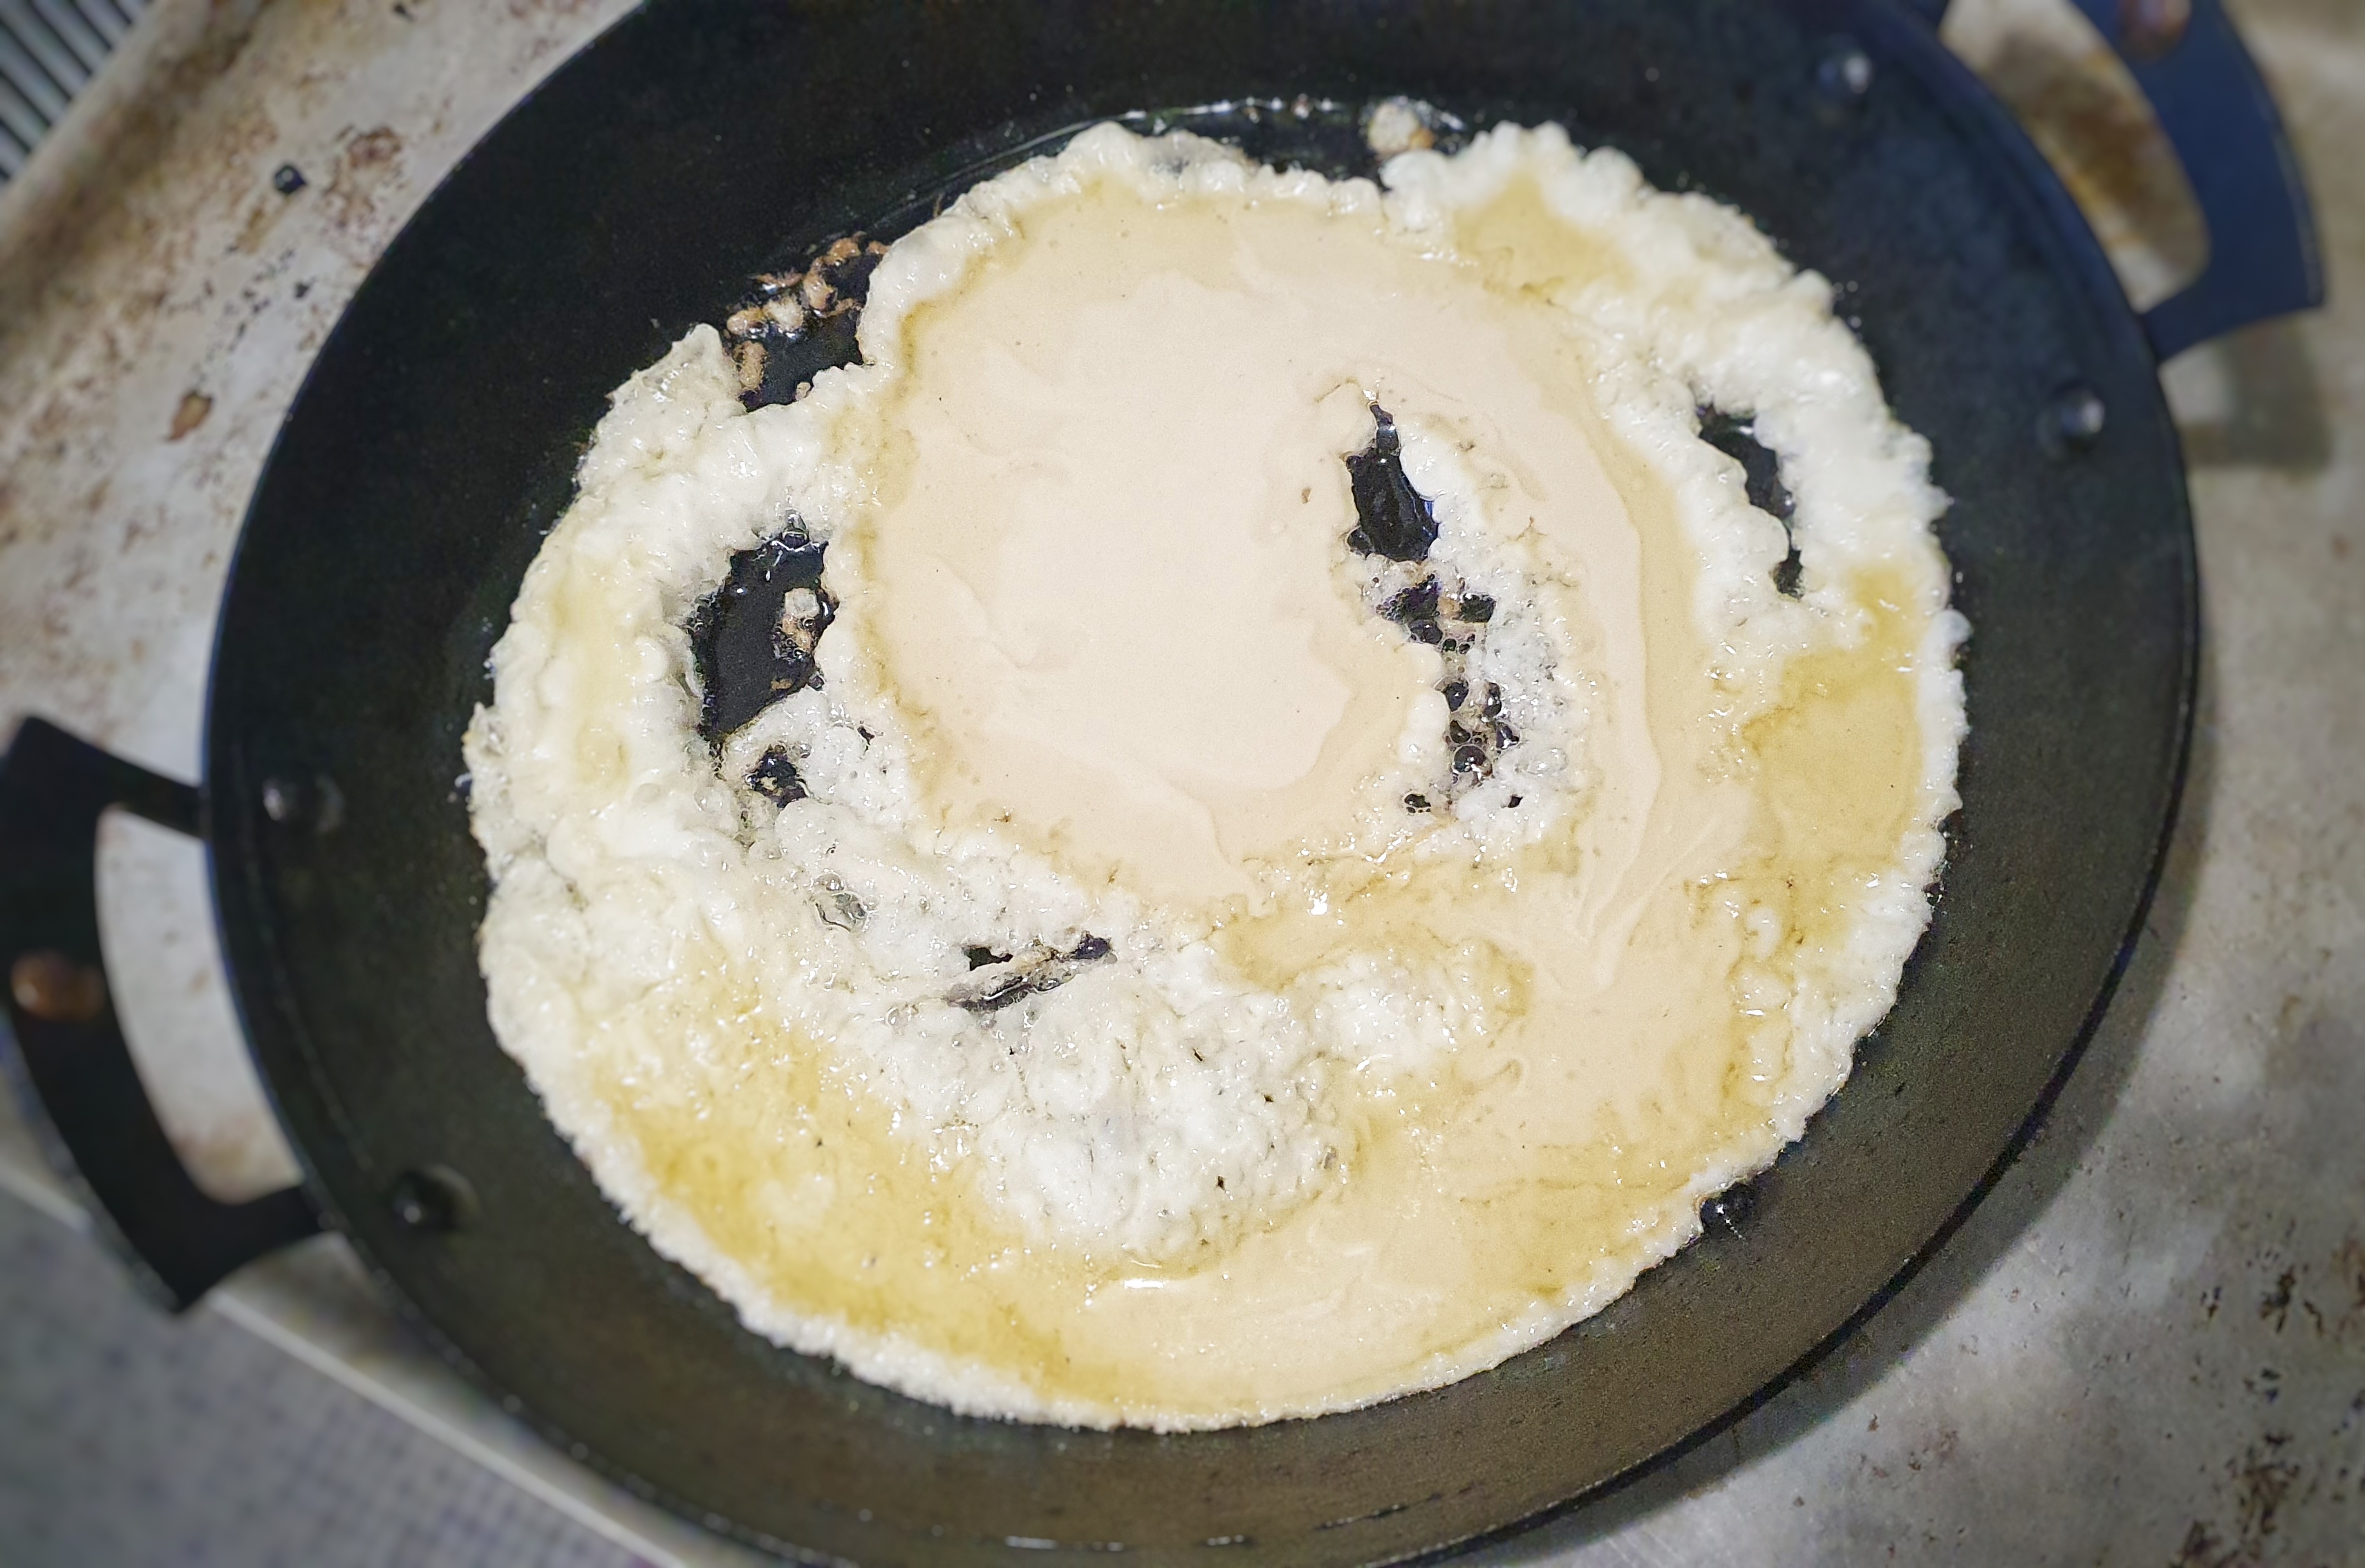
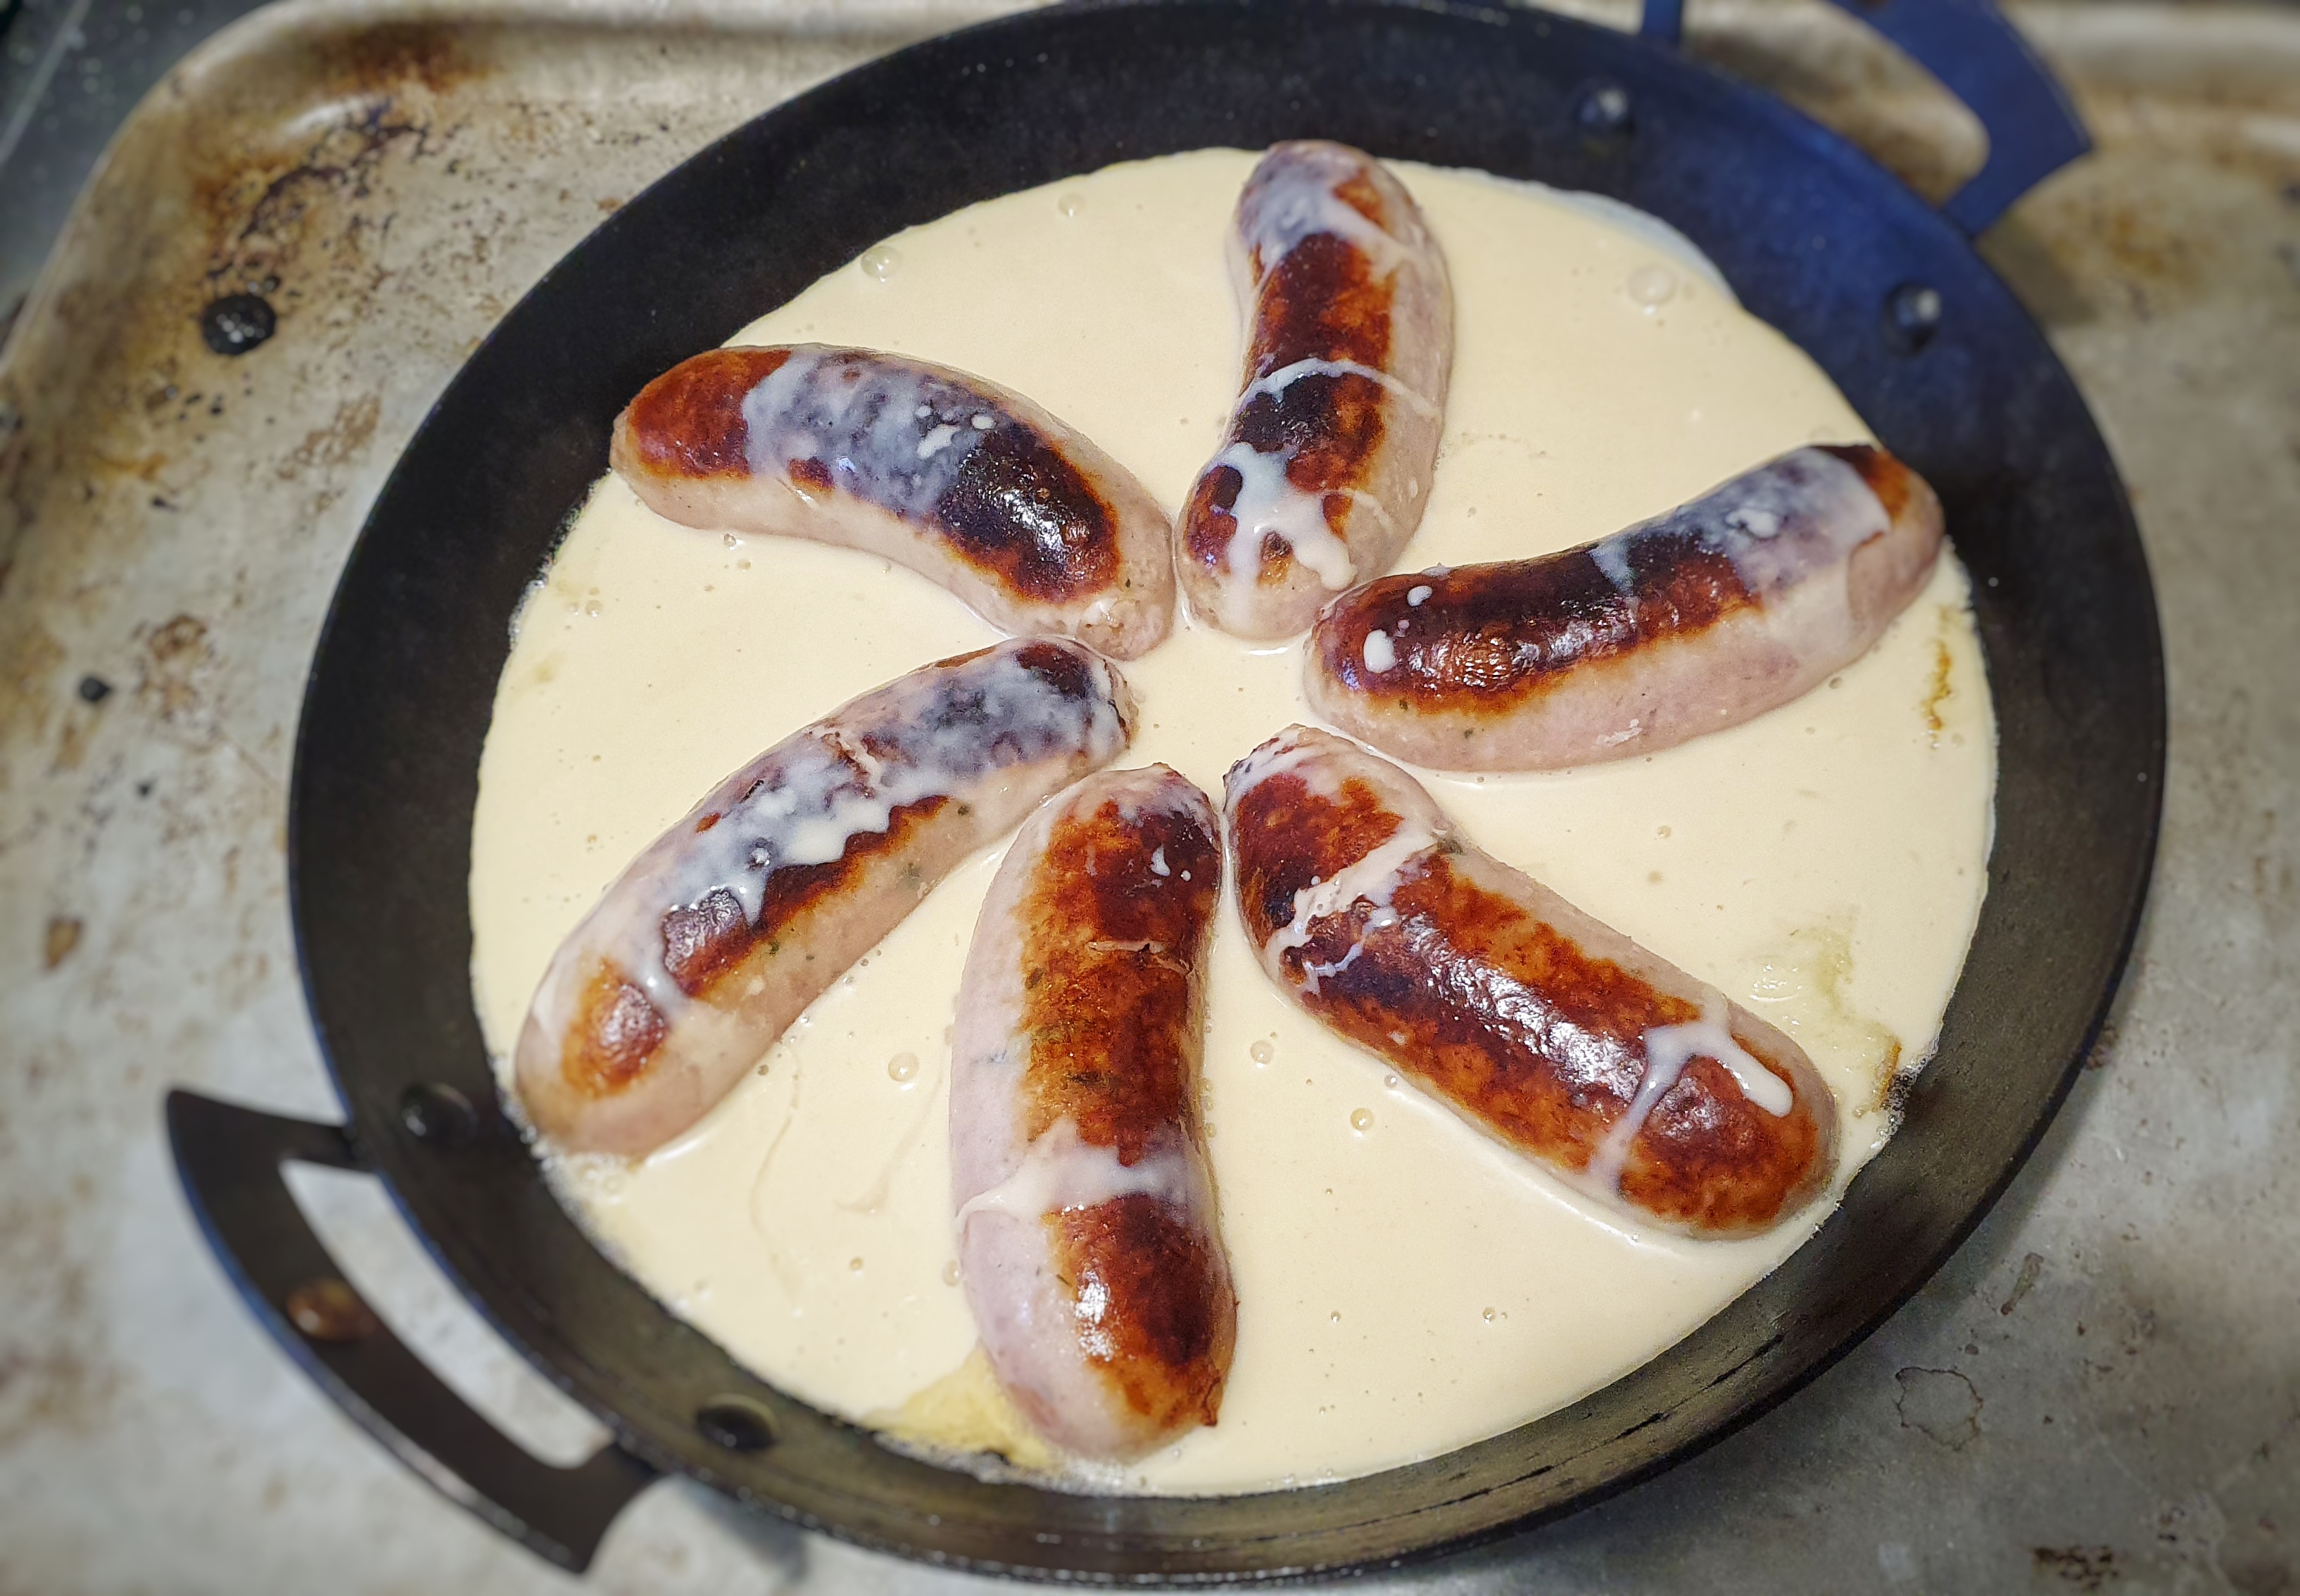
Heat a little of the fat or oil in your pan and brown the sausages on two sides: you’re not looking to cook them, just to sear them, as it were. Remove the sausages and set aside.
Add the remaining fat to the pan or tray in which you’ll be baking the toad-in-the hole (along with any juices from the frying pan, if used), place in the oven and allow it to become very hot and smoking– a good 15 minutes. Gingerly remove the pan or tray and add a ladleful of batter to it, and give it a quick swirl before returning it to the oven to cook and set for 3 or 4 minutes.
Remove the pan or tray, arrange the sausages evenly and neatly and pour over the rest of the batter. Return to the oven. Do all of this as quickly – and safely – as possible.
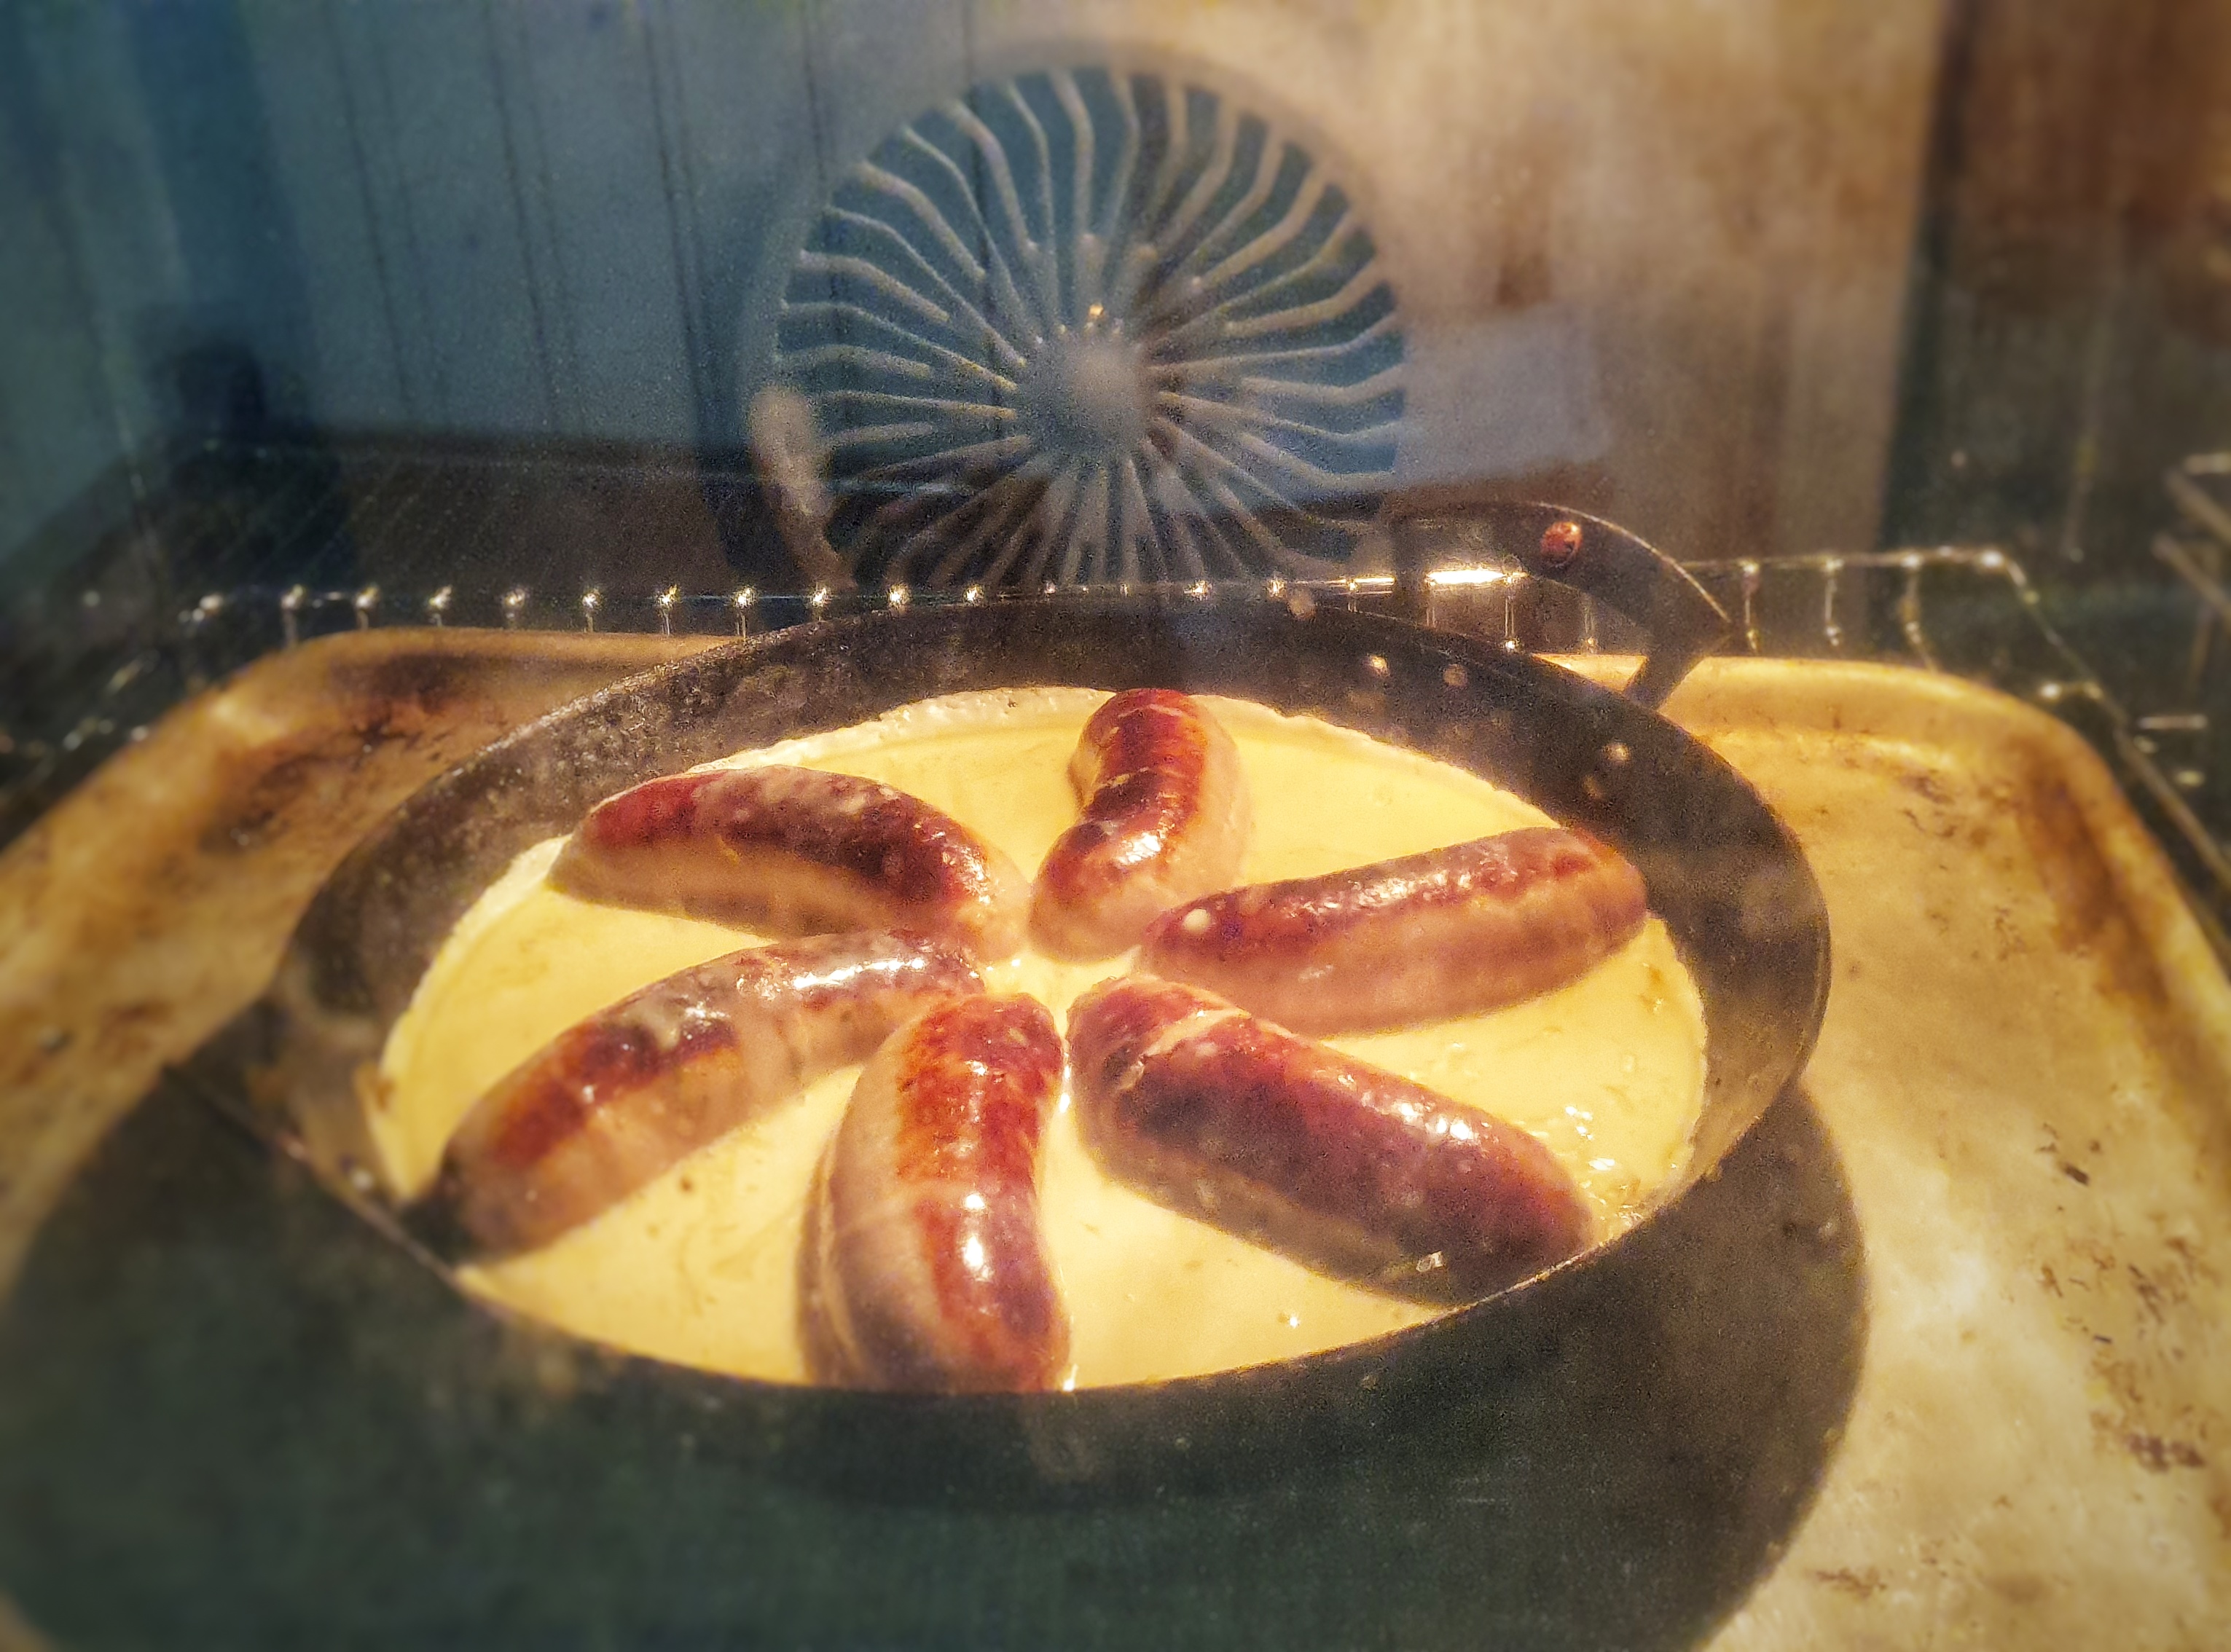
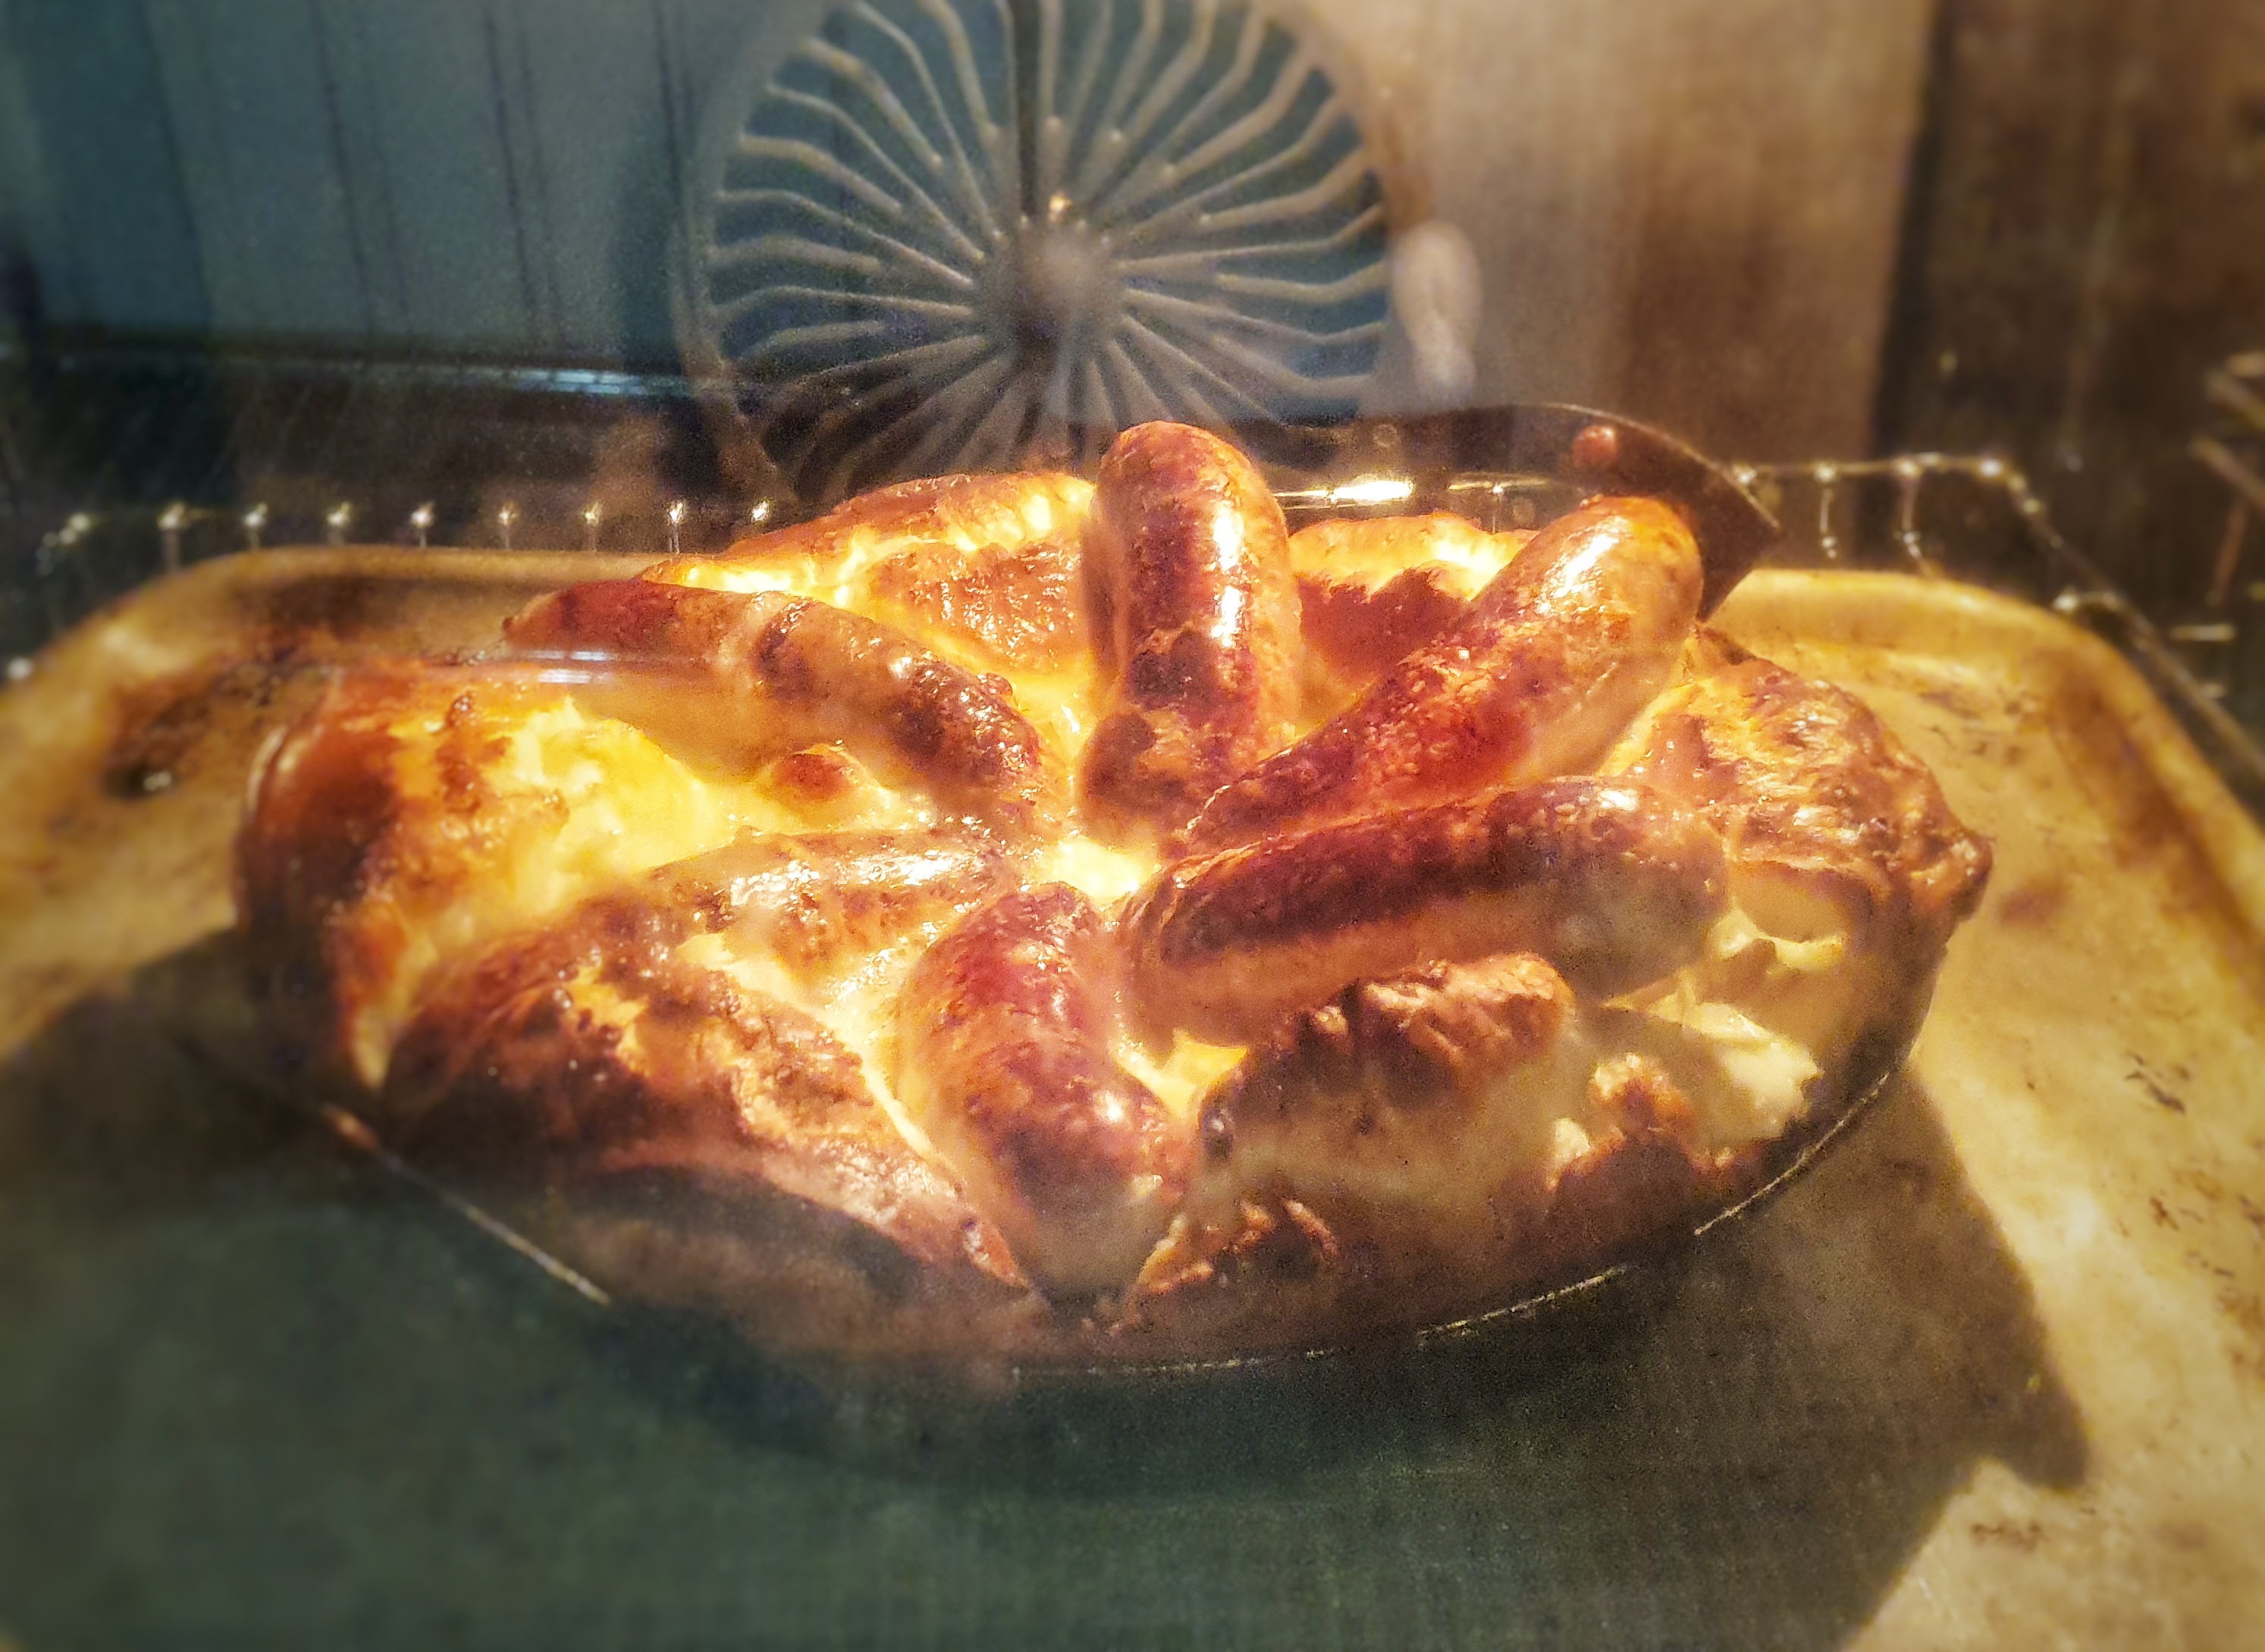
Bake for 30 minutes until well risen and a deep-golden brown. If the pudding and sausages are going a bit too brown for your liking, turn the heat down to 180°C.
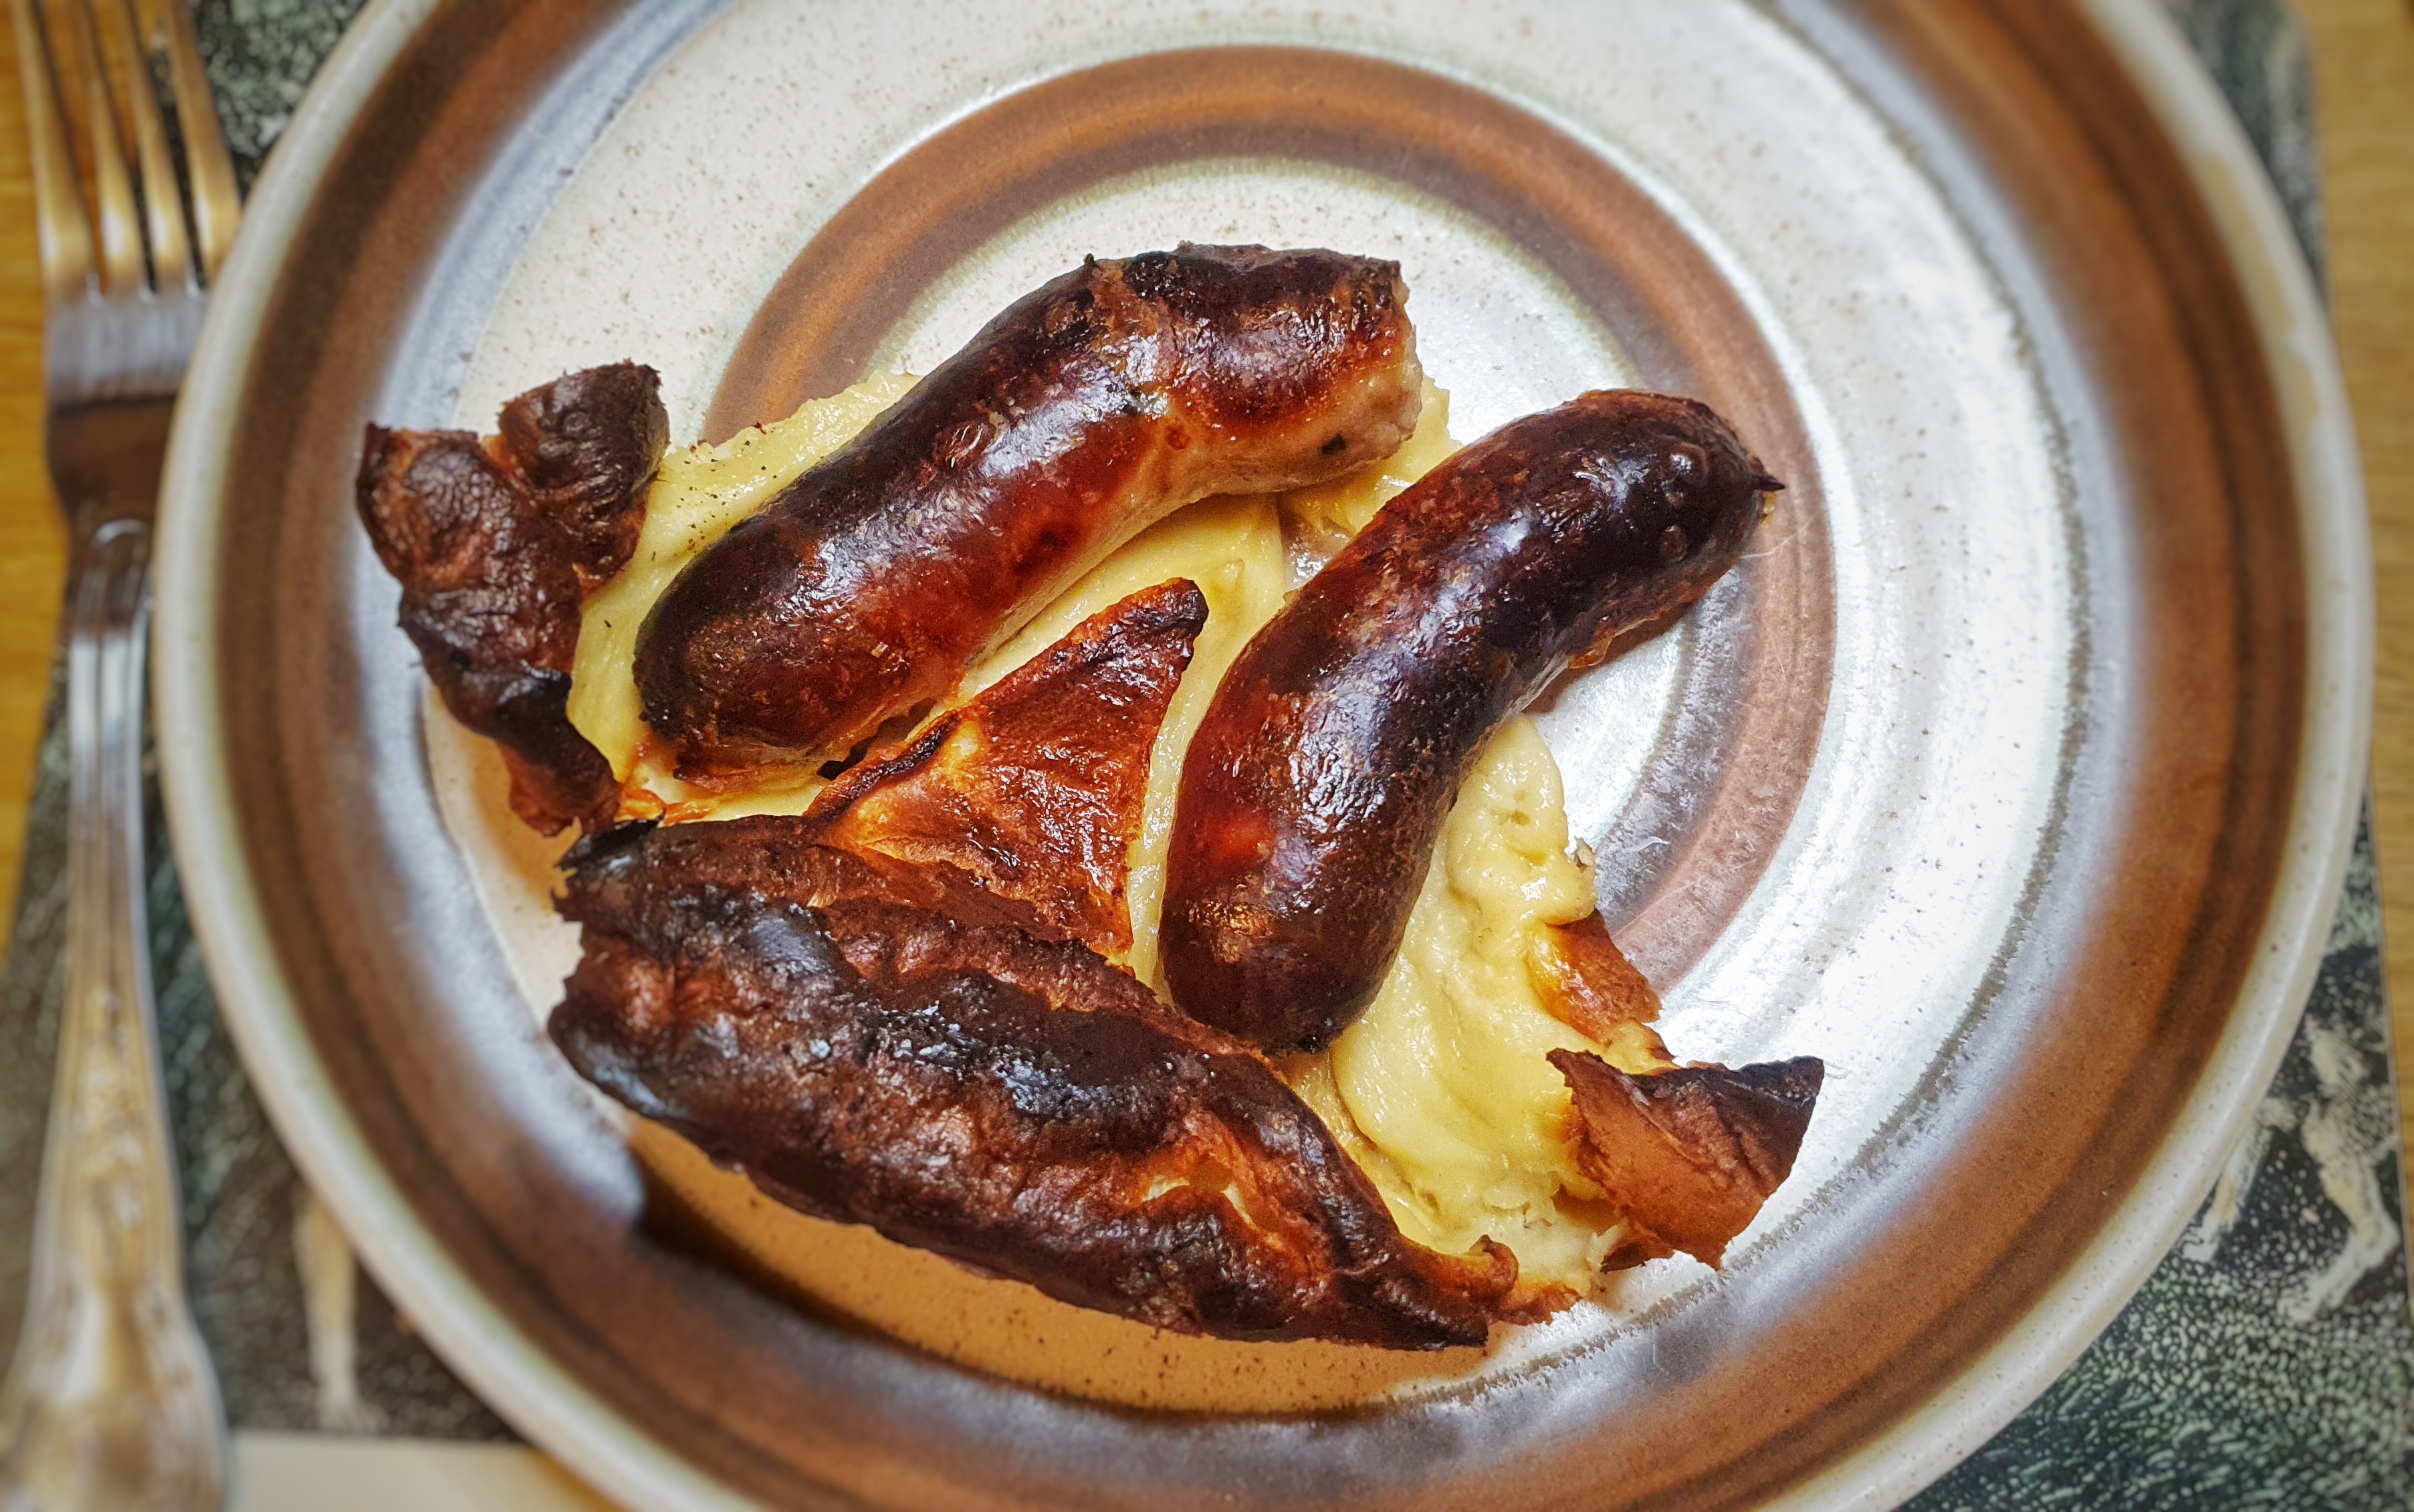
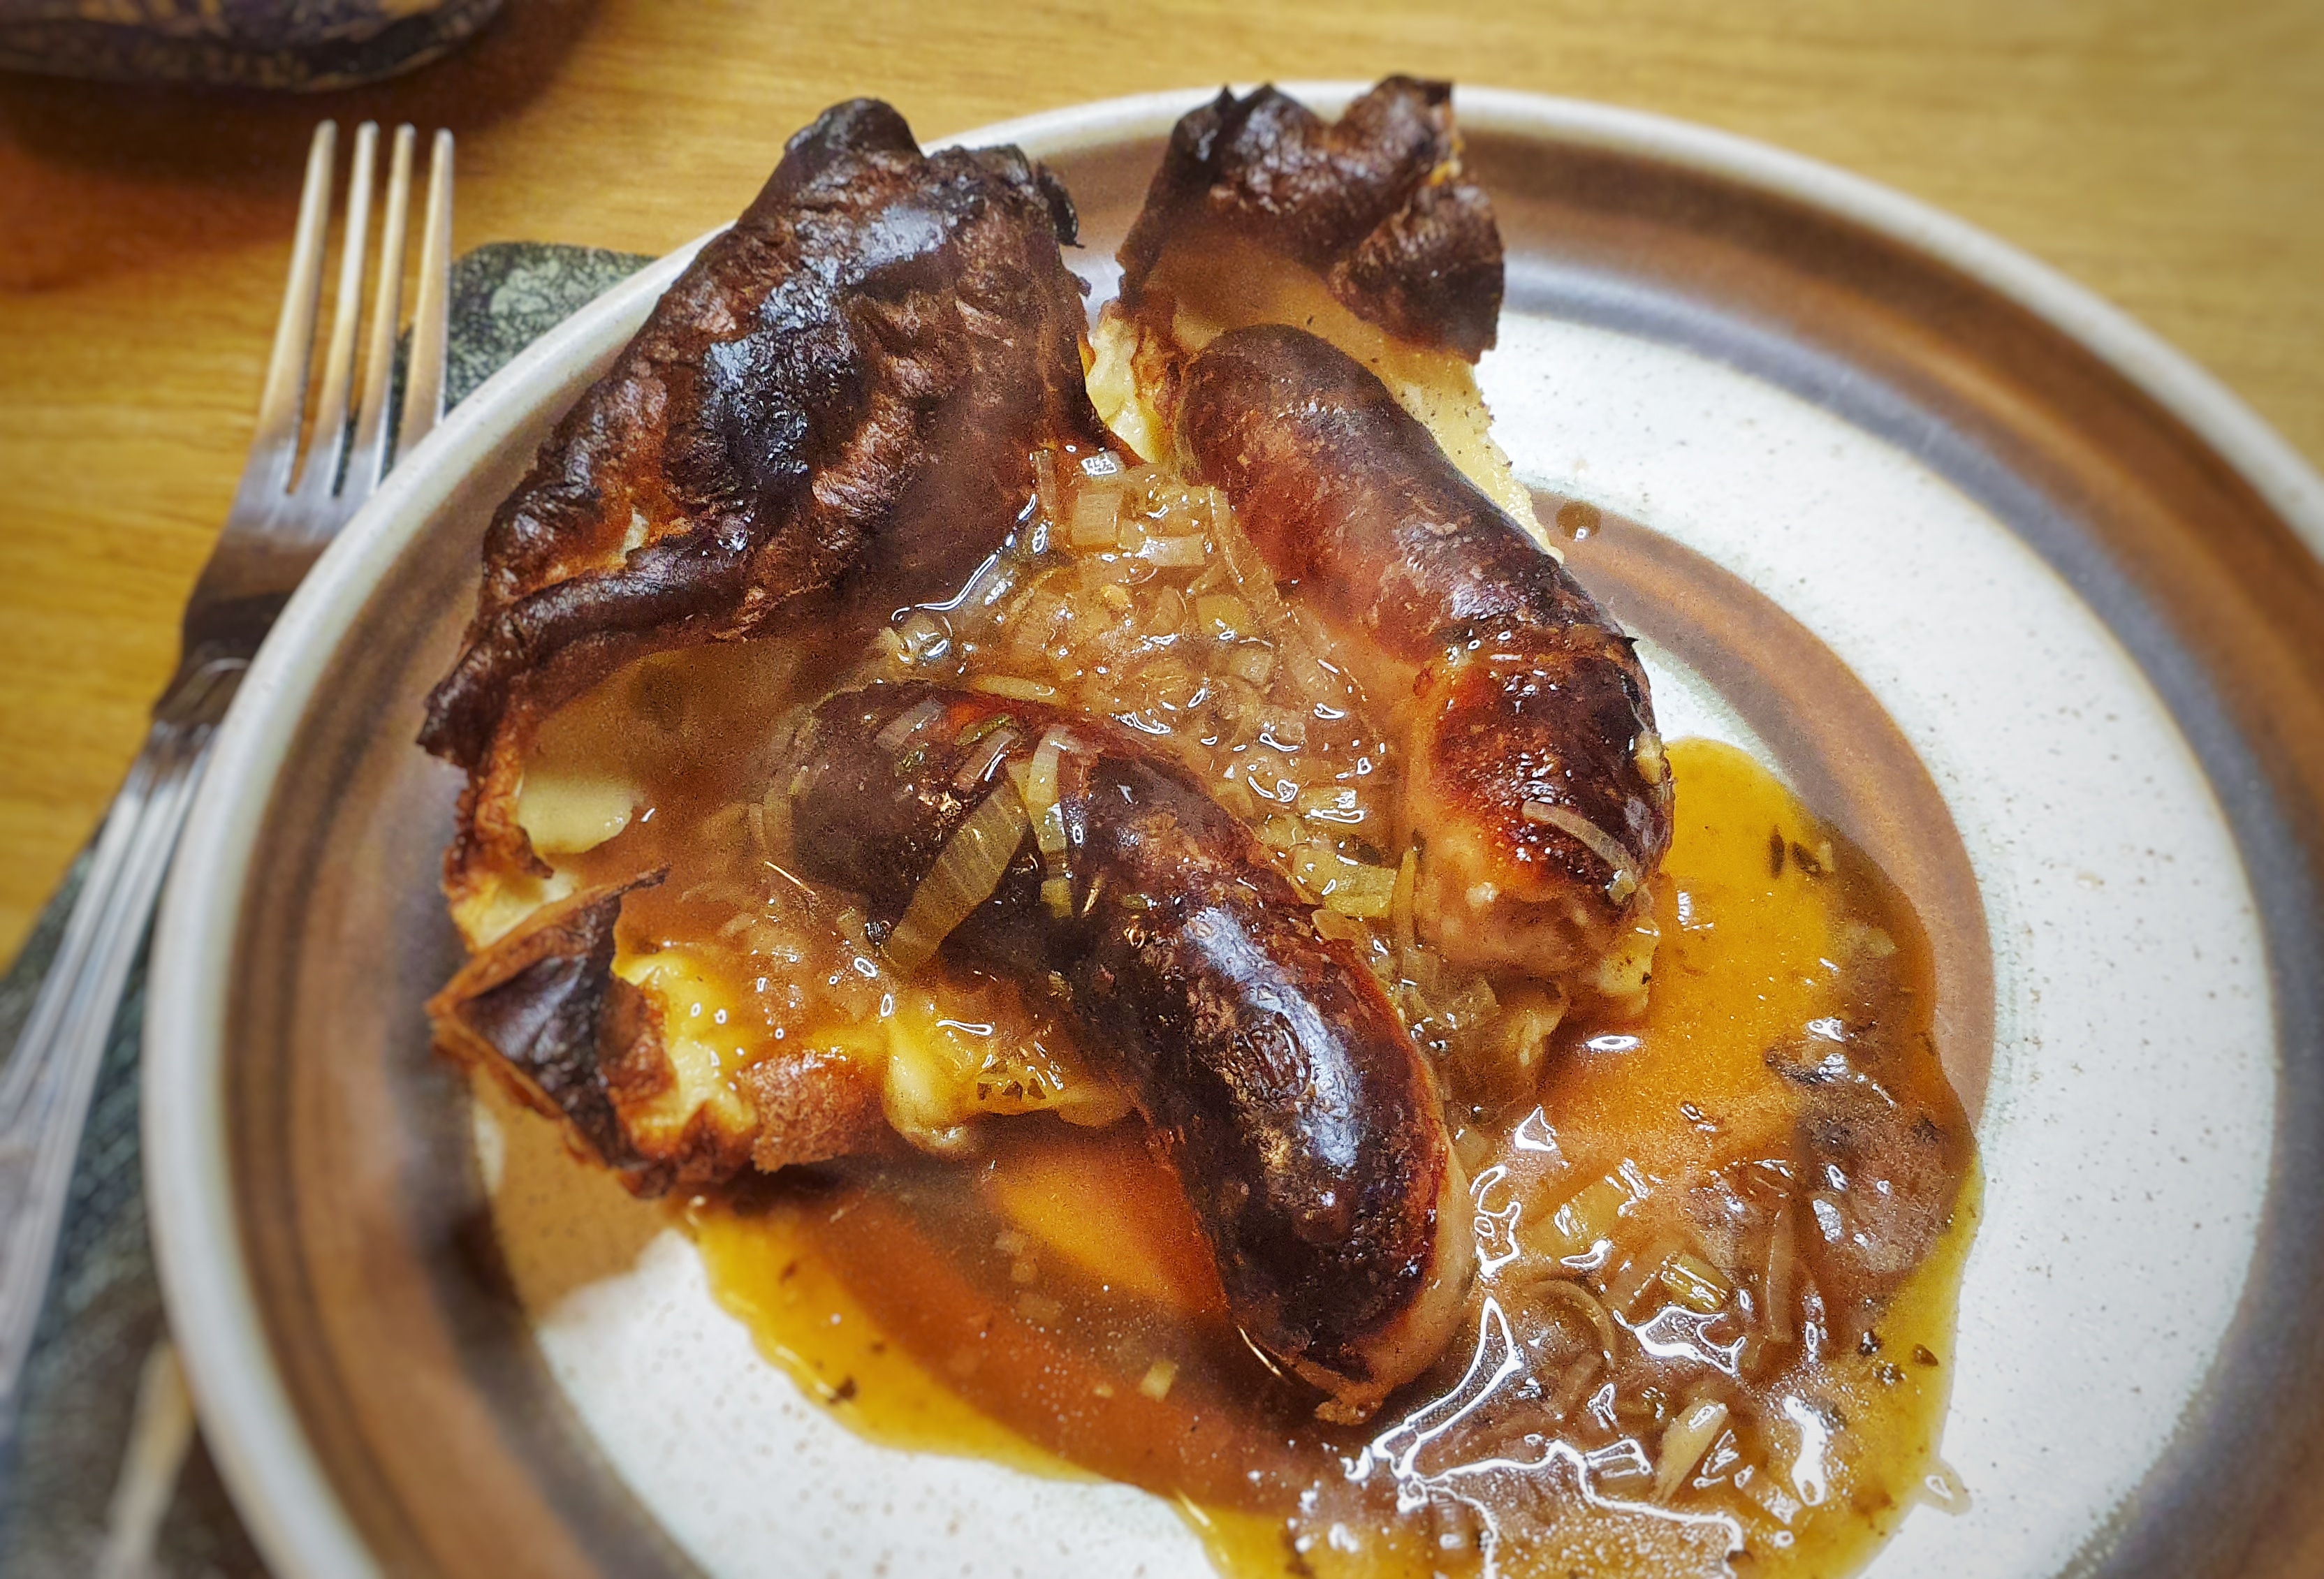
Serve with plenty of onion gravy, steamed vegetables and a blob of mustard.
Notes
[1] Grigson, J. (1992). English Food (Third Edit). Penguin.
[2] This is Marc Meltonville’s transcription from his 2023 book The Tavern Cook: Eighteenth Century Dining through the Recipes of Richard Briggs published by Prospect Books
[4] Grose, F. (1790). A provincial glossary: with a collection of local proverbs, and popular superstitions (2nd ed.). S. Hooper.
[5] Turner, T. (1994). The diary of Thomas Turner, 1754-1765 (D. Vaisey, Ed.). CTR Publishing.
[6] One of the food historians in question is Alan Davidson, in The Oxford Companion to Food. Oxford University Press (1999).
[7] Glasse, H. (1747). The Art of Cookery Made Plain and Easy. Prospect Books.
[8] Beeton, I. (1861). The Book of Household Management. Lightning Source.
[9] Hutchins, S. (1967). English Recipes, and others from Scotland, Wales and Ireland as they appeared in eighteenth and nineteenth century cookery books and now devised for modern use. Cookery Book Club.
My guest today is Mark Dawson, food historian, specialising in the food of the Tudor period, but also food of Derbyshire. We met up at Mark’s home in Derbyshire to talk all things Derbyshire oatcakes.
Mark and I talk about the oatcakes of Britain, doshens and sprittles, the usefulness of probate inventories, oatcakes as penance, and oatcake goblins – amongst many other things.
It’s available on all podcast platforms and YouTube. If you’re not a podcast/YouTube sort of person, listen here:
Those listening to the secret podcast can hear about other Derbyshire foods made from oats; a discussion about why oatcake is better than porridge; and I grill Mark on one very important matter: just what is the difference between a Derbyshire and a Staffordshire oatcake.
Follow Mark on Instagram @drdobba
Mark’s book Lumpy Tums: Derbyshire’s Food & Drink will be published by Amberley in April 2026
L to R: sprittle, slice and oatcake toaster (Derby Museum); an oatcake stone (Joan Clough); my attempt at a sourdough Staffordshire (shock-horror!) oatcake
Remember: Fruit Pig are sponsoring the 9th season of the podcast and Grant and Matthew are very kindly giving listeners to the podcast a unique special offer 10% off your order until the end of October 2025 – use the offer code Foodhis in the checkout at their online shop, www.fruitpig.co.uk.
If you can, support the podcast and blogs by becoming a £3 monthly subscriber, and unlock lots of premium content, including bonus blog posts and recipes, access to the easter eggs and the secret podcast, or treat me to a one-off virtual pint or coffee: click here.
Don’t forget, there will be postbag episodes in the future, so if you have any questions or queries about today’s episode, or indeed any episode, or have a question about the history of British food please email me at neil@britishfoodhistory.com, or leave a comment on the blog.
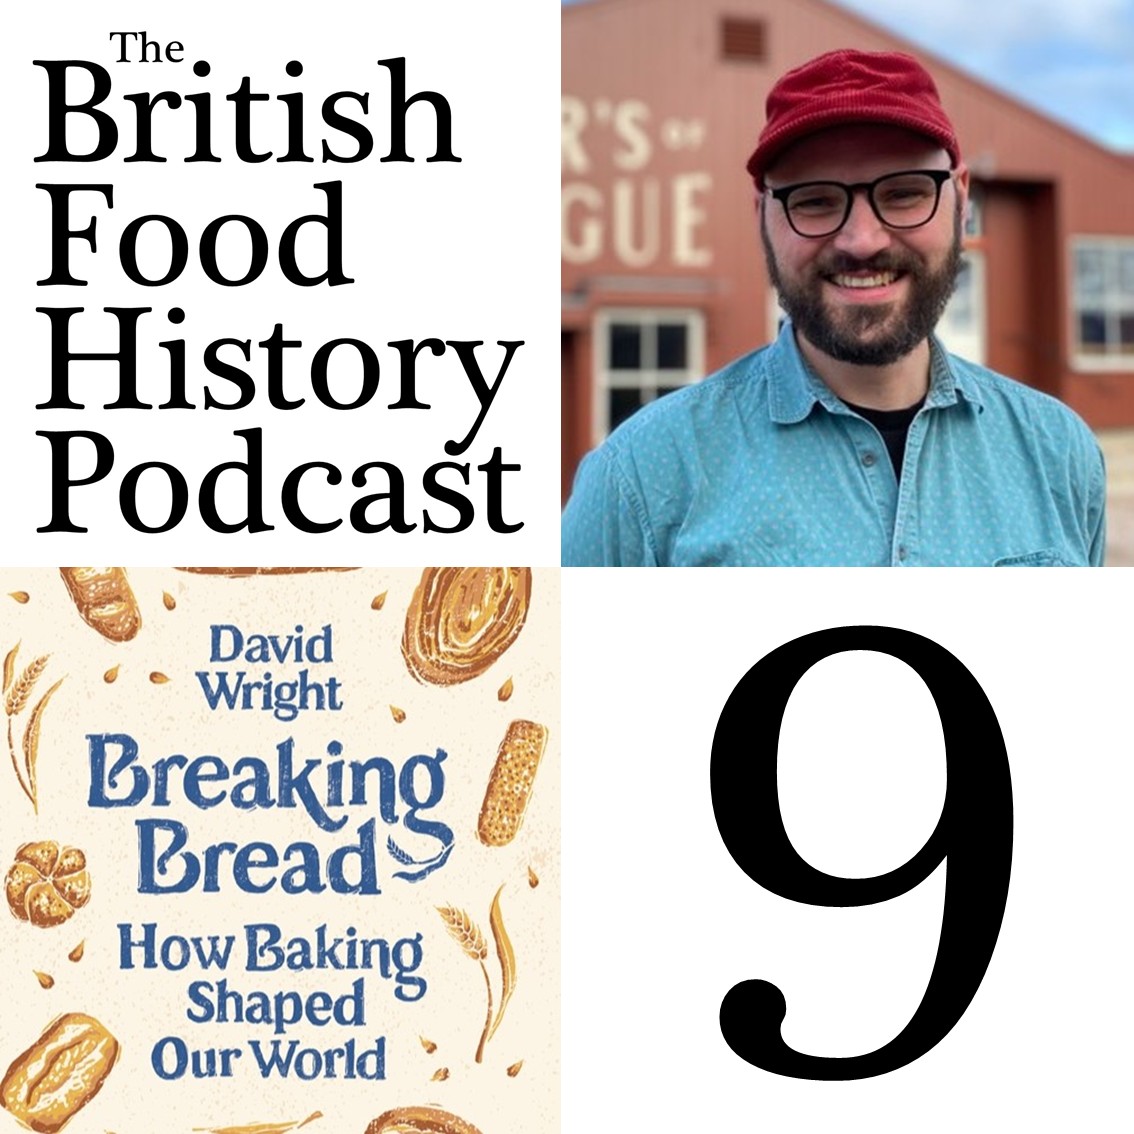
My guest today is third generation baker, writer and teacher David Wright author of the excellent book Breaking Bread: How Baking Shaped our World published by Aurum.
We talk about the social benefits of bread making, milling grain into flour, the anatomy of a grain, roller mills, the Chorleywood process and why gluten can be compared to Arnold Schwarzenegger and Danny DeVito.
Those listening to the secret podcast: you get a little over 15 minutes of bonus material that includes additives that don’t have be named on ingredients lists, flatbreads, the National Loaf, the value of bread and more!
Available on all podcast platforms. If you’re not a podcast person, you can stream the episode via the Spotify embed, below:
Remember: Fruit Pig are sponsoring the 9th season of the podcast and Grant and Matthew are very kindly giving listeners to the podcast a unique special offer 10% off your order until the end of October 2025 – use the offer code Foodhis in the checkout at their online shop, www.fruitpig.co.uk.
If you can, support the podcast and blogs by becoming a £3 monthly subscriber, and unlock lots of premium content, including bonus blog posts and recipes, access to the easter eggs and the secret podcast, or treat me to a one-off virtual pint or coffee: click here.
Don’t forget, there will be postbag episodes in the future, so if you have any questions or queries about today’s episode, or indeed any episode, or have a question about the history of British food please email me at neil@britishfoodhistory.com, or leave a comment below.
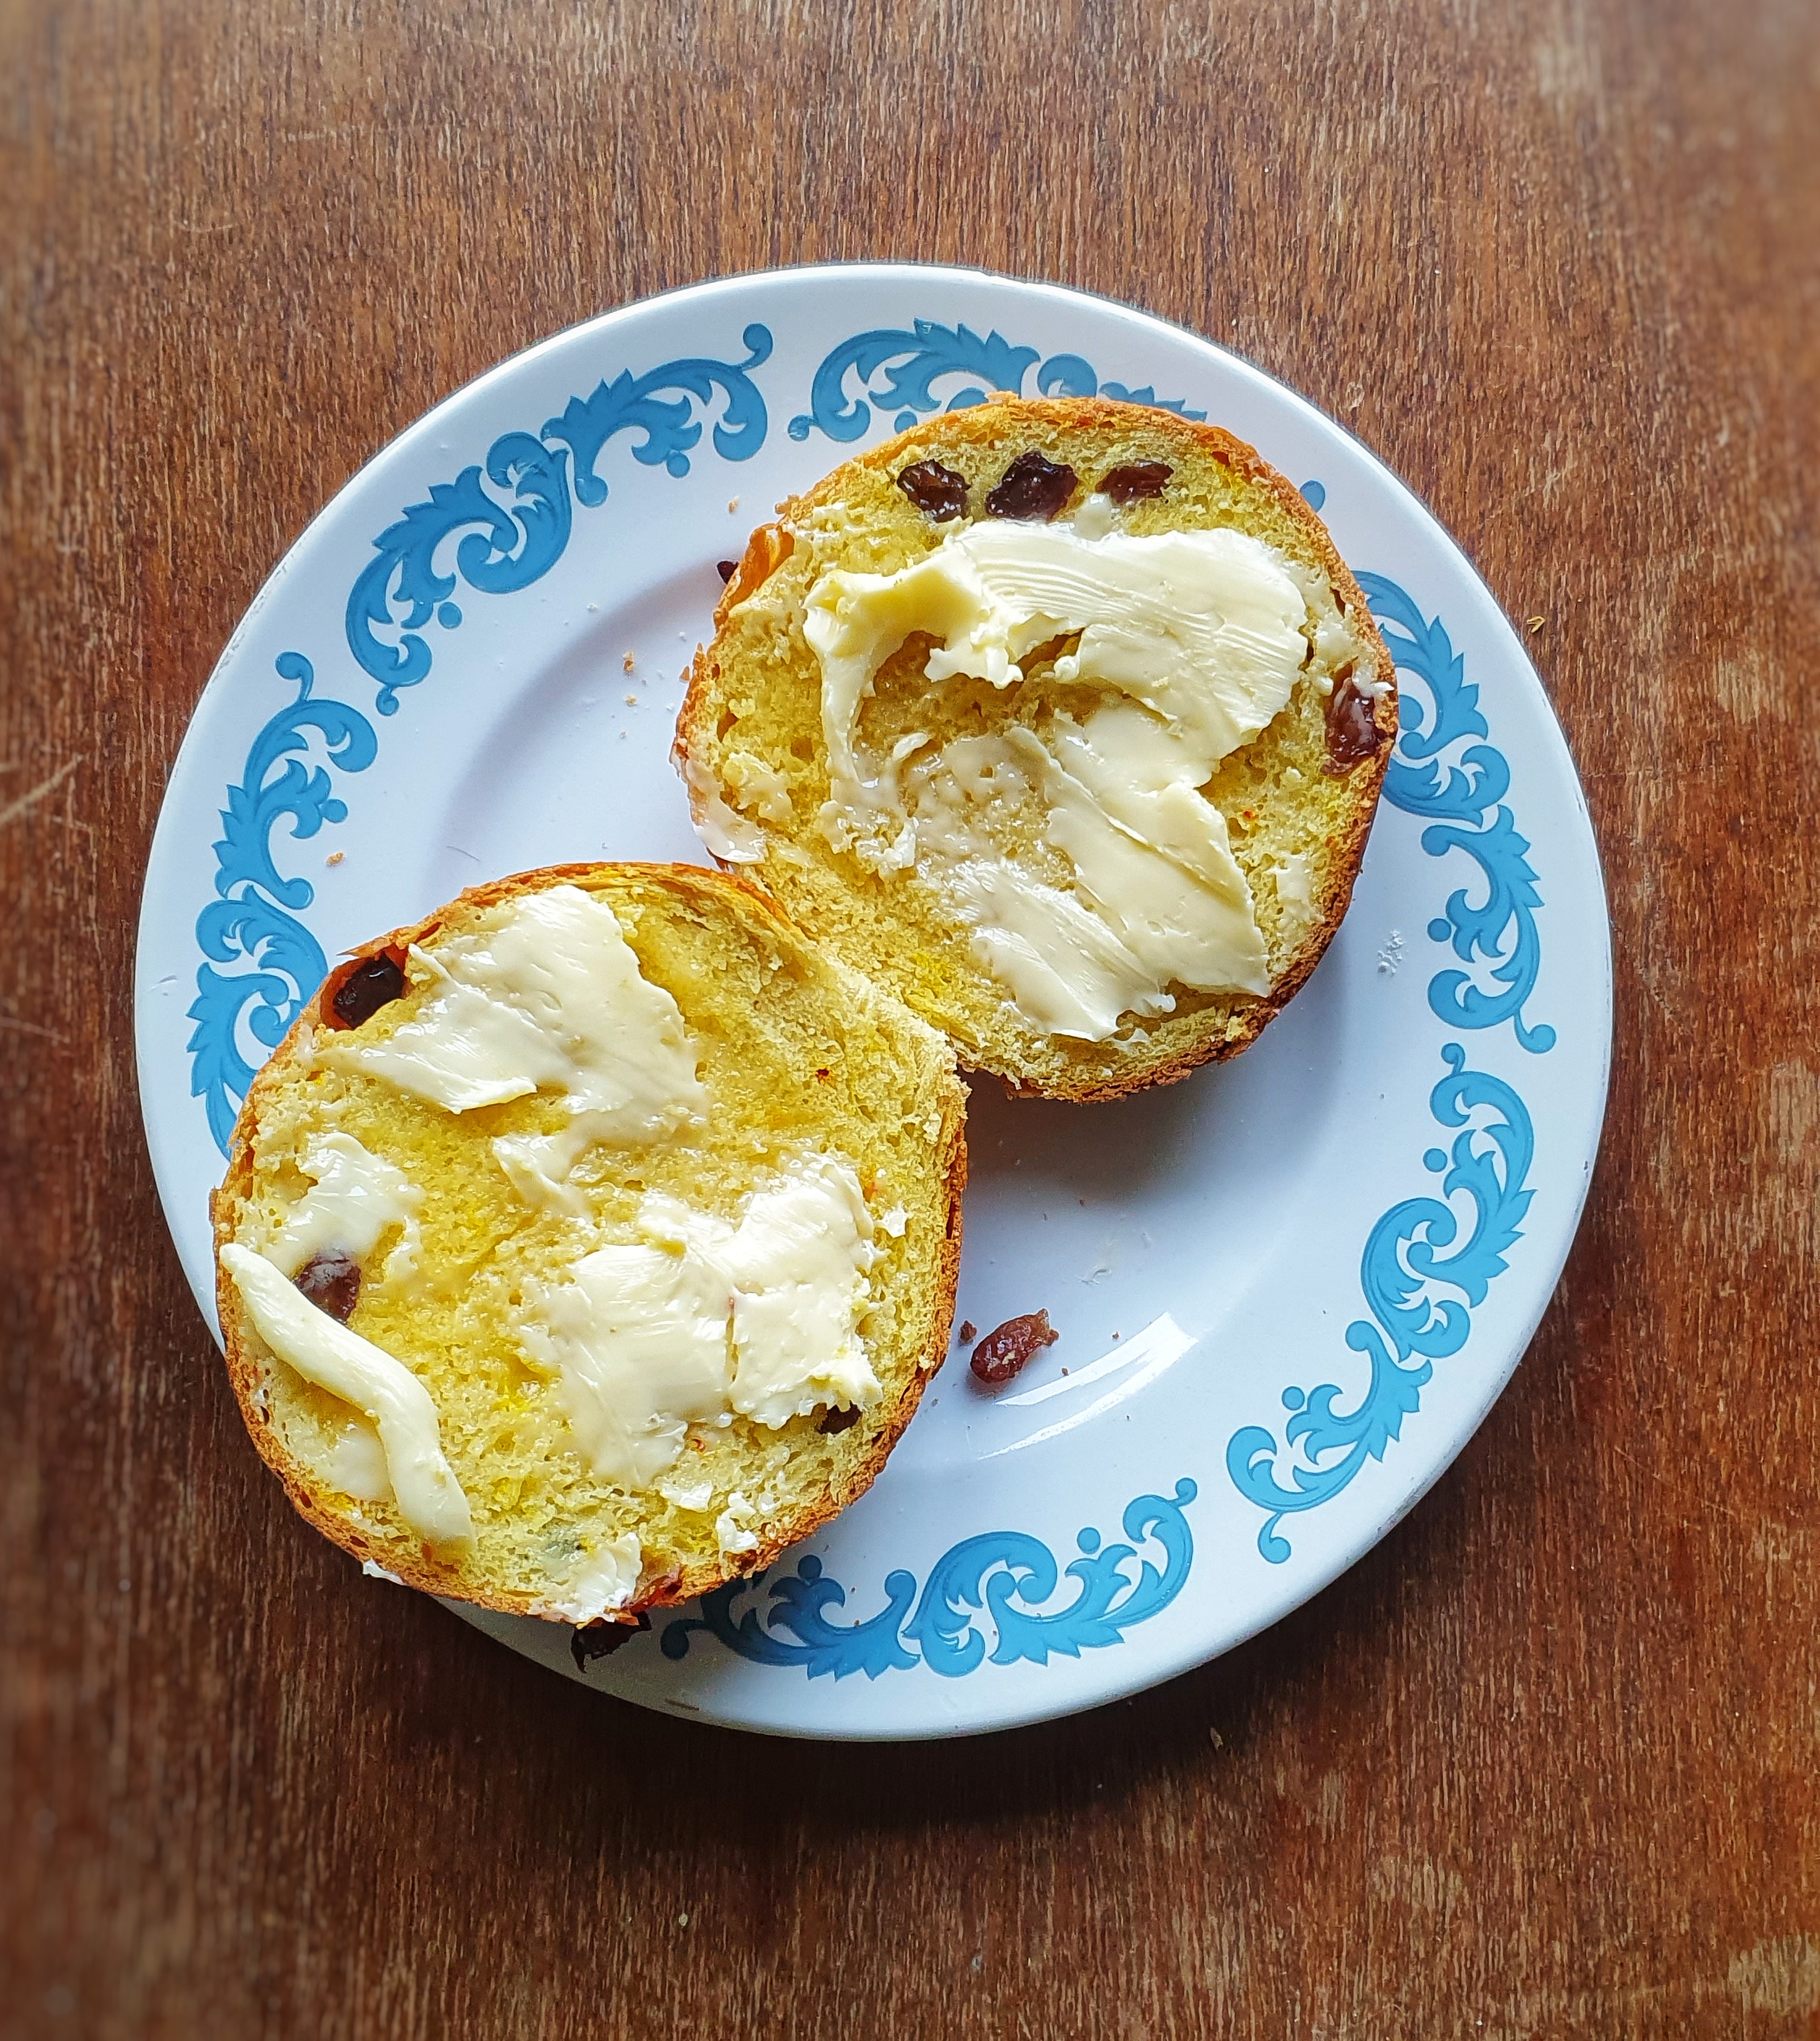
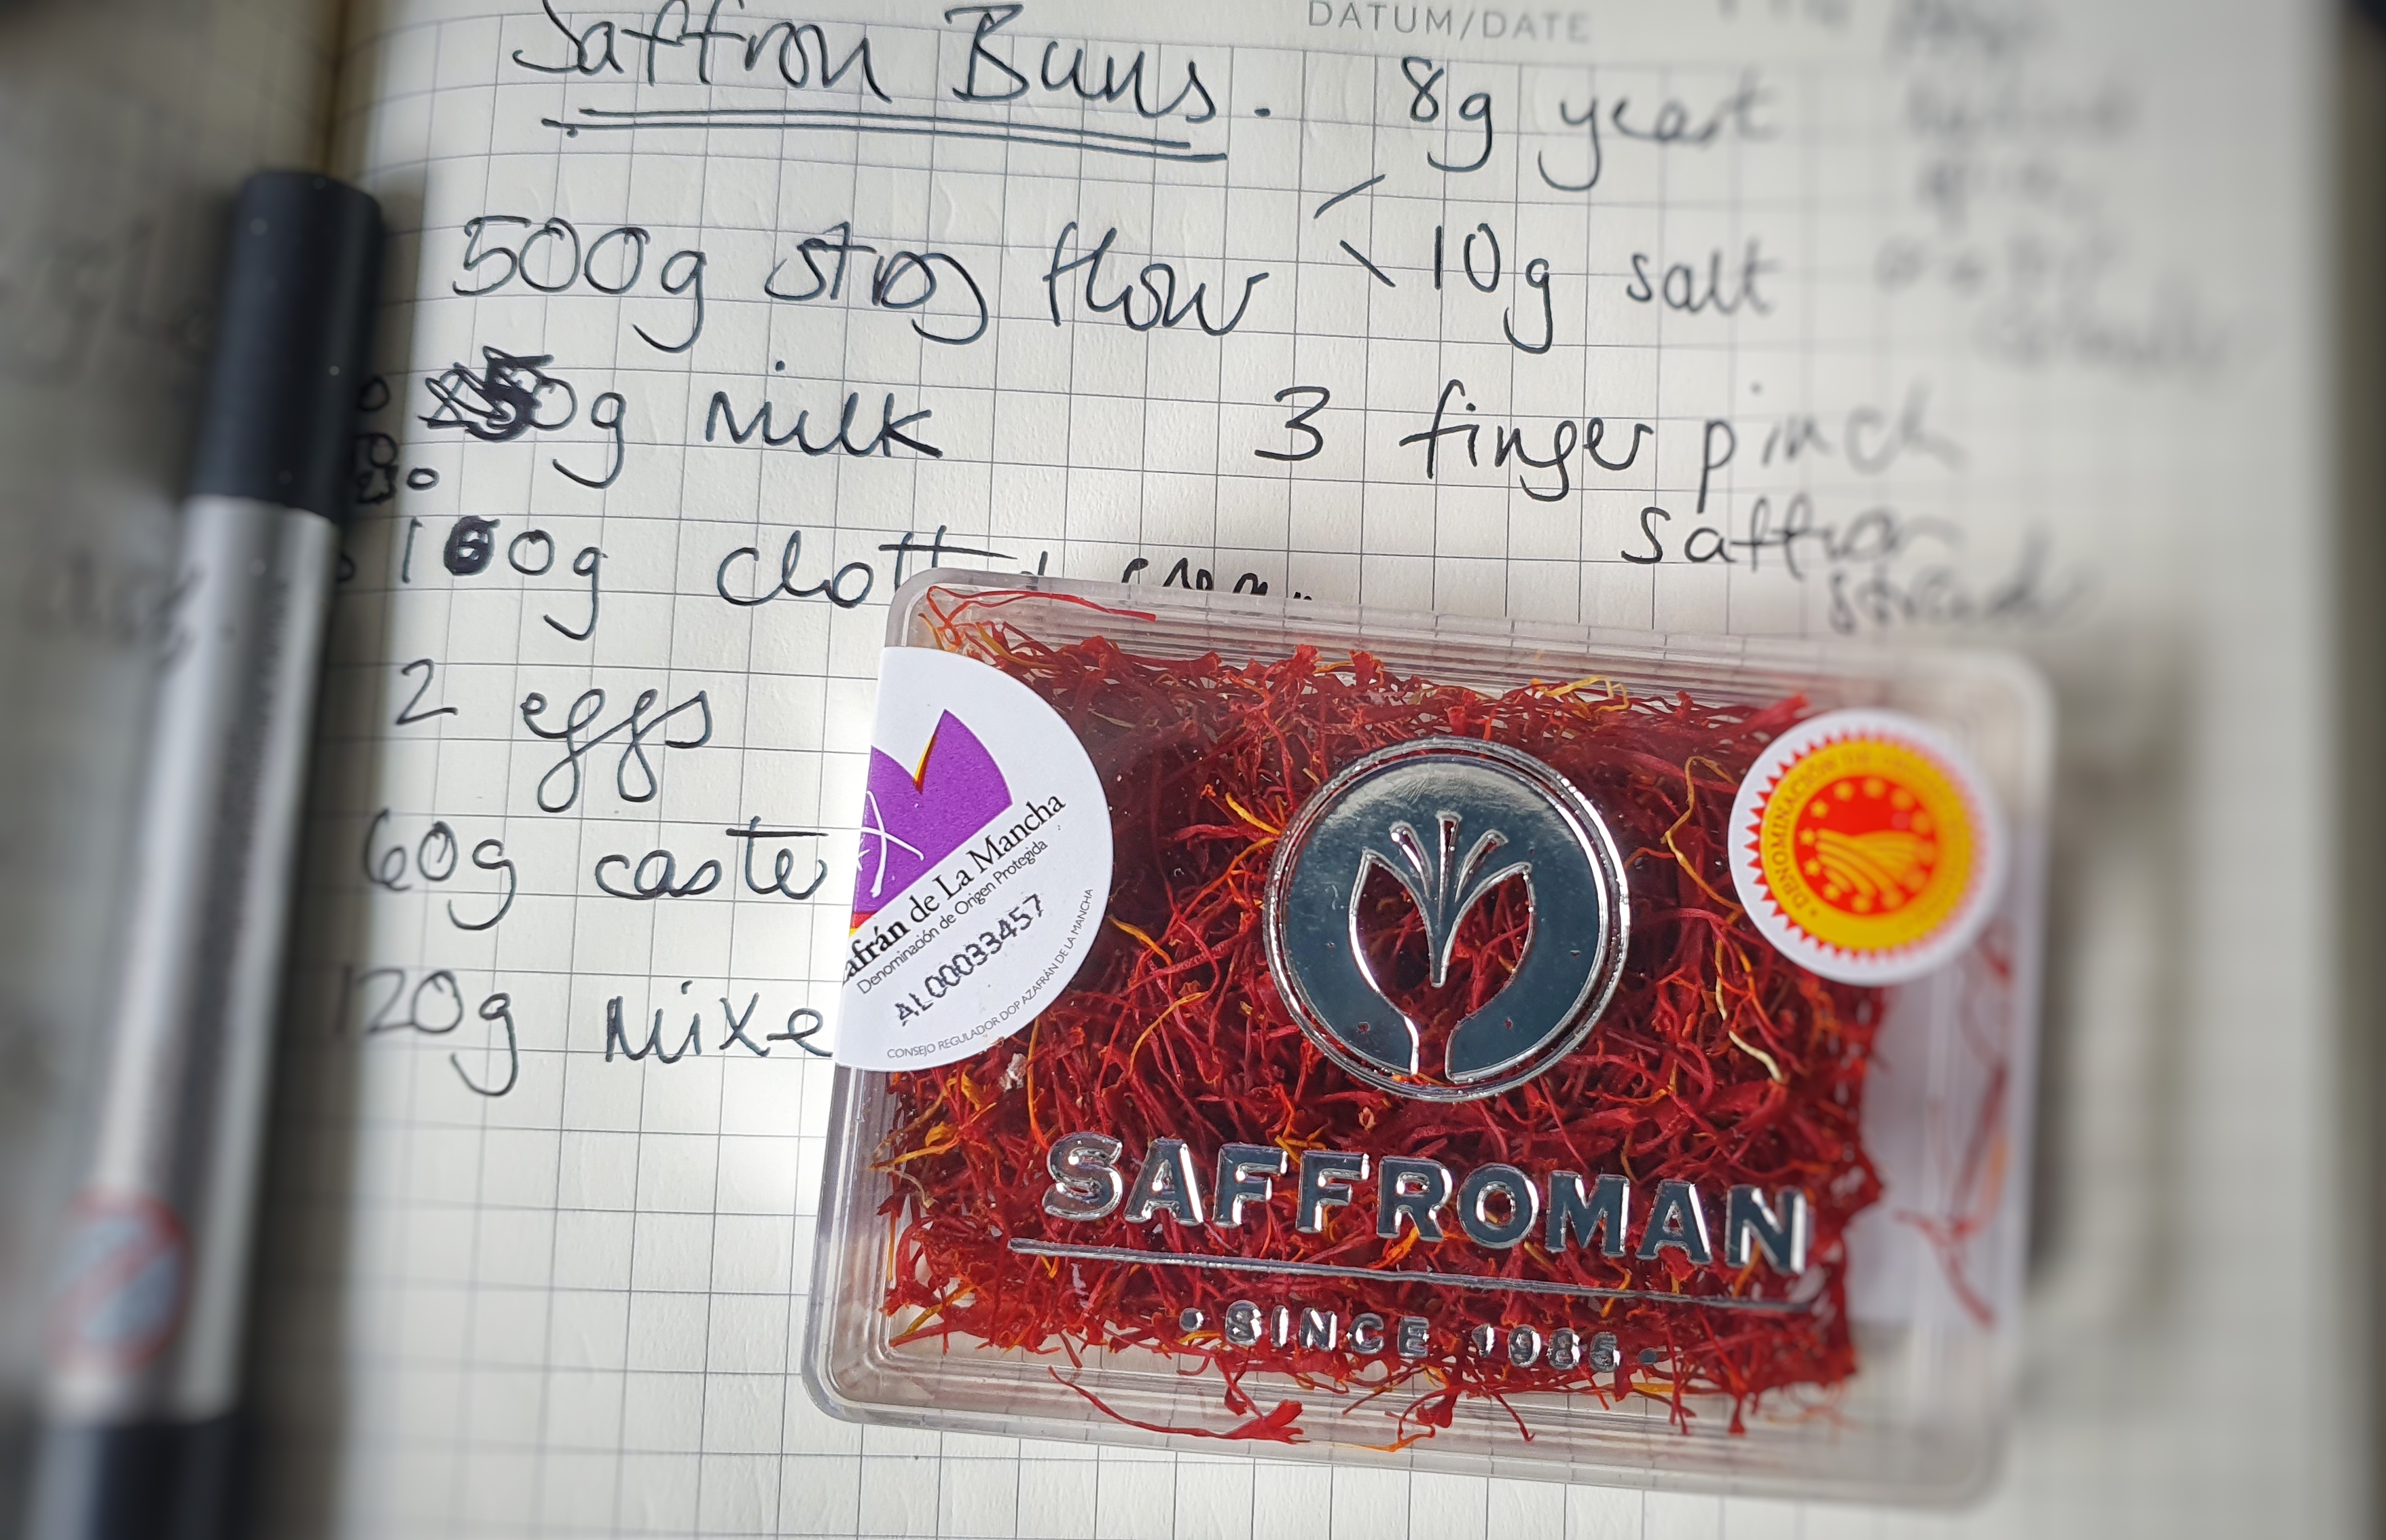
Saffron-scented buns, breads and cakes used to be enjoyed right across England from at least the 17th century. Today, however, they are typically found in bun form and are associated with Cornwall because, from around the 1780s, saffron was only grown in this area and Essex.[1]
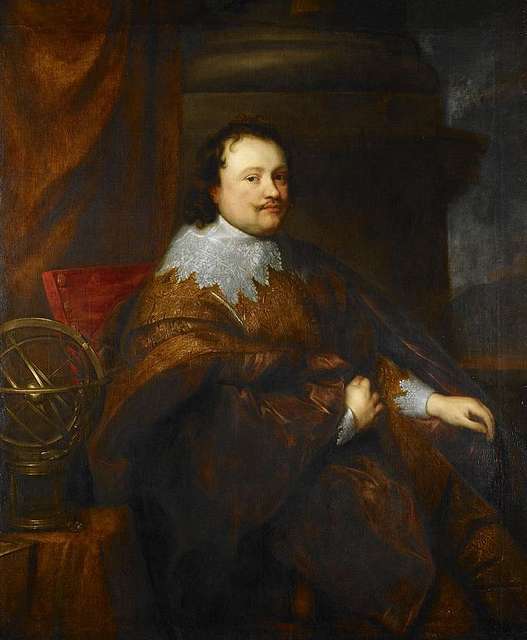
A modern-day saffron bun is a lovely egg yolk yellow and has that lovely, unique earthy flavour associated with the spice. Other ingredients usually include mixed spice, dried fruit and a little sugar, and e enriched with a good amount of egg and clotted cream, though as Sam Bilton points out in Fool’s Gold: A History of British Saffron, Sarah Harrison’s 18th-century recipe contains no fruit, and the only spice used aside from saffron is coriander seed.[2] Early recipes are usually for single, large cakes such as Sir Kenelm Digby’s ‘excellent cake’, which is baked in a hoop and requires ‘a Peck of fine flower’. It’s enriched with (amongst other things) ‘one pint of Sack…half a pint of Rose-water [and] half a quarter of an ounce of Saffron.’ It is then iced with sugar and egg whites flavoured again with rose water.[3] Rosewater seems to have been a key ingredient because it’s still used a century later in John Farley’s London Art of Cookery (1783) and again in Cassell’s Dictionary of Food a century after that.[4] Perhaps it should be brought back?
Sir Kenhelm Digby’s ‘excellent’ saffron cake also contained rose water
Because of their expensive and rich ingredients, saffron buns are associated with celebrations and feast days. On Good Friday (a day associated with spiced buns), they were cut with a cross and brushed with a saffron wash and eaten with clotted cream.[5] At Christmastime, they were made into miniature cottage loaf shapes. They were also a special taste of home: folk of Newquay, when putting together Christmas food parcels to be sent to fighters during the Great War, were sure to include saffron cakes and buns.[6]
If you want to know more about the history of baking, check out my book Knead to Know, published by Icon Books.
According to Cassell, aside from providing colour and flavour, saffron makes buns or cakes ‘wholesome and palatable’, aids digestion and will ‘drive out intestinal worms’ to boot, and suggests swapping the liquid used in your favourite bun or cake recipe for saffron-steeped hot water that has been allowed to cool to blood heat.[7]
Saffron is the most expensive spice in the world by weight, and there was (and still is) therefore pressure for food manufacturers to use an adulterant such as yellow food colouring or turmeric to offset costs. Real saffron buns are appropriately (but proportionally) more expensive than your regular fruit bun, and according to Elizabeth David, the strands are not strained from their soaking water as one might expect, ‘probably as a visible sign that true saffron has been used.’[8]
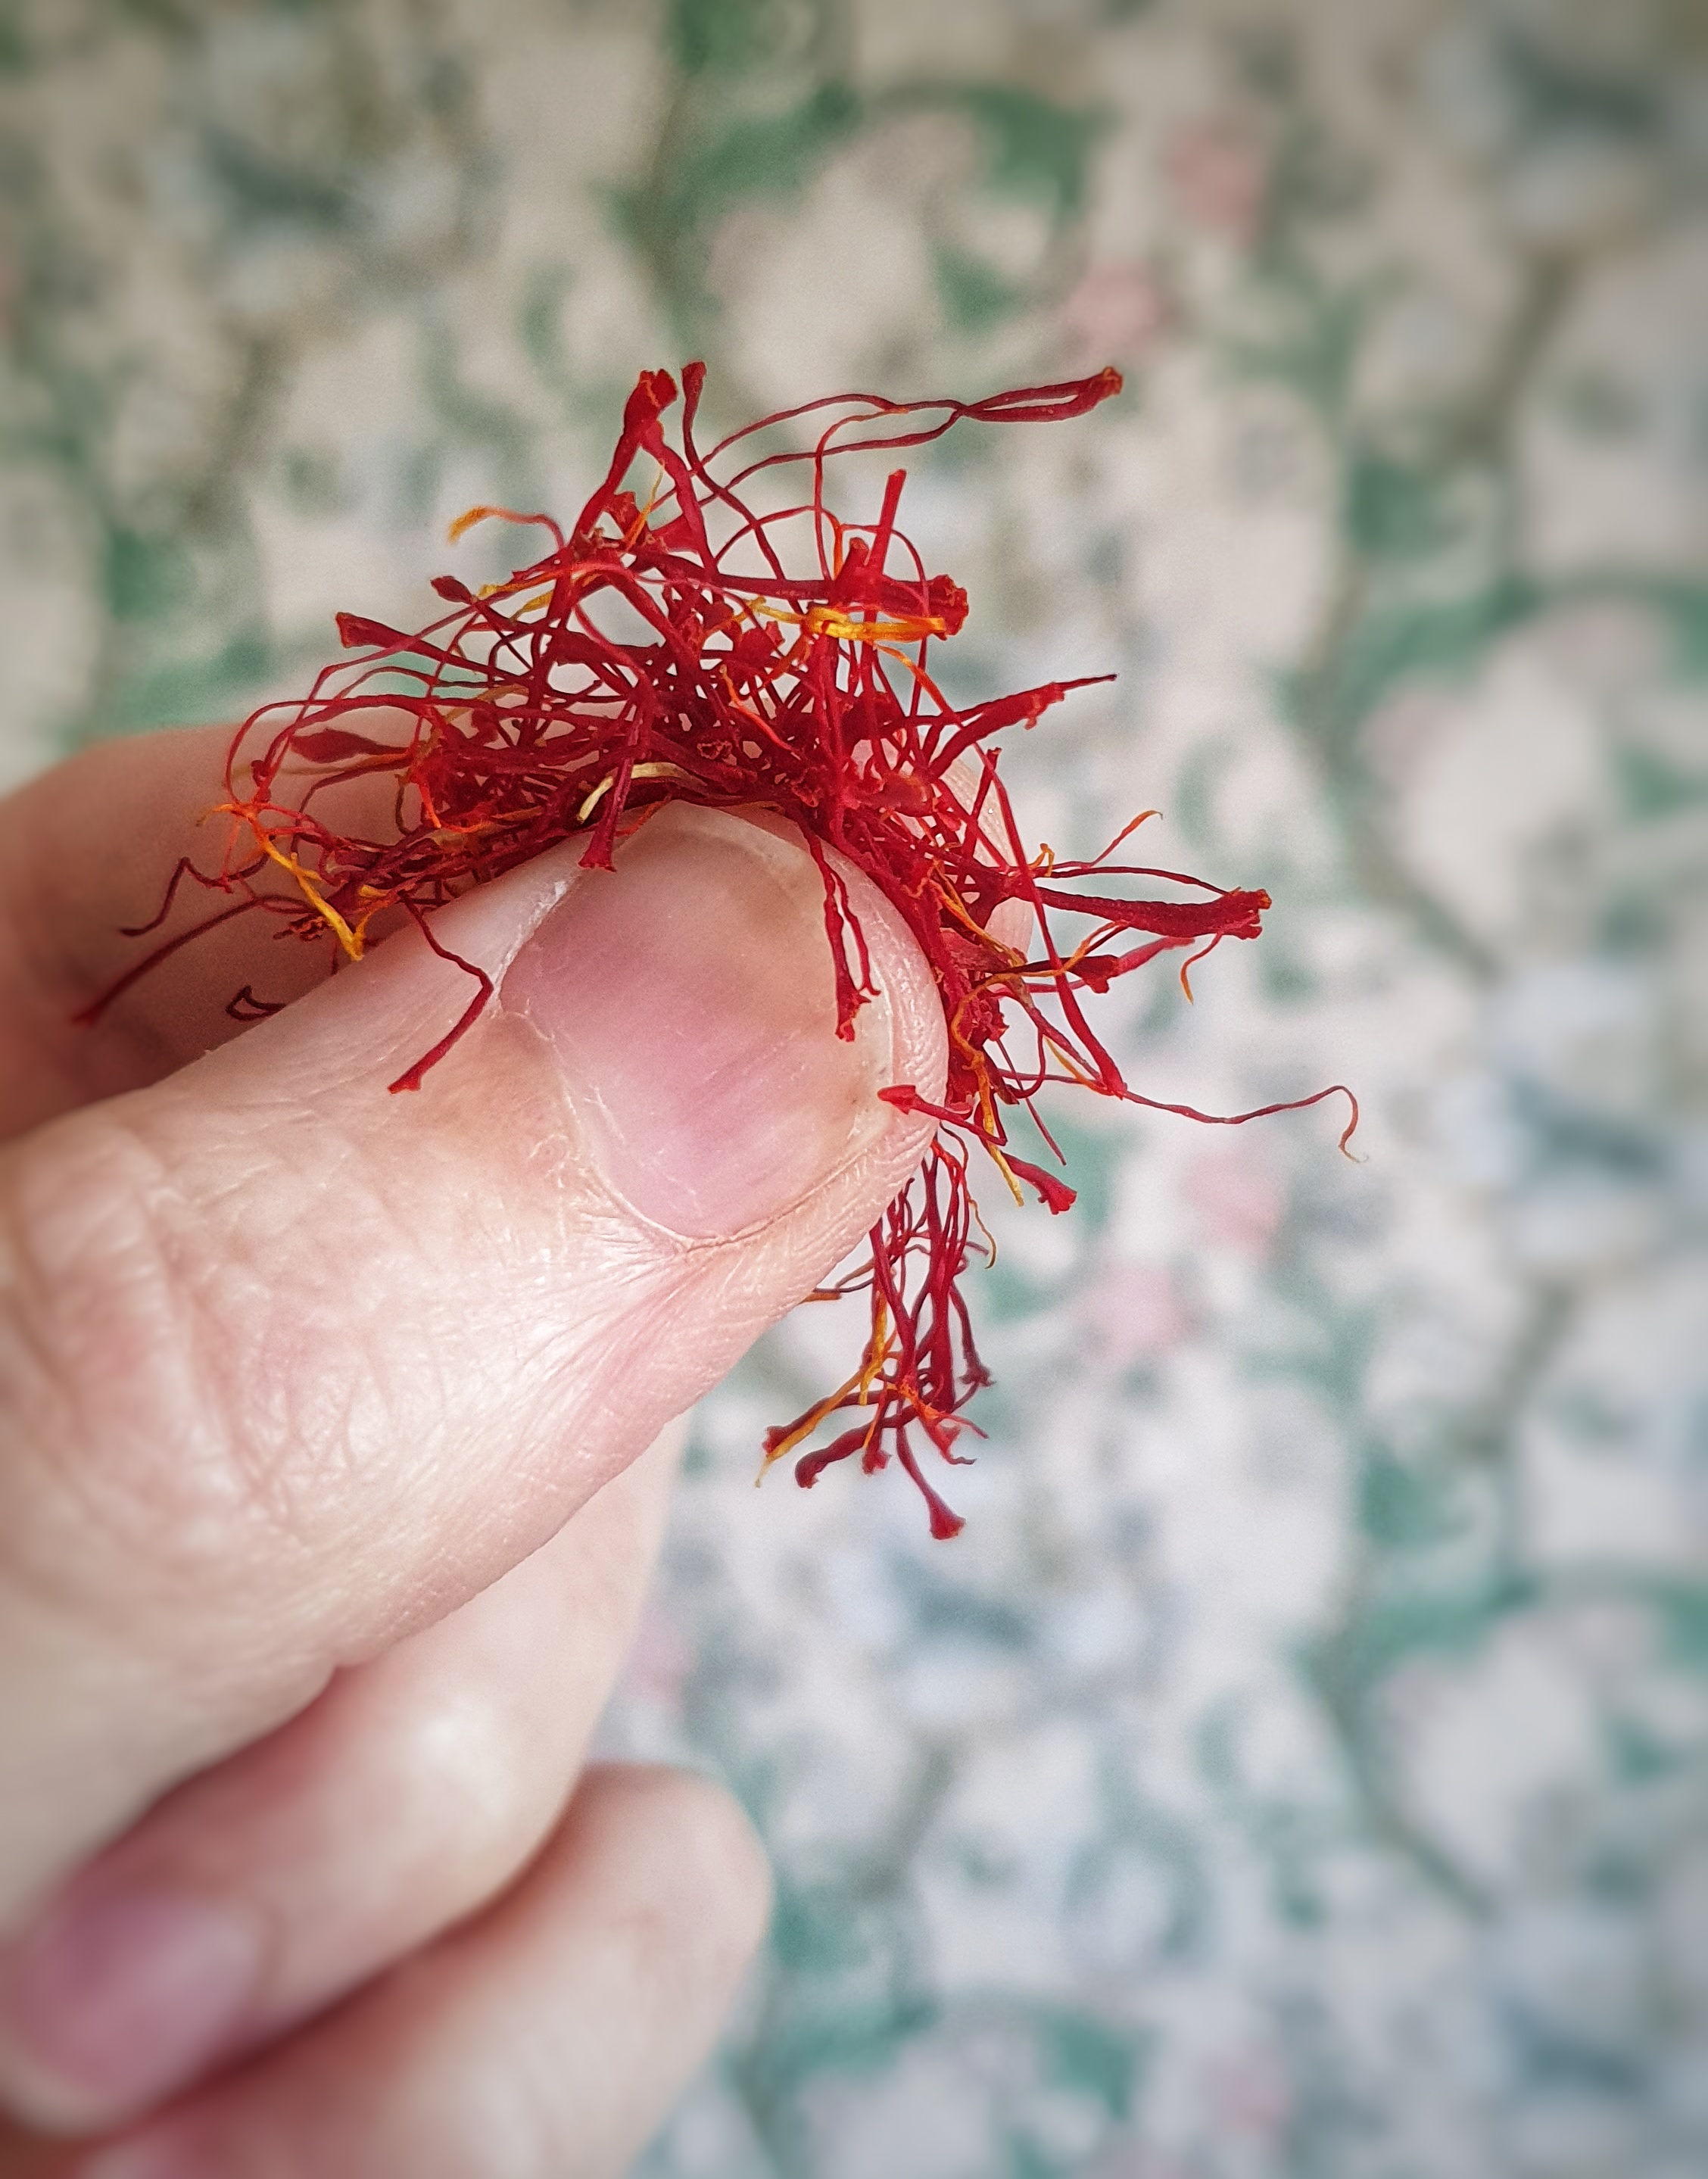
But how much saffron to use? Amounts can vary greatly, and Sam Bilton wrestles with this question: she spotted that Elizabeth David complained about people using too much saffron in their cooking – true, it can taste soapy when over-applied – but then asks for four pinches in her recipe for buns![9] Of course, the answer depends upon a few factors: the quality of your saffron, how long it has been sitting in the spice rack, and how much you enjoy the flavour of saffron. My recipe uses ‘a good 2-finger pinch’.
This is what ‘a good 2-finger pinch’ looks like
If you want to know more about the history of saffron in Britain, have a listen to this episode of The British Food History Podcast with guest Sam Bilton:
If you like the blogs and podcast I produce and would to start a £3 monthly subscription, or would like to treat me to virtual coffee or pint: follow this link for more information.Thank you.
Recipe
Makes 12 buns.
230 ml full-fat milk, plus extra for brushing.
A good 2-finger pinch of saffron
500 g strong white bread flour, plus extra for rolling
120 g mixed dried fruit (currants, raisins and sultanas)
Pour the milk into a small saucepan and bring to scalding point. Check to see if a skin has formed on the milk’s surface, if so, remove it before adding the saffron.[10] Whisk in the saffron strands and let the milk cool to ‘blood heat’ (about 40°C).
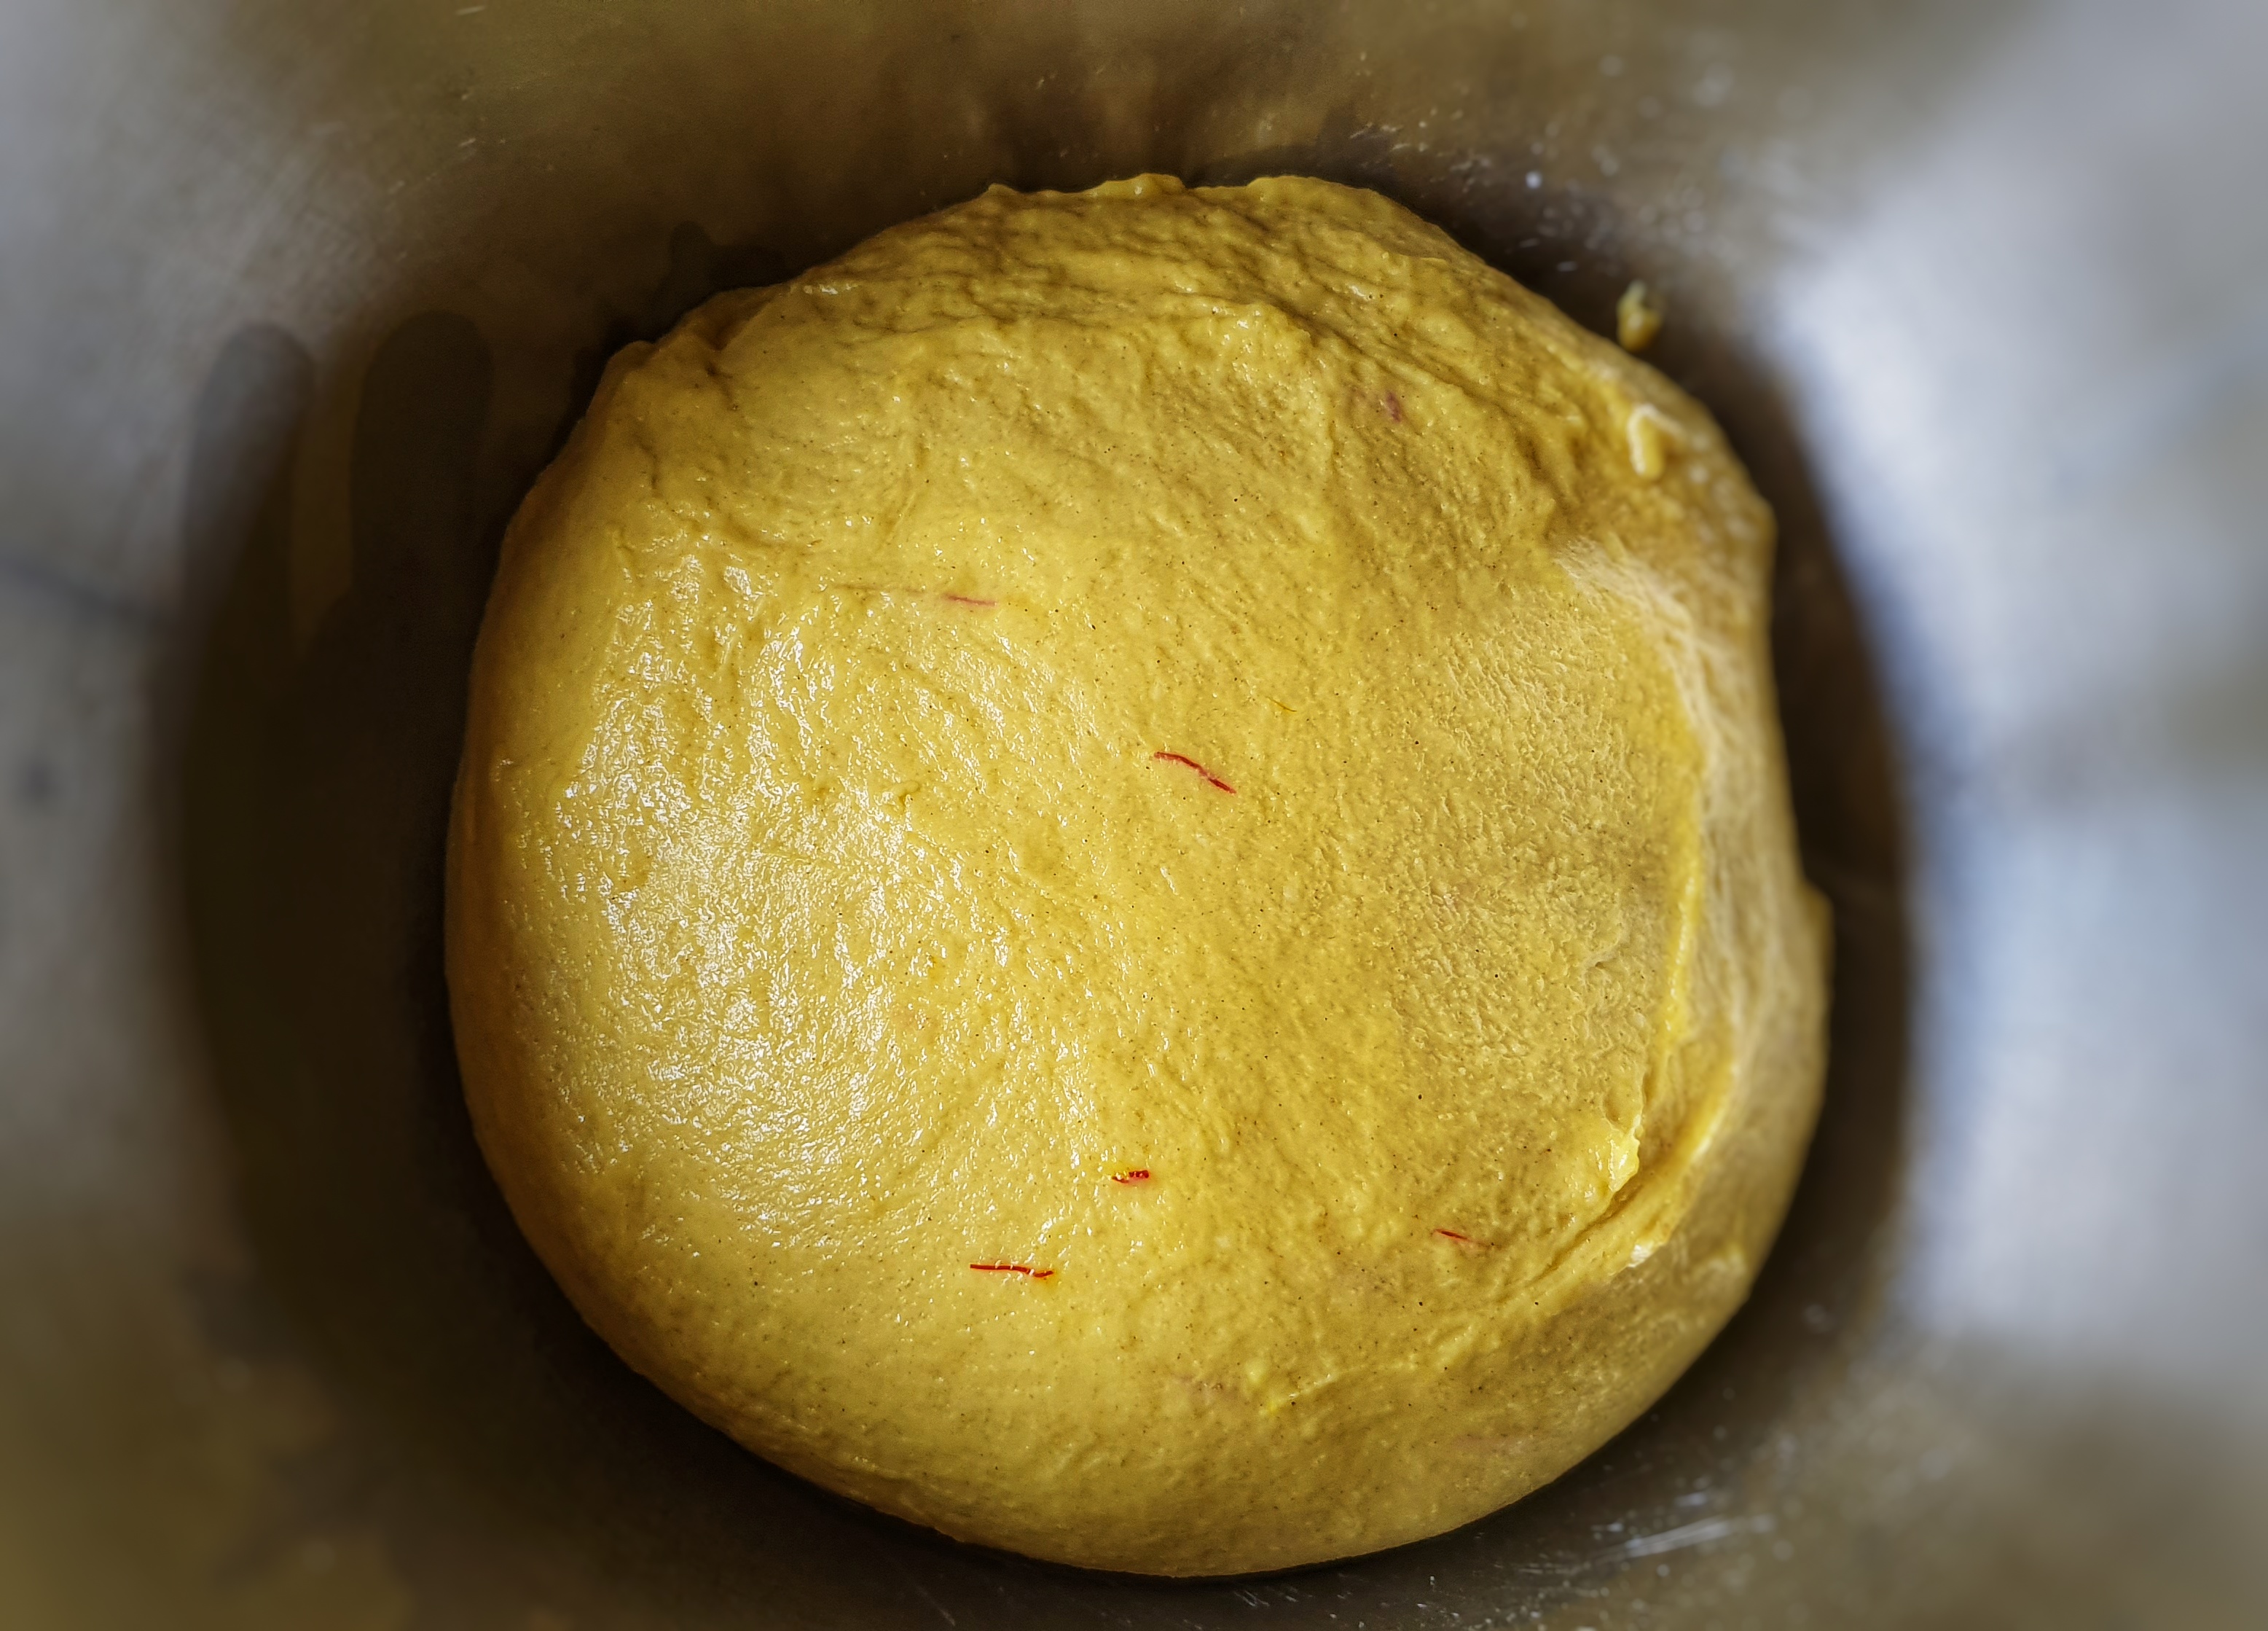
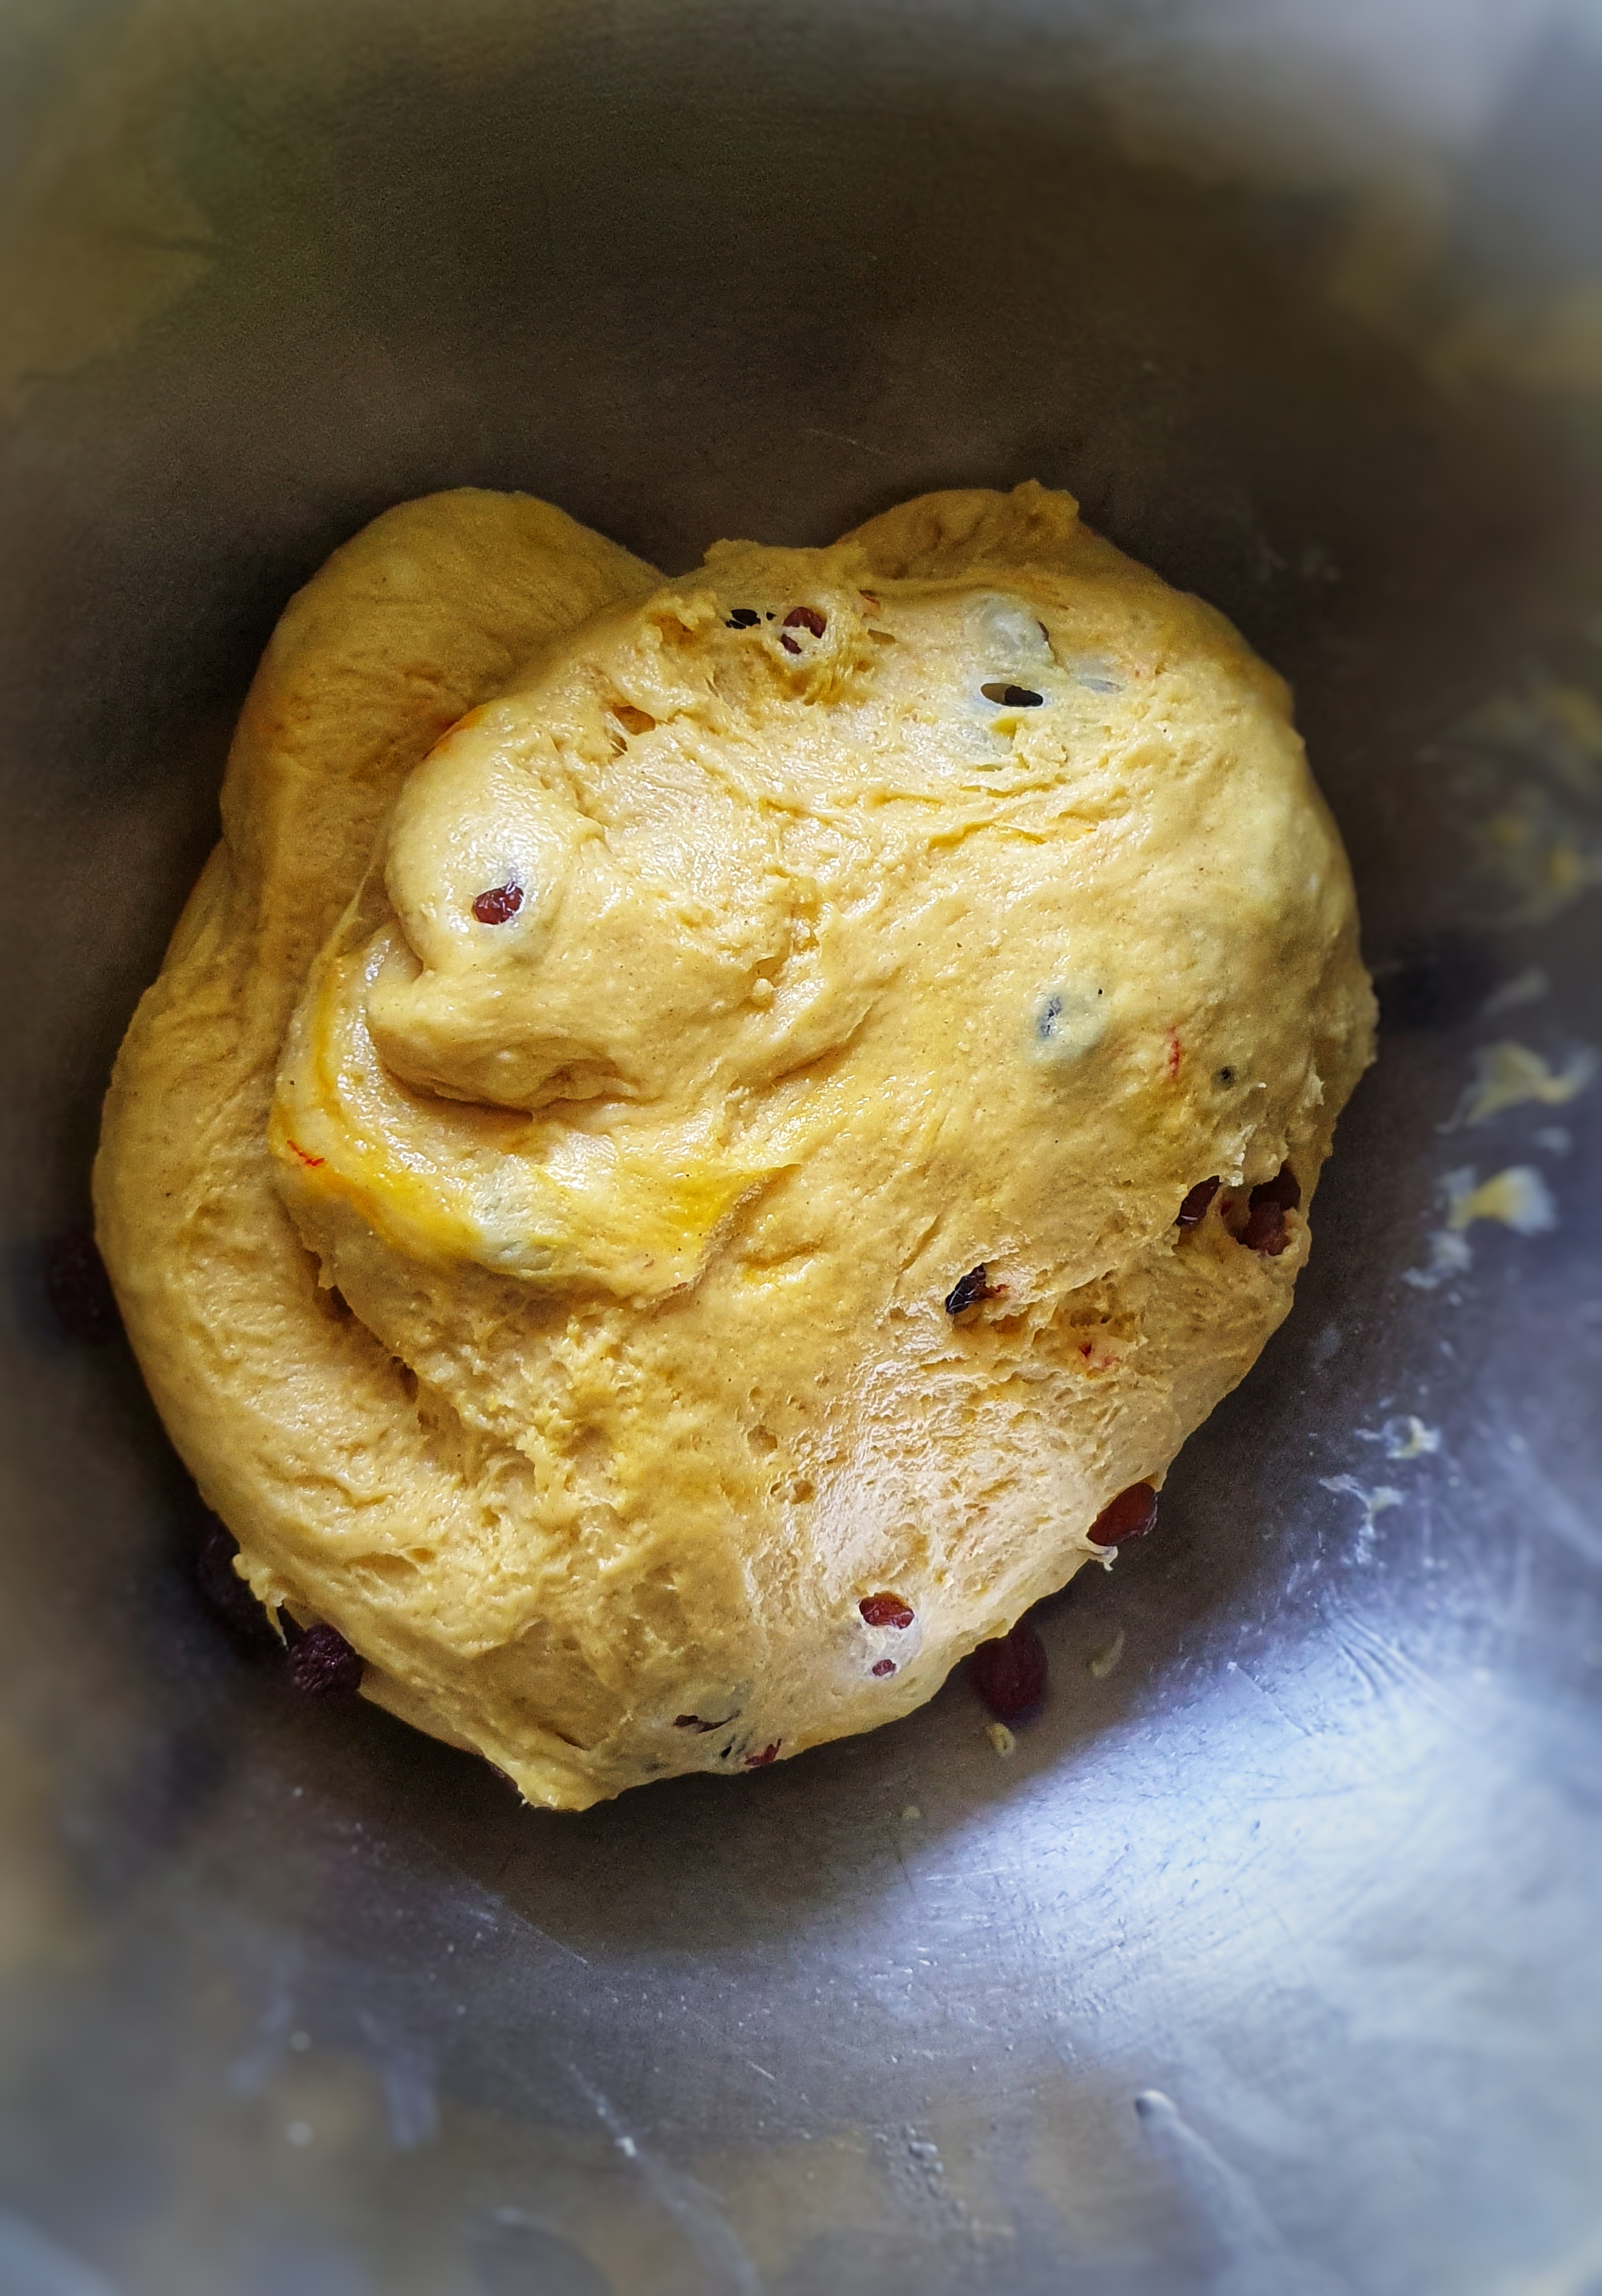
Mix the flour, yeast, salt, spice/s and sugar in the bowl of a tabletop mixer, make a well in the centre and add the eggs, clotted cream and saffron-infused milk. Attach a kneading hook, mix to combine on a slow speed and then turn up the speed a couple of notches and knead for around 6 minutes, until the mixture is smooth and elastic – it will still be a little sticky.
Add a little oil to a bowl and with oiled hands, gather up your dough into a ball and sit it in the bowl. Cover with cling film or a damp, clean tea towel until it doubles in size. Mine took 2 hours.
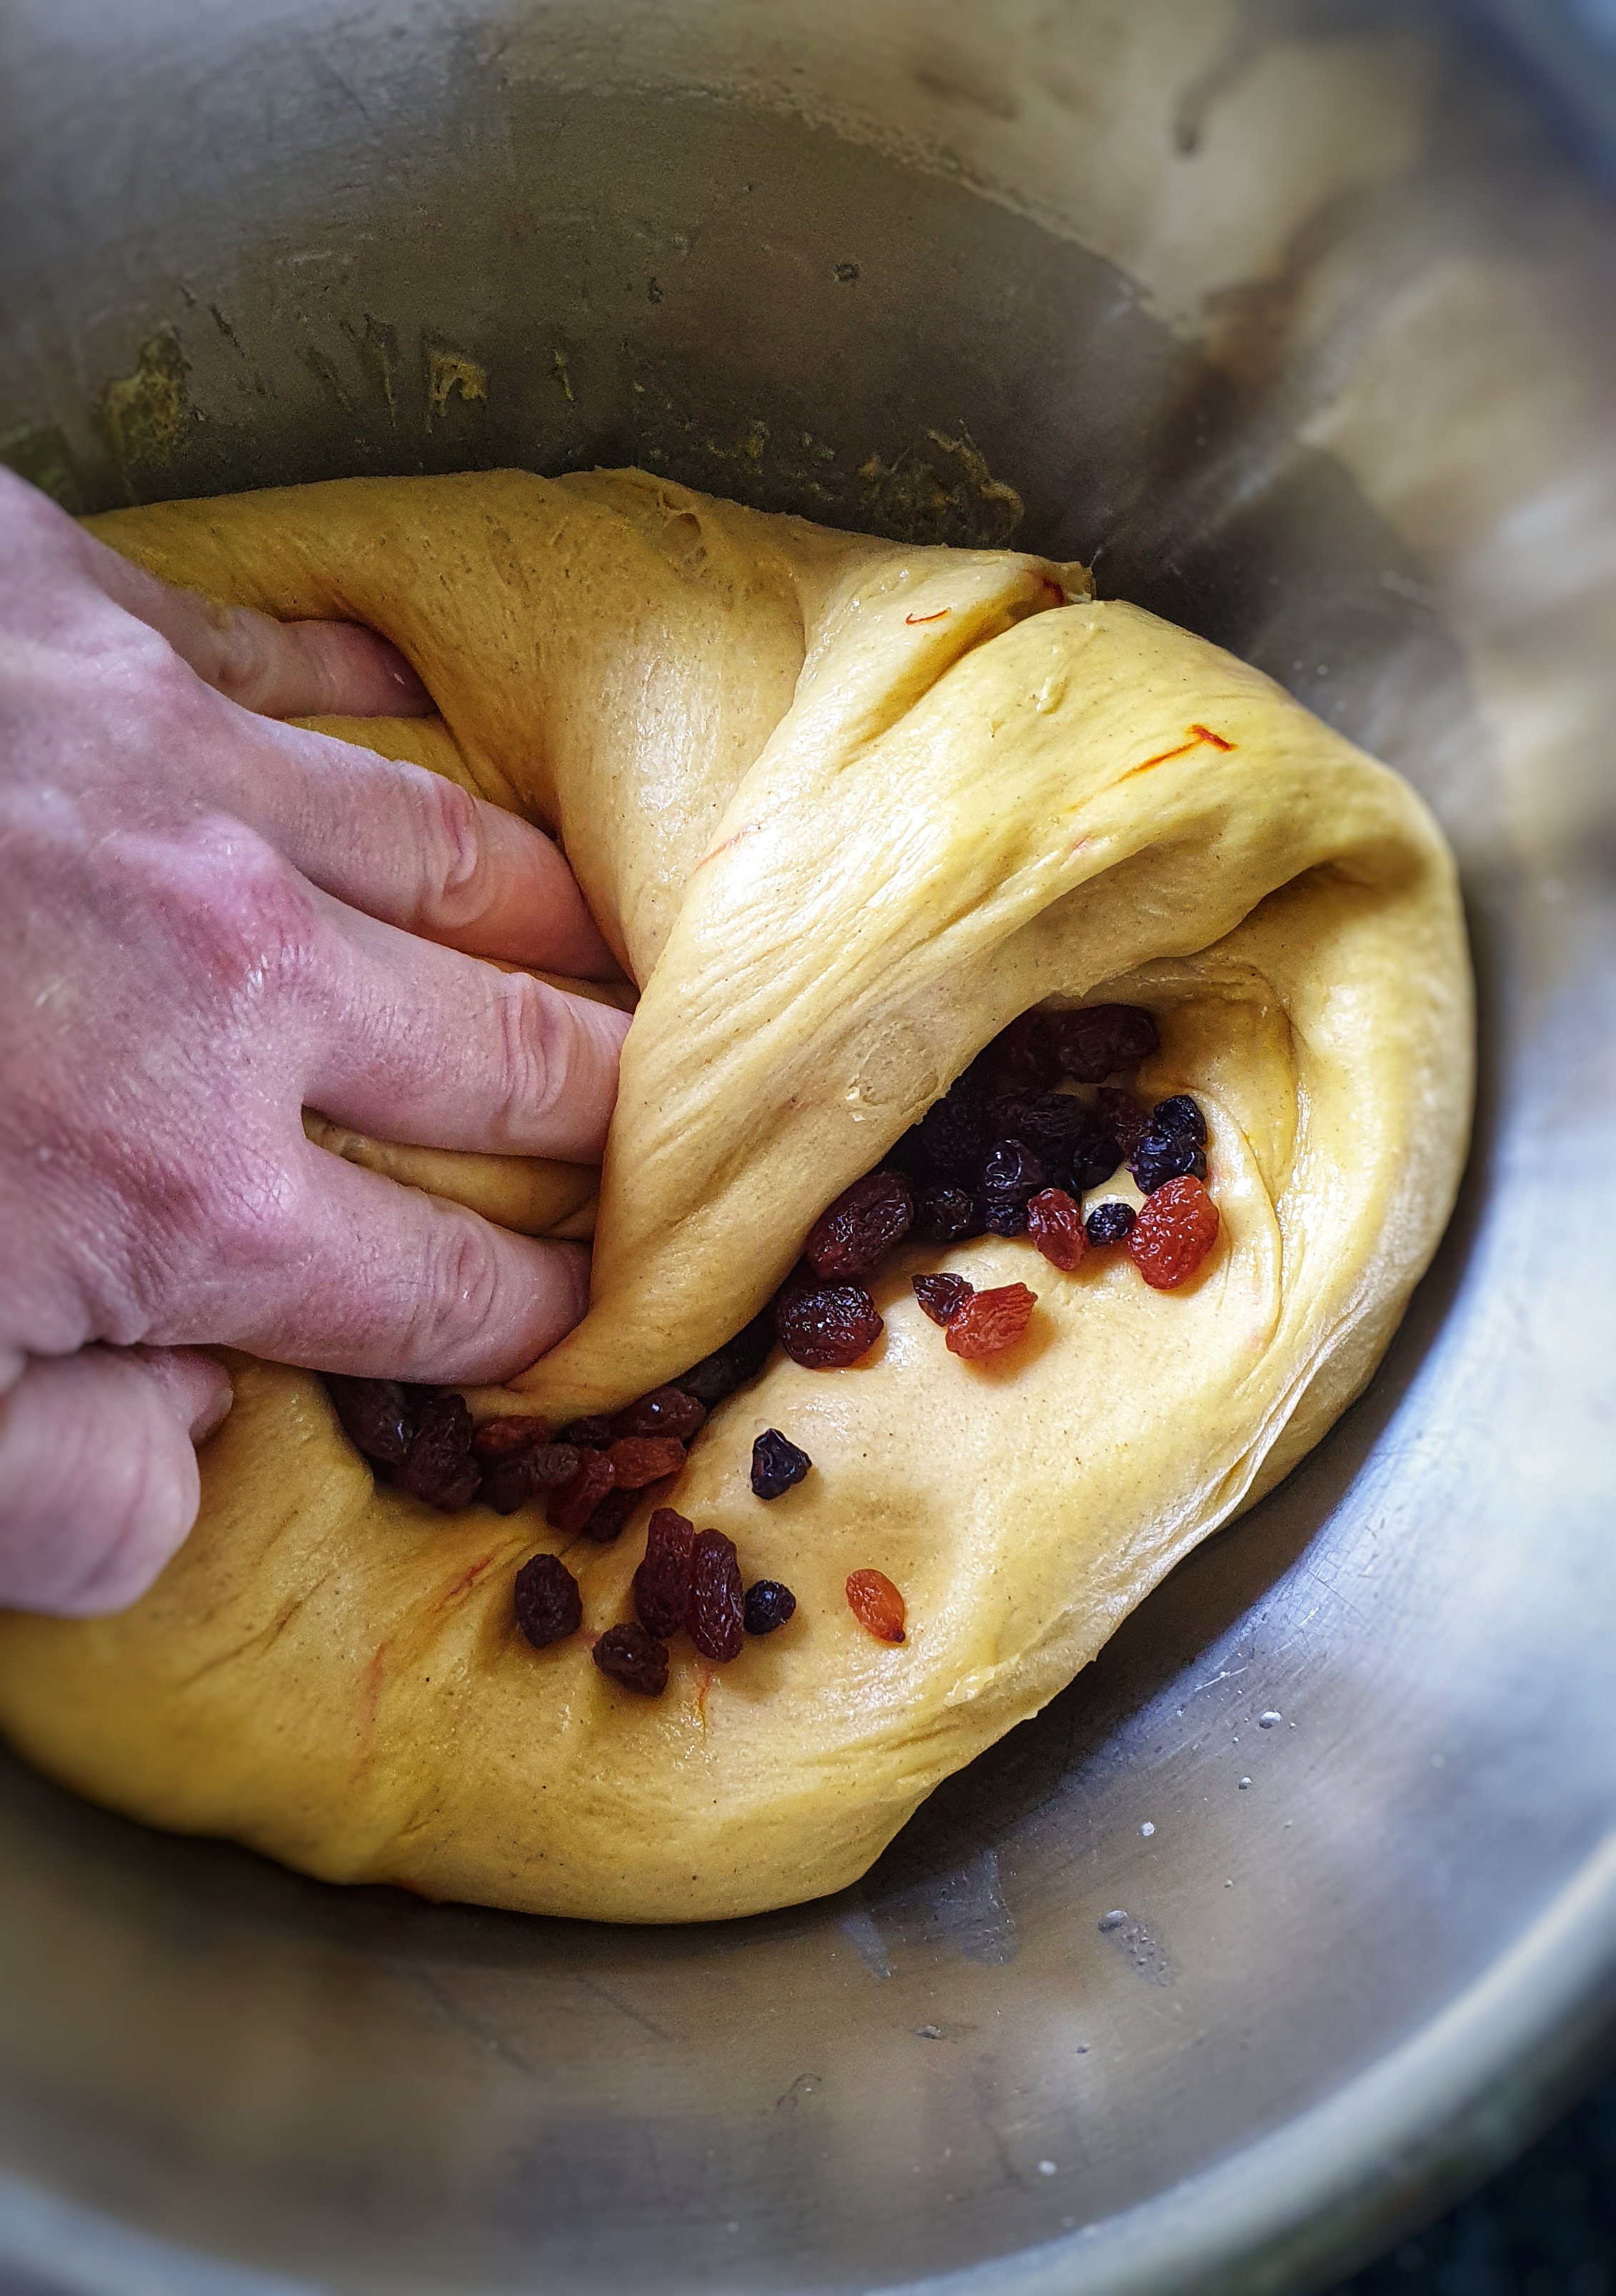
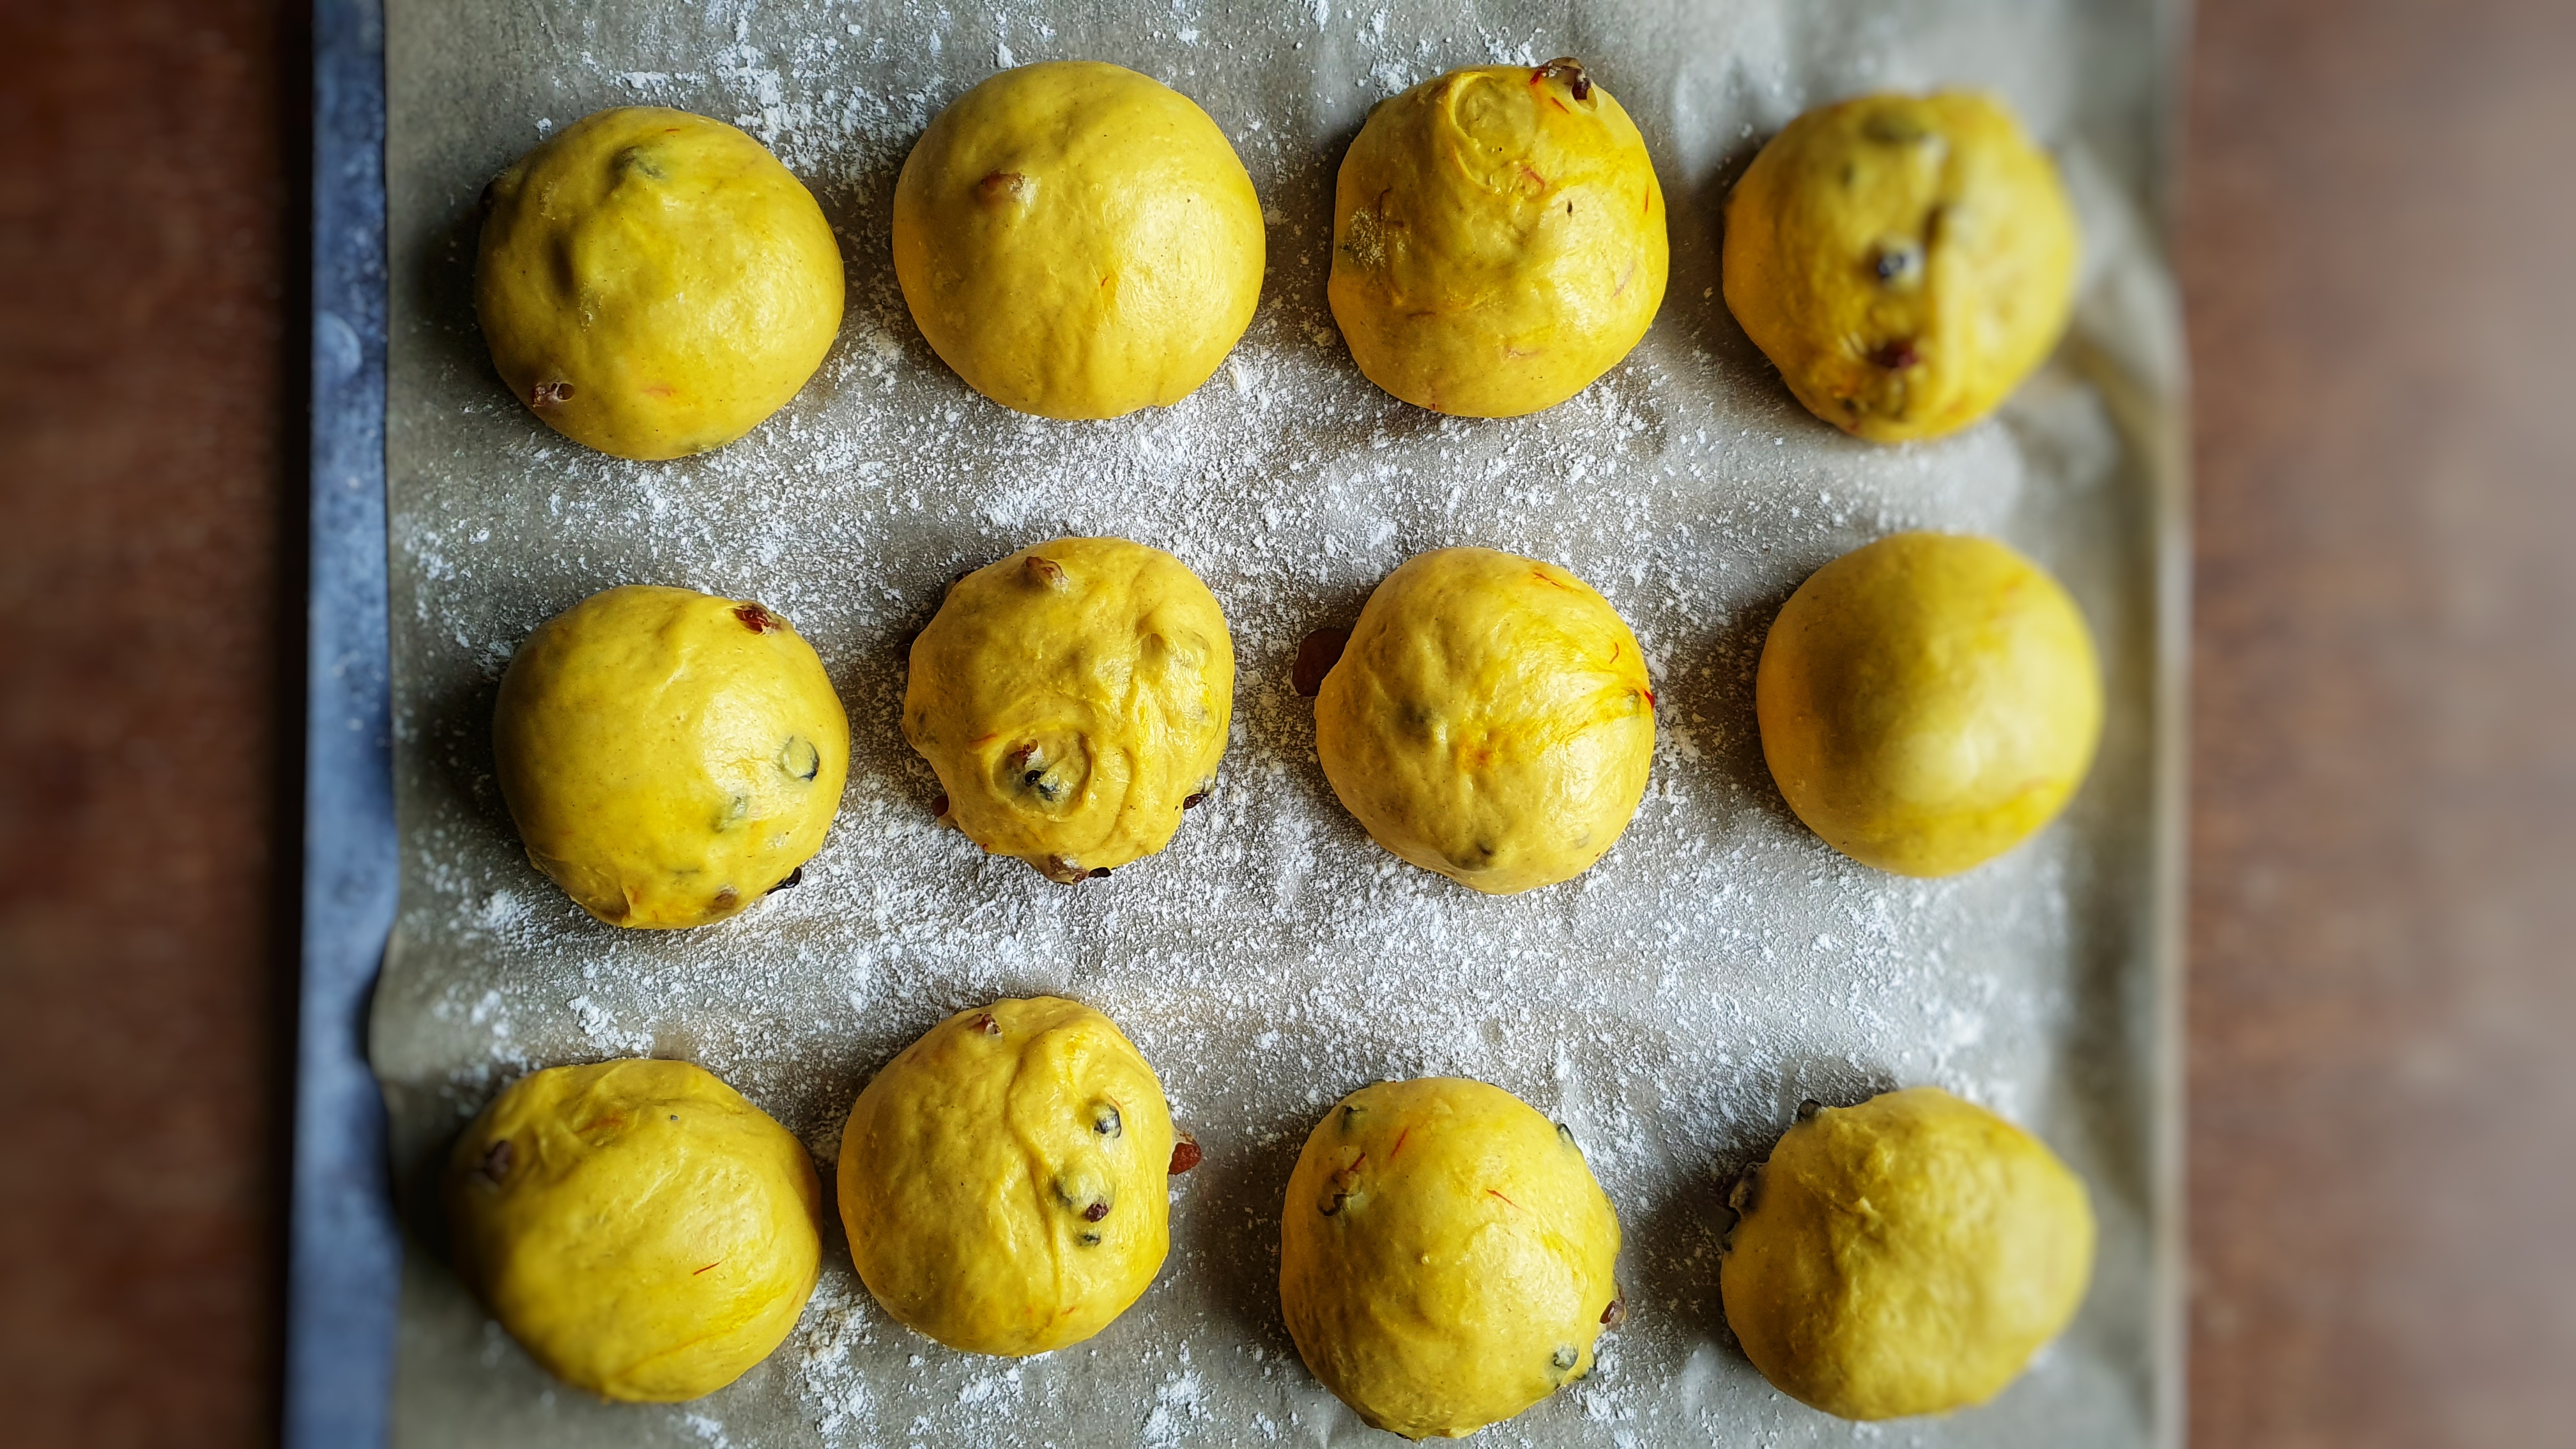
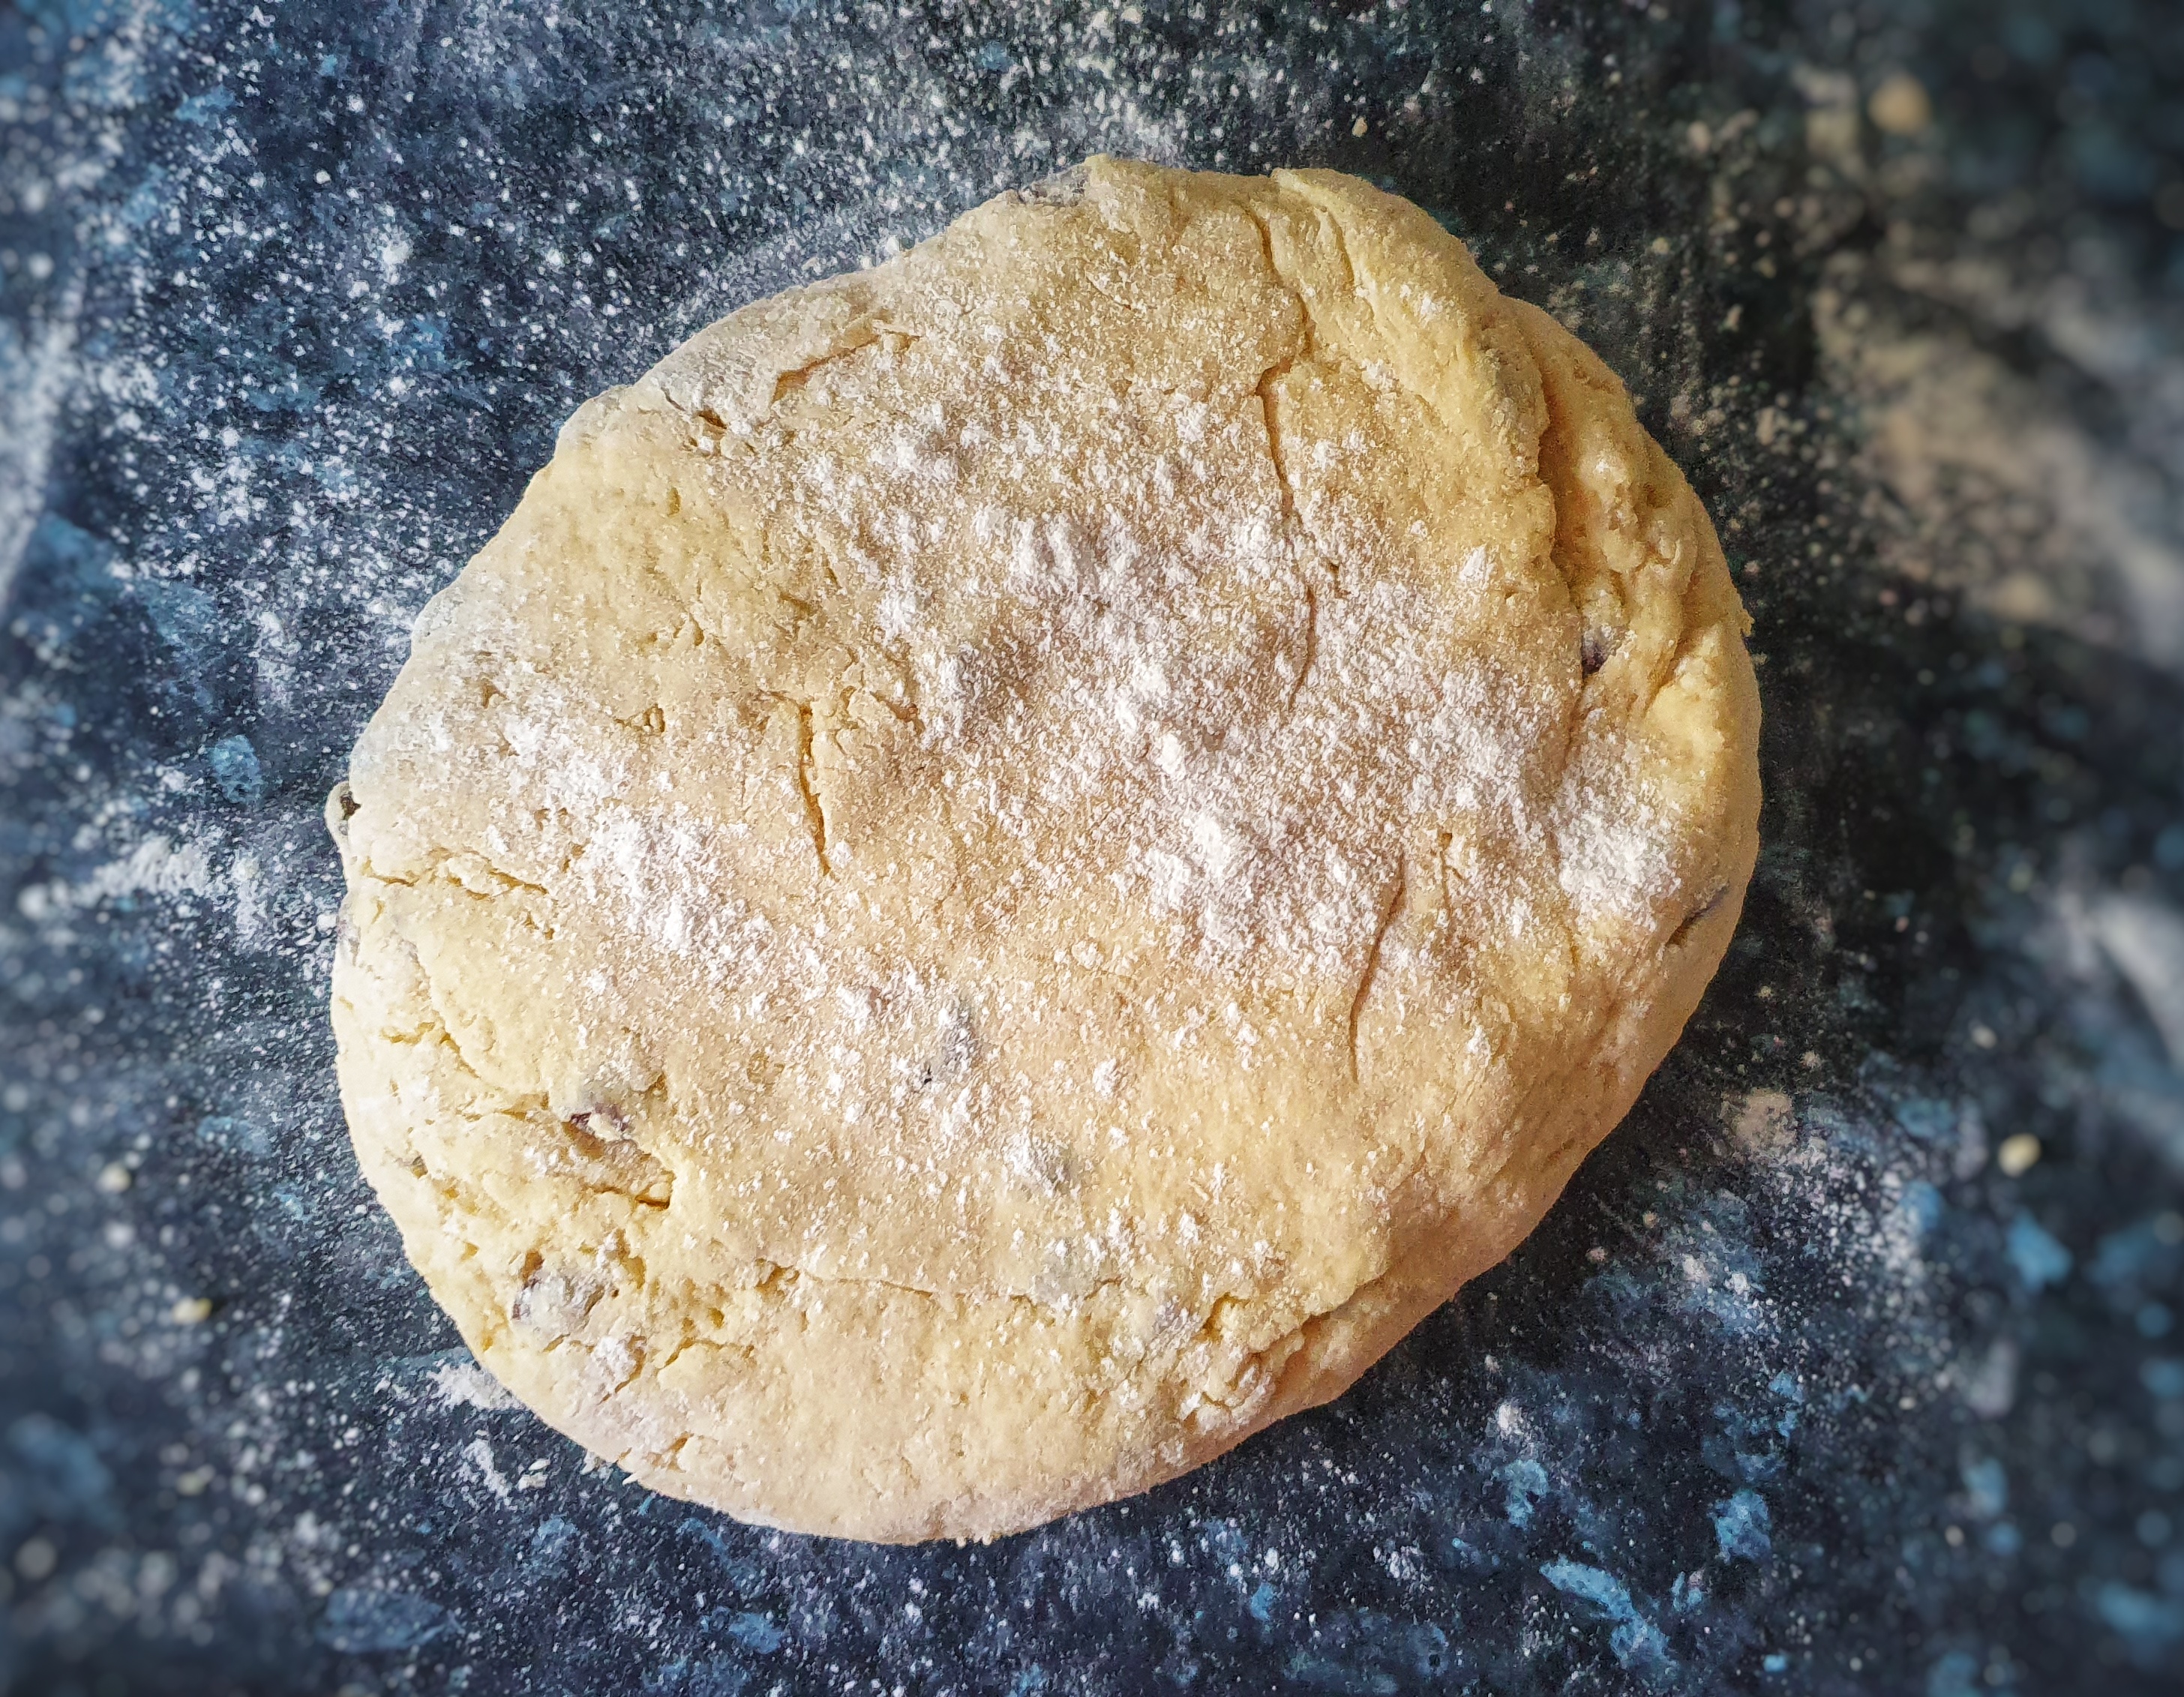
Knead the dried fruit into the dough, then divide into 12 (for precision weigh the dough), then line a baking tray with greaseproof paper.
Roll each piece of dough into tight balls using a very small amount of flour to prevent it sticking and then arrange on the baking tray. Cover and allow to prove – this usually takes a third of the time as the first rising.[11]
Preheat the oven to 200°C and use the steam setting, or place a metal tray on the base of the oven and pour water into it.
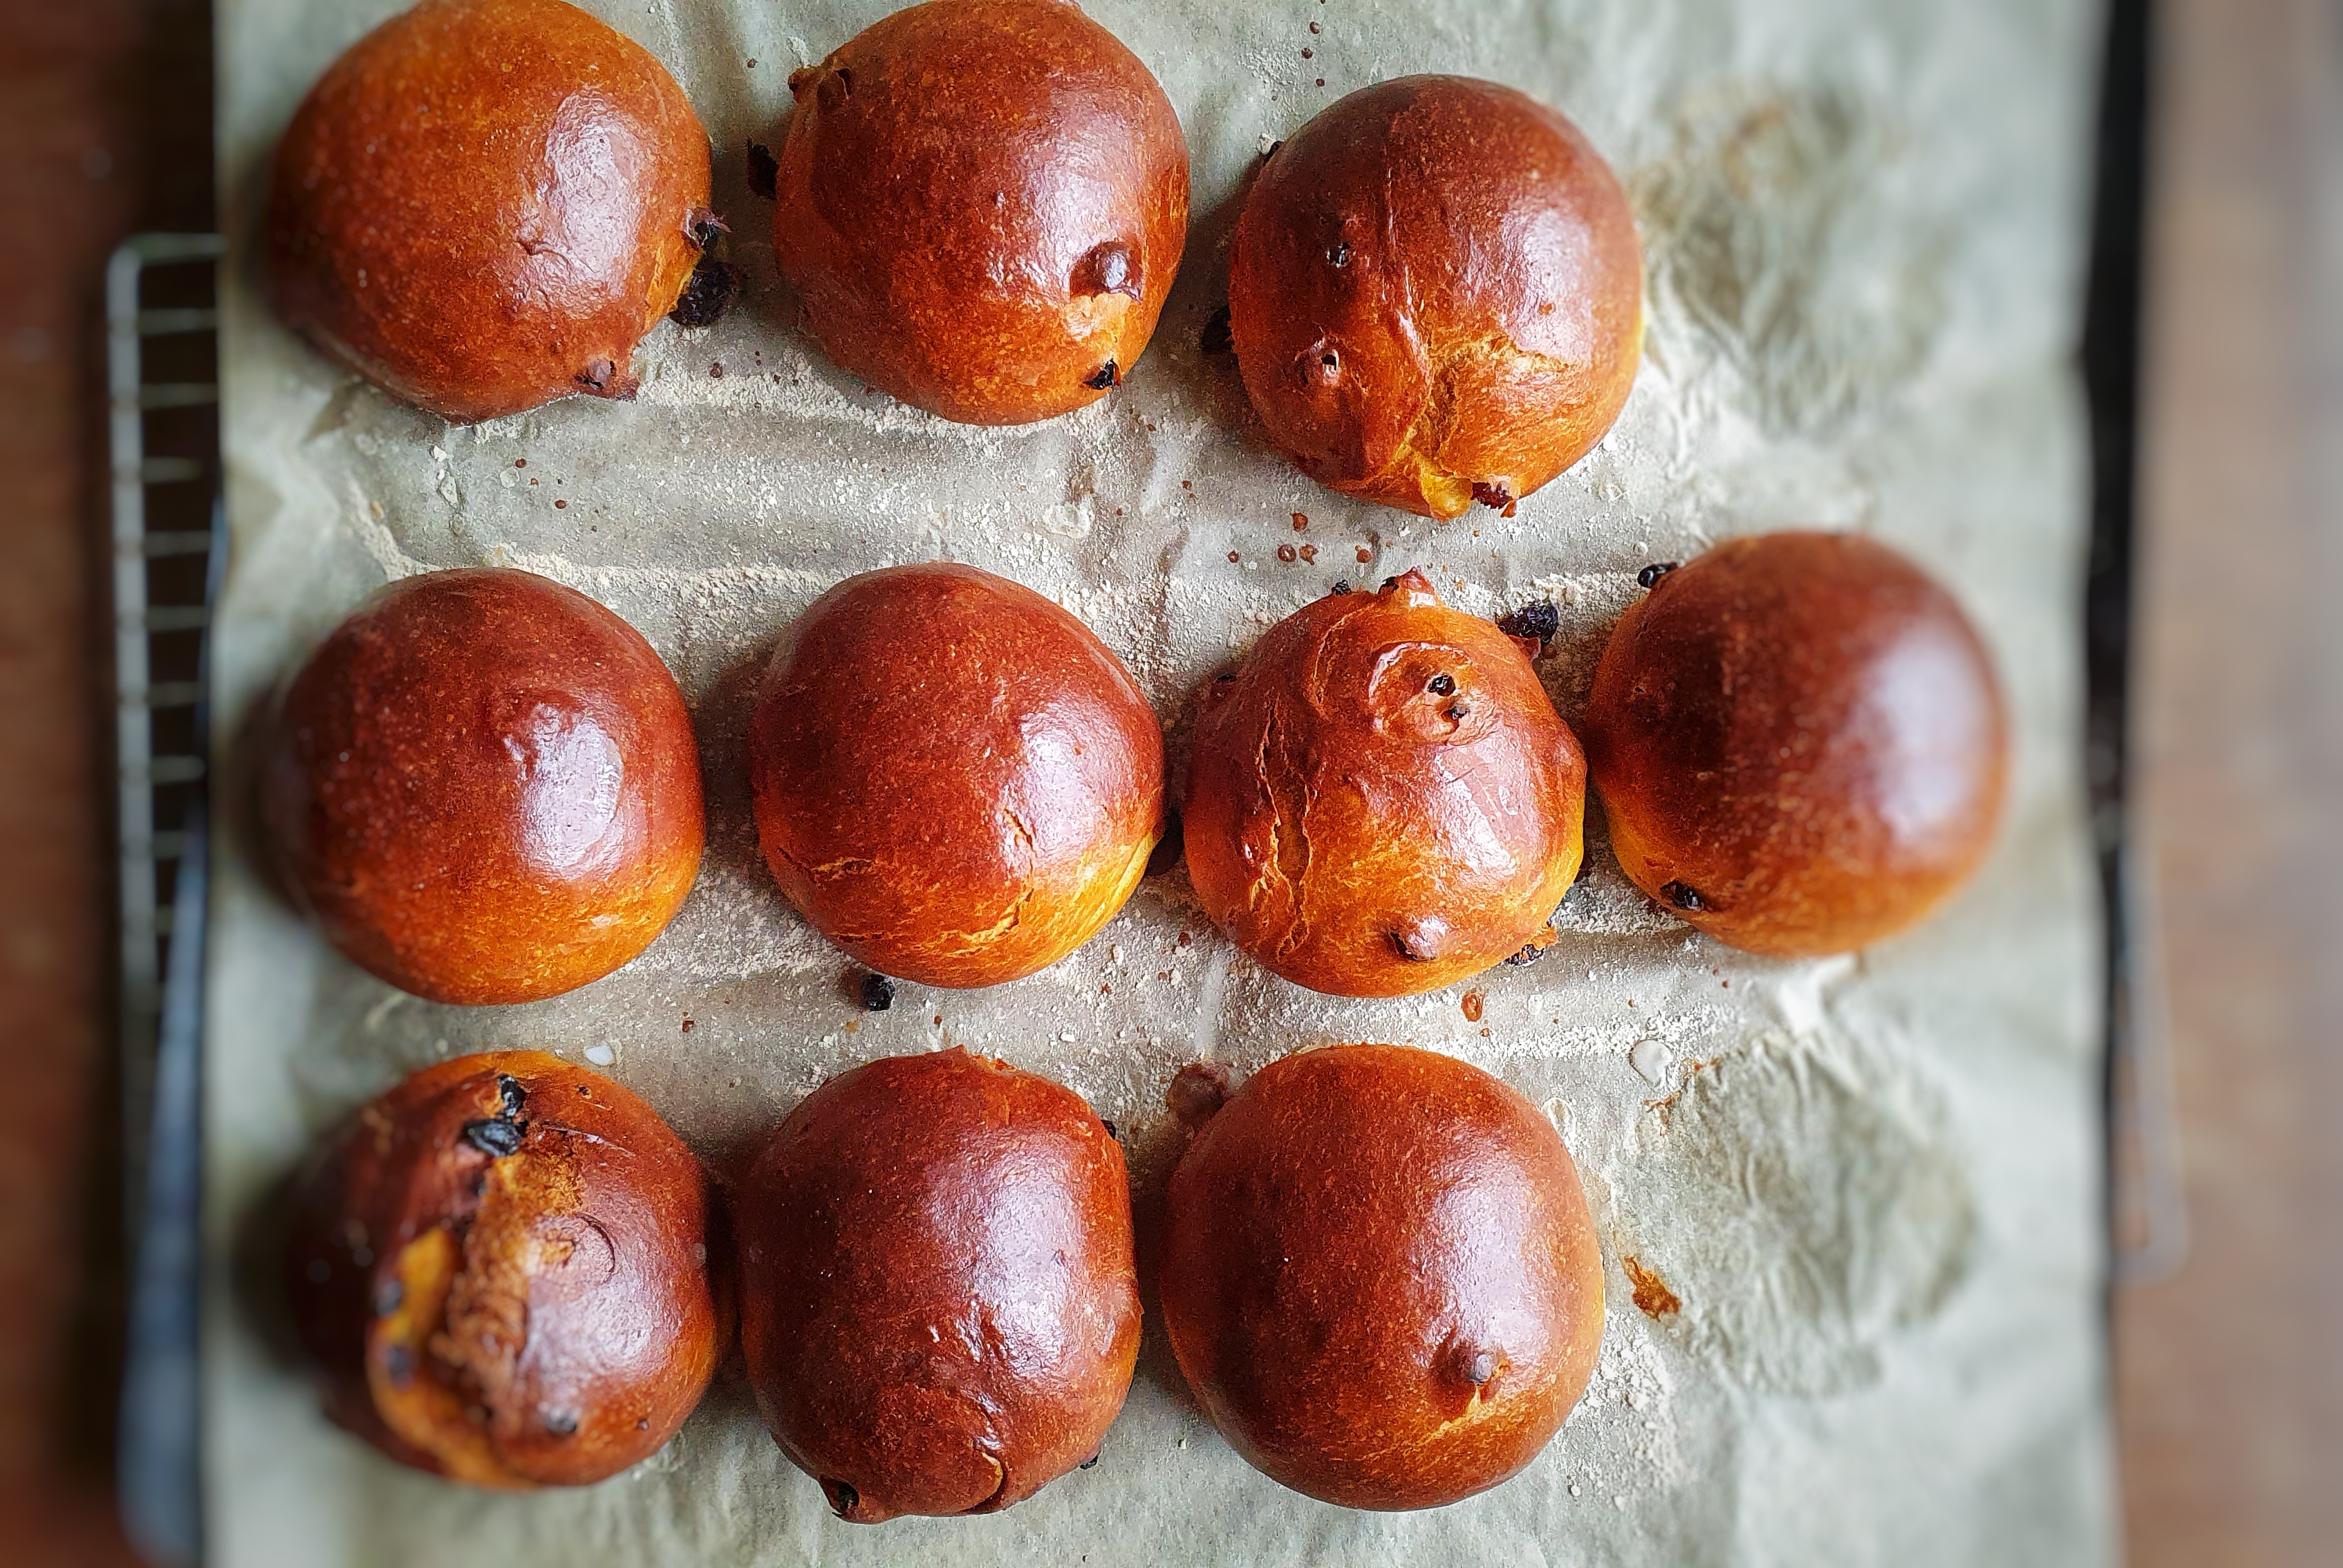
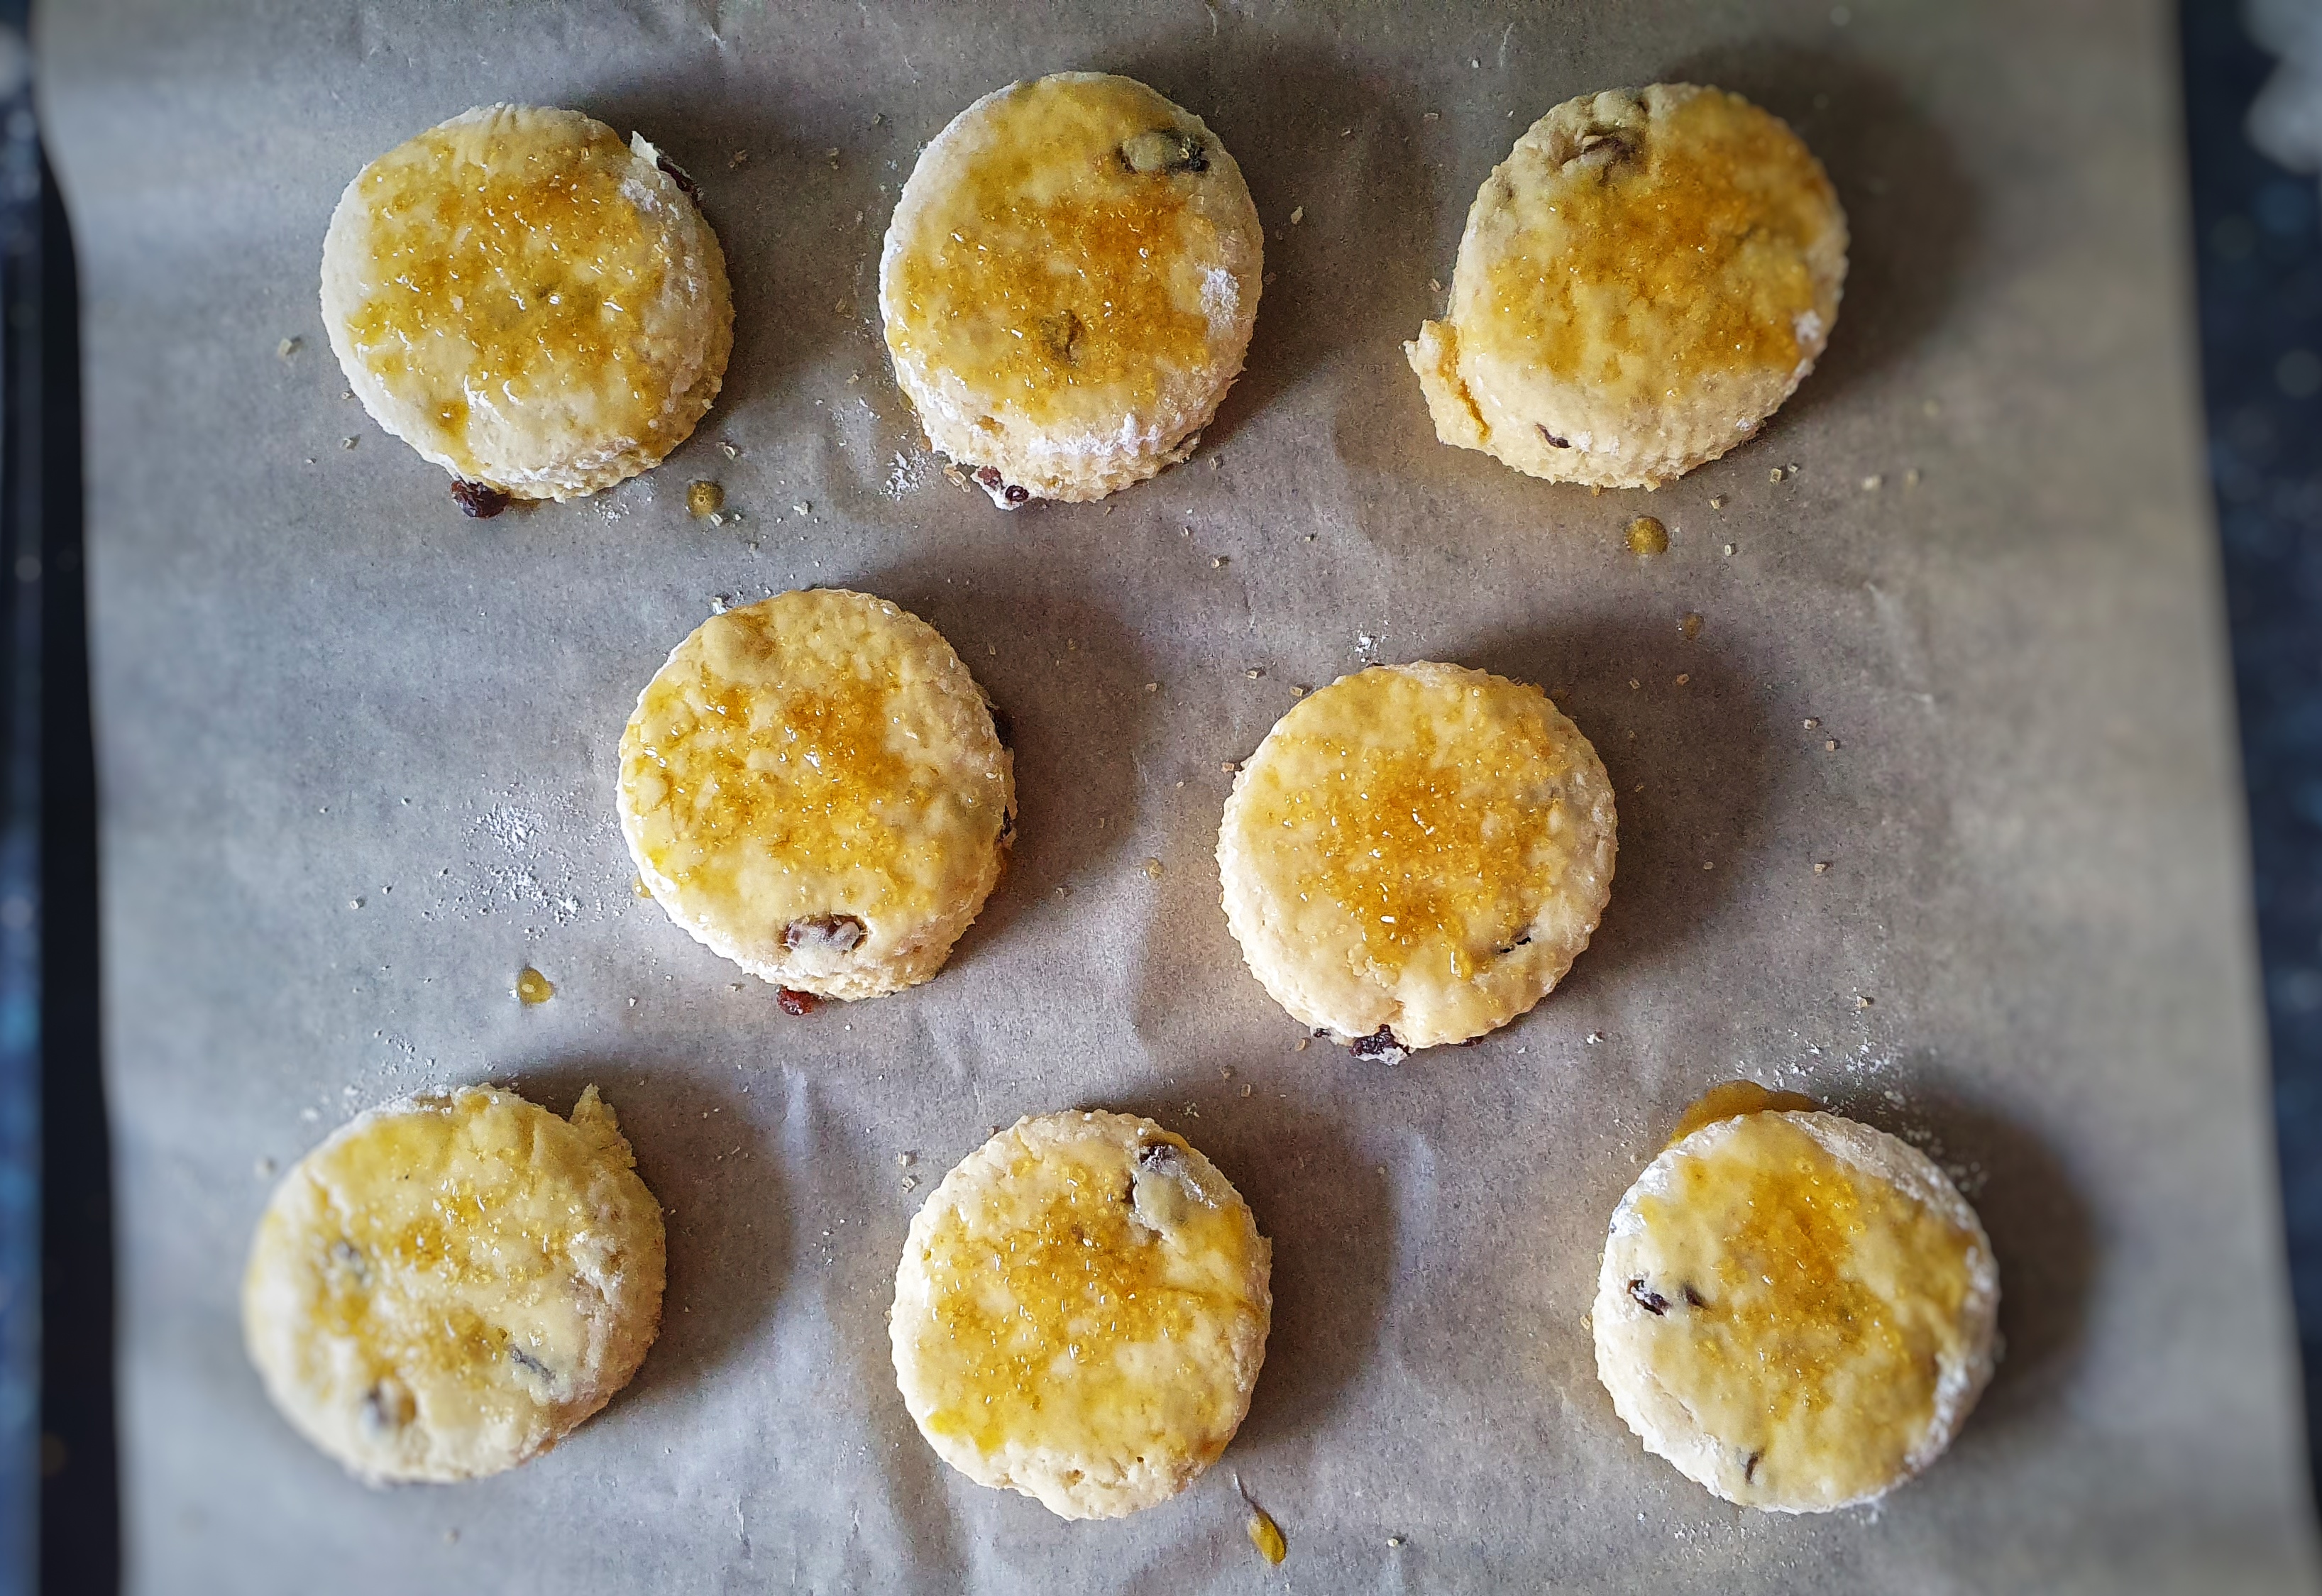
Brush the buns with milk and place in the oven for 18 to 20 minutes. If they turn too golden brown, turn down the heat to 175°C.
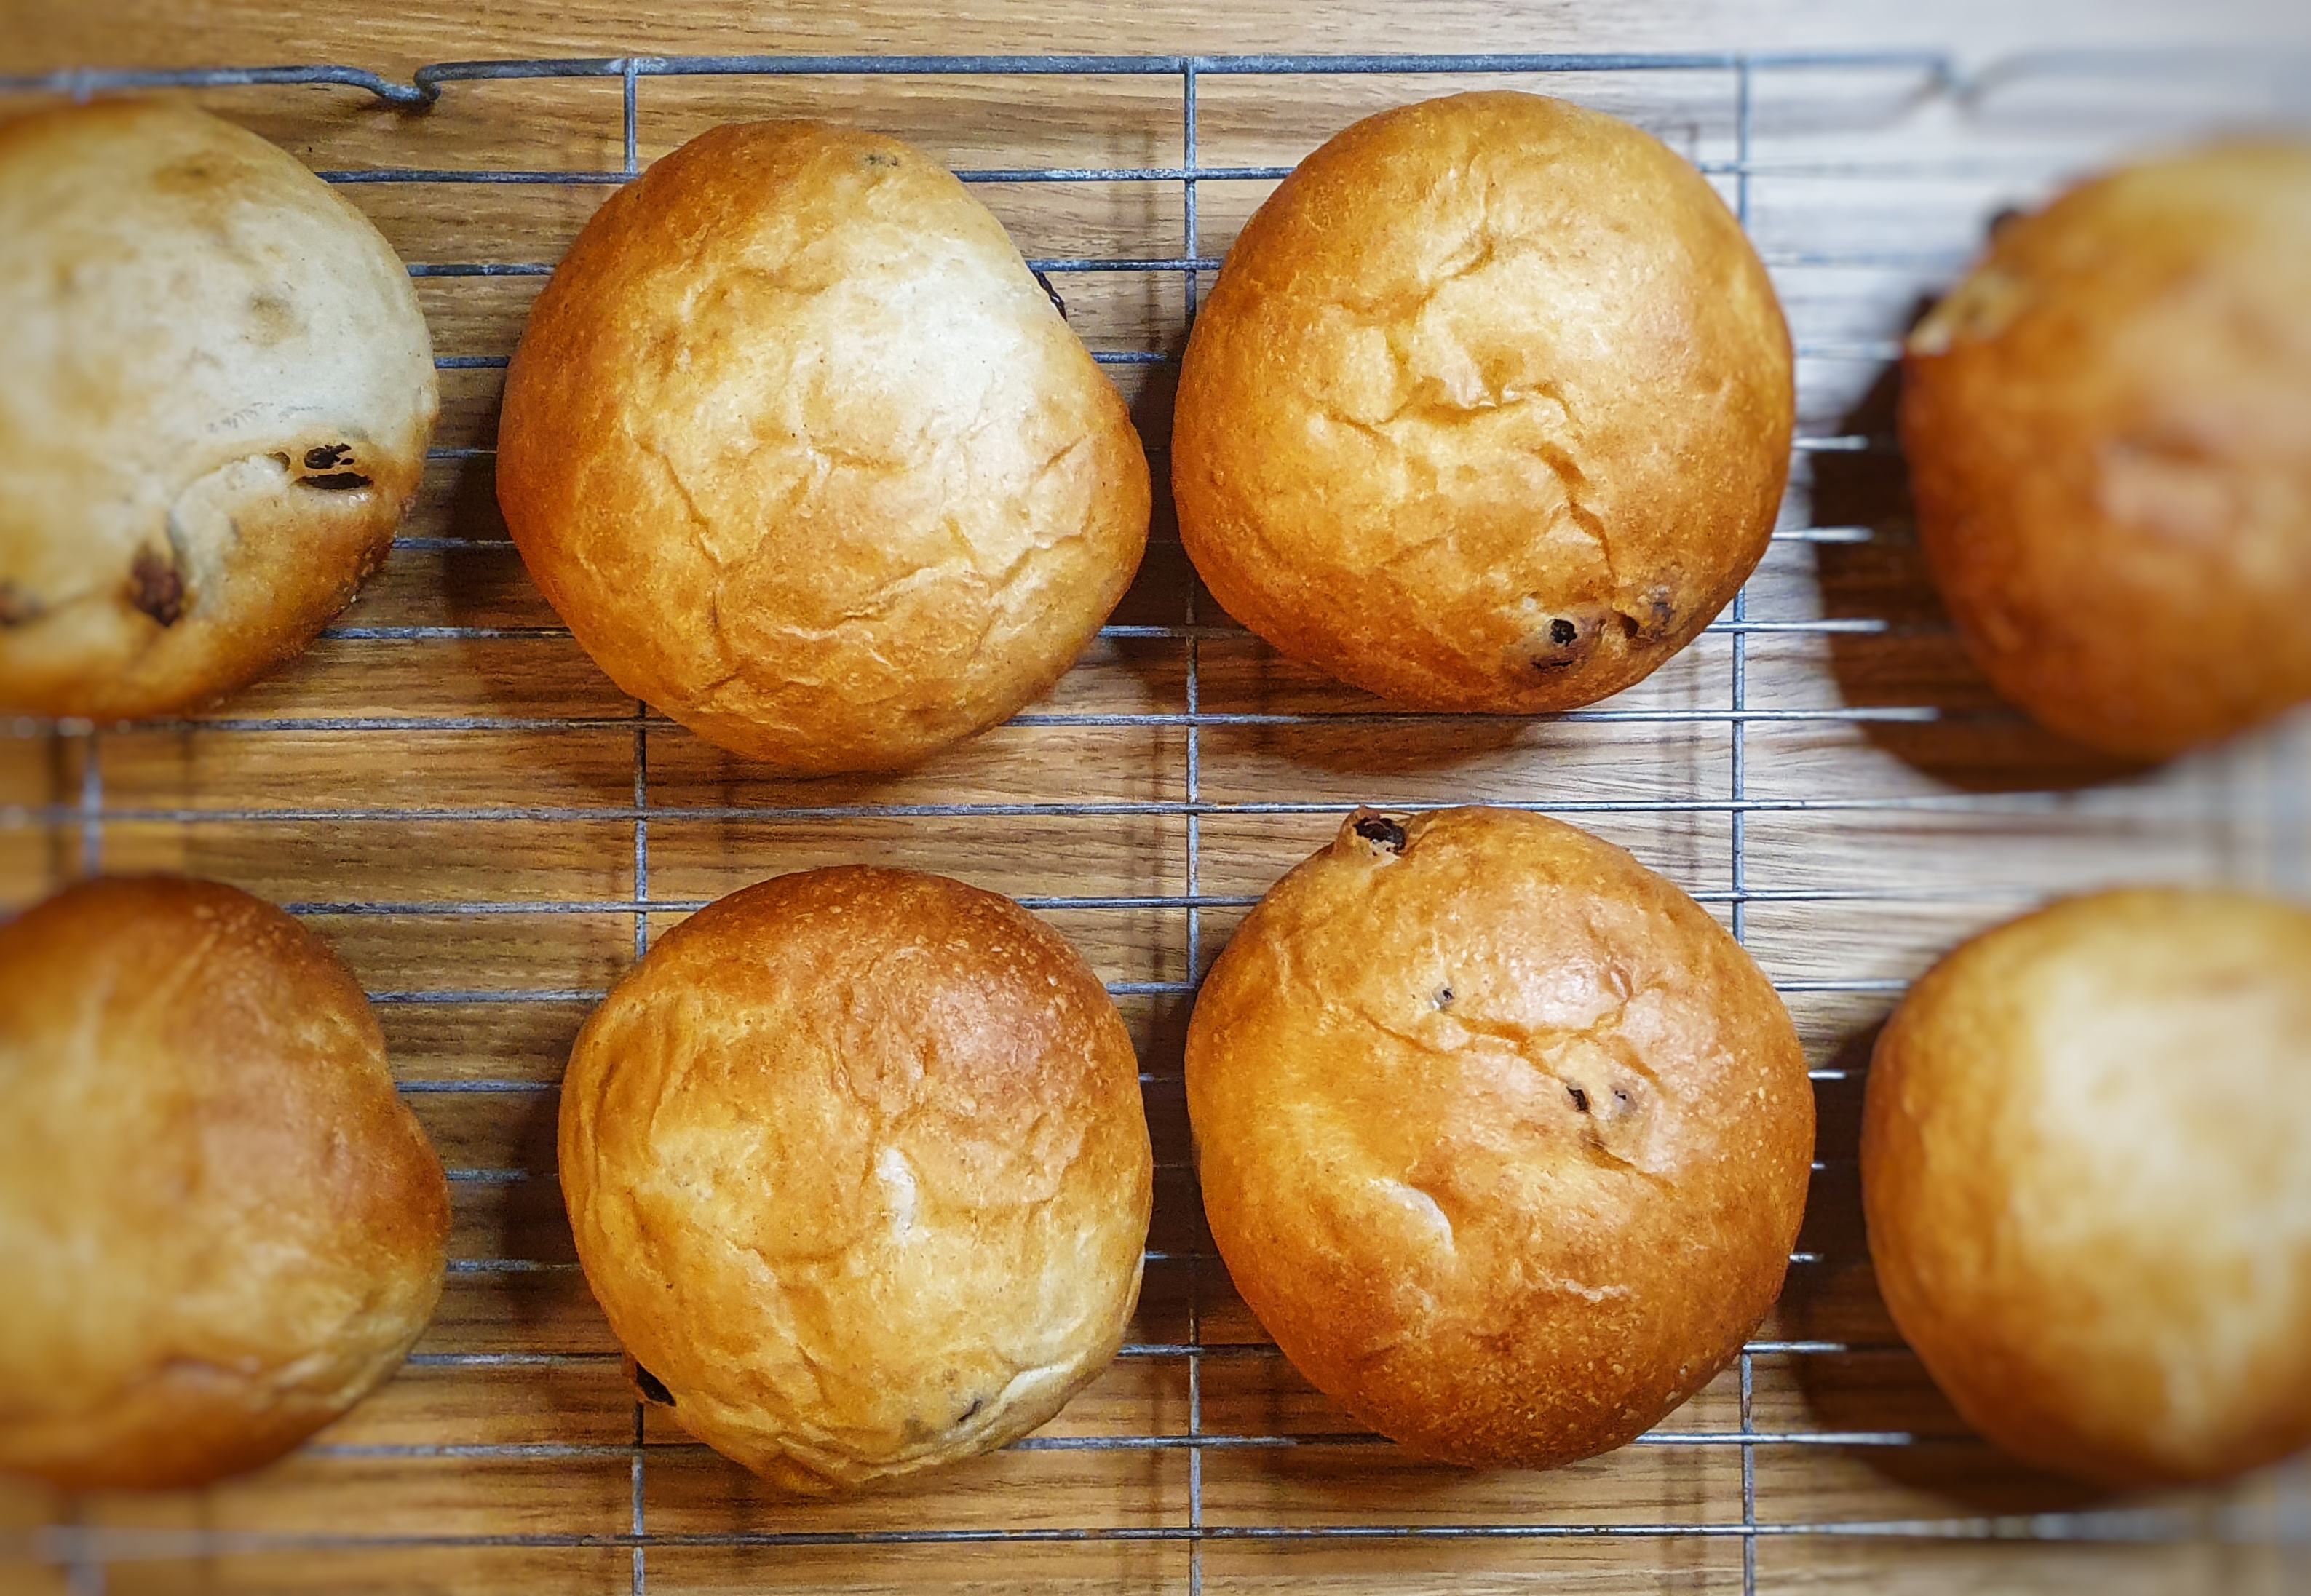
When ready, remove from the oven and immediately brush with more milk and then throw a double layer of clean tea towels over them and allow to cool.
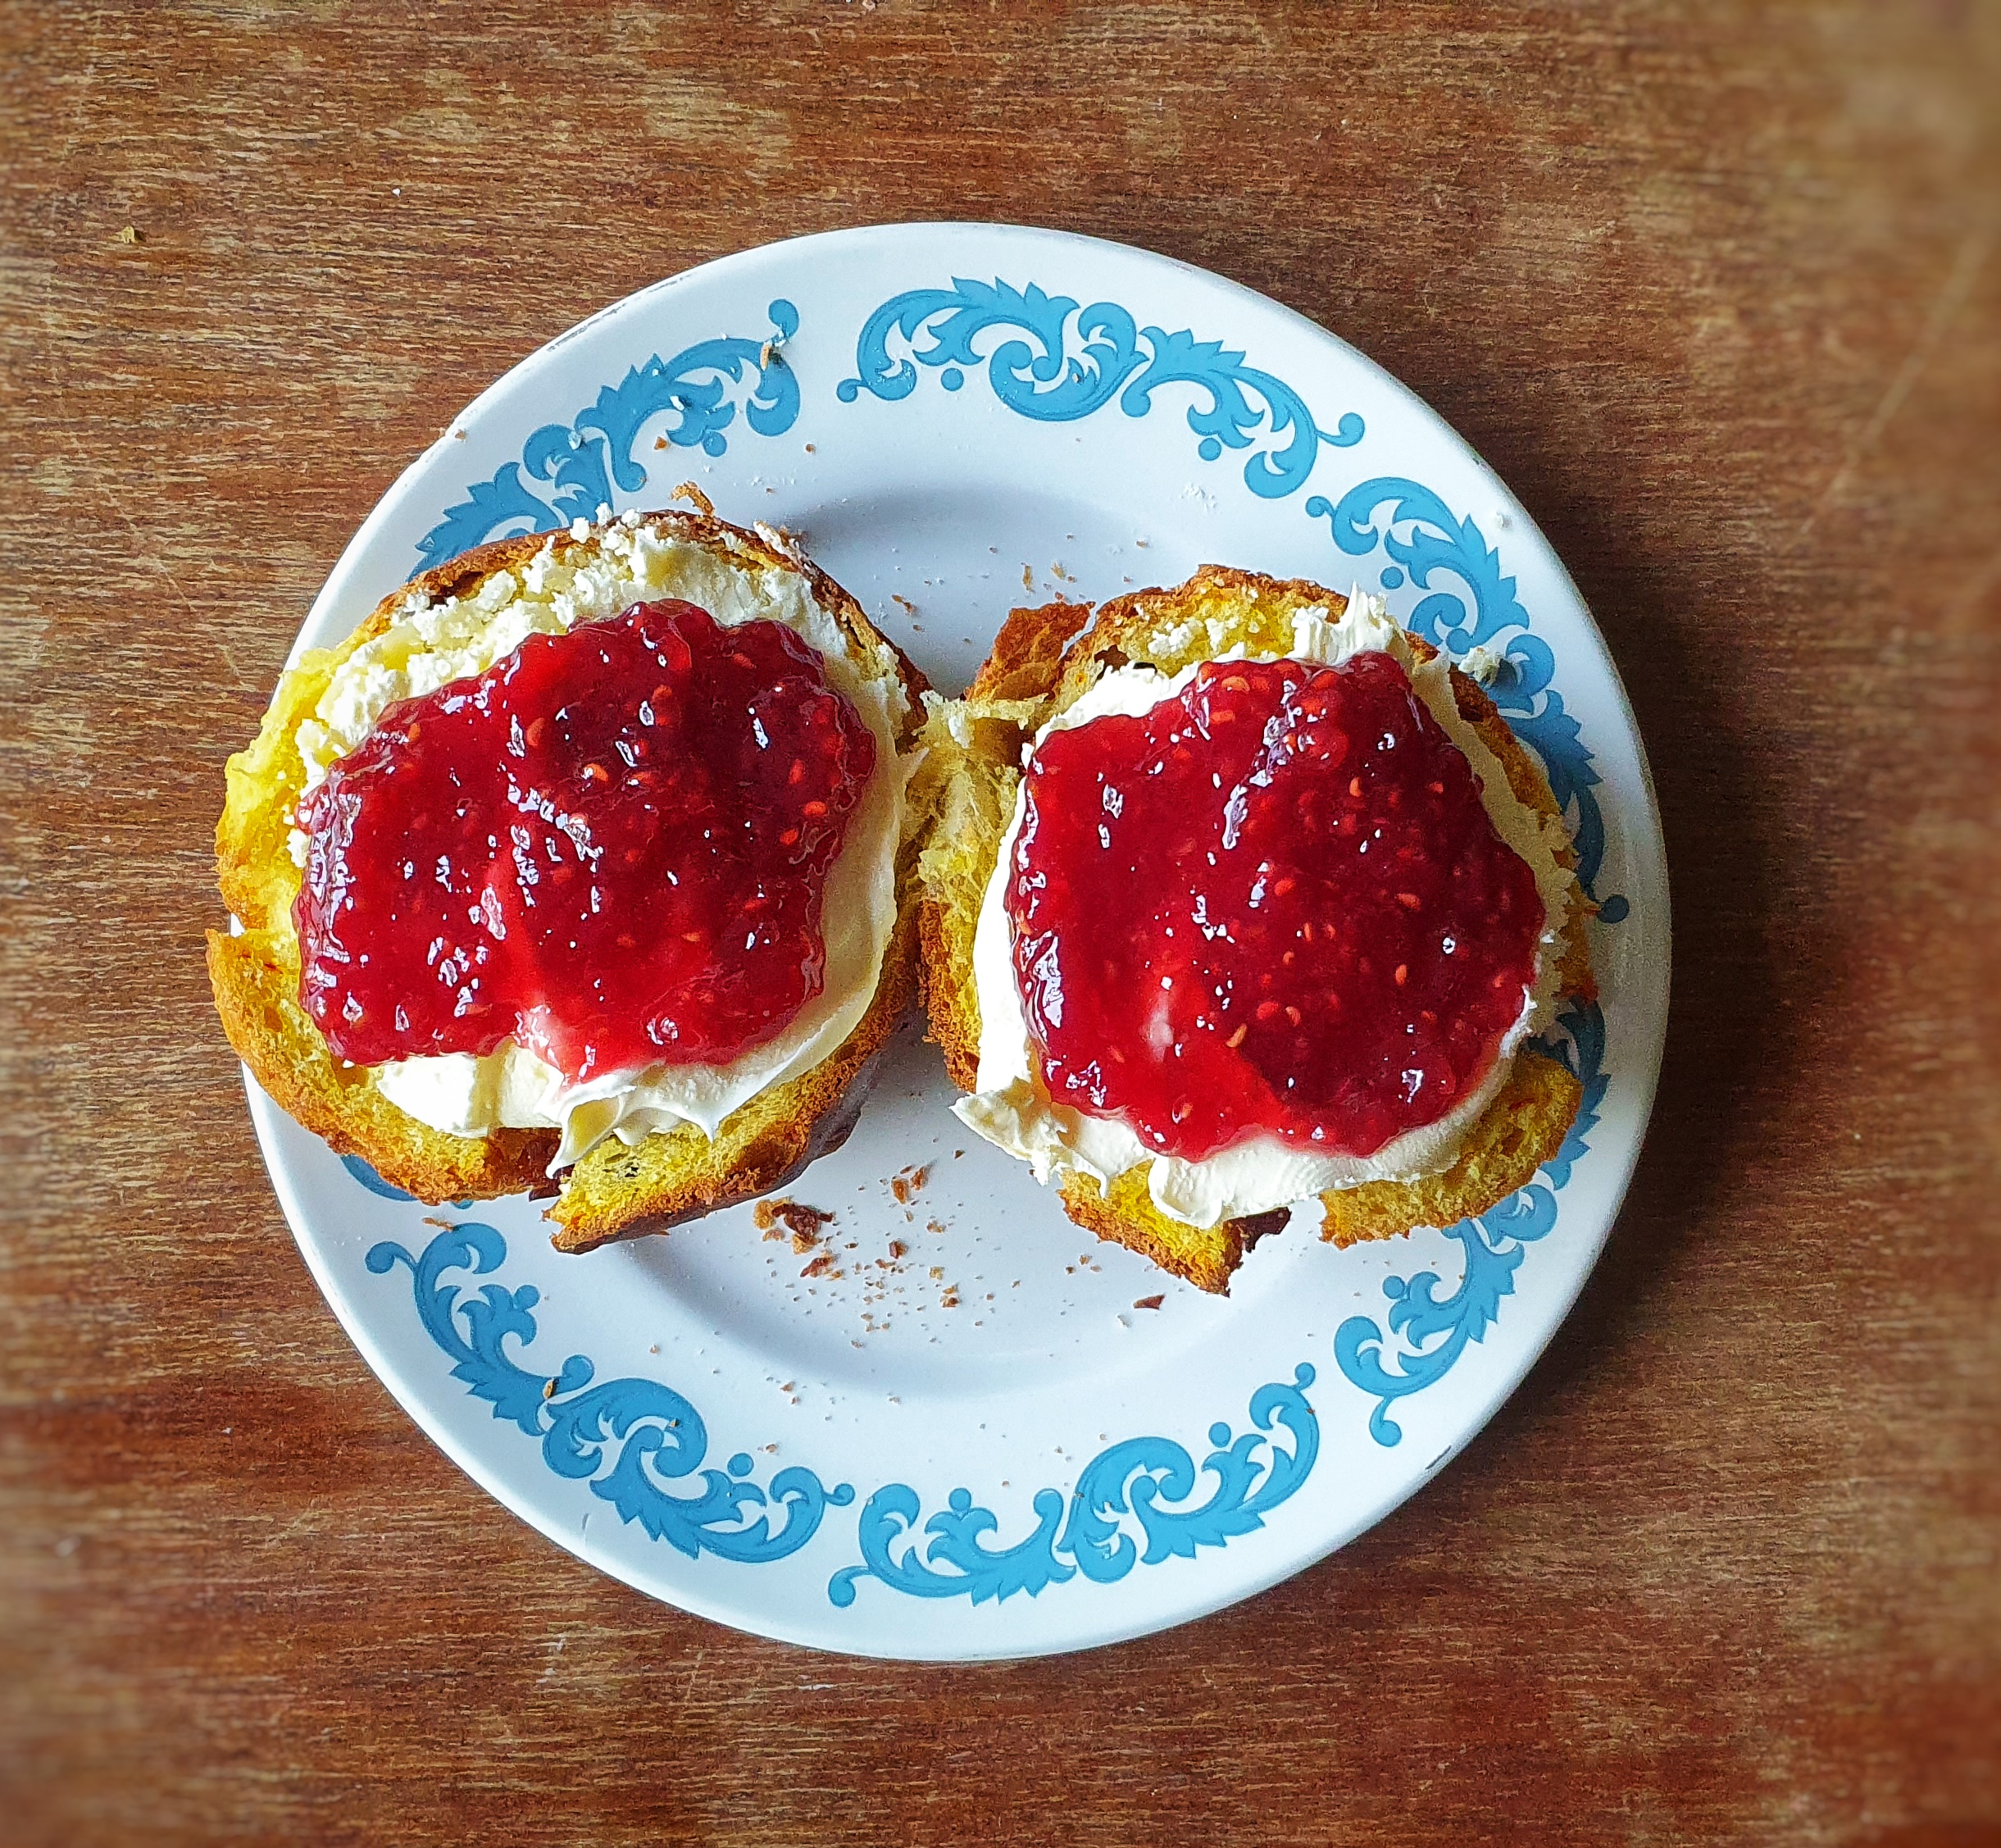
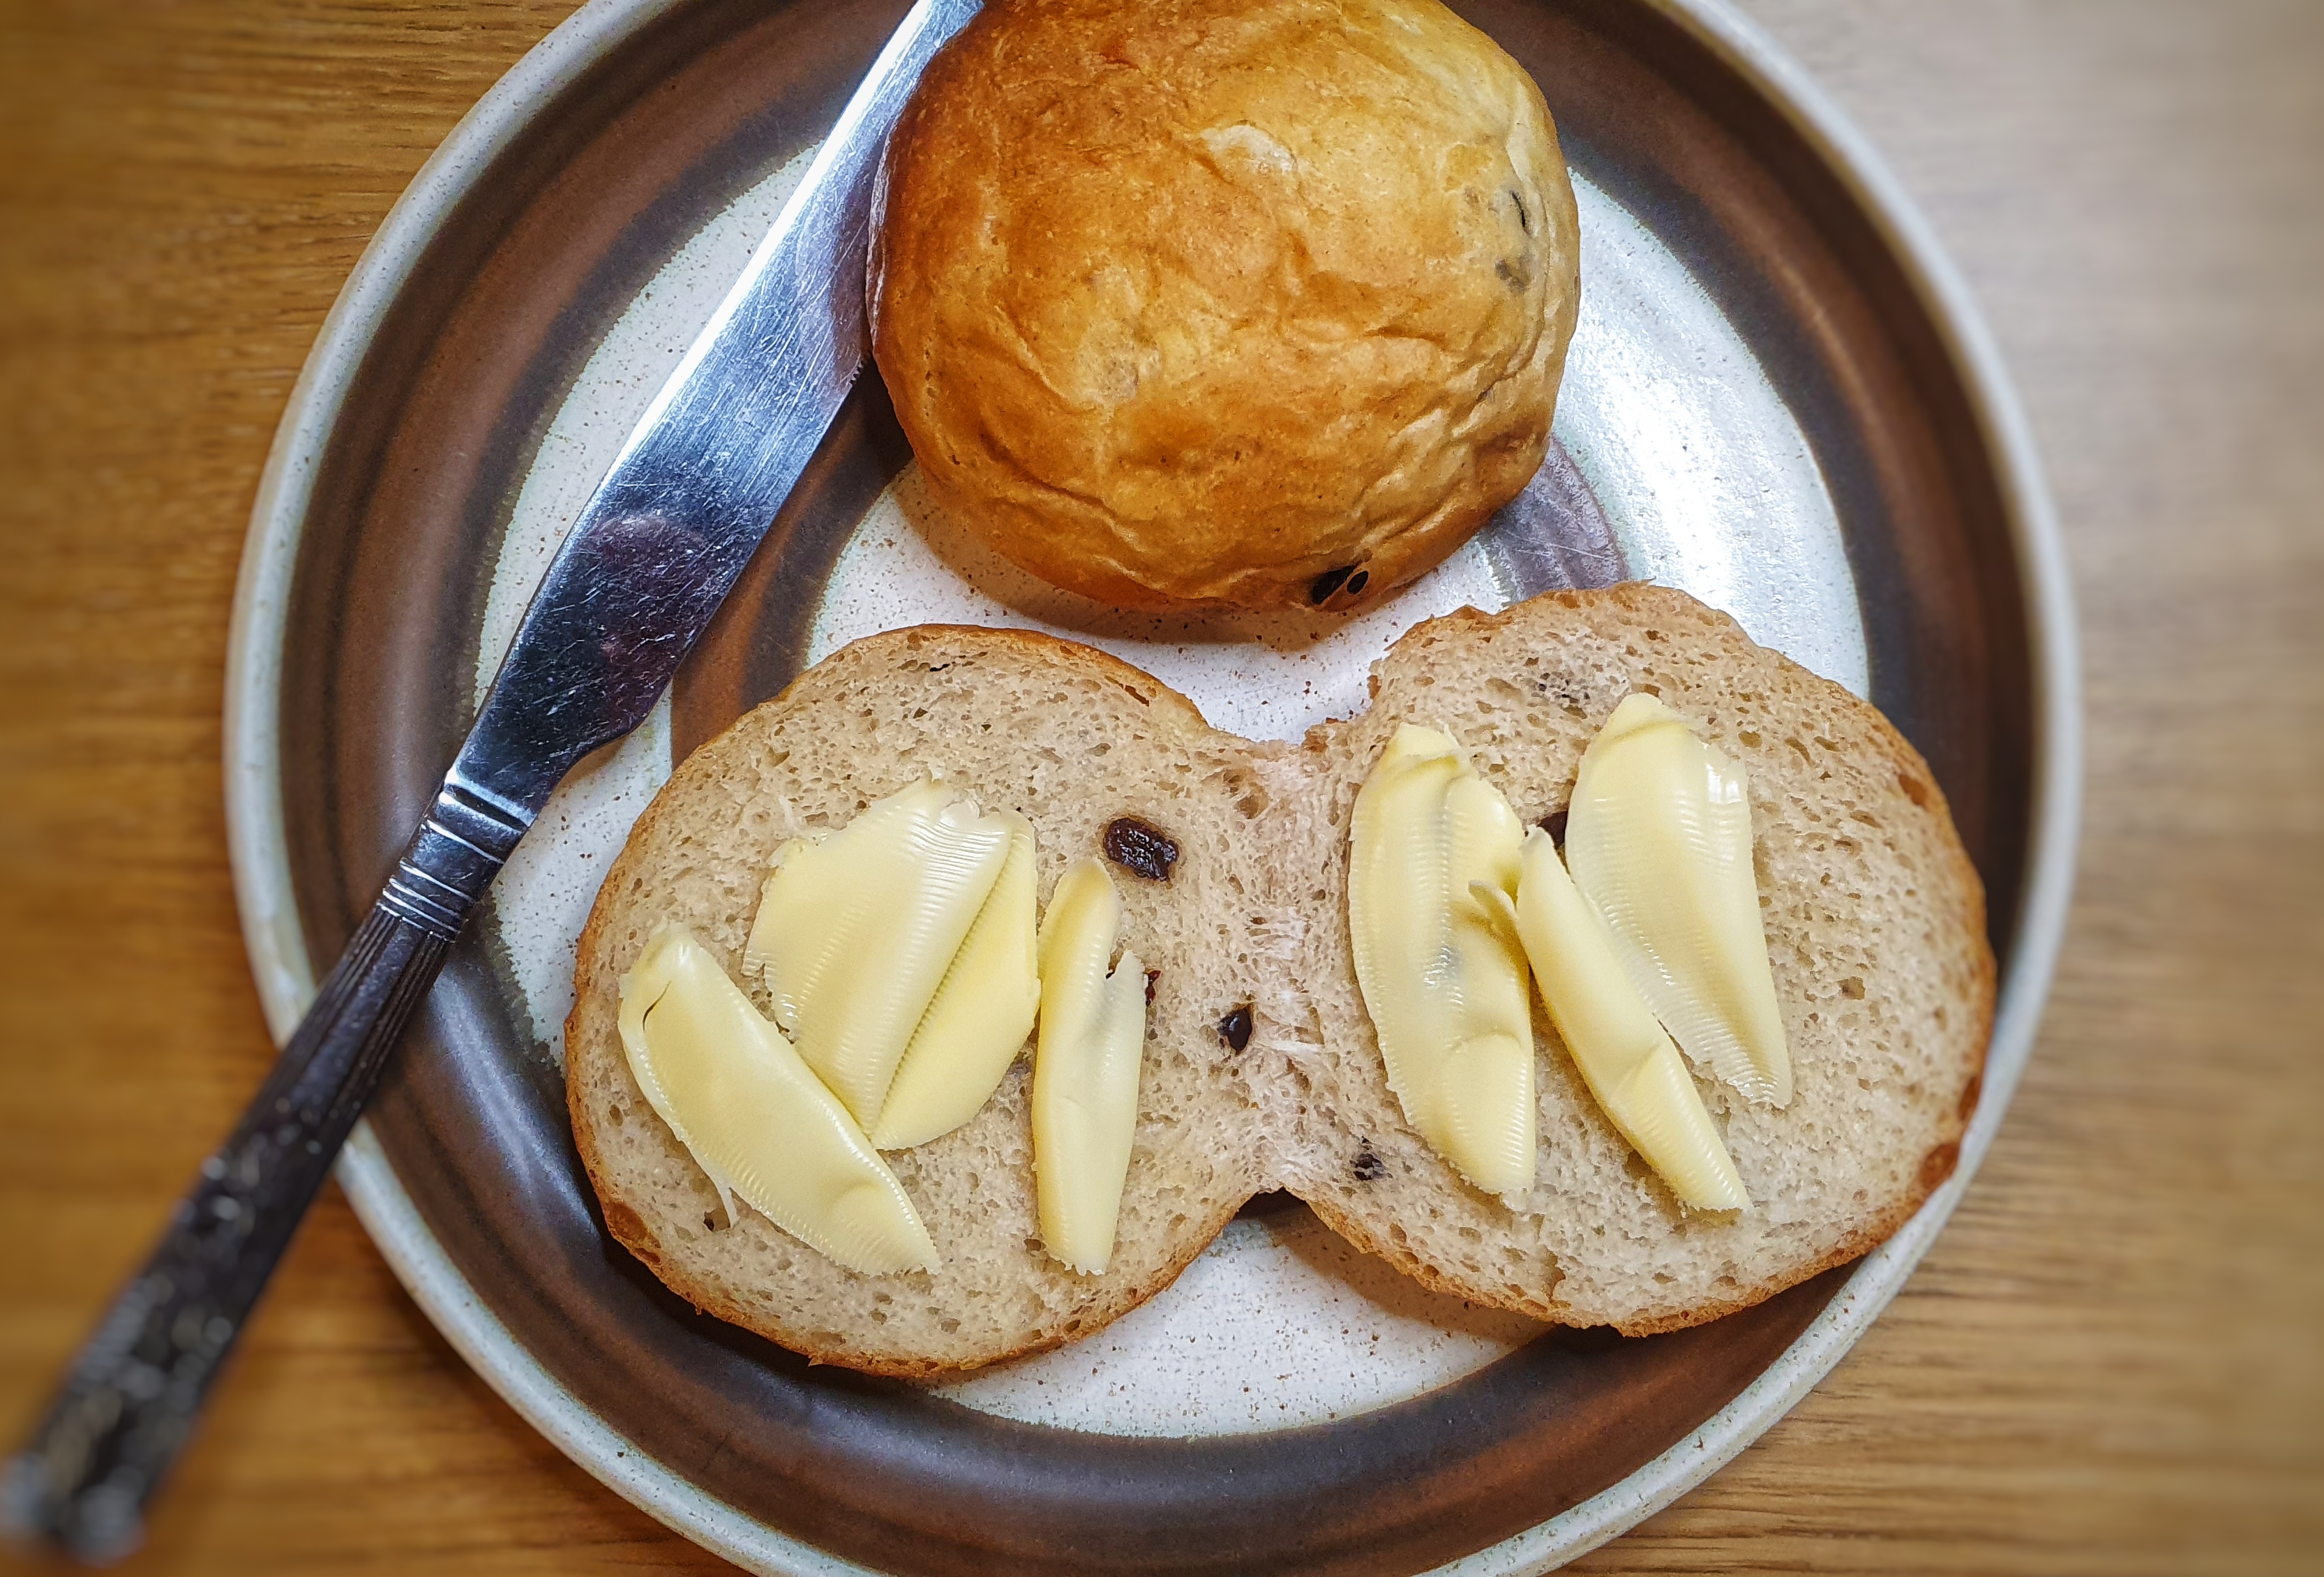
These are best eaten on the day they were made; any older than that, they should be toasted.
Notes:
[1] Davidson, A. (1999) The Oxford Companion to Food. Oxford University Press; Mason, L. and Brown, C. (1999) The Taste of Britain. Devon: Harper Press. It also prompts the question – why are there no famous Essex saffron bakes or dishes? Maybe there is.
[2] Bilton, S. (2022) Fool’s Gold: A History of British Saffron. Prospect Books.
[3] Digby, K. (1669) The Closet of Sir Kenelm Digby Opened (1997 reprint). Edited by J. Stevenson and P. Davidson. Prospect Books.
[4] Cassell (1883) Cassell’s dictionary of cookery. Cassell, Petter, Galpin & Co.; Farley, J. (1783) The London Art of Cookery, and Housekeeper’s Complete Assistant. Price.
[10] I speak from personal experience here: if you don’t remove the skin, the strands just get caught encapsulated in it.
[11] The best things to use to cover a whole tray of buns are a large shopping “bag for life”, an upturned plastic storage box or a damp, clean tea towel: take your pick.
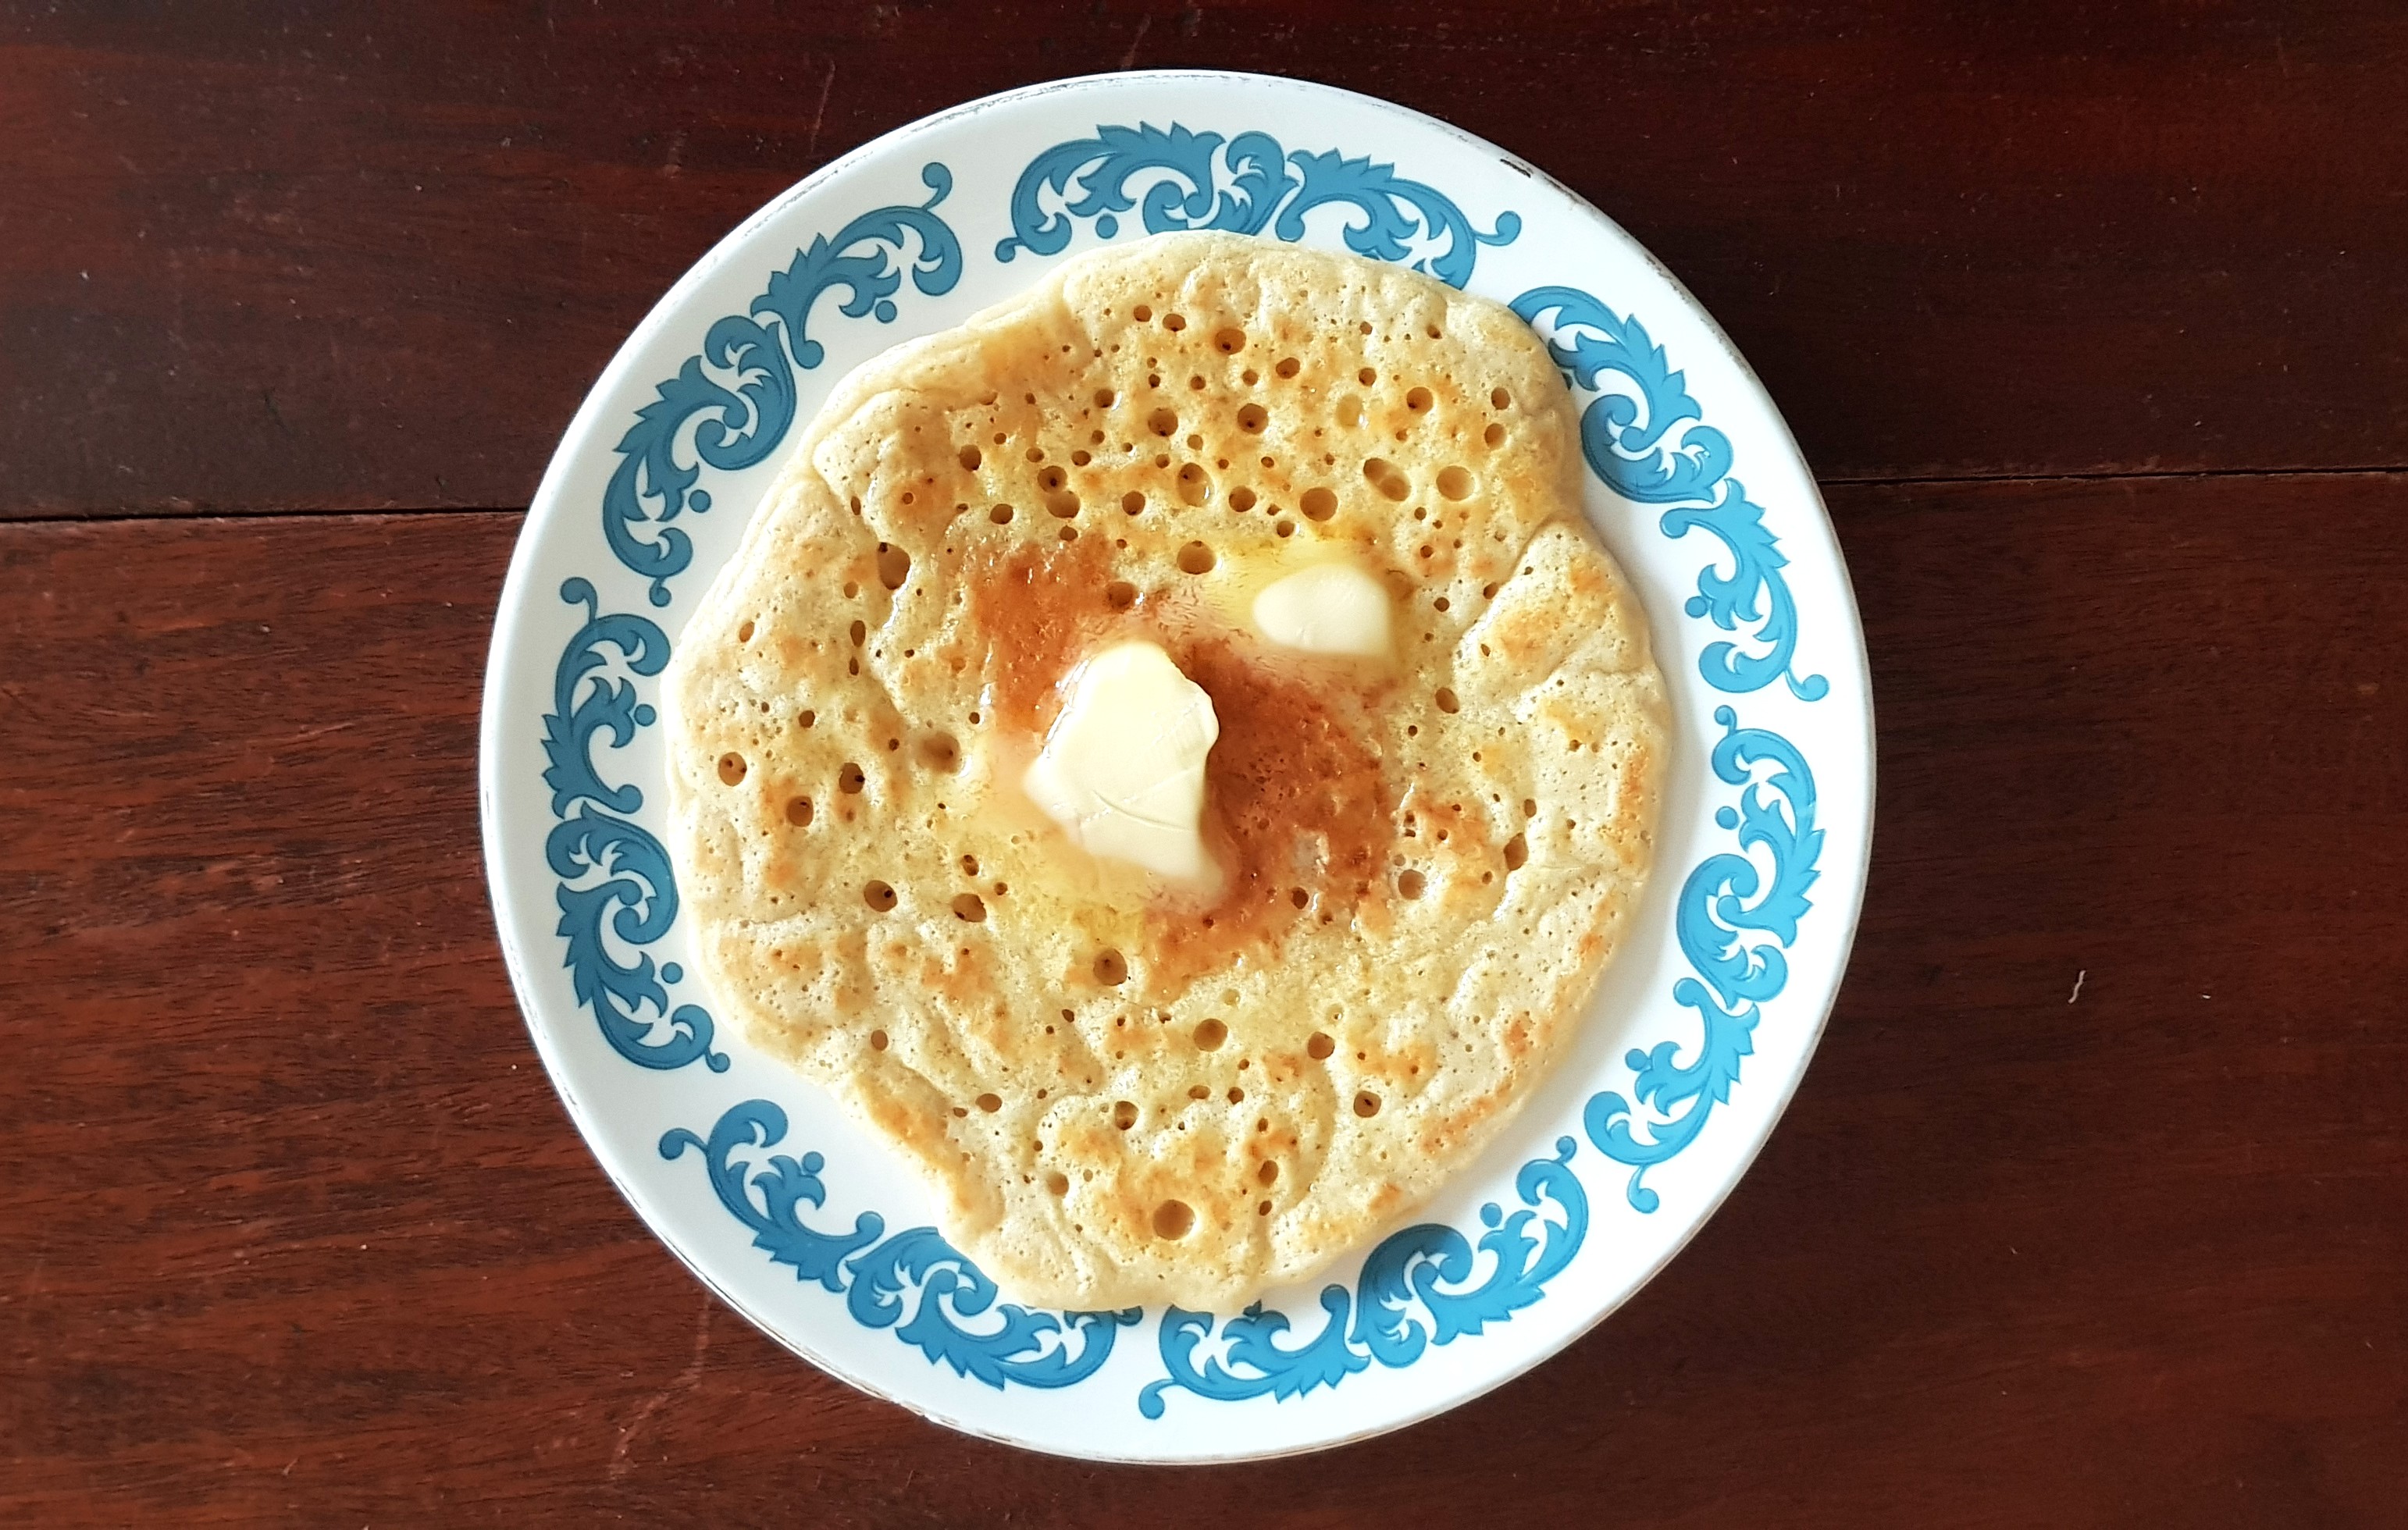
A couple of posts ago I gave you my recipe for scones. As with many foods, there is a variety of baked things that are called scones, which can cause a certain amount of confusion (see also: pudding[1], bun and cake[2]). My recipe is for what I think most people would consider a ‘proper’ scone: cakey, slightly dry and crumbly and therefore served spread with lashings of jam and butter or clotted cream. In other words, the scone one receives when ordering a cream tea. Despite its modern link with Devon and Cornwall, the scone most certainly originated in Scotland. These scones were baked not in ovens but on girdles/griddles or bakstones/bakestones, and there are two main types: those made from a runny batter and baked on a lightly greased griddle, often called drop scones today, or ‘Scotch’ pancakes outside of Scotland.[3] The second type is more cakelike; a dough that may be shaped into one large round and baked whole as a bannock, or cut into triangles as scones. The scones may also have been made by rolling out the dough and cutting out rounds. However they were shaped, these scones were cooked on a lightly-floured girdle.[4]
Wheaten bread may have been used in both types of scone, but more often they were made from oats or barley and sometimes peasemealin the very north of Scotland.[5] For delicious potato scones, some of the wheat flour is replaced with leftover mashed potatoes. Scones are typically chemically raised with bicarbonate of soda activated usually with soured buttermilk, but seeing as the word scone goes as far back as the early 16th century, this cannot have always been so; chemical raising agents were not widely available until the latter half of the 18th century. I do see recipes that use yeast and others with no leavening at all. I strongly suspect that the early scones would have been made with sourdoughs.
This is a sowans scone – made with the sour liquid poured off from fermenting sowans instead of the usual cultured buttermilk
Recipes begin to travel south and cross the border. Jane Grigson mentions a Northumbrian scone that is made with wholewheat flour and is leavened by yeast.[6] F. Marion McNeill, writing in the 1920s observes that ‘scones [are] popular in England now, but there are no recipes in Beeton’s book’, meaning – of course – the fantastically comprehensive Beeton’s Book of Household Management of 1861.[7] There are several recipes for scones in Cassell’s Dictionary of Cookery (1883) and Robert Wells’ Pastry & Confectioners’ Guide (1892).[8] Interestingly, none of them are baked in ovens despite many homes having ovens by this point in history.
However, in Good Things in England (1932), that wonderful collection of traditional English recipes by Florence White, there are recipes for scones baked both in ovens and on griddles. A variety of flours are being used too, including oatmeal and ‘Maize or Indian Meal’.[9] Baked scones – in England, at least – quickly take over and usurp not only the griddlecake variety of scones, but also the Devonshire/Cornish split in the cream tea.[10] But in the 21st century, these baked scones move even further away from their origins – egg is added for richness, milk is used over the now tricky to find buttermilk (in combination with baking powder).
For many folk, scones will be forever associated with the south-western peninsula of England, but it is important to remember, as Catherine Brown and Laura Mason put it in The Taste of Britain (1999): ‘Few English people would appreciate that [scones are] as Scottish as oatmeal porridge.’[11] I hope you appreciate it now!
If you like the blogs and podcast I produce and would to start a £3 monthly subscription, or would like to treat me to virtual coffee or pint: follow this link for more information.Thank you.
[2] These are discussed in my book Knead to Know: A History of Baking (2024).
[3] These griddlecakes are also the forerunner to the sublime fluffy American pancake
[4] Buttery, N. (2024). Knead to Know: A History of Baking. Icon Books; McNeill, F. M. (1968). The Scots Kitchen: Its Lore & Recipes (2nd ed.). Blackie & Son Limited.
[5] Buttery, N. (2018, April 17). Pease Pancakes. British Food: A History.
[6] Grigson, J. (1992). English Food (Third Edit). Penguin. I have – of course – cooked this recipe as part of my Neil Cooks Grigson project all the way back in 2008. I didn’t do a very good job of it and it requires a revisit. Read the original post here.
Hello everyone. I do hope your Bank Holiday Weekend is going swimmingly and that you are enjoying the sunshine (& showers!).
I have uploaded my ‘Knead to Know’ Zoom talk from September last year to my YouTube channel. I know there were several people who couldn’t make it on the night. It’s completely unedited except for the Q&A section at the end.
I talked about how I approached writing Knead to Know: A History of Baking by asking myself, “What is baking?”, a trickier and more philosophical question than you might think; the origins and history of the very first bakers; Early Medieval bread and bakers; Yorkshire Christmas Pyes; and the Denby Dale Pie.
If you like the blogs and podcast I produce and would to start a £3 monthly subscription, or would like to treat me to virtual coffee or pint: follow this link for more information.Thank you.
You know what it’s like; you go to the home baking aisle of the supermarket and pick up a bag of flour, thinking ‘I’m sure I’m running low’, buy a bag, only to find there is, in fact, a large bag sitting, unopened, in the pantry. Unsure what to do with them, I asked social media whether I should make some scones, saffron buns or lardy cake with it (three recipes I have been meaning to post for years now). The answer came in: 3-way tie. I shall endeavour to do all three for you over the next month or so.
Up first, then, are scones, the must-have for a modern Cornish or Devonshire cream tea. I have written about cream teas both on the blog and in my book Knead to Know, the excerpt of which you can find on my YouTube Channel.
This is the recipe I used when I had both my restaurant and artisan market stall, so it is very tried-and-tested. I have provided some variations for you beneath the method: cranberry and orange, cheese, and walnut and Stilton. When the restaurant was open, we served a savoury cream tea using a cheese scone, swapped clotted cream for cream cheese and exchanged the jam for curried beetroot chutney or onion marmalade.
Classic recipes – especially Scottish and Irish ones – use buttermilk instead of plain milk. As buttermilk is increasingly difficult to get hold of these days, I’ve used milk, but you can swap the two. If you do, use 15 g bicarbonate of soda instead of 25 g baking powder. One final thing: I use strong white flour instead of plain to give the scones a boost in the oven, again, not traditional; in fact, it was a trick picked up from Paul Hollywood in his book 100 Great Breads. This doesn’t mean you can knead the dough roughly as though it is for bread; you still have to use a light touch with mixing, rolling and cutting out. Hopefully, my method will help you achieve great results.
I’ll follow soon with a post on the history of scones.
If you like the blogs and podcast I produce and would to start a £3 monthly subscription, or would like to treat me to virtual coffee or pint: follow this link for more information.Thank you.
Basic Scones
A note on measuring liquids: 1 ml of milk weighs 1 g, so it’s easier – and much more accurate – to weigh it on scales rather than reading the graduations on the side of the measuring jug.
Makes 12 to 15 scones.
500 g strong white flour, plus extra for dusting
30g baking powder
½ tsp salt
75g butter
75g caster sugar
80g quartered glacé cherries, raisins or currants (optional)
200 ml/g whole milk
2 medium eggs
Egg wash: 1 egg or egg yolk beaten with ½ tsp salt
Granulated or Demerara sugar for sprinkling
Preheat your oven to 200°C.
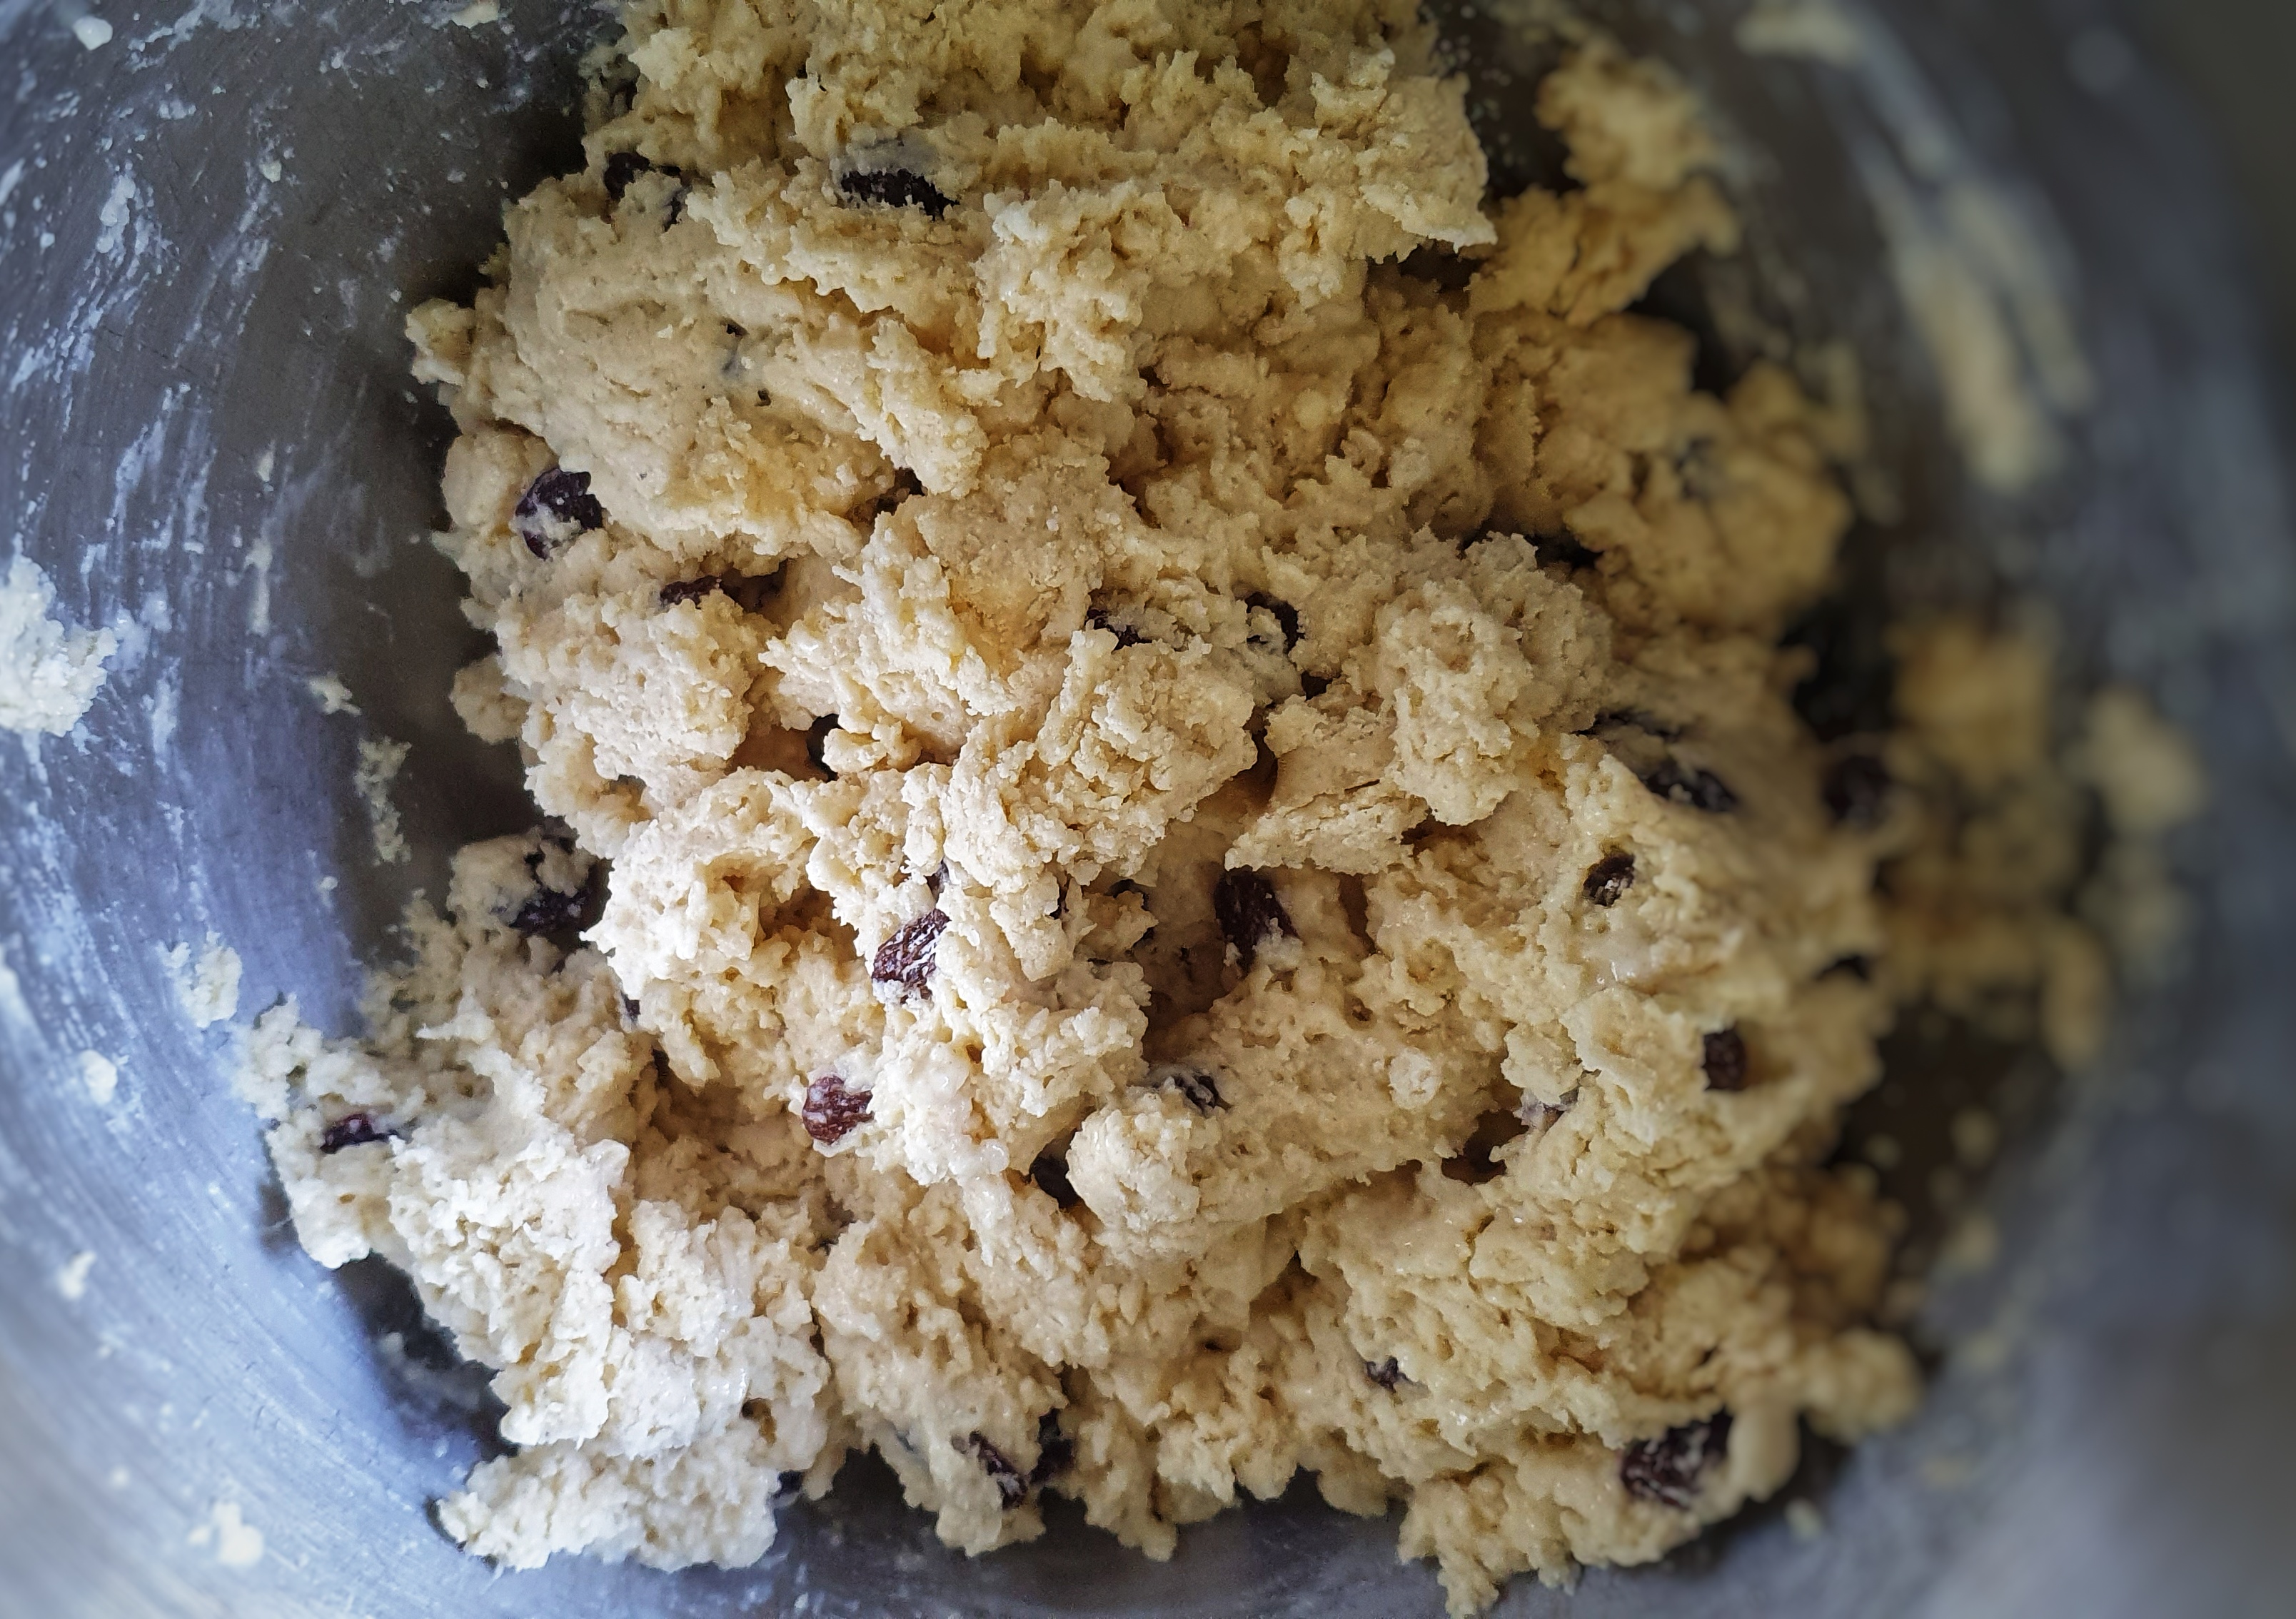
In a bowl, mix flour, baking powder and salt and rub in the butter – you can use the flat beater attachment on your mixer with this, or good old fingertips. Stir in the sugar and fruit (if using).
Beat the eggs with the milk, and steadily mix the liquids into the dry ingredients. If using a mixer, keep it at a slow speed. Make sure all the flour is incorporated, bring the dough together and give it a brief knead on a floured worktop until the dough is smooth.
Keeping your worktop floured, roll out the dough to a thickness of 1.5 to 1.75 cm (a generous ½ inch), and cut out into rounds. I normally use a cutter of a diameter between 7 and 8 cm. It is important to take care when cutting: make sure you dunk your cutter in more flour and tap off excess before cutting. This is important because if there are splodges of sticky dough on the cutter, it will seal the edges of the scones, preventing a good rise. Also, don’t be tempted to twist your cutter, as this will have a similar effect. Arrange the cut-out scones on 2 lined baking sheets.
Bring the leftover dough together with your hands to form a cohesive dough without kneading it too much – we don’t want tough scones! Roll out again and cut out. Repeat until all of the mixture is used up.
Brush with egg wash being careful not to let any dribble down the sides – again, this will hamper the rising of the dough – then sprinkle with sugar. Bake for 15-20 minutes until golden brown and well risen. If there is uneven browning at the 10-minute mark, switch the trays around in the oven.
Cool on a rack.
Scones are best enjoyed on the day or the day after they are made. They do freeze well. Enliven them by popping them in the microwave for 10 to 20 seconds.
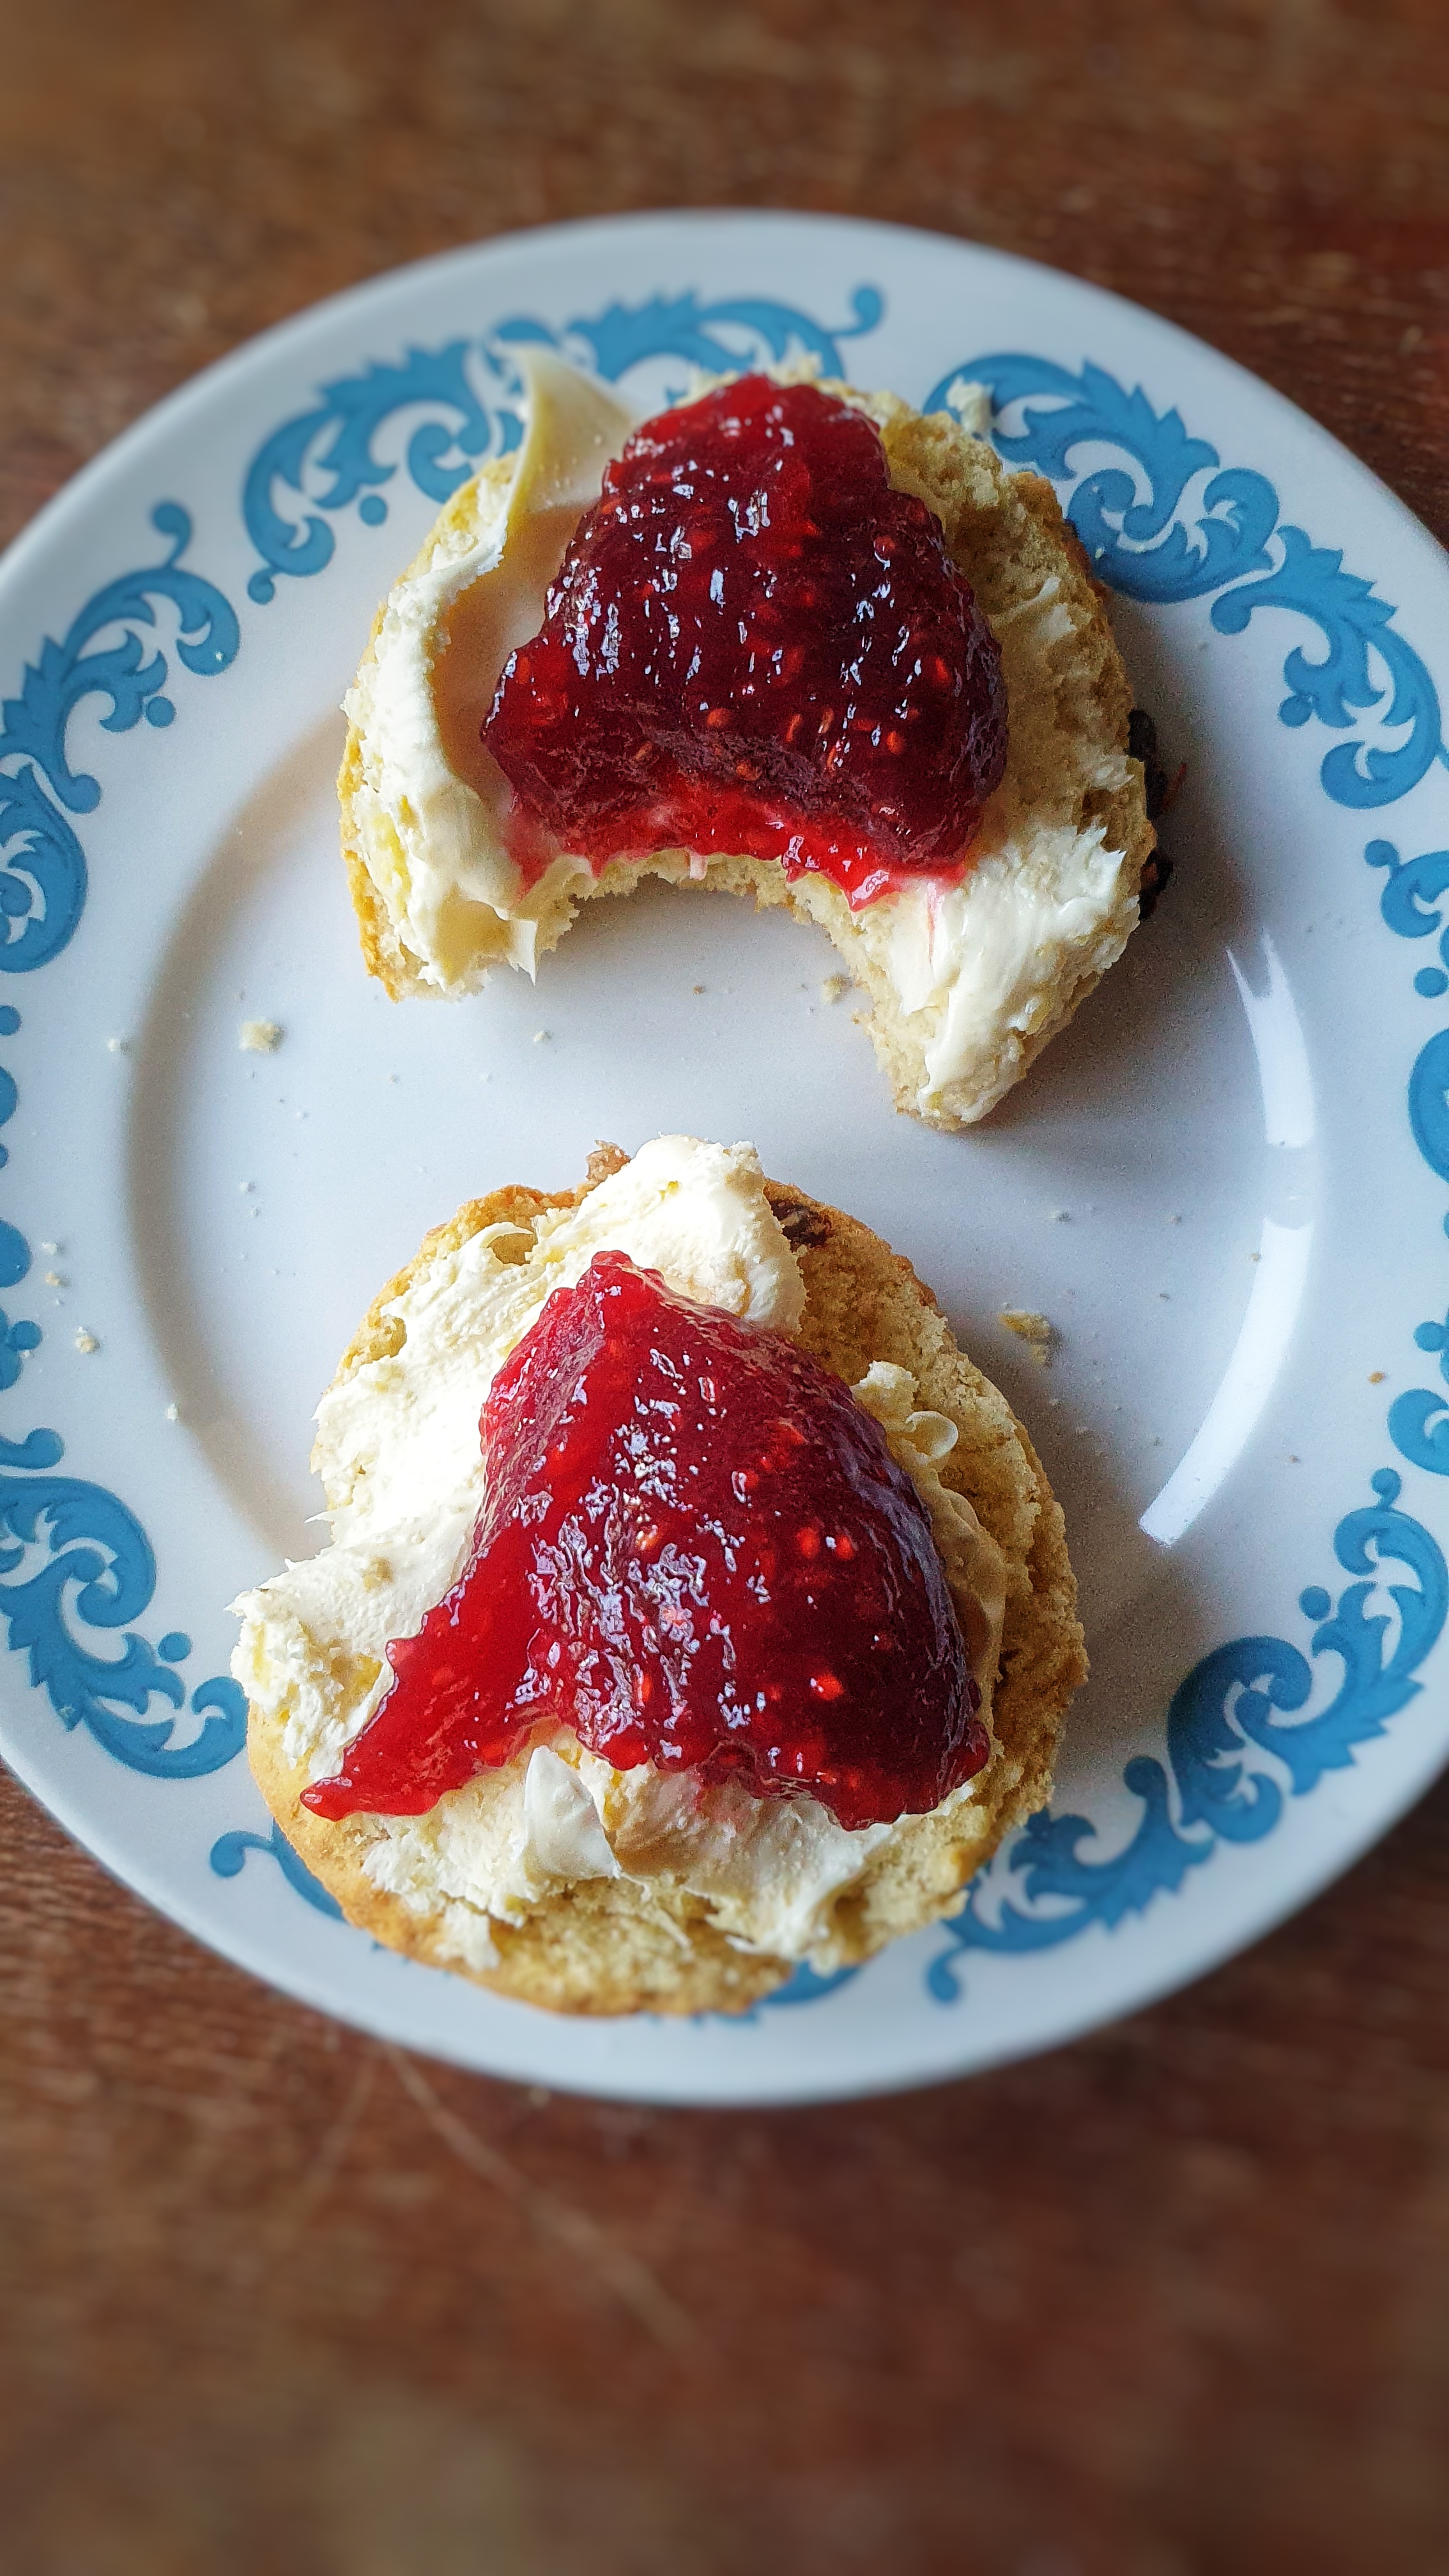
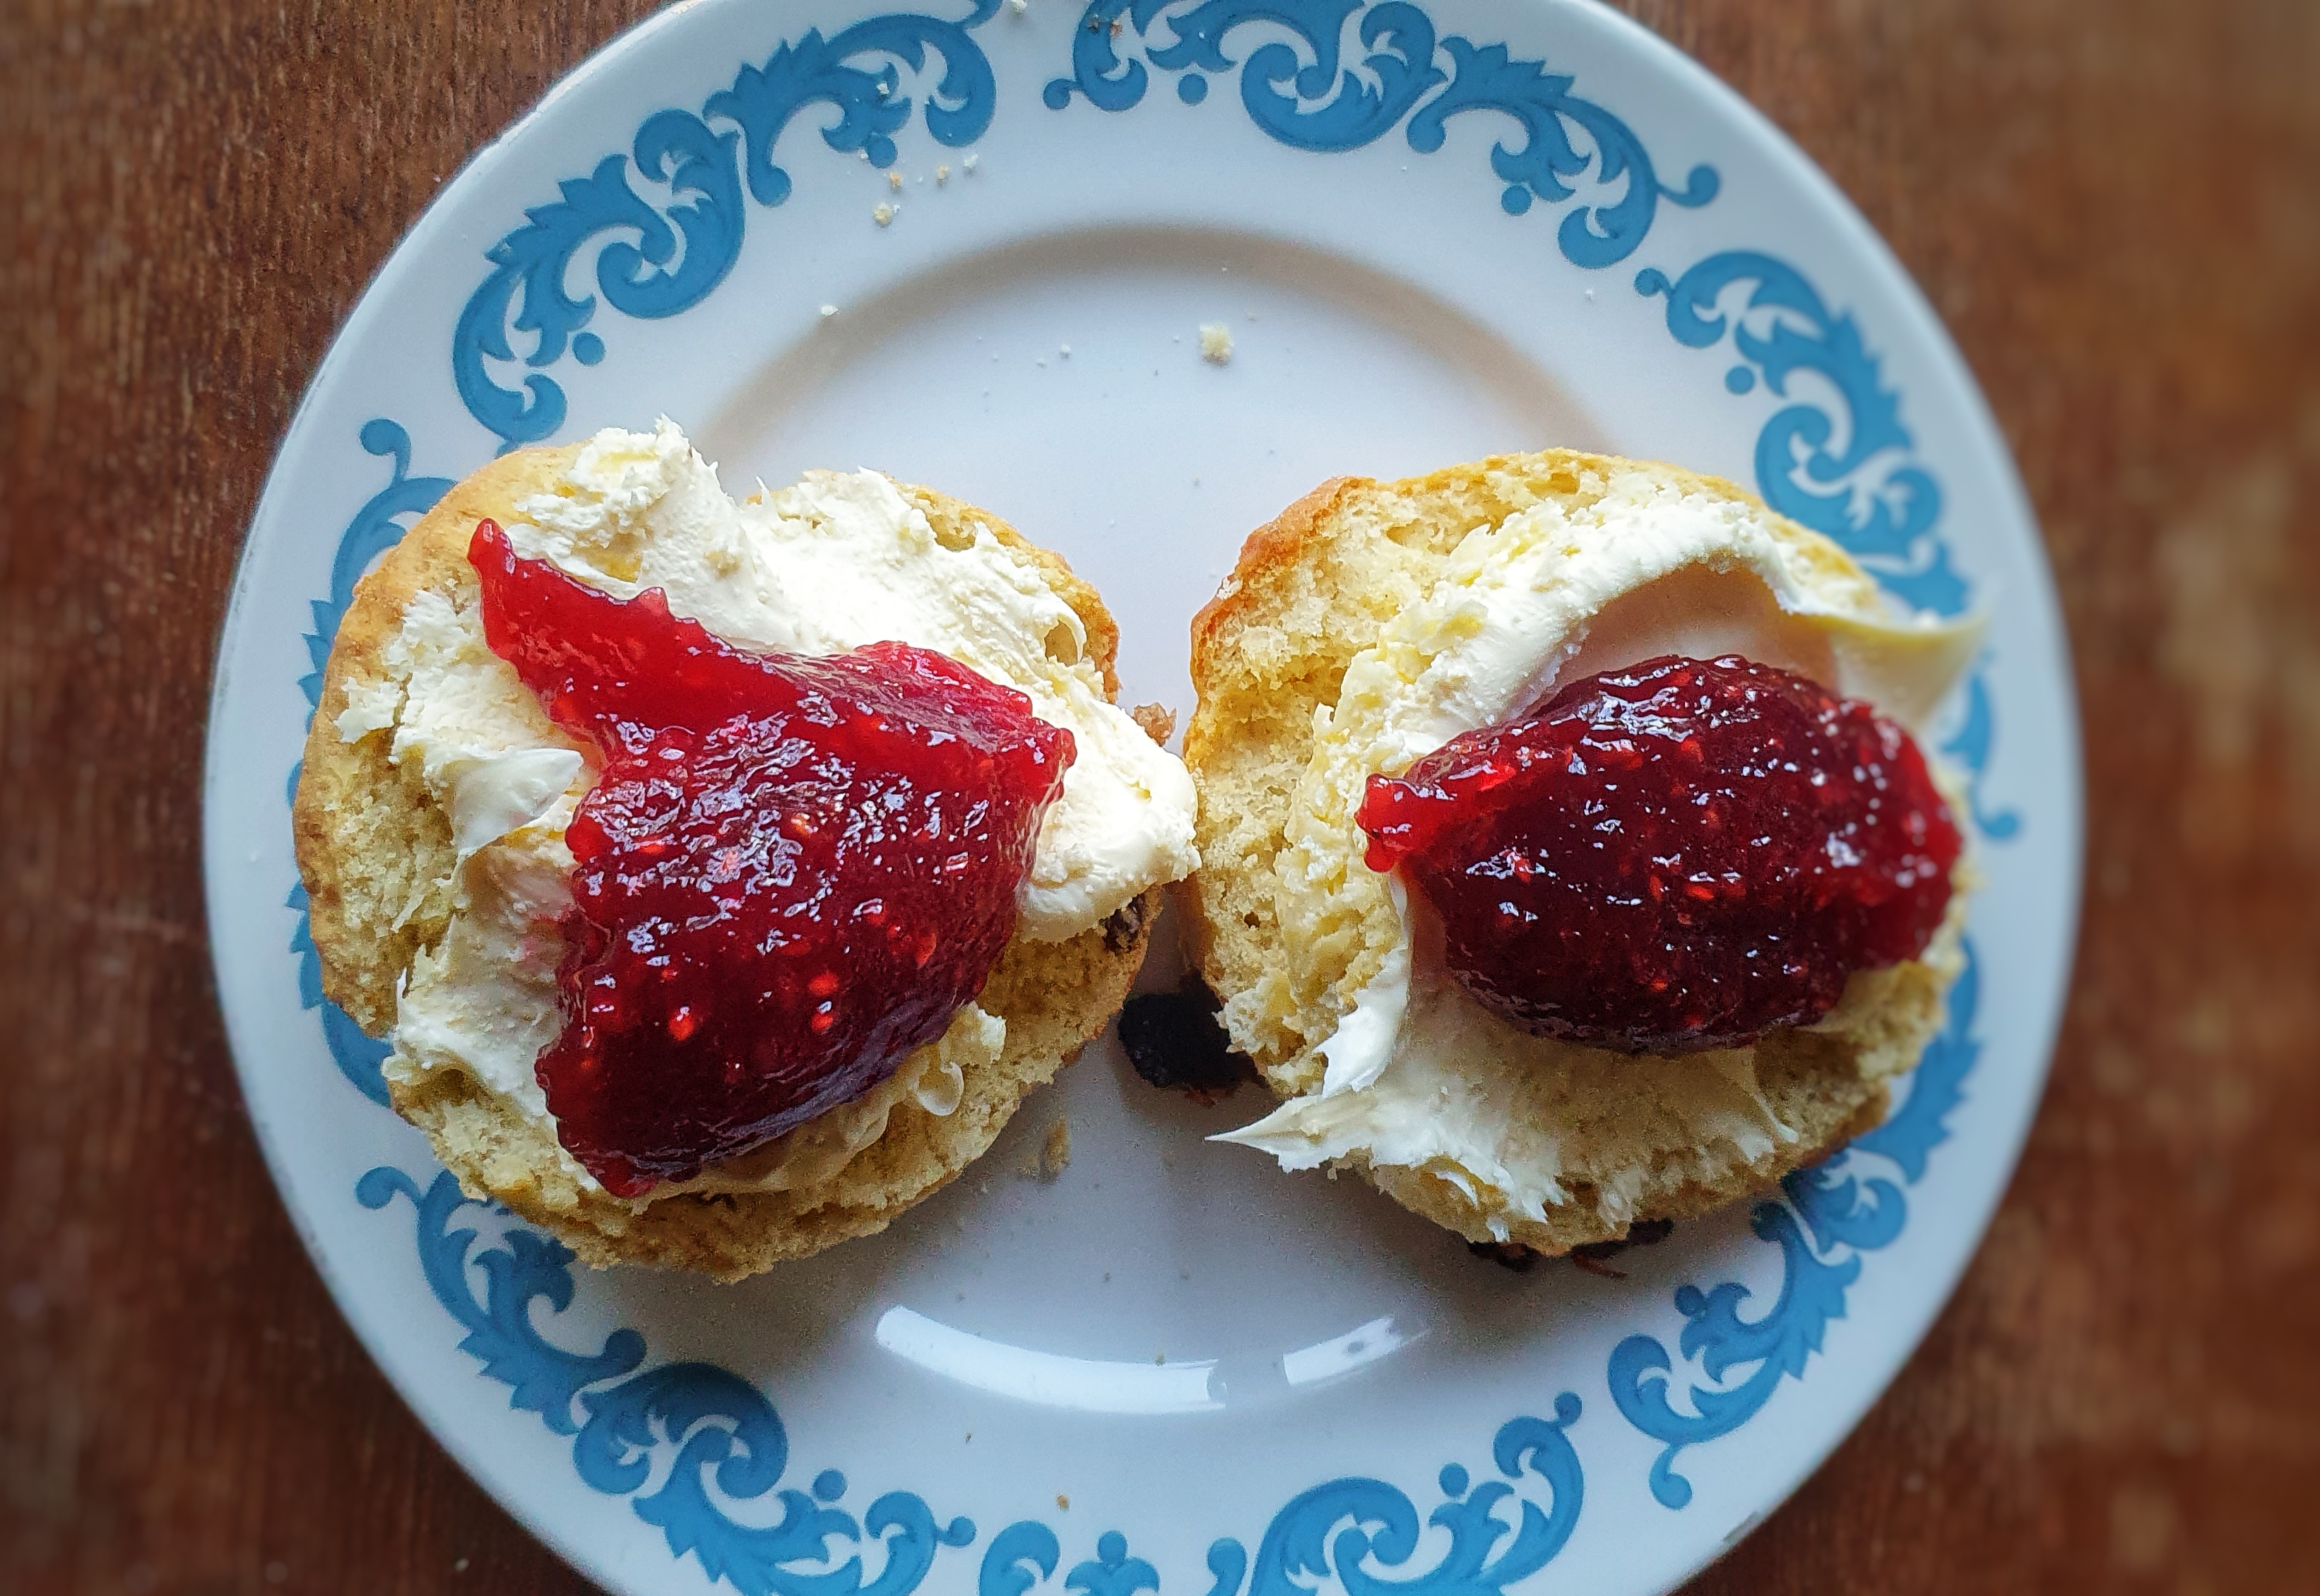
Eat with butter or clotted cream and jam.
Variations
Cranberry and Orange
Make as above, but add the zest of two oranges to the dry ingredients, and use dried cranberries instead of raisins or currants. Juice the oranges, pour into a measuring jug and top up with milk to 200ml/g.
Classic cheese scones
Use just 25 g caster sugar, and add 100 to 125 g grated Cheddar cheese once the flour has been rubbed in. If you like, you can add ½ teaspoon of dried herbs and a good pinch of Cayenne pepper. Use 230 g/ml of milk instead of 200 g/ml. Sprinkle some finely grated cheese (Parmesan is good) over the egg-washed scones before they go in the oven.
Walnut and Stilton scones
As above, but use 100-125 g grated Stilton and 80 g chopped walnuts
A hospitable Yorkshire housewife would consider her tea table was barely spread if it were not liberally supplied with these delicious cakes, constant relays of which should be served steaming hot.
A split and toasted fruit teacake, liberally spread with melting salted butter is one of life’s simple pleasures. For those of you who are not already in the know, a Yorkshire teacake is a round, slightly flattened, enriched, soft breadcake usually containing a little sugar, spice, dried fruit, and candied peel. There was a time when England had scores of regional fruited or enriched bread cakes and loaves, but they have largely gone by the wayside. Others that spring to mind are Bath buns, Wiltshire lardy cakes and Lincolnshire plum bread.[2] These types of cakes and breads are much more appreciated in Wales, Scotland and Ireland, or so it seems. The Yorkshire teacake has escaped its regional roots, so much so that it has lost its Yorkshire identifier and is simply called a teacake by most people.
Just-baked teacakes with plenty of salted butter
Yorkshire teacakes can be traced back to the opening decades of the 18th century when they were called ‘Yorkshire Cakes’. They will have been very expensive because they are enriched with eggs, butter, milk, and plenty of sugar and dried fruits.[3] By the 1880s, they are called Yorkshire teacakes.[4]
Working-class families enjoyed them too, but there was invariably less fruit, just a touch of sugar, half-and-half milk and water, no eggs and lard instead of butter. I like this more austere version, though I do go will all milk (full fat, of course) and much prefer lard to often over rich butter. Looking through recipes, the amount of lard varies greatly from a knob to over five ounces per pound of flour.
It’s very important that the teacakes are nice and soft. To achieve this, heed this excellent advice from Florence White:
Immediately after taking from the oven, rub over with buttered paper, and cover with a light, clean blanket; this gives a soft skin.[5]
When they are freshly baked they are lovely eaten untoasted, but any older than that and they must be split and toasted (or if you want to go hardcore Yorkshire, strong Cheddar cheese[6]).
It occurred to me that I hadn’t baked a batch of teacakes for a good few years, and I was thereafter craving them, so I baked a batch. They are so worth making at home and I give you my recipe, should you fancy having a go yourself.
If you like the blogs and podcast I produce and would to start a £3 monthly subscription, or would like to treat me to virtual coffee or pint: follow this link for more information.Thank you.
Recipe
This is quite a sticky dough and I would recommend making this in a stand mixer with a dough hook, but they can be made without one; just be prepared to be very sticky in the first 10 minutes of kneading. If you prefer plain teacakes, omit the fruit and spice and add half the sugar.
Makes 8 teacakes:
500 g strong plain flour, plus extra for kneading and shaping
30 g caster sugar
1 tsp salt
1 tsp instant yeast
½ tsp mixed spice or ½ a grated nutmeg
80 g softened lard or butter, or a mixture
300 ml warm milk or half-and-half milk and water
Around 2 tbs vegetable or sunflower oil
80 g mixed dried fruit
30 g candied peel (optional)
Extra milk for brushing
Add the flour, sugar, salt, yeast and spices to a mixing bowl, make a well in the centre and add the softened fat, then tip in the warm liquid. Using a kneading hook, mix the ingredients on a slow speed until everything has combined, then turn up the speed a notch or two and knead for about 10 minutes until smooth – it won’t be very elastic because of the lashings of lard.
If you want to do this by hand, mix the ingredients with a wooden spoon. When thoroughly mixed, leave it to stand for 15 minutes or so; this gives the flour to absorb some of the liquid making for easier hand kneading. Knead on a lightly floured surface for around 15 minutes.
Brush a clean mixing bowl with the vegetable oil, gather up the floppy dough as best as you can (oil your hands, it makes this bit much easier), tuck it into a ball and pop it in the oiled bowl. Cover with a tea towel or cling film until it has doubled in size. This will take a while; even sat close to the radiator, my dough took over two hours.
Now take two baking sheets and line them with greaseproof paper and set aside.
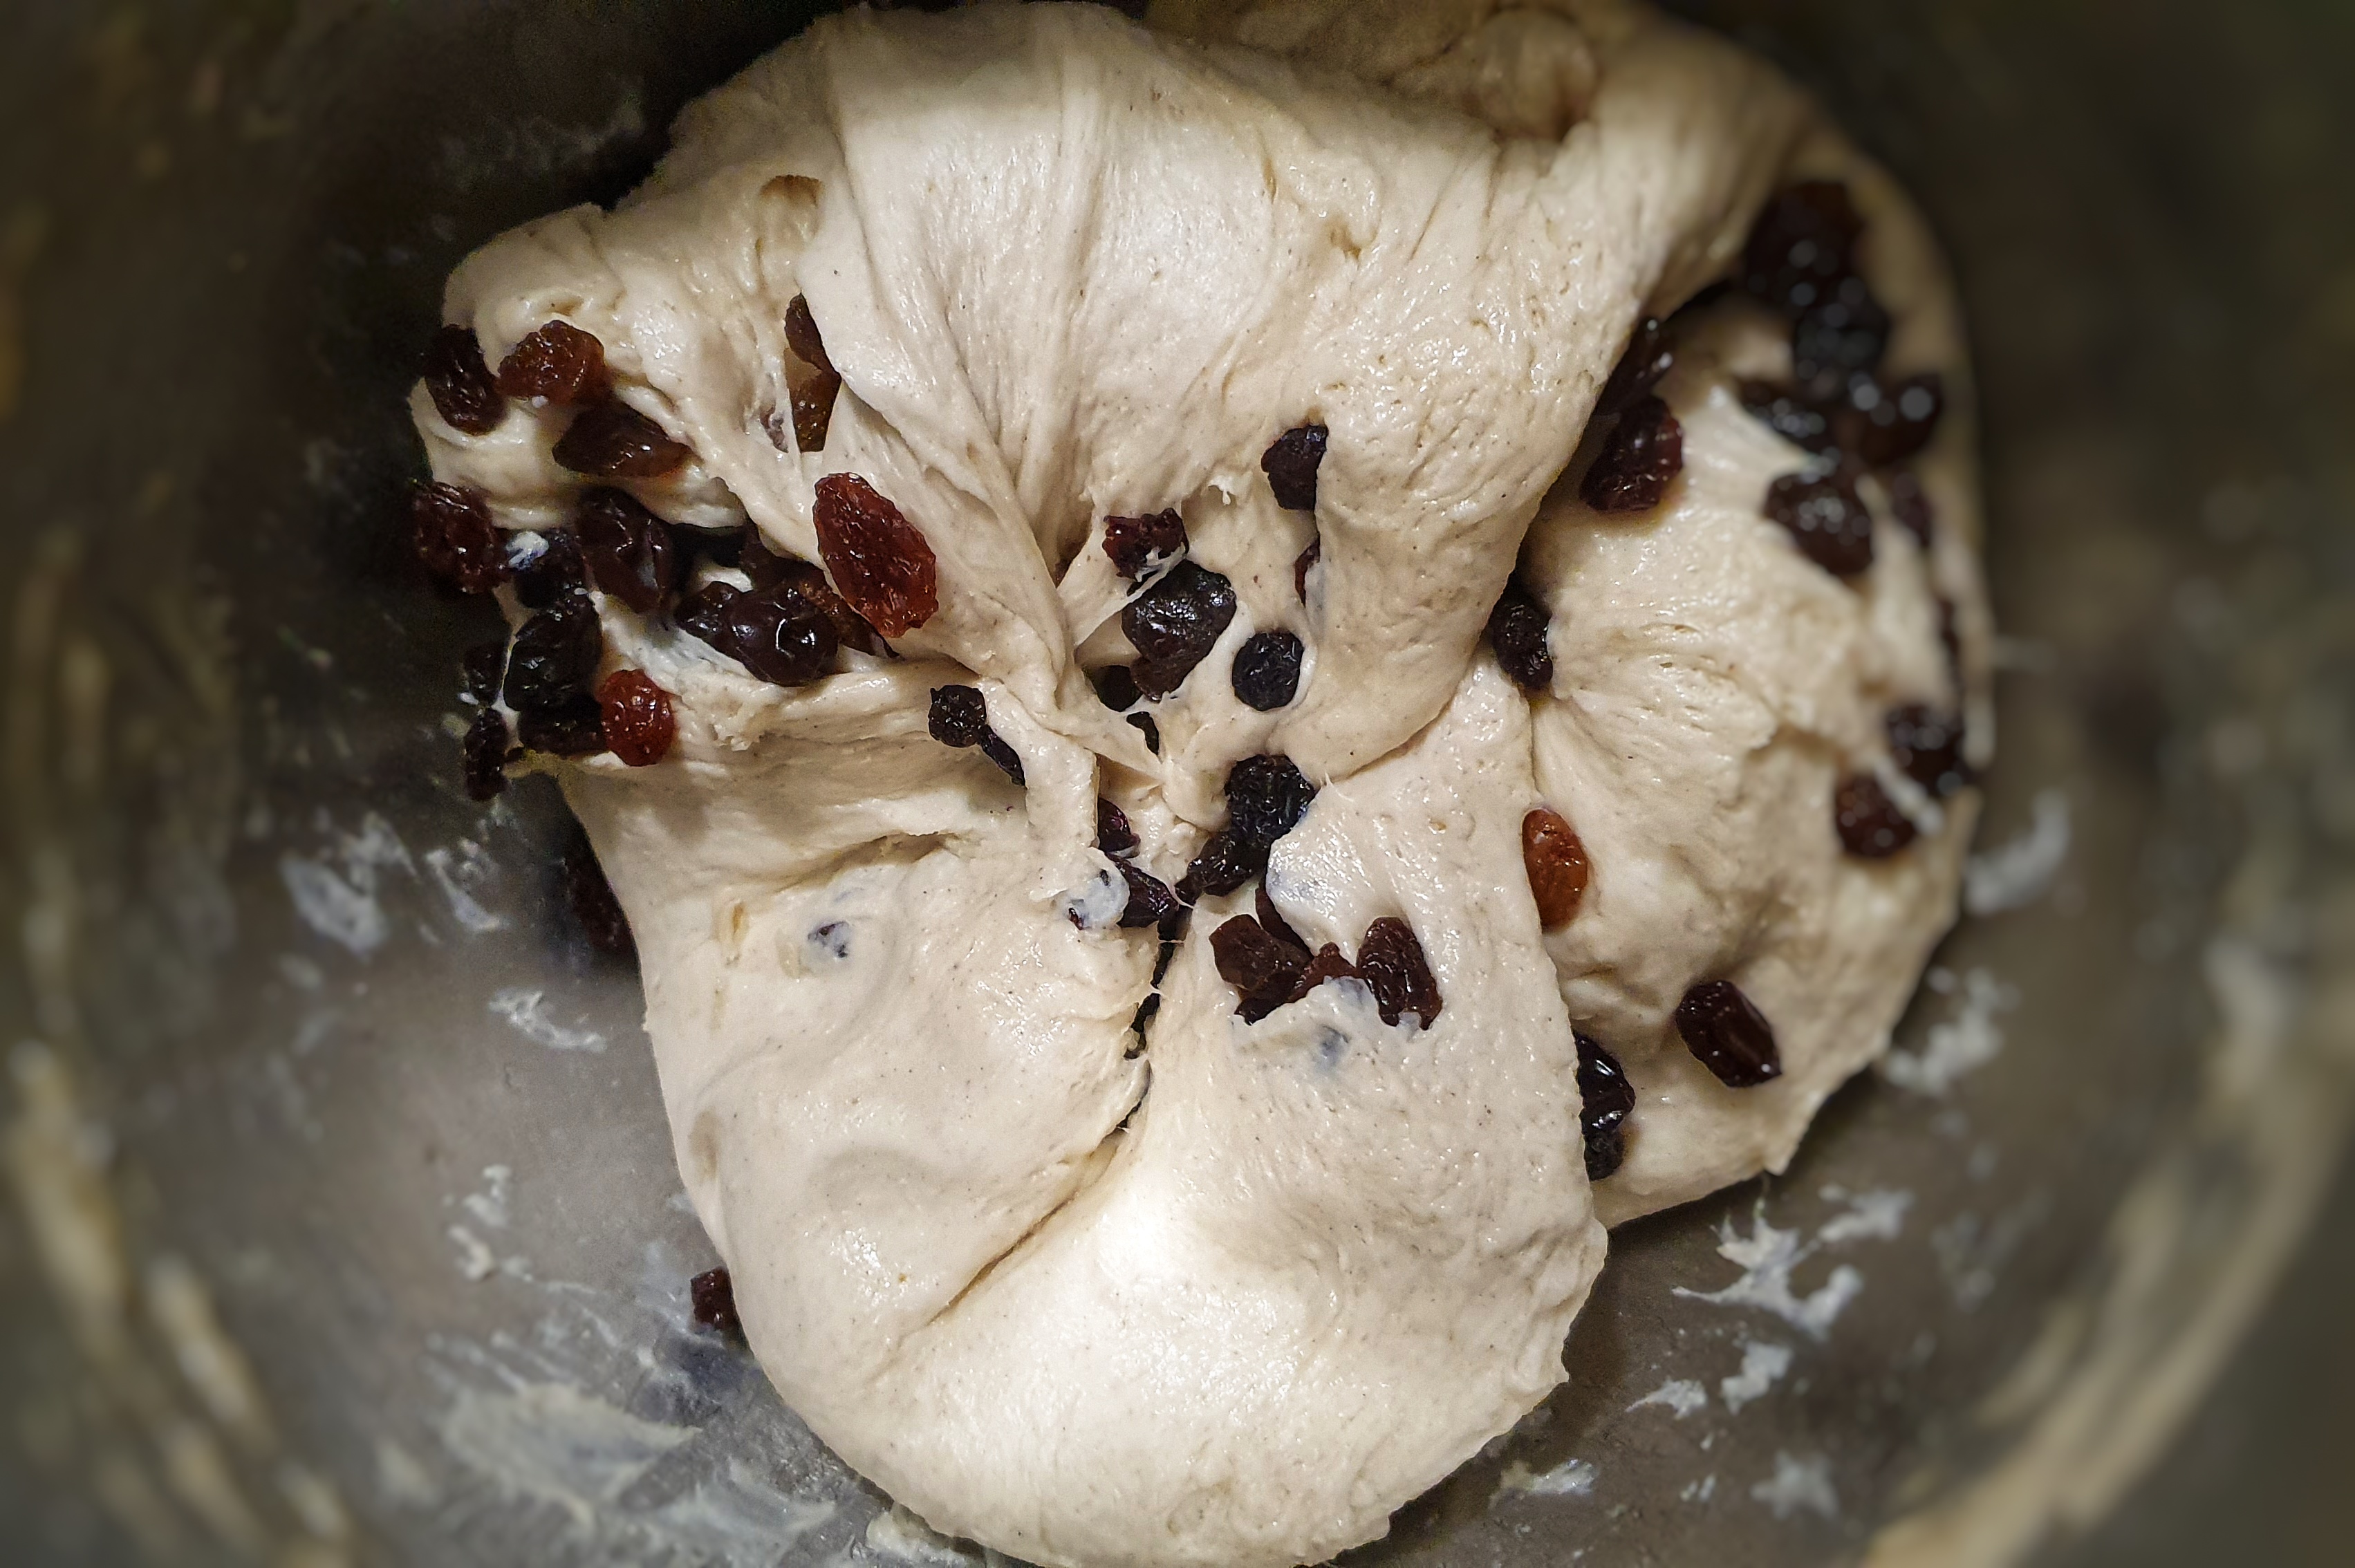
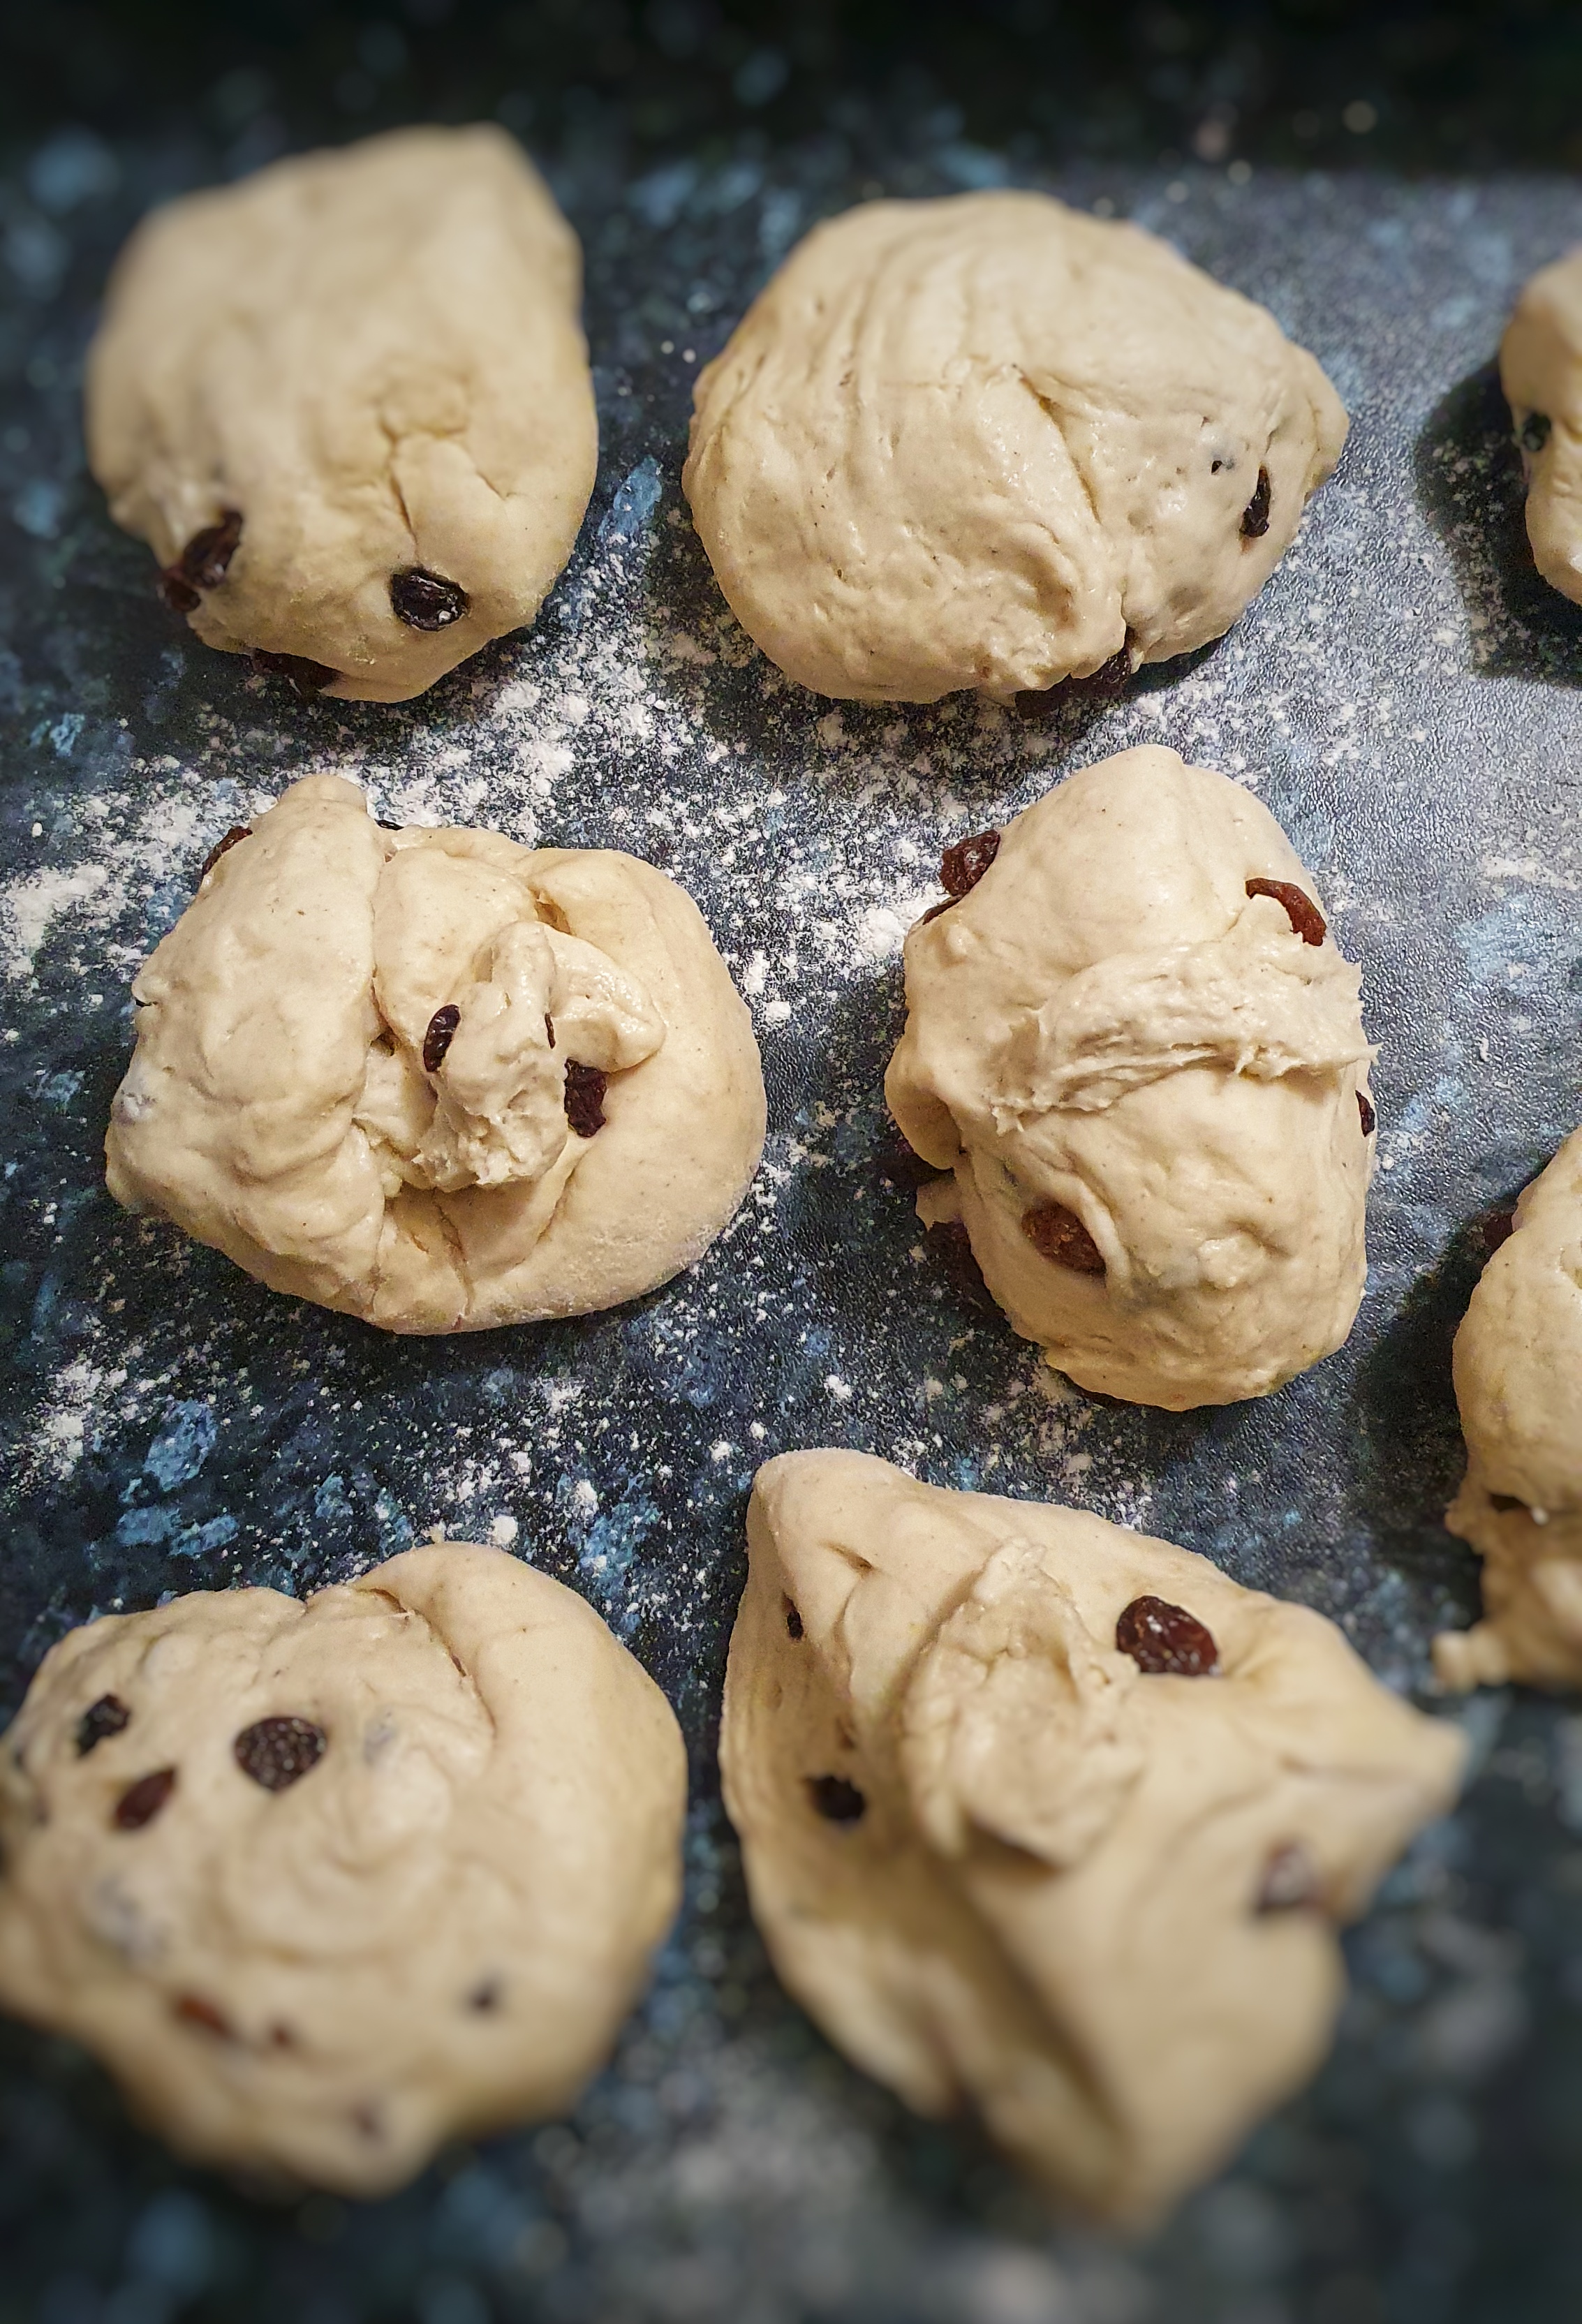
Tip the dough onto a floured worktop and press out into a square, add the fruit and knead it into the dough. You do this step in the oiled bowl if you like. When everything is reasonably equally distributed, cut the dough into 8 equal-sized pieces. Using just a very little flour roll the pieces of dough into tight balls, then roll them out into circles with a floured rolling pin so they are 4 to 5 cm thick. Sit them on your baking sheets as you make them.
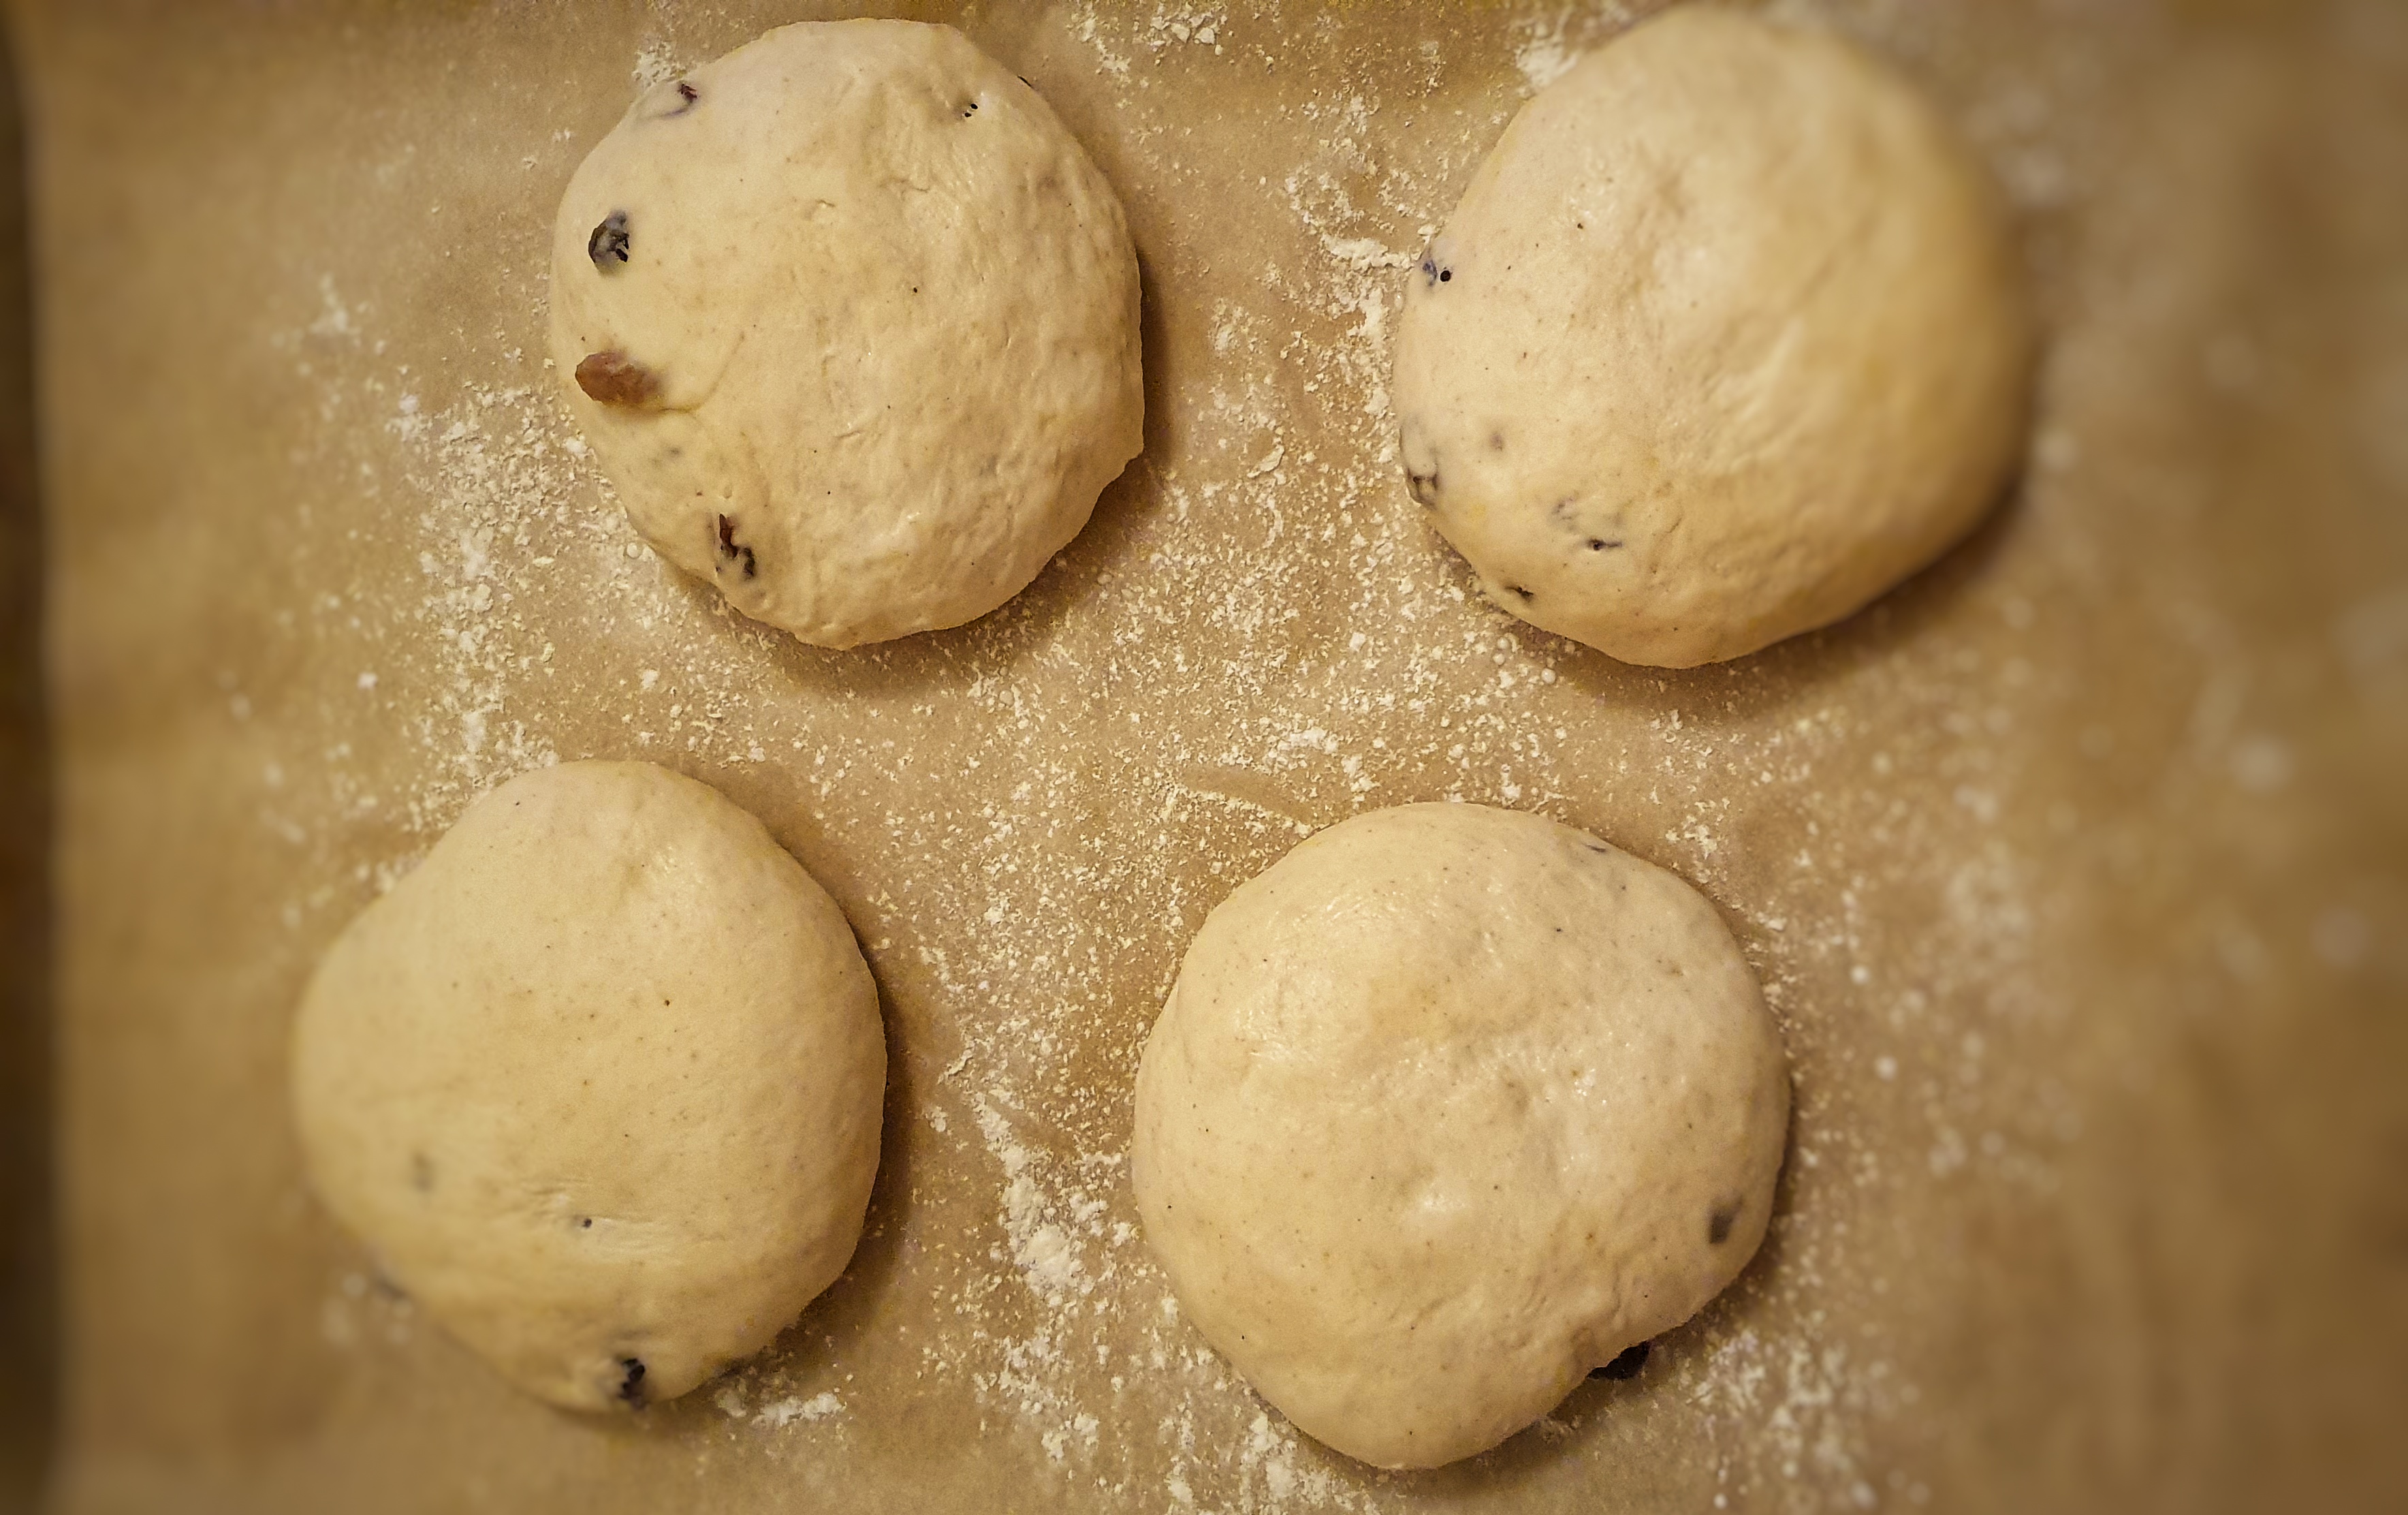
When you’ve done all 8, cover them with tea towels or place a container over them so they can prove again. In my experience the second proving takes about half the time of the first. As they prove turn your oven to 200°C fan (or equivalent). If you have a steam setting on your oven, use it. If you don’t, place a roasting tin in the bottom of the oven to heat up, and when you put your teacakes in the oven, tip some water into the now very hot tin and close the door.
Before and after the second proving
When they have doubled in size, brush them with milk and pop them in the oven. Bake for 15 to 20 minutes until golden brown. Test whether they are ready by tapping the base of one: it should sound hollow.
Remove the teacakes from the oven and immediately throw a double layer of tea towels over them to keep them soft as they cool.
At the end of 2024, I gave you my recipe for Bakewell pudding. The plan was to follow with my recipe for Bakewell tart. Alas, life, Christmas and then a holiday to New Zealand got in the way.
But I always get around to things eventually and I give it to you today!
The Bakewell tart, despite it being dearly loved by Brits, was originally made as a cheap, dumbed-down version of the rich Derbyshire pudding: the puff pastry swapped for shortcrust, and the buttery almond filling swapped for an almond-flavoured sponge cake.
I write about the histories of the Bakewell pudding and tart in Knead to Know: A History of Baking, so pick up a copy if you want to know more.
I have been using this recipe for years now and it’s a real crowd-pleaser. When the restaurant was open, I served this tart warm with a lemon-flavoured cream and received a big bear hug from a diner: there could have been no better seal of approval in my book! The secret to its success is that I make a frangipane rather than a sponge cake filling, bound together with just a tablespoon of flour.
If you like the blogs and podcast I produce and would to start a £3 monthly subscription, or would like to treat me to virtual coffee or pint: follow this link for more information.Thank you.
Recipe
Makes 1 x 21 cm/8 inch tart
For the sweet shortcrust pastry:
200 g plain flour
100 g salted butter, diced (or half-and-half butter and lard)
50 g caster or icing sugar
1 egg, well beaten
Cold water (see recipe)
For the filling:
100 g salted butter, softened
100 g caster sugar
2 eggs
100g ground almonds
30 g self-raising flour
¼ tsp almond extract
3 or 4 tbs raspberry jam
30 g slivered almonds
First, make the pastry: Place the flour and fat(s) in a mixing bowl and rub the fat in until the mixture resembles fresh breadcrumbs. You can do this by hand using fingertips or with the flat beater of a stand mixer on a slow speed. Make a well in the centre and add most of the egg. If using a stand mixer, slowly mix it in, pouring more egg into any dry patches. If doing by hand, use a butter knife to mix (this prevents overworking of the dough). You should have a cohesive dough that can be brought together with your hand – if it does seem dry, add a tablespoon of cold water.
Knead briefly, cover and allow to rest in the fridge for 20 to 30 minutes. Meanwhile, preheat your oven to 180°C and place a baking tray on the centre shelf
On a lightly floured work surface, roll out the pastry to the thickness of a pound coin, and use it to line an 8”/20 cm loose-bottomed tart tin or ring.[1] Prick the base with a fork and place it back in the fridge to firm up.
Now make the filling: using a hand beater or stand mixer, beat together the soft butter, caster sugar, eggs, almonds, flour and extract until smooth.
Take the pastry out of the fridge and spread jam over the bottom leaving a centimetre gap all around the inside edge. Spoon or pipe the mixture first around the edges and then the centre (this stops the jam from rising up the sides of the pastry lining), levelling off with a spatula.
Sprinkle with the slivered almonds and slide the tart onto the hot baking sheet and bake for 40 minutes, turning the heat down to 160°C if the top gets too brown. Cool on a rack, and remove from the tin when just warm.
[1] You will find that there is excess pastry – make some nice jam tarts or turnovers.