Category Archives: Vegetables

Dock Pudding

The good thing about being a lover of British puddings is that there is an almost infinite number to cook and try. All of the pudding recipes I have posted on the blog thus far have all been of the sweet variety, and they have all been fairly well known, but this year I am going to try and write some posts and recipes for savoury or obscure ones. First up is dock pudding which happens to tick both of those boxes. This pudding is one I have been meaning to cook for years, but I’ve only gotten around to it until now.

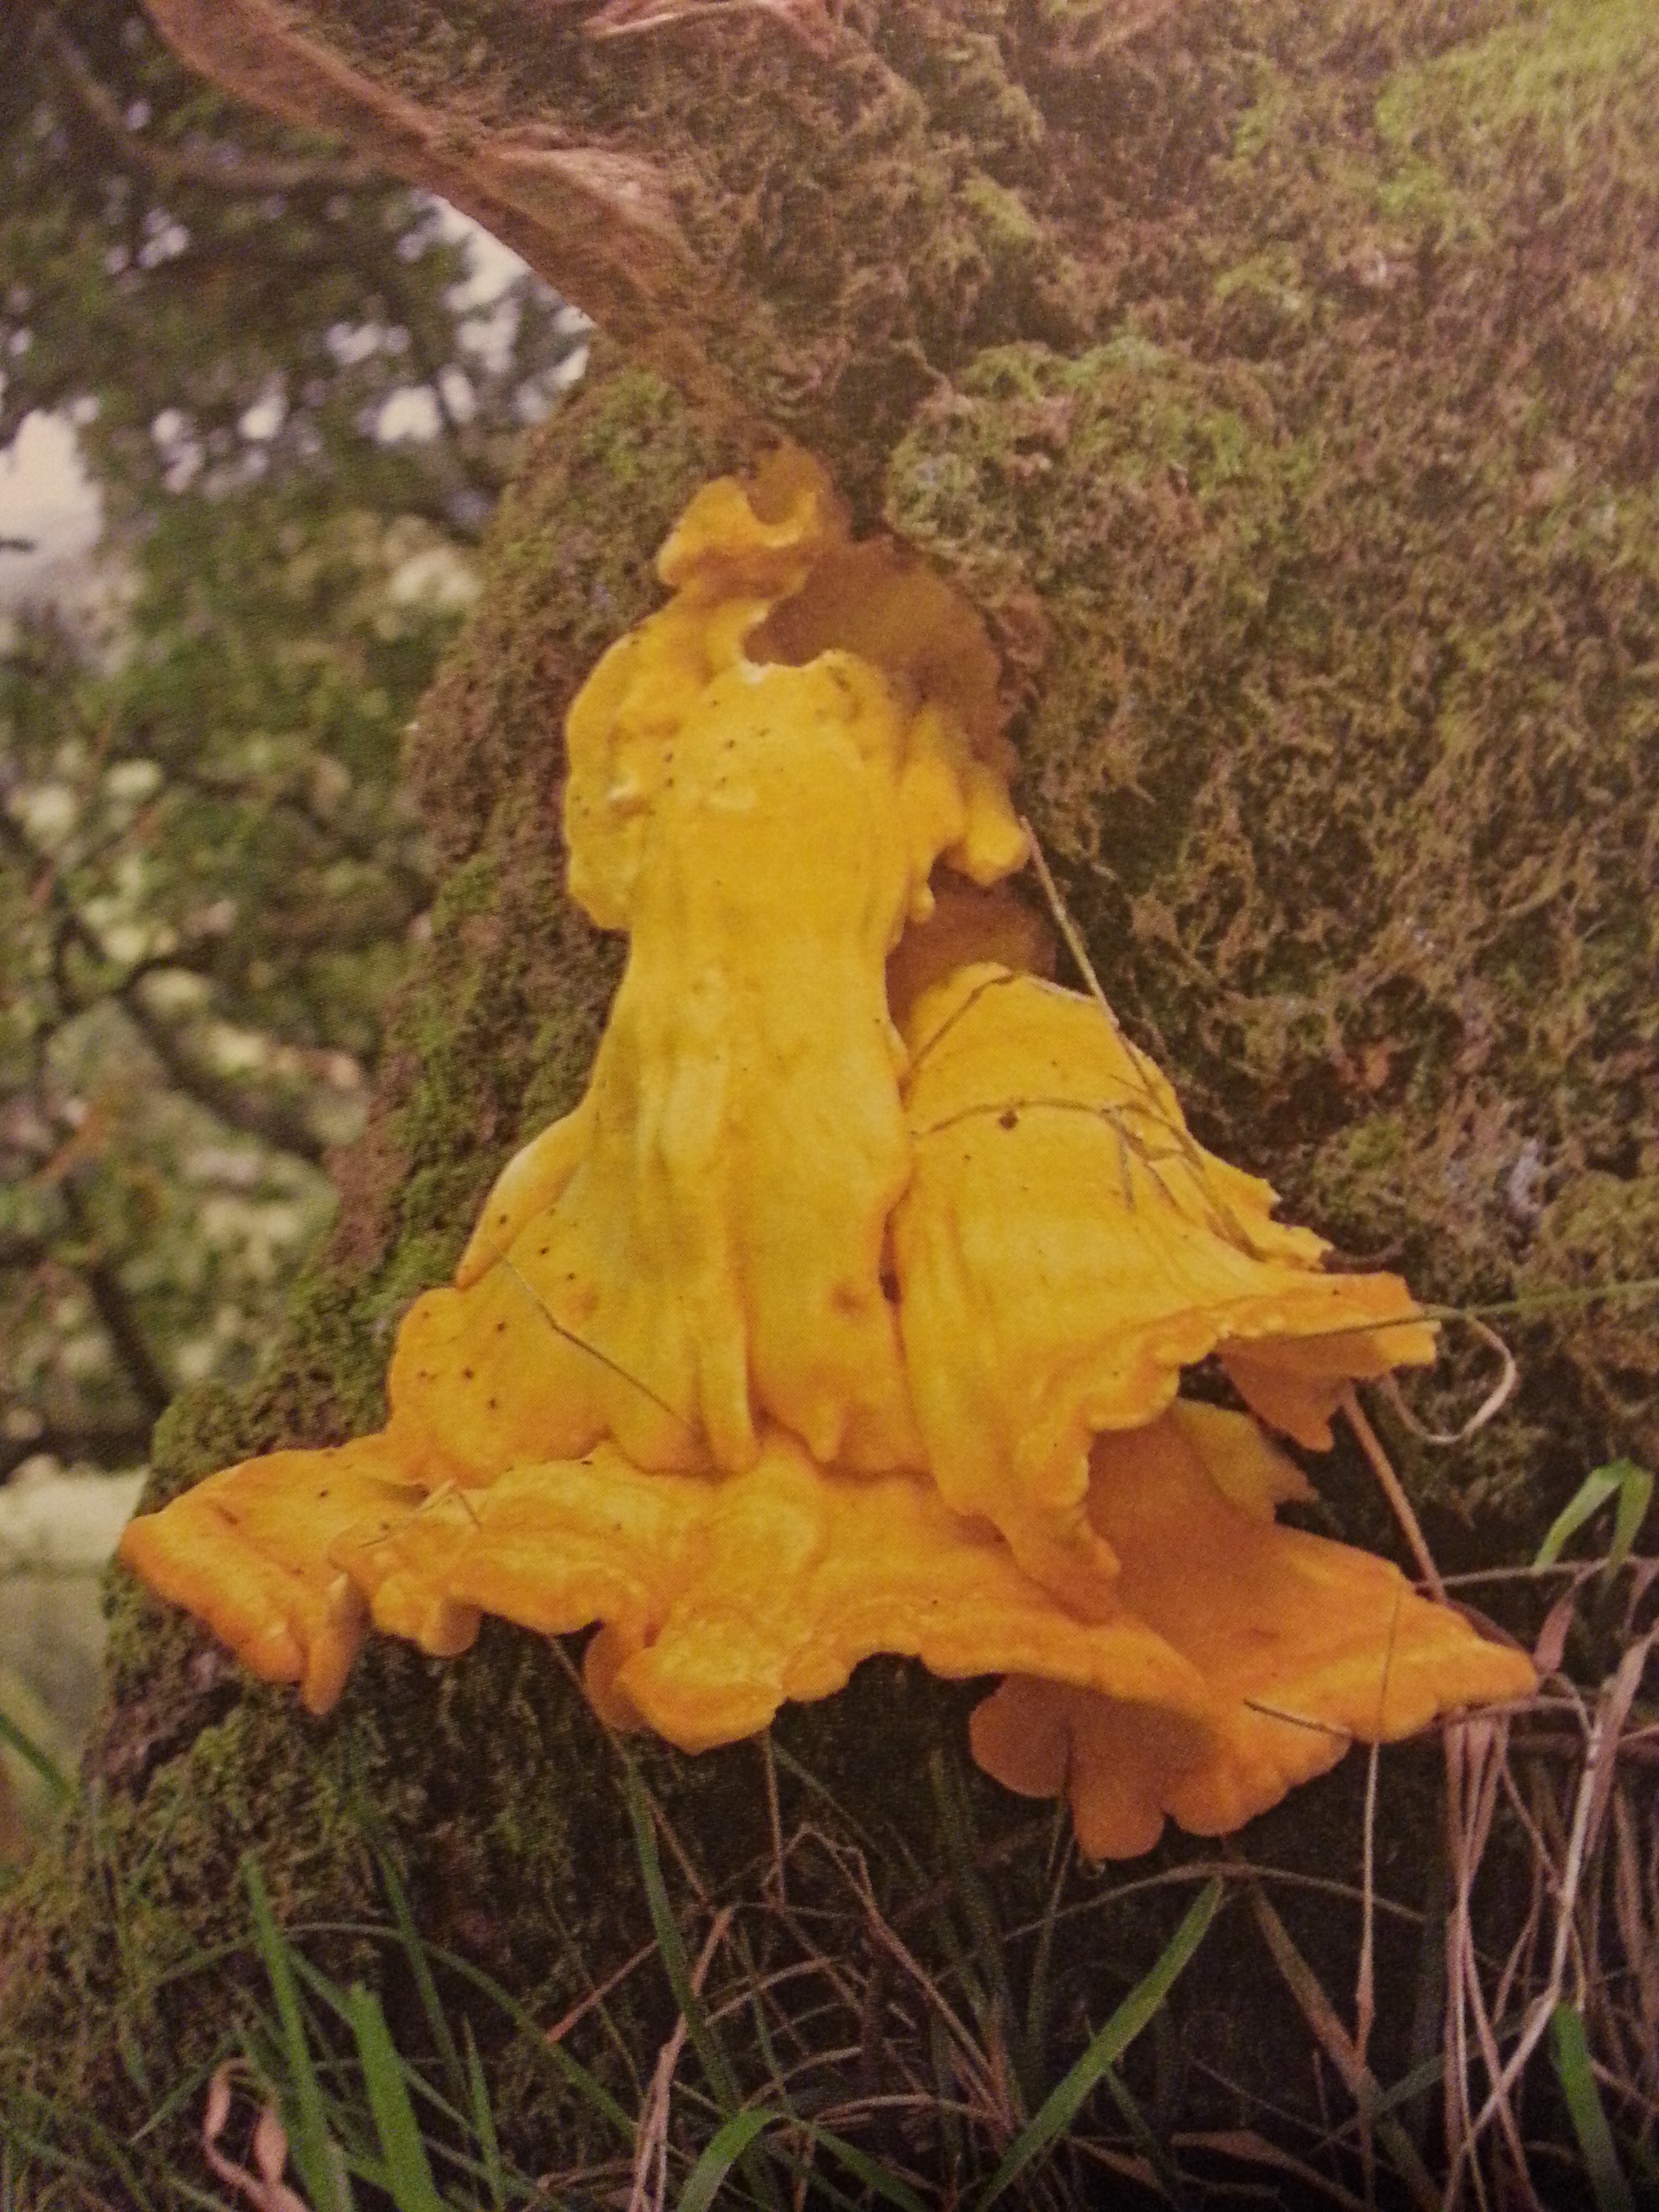
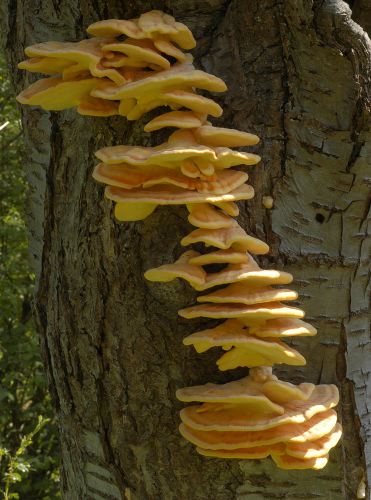
Dock pudding used to be very popular in Yorkshire, especially in the Calder Valley, West Yorkshire. The dock in question isn’t the common dock (the one you rub on nettle stings) but a particular species that goes under several names including bistort, passion dock and sweet dock, its Latin name is Polygonum bistorta.[1] It can be distinguished from the common dock by its yellowish spear-shaped leaves. The leaves are collected when young, alongside tender nettle tops, there is a recipe for it in Alexis Soyer’s classic 19th century work A Shilling Cookery For the People, where it is made with a mix of two-thirds passion dock, and one-third nettles.[2] These were supplemented or replaced with whatever greens were around: sorrel, raspberry leaves, chives, spinach, etc, the choice changing with the season. These are washed, sliced and cooked with onion or leek and oatmeal to make a very dark green porridge, which is fried in dollops in bacon fat, lard or beef dripping.[3] It has been likened to Welsh laverbread in colour and flavour, in that you will either love it or hate it.[4] It sometimes goes by the name herb pudding, which makes sense seeing as docks are only eaten in the springtime when they are tender. It is mixed with more oatmeal and water, tied in a cloth and boiled, cooled and fried in slices.

My patch of Passion dock

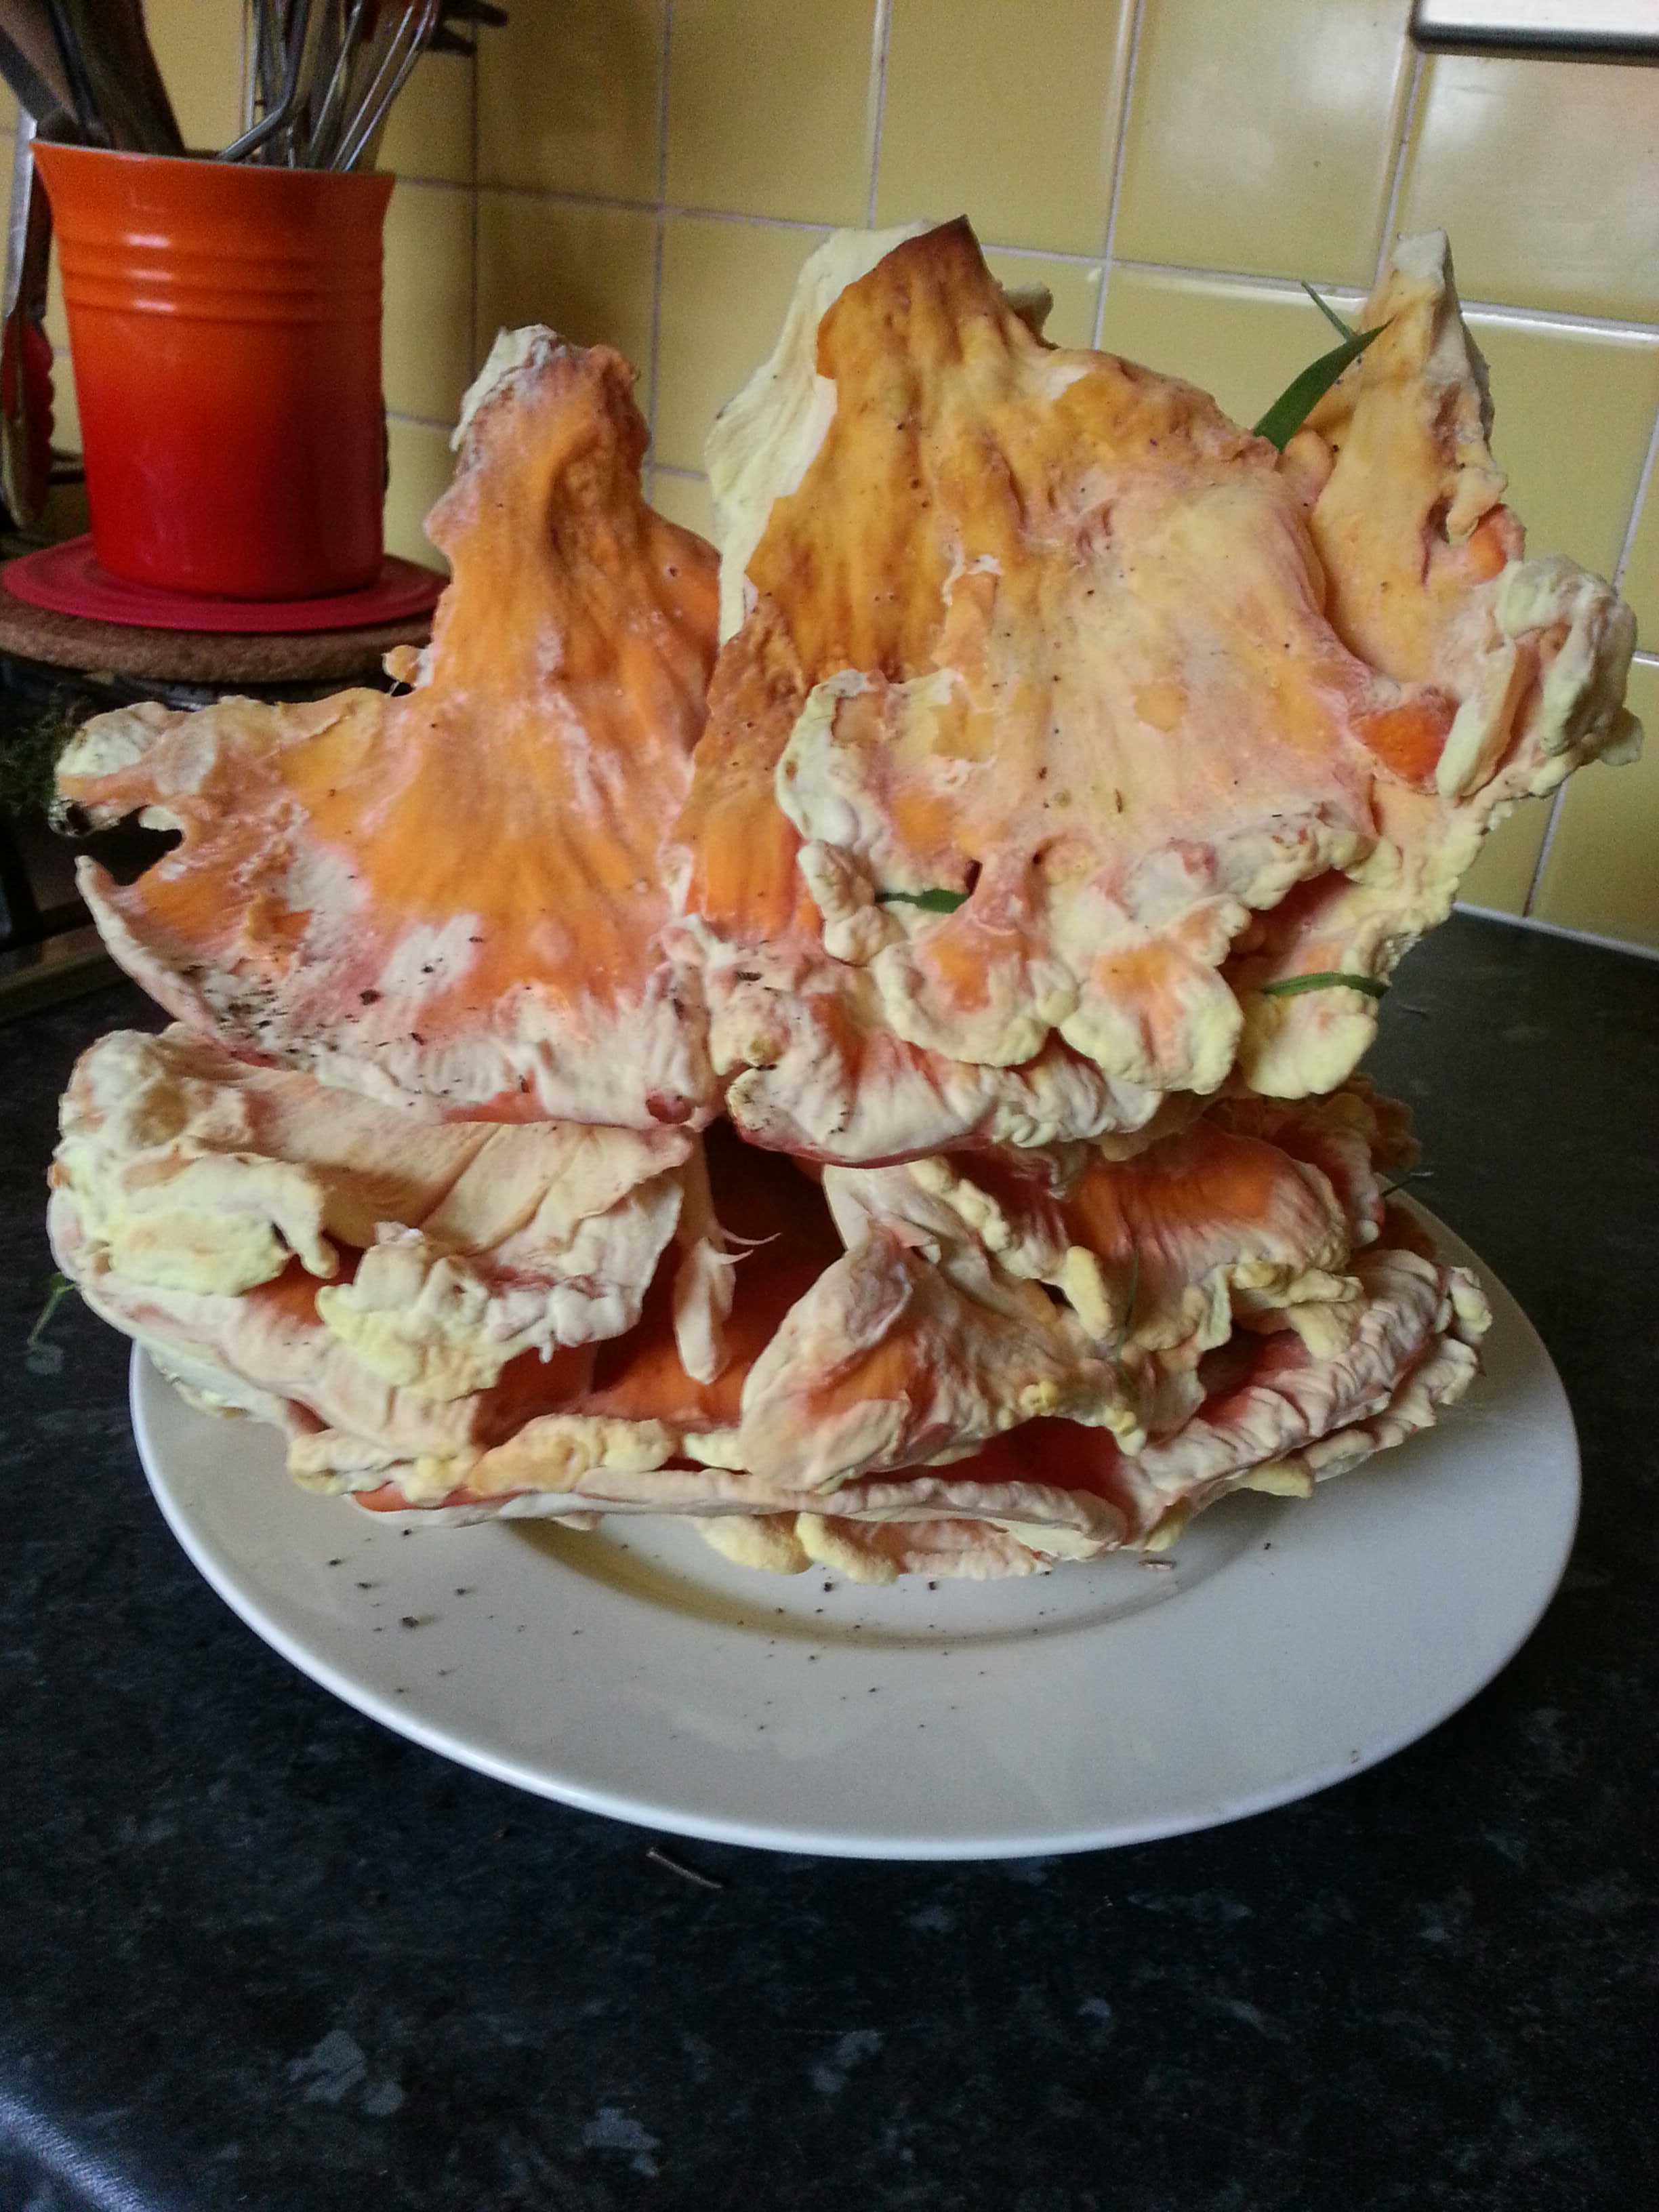
Technically, then, I could have used any green leaves, but I really wanted to make it with Passion dock; so called because it is found growing during Passion Week, the last week of Lent.[5] It was an extremely important food, the first fresh green vegetable after a winter of eating only pickled vegetables and salted meats. Many people were showing signs of scurvy by early spring, so few fresh vegetables were eaten. Dock is also said to be an excellent blood cleanser and good for the skin too, being a preventative of spots and pimples.[6]

Dock pudding was especially popular in the Victorian era, but was considered a famine food in the 20th century.[7] Very few people eat it now, but there is an outlier because the West Yorkshire town of Mytholmroyd has held the World Dock Pudding Championships every May since 1971.[8] I’m going to try my best to go next year.


If you like the blogs and podcast I produce and would to start a £3 monthly subscription, or would like to treat me to virtual coffee or pint: follow this link for more information. Thank you.


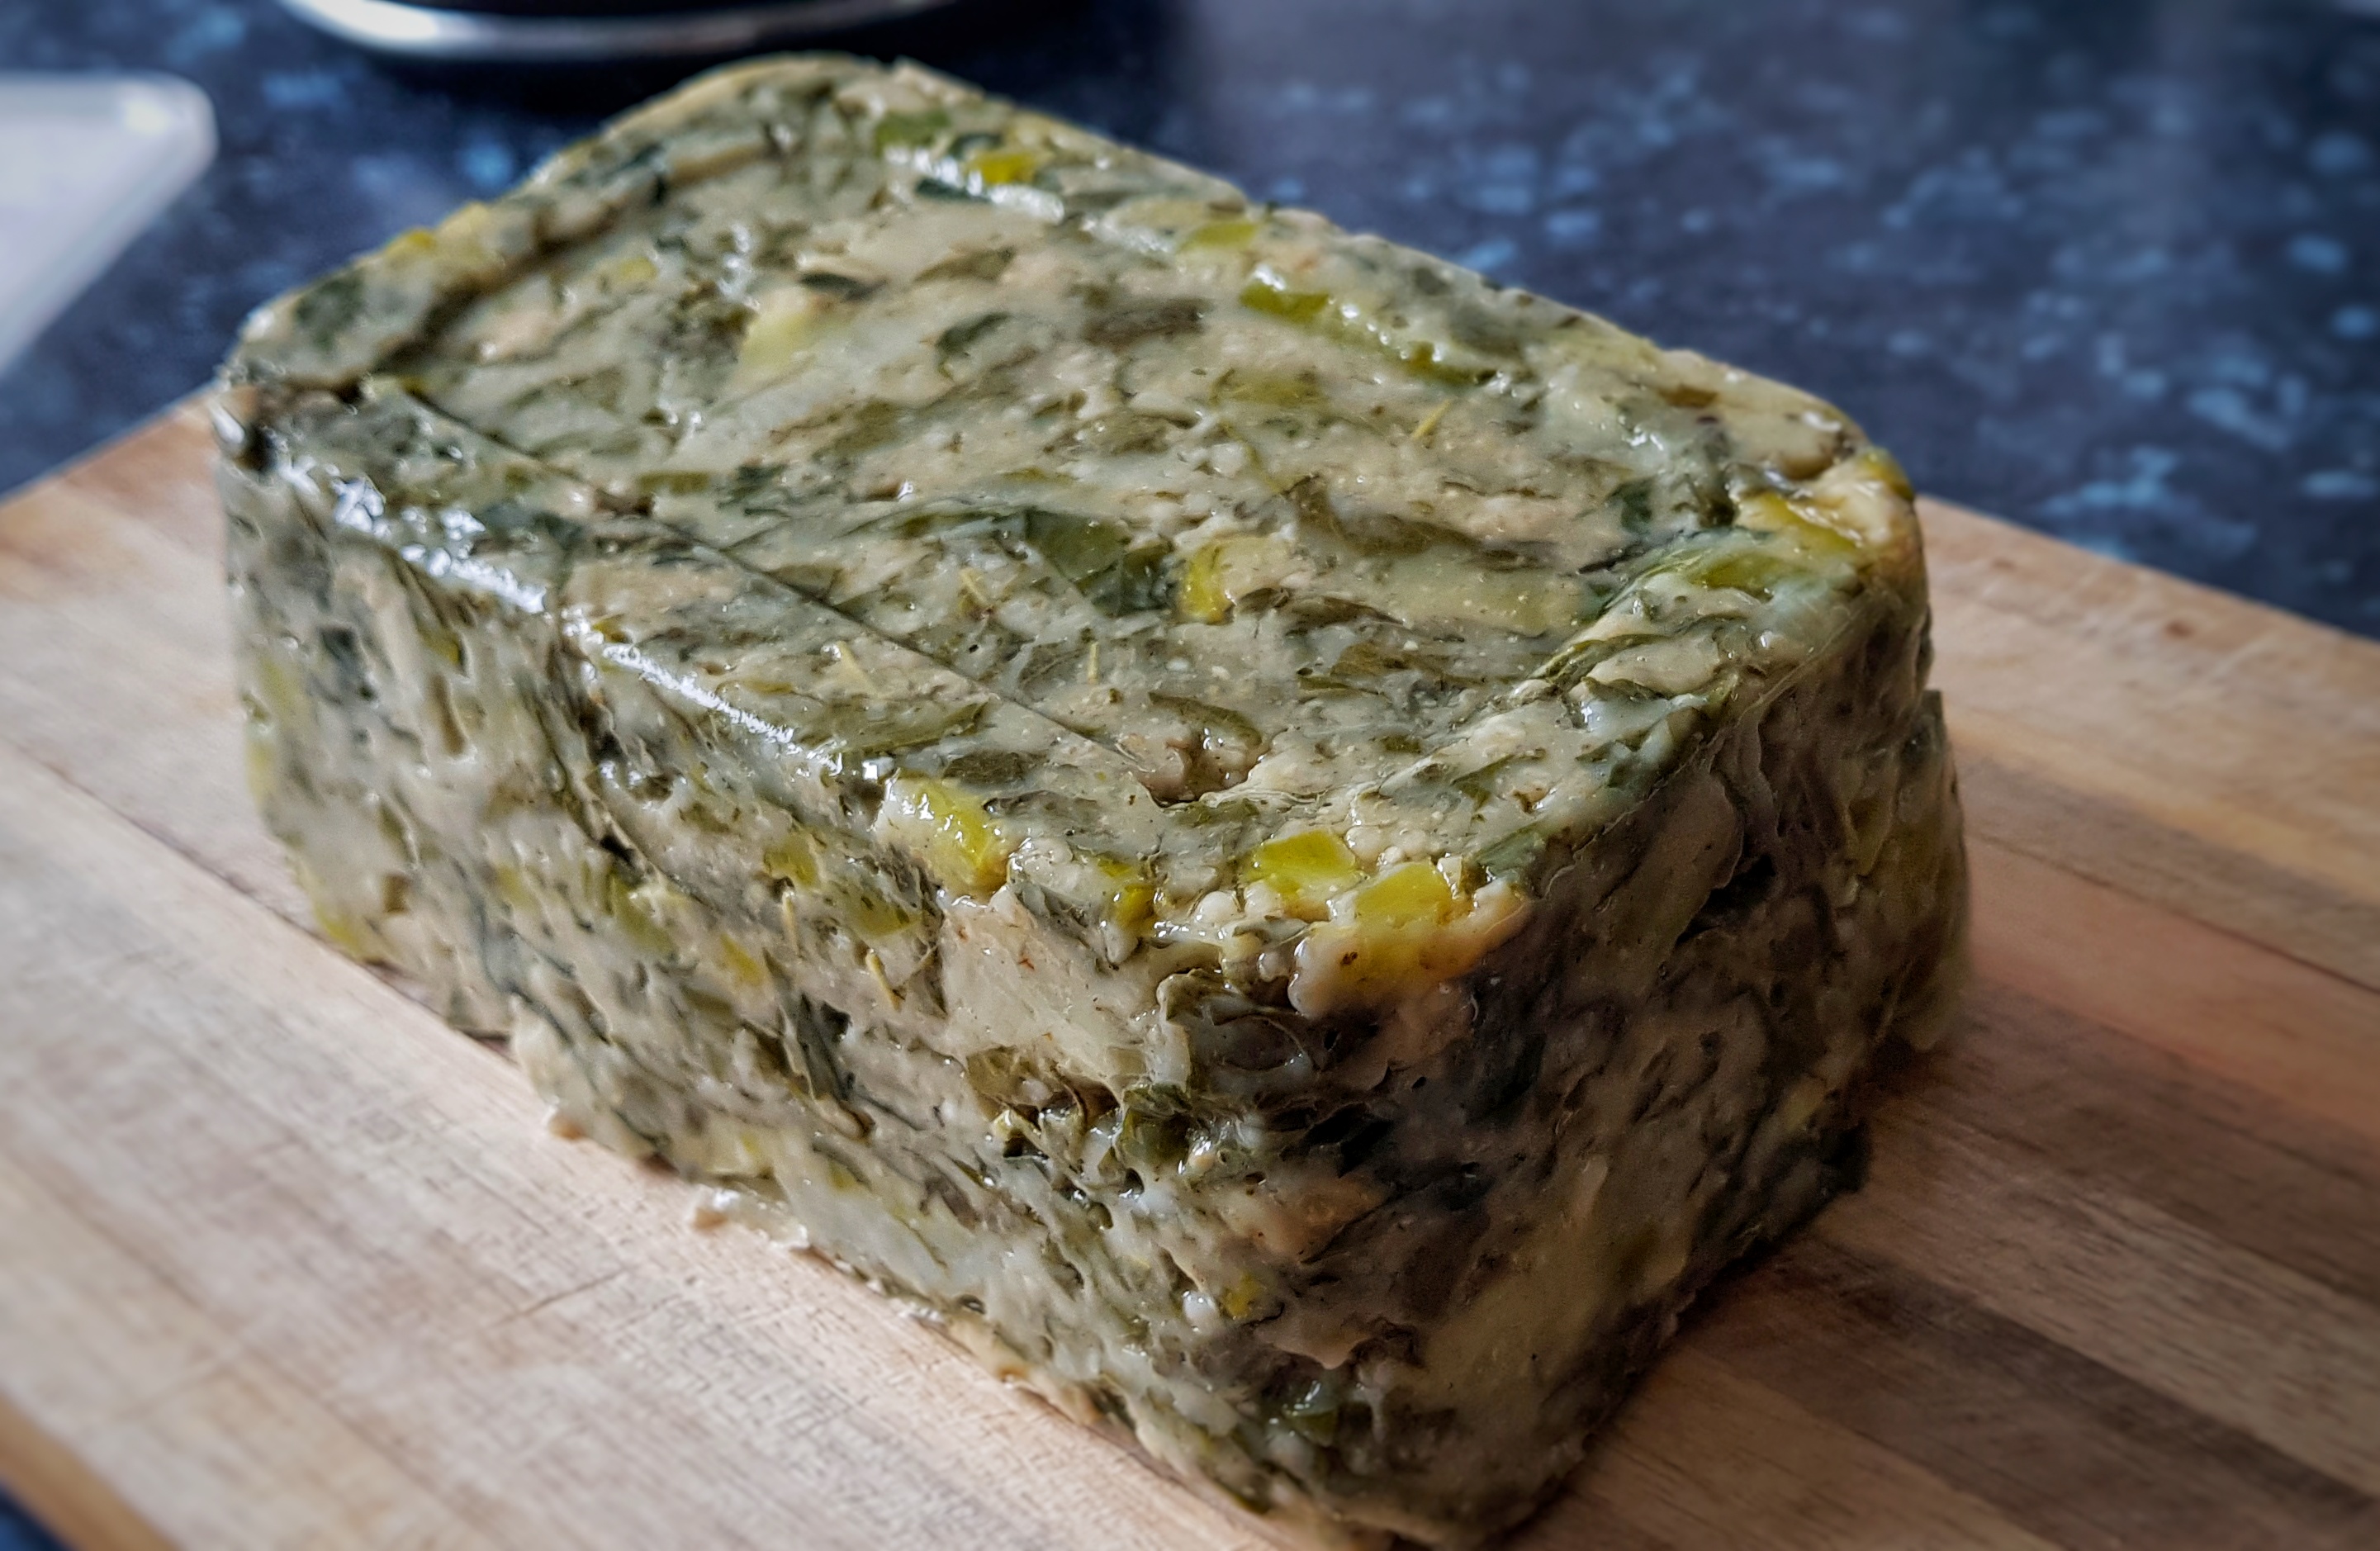
I found a patch of Passion dock growing in the Cheshire town of Lymm last year, but they were far too old and tough to pick, but I remembered this year. Oddly, I couldn’t find any nettles, but I did spot some sorrel and some wild garlic. I was in a bit of a rush, and didn’t have enough to make the very green sort of pudding, but I didn’t want to boil one (to save on fuel), so tried a common trick of cooking it in a saucepan, pouring and setting it in a tub so I could slice and fry it. This method is sometimes used for other savoury puddings such as black pudding or mealy pudding.

Makes 8 to 10 slices of pudding:

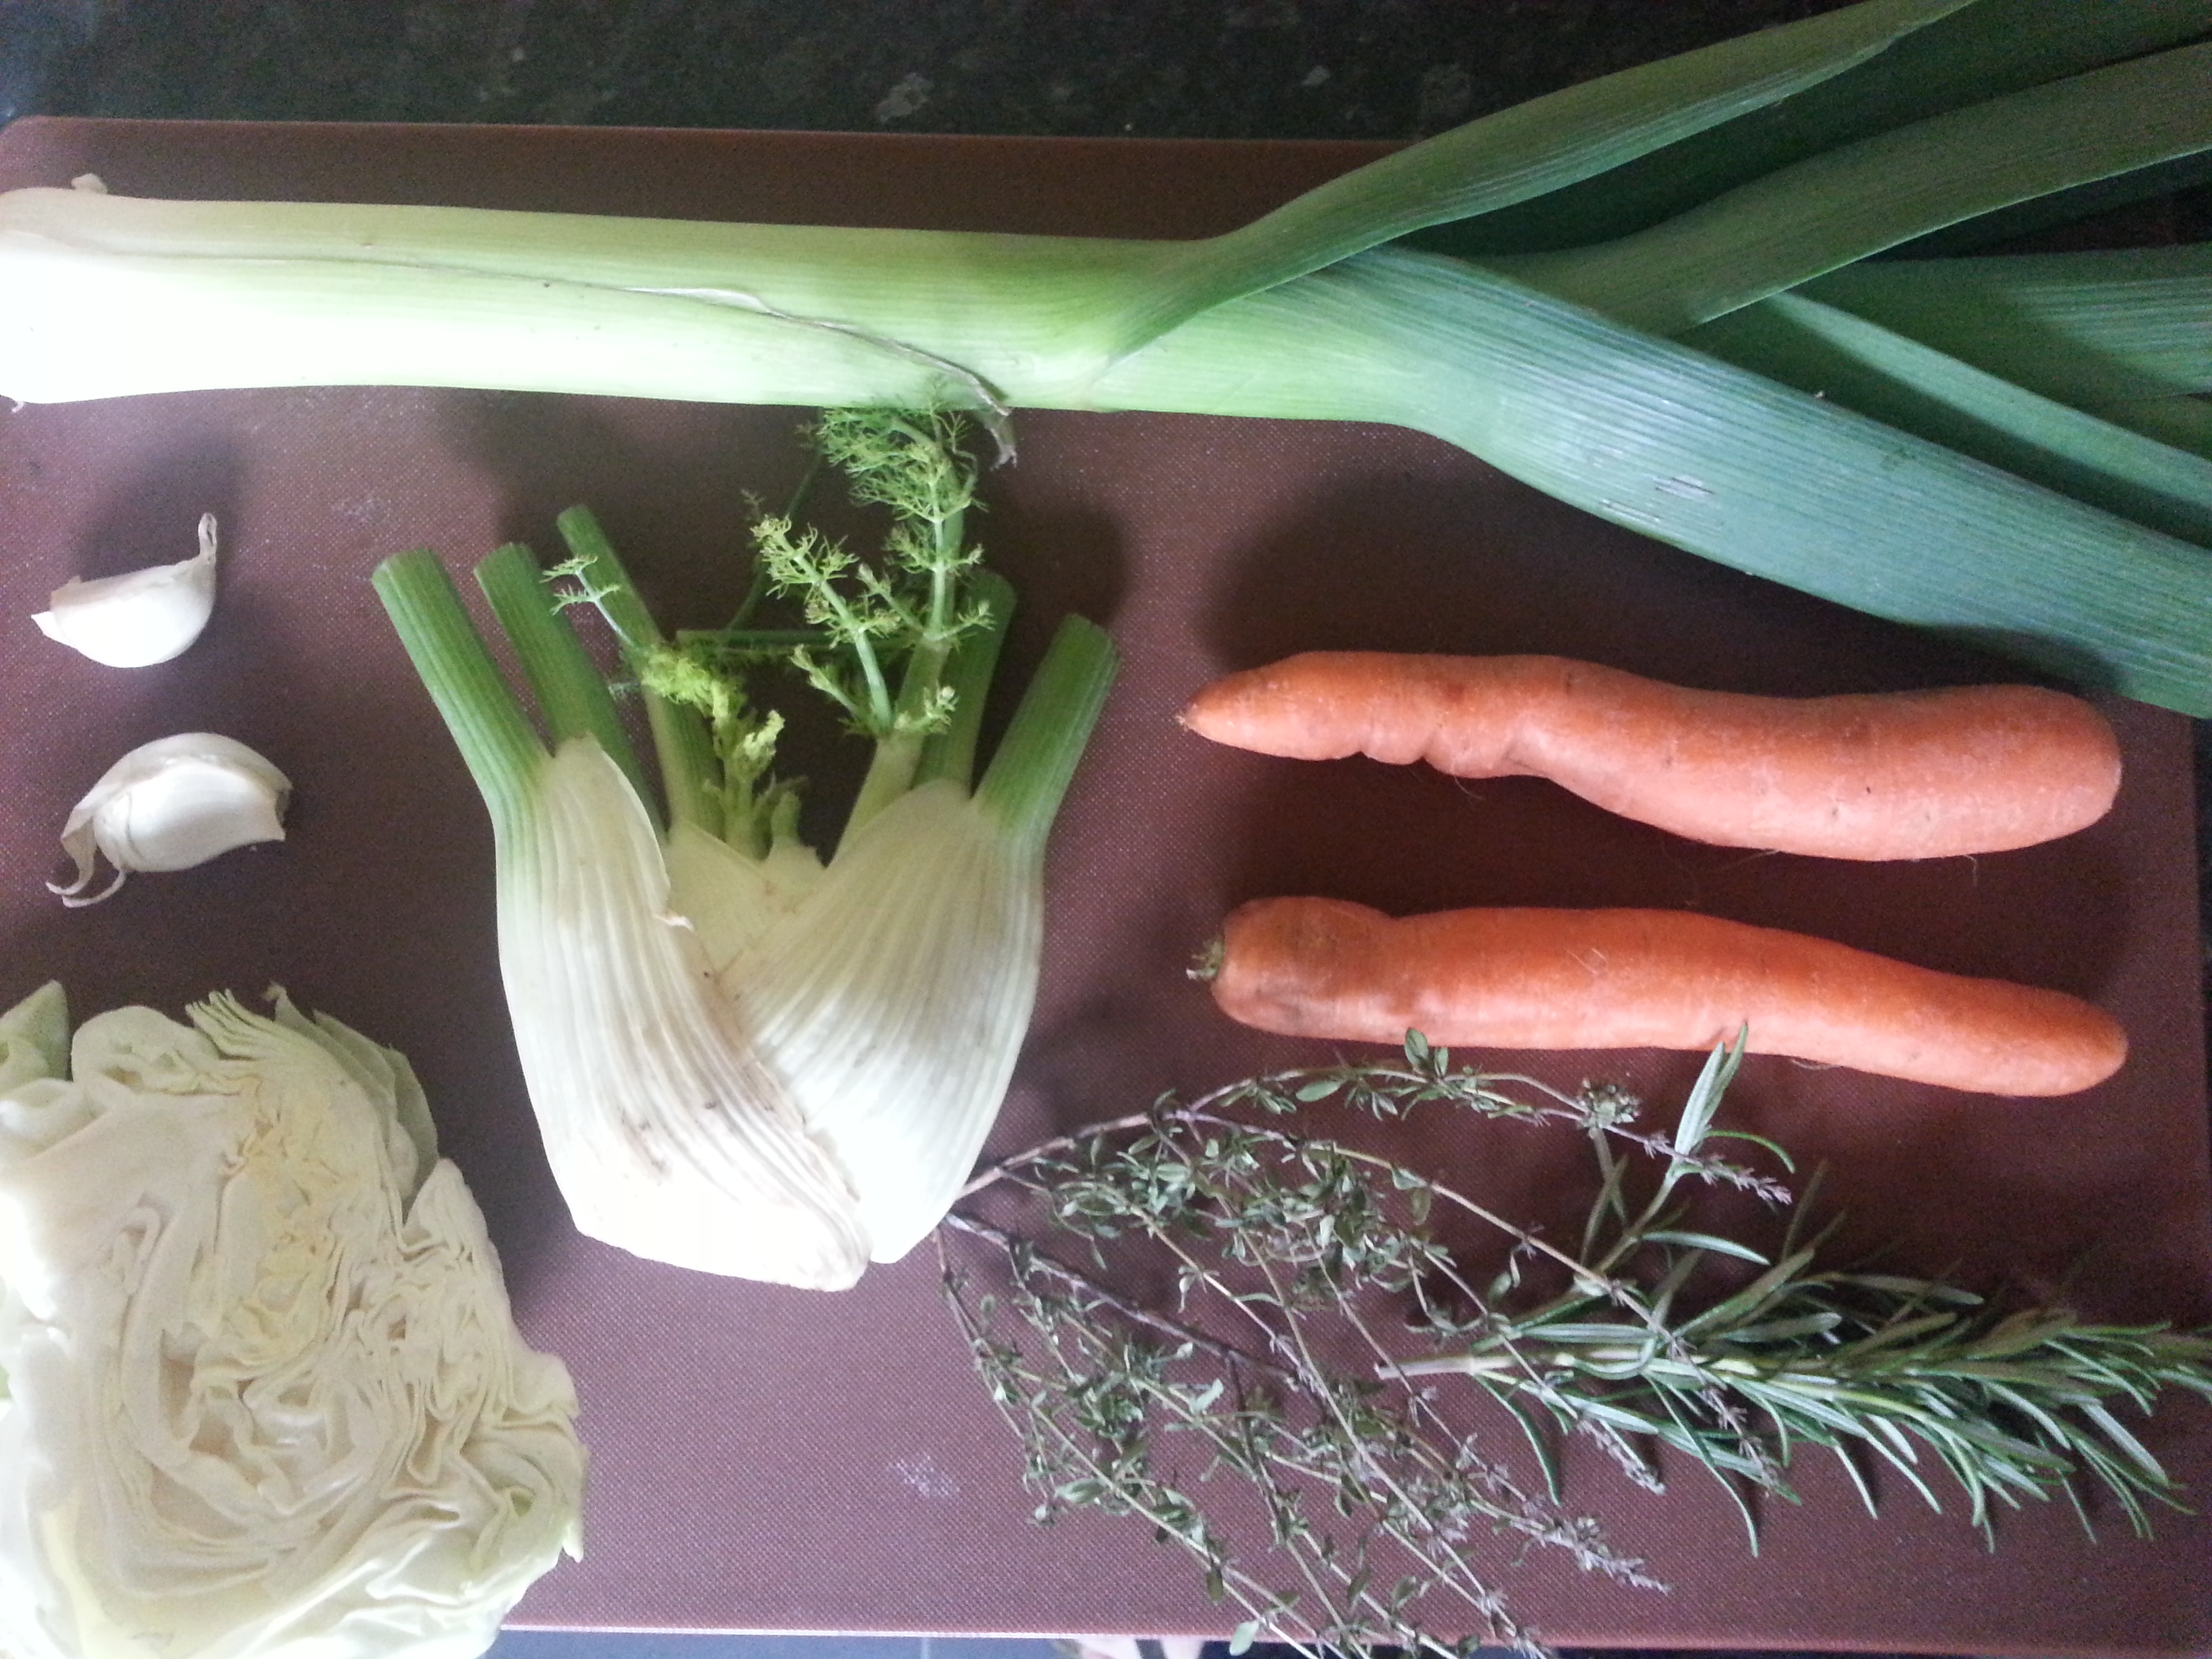
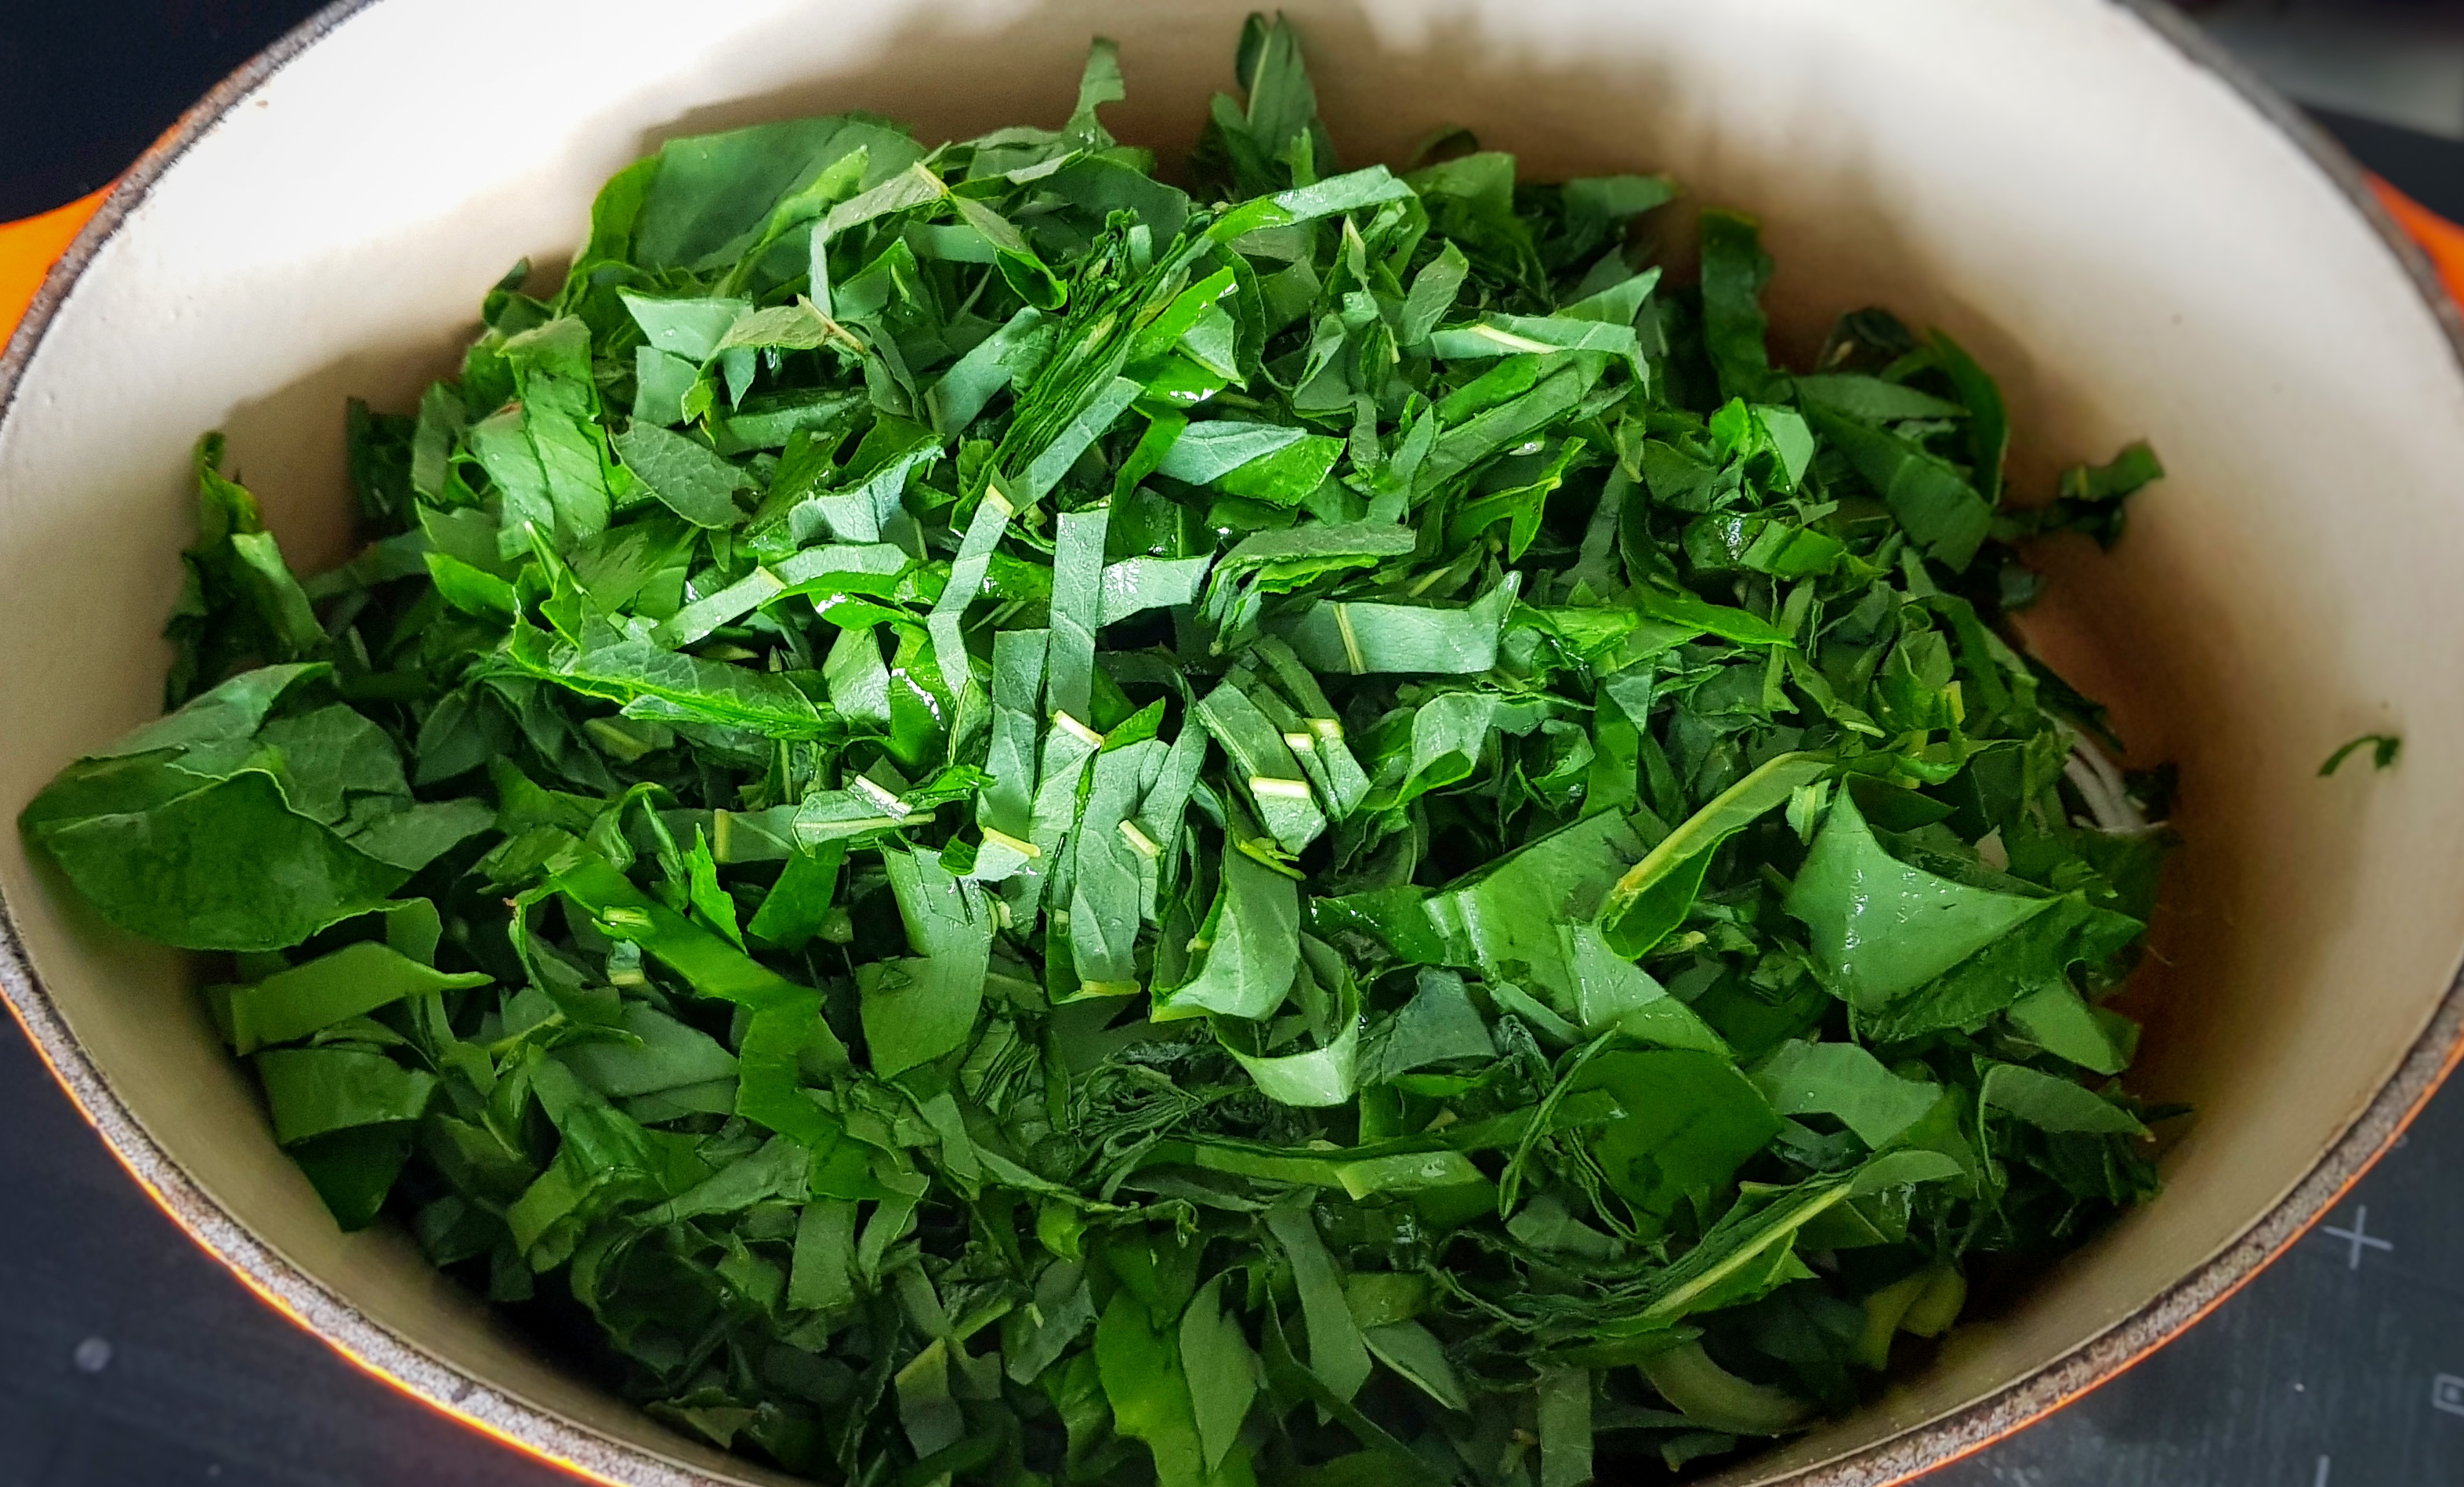
100 g trimmed, young leaves of any amount of the following: passion dock, nettles, spinach, sorrel or any other edible greens you like

1 leek or onion, sliced thinly

80 g oatmeal (not rolled oats)

1 tsp salt

Freshly ground black pepper

400 ml water

A smidge of flavourless oil such as sunflower or groundnut

8 rashers of streaky bacon

30 g lard or dripping, or 2 tbs of your favourite frying fat or oil

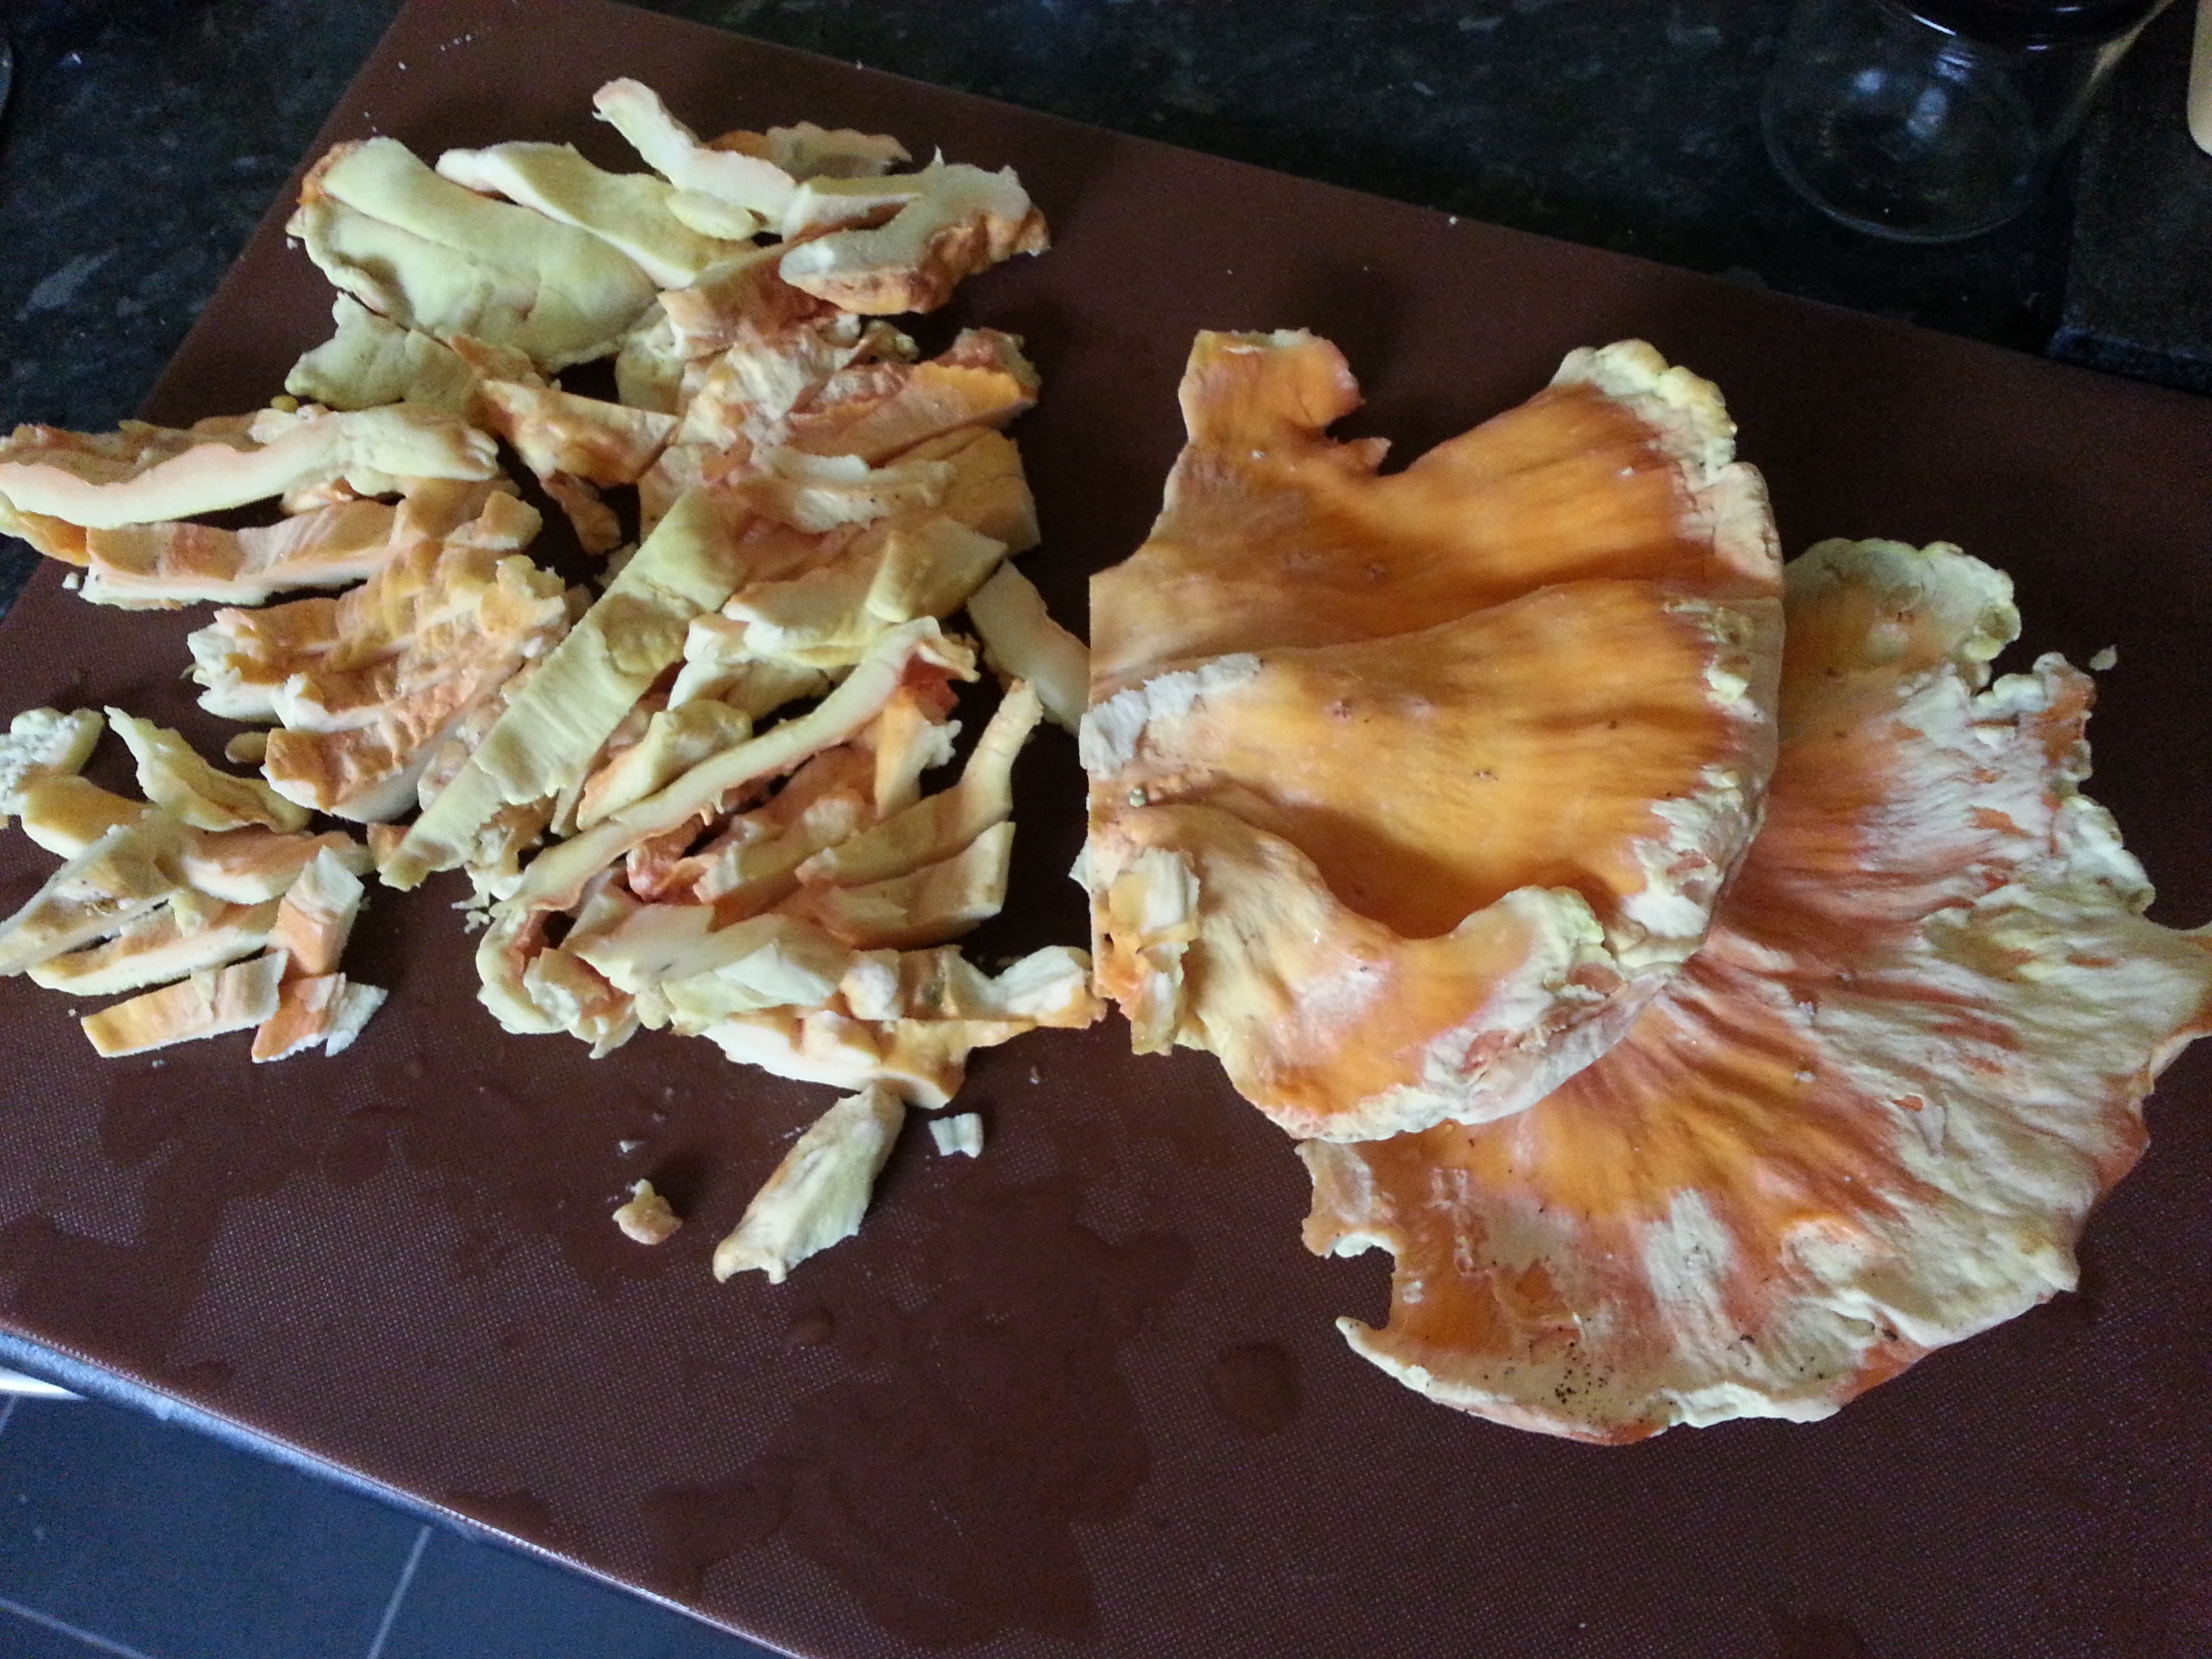
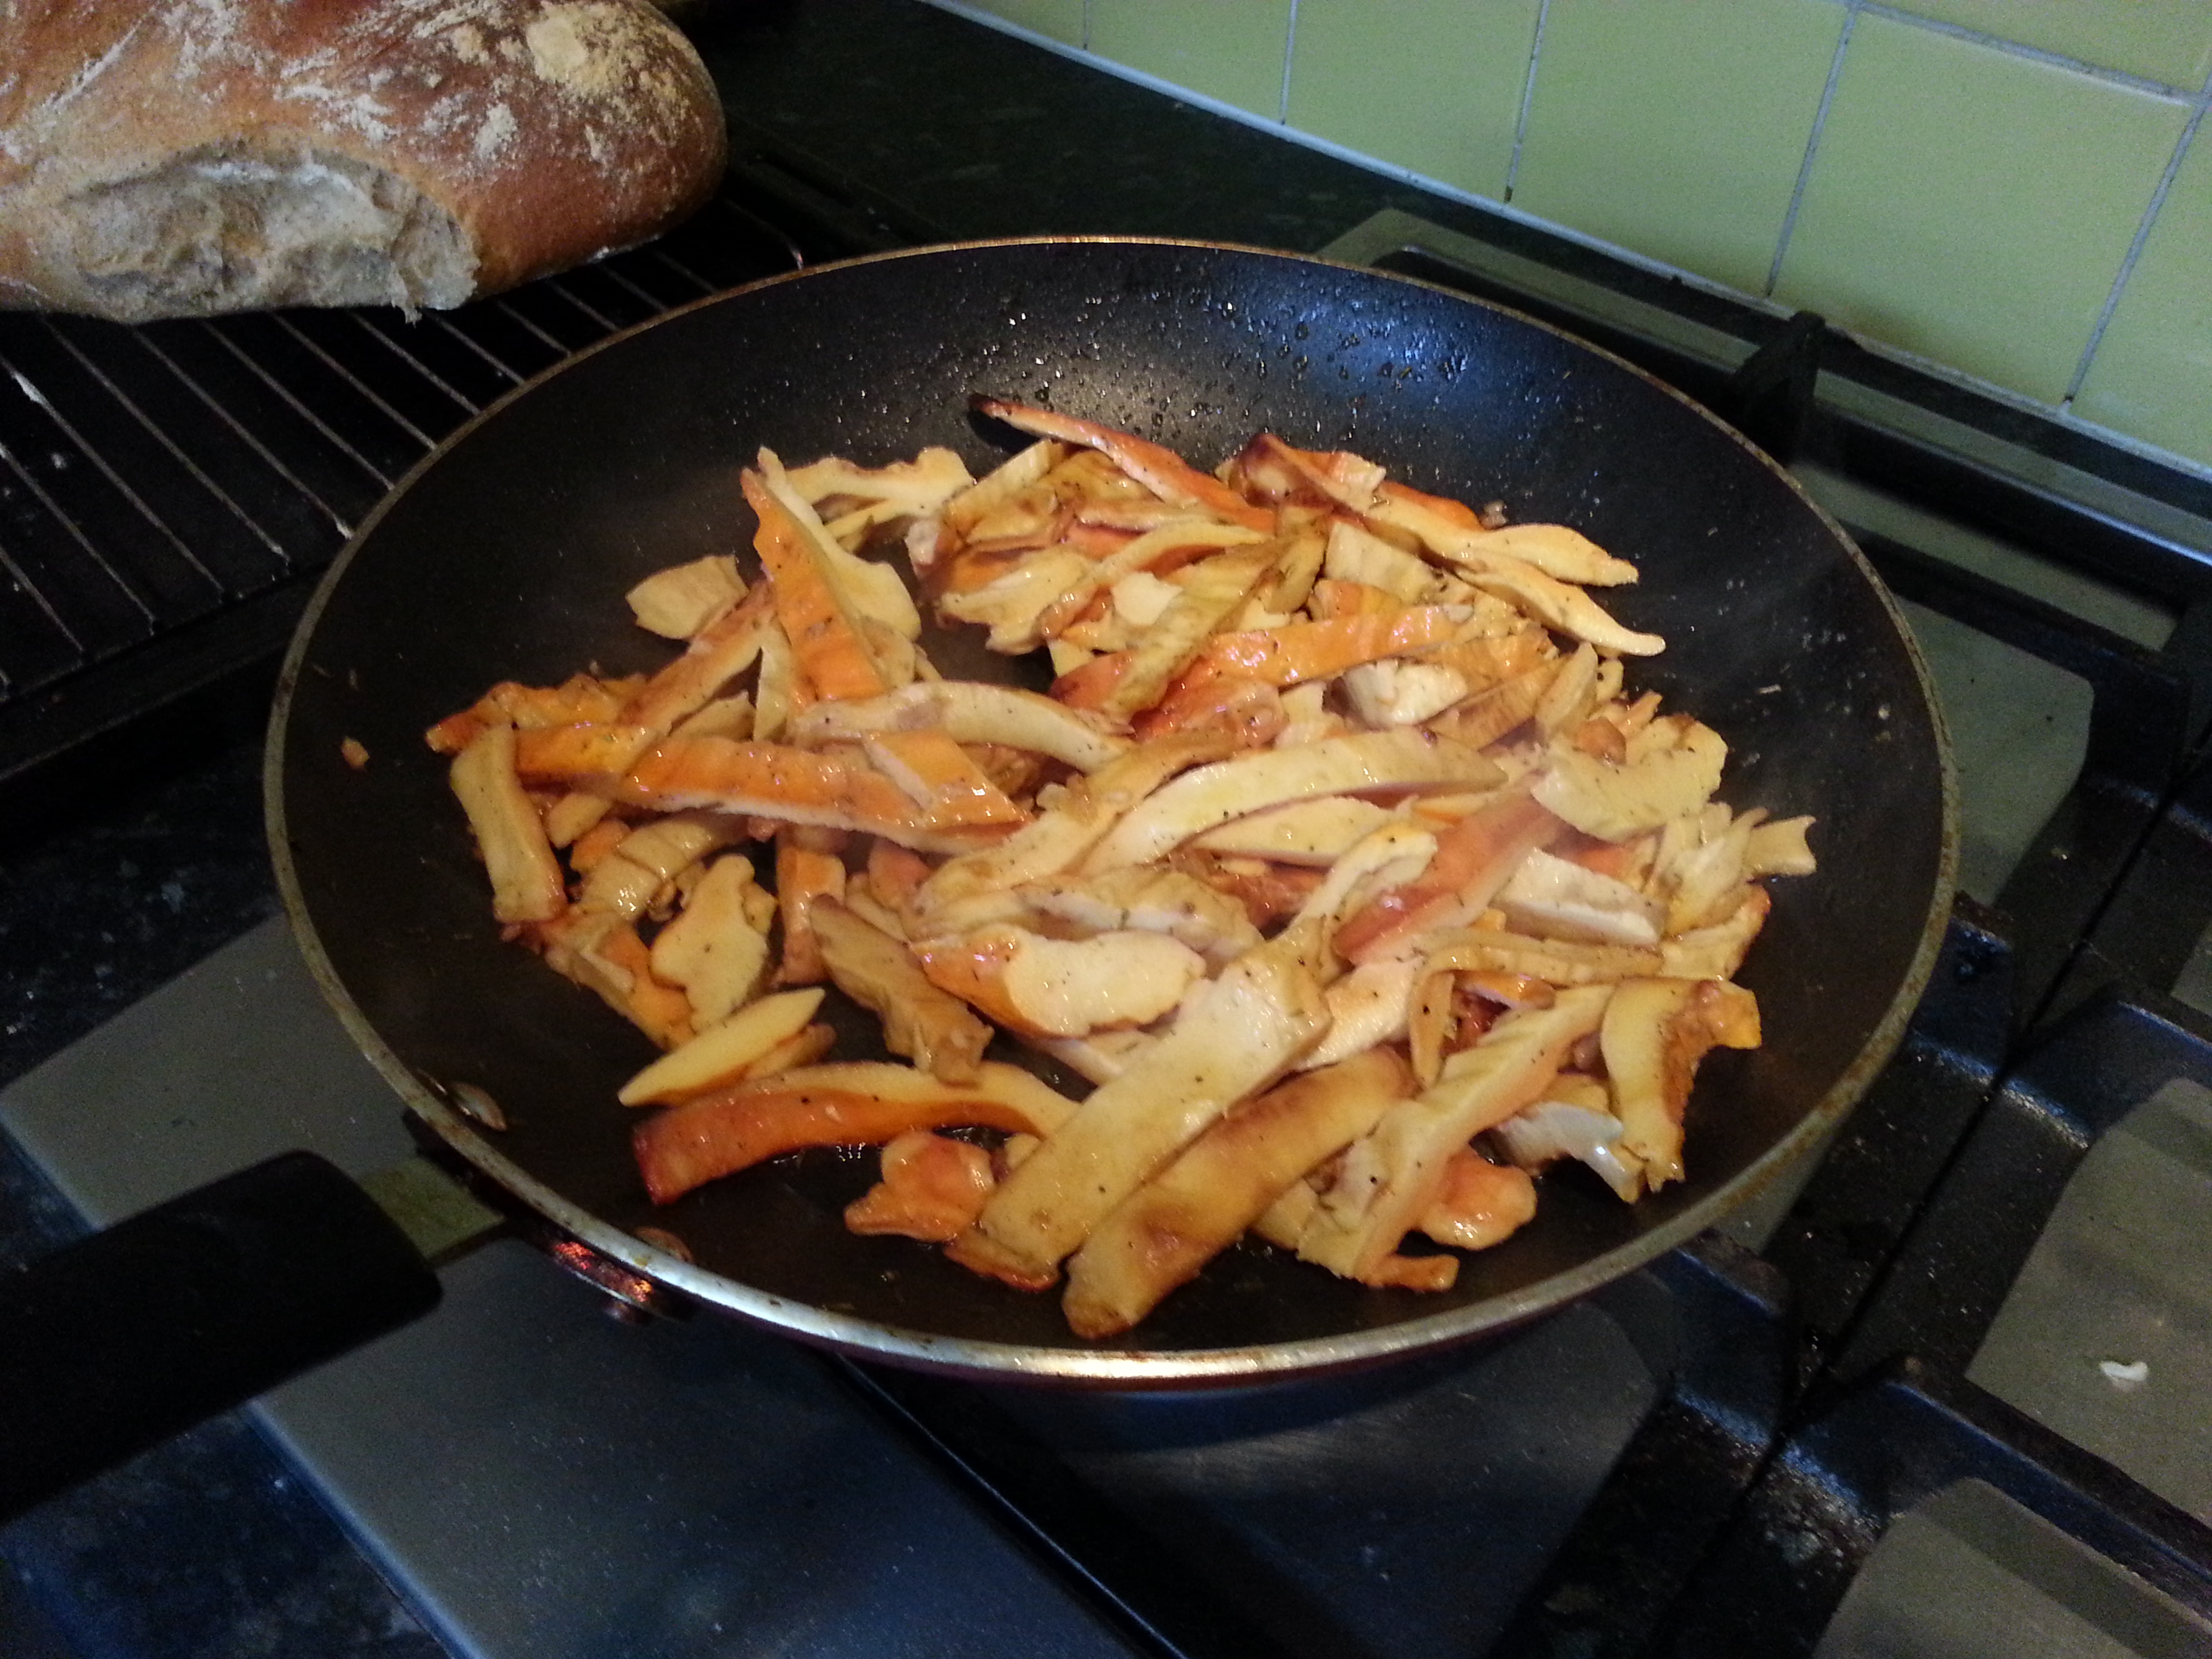
Your pudding needs to be cooked, cooled and set the day before you want to eat it (or several days before if you like). To do this, shred the leaves and add them to a pan with the leek or onion, oatmeal, salt, pepper and water. Bring to a simmer, stirring so that it doesn’t form lumps.

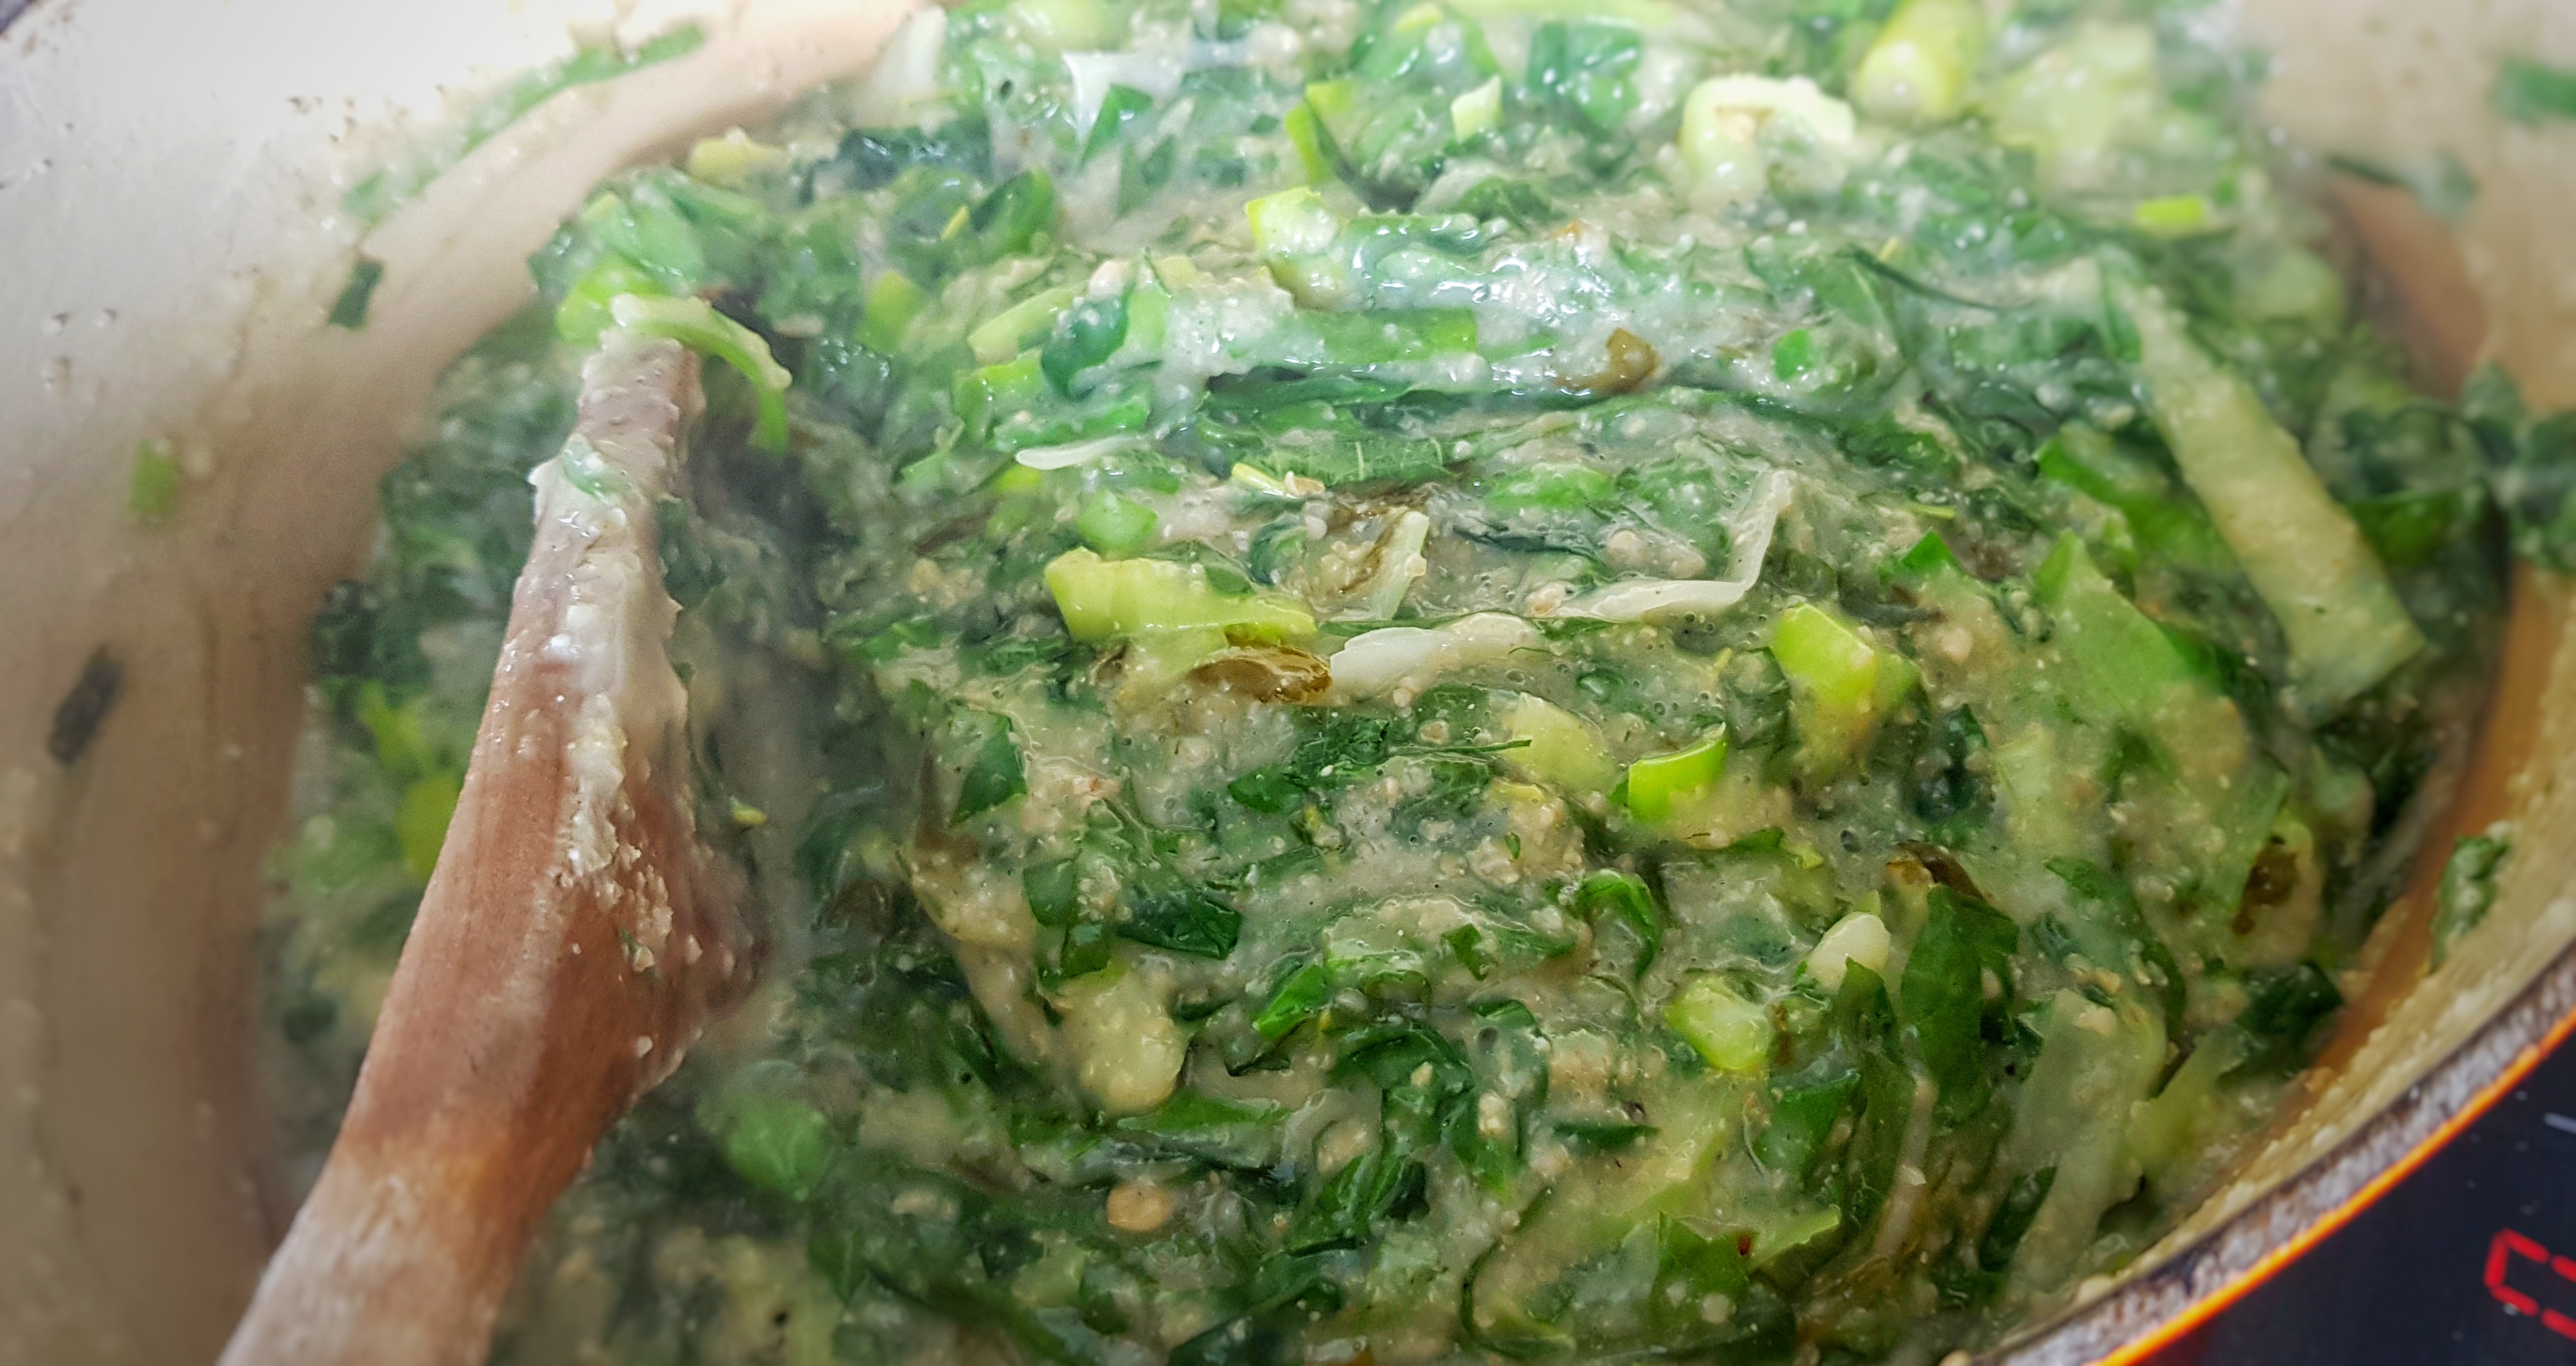
Cook for around 20 minutes and all of the vegetables are soft, then take off the heat. Now take a tub of around 1 litre capacity and brush with the oil. Pour the pudding into the tub, cover, cool and then refrigerate.

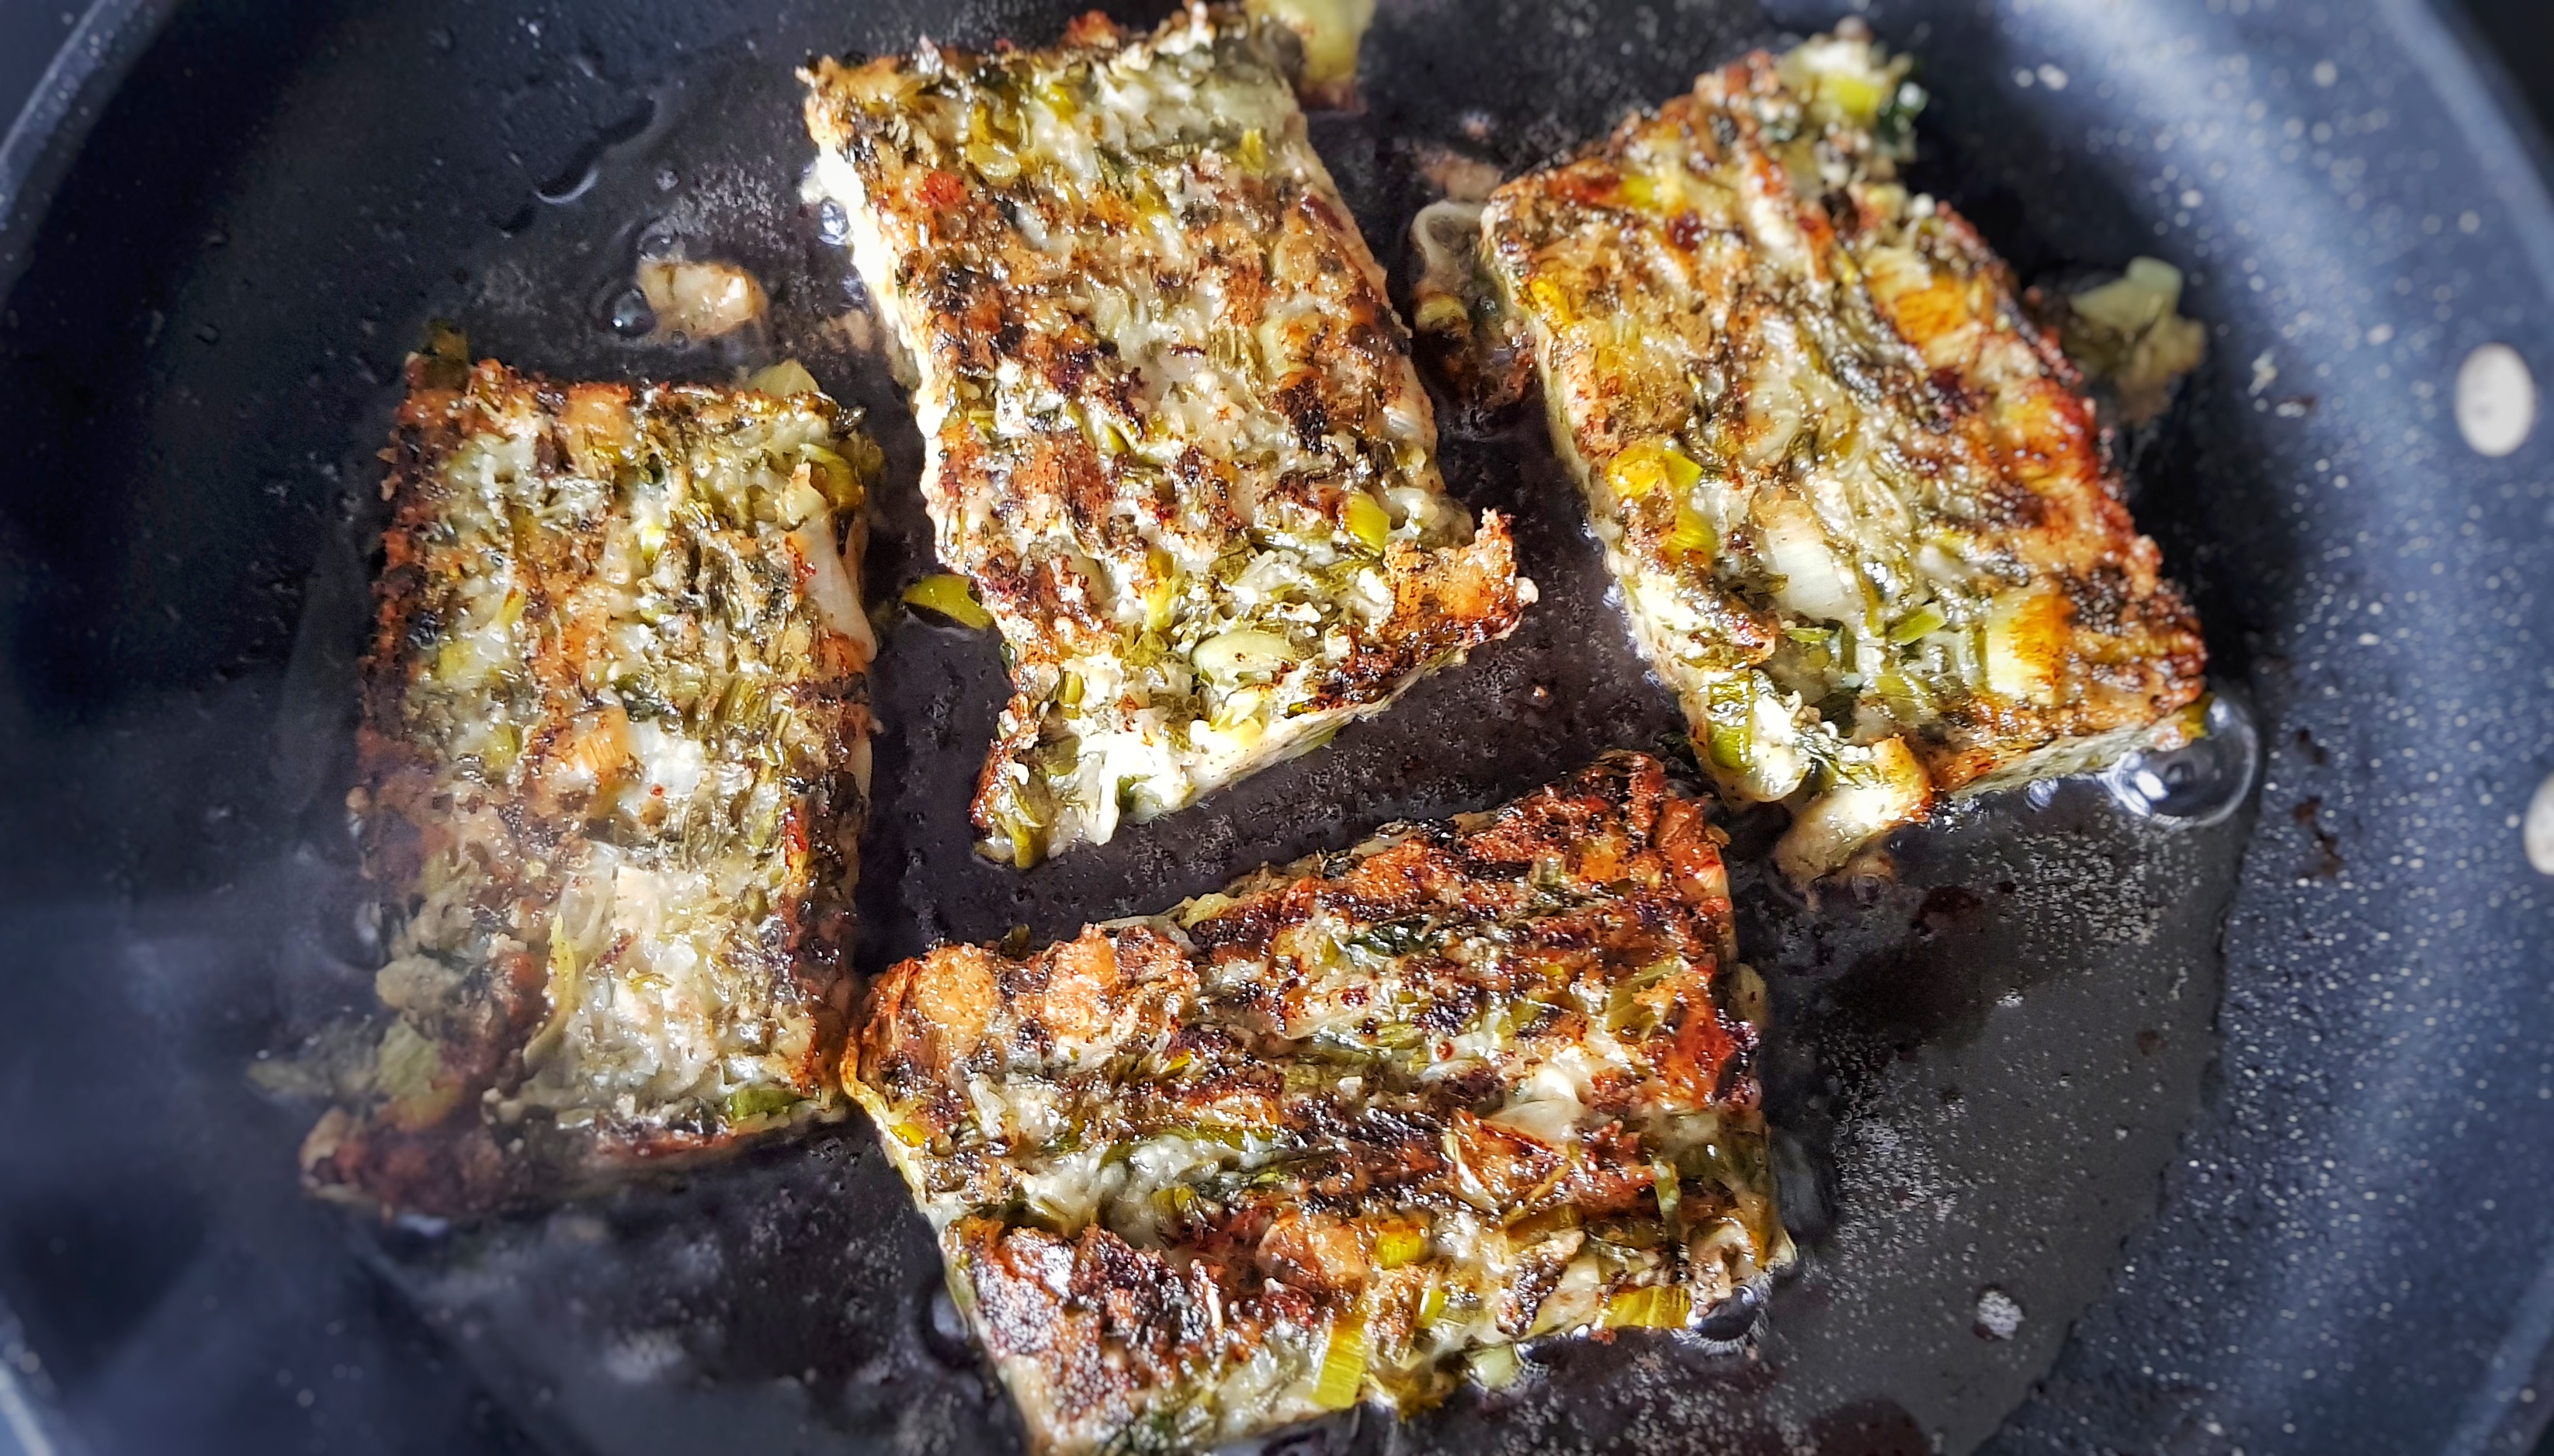
When you want to cook your pudding, first fry the bacon in your chosen frying fat or oil over a medium heat until very crisp. As they cook, prepare the pudding: turn out onto a board and cut even slices between 1 and 1.5 cm thick. It’s best to use a serrated knife for this task.

Remove the bacon rashers and keep warm as you fry the pudding slices: turn up the heat to medium-high and pop in the slices. It’s a bit like making bubble and squeak in that you need to wait and allow them to build up a good, crisp fried layer before you disturb them: a good 5 minutes. Turn over with a spatula and fry the other side for a further 4 or 5 minutes.

When ready, serve up with the bacon and whatever other breakfast things you like. I went with fried eggs.


Notes:

[1] Brears, P. (2014) Traditional Food in Yorkshire. Prospect Books.

[2] Soyer, A. A Shilling Cookery for the People: Embracing an Entirely New System of Plain Cookery and Domestic Economy. (Geo. Routledge & Co., 1855).

[3] Davidson, A. (1999) The Oxford Companion to Food. Oxford University Press.

[4] Mason, L. and Brown, C. (1999) The Taste of Britain. Devon: Harper Press.

[5] If you want to know more about the food of Passion Week, listen to this episode of the podcast:

[6] Davidson (1999); Brears (2014)

[7] Brears (2014)

[8] Davidson (1999)

11 Comments

Filed under Britain, cooking, food, foraging, General, history, nature, Puddings, Recipes, The Victorians, Uncategorized, Vegetables

Third Course: ‘Mutton to eat as venison’ with Lenten Pie

elizabeth raffald

Here we are at the mid-way point of the Dinner Party Through Time and we have arrived in the Georgian period with two great recipes inspired and stolen from the excellent 18th century cook book The Experienced English Housewife by Elizabeth Raffald. The book and the great lady herself deserve a post to themselves really; it lets such a light into the world of grander houses during that time. It’s a book I often leaf-through, so it was the obvious choice.

I thought that the course should be from opposite ends of the gastronomic spectrum with a rich leg of mutton, specially prepared to taste just like venison, and a Lenten pie, specially made for fast days and full of lovely vegetables and herbs.

mutton3

To dress a Leg of Mutton to eat like Venison

Get the largest and fattest leg of mutton you can get cut out like a haunch of venison as soon as it is killed, whilst; it will eat the tenderer. Take out the bloody vein, stick it in several places in the under side with a sharp pointed knife, pour over it a bottle of red wine, turn it in the wine four or five times a day for five days. Then dry it exceeding well with a clean cloth, hang it up in the air with the thick end uppermost for five days; dry it night and morning to keep it from being damp or growing musty. When you roast it cover it with paper and paste as you do venison. Serve it up with venison sauce. It will take four hours roasting.

It was very intriguing, but it was also obviously unachievable. Looking in other books, I found many versions of it, sometimes roasted, sometimes braised, but always marinated in red wine (and often in the blood of the beast too!). I knew the recipe looked familiar, and it finally dawned on me that an updated recipe for it appeared in good old English Food by good old Jane Grigson. It’s not served with a rich venison sauce, but a gravy made with the cooking liquor

There’s a 4 day marinating time for this recipe, so plan ahead if you fancy making it. It is worth it, this is one of the most delicious things I have ever cooked and eaten. It is beautifully gamey, but with the moist succulence you would expect from lamb or mutton. It is magically transformed! Witchcraft can only be to blame.

Here’s what you need:

1 full leg of mutton (or lamb)

For the marinade:

250g onions, chopped

250g carrots, chopped

100g celery, chopped

4 or 5 cloves of garlic, chopped

3 tbs sunflower oil or lard

2 bay leaves

3 good sprigs of thyme

6 sprigs of parsley

3 sprigs of rosemary

12 crushed juniper berries

12 crushed coriander seeds

15 crushed black peppercorns

1 tbs salt

750ml red wine

175ml red wine vinegar

To cook the mutton:

3 onions, sliced

3 carrots, diced

3 celery stalks, sliced

3 leeks, sliced

375g unsmoked streaky bacon, chopped

90g salted butter

Veal stock or water

To make the marinade, fry the vegetables in the oil or fat. Take your time over this and get them good and brown; the veg won’t be in the final dish, but their flavour will be. Let them cool, and mix with the remaining marinade ingredients.

2014-10-28 13.34.33

Score the fat of the leg into a diamond pattern, like you would do for a ham. Find a large, deep dish or pot and place the lamb inside and pour over the marinade. Make sure the whole leg gets the marinade on it, so turn it over a few times. Keep the leg somewhere cool – a fridge, or a nice cool cellar or pantry – and cover it with foil. Turn it twice a day for four days.

When the four days is up, get the new set of vegetables ready. To cook the mutton, spread the prepared vegetables over the base of a deep roasting tin, place the leg on top and strain the marinade over it. Top up the marinade liquid with veal stock or water so that it comes up two-thirds of the way up the tin. Cover with foil.

You have two choices now: either bring the whole thing slowly to boil and simmer gently for 3 hours on the hob, or bring to simmer and pop it in a cool oven instead, 150⁰C will do it, for a similar amount of time. Turn the joint over after ninety minutes and in the final half an hour, ladle out 2 pints of the cooking liquid and boil it down hard to make a concentrated, richly flavoured stock.

When the cooking time is up, remove the leg and put it into another roasting tin and turn the oven up to 220⁰C. Roast for a good 20 minutes and baste well with the concentrated stock to achieve a nice glaze. Any remaining concentrated stock can be used as gravy.

mutton2

An Herb Pie for Lent

Take lettuce, leeks, spinach, beets and parsley, of each a handful. Give them a boil, then chop them small, and have ready boiled in a cloth one quart of groats with two or three onions in them. Put them in a frying pan with the herbs and a good deal of salt, a pound of butter and a few apples cut thin. Stew them a few minutes over the fire, fill your or raised crust with it, one hour will bake it. Then serve it up.

Groats are whole grains of cereals and oats or barley could have been used, but I chose whole wheat. The only change I made was to use a normal shortcrust pastry and make a regular double-crust pie in a tin, rather than a raised crust with a hot water pastry. I regret that a bit now, but I wasn’t as good at pastry then as I am today. It is a good pie – some plainer cooking that married very well with the rich meat.

Here’s how I approached the recipe:

1 onion, chopped

oil or butter

150g wholewheat groats

generous knob of butter

2 Cox’s apples, peeled, cored and sliced

2 little gem lettuce, sliced

1 leek, sliced

1 medium golden beetroot, diced

1 handful of spinach, rinsed

1 bunch parsley, chopped

shortcrust pastry

Begin by gently frying the onion in a little butter or oil until soft and golden. Add the groats and cover with water. Simmer gently until the groats are tender, topping up with more water if things look a little dry. Season with salt and pepper and allow to cool. Meanwhile fry and soften the apples in butter and let those cool too.

Mix the apples with the groats and the remaining vegetables and line a pie tin with shortcrust pastry. Tip in the mixture and cover with more pastry in the usual way.

2014-10-31 17.36.23

Glaze with beaten egg and bake at 200⁰C for 20 minutes until golden, then turn down to 175⁰C for 35 to 40 minutes.

2014-10-31 17.52.06

If you like the blogs and podcast I produce, please consider treating me to a virtual coffee or pint, or even a £3 monthly subscription: follow this link for more information.


Leave a comment

Filed under Britain, cooking, Eighteenth Century, food, General, history, Meat, Recipes, Uncategorized, Vegetables

Dulse

brown_william_marshall-the_dulse_gatherers~300~10437_20110602_316_22

The Dulse Gatherers by William Marshall Brown, 1863-1936

Nobody really eats dulse, or any other seaweed for that matter, in England these days, though they used to. It is a pity because I do like the stuff. It is eaten in Ireland and parts of Scotland still; I ask friends to bring back a bag of it whenever they cross the seas. I recently received a bag from my friend Hugh.

Dulse had been eaten for over one thousand years in North-Western Europe, the ancient Celtic Warriors of old ate dulse as they were marching, and during the seventeenth century British sailors ate it to prevent scurvy (although it was originally used as an alternative to chewing tobacco). Even today, its healthful properties are noted; my friend Evelyn from Ballymena, Northern Island tells me:

When I was pregnant, the midwife thought I was very healthy as my blood pressure and iron levels were so good. Iron goes up to 17 mg/dl max but I was the first person she’d seen that had 15 – apparently quite unheard of for a lady, especially a pregnant lady! We put it down to the dulse (nothing else remotely healthy going on at that time in my diet), and she’s been recommending it to everyone.

Its popularity in Ireland as well as Scotland led to dulse being popular in the USA too when they emigrated over the Pond, although none of my American friends seem to have heard of it.

The dulse industry has obviously died a bit of a death in England, and the rest of the UK and Ireland, compared to days of yore. Charles Dickens, writing in 1858, reminisces about childhood holidays in Aberdeen where there were often over a dozen ‘dulse-wives’ selling dulse:

[O]f all the figures on the Castlegate, none where more picturesque than the dulse-wives. They sat in a row on little wooden stools, with their wicker creels placed before them on the granite paving stones. Dressed in clean white mutches, or caps, with silk-hankerchiefs spread over their breasts, and blue stuff wrappers and petticoats, the ruddy and sonsie dulse-women looked the types of health and strength… Many a time, where my whole weekly income was a halfpenny, a Friday’s bawbee, I have expended it on dulse, in preference to apples, pears, blackberries, cranberries, strawberries, wild peas and sugar-sticks.

He recalls a conversation:

A young one would say: “Come to me, bonnie laddie, and I’ll gie ye mair for yer bawbee than any o’ them.”

An old one would say: “Come to me, bonnie laddie, and I’ll tell what like yer wife will be.”

“Yer dinner ken yerself.”

“Hoot aye – I ken brawly: she’ll hae a head and feet, an mou’, and eyen, and may be a nose, and will be as auld as me, if she lives as lang.”

“Aye: but ye gie me very little dulse for my bawbee.”

“Aye,” replies the honest woman, adding another handful, “but sic a wife is weel worth mair siller.”

The dulse-wives exploded into laughter, when the woman suggested some one like herself, as the ideal wife which youth is doomed always to pursue and never to attain.

Oh! those dulse-wives.

My friend Evelyn reminisces:

It comes with shells and little crustaceans on it; my friend Maisie used to spend hours ‘cleaning’ dulse & would then give me nice little bags with no icky bits on them. Strangely it doesn’t seem to fall under any health and safety rules. Old men that live by the sea just grab a load and dry it on the rocks in the sun.

You can also buy it dried and flaked in sealed bags looking  like reddish tea leaves. Even better, of course, you can forage for it. I must say seaside foraging forms a hole in my knowledge. I should try and remedy that.

Cooking with Dulse

Dulse can be eaten as is, or used in salad and sandwiches. I personally think it is best eaten cooked so I’ve included a couple of simple recipes for you.

Mashed Potato with Dulse

This is a great recipe and much healthier than regular mash because it uses olive oil as opposed to butter. It’s vegan and gluten free too, so you shouldn’t get any complaints from anyone!

It could not be easier, really. First, scrub and then boil some potatoes in their skins without adding any salt. Remove the skins and mash them. Next, finely shred the dulse and fry it in olive oil – you’ll need about 15 grams of dulse for every kilogram of potatoes used. Of course, if you are using the flakes, you can sprinkle them straight into the hot oil. This takes just a few seconds. Add the oil and dulse to the spuds and mix, mashing in some extra olive oil if need be. Season.

Serve with lamb, beef, chicken or fish


 If you like the blogs and podcast I produce, please consider treating me to a virtual coffee or pint, or even a £3 monthly subscription: follow this link for more information.


Lamb & Dulse Broth with Dulse Shards

2013-09-16 19.15.26

I came up with this soup when I found some frozen lamb stock secreted at the back of a freezer-drawer recently. It draws on that classic combination of lamb and seaweed. This recipe requires the rock-dried dulse to make the sweet-tasting shards, but any dulse can be used for the soup itself.

Ingredients

1 tbs butter or olive oil

1 carrot, diced

1 stick celery, diced

a sprig of thyme

a sprig of rosemary

a bay leaf

60g red lentils

2 or 3 tbs dried, chopped dulse

1 litre well-flavoured lamb stock

salt & pepper

For the dulse shards:

‘leaves’ of dried dulse

sunflower, groundnut or rapeseed oil for frying

Melt the butter or oil in a saucepan, add the carrot, celery and herbs. Fry gently for 10 or 15 minutes until the vegetables are soft and translucent. Add the lentils and fry for another two minutes before adding the dulse and lamb stock. Bring to a simmer and cook for around 20-25 minutes until the lentils have cooked and broken up, thickening the broth. Season.

Meanwhile, prepare the dulse shards. Heat up some oil in a frying pan and when hot, throw just one or two dulse pieces into the oil. The dulse will immediately sizzle, crisp and change colour as if by magic. After just a few seconds, remove and drain on kitchen paper. Fry all your dulse pieces in this way, and break them up into shards and place them gently on top of your finished soup.

14 Comments

Filed under Britain, cooking, food, foraging, General, history, Ireland, Recipes, Soups, Vegetables

To Make Vegetable Stock

As promised in my last post a good recipe for a basic vegetable stock which is definitely robust enough to be swapped for chicken or fish stock in any recipe.

It is hard to be exact when making stock because it depends upon the vegetables you like, the vegetables you have and what the stock is to be used for. It’s also worth mentioning that if you don’t have tomatoes, for example, don’t worry, just include something else to make up for it.

The basics are fundamental. You need at least three of the following: onion, leek, carrot, celery and garlic and then everything else is a bonus. I would say you should use at least 3 more vegetables.

The good thing about a vegetable stock is that because it is only simmered for 20 minutes you can get away with cabbage, cauliflower, broccoli, or any other brassicas before they go all farty. Asparagus trimmings, sweetcorn, pea pods, and anything else you can think of all count. Keep your trimmings in a freezer bag until they are required.

The same goes for herbs: freeze parsley stalks and anything else that is looking a bit sad sat in the bottom of the fridge. Avoid mint as it tends to overpower vegetable stocks.

The spices I like to use are peppercorns, cloves and then either some fennel seeds or some allspice berries, but it’s up to you really; cumin or cardamom, nutmeg or mace, chillies or lemon peel have all worked successfully in the past.

Remember: the whole point of making your own stock is that you don’t get the same thing every time. I have never included a vegetable that hasn’t worked, even ones you won’t suspect like beetroots, cucumbers, lettuces and courgettes.

For more general information on stocks click here.

This recipe makes around 1 ¾ litres of stock.

2013-09-01 11.56.01

Ingredients

At least 3 of the following: 1 large onion, 1 carrot, 2 cloves of garlic, 2 sticks celery (with leaves), 1 leek (include the green top)

75g brassica – e.g. cabbage, broccoli, turnip &c

2 tomatoes

½ fennel bulb

Any other vegetable trimmings (if using all trimmings, go for at least 300g in weight)

30g butter or 2 tbs olive oil

2 bay leaves

6-10 parsley stalks

4 springs of thyme

1 sprig rosemary

6 peppercorns

6 allspice berries or a teaspoon of fennel seeds

3 cloves

around 2 litres of water

Begin by preparing your mirepoix; a mirepoix is just vegetables chopped very small so that the maximum amount of flavour can be extracted in the minimum amount of time. I go for the easy option and use a food processor.

2013-09-01 12.08.58

Heat the butter or oil in a pan and fry the vegetables for around 10 minutes so that they soften but don’t colour.

Tip the vegetables into a large saucepan or stockpot along with your herbs and spices. Cover them with cold water and slowly bring to a bare simmer. Try and make sure the stock doesn’t boil. Simmer the stock on the smallest hob on the lowest possible heat so that it merrily ticks away for around 20 minutes.

Let the stock cool slightly before straining it off. Avoid seasoning it with salt – wait until you’ve made the dish you are to use the stock for.

Your vegetable stock is now ready to use.

2013-09-01 20.06.34

If you want, you can reduce it, but you must be careful not to boil it hard as the subtle flavours will evaporate and the stock will look and taste like overcooked sprouts. The best way reduce it is to pour the stock into a wide pan and let it simmer and reduce gently.


If you like the blogs and podcast I produce, please consider treating me to a virtual coffee or pint, or even a £3 monthly subscription: follow this link for more information.


1 Comment

Filed under cooking, food, Recipes, Vegetables

Stock-making, a quick guide

Stock is the body and soul of soups – Lindsay Bareham

I have been making my own stocks for years now and it is part of my regular kitchen routine. I sequester bones, meat offcuts, fish heads and trimmings, vegetable peelings and herb stalks in bags in the bottom of my freezer so that I can combine them appropriately whenever I need to. It’s a thrifty way of living; often making a large batch of stock costs only the price of the fuel that cooked it.

For those that do not cook much at home, stock-making is sometimes regarded as some kind of alchemy, yet this is a misconception, and indeed there are many very complicated stock recipes, but the home cook (I include myself here) need not bother with these. The chances are you have made stock several times and have thrown it down the sink without a second thought, because in its most basic form, the water you cook your vegetables in is a good, light vegetable stock.

From a history point of view, one cannot pin-point when stocks were first made, and one cannot unravel the origins of stock from soup. Take this example from Good Things in England by Florence White:

[The soup] is nothing more than the water in which young cabbage has been boiled…It is extremely good and delicate and tastes very much like chicken broth. It is not merely an economy but a luxury; one of the best of health and beauty drinks.

Wise and thrifty cooks throughout the millennia used the water that their tough meat joints were simmered in or their fish poached in and used them as the base of another dish. One of my favourite dishes is poached silverside of beef which consists of beef, herbs, a couple of veg and water. The resulting broth makes beautifully-tasting soup.

2013-05-02 20.47.25

Poached Silverside of Beef

Seeing as we are trying to be thrifty folk, I thought I would give you a quick guide to stock-making. As I have mentioned, it will save you money, and – like when you make your own bread – you will see how sublime it can taste. Every stock you make will taste a little different each time and it can be tailored to suit its use, e.g. add a few fennel seeds to a stock for a fish soup. Best of all, your soups and stews won’t taste of stock cubes. There is nothing wrong with having a stash of them in your food cupboard, I would do too, but with my very frustrating onion and tomato intolerances, I usually have to do my own. The point is, that when you use bought stock cubes, every soup and stew ends up tasting the same.


If you like the blogs and podcast I produce, please consider treating me to a virtual coffee or pint, or even a £3 monthly subscription: follow this link for more information.


What makes up a stock?

This is the beauty of stock-making; there are no hard-and-fast rules with respect to ingredients.

All good stocks should contain some flavoursome vegetables and aromatic herbs and spices, often called a bouquet garni, as well as the main ingredient: this might be meat and bones, fish, or, more vegetables. The stock might be seasoned or enriched with salt, wine, soy sauce, Worcester sauce, tomato puree, mushroom ketchup or any number of other things, though it is usually best to do this once the soup or stew that the stock is being used for has been made.

Stock vegetables

2013-09-01 11.56.01

The vegetables used in your stock are often key to the quality as they add a lot of depth. The three basic vegetables used for most stocks are carrots, celery and onion, though I personally add garlic and leek to this ‘trinity’ (a trinity in five parts?). My general rule of thumb is to try and include at least three of the five. Anything else is a bonus, really. Fennel is a good addition, if used sparingly, as are tomatoes, mushroom peelings, pea pods. Lentils, parsnips and potatoes add an earthiness, but should be avoided if you don’t like your stock cloudy. Brassicas such as cabbage, cauliflower, of sprouts should be used very sparingly, especially in meat or poultry stocks that have a lengthy cooking time, they are great in vegetables stocks though. Vegetables need to be roughly chopped in long-cooked meat stocks, and chopped small (a mirepoix as it is called in the trade) in quick-cook vegetable and fish stocks. A food processor makes an easy job of it.

2013-09-01 12.08.58

Herbs, spices and other aromatics

Like the vegetables, the herbs and spices you add will depend upon what you have and they are essential. Must-haves herbs include bay leaves, parsley stalks, thyme and rosemary. Other herbs are great if you can get hold of them. Dill stalks in a fish stock are delicious as is a tiny mint sprig in a summertime lamb stock. I keep and freeze all my herb stalks to use later in stocks – there’s no need to throw them away. Must-have spices include black peppercorns, cloves and allspice berries.

The thinly-pared rinds of citrus fruits are also used quite a lot: a strip of orange peel transforms a game stock and lemon rind really lifts chicken, vegetable and fish stocks.

These herbs and spices are often tied up into a faggot or bouquet garni, though I never bother to tie mine up for stock, though I do for stews and soups where careful and efficient removal is required.

Poultry, meat and game

Use whatever you have – raw meat and bones, or bones from a roast. A little goes a long way: I have made game stock using a single woodcock carcass that still tasted great. It is best to avoid bones that have already been stewed as most of the flavour will already have leached out, but do add any left-over pan juices, jelly or gravy. Raw meat or bones will benefit greatly from a quick roasting in a hot oven for 20 minutes or so.

2013-01-11 17.40.58

The important thing here is to treat your stock meat properly – if you boil the stock hard, the tasty amino acids and textural gelatine will not go into your stock, but will either form a nasty grey scum or will be trapped within the meat. Low simmers and long cooking times are essential.

2013-01-11 18.12.08

It is best to avoid kidneys and livers in stocks, as their flavour is far too strong, but hearts, tongues and heads all make good additions.

Fish

Fish stocks, in contrast to meat stocks, can be made in minutes. Use bones and trimmings in your stock, but avoid oily fish such as mackerel and sardines. Mussel, clam, cockle or oyster liquor would be delicious, if you ever have any.

Clarifying Stock

You might want to clarify your stock after straining it. This is straight-forward enough to do and there are several methods. The quick method is to whisk a mixture of egg whites and broken egg shells into the hot stock. The eggs grab hold of and magically mop-up the cloudy substances. The slow – and best – method is to freeze the stock, tie it in muslin and let the melting stock drip through. This method makes beautifully clear stocks.

There are a few tricks to avoid cloudiness in the first place: Don’t use starchy vegetables like potatoes, lentils and parsnips and avoid peppercorns. The best way is it leave the stock be; prodding, poking and rearranging items is the surest way to cloud it.

2013-03-21 20.18.50
Poaching sweetbreads in a light vegetable stock called a court-bouillon

Some stock-making rules:

  1. Start with cold water and bring to a simmer slowly. This is the most important rule of all. As the water gradually heats, the flavours leach out and don’t boil away and connective tissues break down to release their gelatine. The stock should never get hotter than a bare simmer; you want the odd gurgle, nothing more
  2. Remove the scum before you add the herbs and spices. If you don’t the scum gets all caught up in it, making a nasty grey mess. Skim the scum, then add the aromatics.
  3. Remove the layer of fat. Nobody wants greasy soup. The best way to do this is to let it cool and then scrape the fat layer away. If time is an issue, lay paper napkins on the stock’s surface.
  4. The amount of water you use depends on your pot. Don’t follow the recipe when it comes to adding water. Arrange the ingredients in your pan with few gaps and add enough water to just cover.
  5. Break the bones and cut up the meat. This increases the surface area and therefore increases the flavour of your stock.
  6. When storing stock, cool it quickly and keep in the fridge up to 2 or 3 days. Any longer than that, freeze it.
  7. Reducing stocks enhance the flavours and mean you can store more in the freezer. You must strain the stock and skim it of fat before reducing it. Meat stocks you can boil it quite heard, but vegetable and fish stocks need to be treated a little more gently.

Stock recipes

Every post I write a post with a stock recipe or information about stock I tag it appropriately. Click here to see the posts.

I will post a good vegetable stock recipe in the next day or so, as it is the most useful of all the stocks and I already have posted a duck stock recipe.

The best advice is really to use stock recipes as a guide only, use what you have to hand. Keep your vegetable and meat trimmings in a bag in your freezer and you’ll find that you’ll quickly fill them.

8 Comments

Filed under cooking, food, General, Meat, Recipes, Soups, Uncategorized, Vegetables

Chicken-of-the-Woods

I have written a few posts on foraging and natural history in Britain, here’s a little post about a lovely edible mushroom:

As I was walking in Lyme Park at the weekend I kept an eye out for edible goodies. Lyme Park is great for oyster mushrooms because of the large number of beech trees in the forests there. However, I did not expect to find a splendid chicken-of-the woods growing on a dead tree trunk just off the path to the children’s play area! Goodness knows how many had walked past it unaware of the delicious treat..

2013-08-05 19.16.57-1

Although I am by no means an expert, I recognised it straight away – a large bracket fungus with multiple brackets with a beautiful and almost garish orange and sulphur-yellow coloration. In fact, another name for it is the sulphur polypore (the polypore part is because it doesn’t have gills on its underside like a typical fungus, but many tiny pores). There really is nothing else like it, so you can be pretty certain of what it is.

However, before I go on: always confirm you have correctly identified the fungus and check more than one field guide. The two I use are the River Cottage Handbook No.1: Mushrooms, for quick reference and the Collins Fungi Guide for more detailed descriptions. If you are not 100% sure of what you are picking, don’t pick it!

As with all fungi there is a certain amount of variation – there can be many brackets or a few, they can be a range of widths from a few inches to a couple of feet, the brackets can be neat and flat, or can look as though they’ve poured out and frozen, like orange lava, in a Dali-esque manner. The one I found had grown around blades of grass, trapping them like flies on amber. I didn’t take it all because I thought I’d see if the intact part would grow back – if I’m lucky I might be able to collect a regular ‘crop’ over the next few months!

Unfortunately, I didn’t take a photo in situ because my phone has run out of batteries, but here’s a few pictures I have found in books and on the ‘net that shows off this variation:

2013-08-08 21.47.13
chicken wood tall
chicken woods flat
chicken woods tall

From (in order) John Wright, First Nature, Cornell University, Malcolm Storey

Chicken-of-the-woods, or to give its scientific name Laetiporus sulphurous, is only found on trees, and the trees can be living or dead. It is usually found in the Summer and Autumn, and occasionally in Winter if it is a mild one. It grows most commonly upon oak and also yew, cedar, cherry wood, sweet chestnut, and willow. It is worth pointing out that all Laetiporus species are edible except if found growing on poisonous trees such as yew and cedar.

Whilst on the subject of edibility, I should also mention that Laetiporus sulphurous is only edible when cooked.


If you like the blogs and podcast I produce, please consider treating me to a virtual coffee or pint, or even a £3 monthly subscription: follow this link for more information.


Cooking with Chicken-of-the-Woods

This fungus is called chicken-of-the-woods because it’s firm flesh is pale and fibrous but tender, like chicken breast. For that reason it makes an excellent meat substitute for vegetarians. What a coincidence it is that I have a friend visiting me who is vegetarian; we could put the chickeniness to the test.

I did hope it was good because the chicken-of-the-woods I found was pretty big, weighing in at 2 kilograms and bigger than my head! It therefore would keep me and my visiting friend Stuart in meals for most of the week.

Preparing it is simple. Separate the brackets from each other and trim away and tough woody bits then rinse it under the tap briefly to get rid of any soil and creepy-crawlies, then slice it reasonably thinly. Then it is just a question of integrating it into a recipe. As you slice, you’ll notice that the flesh is rather dry, so when frying it you should add a little water so that it can absorb it and become more typically mushroomy in texture.

2013-08-05 19.26.52


Its firm flesh is tender and yielding and definitely has a truffle aroma and flavour when cooked – there’s a lot of umami going on in that mushroom! It’s definitely the tastiest wild mushroom I have found thus far. We couldn’t understand why it hasn’t been cultivated as food because it was so substantial and satisfying, and better than any TVP, Quorn or other mock meats. Maybe I’ve found a gap in the market…

Here’s what I made with it:

One third was turned in simple mushrooms on toast  – a recipe can be found for that here – the only changes I made was to add a little water after a few minutes’ sautéing, and to omit the cream/milk. Whenever you try a mushroom the first time, this is the thing to cook for it shows it off in all its glory! It fed 4.

2013-08-05 20.07.07

The second third was used in a stir fry with the typical stir-fry veg, soy, (vegetarian) oyster sauce and, again, some water. This really showed off its meaty qualities. Excellent. This fed 2.

2013-08-06 20.04.18

The last third was a spinach and chicken-of-the-woods lasagne. I made a simple béchamel sauce flavoured with Lancashire cheese, black pepper and nutmeg, then sautéed the mushrooms in olive oil, added some water and steamed the spinach on top of the mushrooms. Everything was layered up in the usual way, finished with some Parmesan and breadcrumbs and baked. This fed 4….

2013-08-08 20.59.11

Now it is all used up, and we didn’t even get bored of it. I do hope another grows back on that tree trunk…

10 Comments

Filed under Britain, cooking, food, foraging, natural history, nature, Recipes, Uncategorized, Vegetables

Pompion (Pumpkin) Bread

I was recently bequeathed a lovely home-grown organic pumpkin from my good friends Simon and Rachel Wallace – they are slowly but surely building up a small-holding on a farm in the Derbyshire country. They are living the dream, and I am more than a little jealous. Anyway, I wanted to do the lovely pumpkin justice and make some nice meals. I remembered a recipe for pumpkin bread that appears in English Bread and Yeast Cookery by Elizabeth David. She takes it straight from the original manuscript, an 18th century periodical called The Family Magazine. Back then pumpkins were more commonly called pompions, and it is more like some advice rather than a recipe:

Slice a pompion, and boil it in fair water, till the water grows clammy, or somewhat thick; then strain it through a fine cloth, or sieve, and with this make your Bread, well kneading the dough; and it will not only increase the quantity of it, but make it keep moist and sweet a month longer than Bread made with fair water only.

The Family Magazine, 1741

It funny that the British have always had a thing for bread that stays ‘fresh’ for as long as possible; the French, for example, expect the opposite and buy there’s once or twice daily . It goes back to the days when the old brick bread ovens were lit but once a week so the bread – and other goodies – had to last. This love for bread with a long shelf-life is also often blamed for our love of the moist mass-produced packaged breads that go mouldy before they go stale, but I digress.


If you like the blogs and podcast I produce, please consider treating me to a virtual coffee or pint, or even a £3 monthly subscription: follow this link for more information.


I thought I would give this pompion bread a go, but I felt that boiling the poor thing to death was a bit wasteful, and I wanted the bread to have some pumpkin flavour so I roasted it, mashed it up and added it to a basic bread dough along with a little sugar and some mixed spice. It turned out to be delicious so I thought I’d give you the recipe to try. I don’t think it resembles the original recipe, but it certainly inspired me to make it. By the way, it doesn’t stay fresh for a month, but it is very much moist and edible five days later. It goes great with soup and stews or with jam or just butter spread on it.

This recipe makes 2 good-sized loaves.

What you need:

600g piece of pumpkin or other squash, deseeded weight

500g (1 lb 2 oz) strong white flour

50g (2 oz) fine oatmeal

1 ½ tsp mixed spice

25g (1 oz) fresh yeast, or 1 tsp dried instant yeast

2 tsp salt

50g (2 oz) sugar

25g (1 oz) softened butter or olive oil

225g (8 oz) warm water

olive oil

extra flour

extra oatmeal


What you do:

Begin by roasting the pumpkin in a little olive oil until soft – around 30 minutes at 180⁰C (350⁰F). When cooked, remove from the oven, cool, remove skin and mash to a pulp.

FxCam_1360684693650

Mix the flour, oatmeal, mixed spice and sugar in a bowl, then crumble the fresh yeast on one side of the bowl, and spoon the salt one the opposite side. Make a well in the centre and pour in the water along with the olive oil. Notice that I have given the weights of liquids here – I’ve taken to doing this with all my baking recently; you can be much more accurate that way. (For most water-based liquids one millilitre weighs one gram. You can thank Elizabeth David for that one.) Lastly, add the cool pumpkin.

Using you hand, mix everything to a sticky dough – it will be very sticky but don’t worry.

FxCam_1360685406730

Rub a teaspoon or two of olive oil on your work surface and turn out your dough onto it; the oil makes it easier to knead without it all becoming a hideous sticky mess. Keep kneading and adding more oil if need be. If all this seems like too much effort and mess, use the dough hook on a food mixer instead.

When the dough is smooth, do a final kneading on a little flour, then pop into a clean bowl that has been lightly coated with oil to prevent sticking. Cover with Clingfilm (other plastic wraps are available) and allow to ferment away until it has at least doubled in size.

Knock back the dough and shape into two loaves – you can do round cobs on a greased baking sheet or in greased tins, whichever you prefer. i used two cake tins so that my cobs would keep some shape.

FxCam_1360697841988

Cover and allow to prove. Make appropriate cuts and dustings of flour or oatmeal. When doubled in size put into a cold oven. Set the temperature to 220⁰C (425⁰F) and leave for 15 minutes. Turn the heat down to 180⁰C (350⁰F) and bake for a further 15 minutes. Allow to cool on a rack completely before breaking into it.

FxCam_1360707421659

6 Comments

Filed under baking, bread, Britain, cooking, Eighteenth Century, food, history, Recipes, Vegetables

Beetroot

Hello there everyone. Here’s just a quick post to prove that I am not dead, but still alive and kicking! I have had such a crazy couple of months getting this business of the ground whilst working at the University of Manchester and Manchester Metropolitan University. Phewee! There’s no rest for the wicked as they say (and if it is true then I must be extremely wicked indeed).

Anne Swan Beetroot

Ann Swan’s beautiful vegetable art

One vegetable that ranks very highly in my favourite foods is the humble beetroot; it would certainly be in my Top 10. Jane Grigson wrote a fantastic book called Good Things in which each chapter focusses on her favourite ingredients. If I were to write my own version, beetroot would be included. It’s that mixture of sweetness and earthiness that you can’t really get from anything else. Some people shudder at the thought of it as a vegetable in its own right – too much overcooked purple mush at school has not done it any favours – and only really eat it as a pickle.

It is actually a very versatile vegetable; you can boil it, roast it, pickle it, and by virtue of its sweetness, use it as a cake ingredient that surpasses the carrot.

Beetroot has been cultivated for centuries and its ancestor is the sea beet Beta marinama a rather common plant found around the coasts of Eurasia, especially along the Mediterranean Sea. It is from this plant we get today’s red beet (plus several other varieties like the golden beetroot) as well as sugar beet and the less well-known mangel-wurzel or mangold. The latter is used mostly as animal fodder, though it has been a food crop for people too in the past (for those of you that remember it, the scarecrow Wurzel Gummidge had a head made from mangel-wurzel). The history of sugar beet is very interesting and deserves a post all to its own. Oddly enough, the beet plant wasn’t cultivated for its sweet tap roots at first, but its leafy greens. Indeed, our Swiss chard is also of the same species as beetroot and sugar beet. Eating the root didn’t catch on until the 16th century.

There is loads of beetroot hanging around at the moment and it should be reasonably cheap in the greengrocer’s shop this time of year, so you should jump at the chance to having a go at preserving them. I got a huge batch from Manchester Veg People.

IMG_2525

I have already provided a recipe for curried beetroot chutney, but I thought I’d give you the recipe I use to pickle beetroot as well. I first came across it in Good Things (1932) by Florence White, who mentions that the recipe must be very old, though she mentions neither when it was written or by whom. I did find an almost identical recipe as I was flicking through a copy of Mrs Beeton’s Book of Household Management (1861; which can be read online; see this link here).

It is the inclusion of an infusion of black peppercorns and allspice that really makes this pickle special. You’ll never go back to buying jars of it ever again! It’s important to remember to not peel the beetroots before you cook them, otherwise their wonderful colour will be lost to the cooking water.

Pickled Beetroot

2 kg (4 ½ lbs) beetroot

1 ¼ litres (2 pints) cider vinegar

15 g (½ oz) peppercorns

15 g (½ oz) allspice berries

Top and tail but do not peel the beetroot, then simmer them in plain water for around 30 minutes until tender. Very large ones may take over an hour to cook. Meanwhile, boil up the vinegar with the spices and simmer for 10 minutes then strain. Let the beetroots and vinegar cool completely before peeling and slicing the beetroots.

IMG_2532

Put into sterilised jars and cover with the strained, cooled vinegar. In two weeks they’ll be ready to enjoy.

IMG_2533

If you like the blogs and podcast I produce, please consider treating me to a virtual coffee or pint, or even a £3 monthly subscription: follow this link for more information.


7 Comments

Filed under cooking, food, history, Preserving, Recipes, Vegetables

Curried Beetroot Chutney

A while ago, I discovered a recipe for a 19th century British curry (see here for the original post). The recipe required me to prepare both a curry powder and a curry paste. It made a very good, strongly spiced curry, but ever since the jars have been sat in my fridge. I thought there must be something else I can do with these concoctions. After a little thought I came up with this chutney idea and it works very well: the earthy beetroot is very sweet which offsets the spices very well. I thought of beetroot because I often panfry beetroot in olive oil with cumin seeds and always thought the combination delicious. Because beetroot is so sweet and quite a lot of sugar is required for the syrup, I include a quantity of carrot, otherwise I think the sweetness and beetroot flavour may make it a little too rich.

It is delicious with cold meats or cheese and is also a great alternative to mango chutney as a condiment for a curry.

The recipes for the curry powder and curry paste needed for the pickle can be found here.

Ingredients

3 tbs flavourless cooking oil such as sunflower, canola, groundnut &c.

2 tsp cumin seeds

1 tbs 19th century curry powder

1 tbs 19th century curry paste

2 lbs beetroot, peeled and diced

1 lb carrots peeled and diced

1 med onion, chopped

2 tart apples, peeled, cored and grated

1 ¼ UK pints red wine vinegar

1 ½ lbs sugar

1 ½ tsp salt

Heat the oil in a stockpot or large saucepan – you need it quite hot, don’t be scared, the hotter the better. Toss in the cumin seeds and fry in the hot oil for around 30 seconds, then add the curry powder and paste. Stir and fry for around 2 minutes then add the remaining ingredients. Bring to a steady boil, then make sure the sugar has dissolved before letting it simmer away for around 90 minutes until the beetroot is tender and the vinegar and sugar have formed a thick syrup.

Pot into sterilised jars. The chutney can be eaten as soon as it is cool, but it is best to leave it for a couple of weeks to develop its flavour.


If you like the blogs and podcast I produce, please consider treating me to a virtual coffee or pint, or even a £3 monthly subscription: follow this link for more information.


2 Comments

Filed under Britain, food, General, Indian food, Nineteenth Century, Preserving, Recipes, Vegetables

Celery

The great about celery is that it is two vegetables and one spice all in one.

The large familiar swollen stems are actually greatly enlarged leaf stalks and make up most of the plant visible above the soil. The celery we know and love was selectively bred in 14th century Italy from the wild plant that is “rank, coarse, and…poisonous” according to the celery expert Theophilus Roessle. It is these stalks that join onions and carrots to produce the trinity of stock vegetables – indeed it is for stock, or for salads, that celery is commonly used, but it does make a great vegetable on its own. It was very popular to serve celery sauces with poultry, or served covered in a cream sauce with pheasant.

In Good Things, Jane Grigson gives us two valuable pieces of advice: firstly, that celery is a seasonal vegetable that is at its best from November and December. We have lost this seasonality and it is a shame, I expect few of us have eaten prime celery improved by the ‘first frost’. The second piece of advice is how to eat the vegetable raw; once you have procured your first-frosted celery, you should trim it and spread down the curved length of the stem good butter. Next, sprinkle with sea salt. “Avoid embellishments”, she says “a good way to start a meal.” To prepare celery for eating, it is often a good idea to string it – this is particularly important if it is to be cooked. It’s very simple to do because the strings are quite near the surface of the stalk; take a vegetable peeler to its curved underside and peel the strings away. Easy.

If allowed to flower, the seeds produce a spice which was used to make celery vinegar, a popular condiment in the 18th century. It is also the part of the plant that is used to make celery salt, an ingredient in a classic Bloody Mary cocktail. To make it, just grind up some celery seeds and mix with double the amount of good quality sea salt.

Celery plant showing off its stalks and root

It might surprise you to know that celery is a member of the carrot family, but if you look beneath the soil surface you will find a large swollen root, though it doesn’t look very much like a carrot; it is round, creamy and white and covered in small knobbly roots. This is celeriac, sometimes just called celery root. It goes really well with game and can be roasted like parsnips or pureed with some potatoes. Raw, it is an excellent ingredient in coleslaw.

Here are a couple of recipes that show the celery stems off at their very best. Both can be made from one head of celery.

Braised Celery

This is my favourite way of cooking celery and it is also very simple – the most difficult bit is remembering to take it out of the oven! It requires the inside stalks of a head of celery – don’t throw away those outer sticks, you use them to make celery soup (see below). It is best made with beef stock and served with roast beef or game, in particular pheasant.

one head of celery, outer 8 stems removed

2 oz of butter

8 fl oz beef, chicken or vegetable stock

salt and pepper

Separate the sticks of celery, string those that need it and slice them in half and place spread out in a single layer in a shallow ovenproof dish. Dot with the butter and pour over the stock. Season with salt and pepper. Cover tightly with a well-fitting lid or some foil. Bake in the oven at 160⁰C (325⁰F) for 2 ½ hours.


If you like the blogs and podcast I produce, please consider treating me to a virtual coffee or pint, or even a £3 monthly subscription: follow this link for more information.


Celery Soup

This is the best way of using up the really stringy outer stalks on a head of celery. It’s pretty low-fat (you could swap the butter for olive oil) but has a nice ‘cream of…’ look and feel but without the actual cream. To achieve this, all you need to do is to stir in a couple of fluid ounces of milk after the soup has been liquidised. One of my favourite soups.

2 oz butter

1 bay leaf

¼ tsp allspice

8 sticks of celery including the leaves, sliced

1 medium onion, chopped

1 medium potato, diced

1 pint of vegetable or light chicken stock

2 fl oz milk

good pinch of ground white pepper

salt

Melt the butter in a large saucepan, when it stops bubbling add the bay leaf and allspice. Cook in the butter for 30 seconds or so before adding the celery, onion and potato. Mix well to coat the vegetables with the butter. Turn the heat down to low-medium and cover the pan. Let the m cook gently for 20 minutes until the vegetables have softened. Add the vegetable stock, bring to a boil and simmer gently for a further 30 minutes. Let the soup cool a little before liquidising in a blender. Push through a sieve if you like your soup super smooth. Add the milk and a good seasoning of white pepper and salt; the amounts are up to you, but I use around 1/2 teaspoon salt and 1/8 of a teaspoon of pepper.

3 Comments

Filed under Britain, history, Recipes, Uncategorized, Vegetables