I thought you might be interested in getting tickets for this special Serve it Forth Christmas event on 11 December called A Christmas Feast of the Uncanny. Tickets are just £5 (plus Eventbrite booking fee) and the event runs from 7:00pm to 8:45pm.
If you can’t make the whole event, the evening will be recorded and shared soon after.
In case you didn’t know, but Sam Bilton, Alessandra Pino and me are all big horror fans, and Christmas is associated with spooky, ghostly tales. We would love to see you there.
Serve it Forth Food History Festival invites you to an evening exploring the eerie side of Yuletide food traditions.
Step beyond the cozy glow of twinkling holiday lights and into a Christmas world where the shadows tell their own tales. A Christmas Feast of the Uncanny is an immersive online event that explores the eerie, strange, and deliciously dark side of Yuletide traditions through the lens of food.
Join the Serve It Forth team at this live virtual gathering to discover:
Why ghost stories are so popular at Christmas as we explore the food references in some of the lesser-known ghoulish tales from Charles Dickens and his like.
The significance of otherworldly beings like elves, witches and monsters at this time of the year and their relationship to food.
The origins of traditional Christmas foods and the old customs that linked them to fortune-telling and other forms of the supernatural.
It’s time for the now traditional end-of-season postbag episode of The British Food History Podcast, where I (attempt to) answer your questions, read out your comments and mull over your queries.
I’ll be disappearing for a couple of months, unless of course, you are a monthly subscriber, where there will be a bonus episode coming up for you to listen to via the website: Keeping Food Traditions Alive with Tom Parker Bowles, which was recorded live at the Serve it Forth Food History Festival on 18 October.
The British Food History Podcast is available on all podcast platforms. Please subscribe, rate and review. Alternatively, stream the episode via this Spotify embed:
If you can, support the podcast and blogs by becoming a £3 monthly subscriber, and unlock lots of premium content, including bonus blog posts and recipes, access to the Easter eggs and the secret podcast, or treat me to a one-off virtual pint or coffee please click here.
Remember: Fruit Pig are sponsoring the 9th season of the podcast. Visit their website www.fruitpig.co.uk to learn more about them, their journey, to find your local stockist and access their online shop.
Don’t forget, there will be postbag episodes in the future, so if you have any questions or queries about today’s episode, or indeed any episode, or have a question about the history of British food please email me at neil@britishfoodhistory.com, or on twitter and BlueSky @neilbuttery, or Instagram and Threads dr_neil_buttery. My DMs are open.
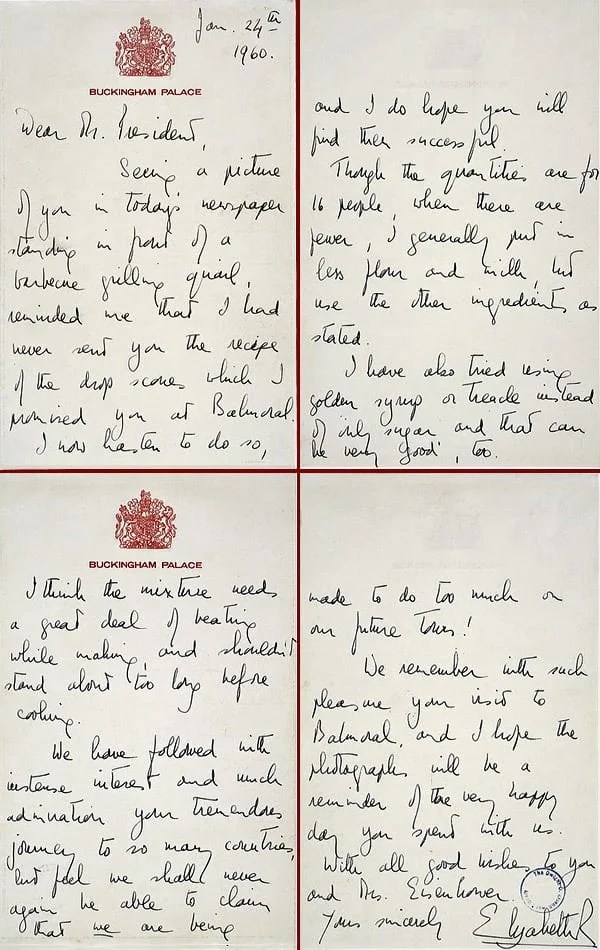
Earlier in the year, the fantastic Fruitpig(sponsors of the ninth season of the podcast) very kindly sent me some fresh pig’s blood so that I could try my hand at making some early modern black puddings, inspired by the recipes of Robert May, Kenelm Digby and Thomas Dawson. I made two versions: a savoury one and another sweetened with sugar and currants – both turned out to be delicious.
Listen to the episode of the podcast with Matthew and Grant aka Fruitpig!
A few years ago I read (I forget where) that blood thickens upon heating just like egg yolks, and I had an idea in the back of my mind that blood ice cream might be possible to make, knowing already that the black puddings of the early modern period were often sweet.
Please that the sweet black puddings tasted good, I set about to see if I could find any British examples of blood ice cream or, at least, something similar. I couldn’t find anything. However, I did discover in the pages of Jennifer McLagan’s excellent offal cookbook Odd Bits, a blood and chocolate ice cream recipe, adapted from an Italian set dessert called sanguinaccio alla Neapolitana: little pots of set chocolate custard, thickened with blood instead of egg yolks.
Encouraged by the fact I knew it could be done, I went about adapting my black pudding recipe into an ice cream. I have a good, basic vanilla ice cream recipe that I’ve been using for years, which in turn is based on my custard recipe, and all I did was swap out the eight egg yolks for 200 ml of pig’s blood. Not convinced that the blood would thicken things sufficiently, I popped in two egg yolks for good measure. The milk and cream were flavoured not with a vanilla pod, but the same aromatics as the black pudding: pepper, cloves, mace and dried mixed herbs. I really wanted to include the currants, but knowing they would freeze hard into bullets, I thought an overnight soak in some sherry would work well – not unlike modern rum and raisin ice cream. I chose sherry because it’s the closest thing we have to sack, the popular fortified wine of the early modern period, and a common addition to recipes.
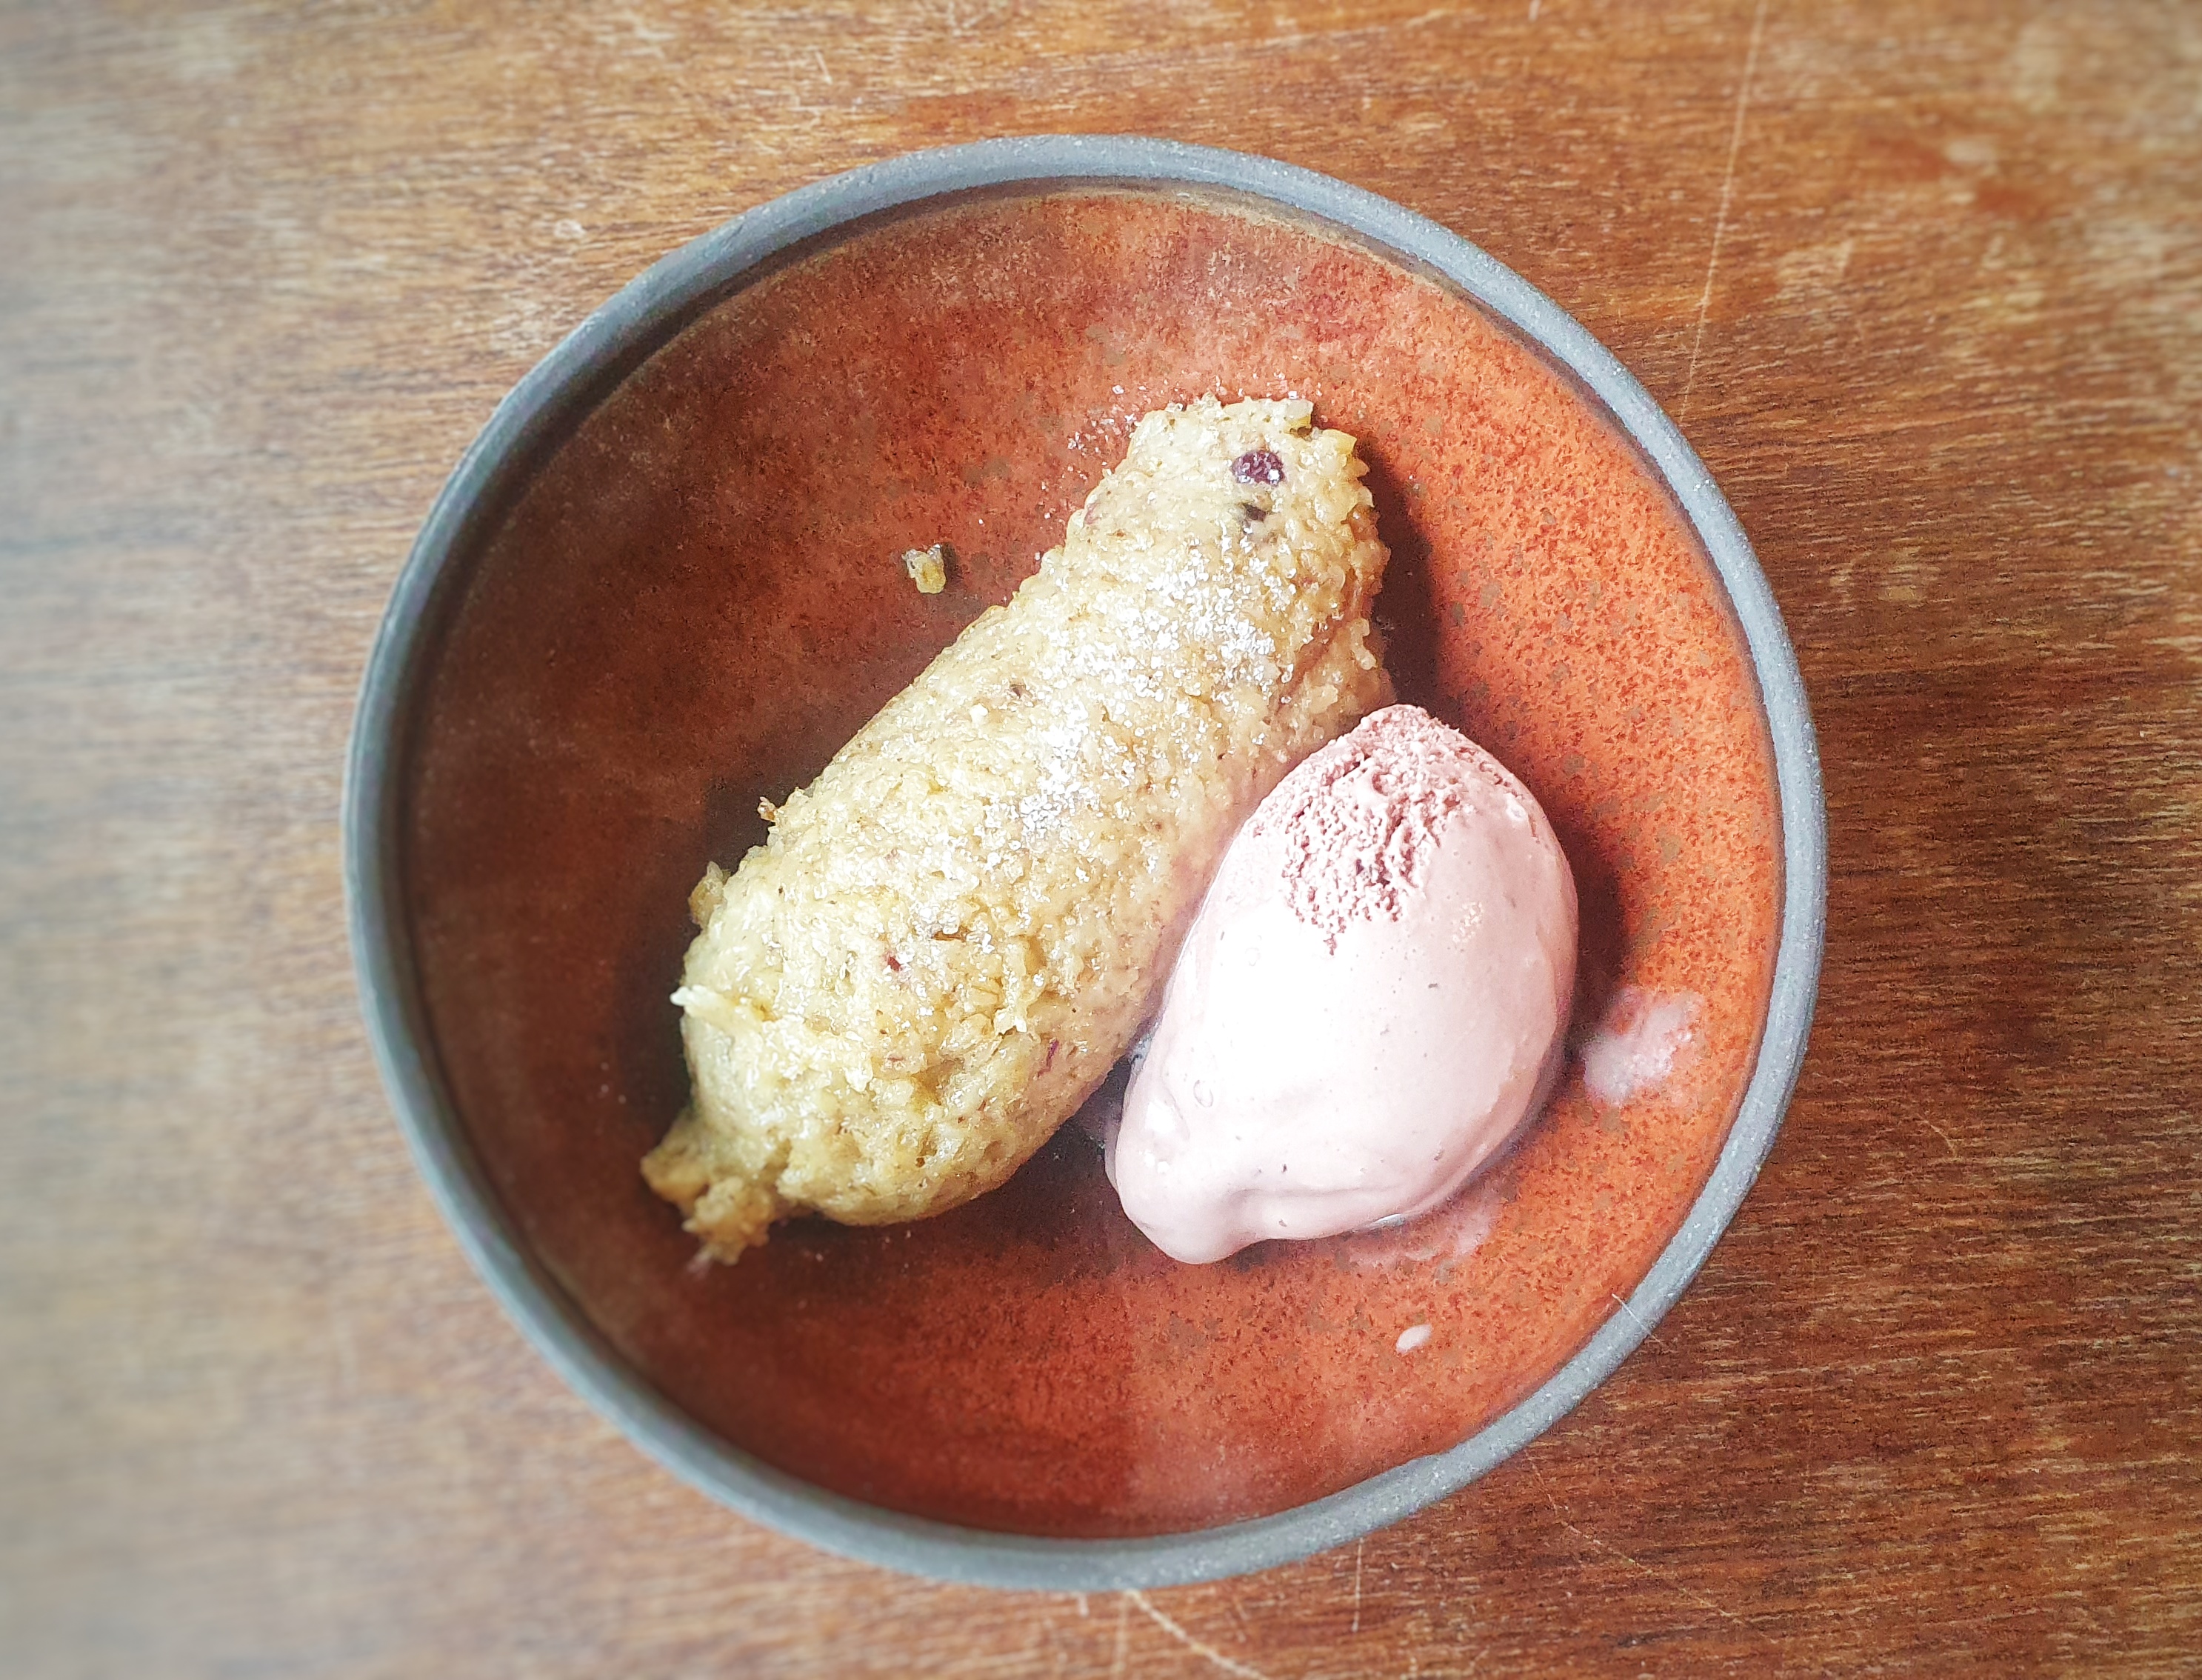
Well, I am very pleased to say that it was a great success. It was the richest ice cream I have ever eaten: luxurious, aromatic and with a very slight metallic tang. I ate a scoop with one of my early modern white puddings. What a combination!
If you like the blogs and podcast I produce, please consider treating me to a virtual coffee or pint, or even a £3 monthly subscription: follow this link for more information.
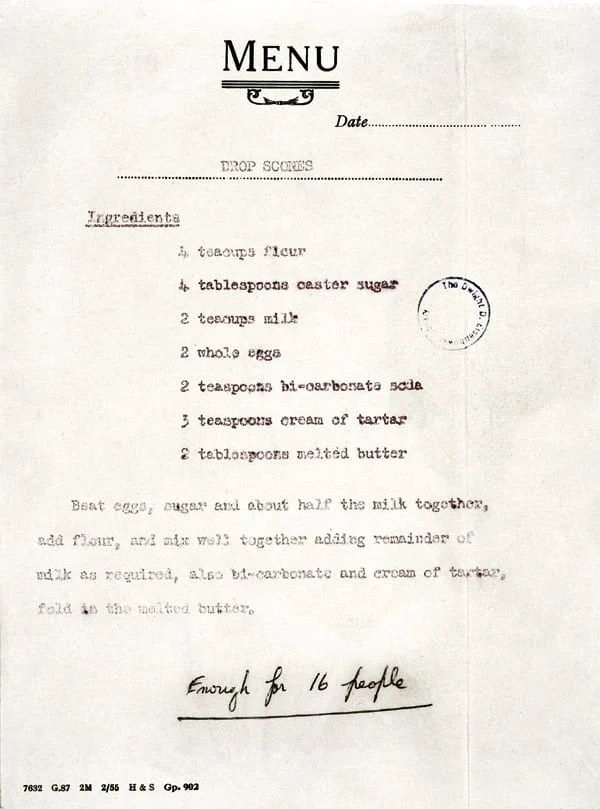
Ingredients
300 ml milk
300 ml cream seeds
½ tsp bl peppercorns
1 tsp fennel
½ tsp cloves
2 blades of mace
1 tsp dried mixed herbs
200 ml fresh blood
2 egg yolks
160 g sugar
50 g currants
a few tablespoons of sweet or medium sherry overnight
Method
Pour the milk and cream into a saucepan. Crack the peppercorns and bruise the remaining spices in a pestle and mortar, and add to the milk and cream along with the dried herbs. Mix well, making sure everything has been submerged, and warm the mixture over a medium-low heat and bring everything to scalding point – i.e. just before the milk and cream boil.
Meanwhile, add the blood, egg yolks and sugar to a mixing bowl and whisk together well.
When the mix and cream mixture reaches scalding point, remove the pan from the heat and whisk in around a quarter of it into the blood mixture. When everything is incorporated, beat in the rest of the cream mixture, and pour the whole thing back into the saucepan.
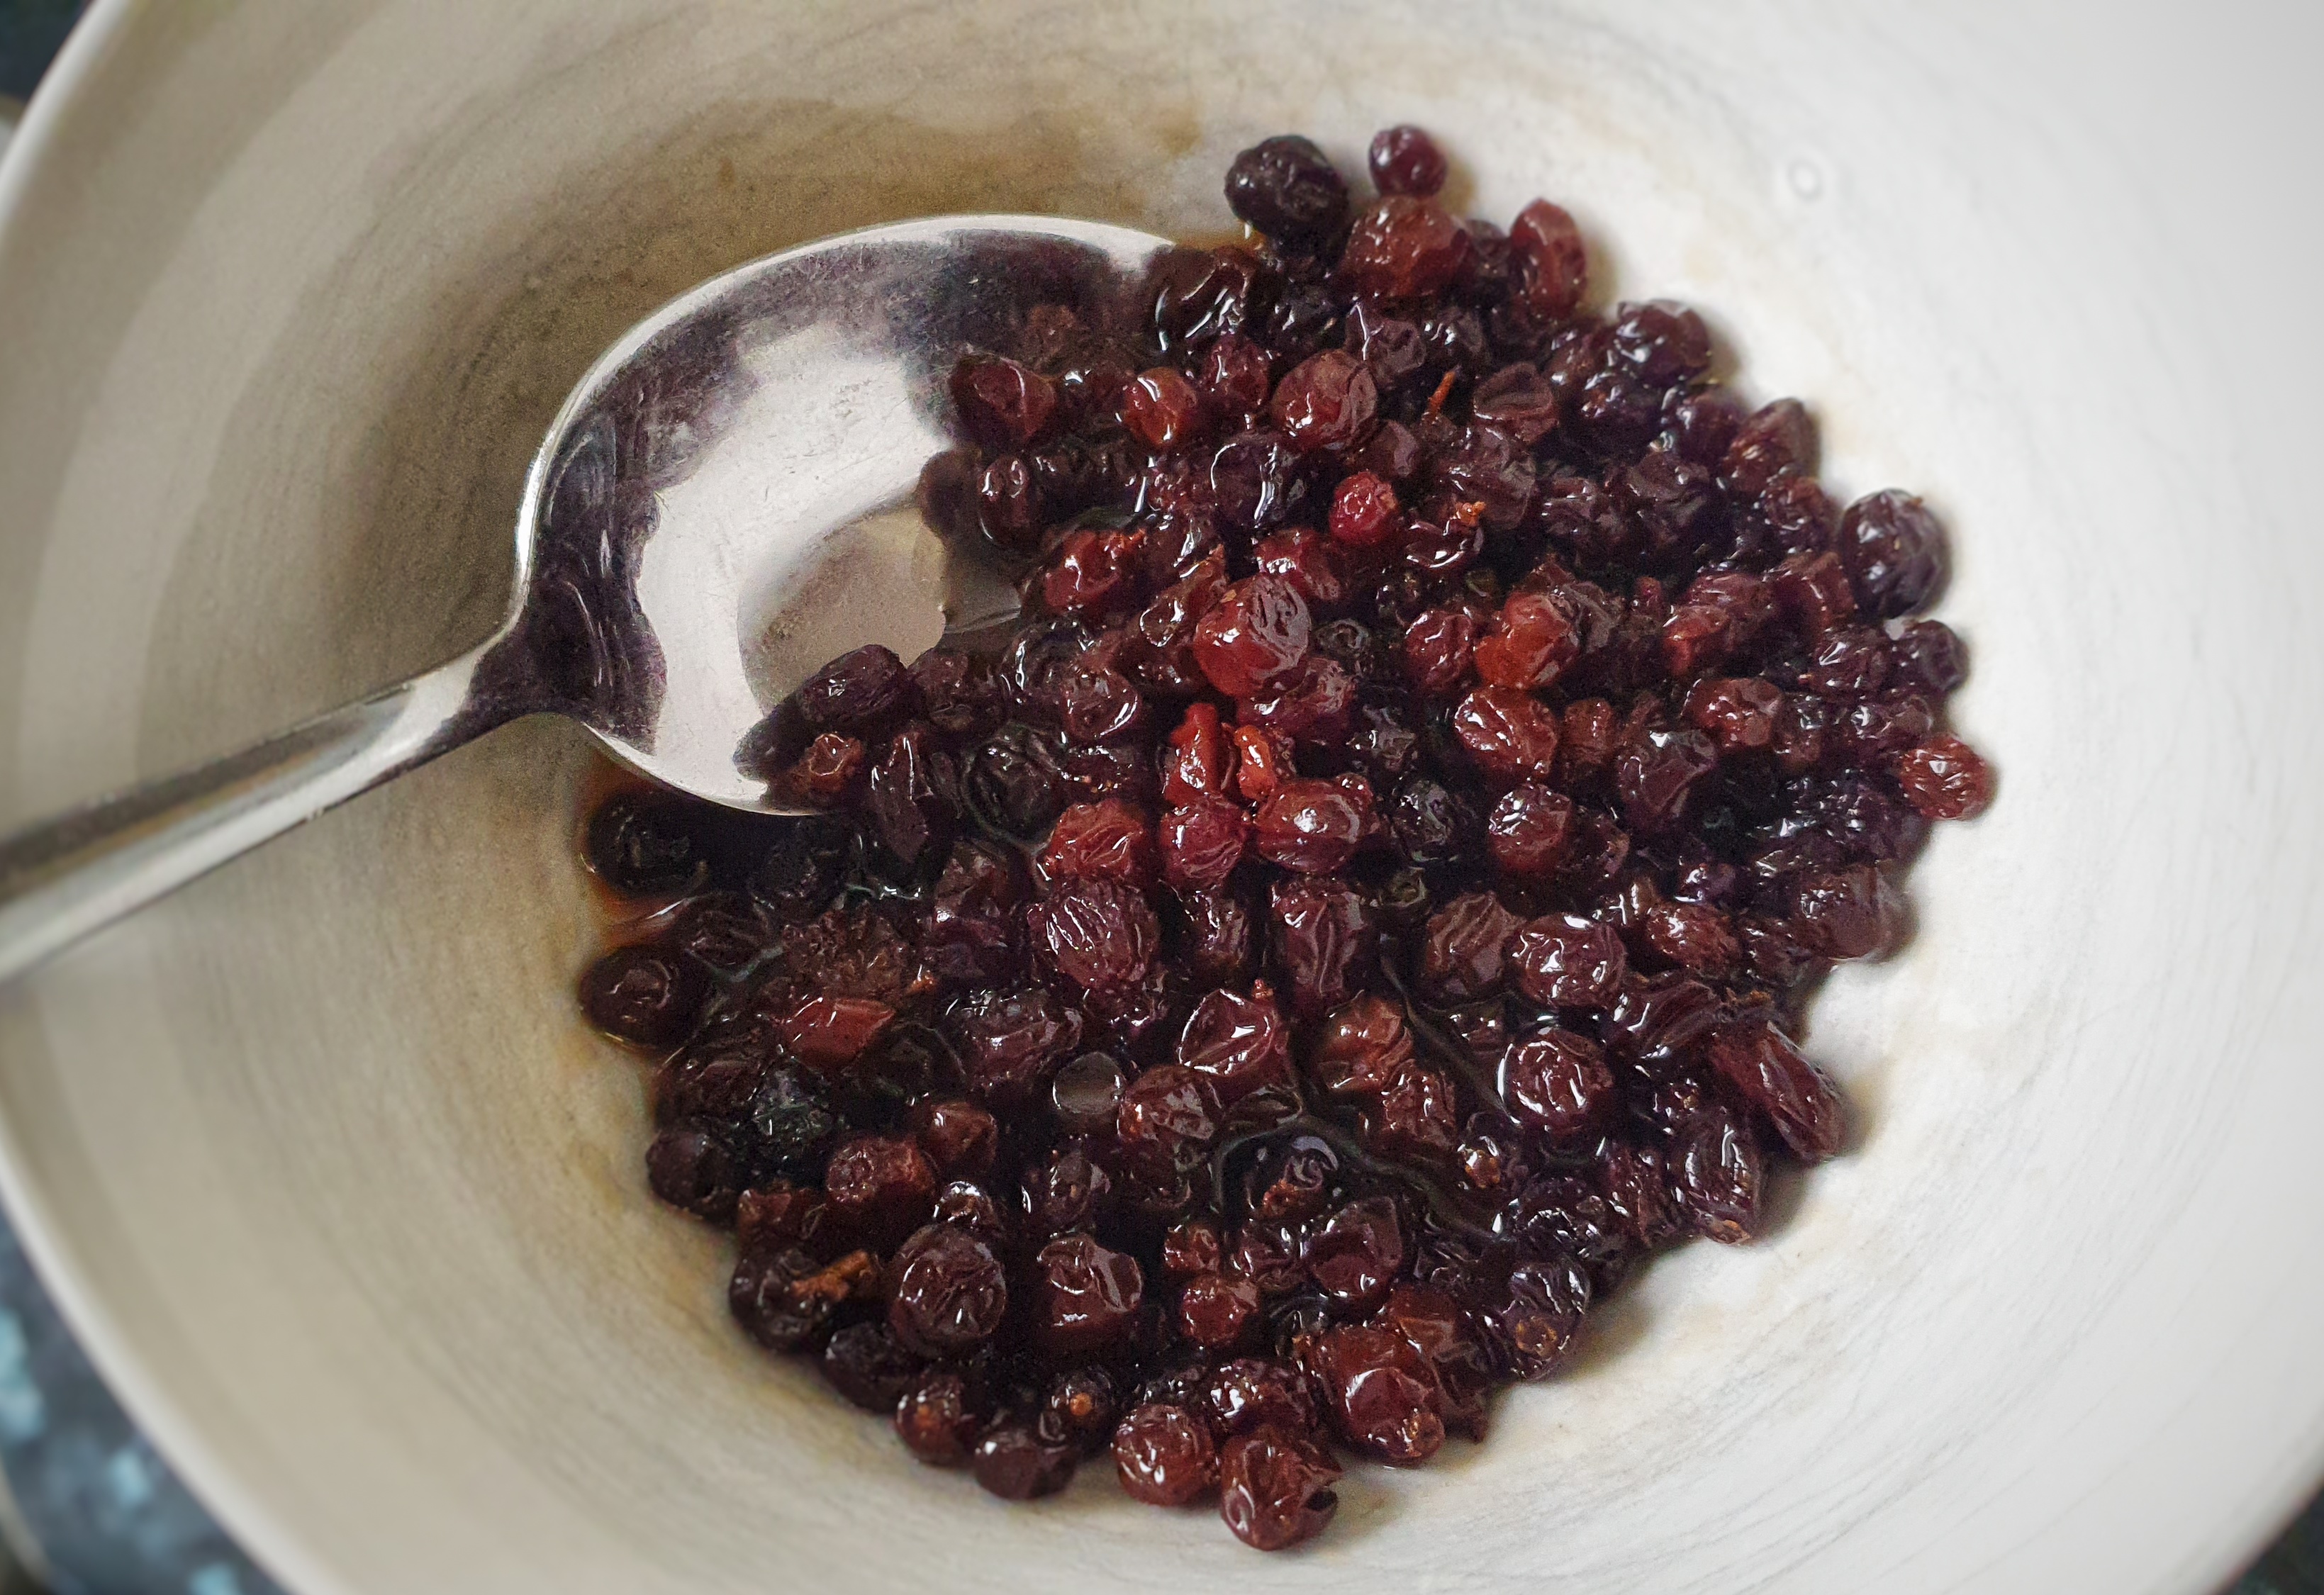
The cooled blood-custard base and the macerated currants
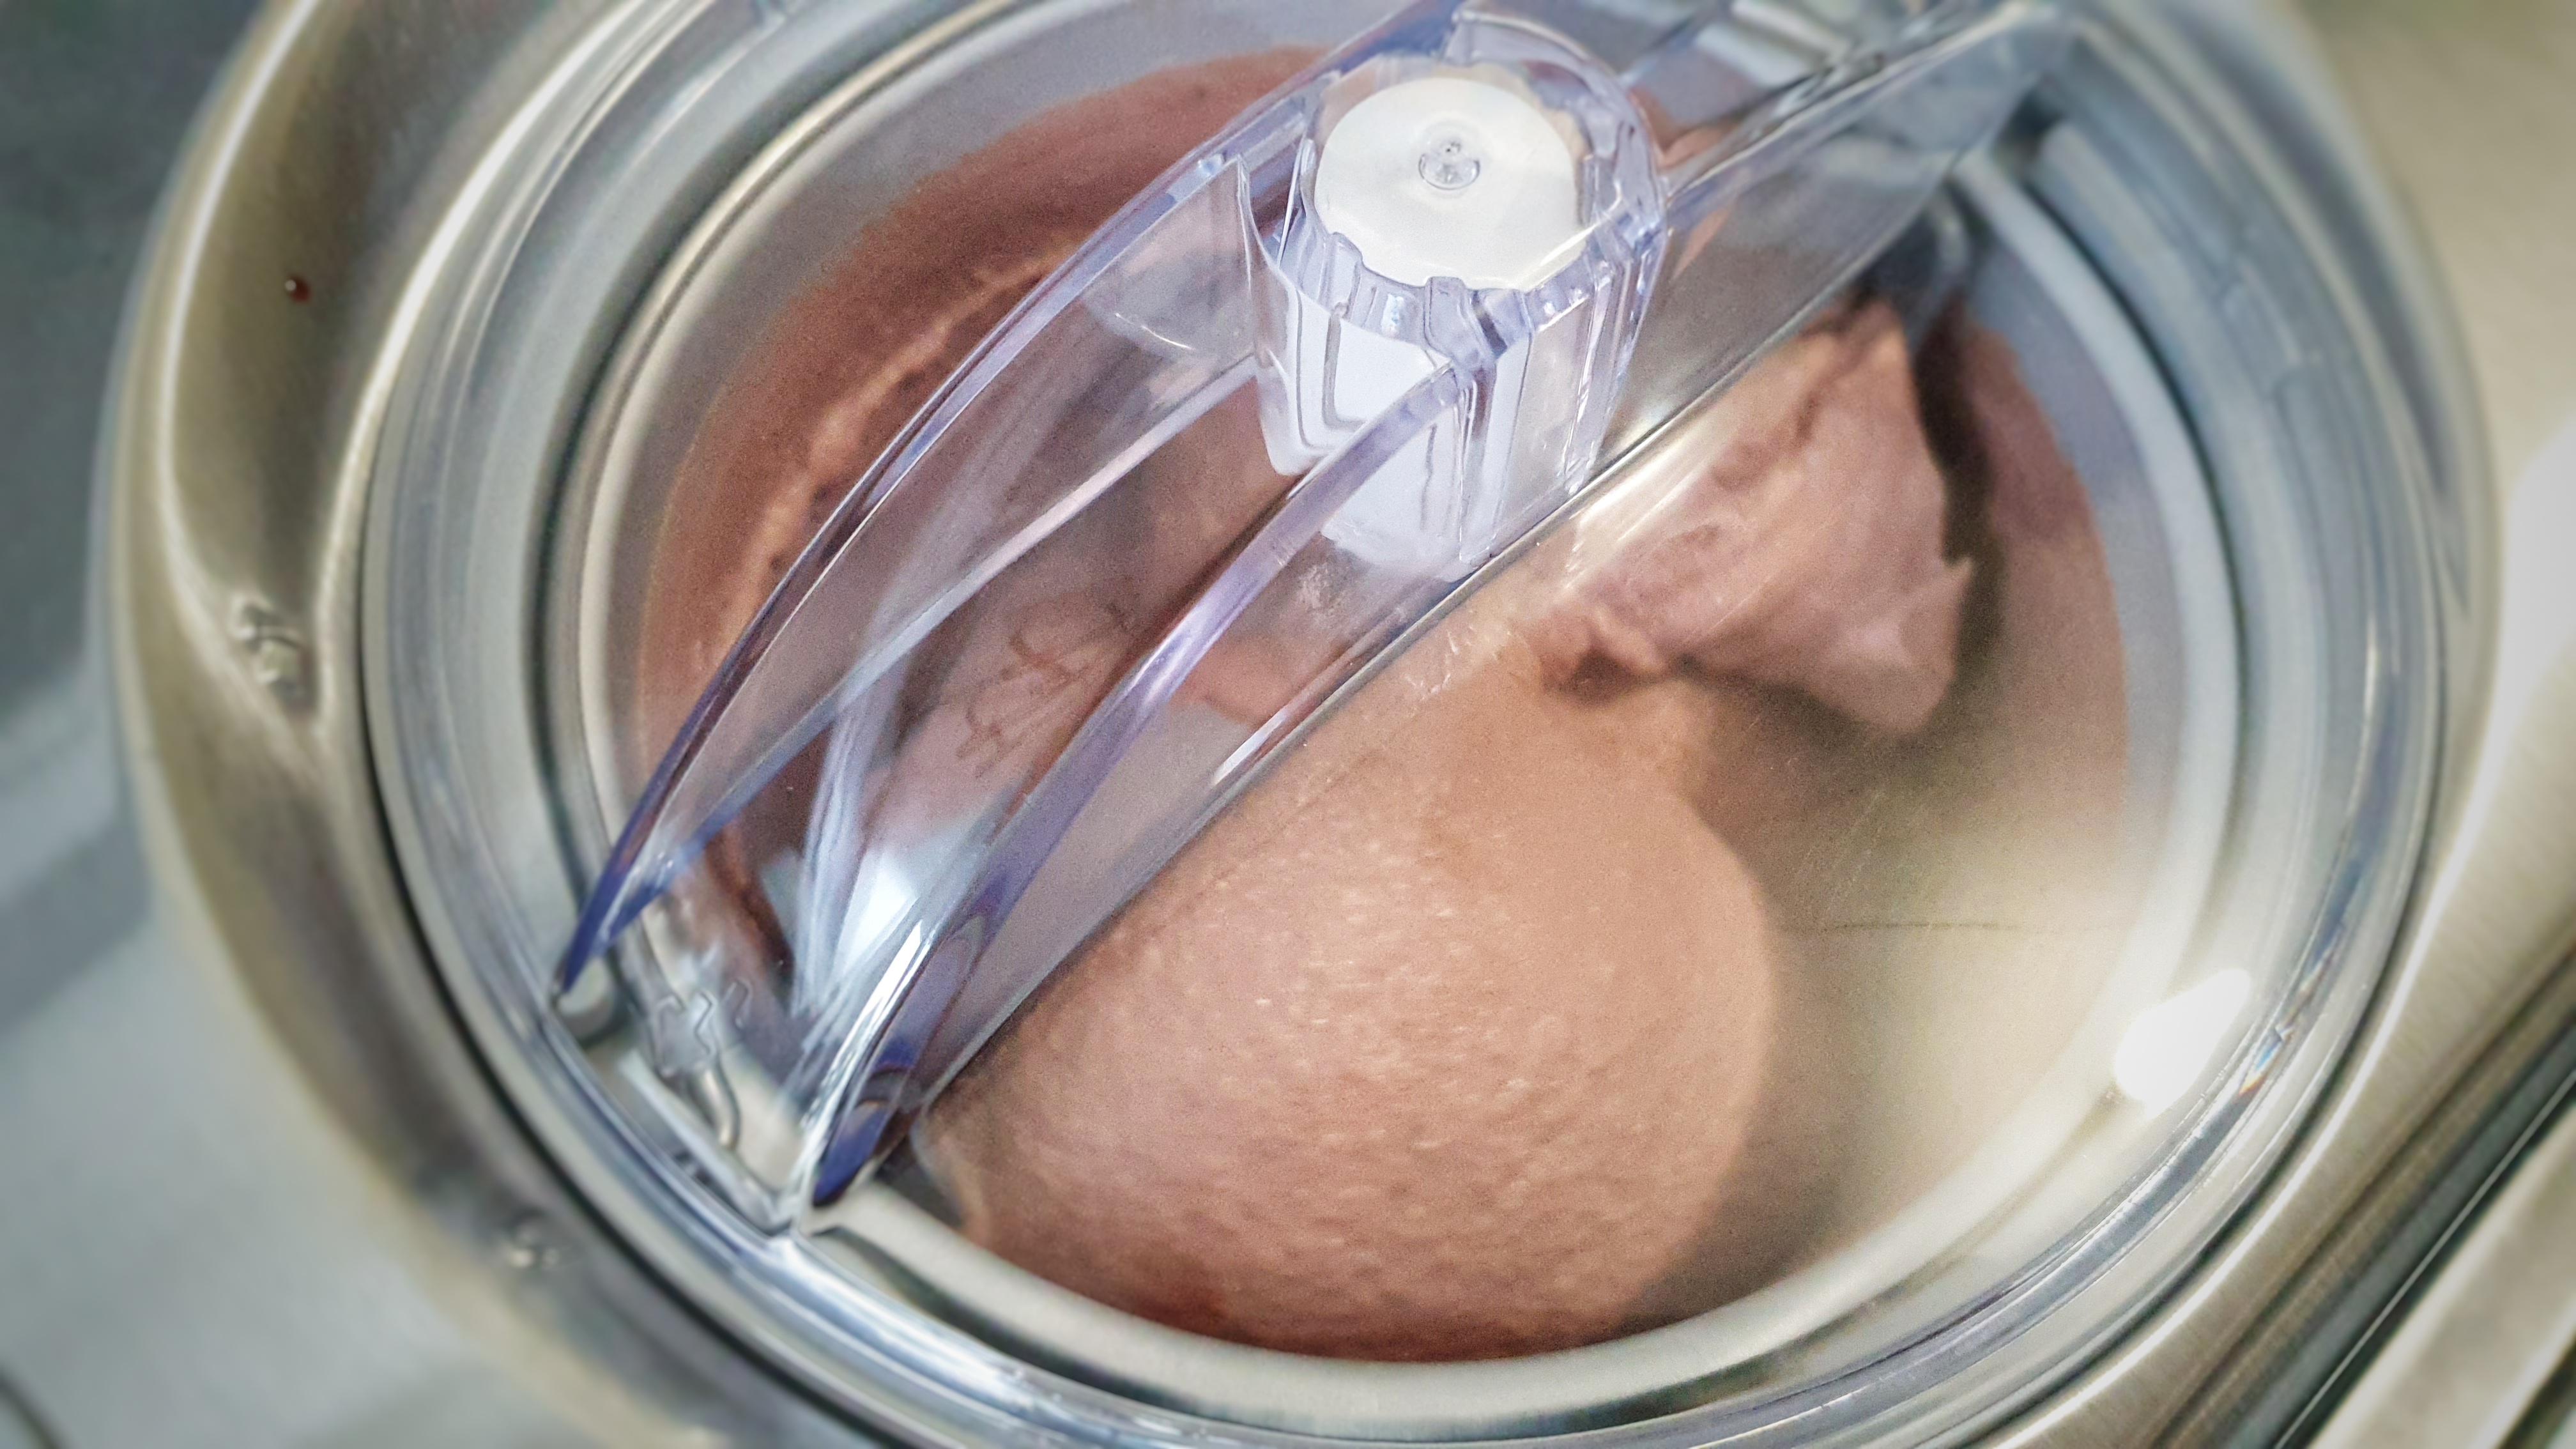
Now keep whisking or stirring until the temperature reaches 80°C – you can tell this temperature is reached because the mixture thickens noticeably and coats the back of a spoon (check with a difital thermometer, if unsure). Take off the heat and pass the whole thing through a sieve into a clean bowl or tub. Leave to cool and refrigerate overnight. Soak the currants in sherry and leave those to macerate overnight too.
Next day, churn the mixture in an ice cream machine until a very thick soft-scoop consistency. As you wait, strain the currants (keep the sherry and drink it!). When the ice cream is almost ready, add the currants.
Pour the mixture into tubs and store in the freezer. Eaten within 3 months.
The ice cream ready to receive its currants and my serving suggestion!
My guest on The British Food History Podcast today is historian Mark Truesdale, scholar of the fifteenth-century King and Commoner tradition and its early modern afterlife and author of The King and Commoner Tradition: Carnivalesque Politics in Medieval and Early Modern Literature, published by Routledge.
We talk about medieval carnival, the plot of a king and commoner tale, spying foresters, rude monks, the love of eating tiny birds, who the audience might be, and the ridiculousness of baking a venison pasty in Sherwood Forest – amongst many other things.
The British Food History Podcast is available on all podcast apps, YouTube, and can be streamed here via this Spotify embed:
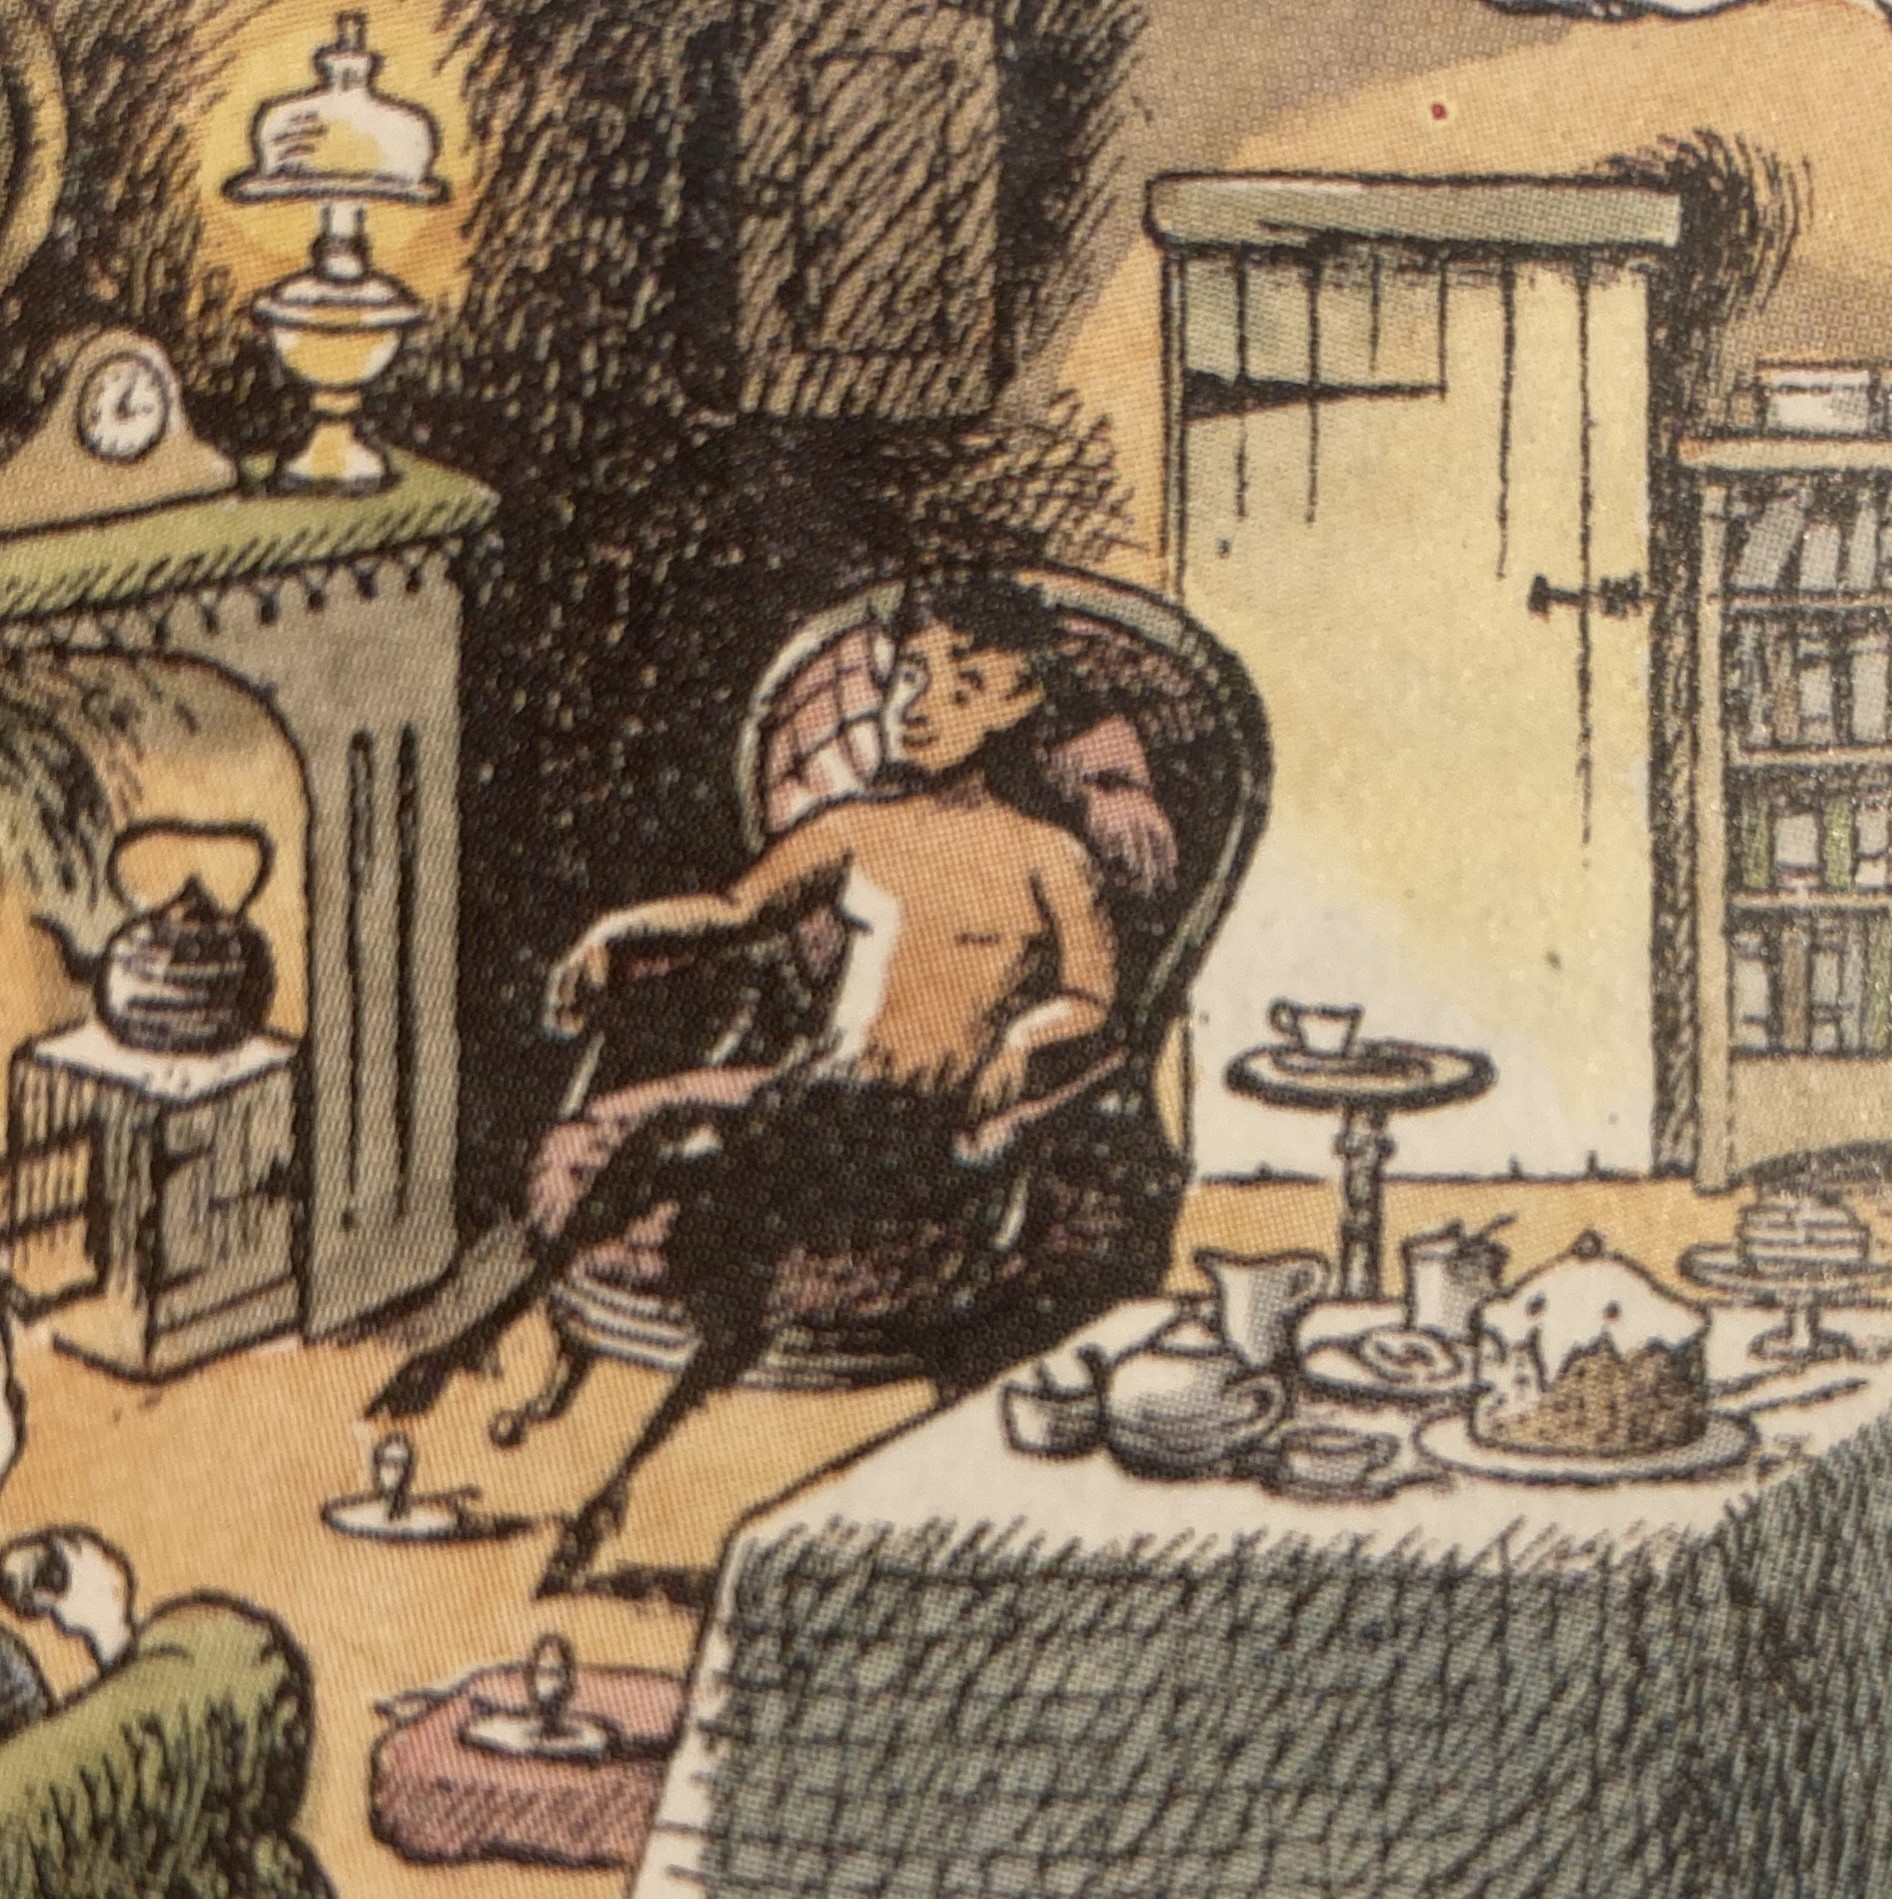
A selection of illustrations from manuscripts of various king & commoner tales
Those listening to the secret podcast can hear about Henry VIII’s love of Robin Hood tales, cowardly herons, and Mark tells me who the king in these tales may (or may not) be referring to.
Remember: Fruit Pig are sponsoring the 9th season of the podcast, and Grant and Matthew are very kindly giving listeners to the podcast a unique special offer 10% off your order until the end of October 2025 – use the offer code Foodhis in the checkout at their online shop, www.fruitpig.co.uk.
If you can, support the podcast and blogs by becoming a £3 monthly subscriber, and unlock lots of premium content, including bonus blog posts and recipes, access to the easter eggs and the secret podcast, or treat me to a one-off virtual pint or coffee: click here.
Don’t forget, there will be postbag episodes in the future, so if you have any questions or queries about today’s episode, or indeed any episode, or have a question about the history of British food please email me at neil@britishfoodhistory.com, or leave a comment, below.
Hello everyone – I do hope you are all having a great weekend.
This is just a super-short post just to remind you that the first Serve it Forth Food History Festival is just one week away – it’s online and on Saturday 18 October!
If you want to get hold of a ticket, visit the Eventbrite page, but remember to use the offer code SERVE25 at the checkout to get 25% off the ticket price.
So, come and join my and my cohosts – Sam Bilton, Thomas Ntinas and Alessandra Pino for an educational and fun day with guests such as Tudor food expert and author Brigitte Webster and food writer, journalist and author Tom Parker Bowles. Check out the full Bill of Fare here.
If you didn’t catch it, here’s a podcast episode we made to let you know more about the day, but also to get to know us all a little better.
Here’s a quick special bonus episode of the podcast for you – the lowdown on the Serve it Forth Food History Festival 2025, sponsored by the excellent Netherton Foundry. It’s available on all podcast apps, but if you like, listen via this Spotify embed:
My fellow festival coordinators Sam Bilton, Thomas Ntinas and Alessandra Pino and I are here to tell you more about it: how the day will work, what the sessions will be like, the topics and the guests – including my guest Tom Parker Bowles.
We have a brief discussion about our own interests and how we all got into food history. We also talk about our biggest/most embarrassing disasters.
Most important headlines are: it’s online on 18 October. It’s £16, but there’s 25% off ticket price until September 14th. Don’t worry if you miss some, or even all of the day, we will be making every recording available to all ticket holders.
NB: If you want to get 25% off the ticket price after the early bird has finished, use the offer code SERVE25 at the Eventbrite checkout.
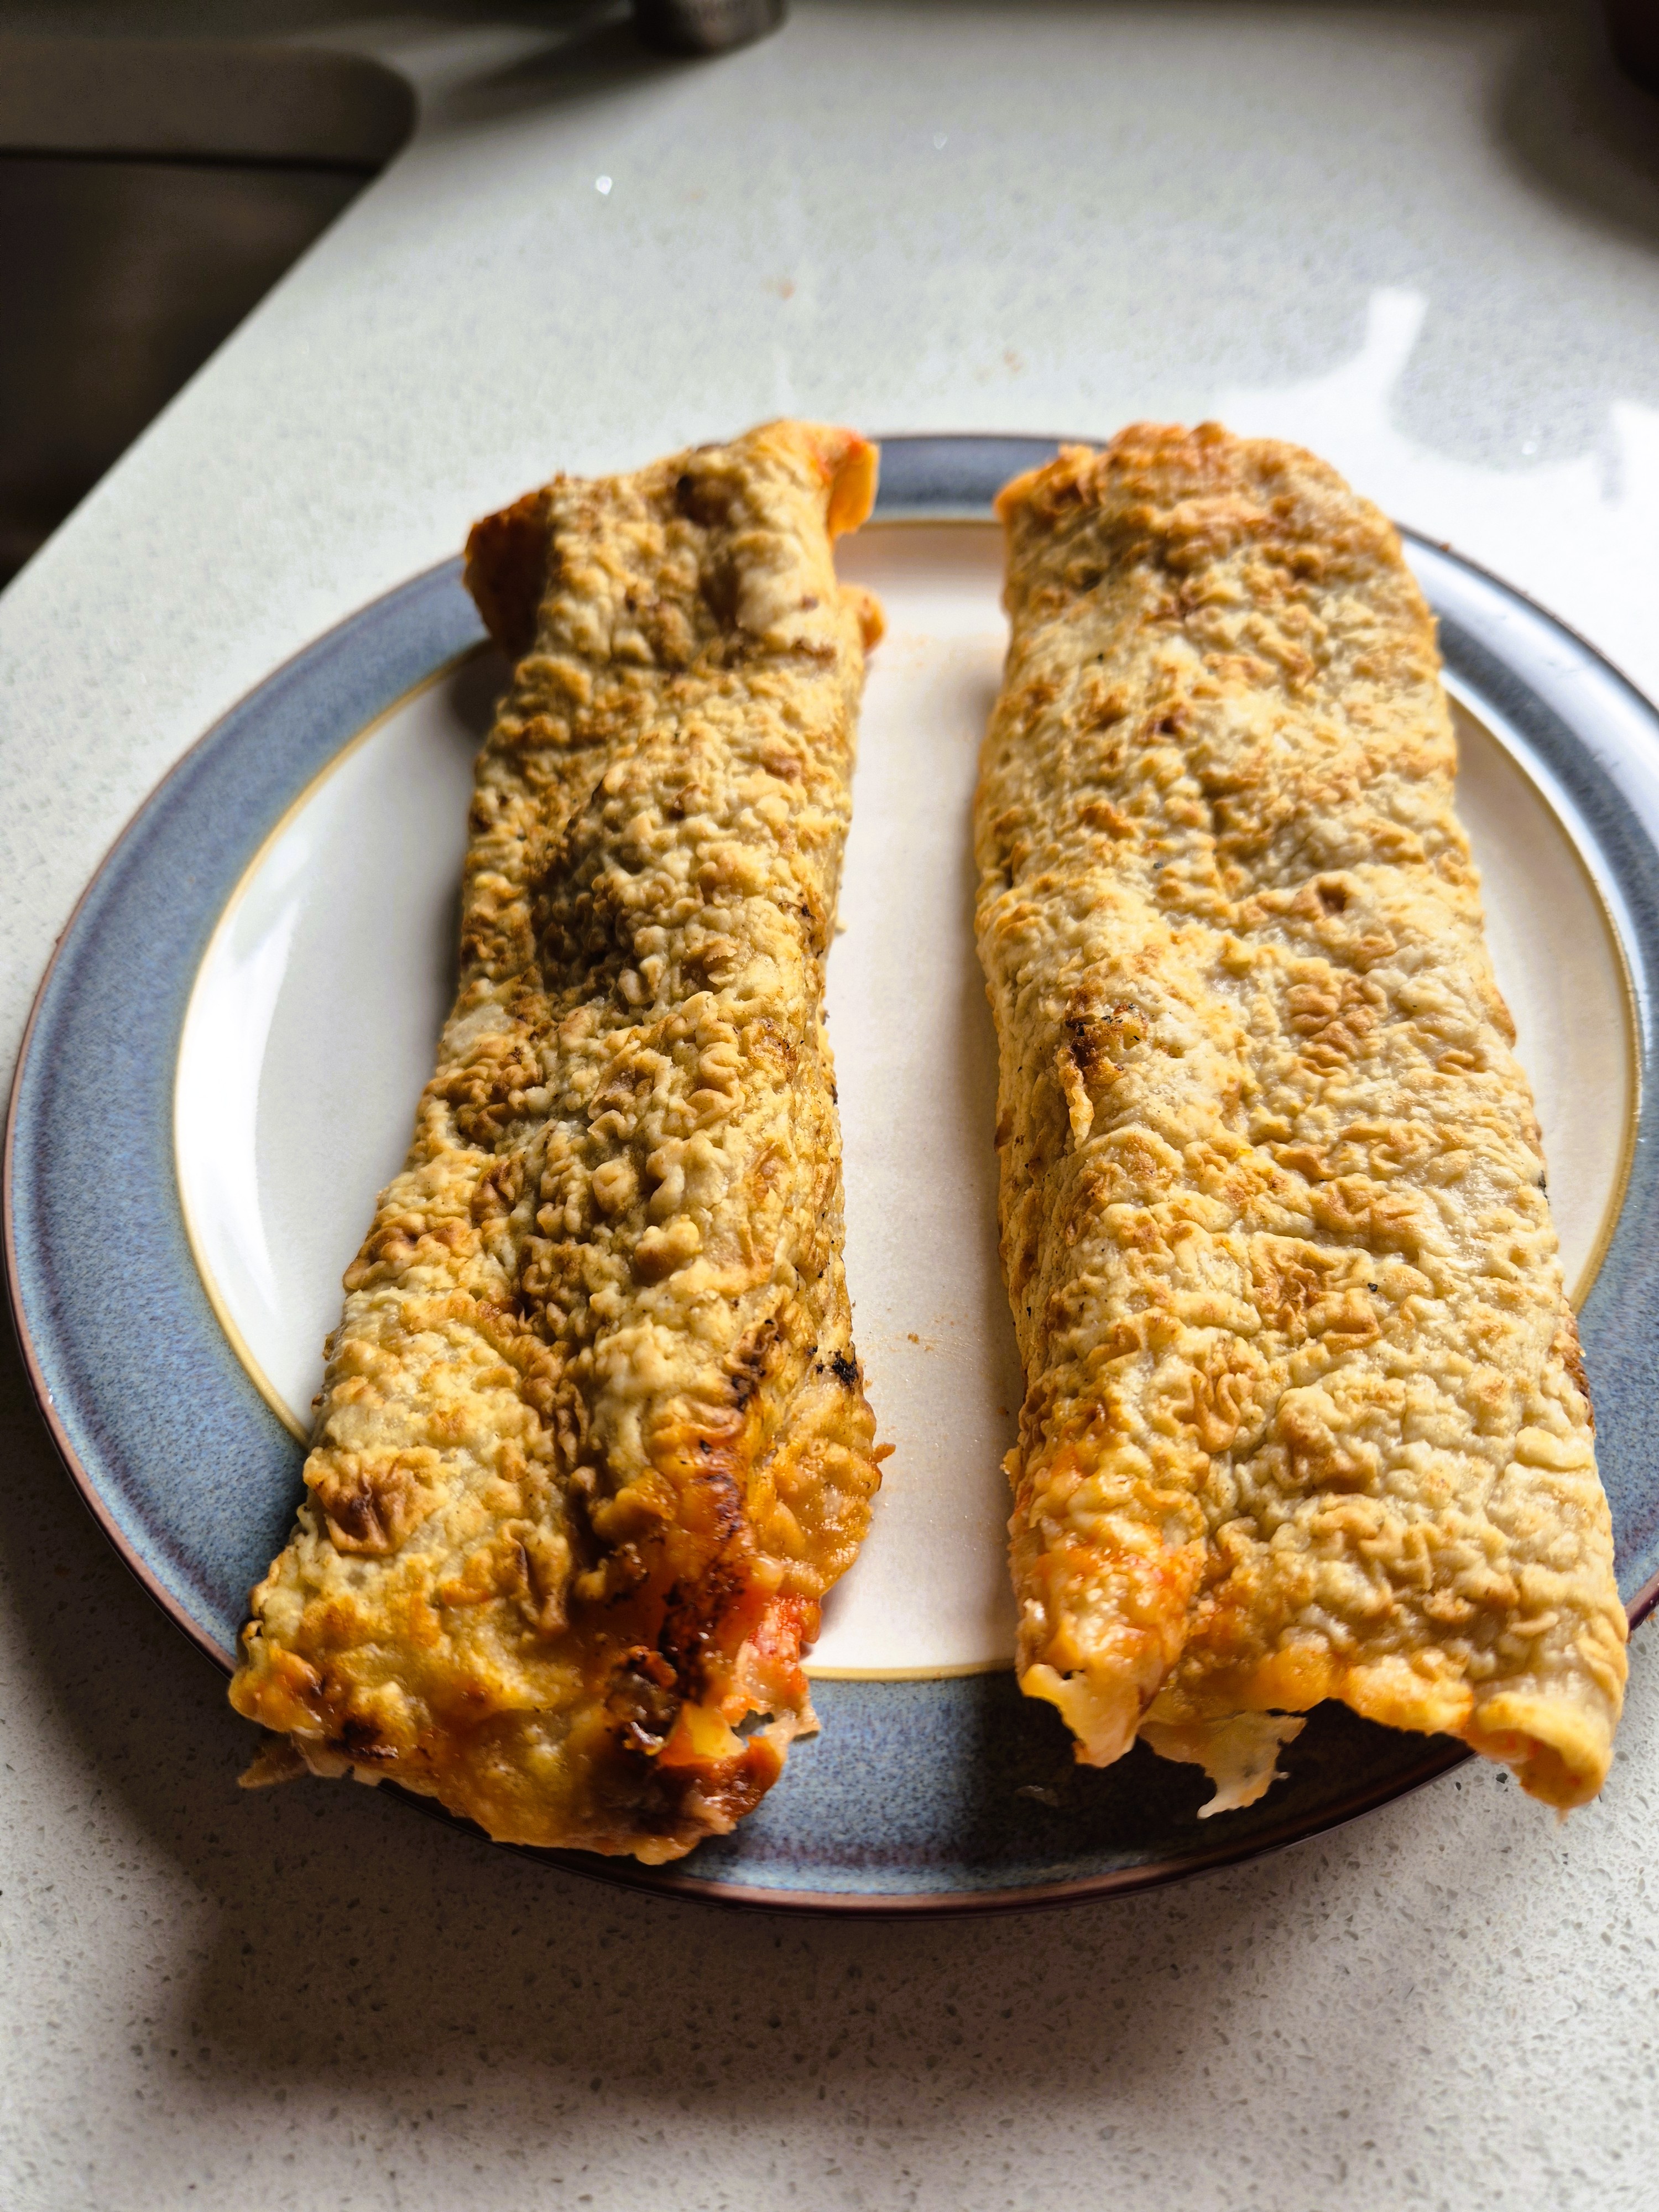
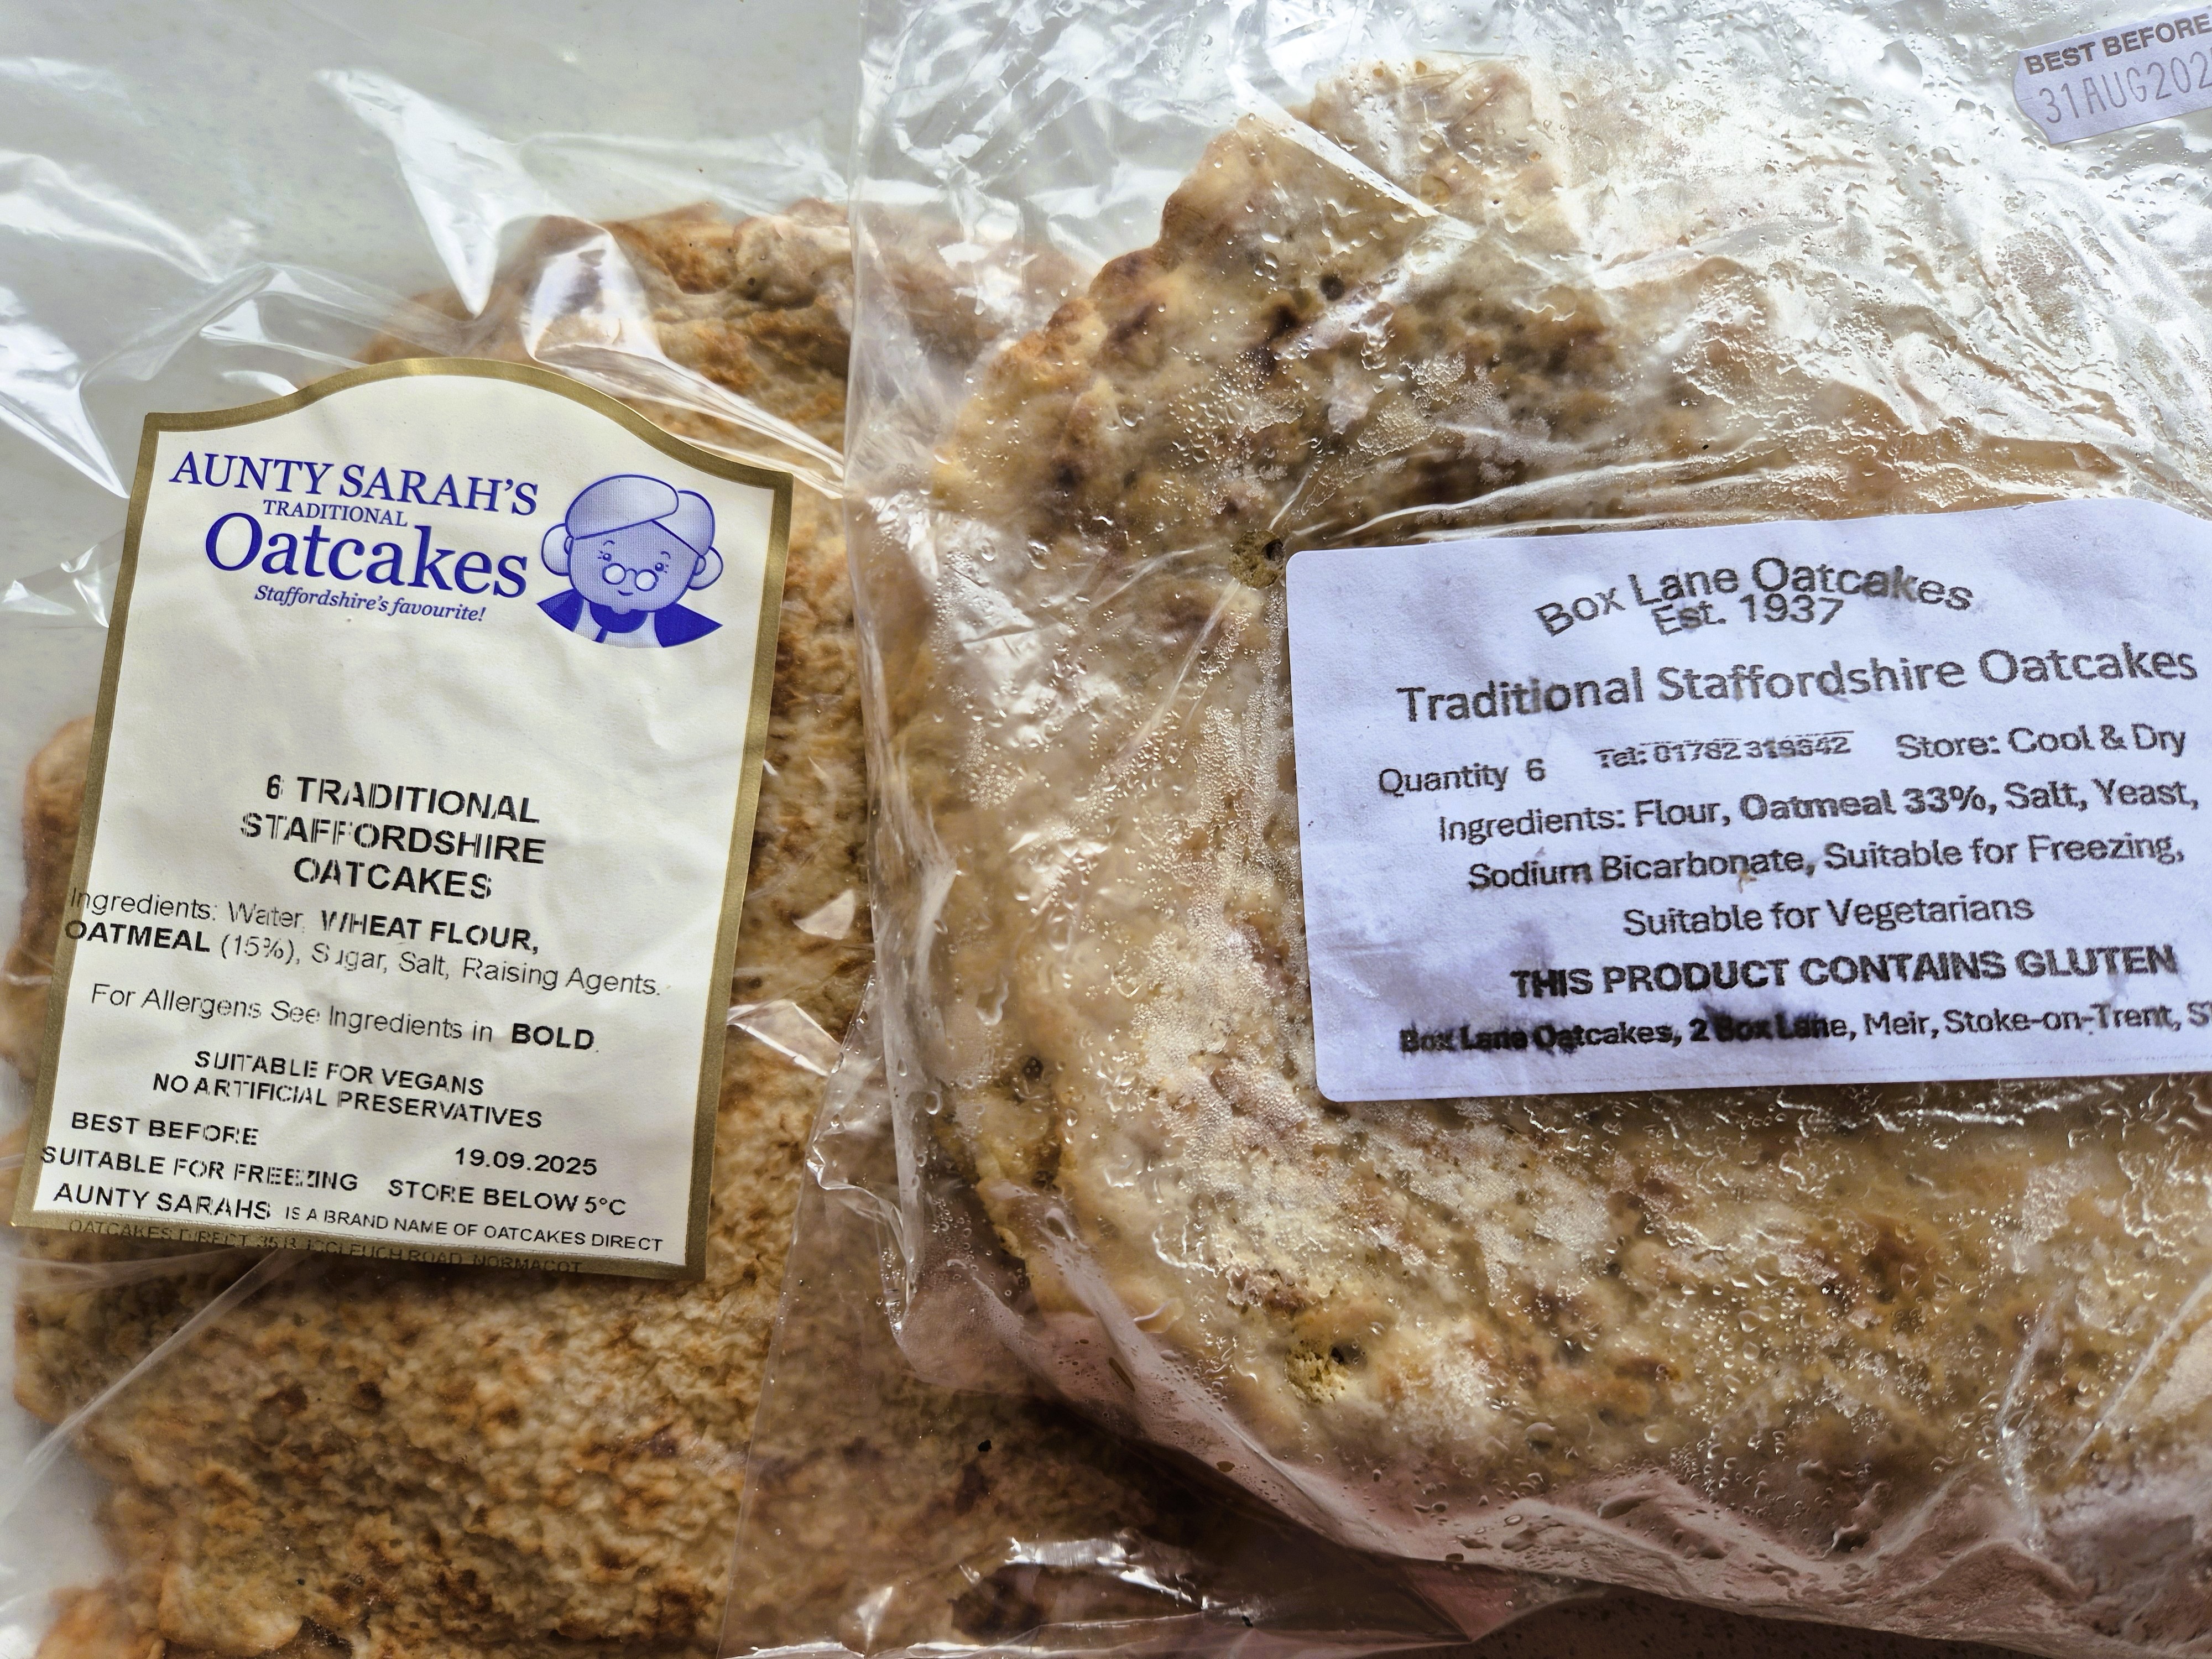
My guest today is Mark Dawson, food historian, specialising in the food of the Tudor period, but also food of Derbyshire. We met up at Mark’s home in Derbyshire to talk all things Derbyshire oatcakes.
Mark and I talk about the oatcakes of Britain, doshens and sprittles, the usefulness of probate inventories, oatcakes as penance, and oatcake goblins – amongst many other things.
It’s available on all podcast platforms and YouTube. If you’re not a podcast/YouTube sort of person, listen here:
Those listening to the secret podcast can hear about other Derbyshire foods made from oats; a discussion about why oatcake is better than porridge; and I grill Mark on one very important matter: just what is the difference between a Derbyshire and a Staffordshire oatcake.
Follow Mark on Instagram @drdobba
Mark’s book Lumpy Tums: Derbyshire’s Food & Drink will be published by Amberley in April 2026
L to R: sprittle, slice and oatcake toaster (Derby Museum); an oatcake stone (Joan Clough); my attempt at a sourdough Staffordshire (shock-horror!) oatcake
Remember: Fruit Pig are sponsoring the 9th season of the podcast and Grant and Matthew are very kindly giving listeners to the podcast a unique special offer 10% off your order until the end of October 2025 – use the offer code Foodhis in the checkout at their online shop, www.fruitpig.co.uk.
If you can, support the podcast and blogs by becoming a £3 monthly subscriber, and unlock lots of premium content, including bonus blog posts and recipes, access to the easter eggs and the secret podcast, or treat me to a one-off virtual pint or coffee: click here.
Don’t forget, there will be postbag episodes in the future, so if you have any questions or queries about today’s episode, or indeed any episode, or have a question about the history of British food please email me at neil@britishfoodhistory.com, or leave a comment on the blog.
Read more of this content when you subscribe today. A monthly subscription costs just £3 (about $3.80 USD). You get access to premium blog content, the secret podcast, the Easter eggs page (with hours of clips to listen to!) and my monthly newsletter. For more information and to sign up, go to the Support the Blog & Podcast tab. Thank you
I have teamed up with fellow food historians Sam Bilton, Thomas Ntinas and Alessandra Pino to bring you this new food history festival. It’s online – though in future years we hope to be able to do it as an in-person event – and it’s on 18 October 2025. One benefit of it being online of course is that anyone can come. If you cannot make the whole day, don’t worry all ticket holders will be sent links to recordings of each event.
Your hosts for the day (L to R): Sam Bilton, Alessandra Pino, Neil Buttery and Thomas Ntinas
We are all hosting a session, and I am kicking off the day in conversation with a very special guest, Tom Parker Bowles, about his love of traditional and classic British cooking and how we can keep it alive and relevant today. We’ll also be taking a peek at the food cooked and enjoyed by British Monarchs, from Queen Victoria to Charles III.
My guest will be none other than Tom Parker Bowles
Thomas Ntinas will be presenting A Life of Luxury: The famous chefs of the Ancient Greek world. Dr Alessandra Pino The River Remembers: A Journey Through London’s Lost Larder. Sam Bilton’s section is entitled Gourmand or Glutton? Feeding Falstaff.
There will also be food demos and short interviews in between sessions. The day begins at 10.30 am and finishes at 4.30 pm click this linkto see a full breakdown of the day.
We’re all really excited about this event, and we would love it if you can join us for the first of (hopefully) many more Serve it Forth food history festivals in the future!