My guest on the podcast today is Alex Bamji, Associate Professor of Early Modern History at the University of Leeds, and we are talking about a rare treatise on cheese dating from the Early Modern Period.
We met up at the Brotherton Library which is home to a fantastic collection of cookery books and manuscripts. We talk about cheese, health and humoral theory; what makes a good cheese; the early modern cheese landscape; cheese as a cure for gout; and cheese haters – plus many other things.
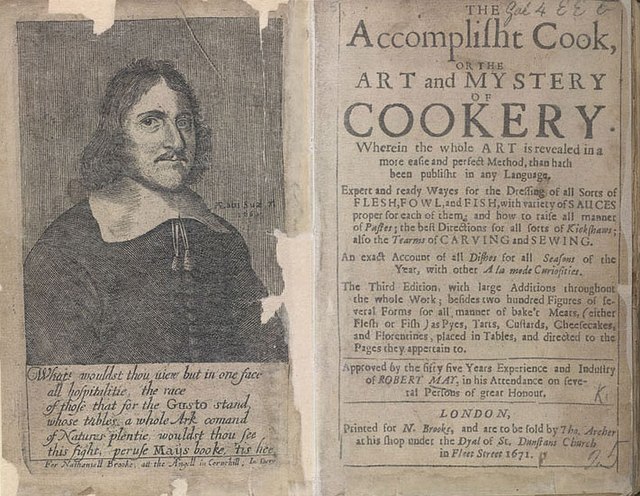
The front cover and title page of the cheese ‘pamflyt’ (University of Leeds Cultural Collections)
Those listening to the secret podcast: Alex and I talk about why cow’s milk is the best milk, and I wonder whether there any clues as to where their microbes are coming from.
The British Food History Podcast can be heard on your favourite podcast app and on YouTube, or si ply steam via this Spotify embed:
Follow Alex on Twitter, Bluesky and Instagram @alexbamji
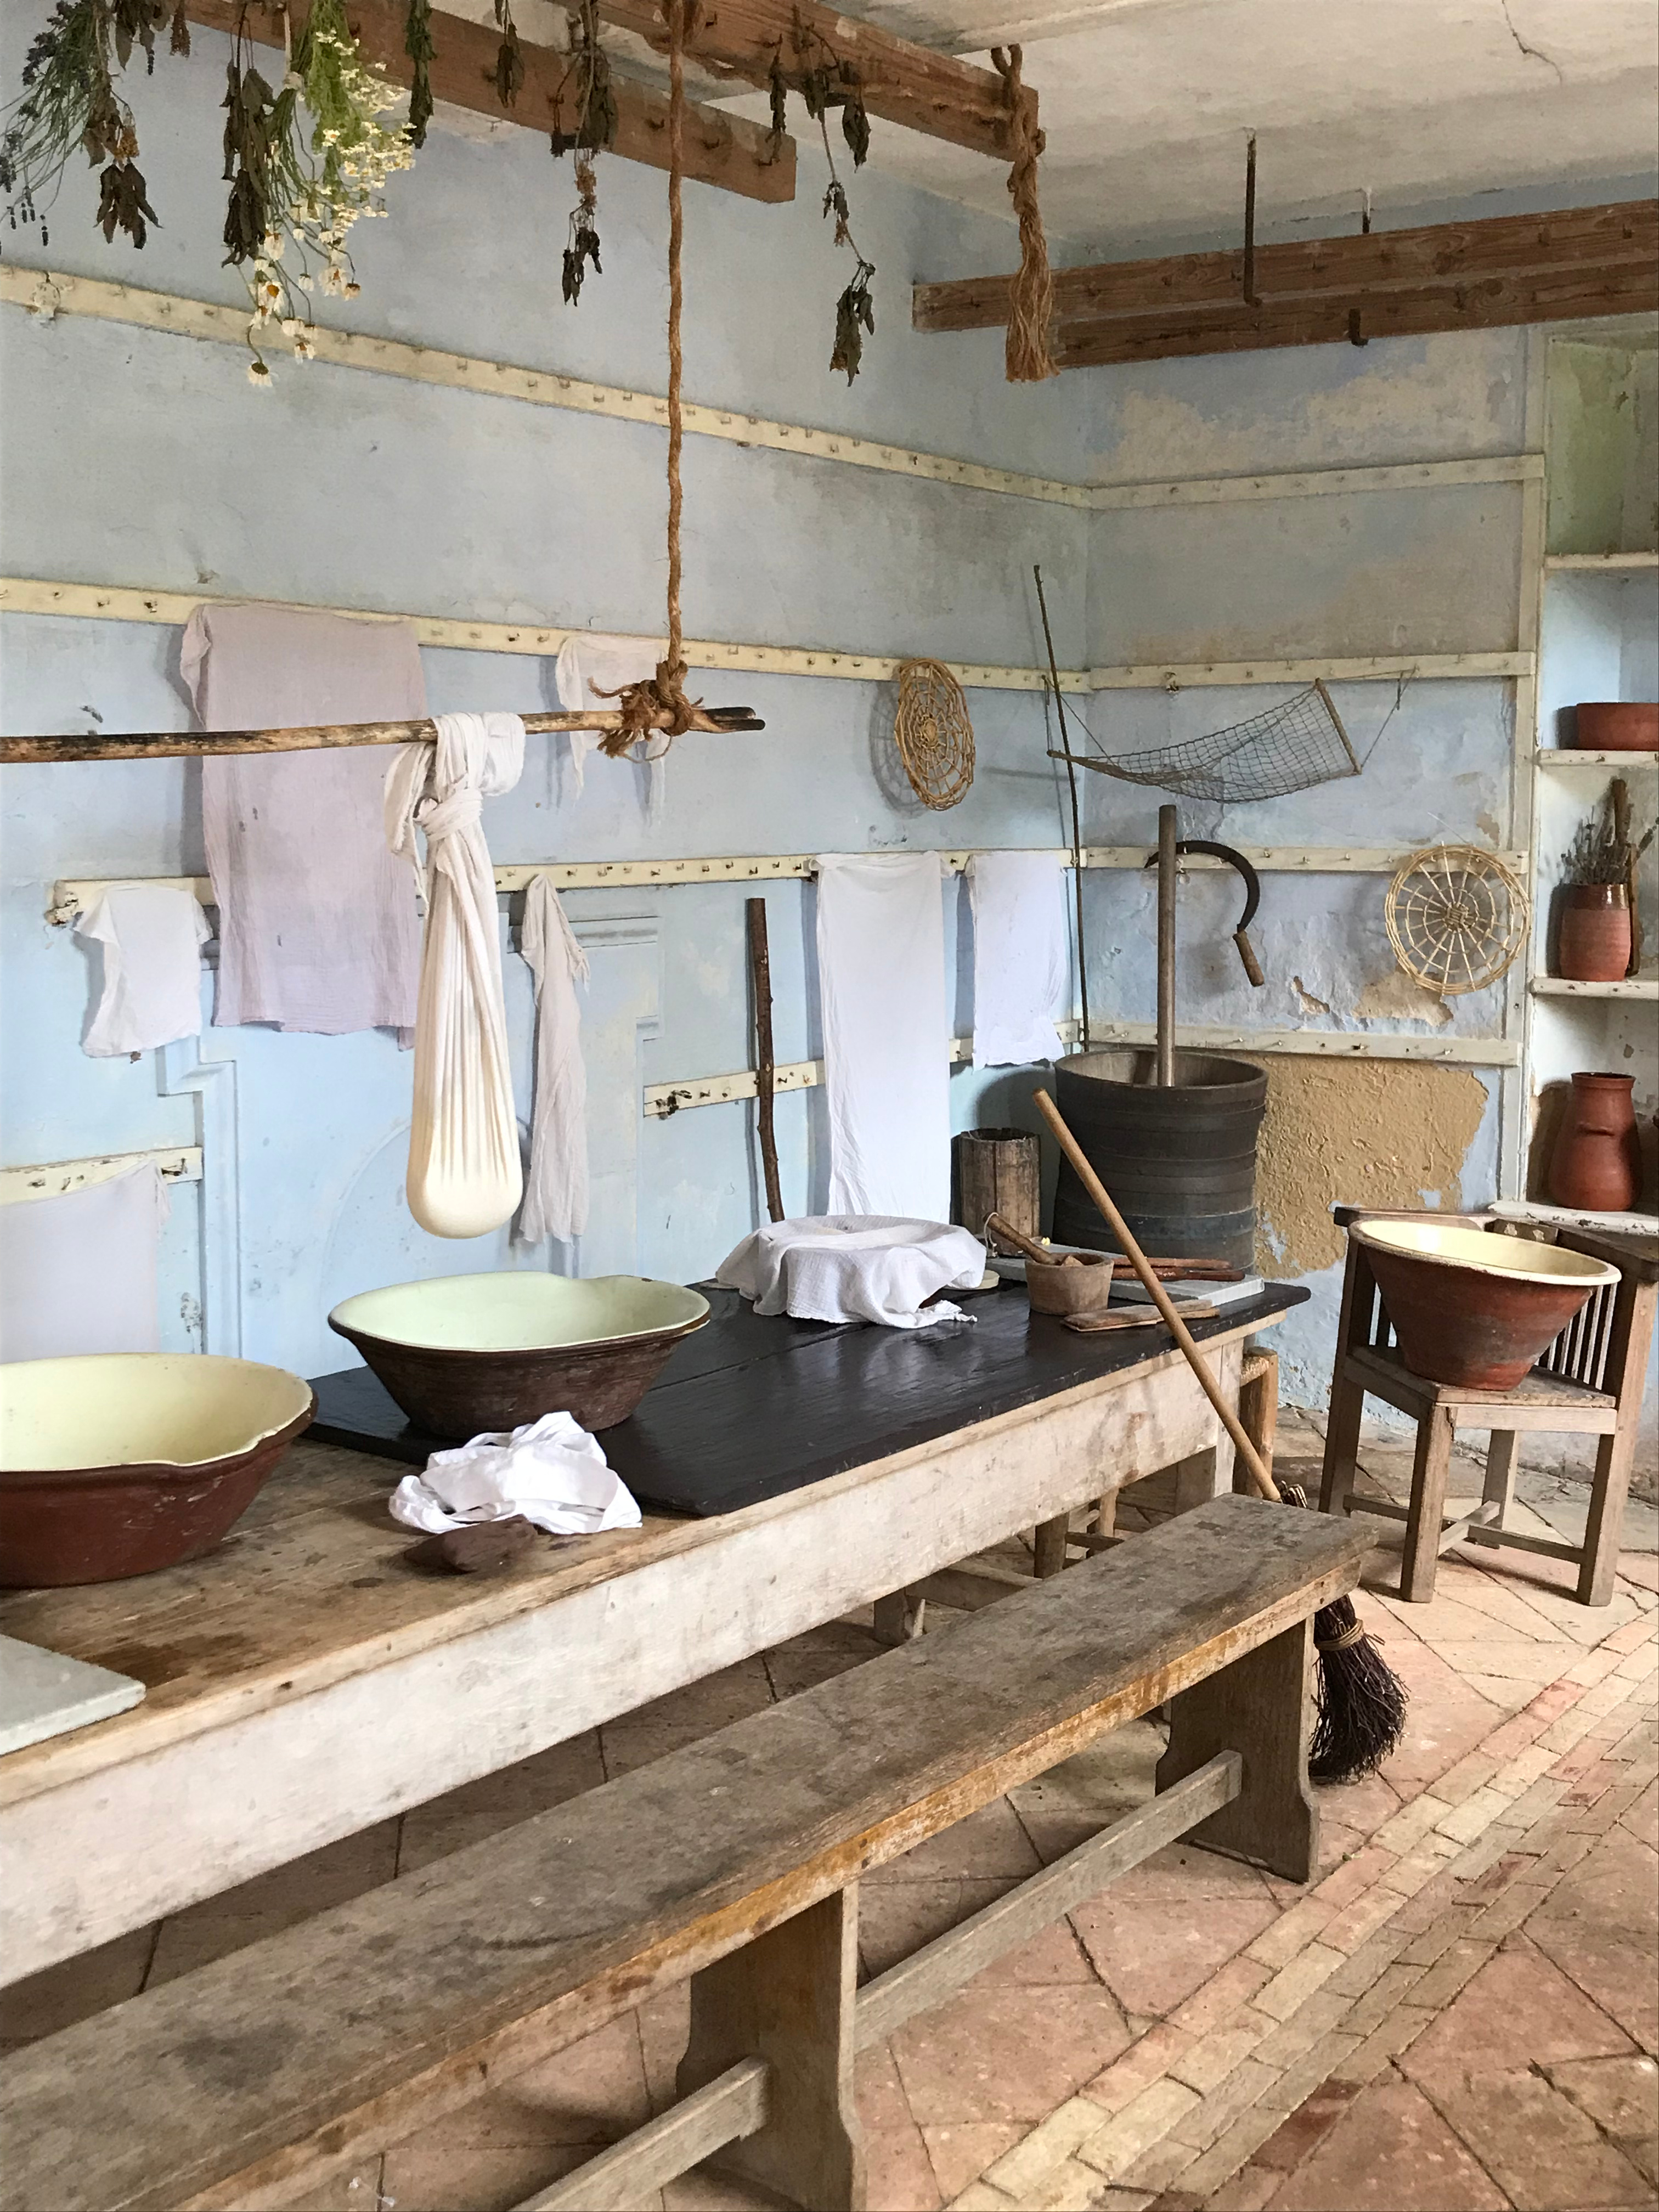
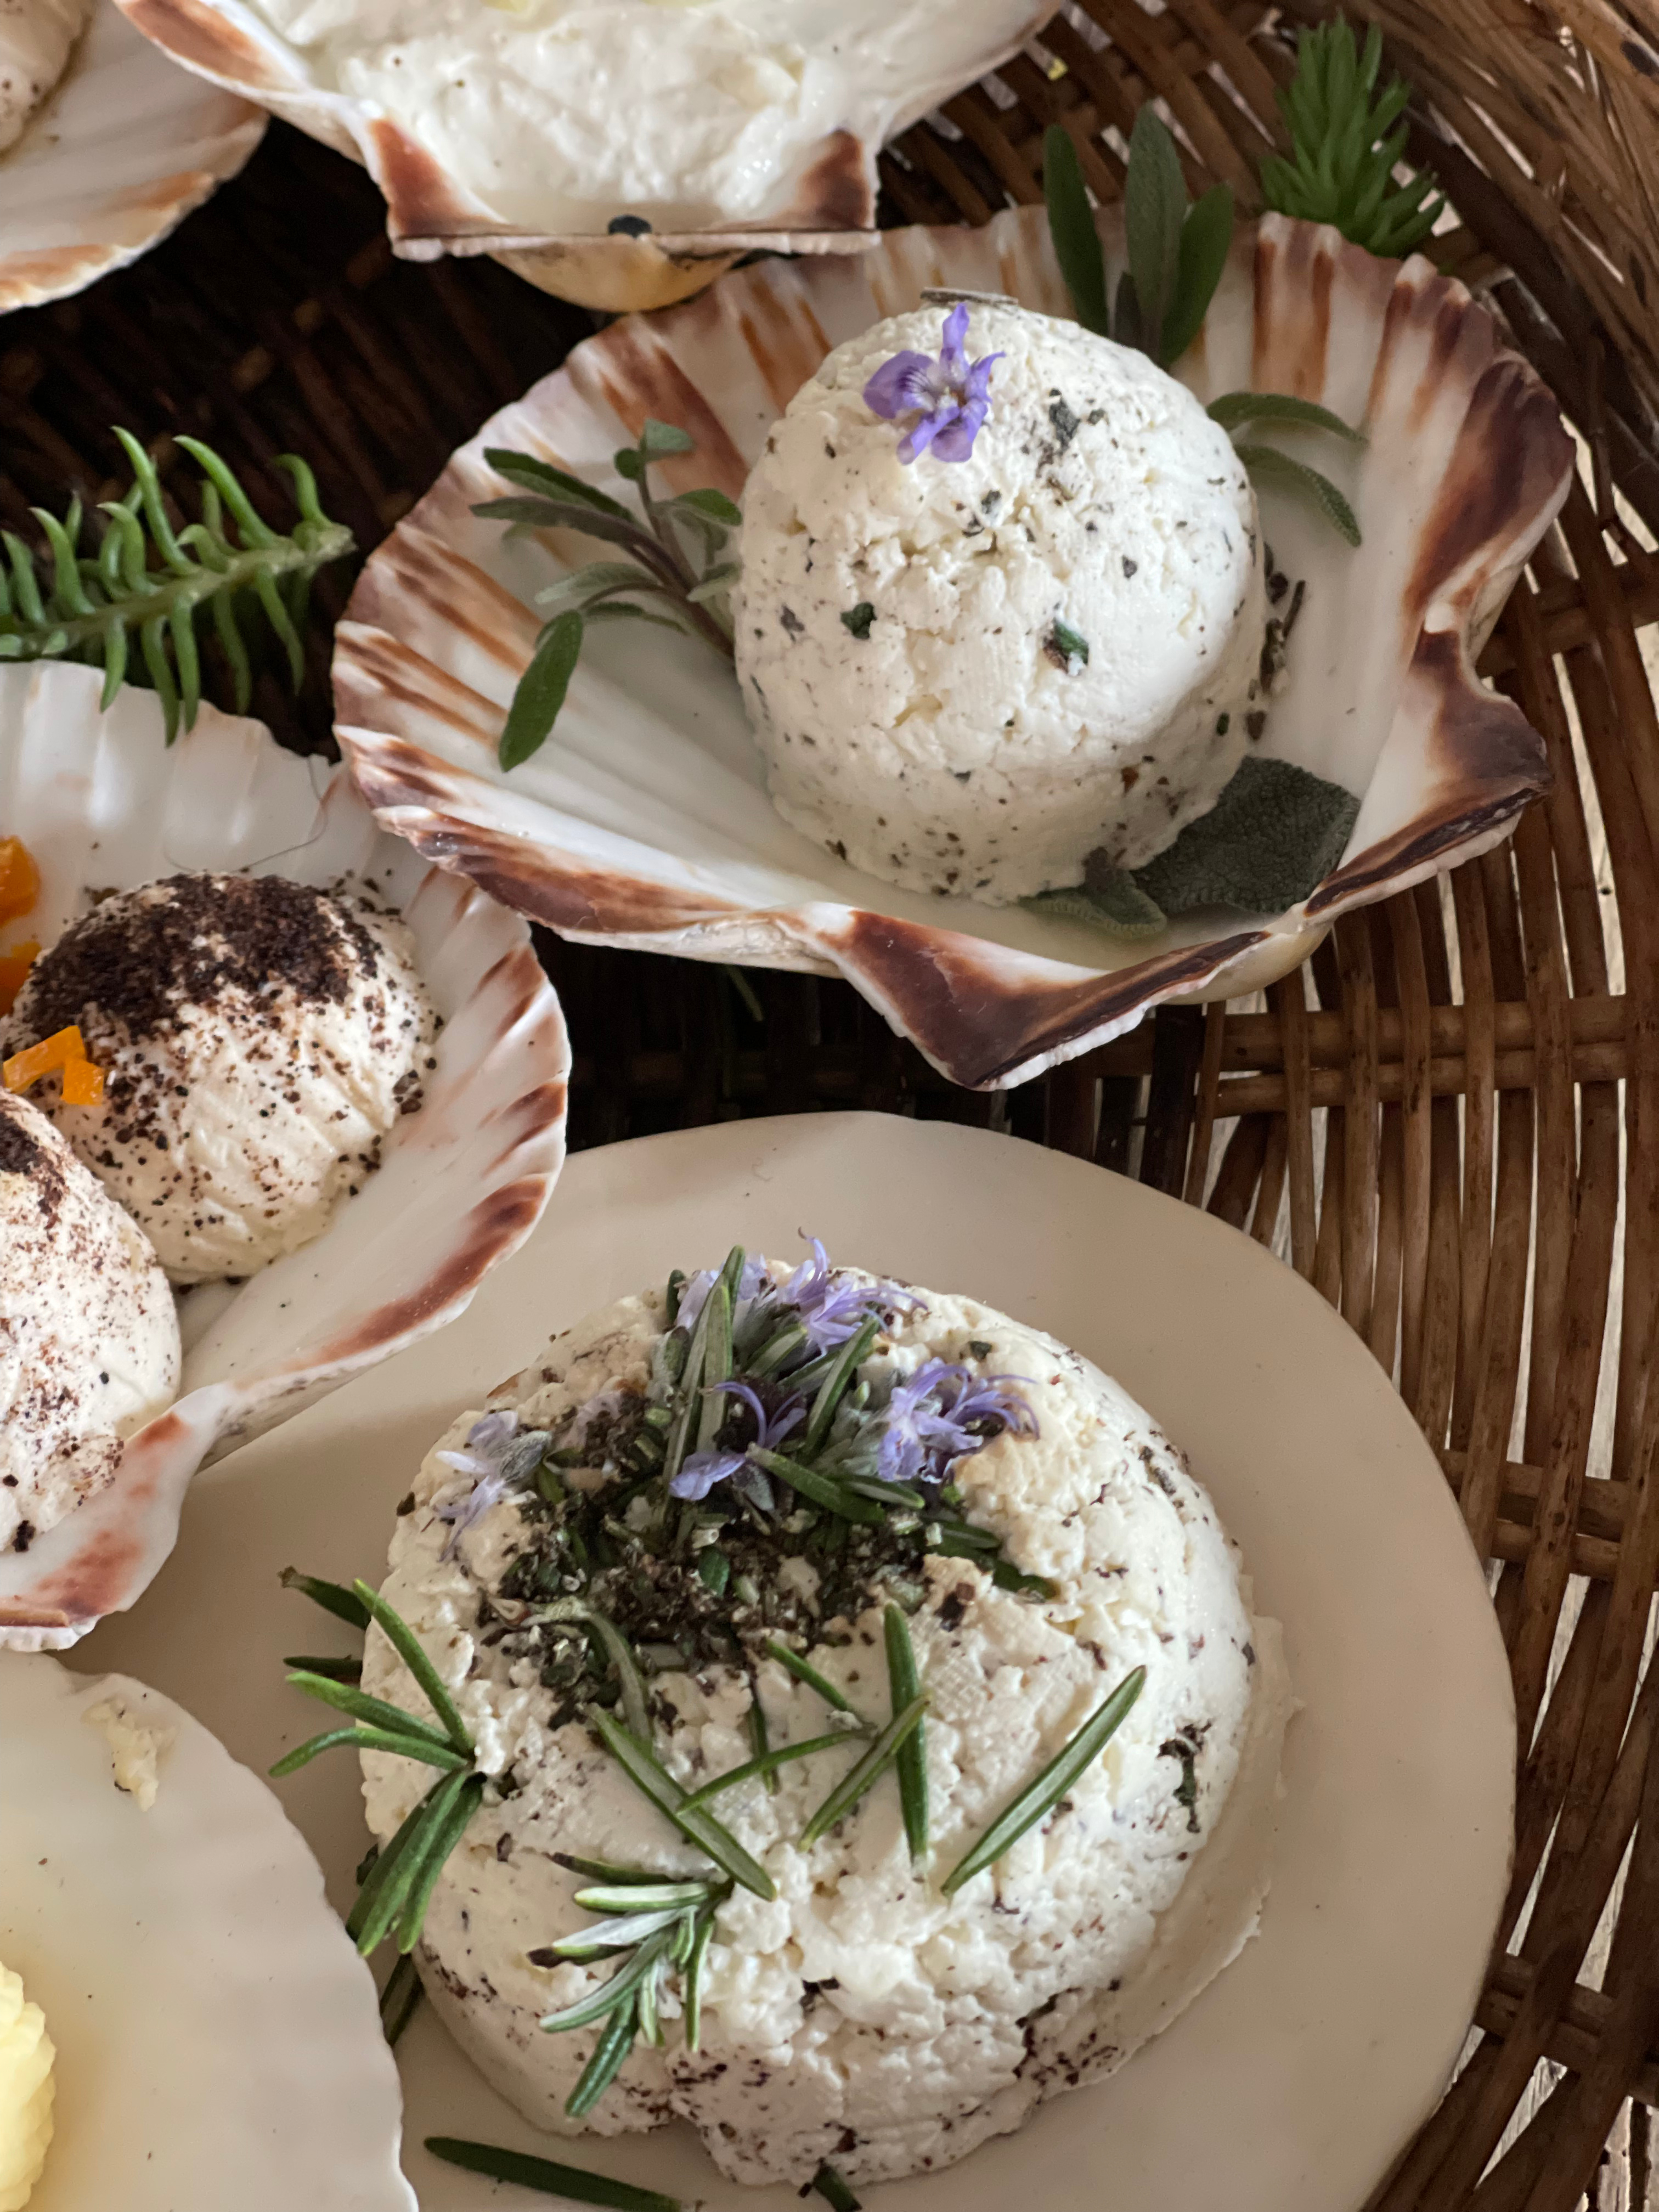
Early Modern cheeses recreated at Kentwell Tudor Dairy, Suffolk (Tracey Doyle)
Remember: Fruit Pig are sponsoring the 9th season of the podcast and Grant and Matthew are very kindly giving listeners to the podcast a unique special offer 10% off your order until the end of October 2025 – use the offer code Foodhis in the checkout at their online shop, www.fruitpig.co.uk.
If you can, support the podcast and blogs by becoming a £3 monthly subscriber, and unlock lots of premium content, including bonus blog posts and recipes, access to the easter eggs and the secret podcast, or treat me to a one-off virtual pint or coffee: click here.
Don’t forget, there will be postbag episodes in the future, so if you have any questions or queries about today’s episode, or indeed any episode, or have a question about the history of British food please email me at neil@britishfoodhistory.com, or on twitter and BlueSky @neilbuttery, or Instagram and Threads dr_neil_buttery. My DMs are open.
I recently had a go at making a fresh blood black pudding, taking inspiration from cookery books from the 16th and 17th centuries. The fresh blood was very kindly sent to me by Matthew Cockin and Grant Harper of Fruitpig, Britain’s last craft producer of fresh blood black pudding, who are also sponsoring the ninth season of The British Food History Podcast. Listen to the episode we recorded here:
We also talked about their hog’s pudding – a type of white pudding – and I felt I had to complete the set and make an Early Modern white pudding as well.
We know where we stand with black puddings: we expect them to be made largely of blood, cereal and fat, but what about white puddings? These are more mysterious, I feel. Modern white puddings are made from ground pork, pork fat, breadcrumbs and rusk or oats, plus lashings of white pepper, and are today associated largely with Scotland and Ireland. There used to be a rich diversity of white puddings right across Britain and Ireland, their contents highly variable, the only prerequisite being that the finished product would come out white. In the Early Modern Period, they were lavish ‘puddings of the privileged’[1], and had more in common with French boudin blanc than modern British white puddings. There was plenty of eggs, milk and cream, and the meat used (if any) was suitably pale in colour: Kenelm Digby’s recipe contained the meat of ‘a good fleshly Capon’ as well as streaky bacon,[2] Thomas Dawson’s was made with a calf’s chauldron, i.e. intestines.[3] Some recipes contain no meat at all: rice pudding could be counted as a form of white pudding in this context. Things do begin to get confusing, however, because some white puddings made with pork are called hog’s puddings, but only some. As Peter Brears wrote in an article on white and hog’s puddings:
Read about the history of puddings in my book The Philosophy of Puddings, from British Library Publishing
On studying these recipes, one rather surprising fact becomes particularly obvious; there is no material significance in the various names given to such puddings. Whether called hog’s or white puddings, their ingredients might be identical, or quite disparate, while many contain absolutely no pork whatsoever.[4]
Today, hog’s puddings are associated with Devon and Cornwall. Fruitpig’s hog’s pudding uses a base of bacon and oats. We can muddy the water even further because a hog’s/white pudding if made with pig’s liver could also go by the name of leverage pudding.
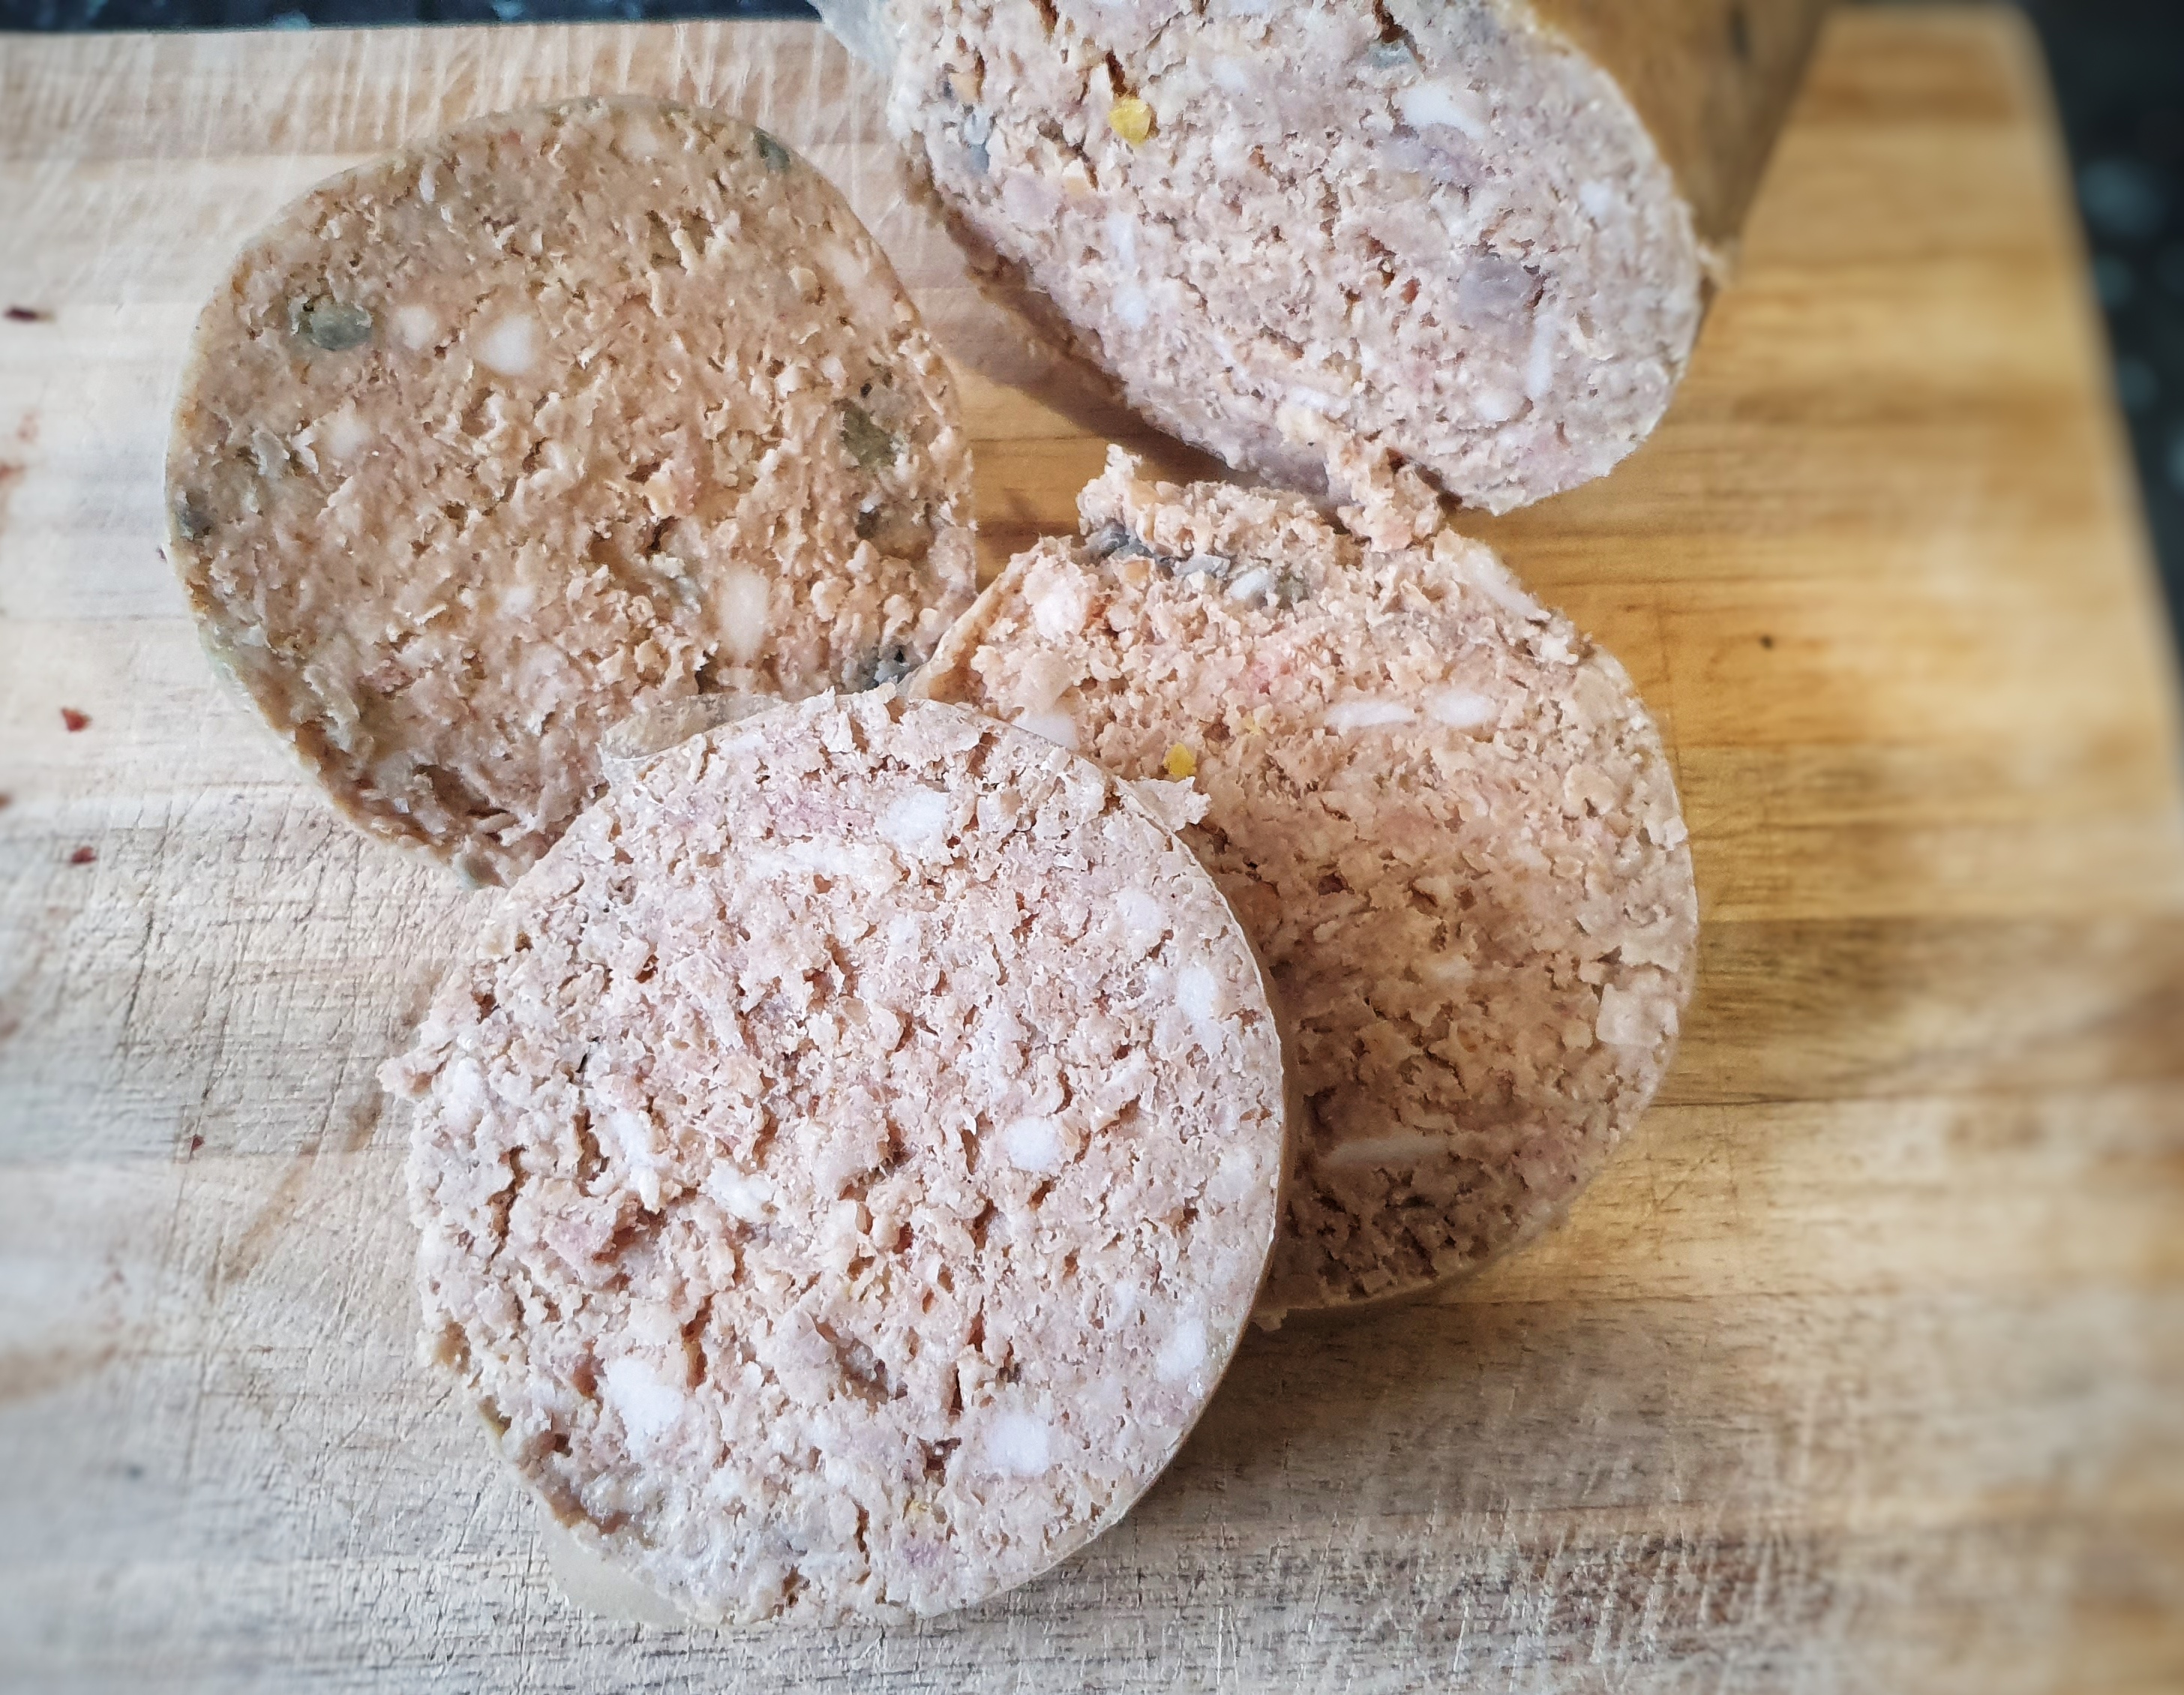
Looking pretty smug with my 17th-century puds!
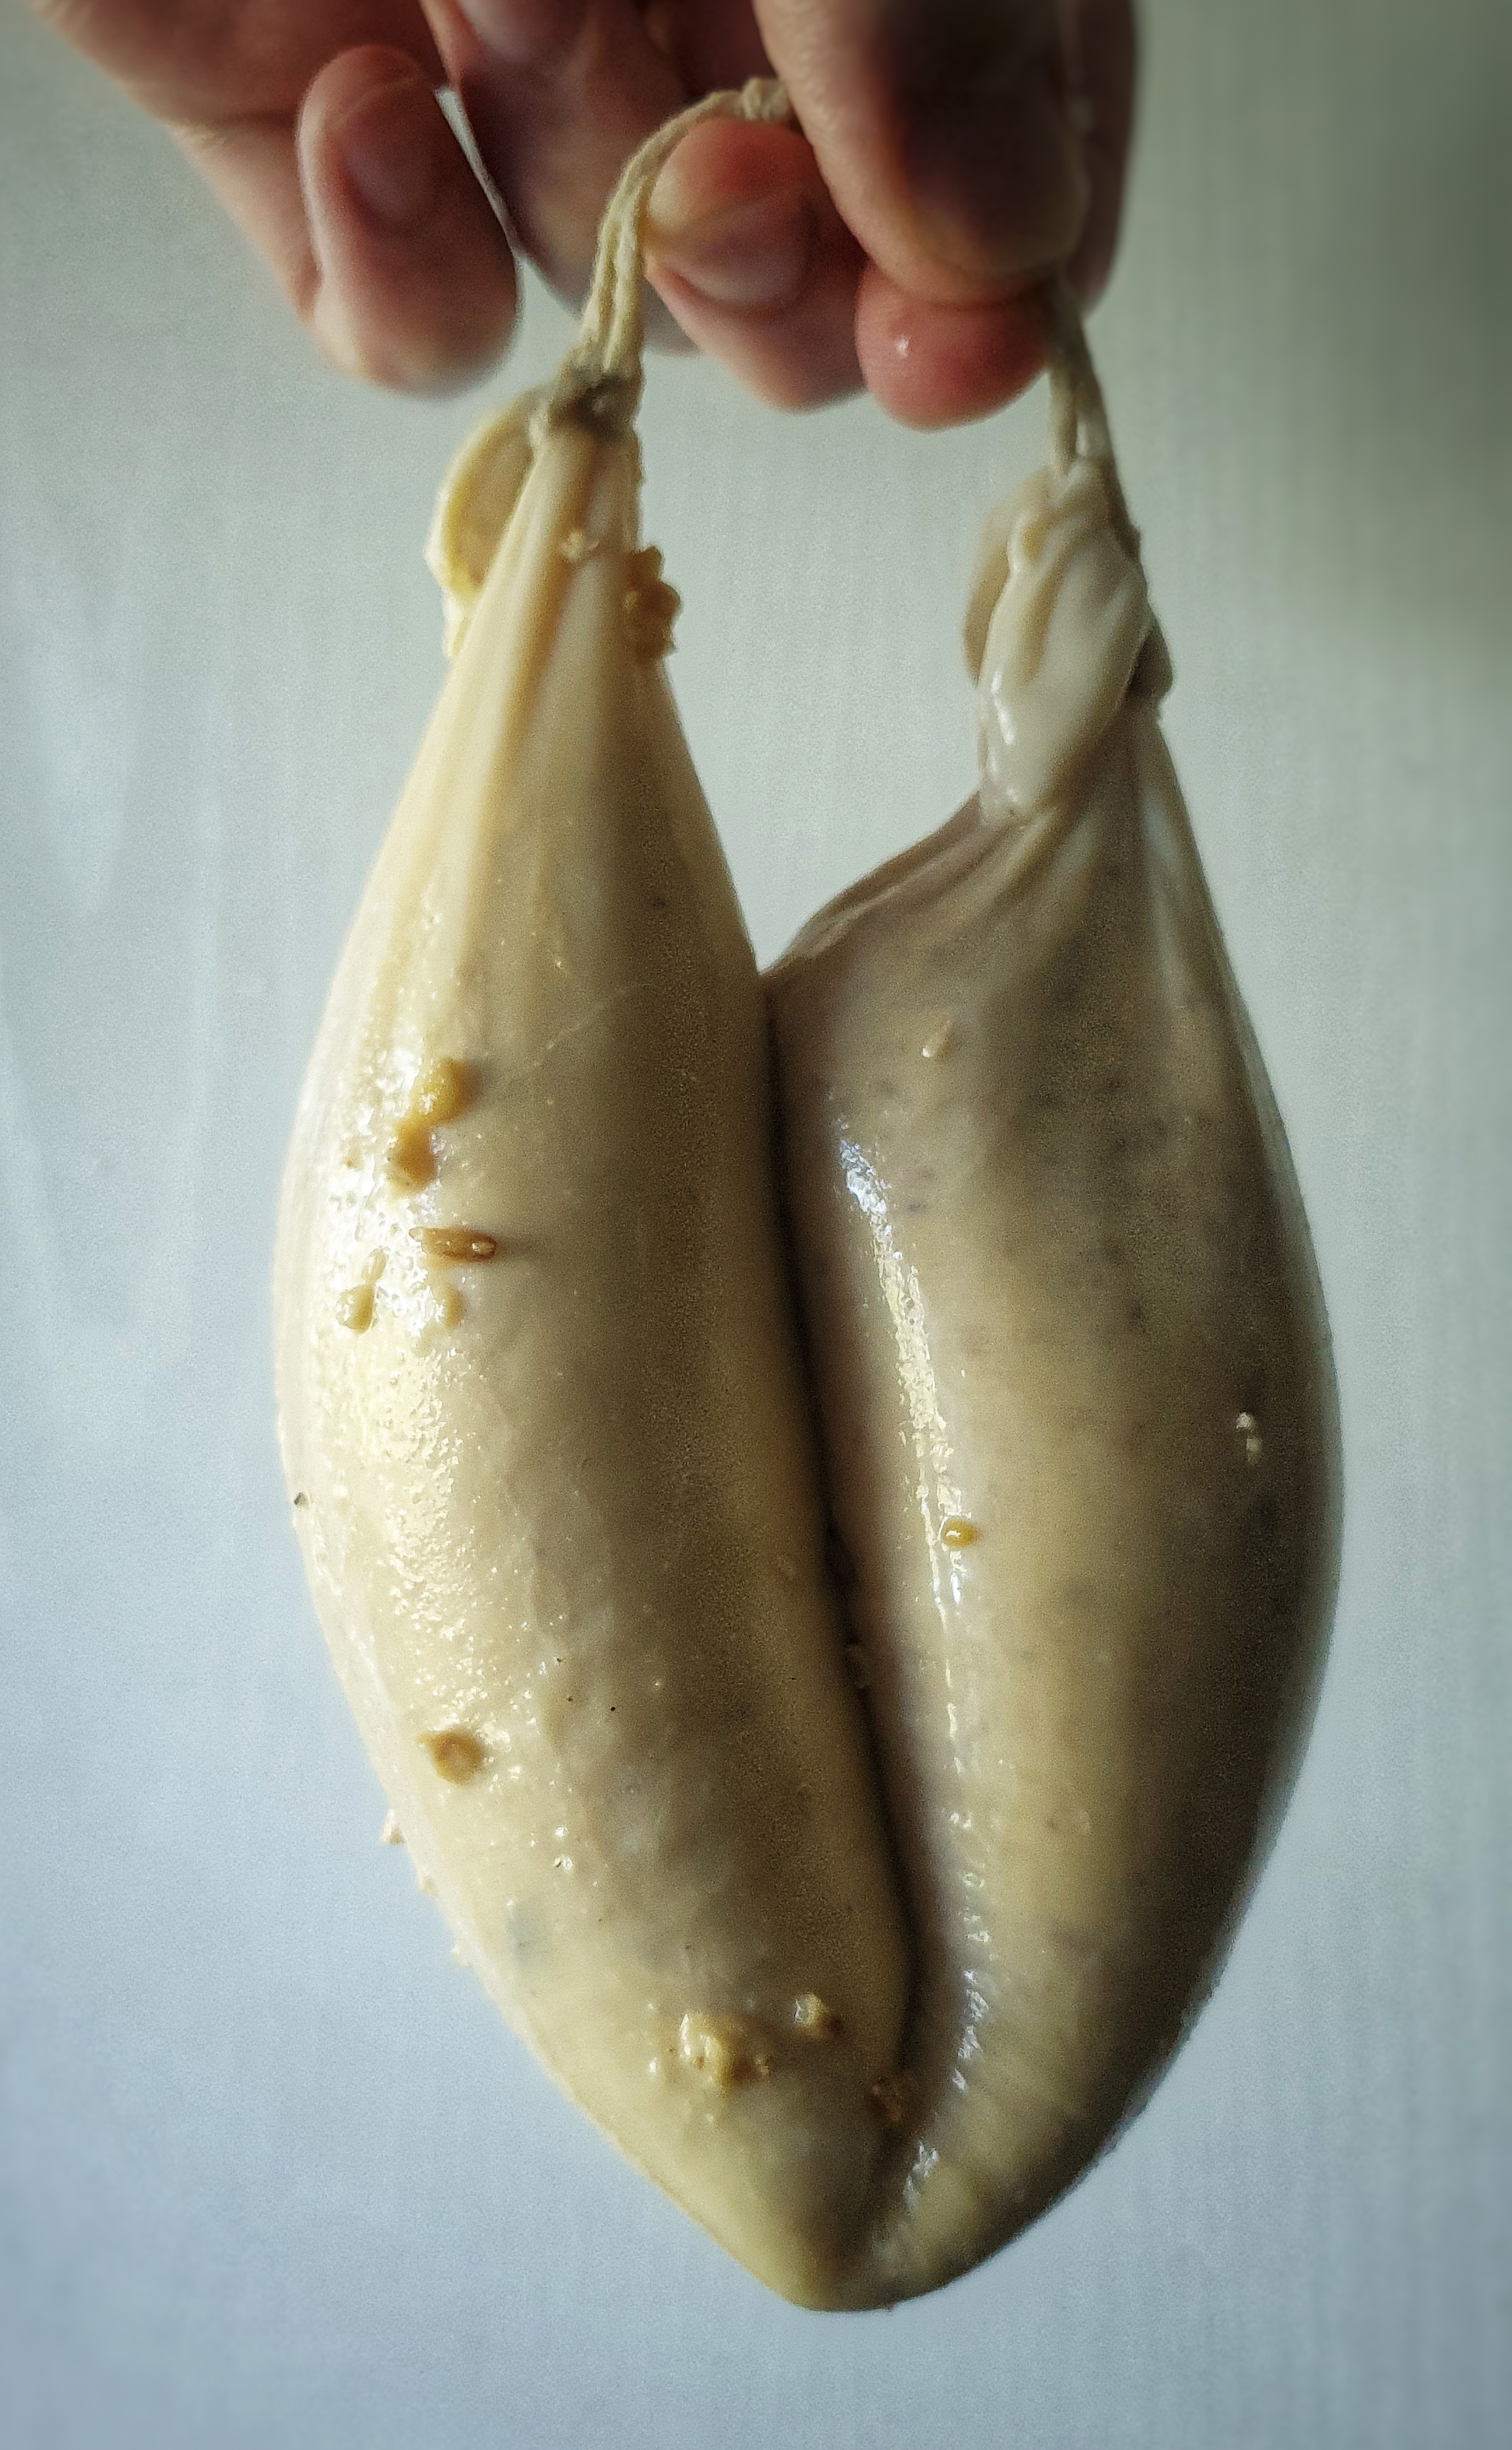
After a great deal of flicking through cookery books, I decided to make Gervase Markham’s white pudding from his classic The English Housewife (first published 1615), mainly because I had most of the ingredients in the house.
As you can see, Markham’s recipe contains no meat (aside from the beef suet and the pudding casings themselves).[5]
I have to say, they were a triumph! They freeze well and are easy to reheat. When it comes to serving them, let them cool for 5 minutes before cutting into them. The best way I have discovered to eat them (so far) is with crispy smoked bacon and golden syrup. Breakfast of champions.
If you like the blogs and podcast I produce, please consider treating me to a virtual coffee or pint, or even a £3 monthly subscription: follow this link for more information.
Recipe
Makes 6 x 375 g (approx.) puddings:
500 g cracked oat groats or pinhead oatmeal (steel-cut oats)
500 ml whole milk, plus 2 tbs for the saffron (and possibly extra, see recipe)
The day before you want to make your puddings, place the oats in a bowl or jar and pour over the milk. Cover and refrigerate. Soak your beef casings in fresh water, cover and refrigerate too.
Next day make the pudding mixture: in a large mixing bowl add the milk-soaked oats, cream, suet, sugar, eggs, dates, currants, ground spices and salt. Stir well. Warm up the 2 tbs of milk, add the saffron strands and allow them to infuse and cool, then stir into the mixture.
Now let everything meld together for a couple of hours so that the whole mixture is the consistency of spoonable porridge. If your oats were particularly absorbent, you may need to loosen the mixture with a few tablespoons of extra milk.
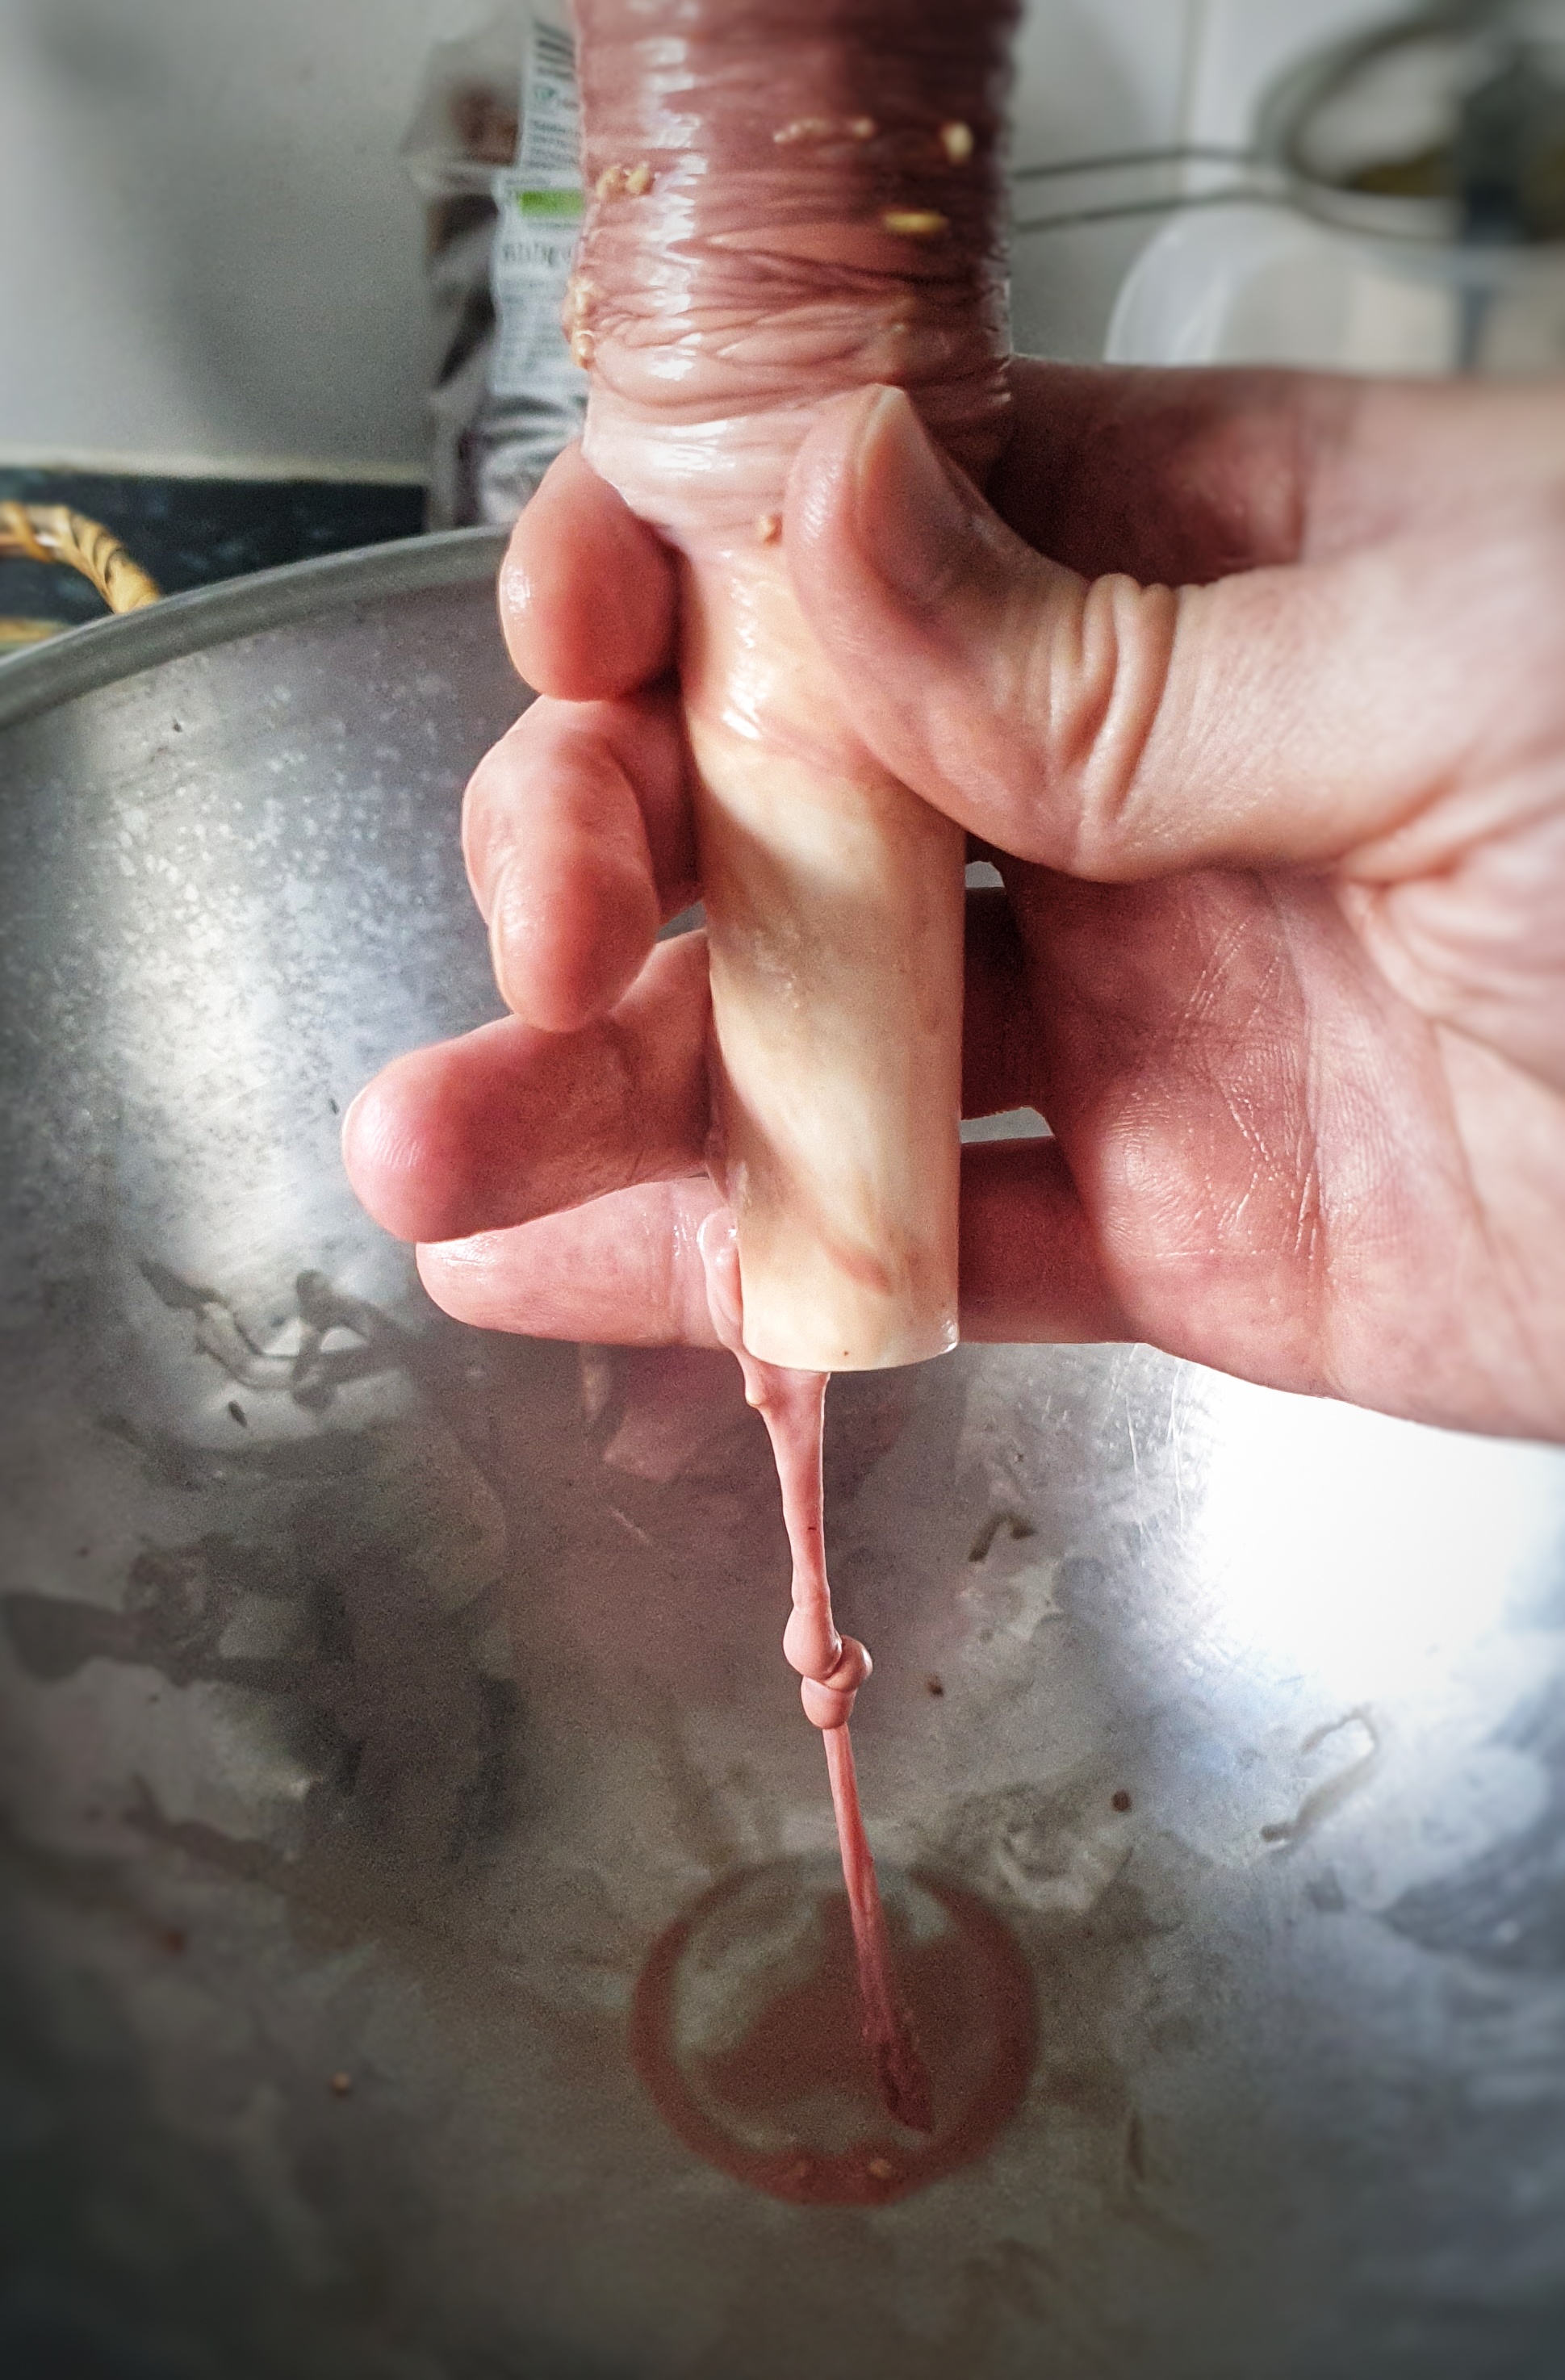
Cut the soaked beef casings into 35 cm lengths and tie the ends securely with string. Now it’s time to attach a funnel to the other end of your first length of gut. I used a jam funnel and secured it with more string.
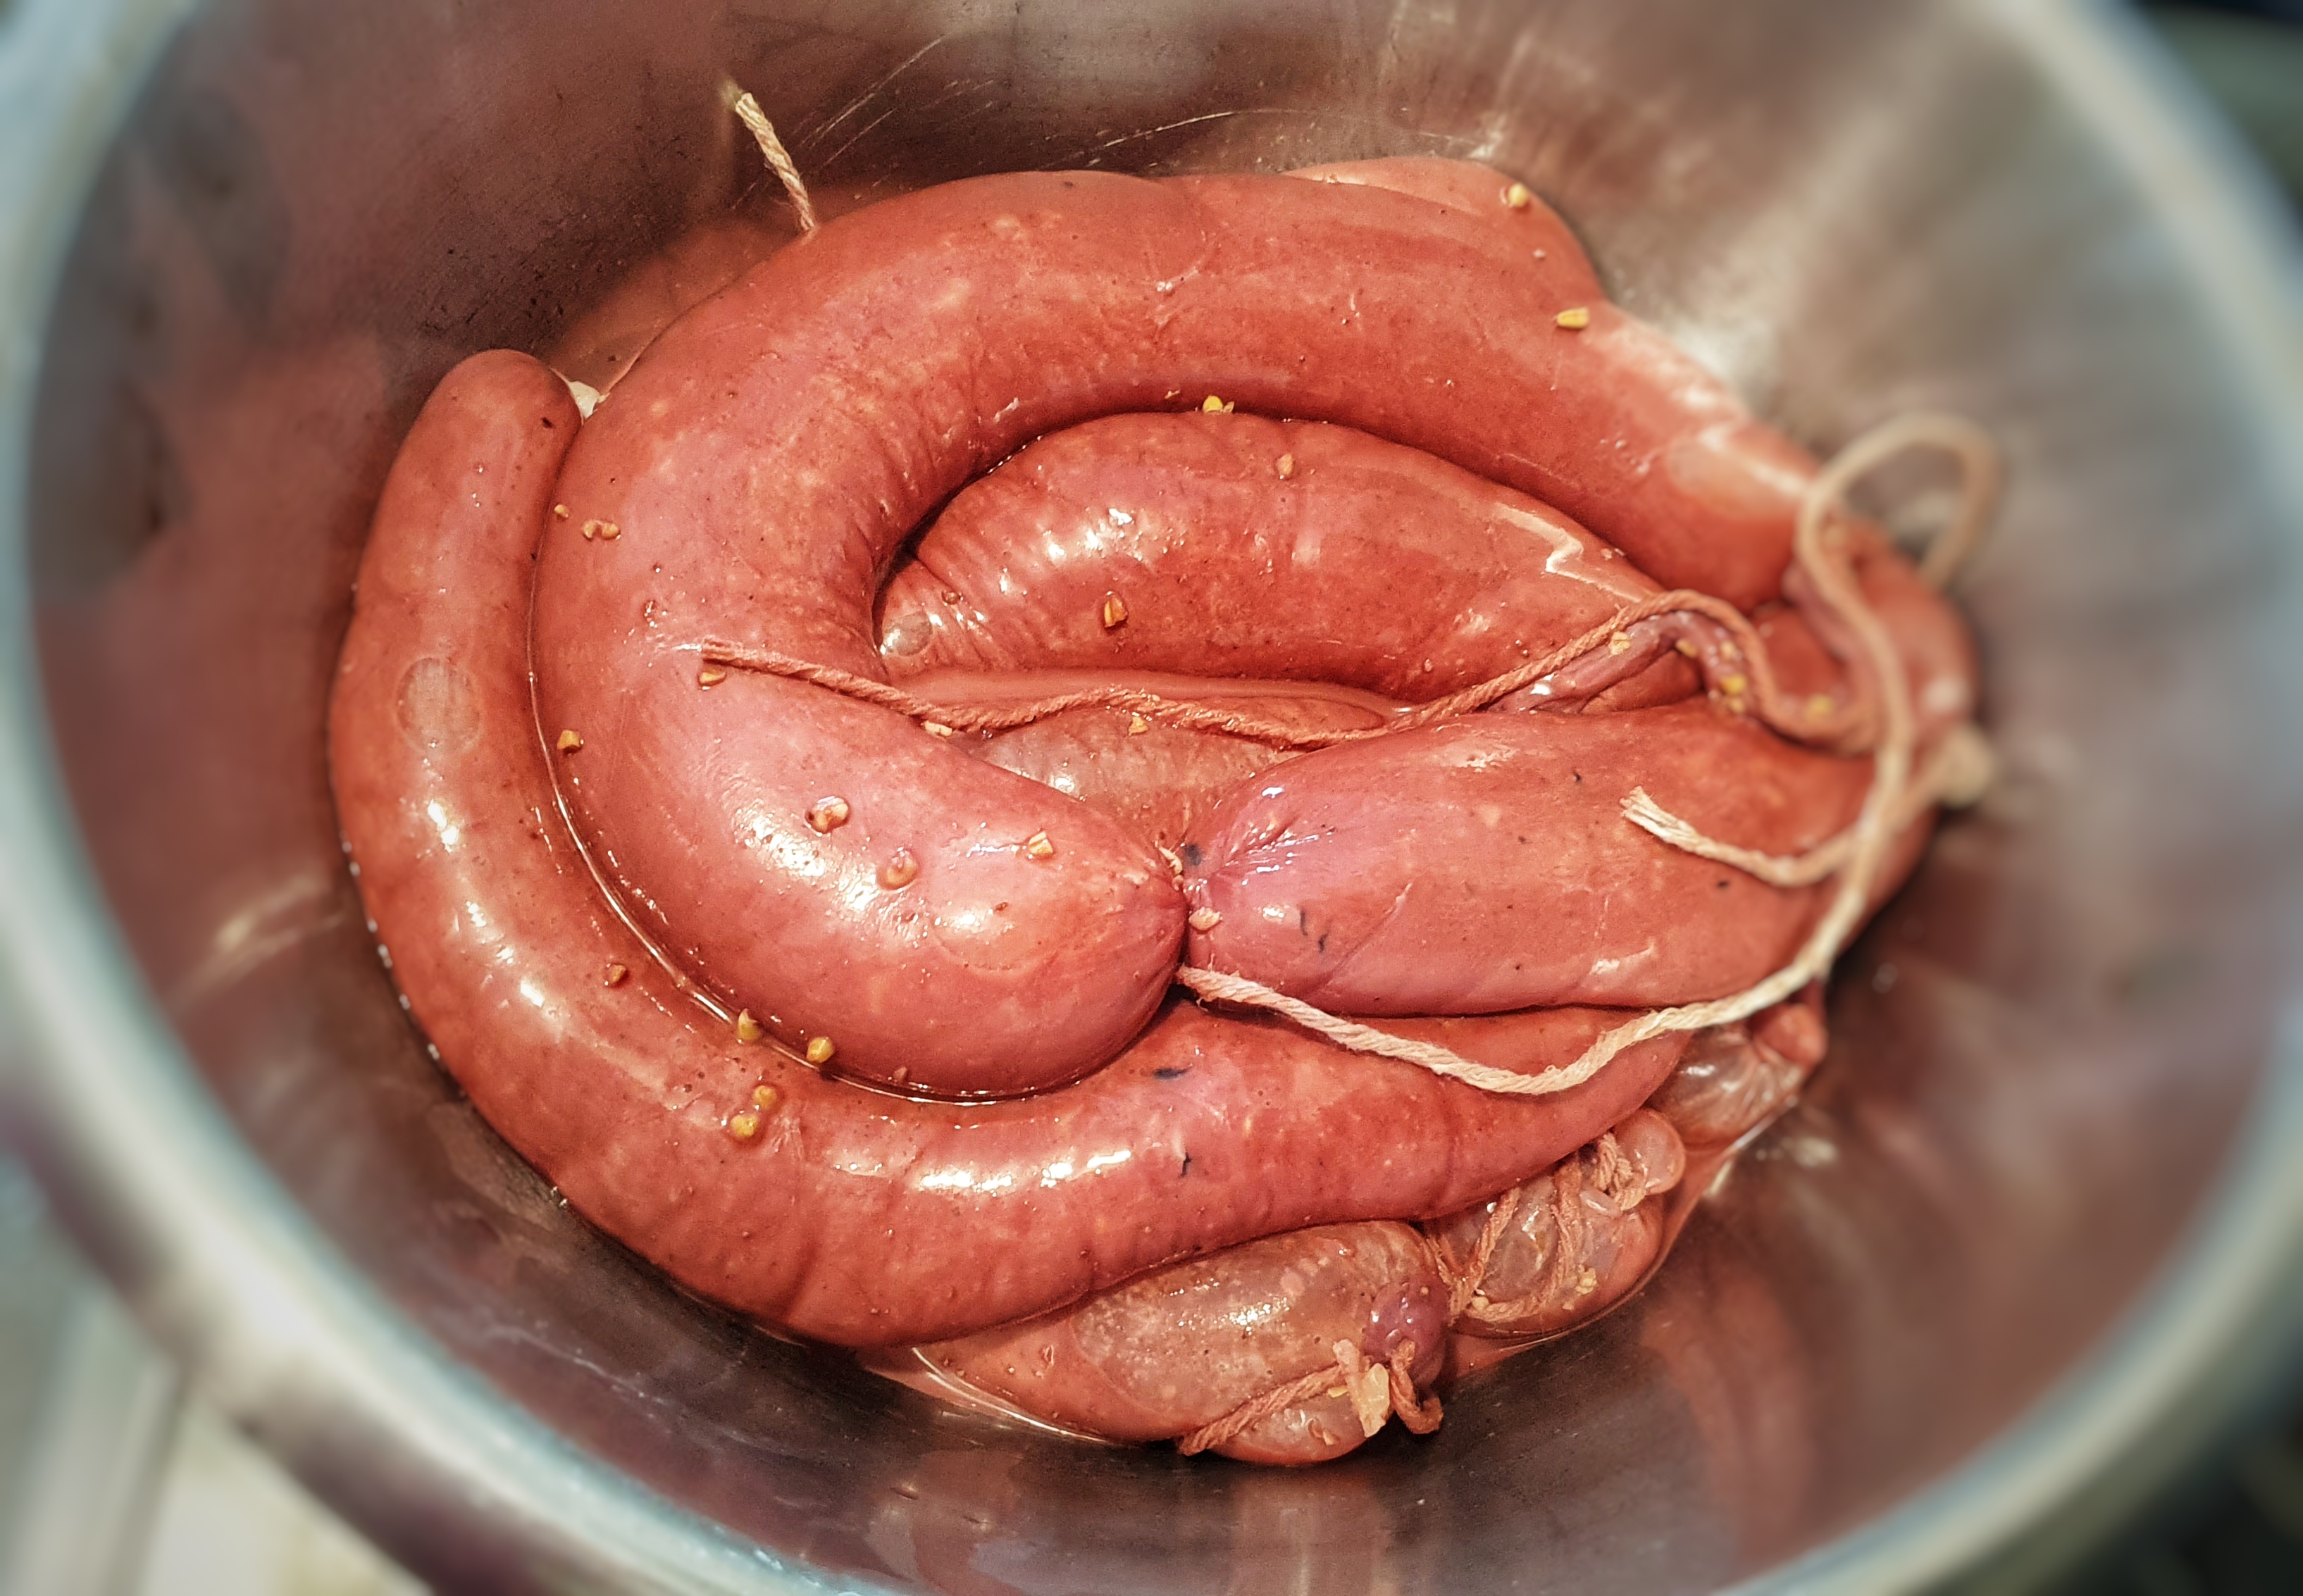
Hold the funnel in one hand and add small ladlefuls of mixture into the gut. It should slip down relatively easily. Keep the funnel raised and try to massage out any large air bubbles. When the gut is around two-thirds to one-quarter full, remove the end tied to the funnel, press out any air and tie with more string. The casings are slippery and so you must make sure that the knots are made at least 2.5 cm/1 inch from the ends. I found 350 g mixture to be a good amount. Now tie the ends together with more string to make that classic pudding shape.
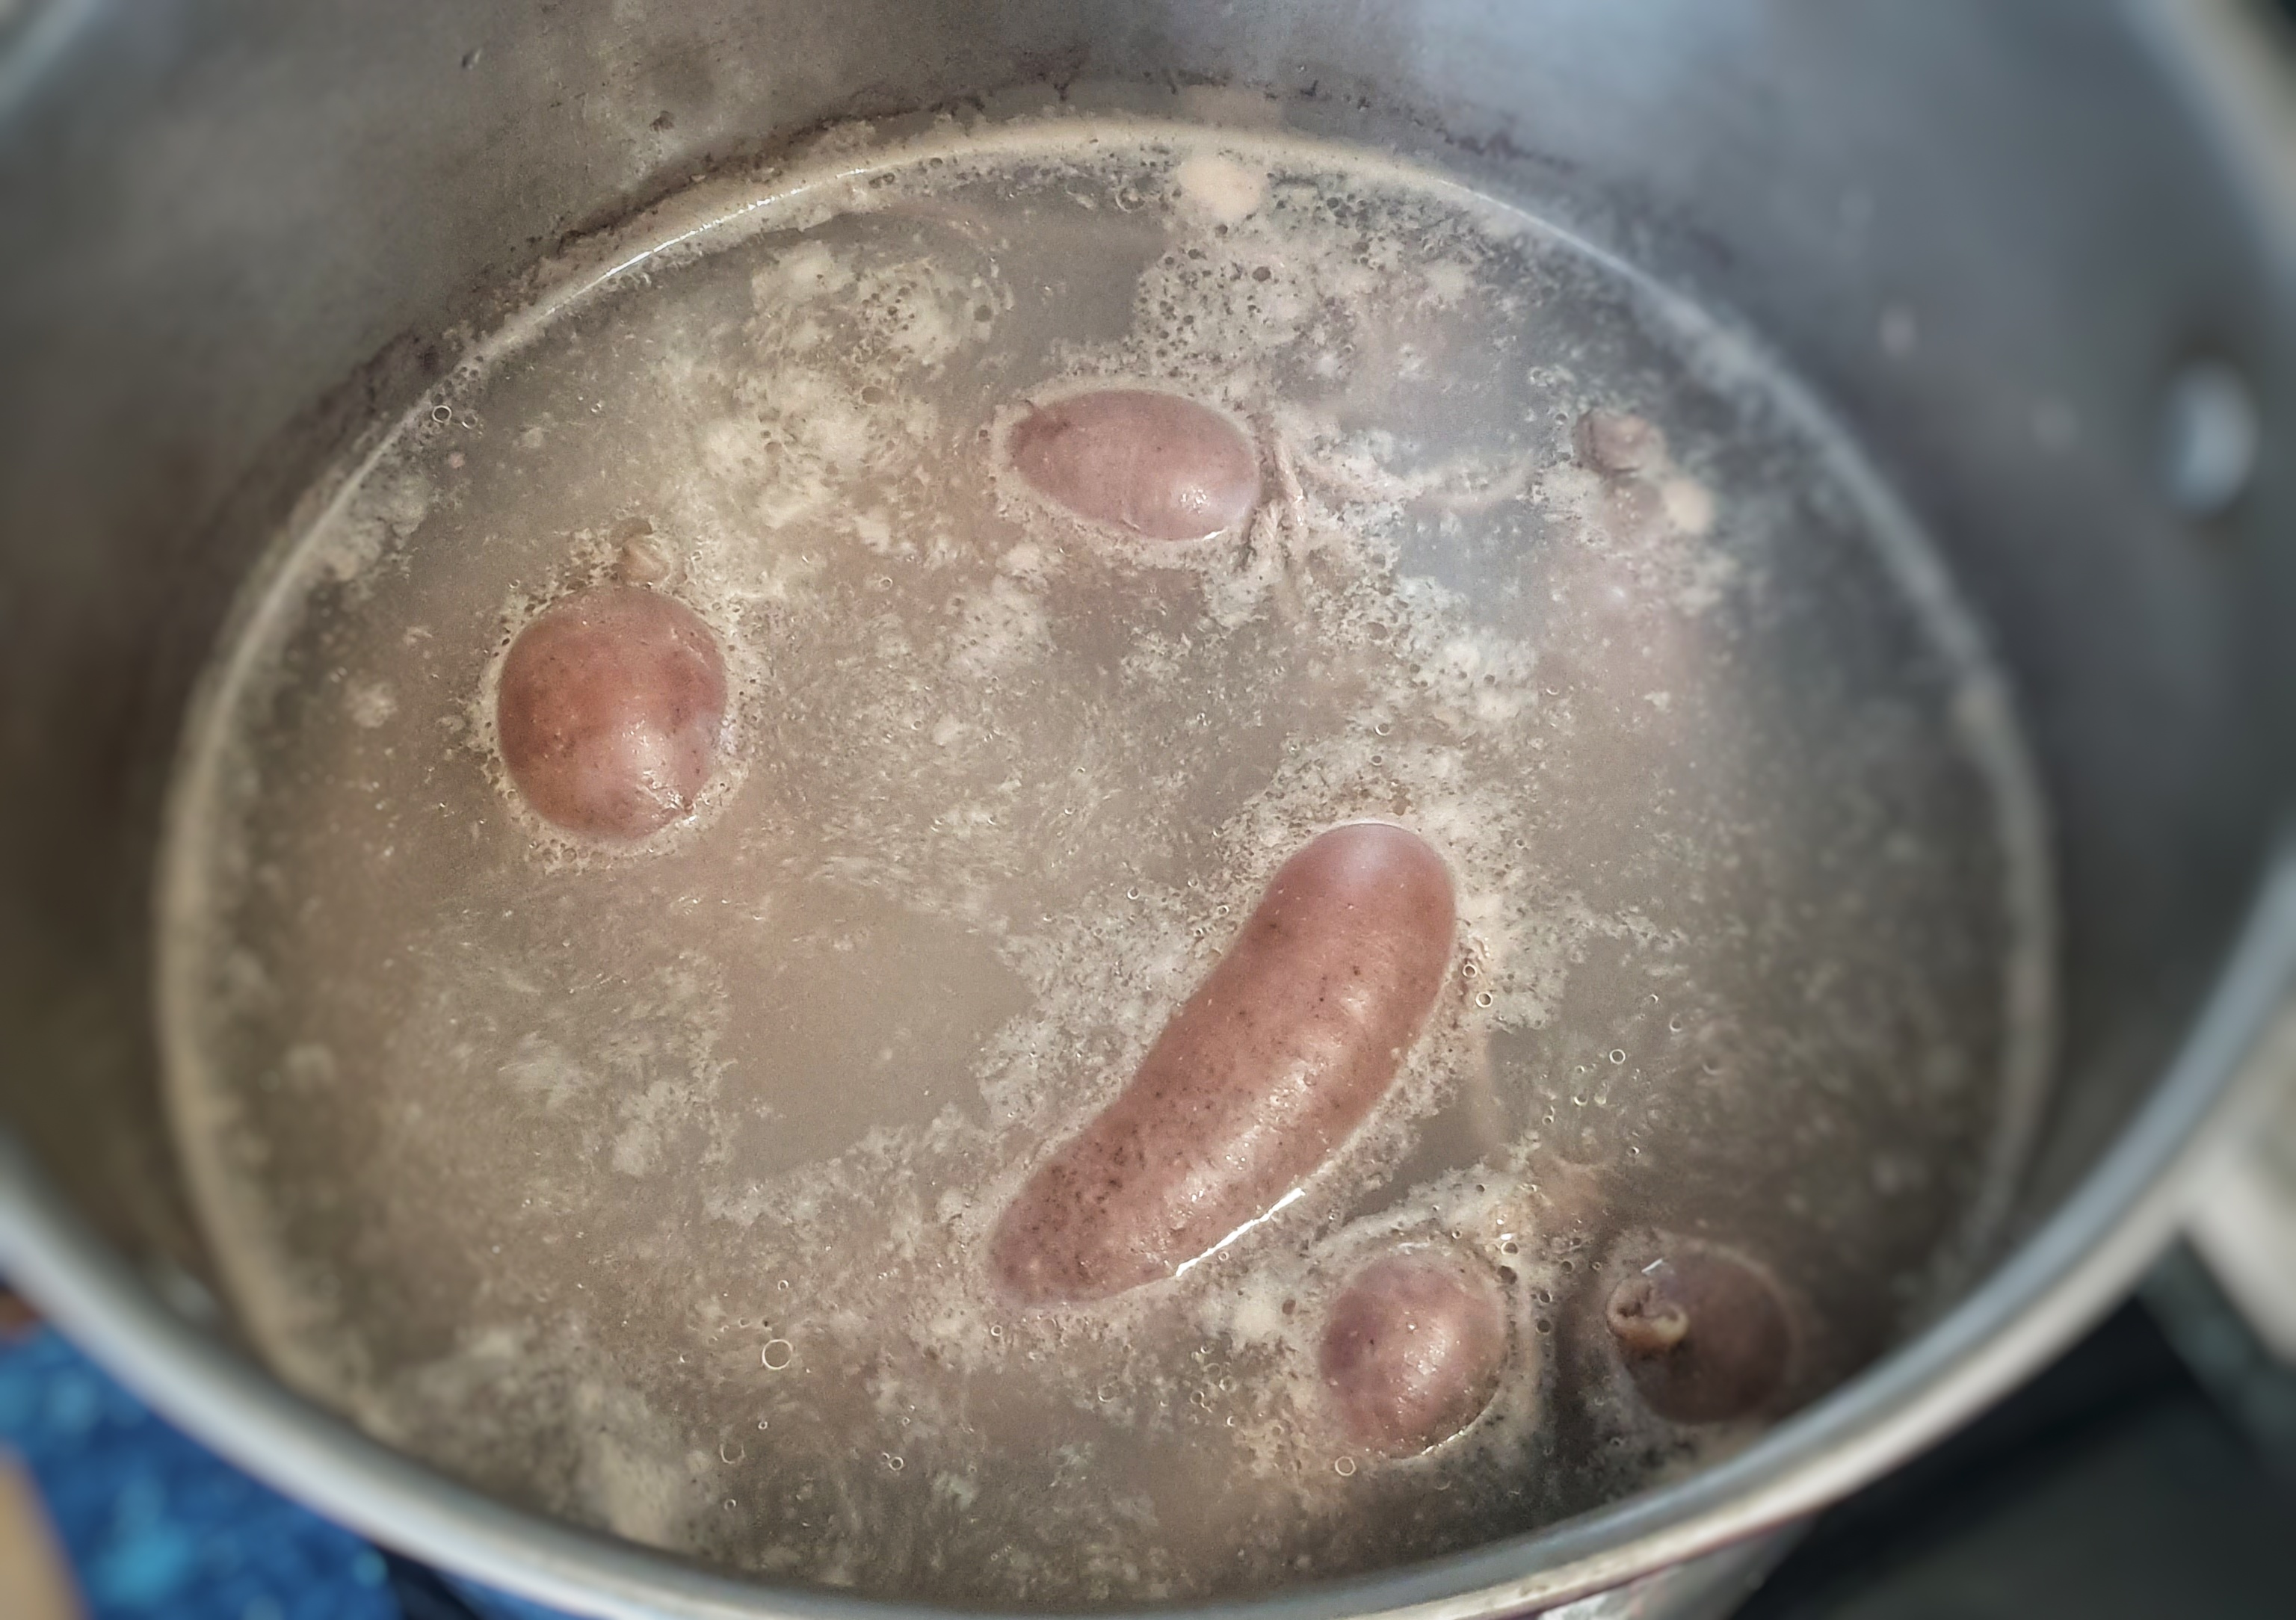
Keep them covered as you get a large pot of water simmering.
Cook the puddings in batches: drop three into the water and let them gently poach for 35 minutes – there should just be the odd bubble and gurgle coming from the cooking water. You must pop any bubbles immediately with a pin, otherwise the puddings will burst open. Turn the puddings over every 7 or 8 minutes to make sure both sides are cooked evenly.
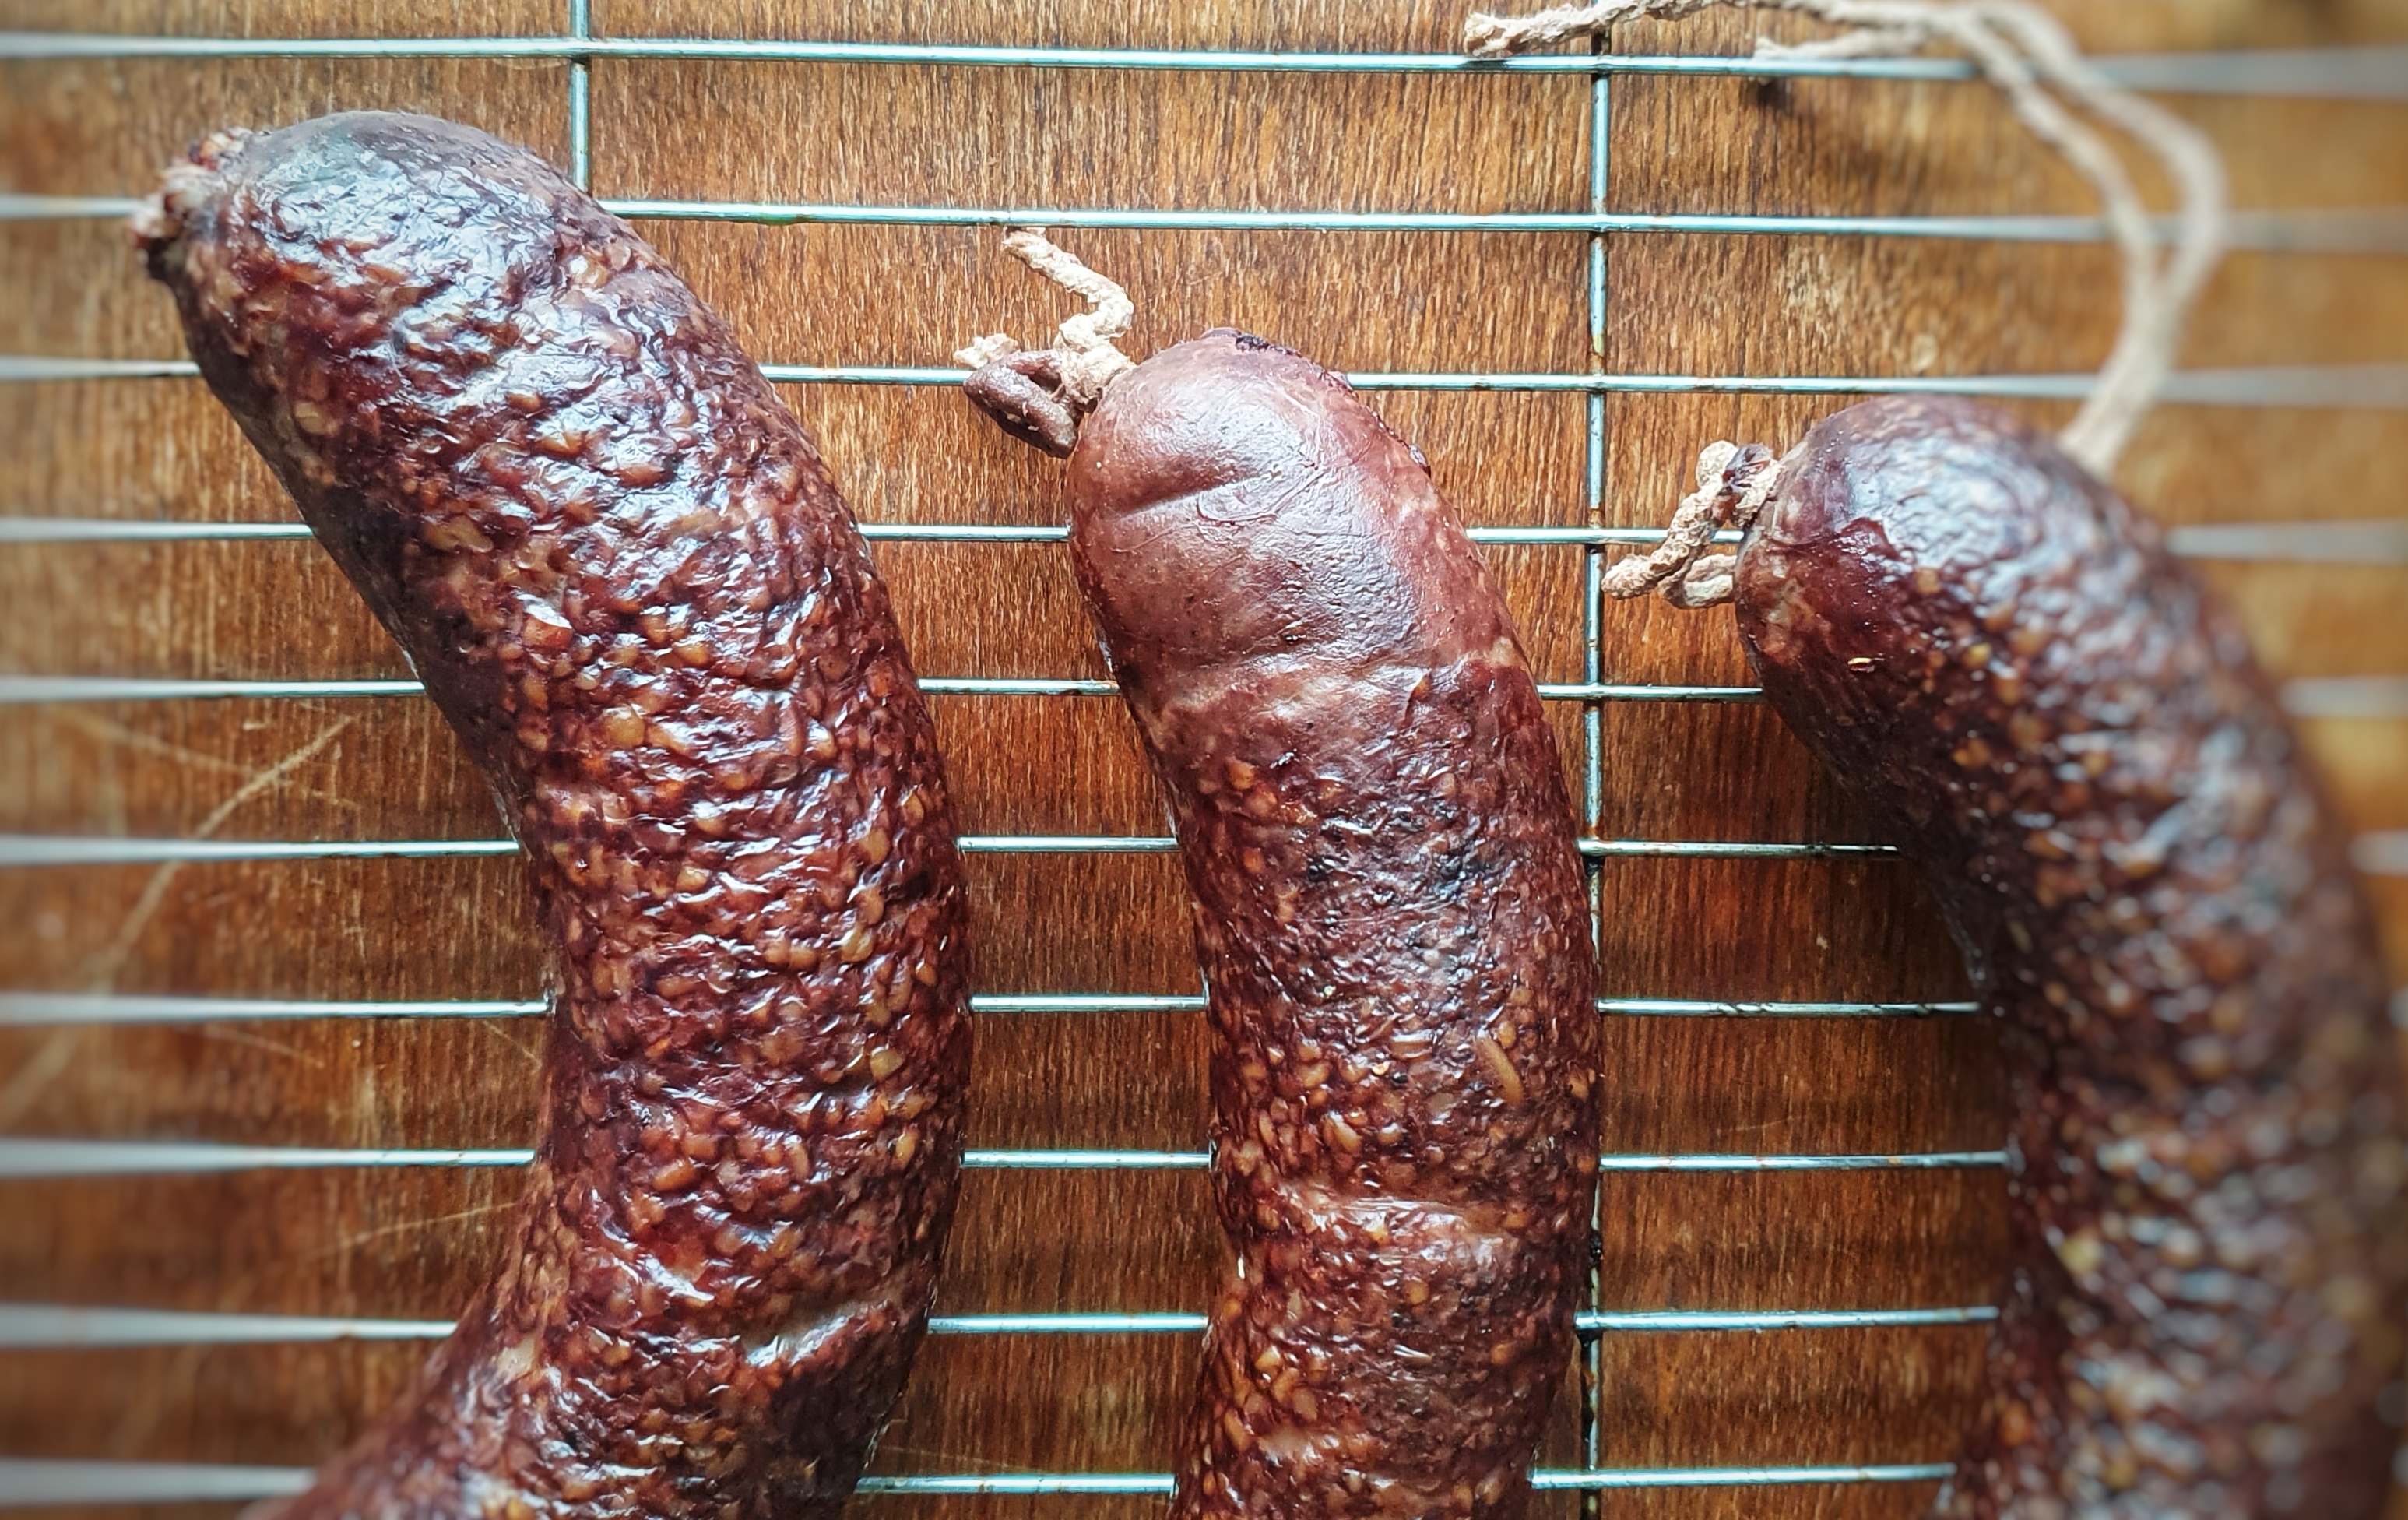
When cooked, fish the puddings out and hang them up to dry for a few hours, then refrigerate.
To cook the puddings, poach them in more water for around 15 minutes, turning occasionally.
[1] Davison, J. (2015). English Sausages. Prospect Books.
[2] Digby, K. (1669). The Closet of Sir Kenelm Digby Opened (1997 reprint) (J. Stevenson & P. Davidson, Eds.). Prospect Books.
[3] Dawson, T. (1596). The Good Housewife’s Jewel (1996 Editi). Southover Press.
[4] Brears, P. (2016). Hog’s Puddings and White Puddings. Petits Propos Culinaires, 106, 69–81.
[5] This recipe is from the 1633 edition: Markham, G. (1633). Country Contentments, or The English Huswife. J. Harison.
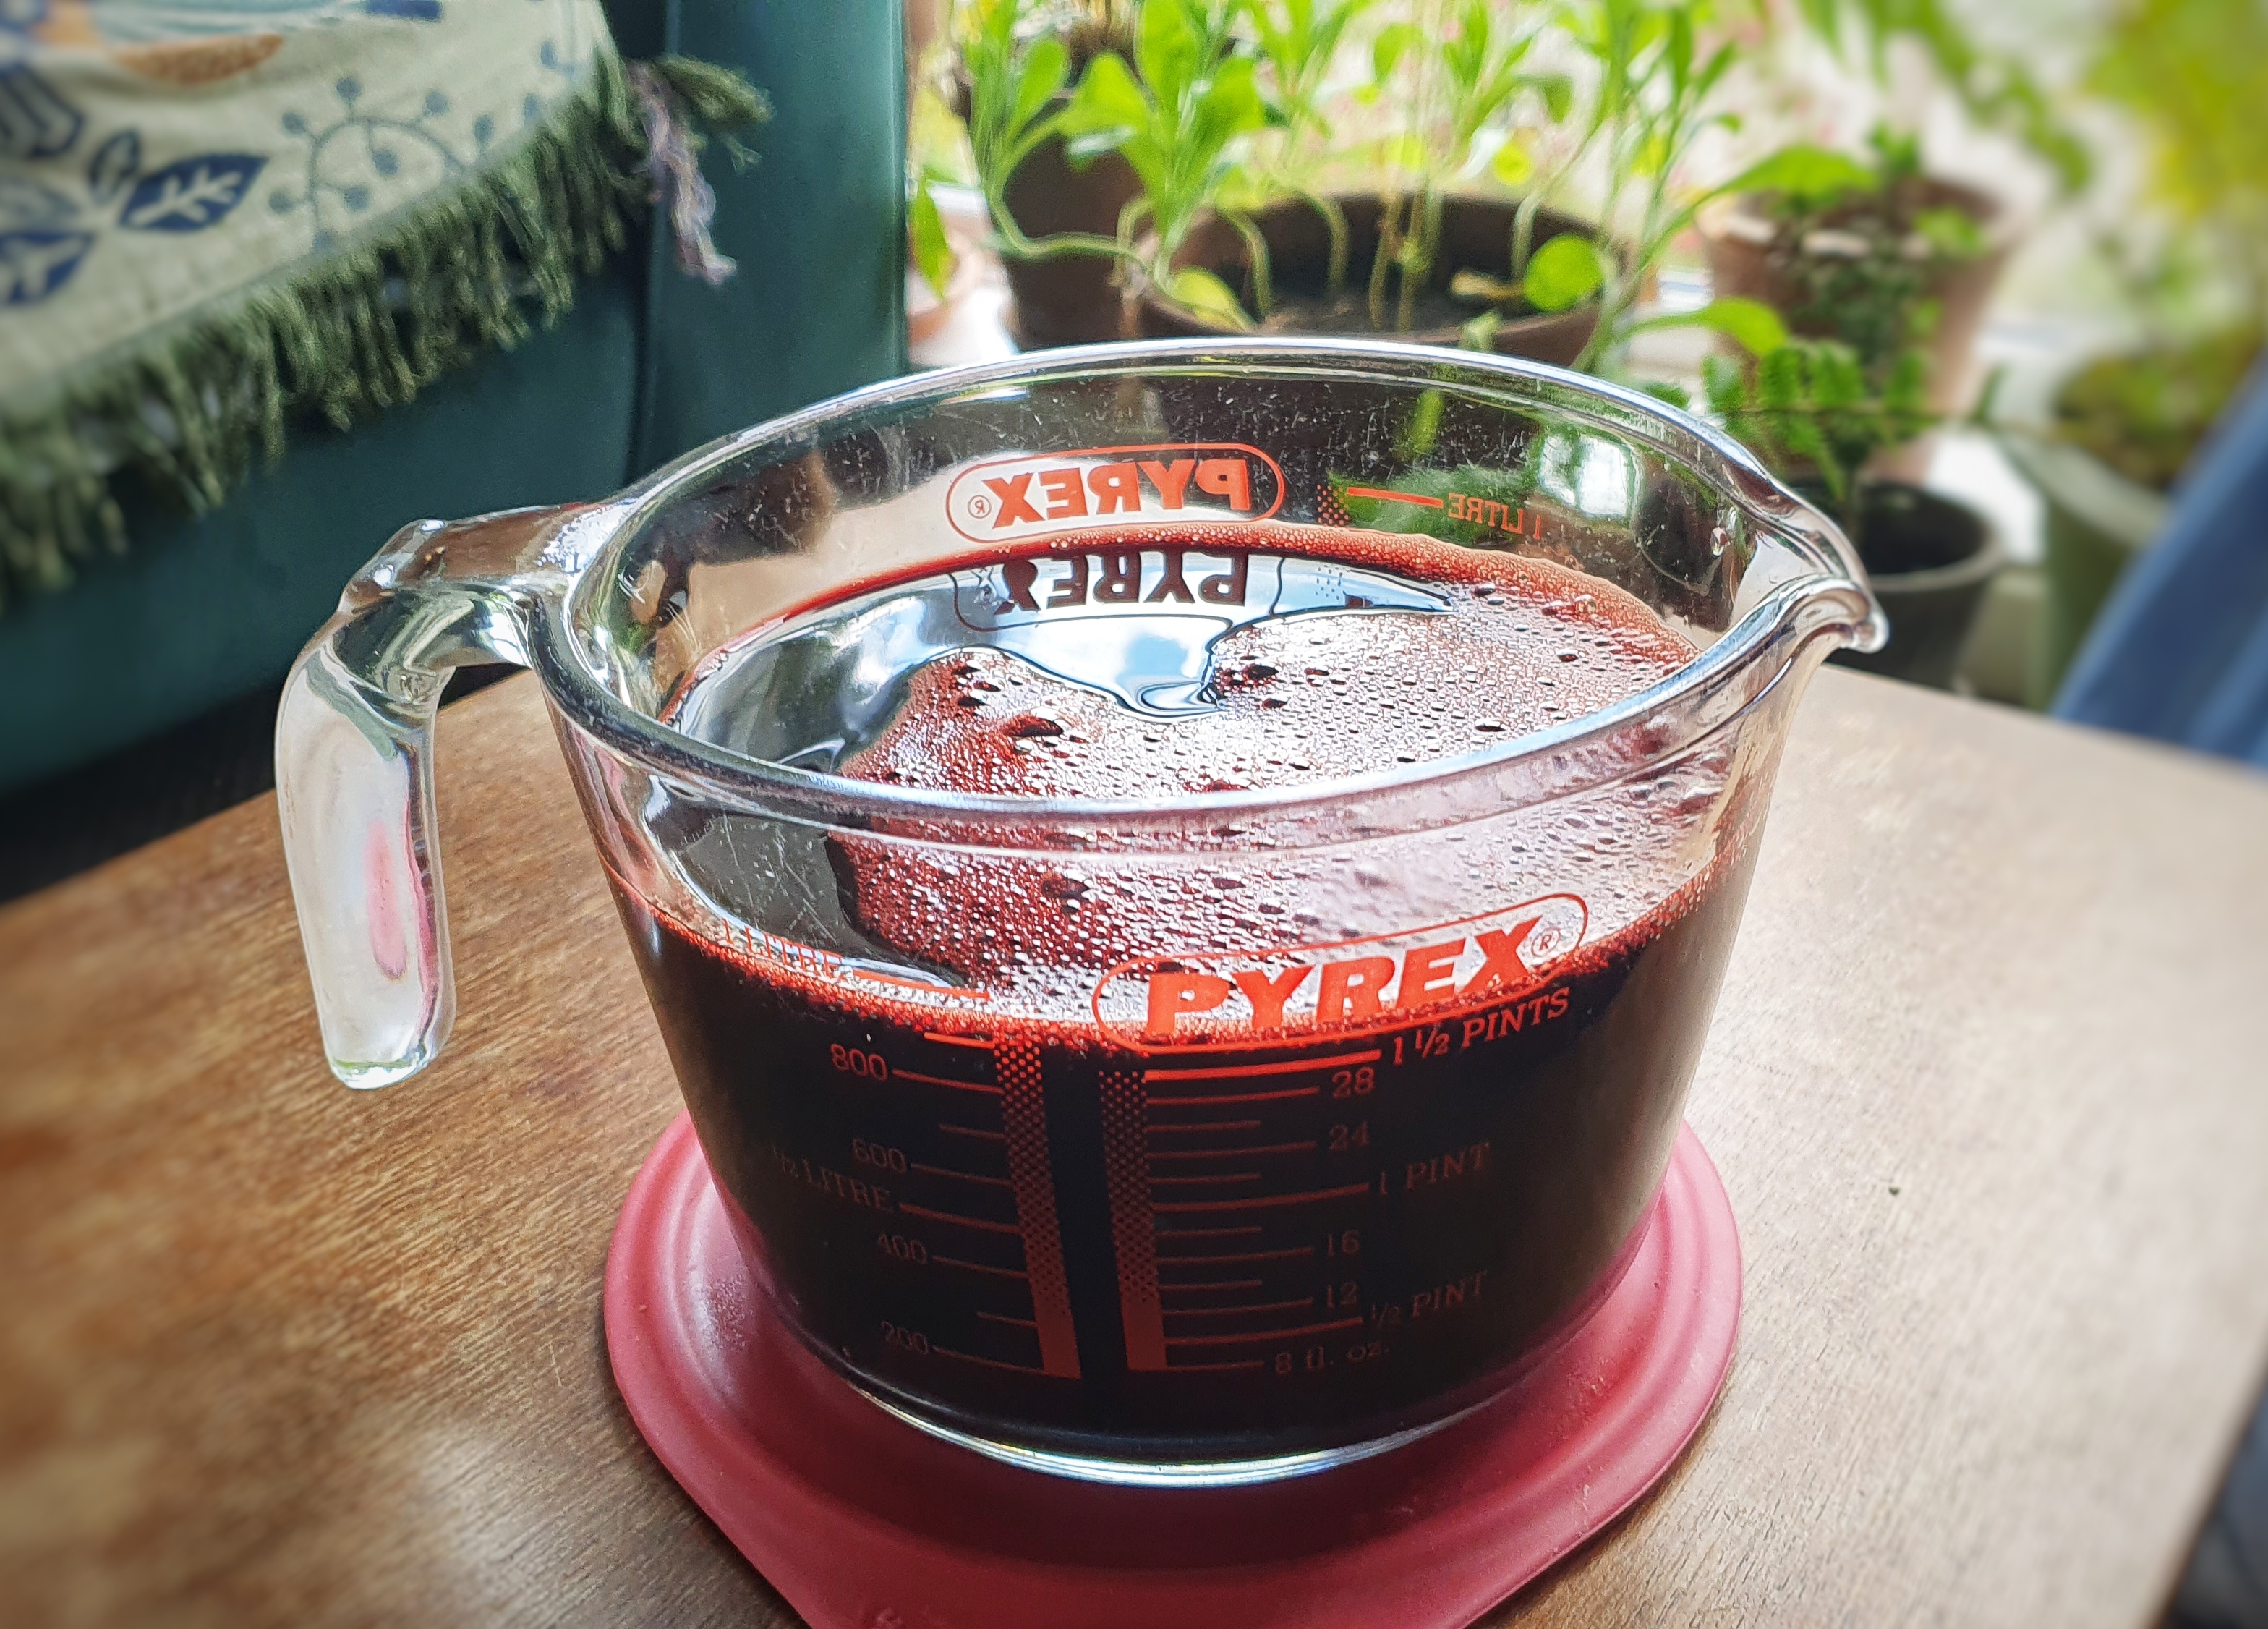
For years now, I have wanted to make my own fresh blood black puddings, but fresh blood is so tricky to get hold of in Britain, I thought I would never get the opportunity. Lucky for me then, that Fruit Pig, who are sponsoring the ninth season of The British Food History Podcast, kindly sent me a litre of pig’s blood. When it came to recipes, I very much had my eye on Early Modern black puddings because they seem so outlandish compared to traditional black puddings of today. On one hand, they are very British, containing oatmeal and/or breadcrumbs and plenty of chopped beef suet. On the other, they are reminiscent of a French boudin noir in that there are lashings of cream and egg yolks.
If you haven’t listened to the episode about black and white puddings with Matthew and Grant of Fruit Pig listen here.
Read about the history of puddings in The Philosophy of Puddings
There are lots of unexpected herbs and spices, too. Thomas Dawson uses sheep’s blood, milk-soaked oats, suet and what we might think of as the constituents of a mixed spice today: nutmeg, mace, black pepper, ginger and cinnamon.[1] Sir Kenelm Digby liked to use chicken blood, cream, almond cream, bone marrow, sugar, salt, rosewater and eggs.[2] Robert May gives us some precise pointers as well as several ways of making black puddings. In one recipe he combines blood and cream in a ratio of 2:1. Sometimes he soaks oats in milk, sometimes blood: ‘Steep great oatmeal in eight pints of warm goose blood, sheeps blood, calves, or lambs, or fawns blood’. He uses a whole range of interesting herbs, including thyme, spinach, parsley, sorrel and strawberry leaves, to name but a few. He also adds ‘Sometimes for variety, Sugar, Currans, &c.’[3] I really want to know what sweet black pudding tastes like!
Robert May liked to add currants and sugar to his black puddings ‘for variety’.
Using these descriptions as inspiration, I created the recipe below. There was a certain amount of trial-and-error, and whenever I got stuck, I made sure to gain advice from Regula Ysewijn’s Pride and Pudding, Hugh Fearnley-Whittingstall’s The River Cottage Cookbook and Fergus Henderson’s The Complete Nose to Tail.[4]
I learned a great deal making them – the most important lesson being just how skilled one must be to make these sorts of puddings frequently and in large amounts. It made me appreciate even more the hard work of our forebears and Fruit Pig!
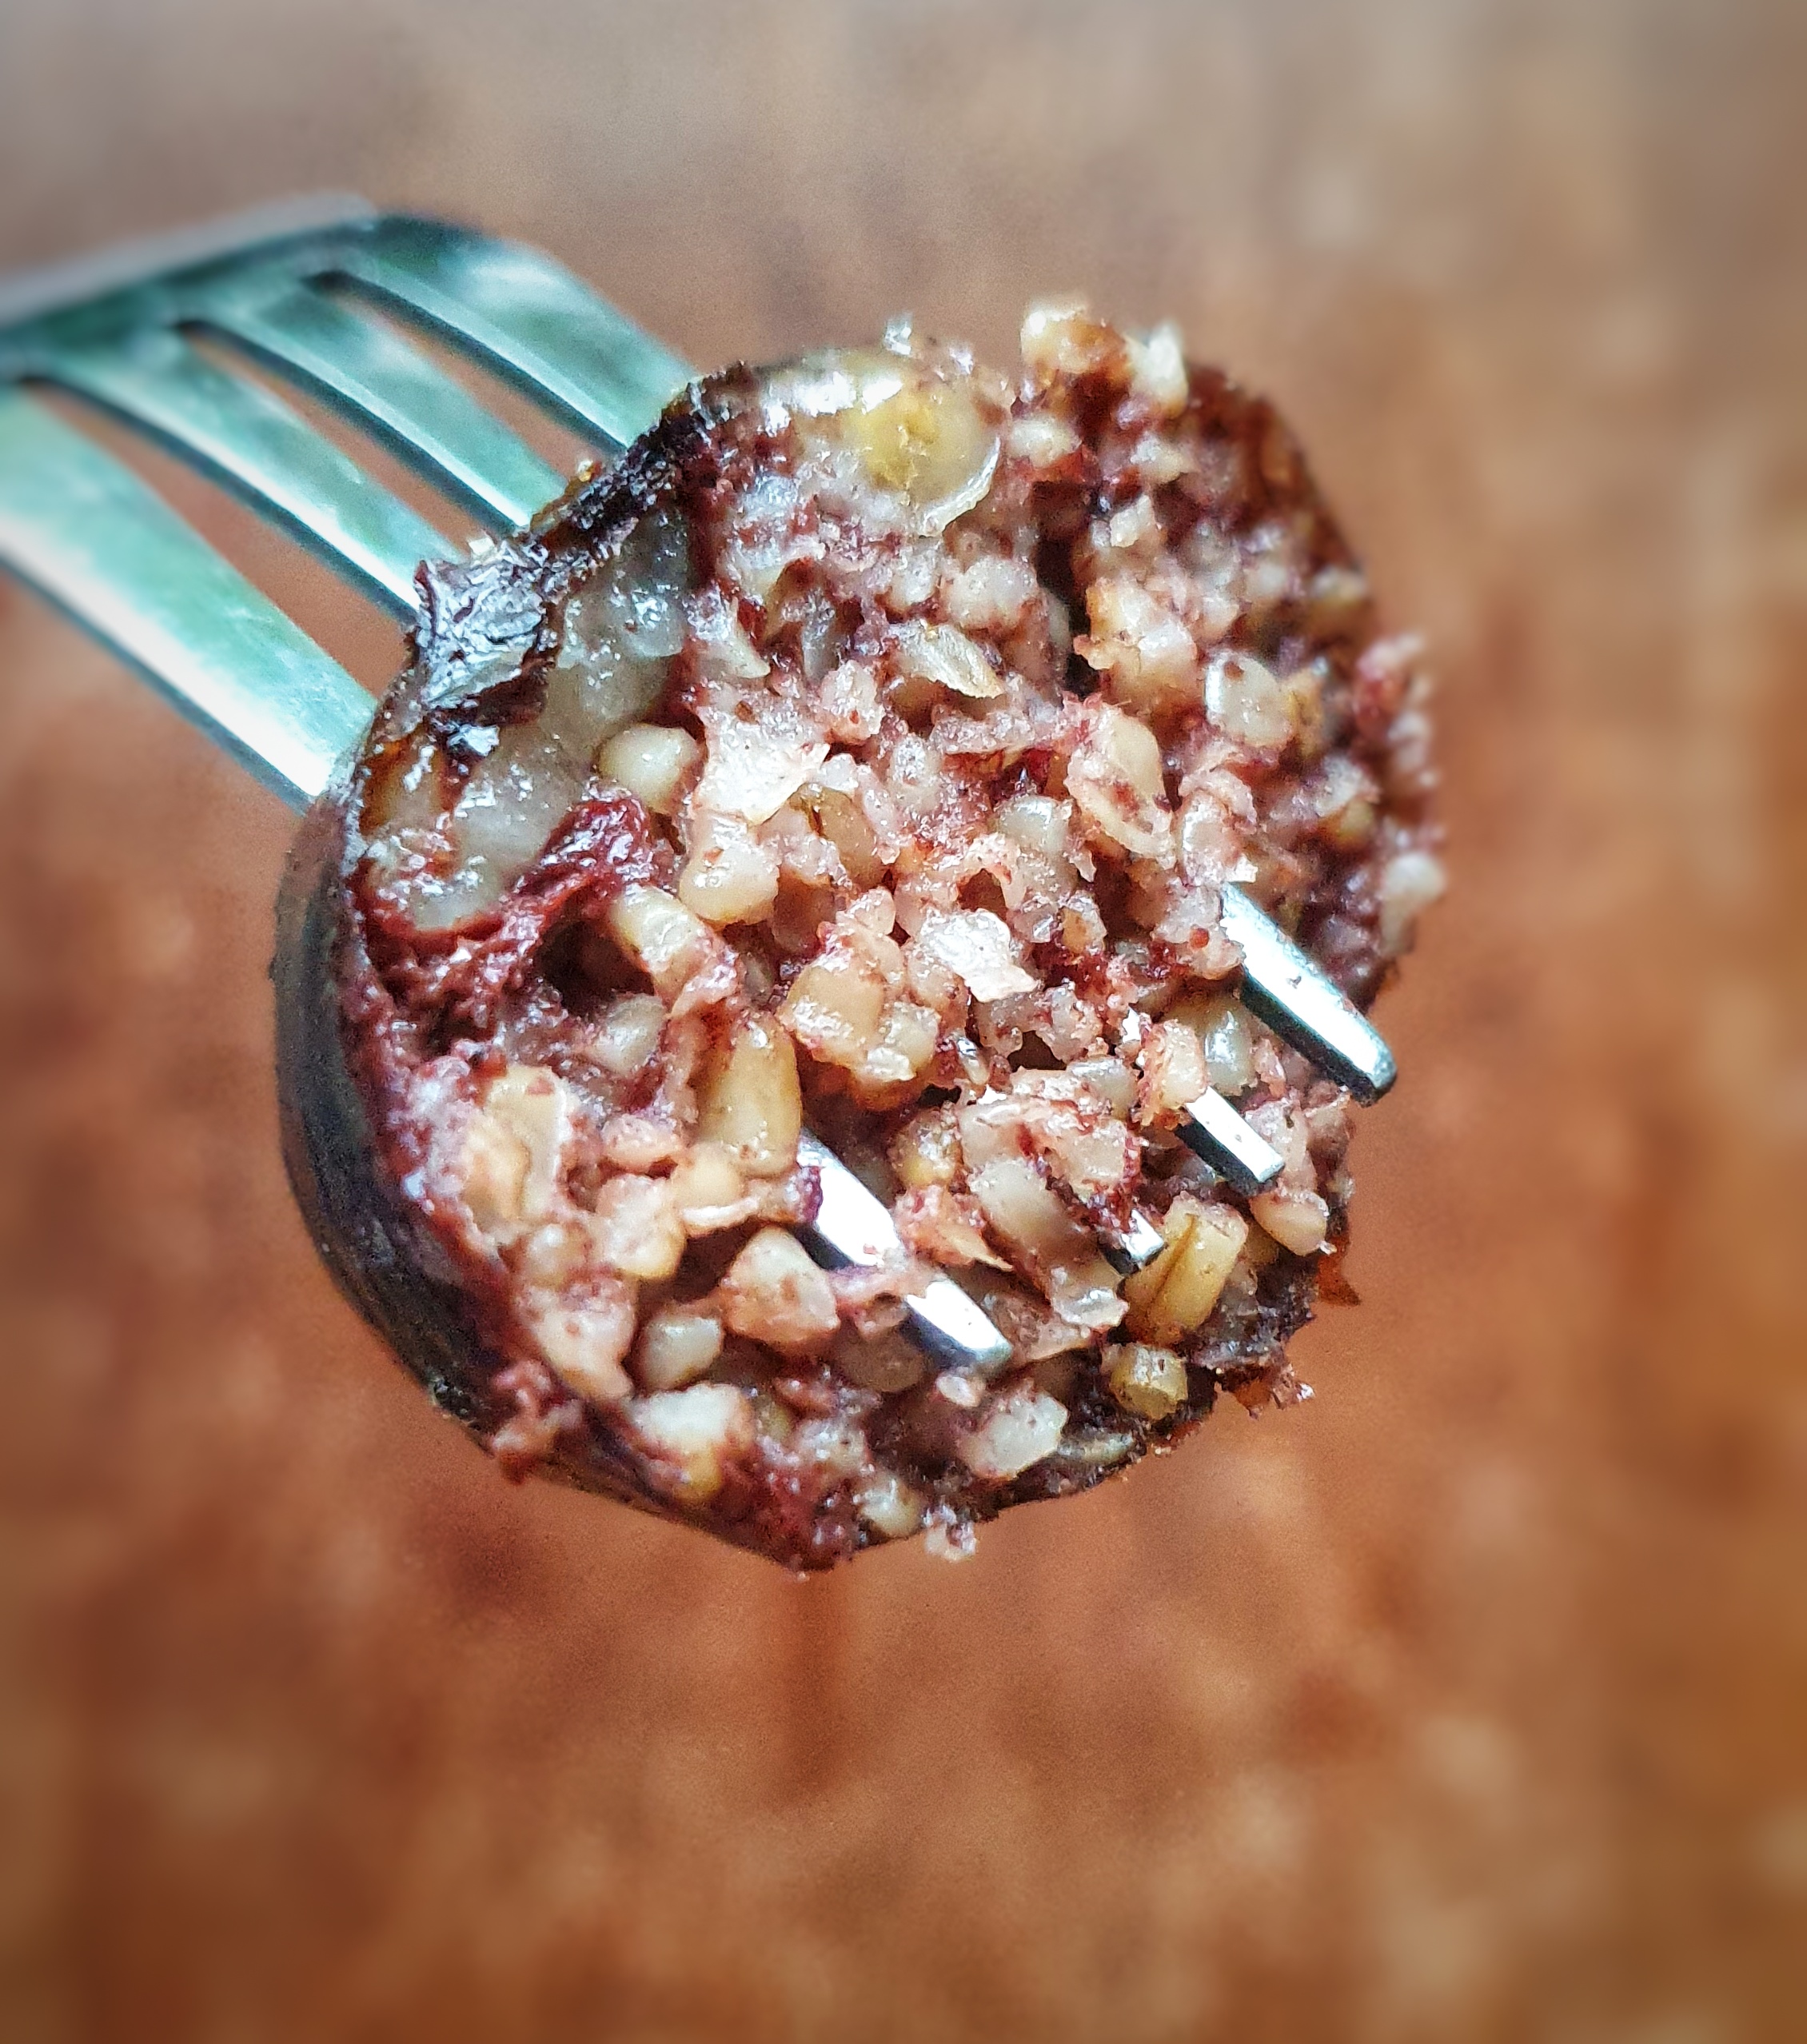
I was really surprised with how well the puddings turned out, and I would certainly recommend giving them a go. I made one batch with sugar and currants and one without. You might be surprised to hear that the sweet one was really quite delicious. I fried my savoury puddings and served them with fried eggs atop some sourdough toast. They tasted rich and were a cross between a black pudding and haggis. I’ll let you know how I served the sweet black puddings.
There are just a couple of things I would have done differently: my main issue was that the butcher gave me pigs’ casings which were not suitable for these black puddings – the nubbly pieces of oat tore through them easily, and the skin burst under their own weight at times. I would therefore recommend beef casings or simply baking them in the oven in loaf tins, or maybe even frying up blood pancakes as suggested by Regula Ysewijn![5]
A big thank you to Matthew and Grant of Fruit Pig for supplying me with fresh blood
If you can, support the podcast and blogs by becoming a £3 monthly subscriber, and unlock lots of premium content, including bonus blog posts and recipes, access to the easter eggs and the secret podcast, or treat me to a one-off virtual pint or coffee: click here.
Recipe
Makes approximately 12 x 20 cm black puddings if made in pork casings, and 6 x 20 cm puddings if made in beef casings.
Natural pork or beef skins, soaked in water overnight (optional, see recipe)
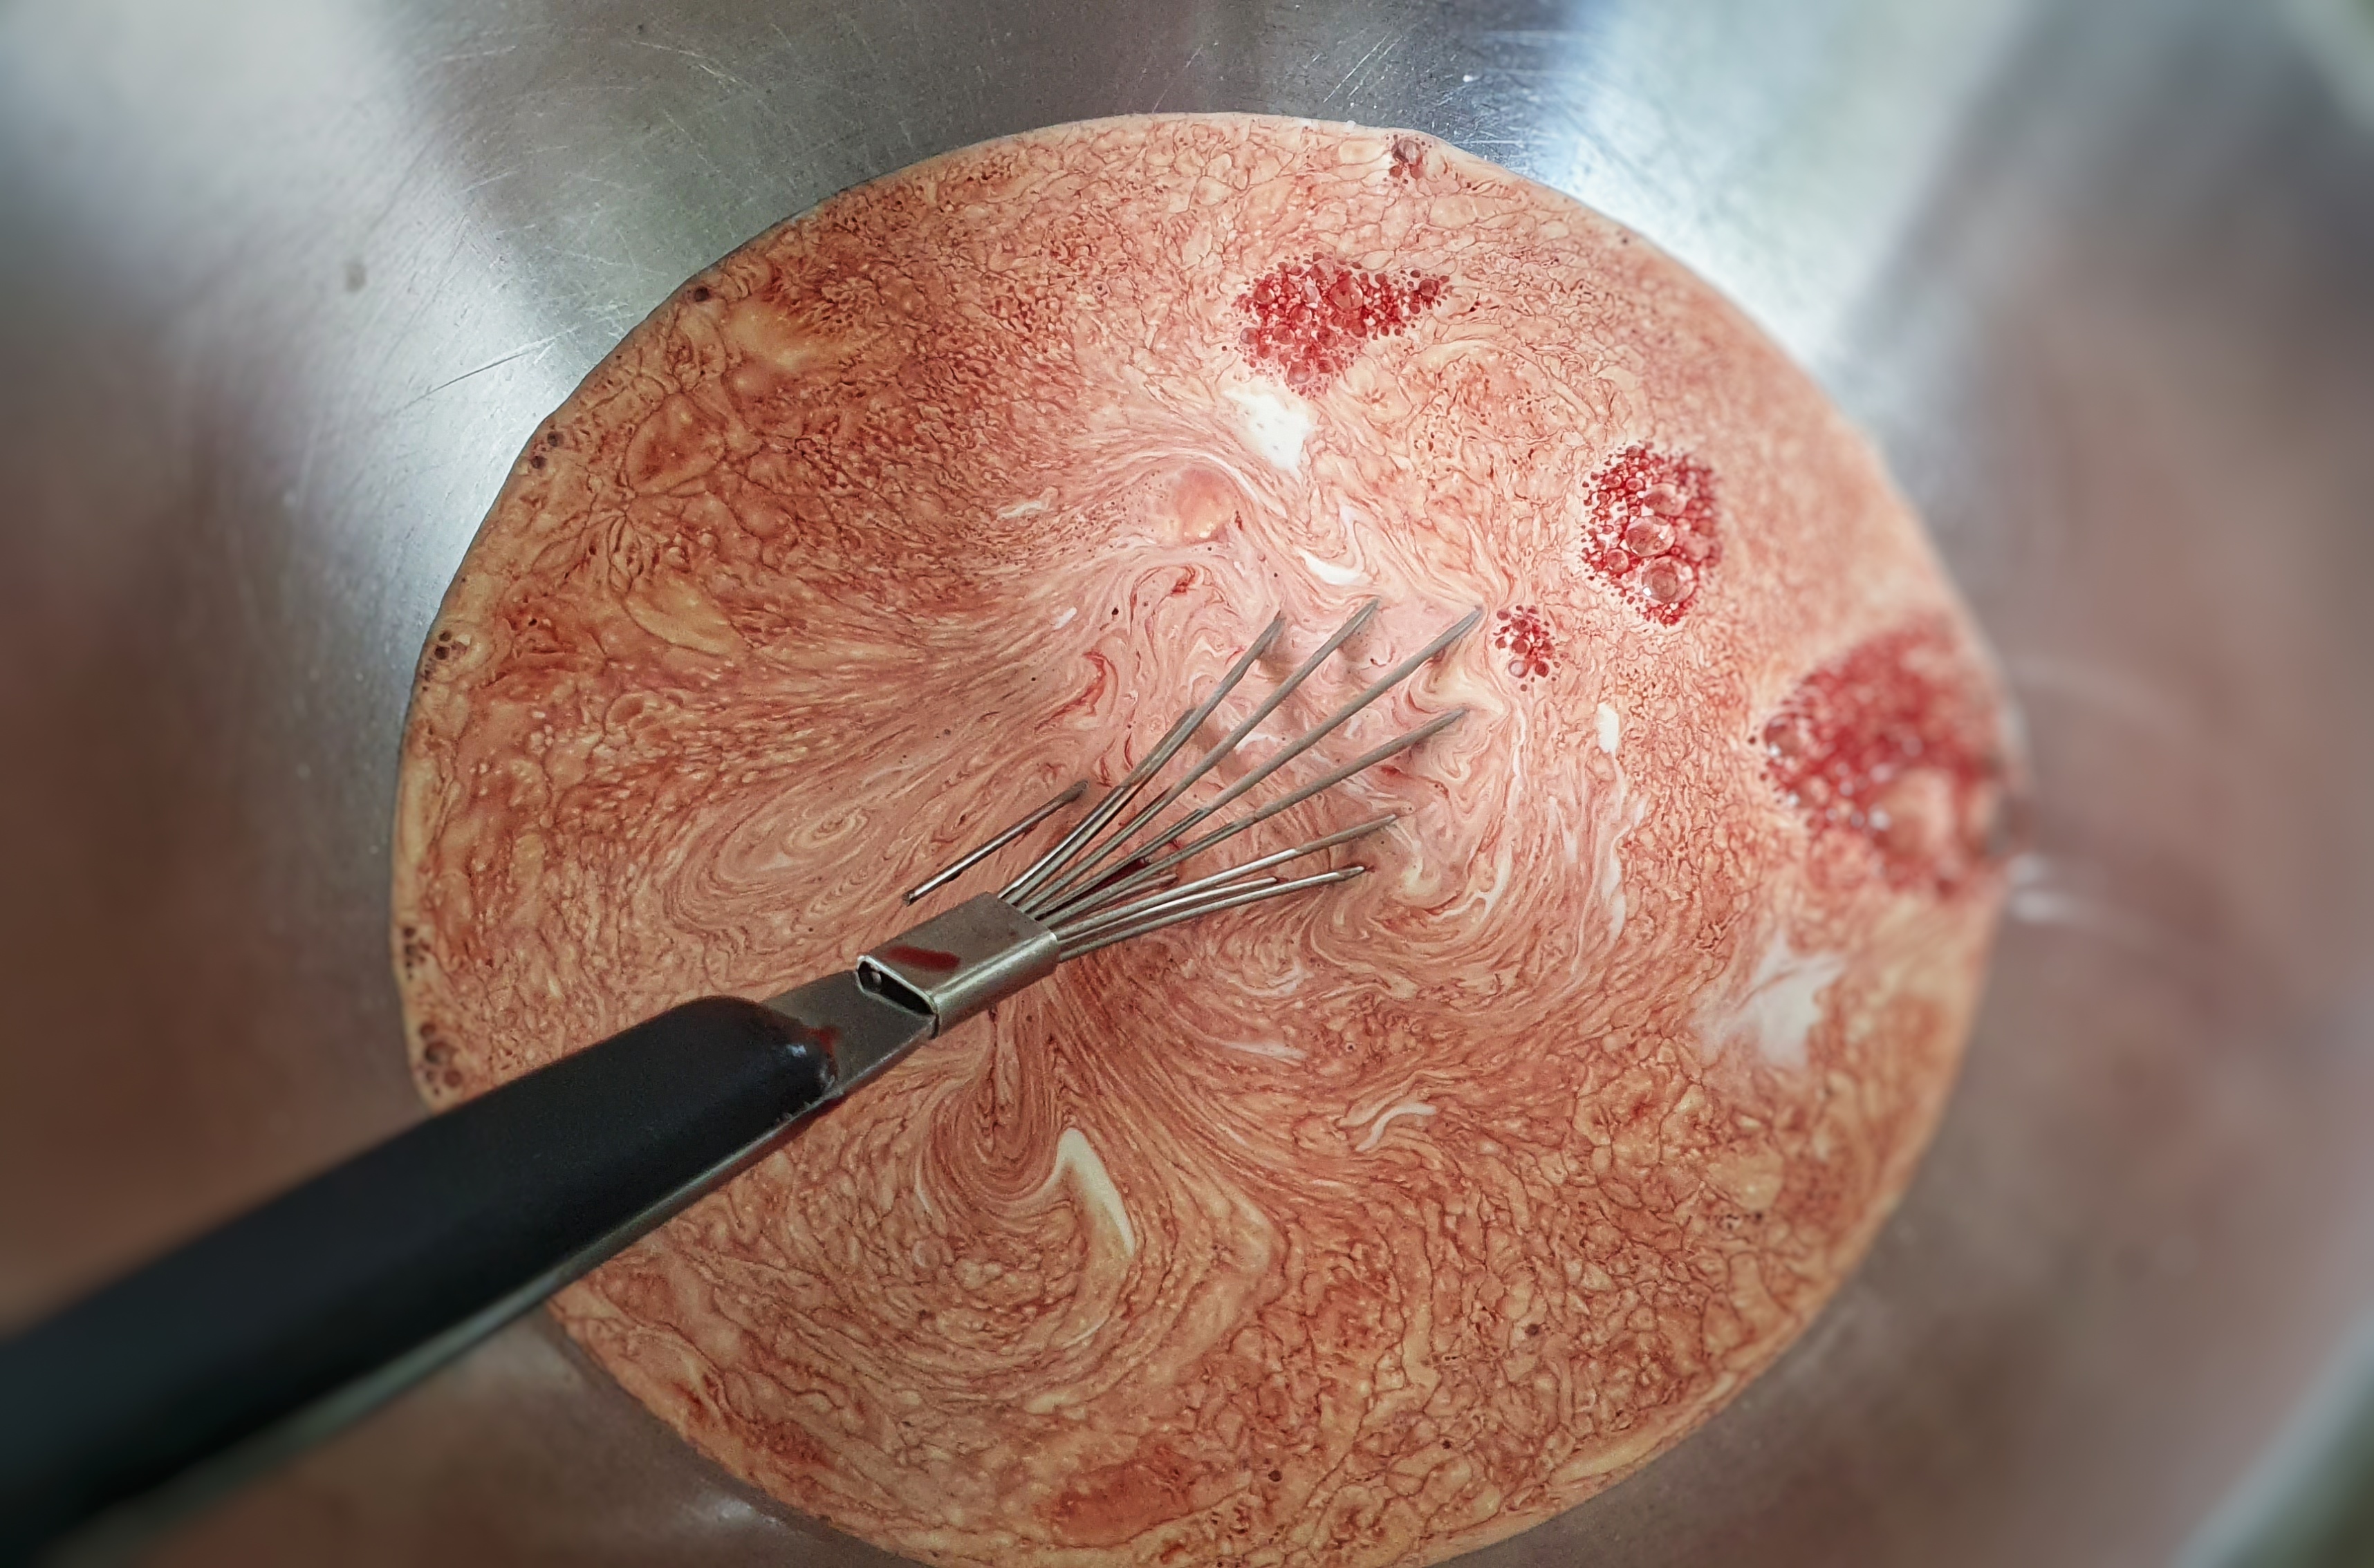
The day before you want to make your puddings, place the oats in a bowl or large jug and pour in enough milk to just cover them. Place in the fridge overnight. Grind the spices and mix in the dried herbs and salt.
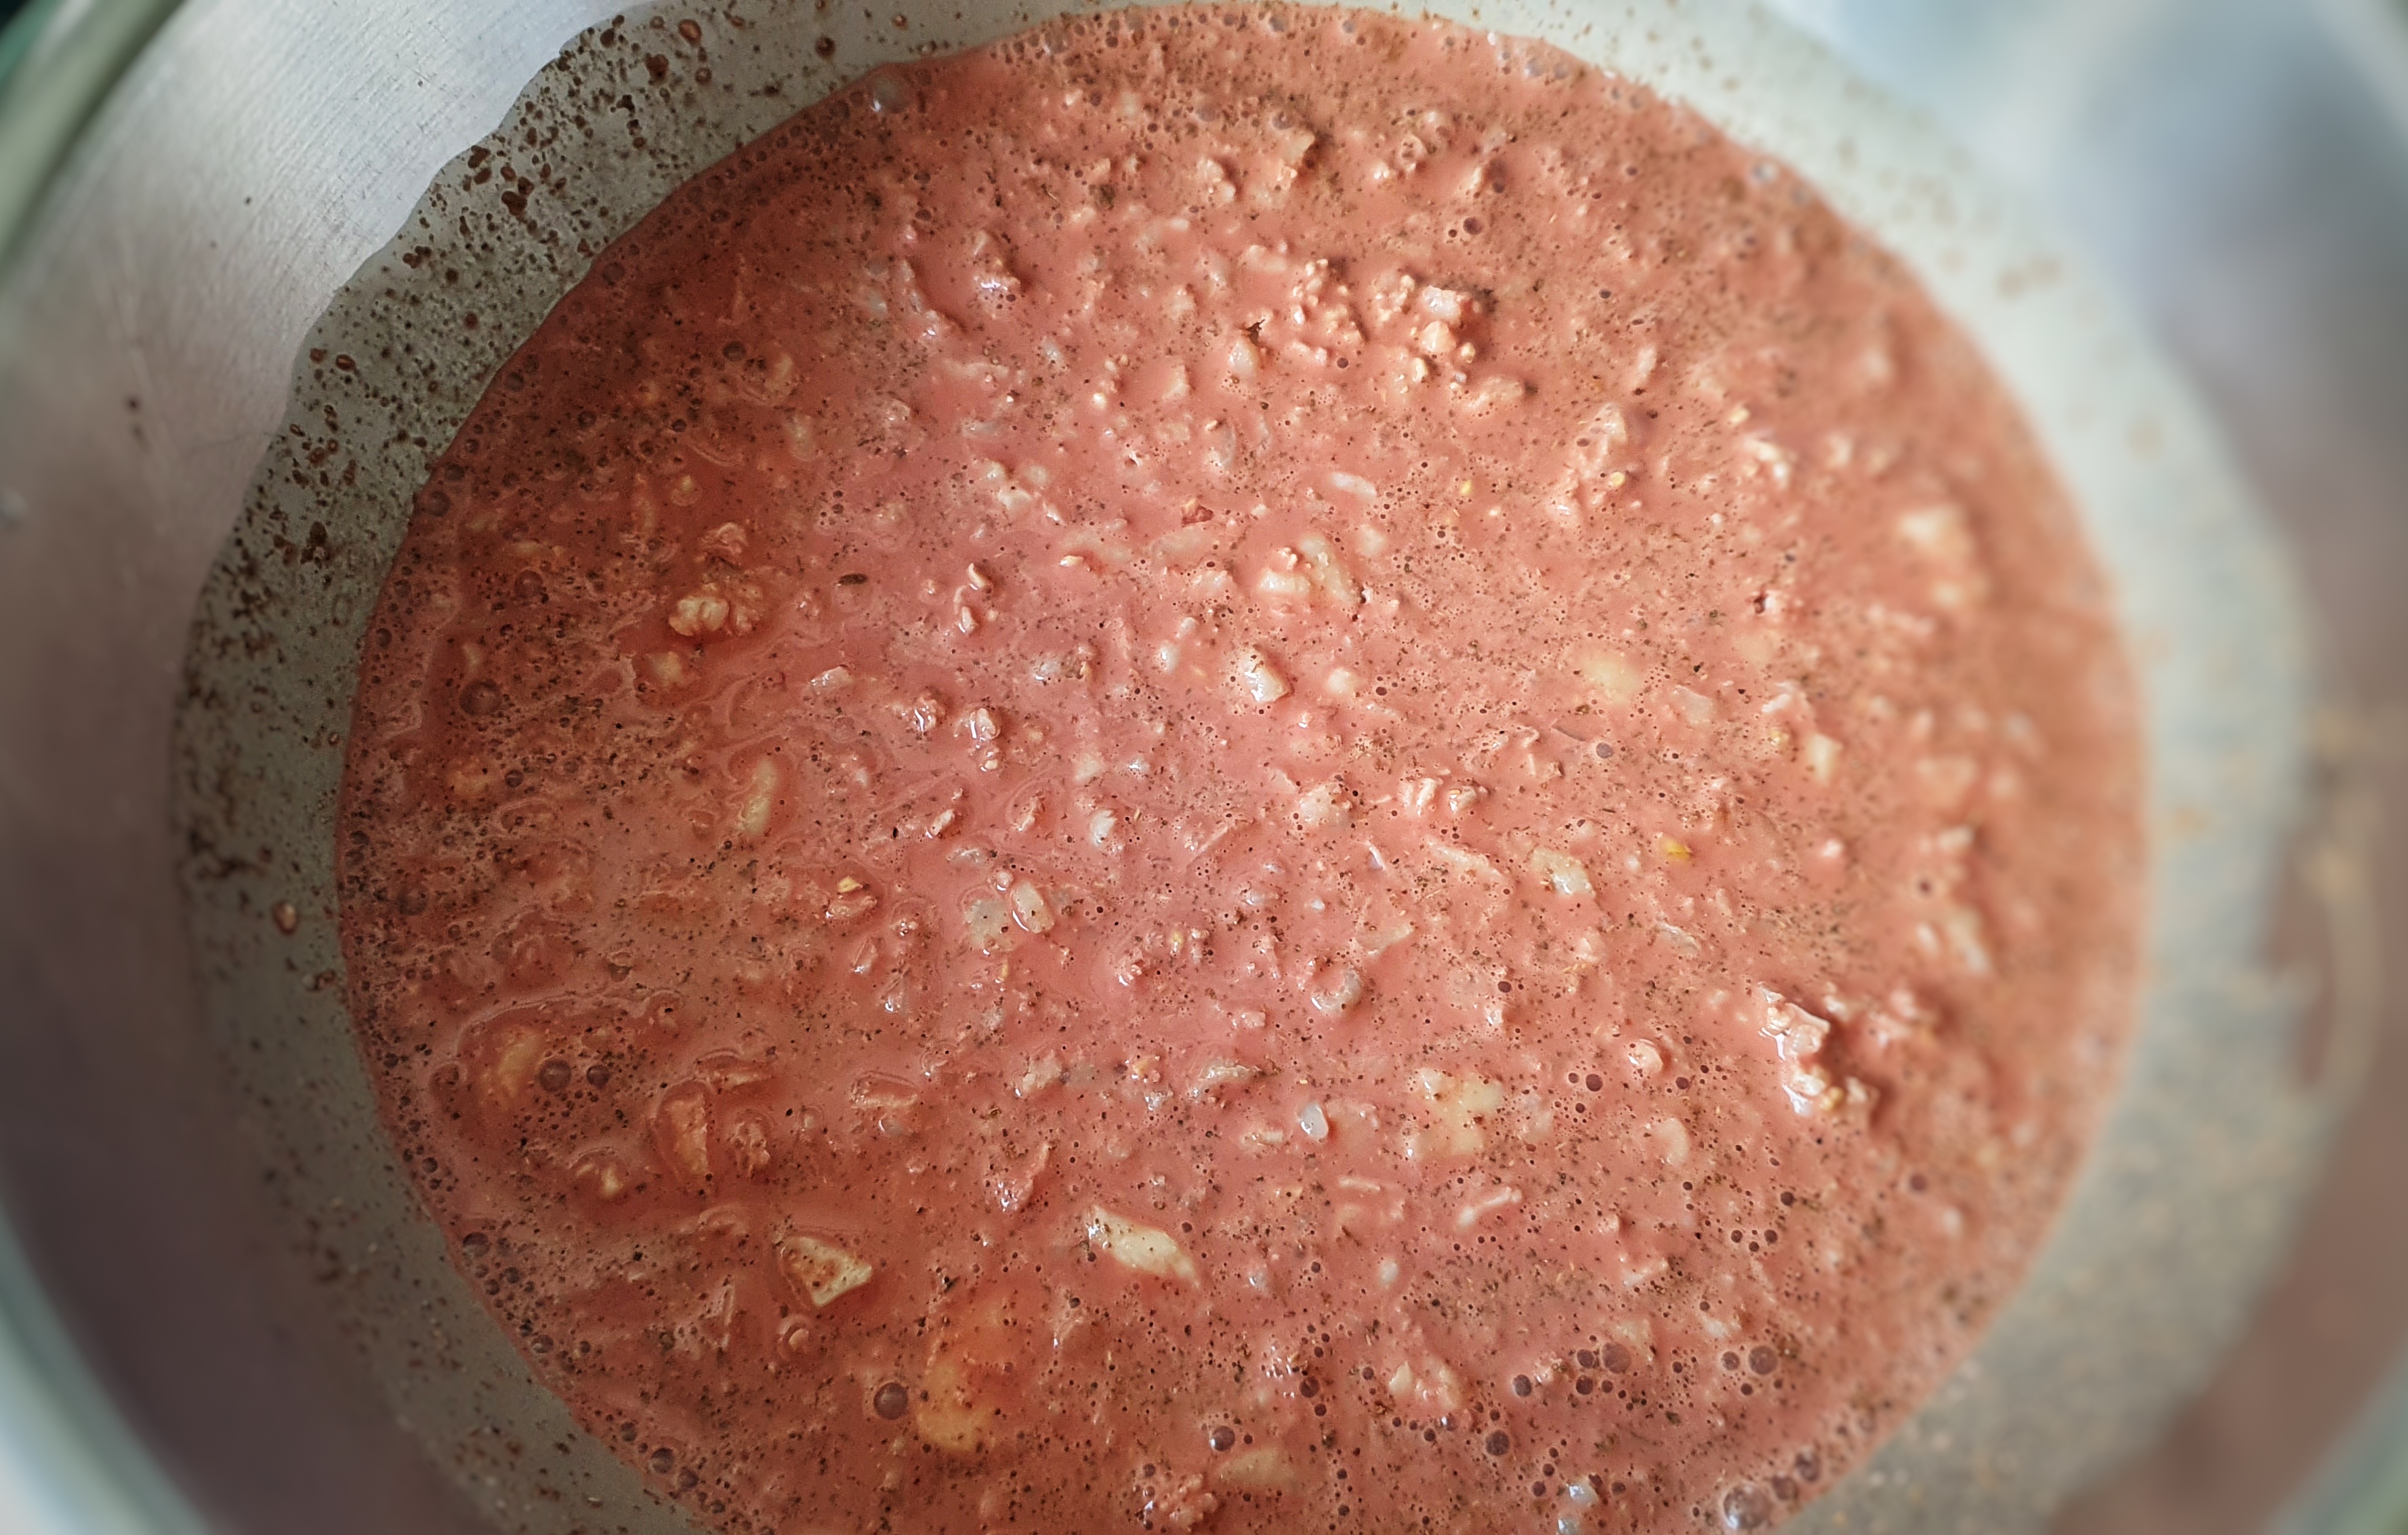
Next day, place all of the ingredients (aside from the casings, if using) in a large mixing bowl. Combine and allow everything to mingle, dissolve and absorb; around an hour – or more if you have the time.[6]
Once everything has had the chance to macerate and absorb, it is time to assemble the puddings. I used my sausage stuffer funnel from the Kitchen Aid and attached a length of pork casing onto it, then secured it with some string and knotted the end. Then I set about filling the casings, a spoon at a time, letting the skins naturally fill and fall into a bowl. Then I tied a link off with some string, making sure the casing wasn’t full and there were no obvious air bubbles. The lengths of the puddings were around 20 cm – though I wasn’t very consistent. In retrospect, I would recommend using beef casings tied to a wide-mouthed jam funnel, much easier to fill and no constant tearing.
Once all of the mixture is used up, get a large pot of water to a good simmer and gingerly plop them in a few at a time. Three was a good number. Keep the water at a gentle simmer and arm yourself with a pin and pop any bubbles that appear in the cooking puds, lest they burst. They will take around 20 minutes to cook, and you must watch them like a hawk, pin poised and ready to pop. You can tell they are done when the liquid that comes out of a freshly-pricked pudding is clear. If using beef casings, they will take 30 to 35 minutes to cook.
Carefully remove the puddings and either hang them up or lay them on a cooling rack to dry for a few hours before placing them in the refrigerator.
You can avoid all of this faff by baking the mixture in large loaf tins sat in a bain-marie for around 1½ hours at 160°C.[7]
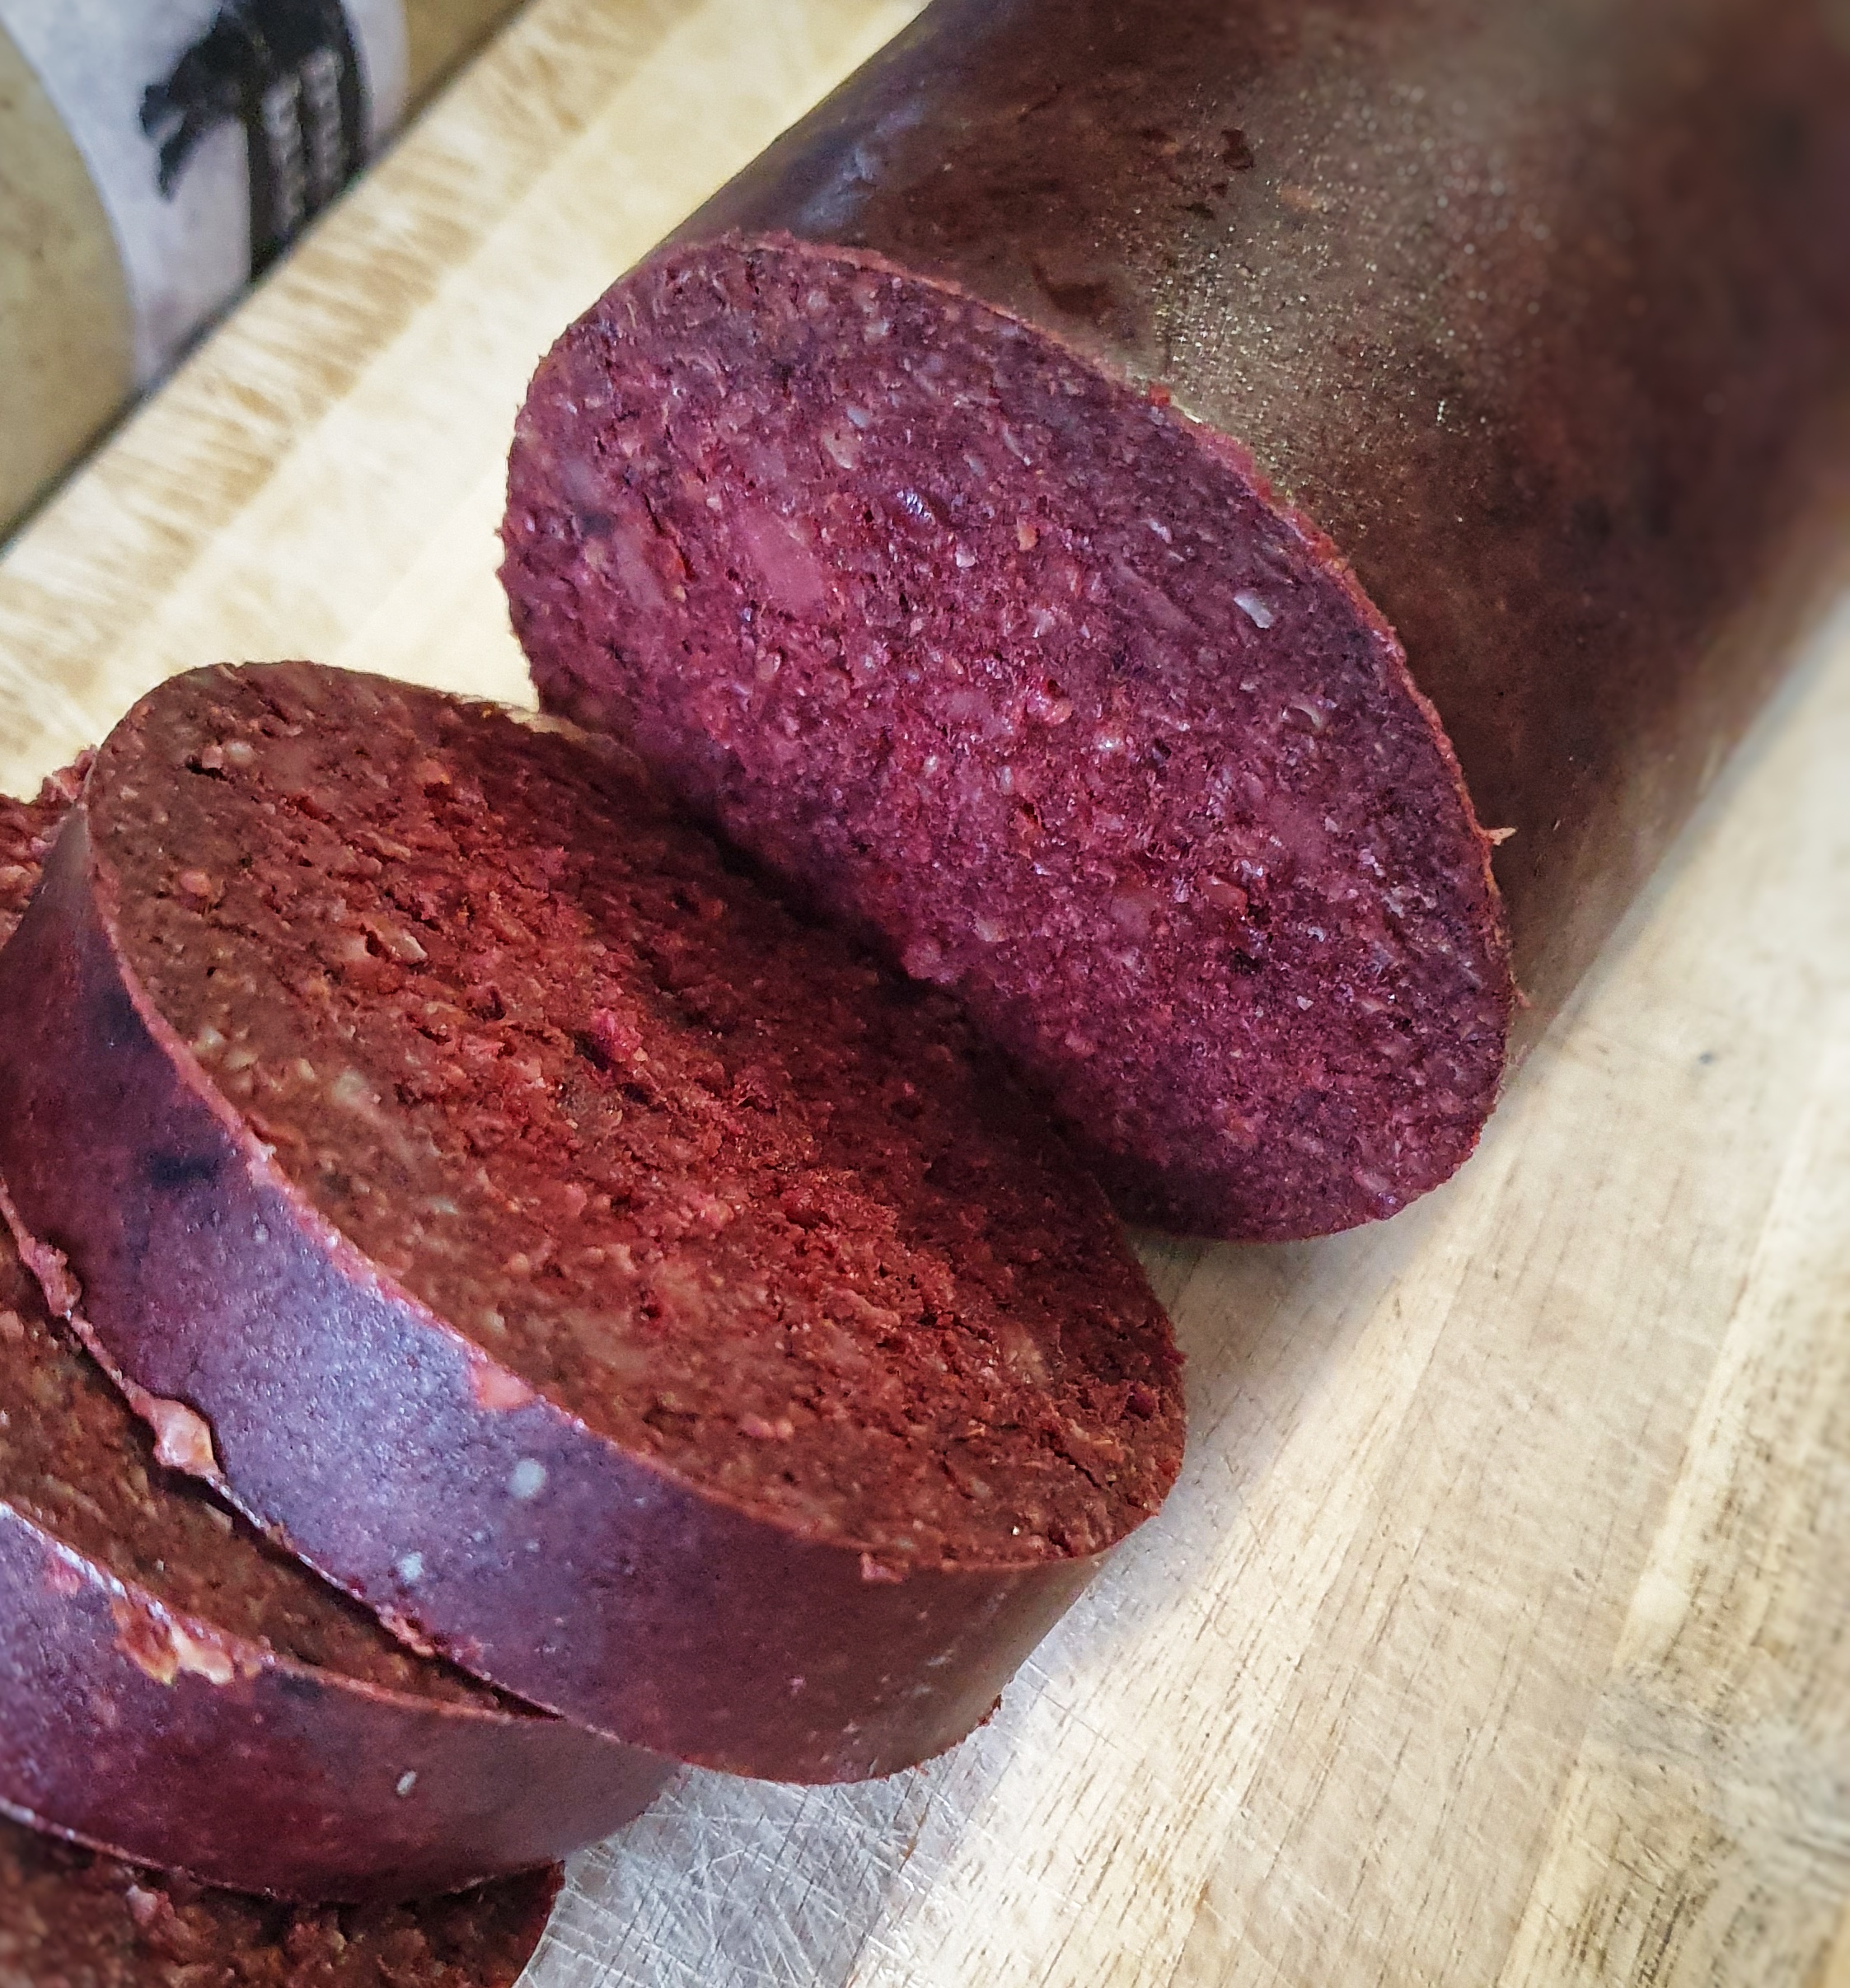
The finished black puddings!
Notes
[1] Dawson, T. (1596). The Good Housewife’s Jewel (1996 Edition). Southover Press.
[2] Digby, K. (1669). The Closet of Sir Kenelm Digby Opened (1997 reprint) (J. Stevenson & P. Davidson, Eds.). Prospect Books.
[3] May, R. (2012). The Accomplisht Cook (1660/85) (A. Davidson, M. Bell, & T. Jaine, Eds.; 1685th ed.). Prospect Books.
[4] Fearnley-Whittingstall, H. (2001). The River Cottage Cookbook. Collins; Henderson, F. (2012). The Complete Nose to Tail: A Kind of British Cooking. Bloomsbury; Ysewijn, R. (2015). Pride and Pudding: The History of British Puddings Savoury and Sweet. Murdoch Books.
[6] Note: Looking back on these initial stages, it would have been much better to soak the oats in the blood overnight, mix everything together in the morning, let everything meld and mingle for a couple of hours, and then add enough milk to make a mixture of a spoonable porridge consistency. We live and learn.
[7] Note: I haven’t tested this method; these instructions have been extrapolated from the Fergus Henderson recipe for blood cake in Henderson (2012).
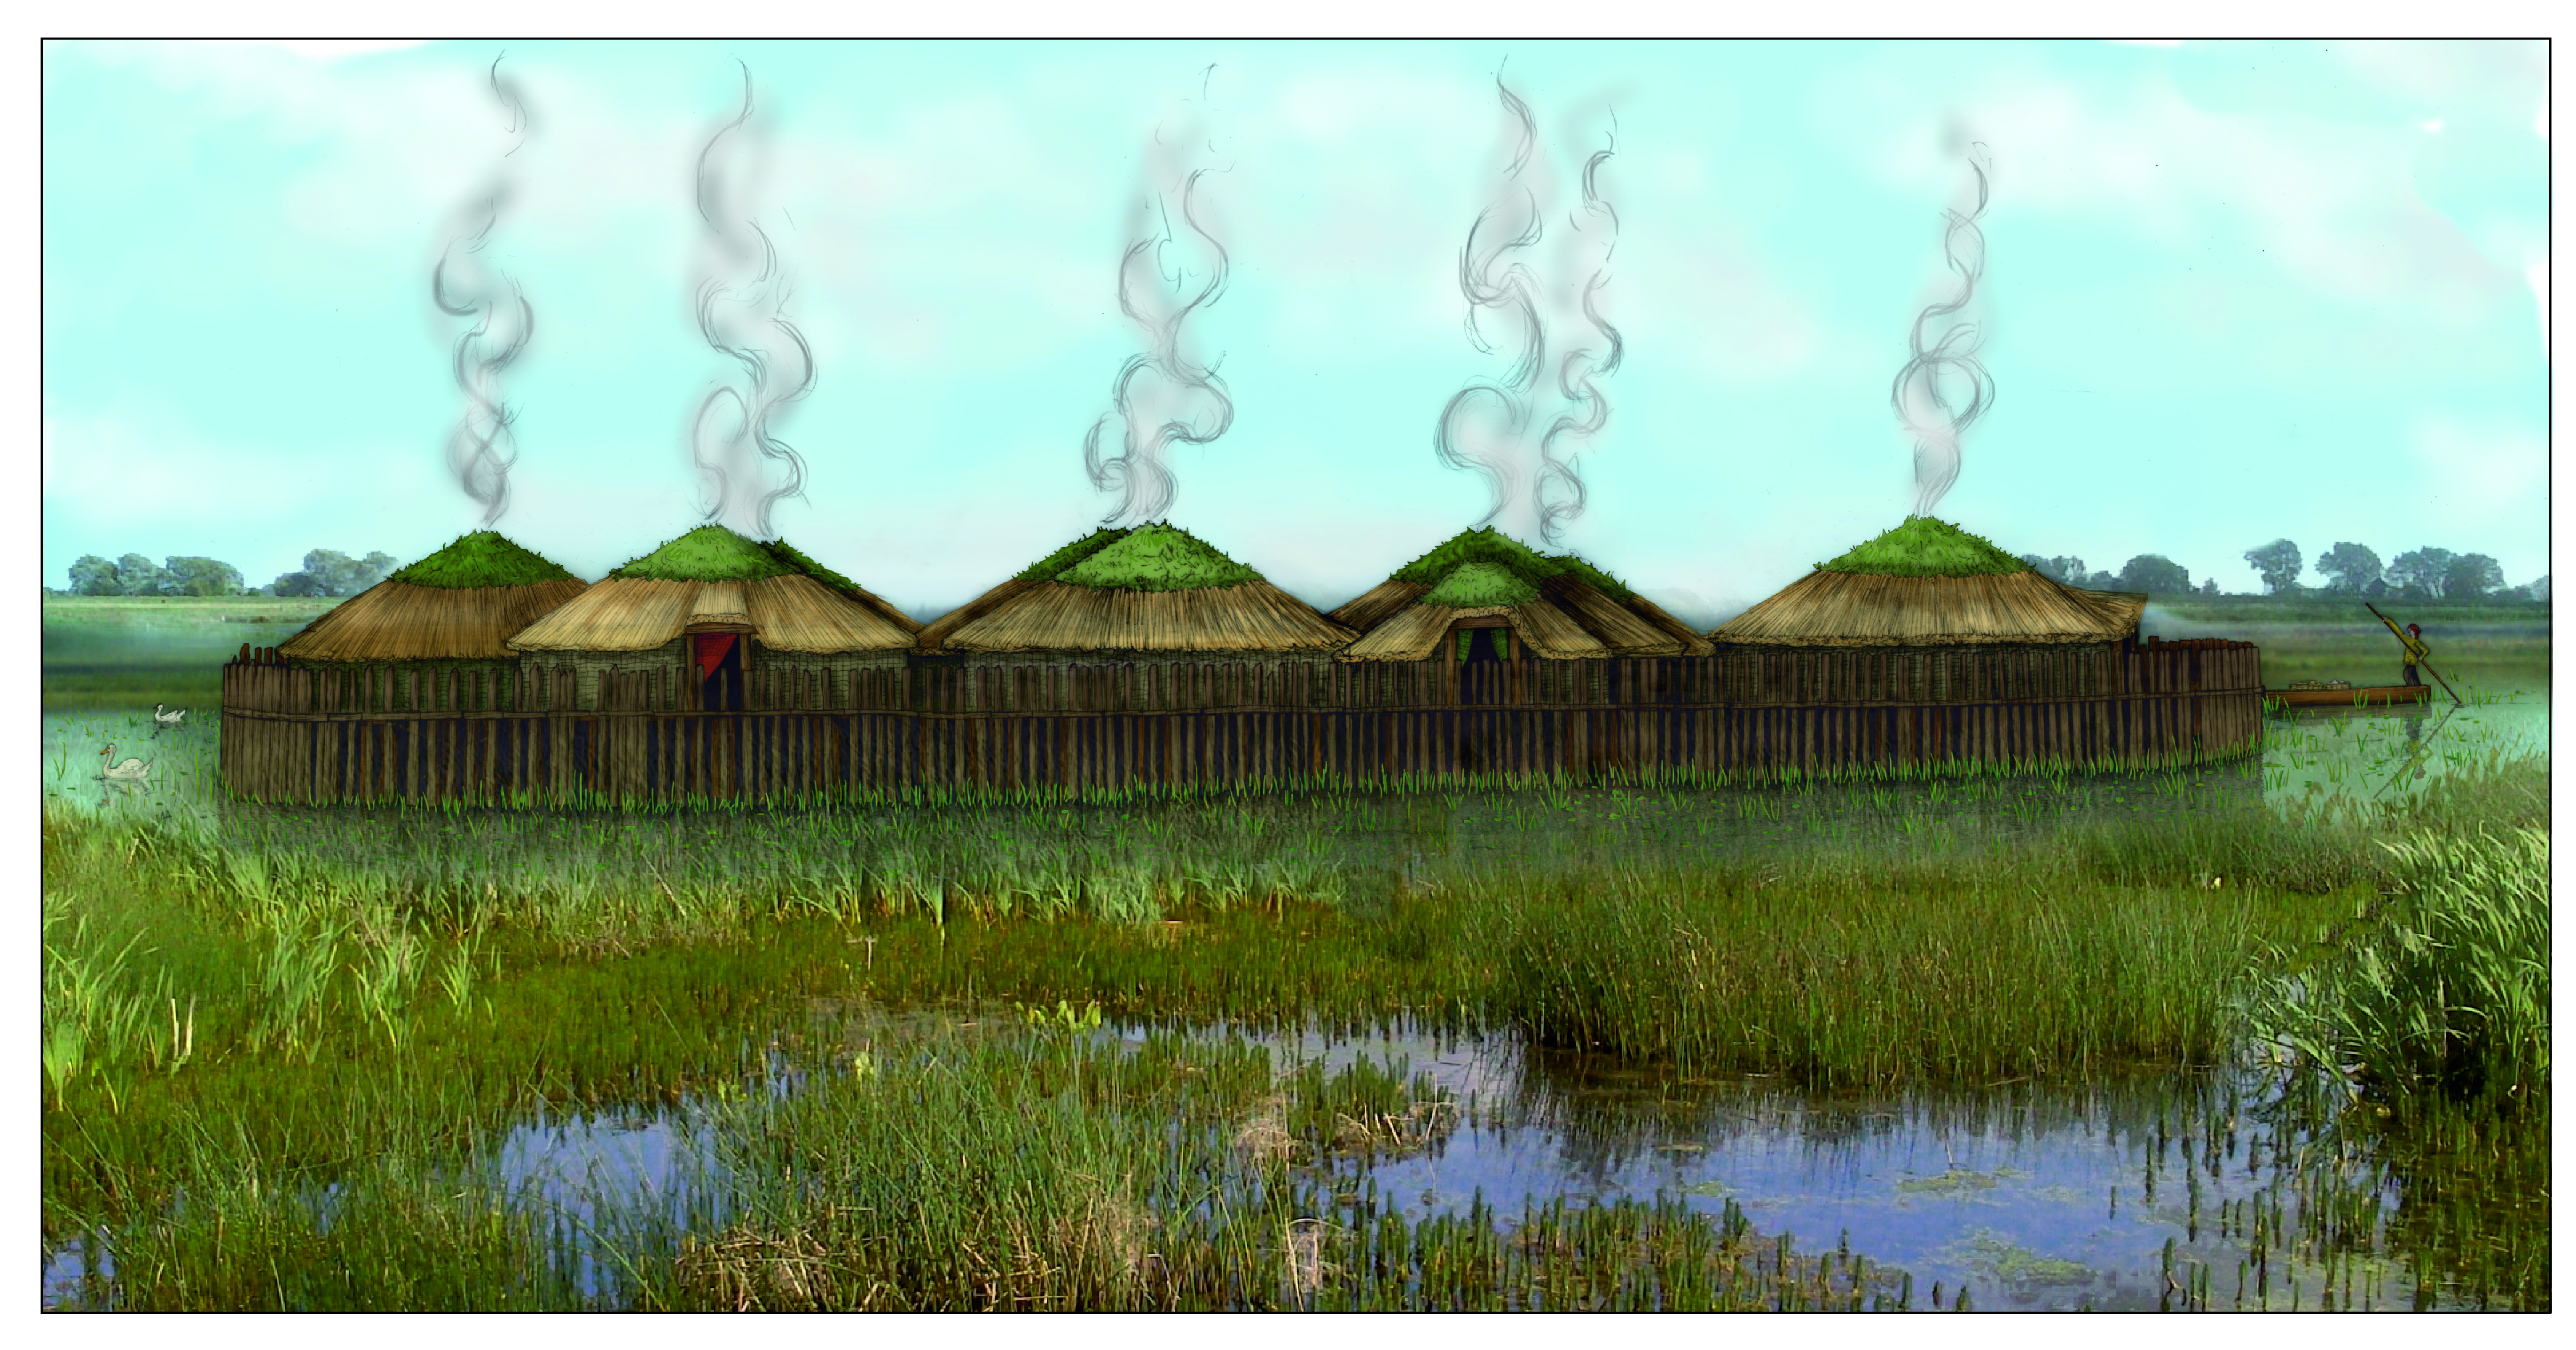
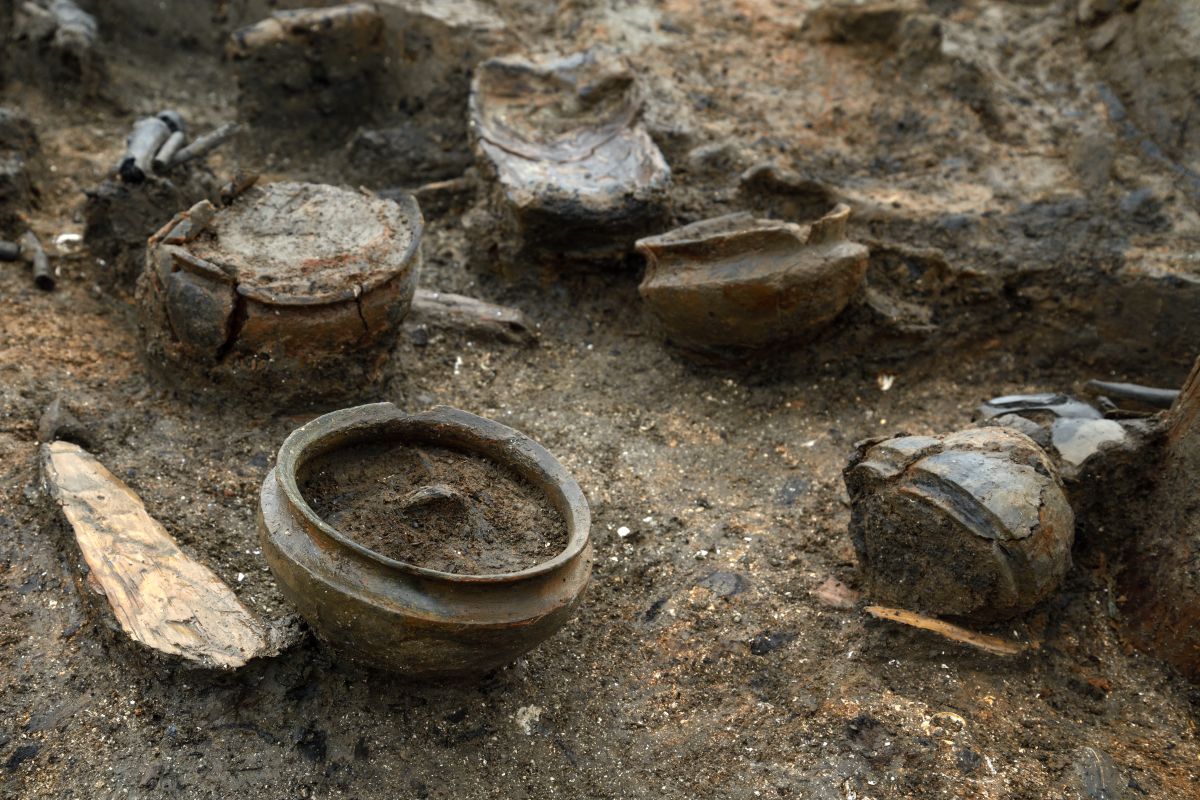
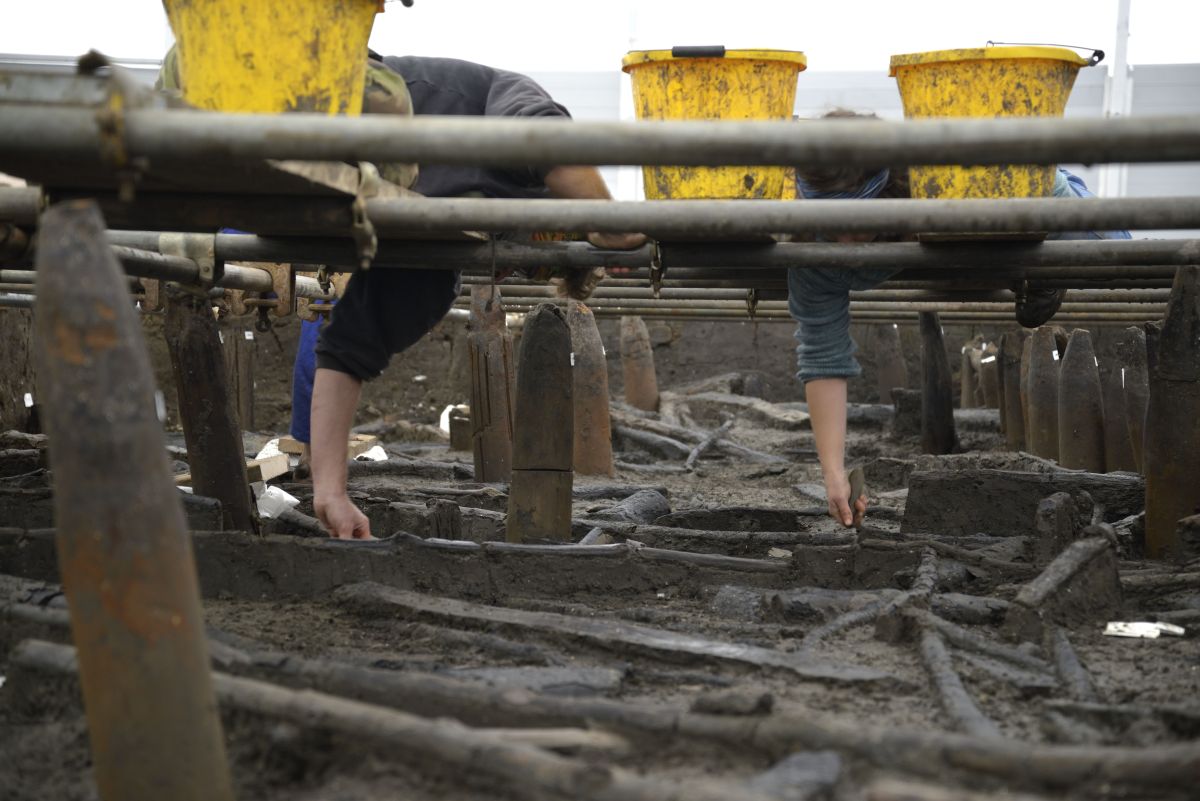
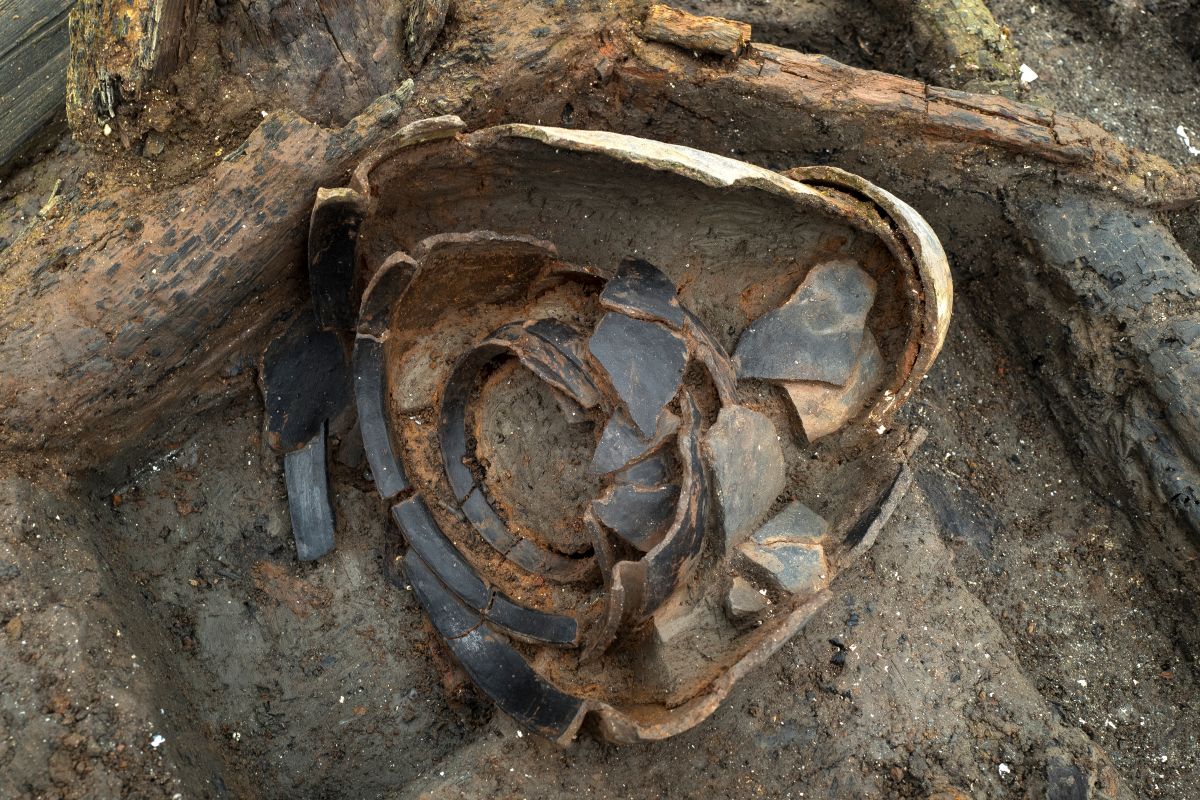
Photo credits: top left: Cambridge Archaeological Unit; bottom right: Cambridge Archaeological Unit using a foreground photographic image supplied by S. Craythorne/Lincolnshire Wildlife Trust
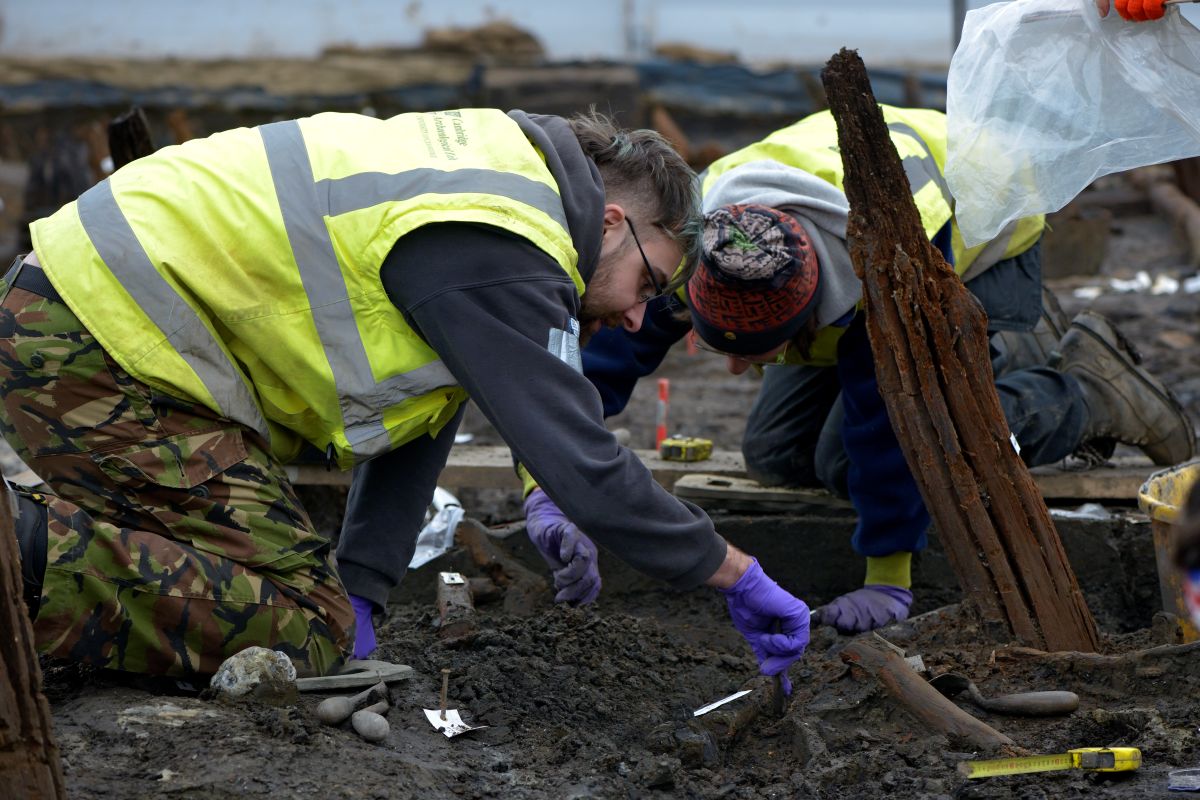
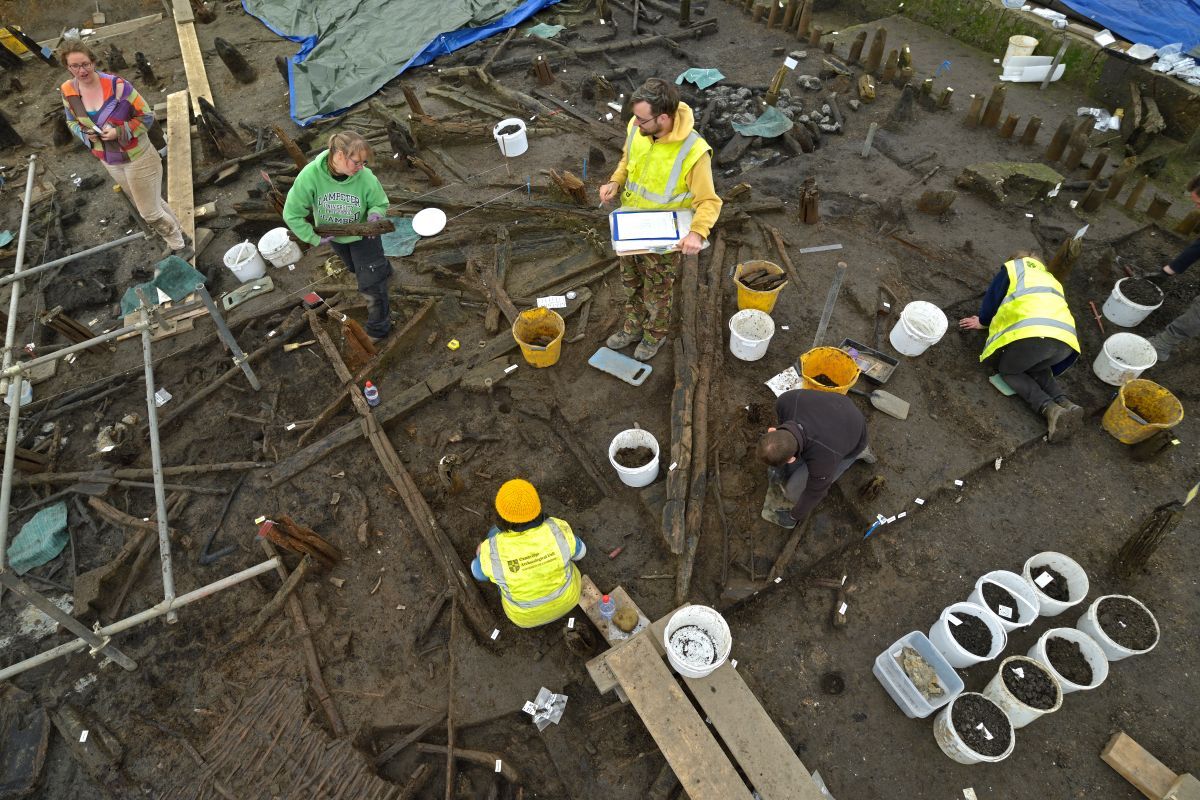
My guests today are archaeologists Chris Wakefield from the Cambridge Archaeological Unit of Cambridge University Rachel Ballantyne from McDonald Institute for Archaeological Research, and they are here to tell me about an absolutely amazing site close to Peterborough that tell us a huge amount about daily life in a late Bronze Age settlement. Prepare to have your minds blown!
We talk about the unique circumstances of how and why the site is so well preserved, kitchen clutter, animal husbandry, querns, frumenty, pike sushi, and whether the English’s love of mustard goes back 3 millennia – among many other things
Those listening to the secret podcast: you get 20 minutes of bonus material that includes the importance of foraging, the evidence for fermentation, Bronze Age recipes, the uses of the whole cereal plant and more!
Available on all podcast apps, just search for ‘The British Food History Podcast’ and hit follow. Or stream via this Spottily embed:
A Must Farm side-view reconstruction (pic: Cambridge Archaeological Unit using a foreground photographic image supplied by S. Craythorne/Lincolnshire Wildlife Trust)
Follow Cambridge Archaeological Unit on Social Media
Facebook: @cambridgearchaeologicalunit
BlueSky: @cambridgearch.bsky.social
Instagram: @cambridgearchaeologicalunit
Follow Cambridge University Department of Archaeology on Social Media
Facebook: @archaeologycambridge
BlueSky: @cam-archaeology.bsky.social
Instagram: @ cambridge_archaeology
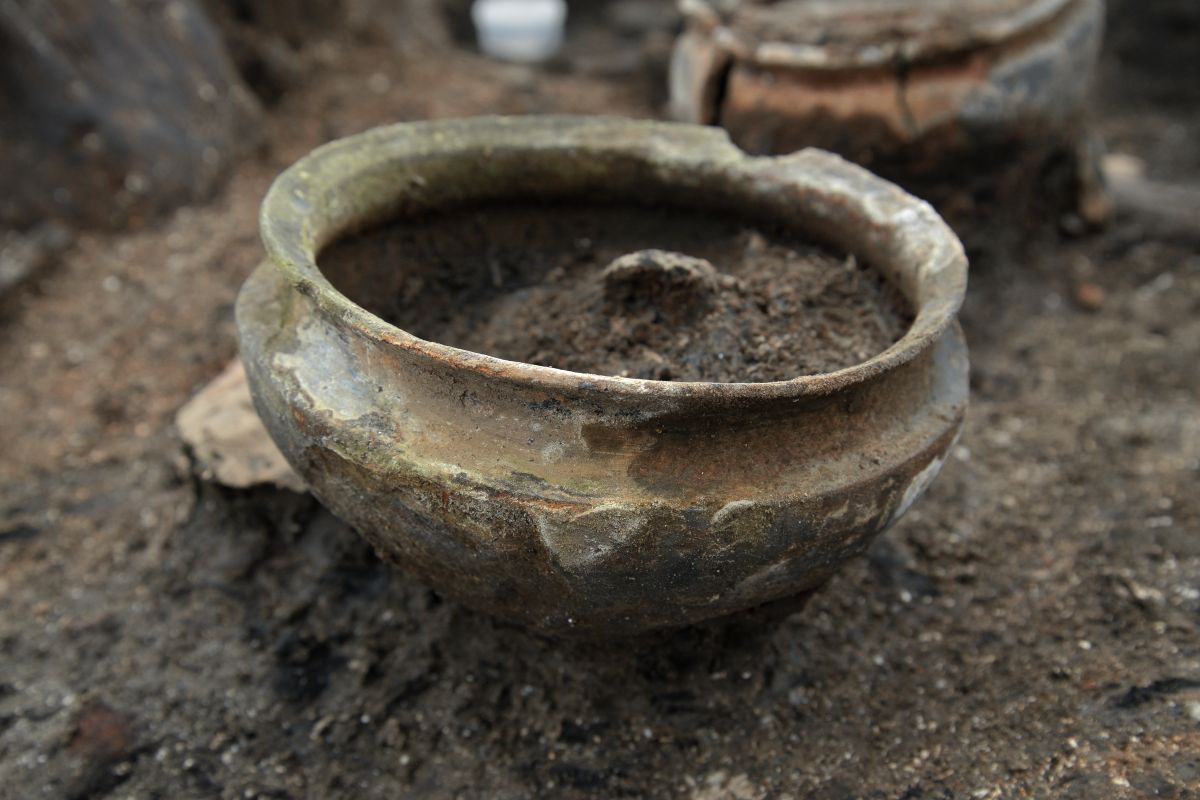
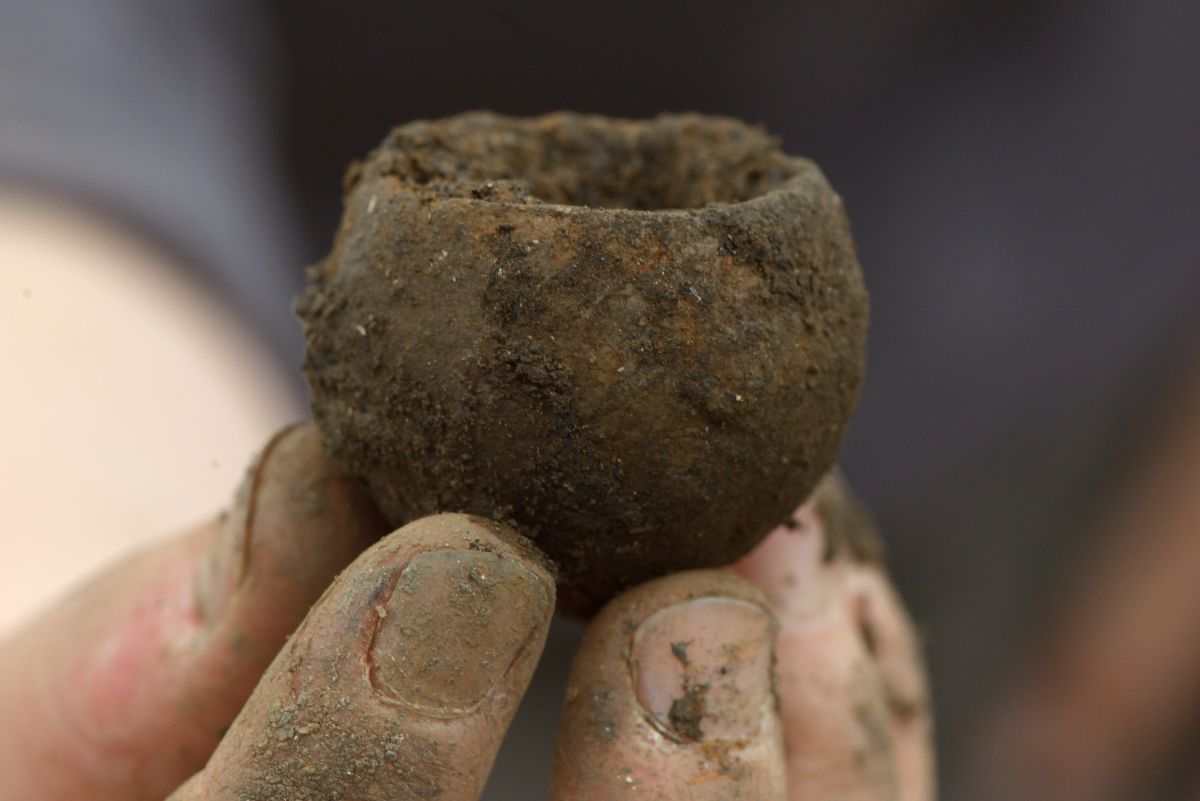
Area of potsExcavation and scaffoldExcavating the site Arial view of excavationPot in situA tiny pot!The tiny pot in situStacked potsSome images of the excavation and finds (all images by Cambridge Archaeological Unit)
Remember: Fruit Pig are sponsoring the 9th season of the podcast and Grant and Matthew are very kindly giving listeners to the podcast a unique special offer 10% off your order until the end of October 2025 – use the offer code Foodhis in the checkout at their online shop, www.fruitpig.co.uk.
If you can, support the podcast and blogs by becoming a £3 monthly subscriber, and unlock lots of premium content, including bonus blog posts and recipes, access to the easter eggs and the secret podcast, or treat me to a one-off virtual pint or coffee: click here.
Don’t forget, there will be postbag episodes in the future, so if you have any questions or queries about today’s episode, or indeed any episode, or have a question about the history of British food please email me at neil@britishfoodhistory.com, or on twitter and BlueSky @neilbuttery, or Instagram and Threads dr_neil_buttery. My DMs are open.
In my last post I launched the ninth season of The British Food History Podcast with an episode about Black and White Pudding with Matthew Cockin and Grant Harper (aka Fruit Pig). Not only are they the only remaining craft producer of fresh blood black puddings in Britain, but they are very kindly sponsoring this season of the podcast. Their puddings are exceptional, and Matthew and Grant are very kindly giving readers of the blog and listeners of the podcast 10% off at their online shop (www.fruitpig.co.uk) with the offer code Foodhis, so if you can please support them – if we don’t use producers like Fruit Pig, we will lose them, and that would be a terrible shame. It’s also worth checking with your local butcher – my nearest traditional butcher, Littlewood’s in Heaton Moor, Stockport, the very place where I bought the meat for today’s recipe, stock them – so perhaps yours does too (or you could suggest they do if they don’t!). Have a listen to the episode, if you haven’t already:
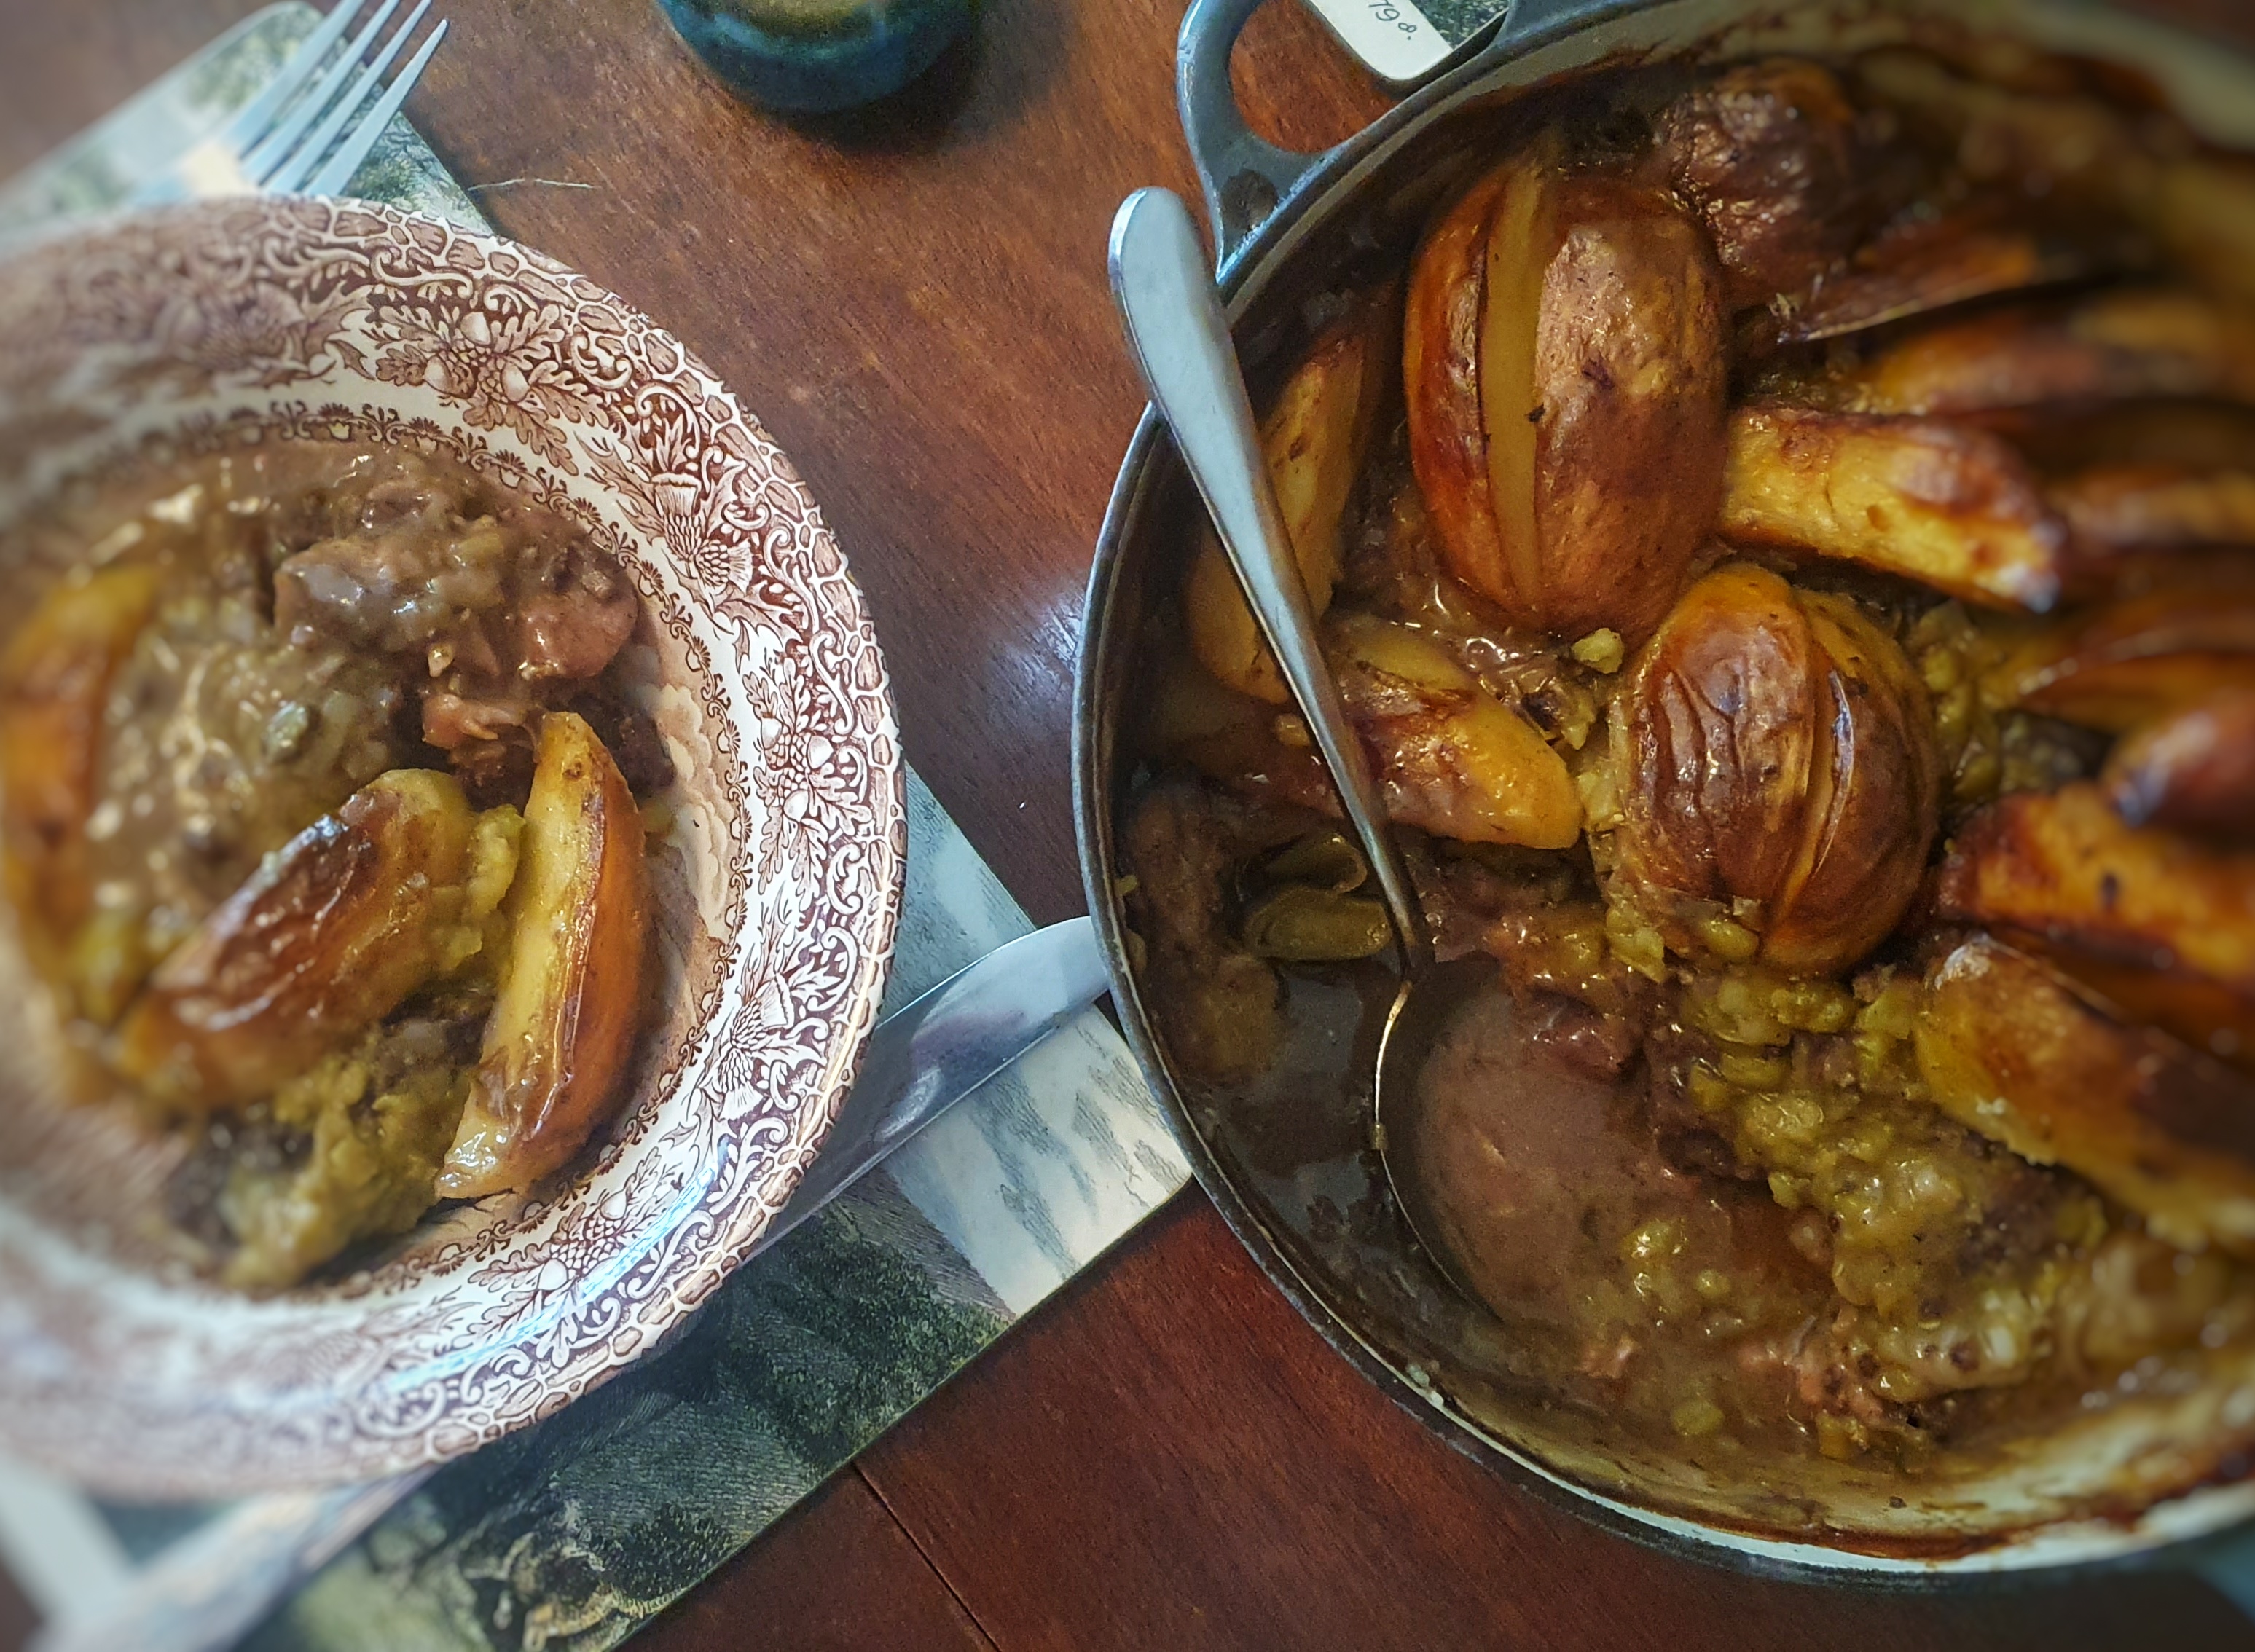
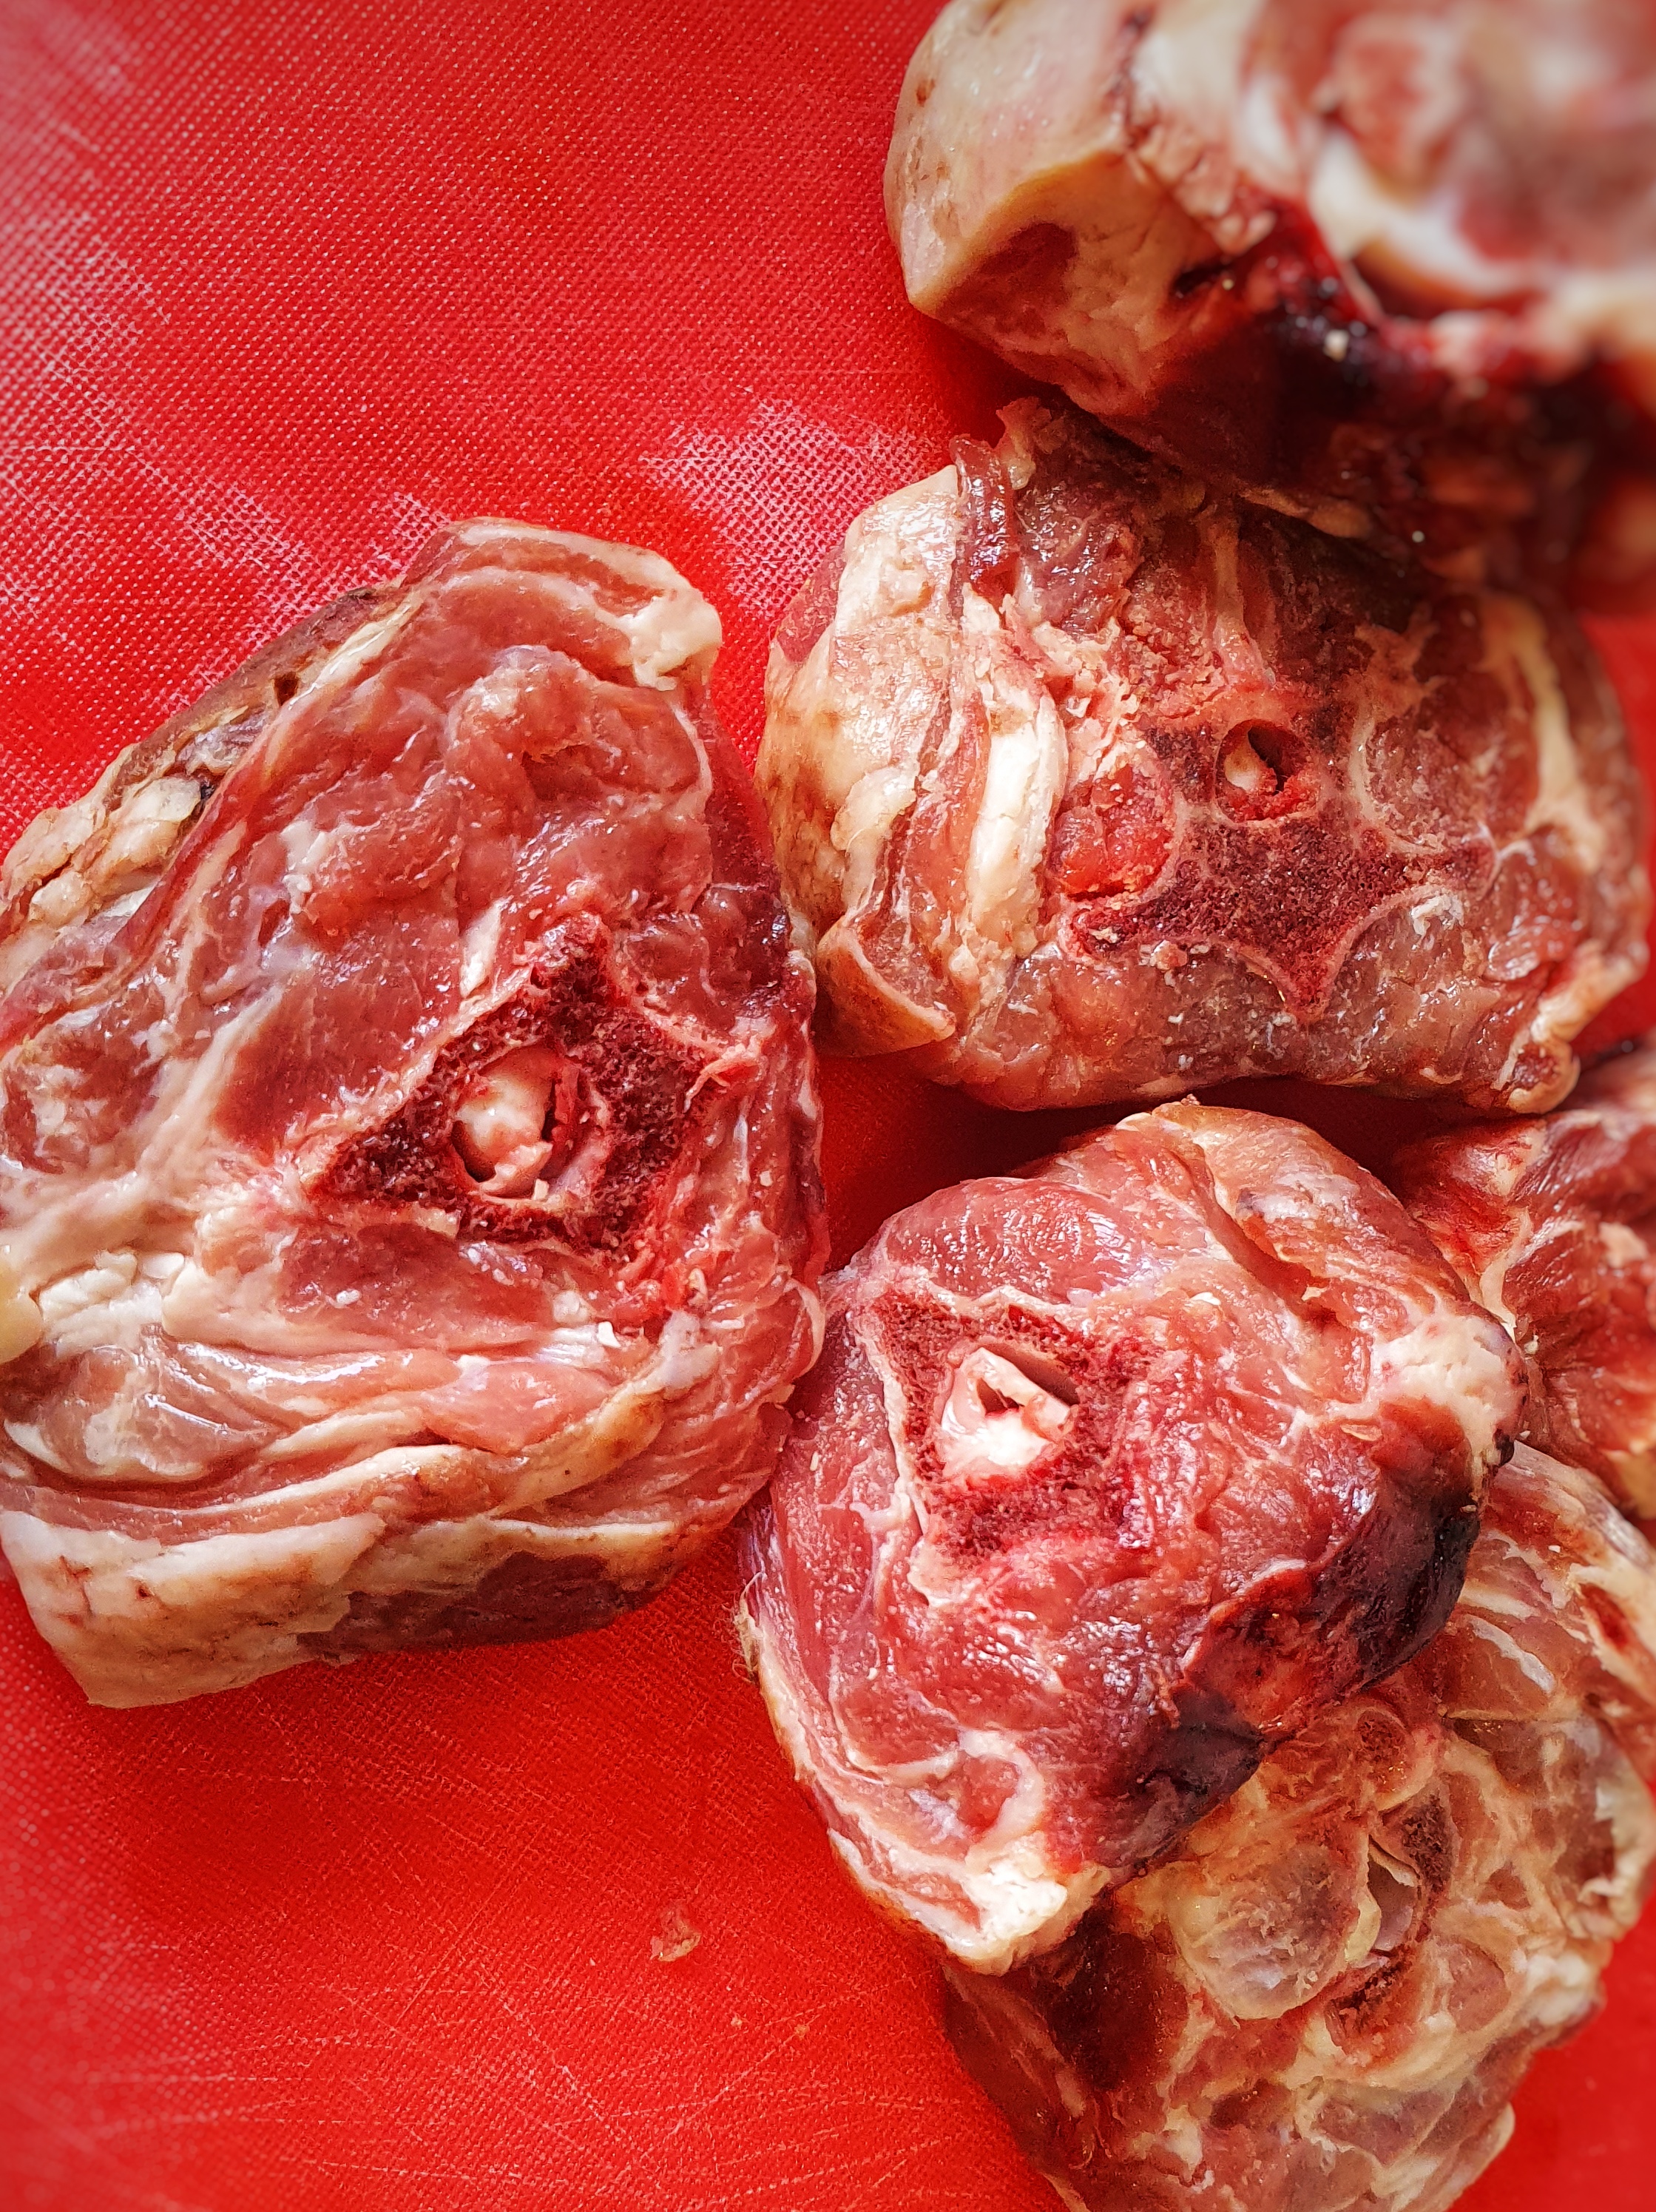
Now, I reckon the vast majority of black pudding eaters enjoy theirs as part of a fried breakfast, but I think we need to remember that black puddings can be eaten for any meal, and in the last post I detailed the old traditional way of eating them with mashed potato and apple sauce. Today I am going one better with this delicious and warming Cumbrian Tatie Pot, a hotpot made of lamb, beef and black pudding, pulses and onions, topped not with nice, neat round slices of potato like a Lancashire hotpot, but quartered floury potatoes.[1] It is important that the cheaper, tougher cuts of beef shin and lamb neck are used, and that the hotpot should be cooked long and slow.
The result is a rich and unctuous hotpot that sticks to your ribs and serves plenty of people; it was on the menu at The Buttery in the first year it was open, and it was very popular.[2] Well-flavoured meat cuts like shin and neck require a similarly good-flavoured black pudding like those made by Fruit Pig.
I first heard about this rather decadent one-pot dish from Jane Grigson in her book English Food.[3] I can find only a few other references to it – a regional dish that seems to be rarely cooked today, yet should, in my opinion, be much more popular than it is.
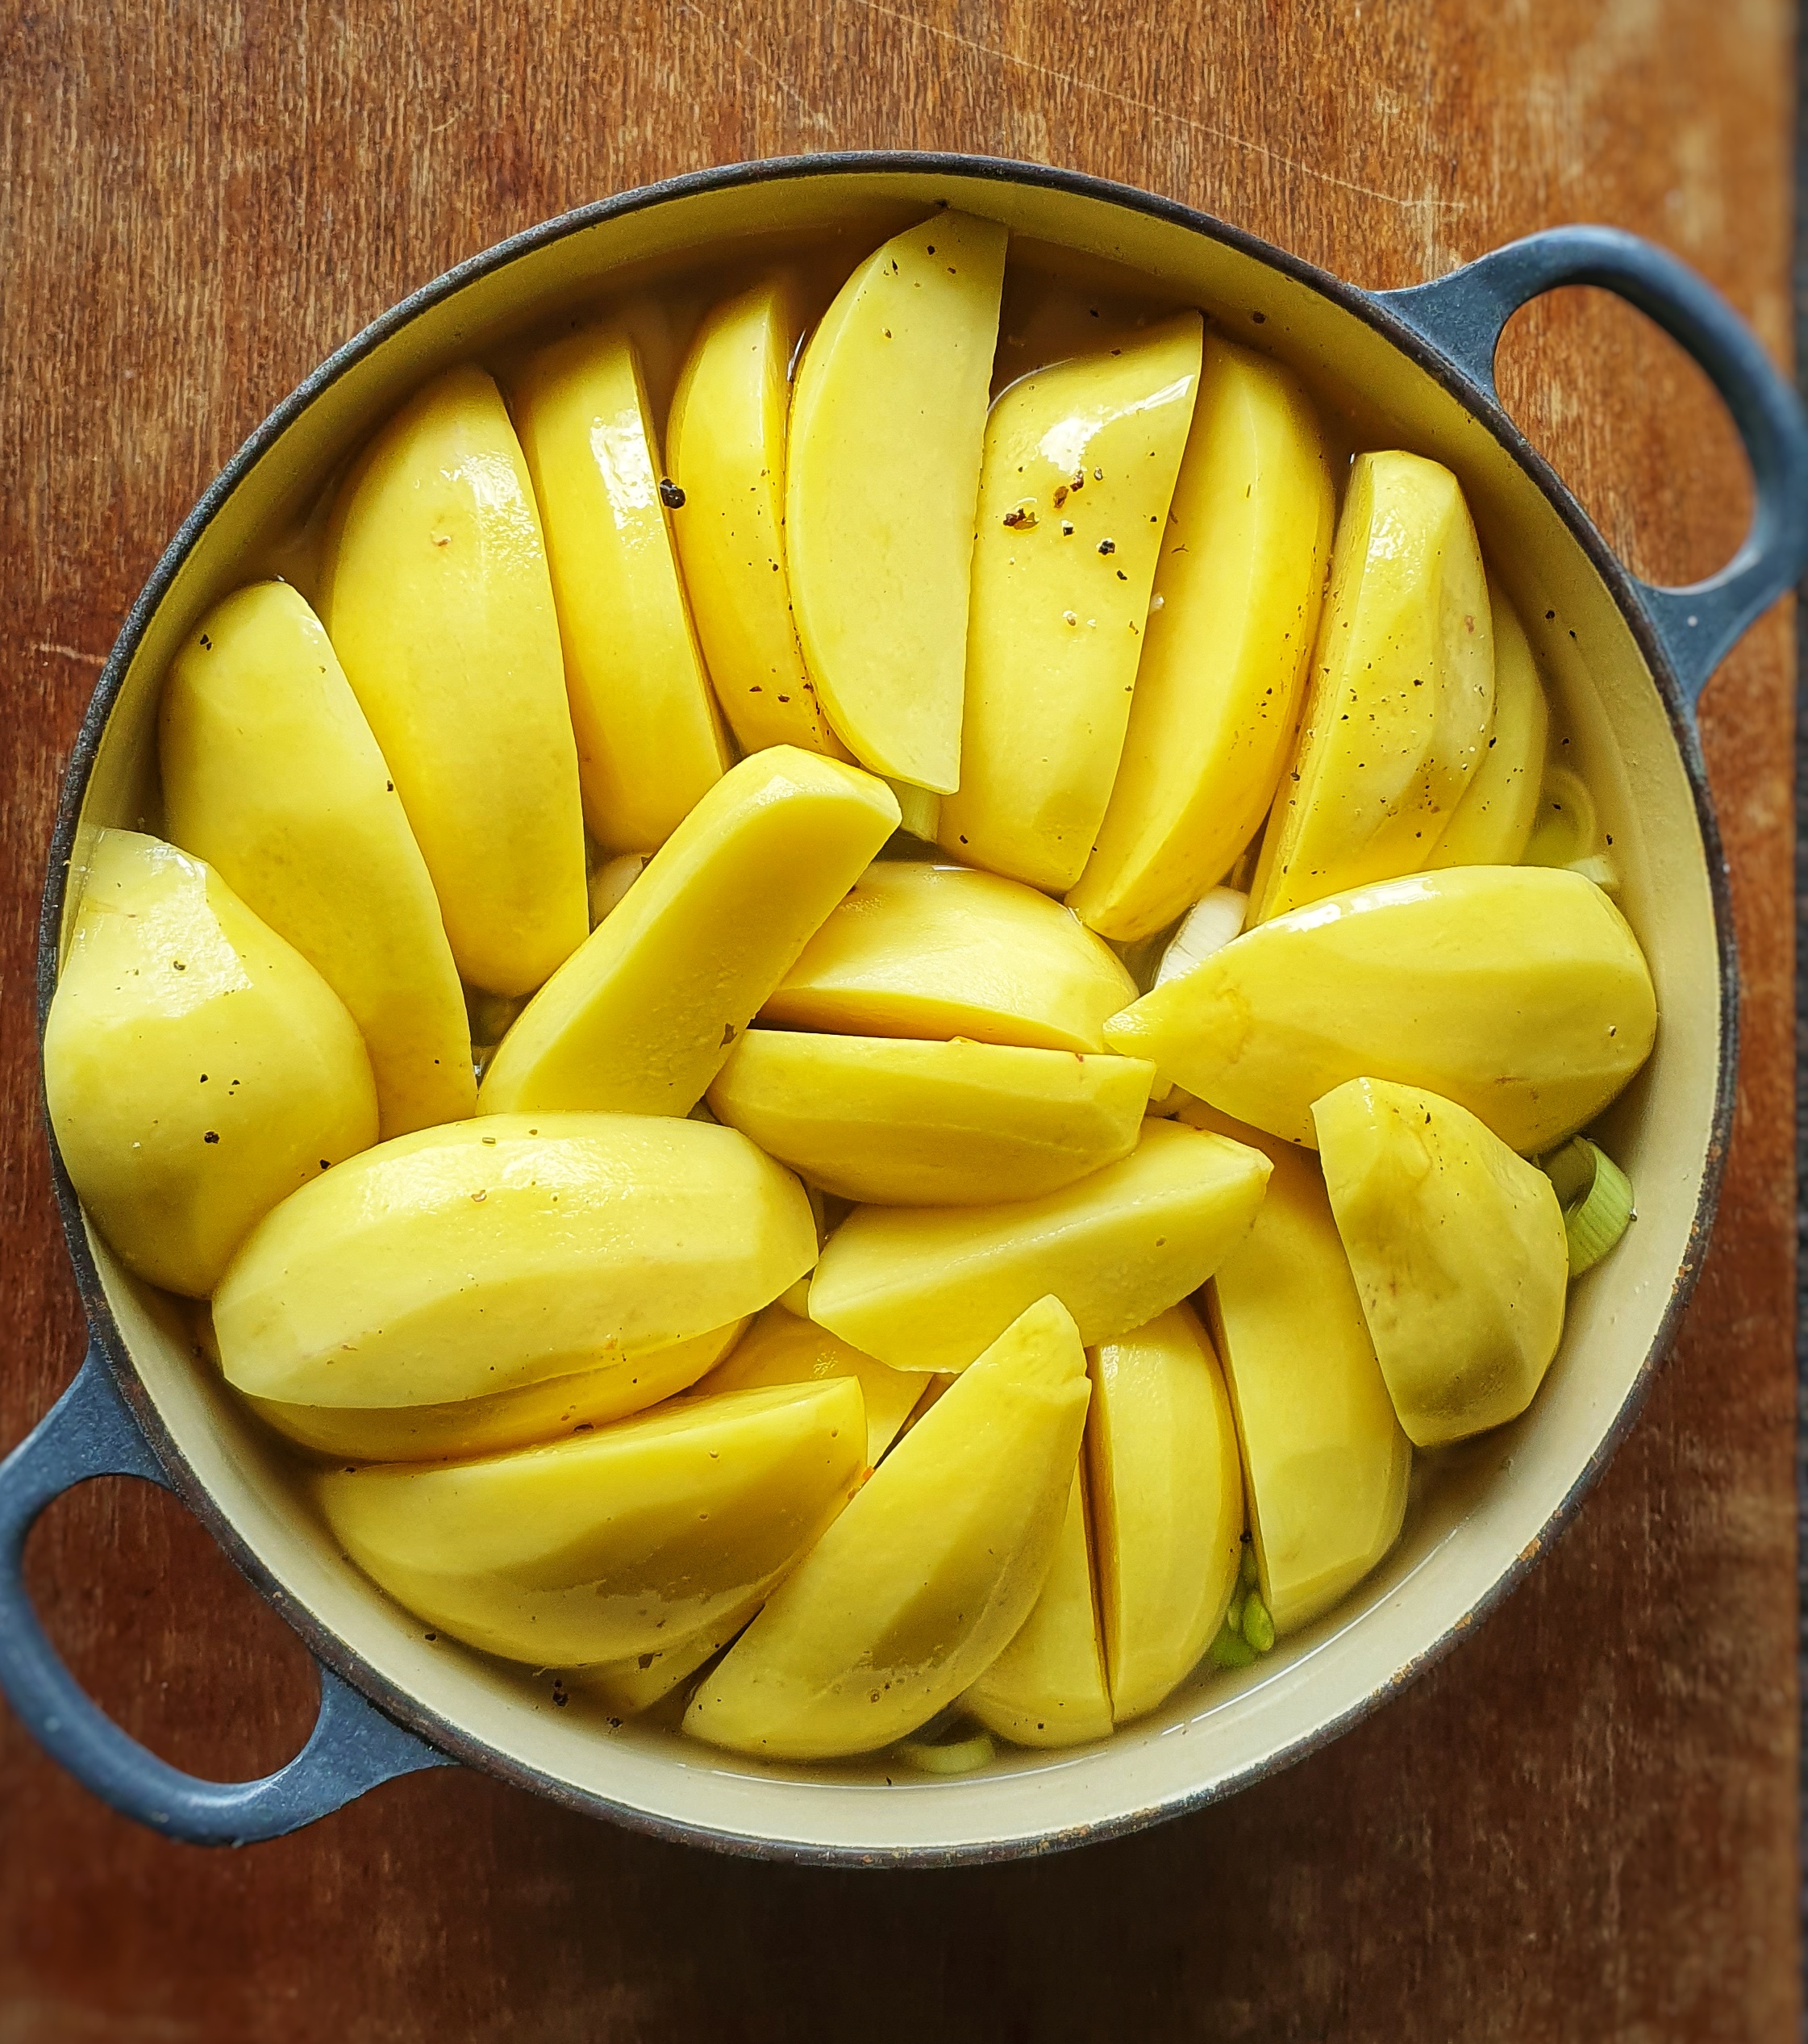
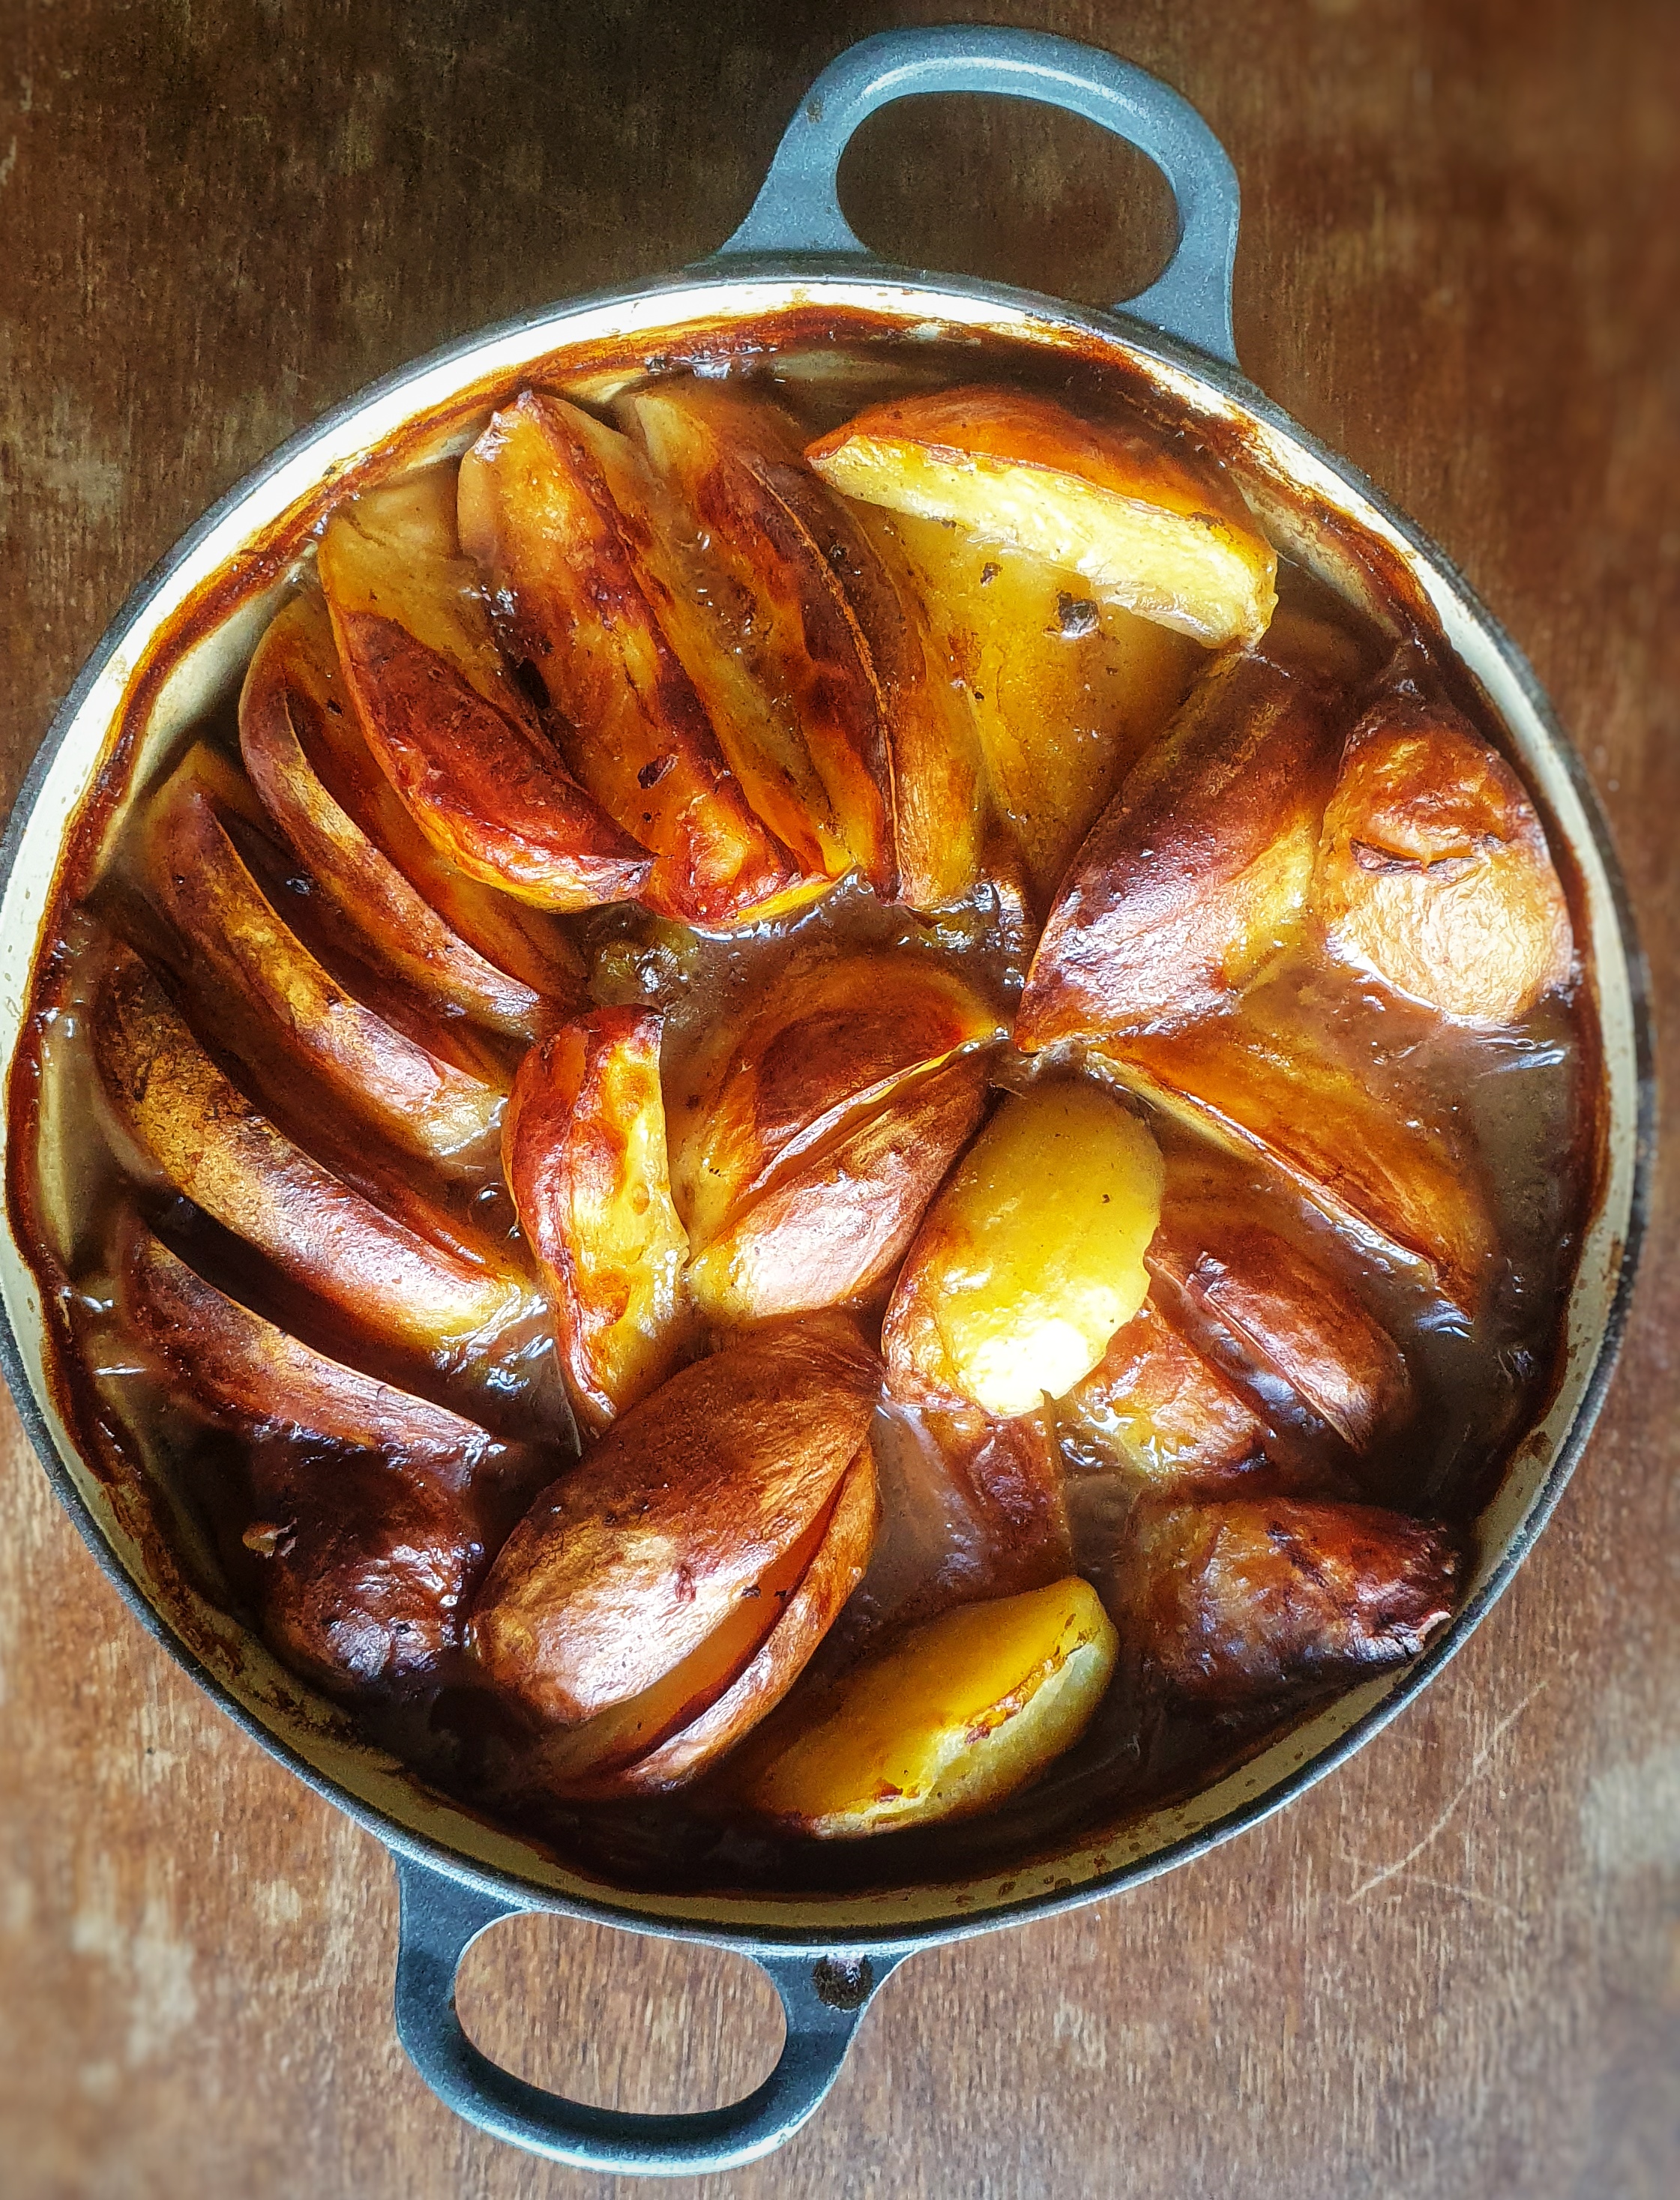
A before and after look at the tatie pot!
Jane was given the recipe from a Mrs Burrows, and in English Food, she tells us that ‘Mrs Burrows said that what interested her was that the tatie pot is one of our few dishes in which different meats are combined, something which is common in mainland Europe.’ Indeed, and assuming your black pudding contains pigs’ blood, then we have three species of mammal altogether; very rare indeed!
Jane Grigson points out that some recipes say that the beef is optional, ‘which it most definitely is not’, she writes, ‘[i]t makes the character of the dish.’ Looking at similar Lakeland recipes available on the Foods of England Project website, there are recipes that contain beef but not lamb (Westmorland tatie pot), and lamb but not beef (Cumberland hotpot). Neither contain pulses, and both have sliced potatoes nicely arranged on top like a Lancashire hotpot.[4] I’m not saying that Jane’s is right and others wrong; it is just interesting to me that everyone has their own correct version of a dish, possibly with slight geographical differences, and usually it’s the one you grew up with, the one that is most familiar to you, that is the ‘right’ one.
If you can, support the podcast and blogs by becoming a £3 monthly subscriber, and unlock lots of premium content, including bonus blog posts and recipes, access to the easter eggs and the secret podcast, or treat me to a one-off virtual pint or coffee: click here.
Shin of beef (L) and lamb neck (R) are the best cuts for this delicious hotpot
Recipe
The long cook time on this hotpot means that you need to keep the liquid levels topped up. You can use stock or water for this – there is nothing wrong with the latter when cooking with these robust cuts of meat.
2 onions, peeled and sliced, or 2 leeks, trimmed, rinsed and thinly sliced
Around 1.2 kg floury potatoes
Around 800 ml hot light beef, lamb, or chicken stock, or water
Soak the pulses in water overnight (or, if you are badly organised, soak in warm water for 4 or 5 hours).
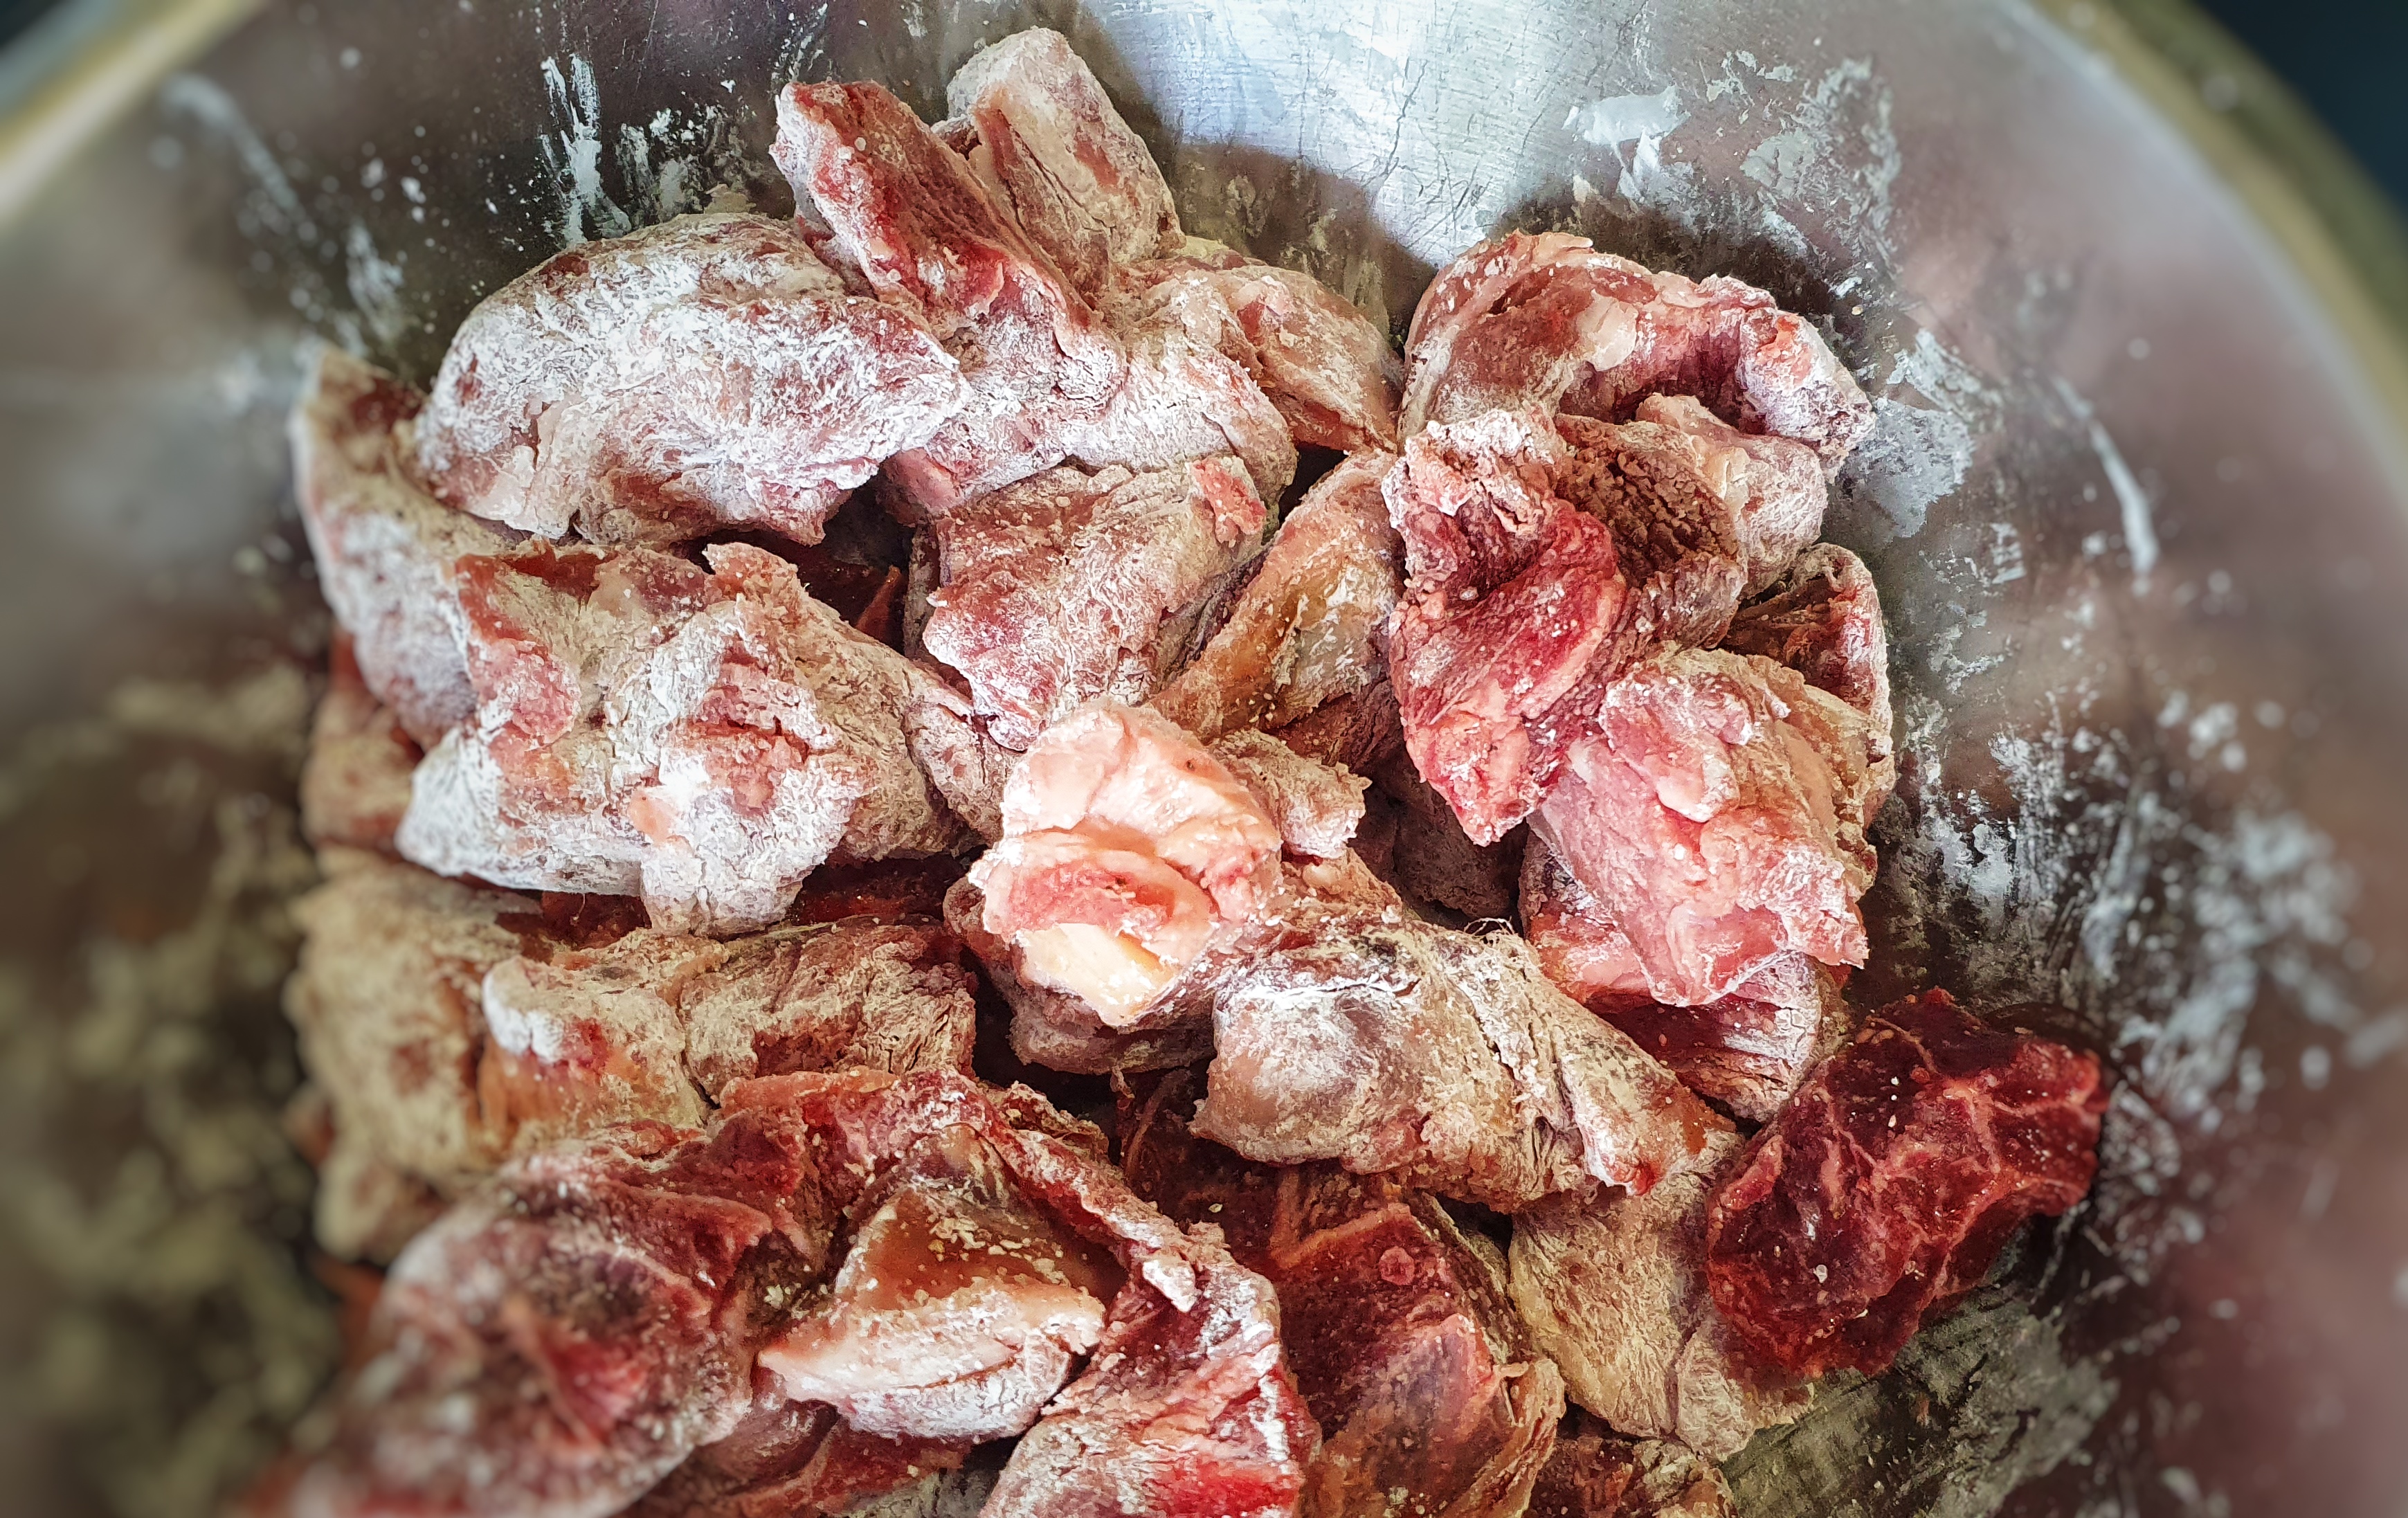
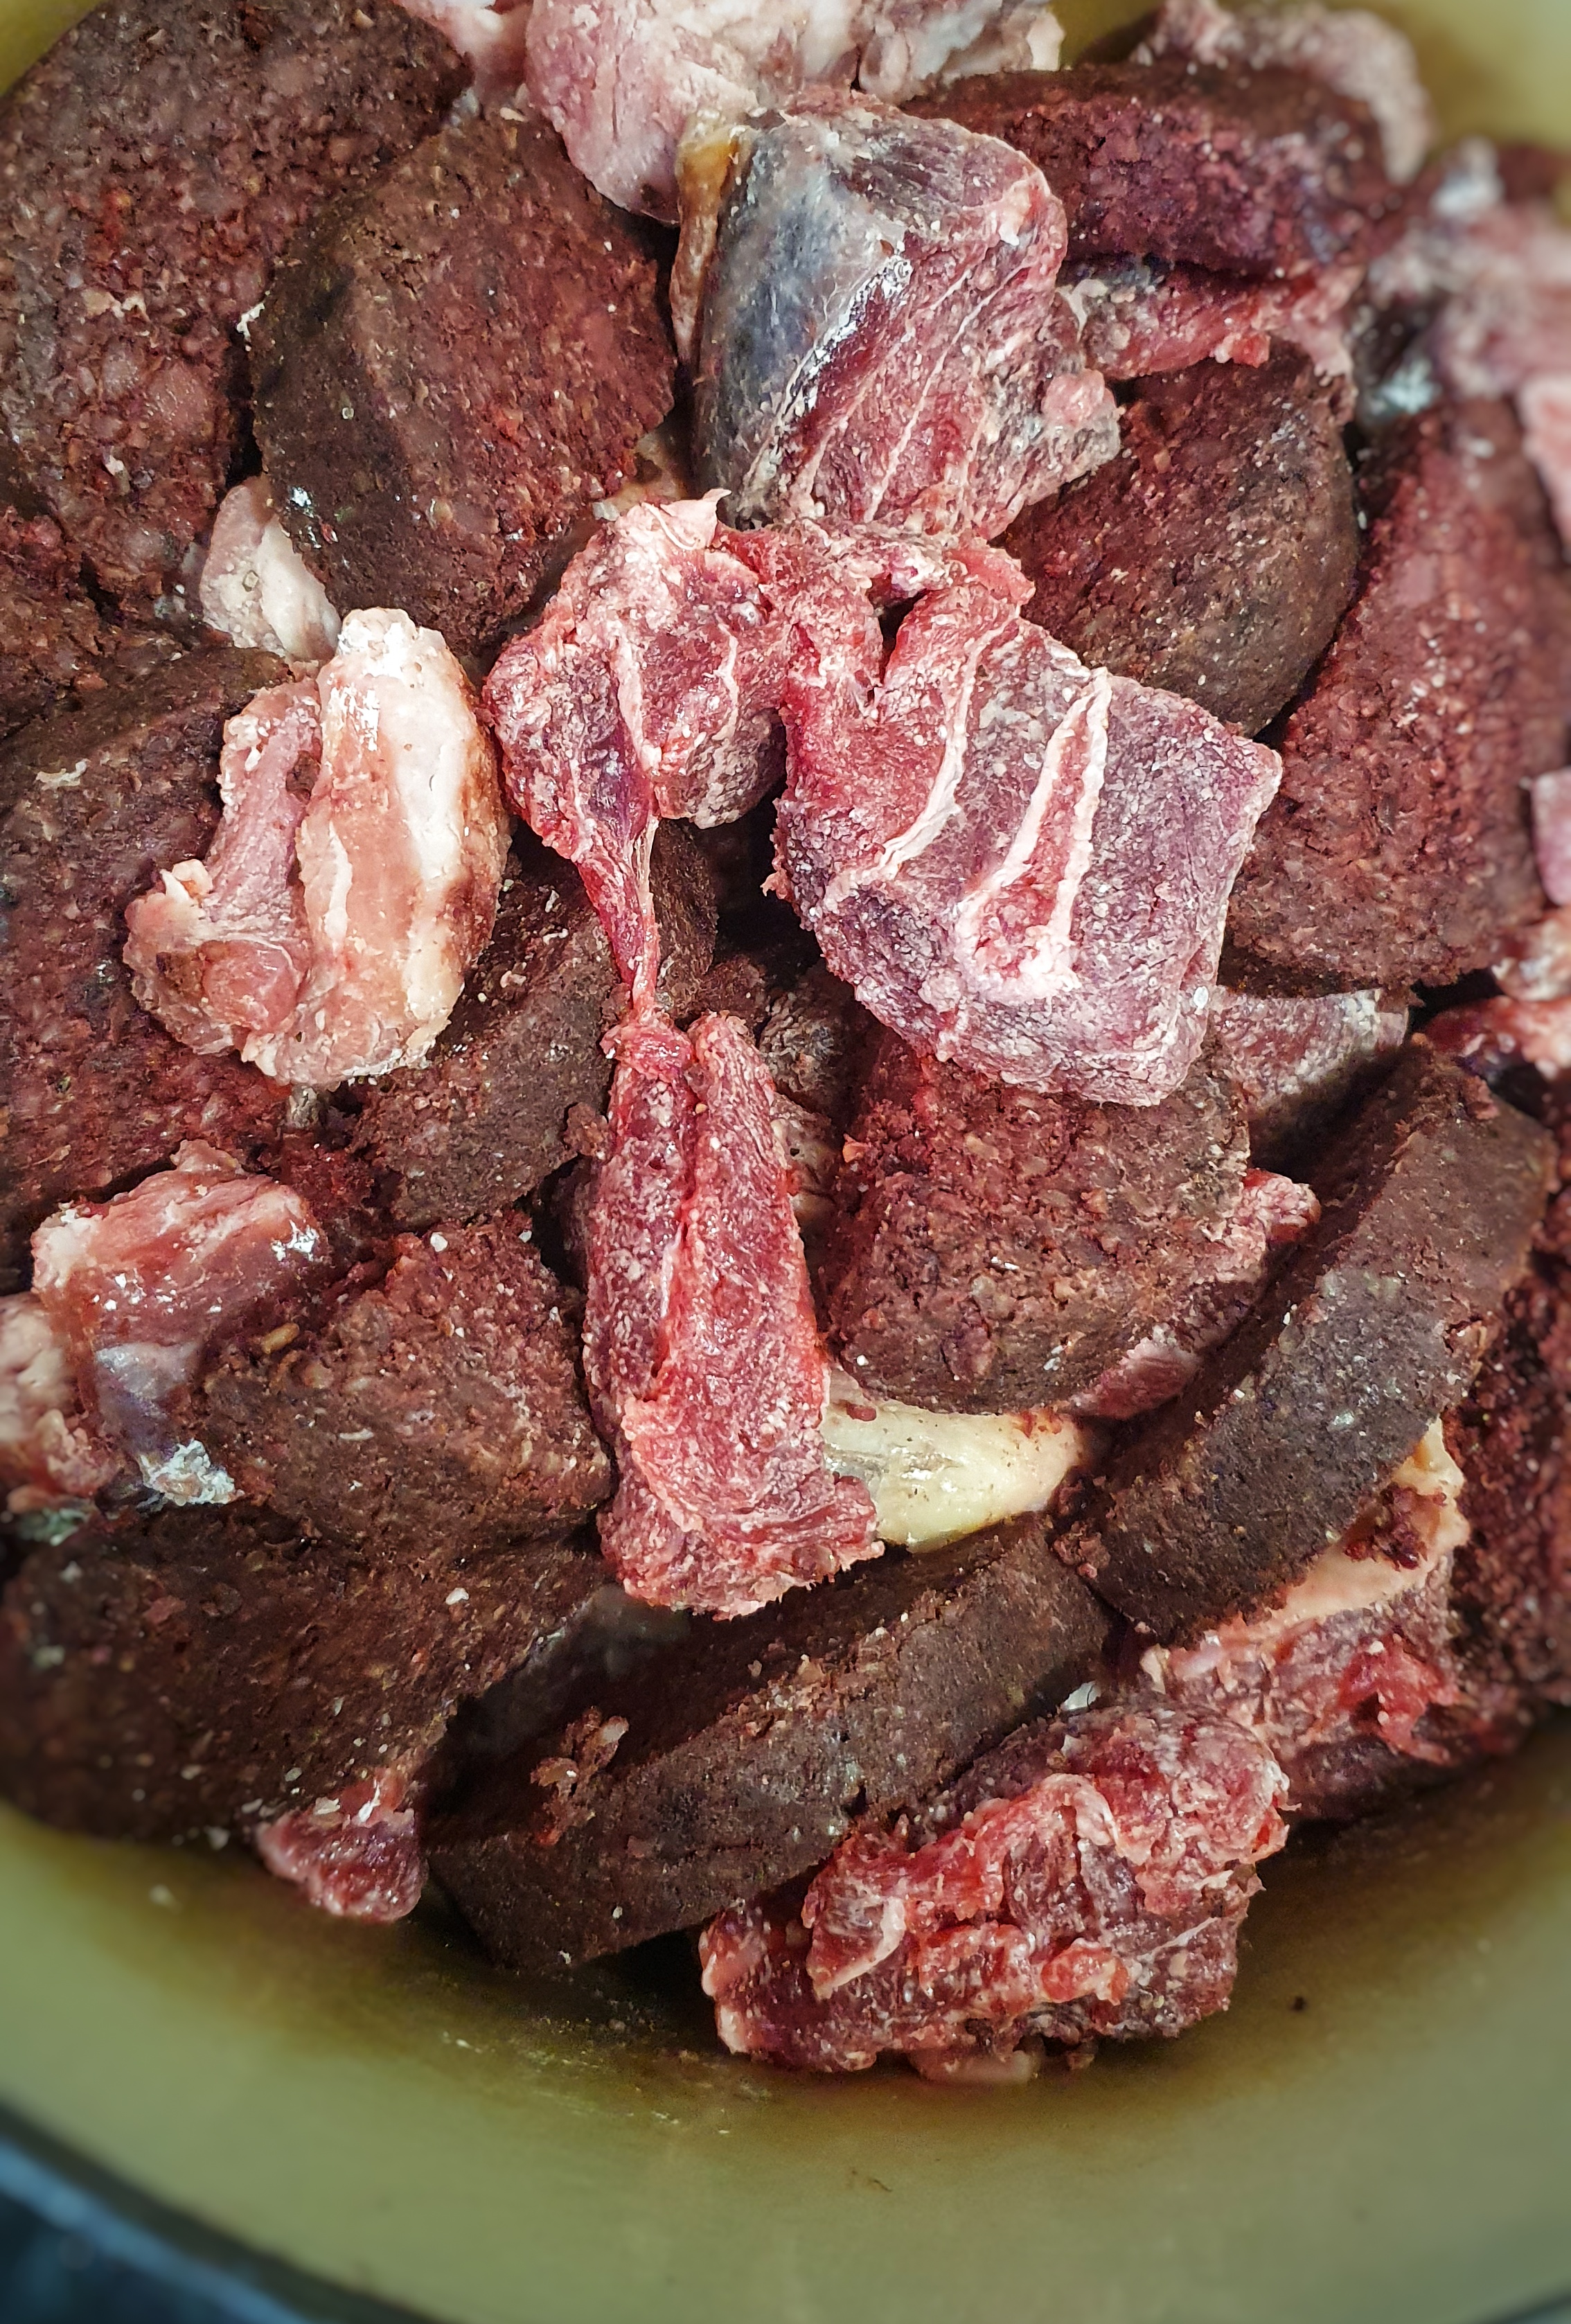
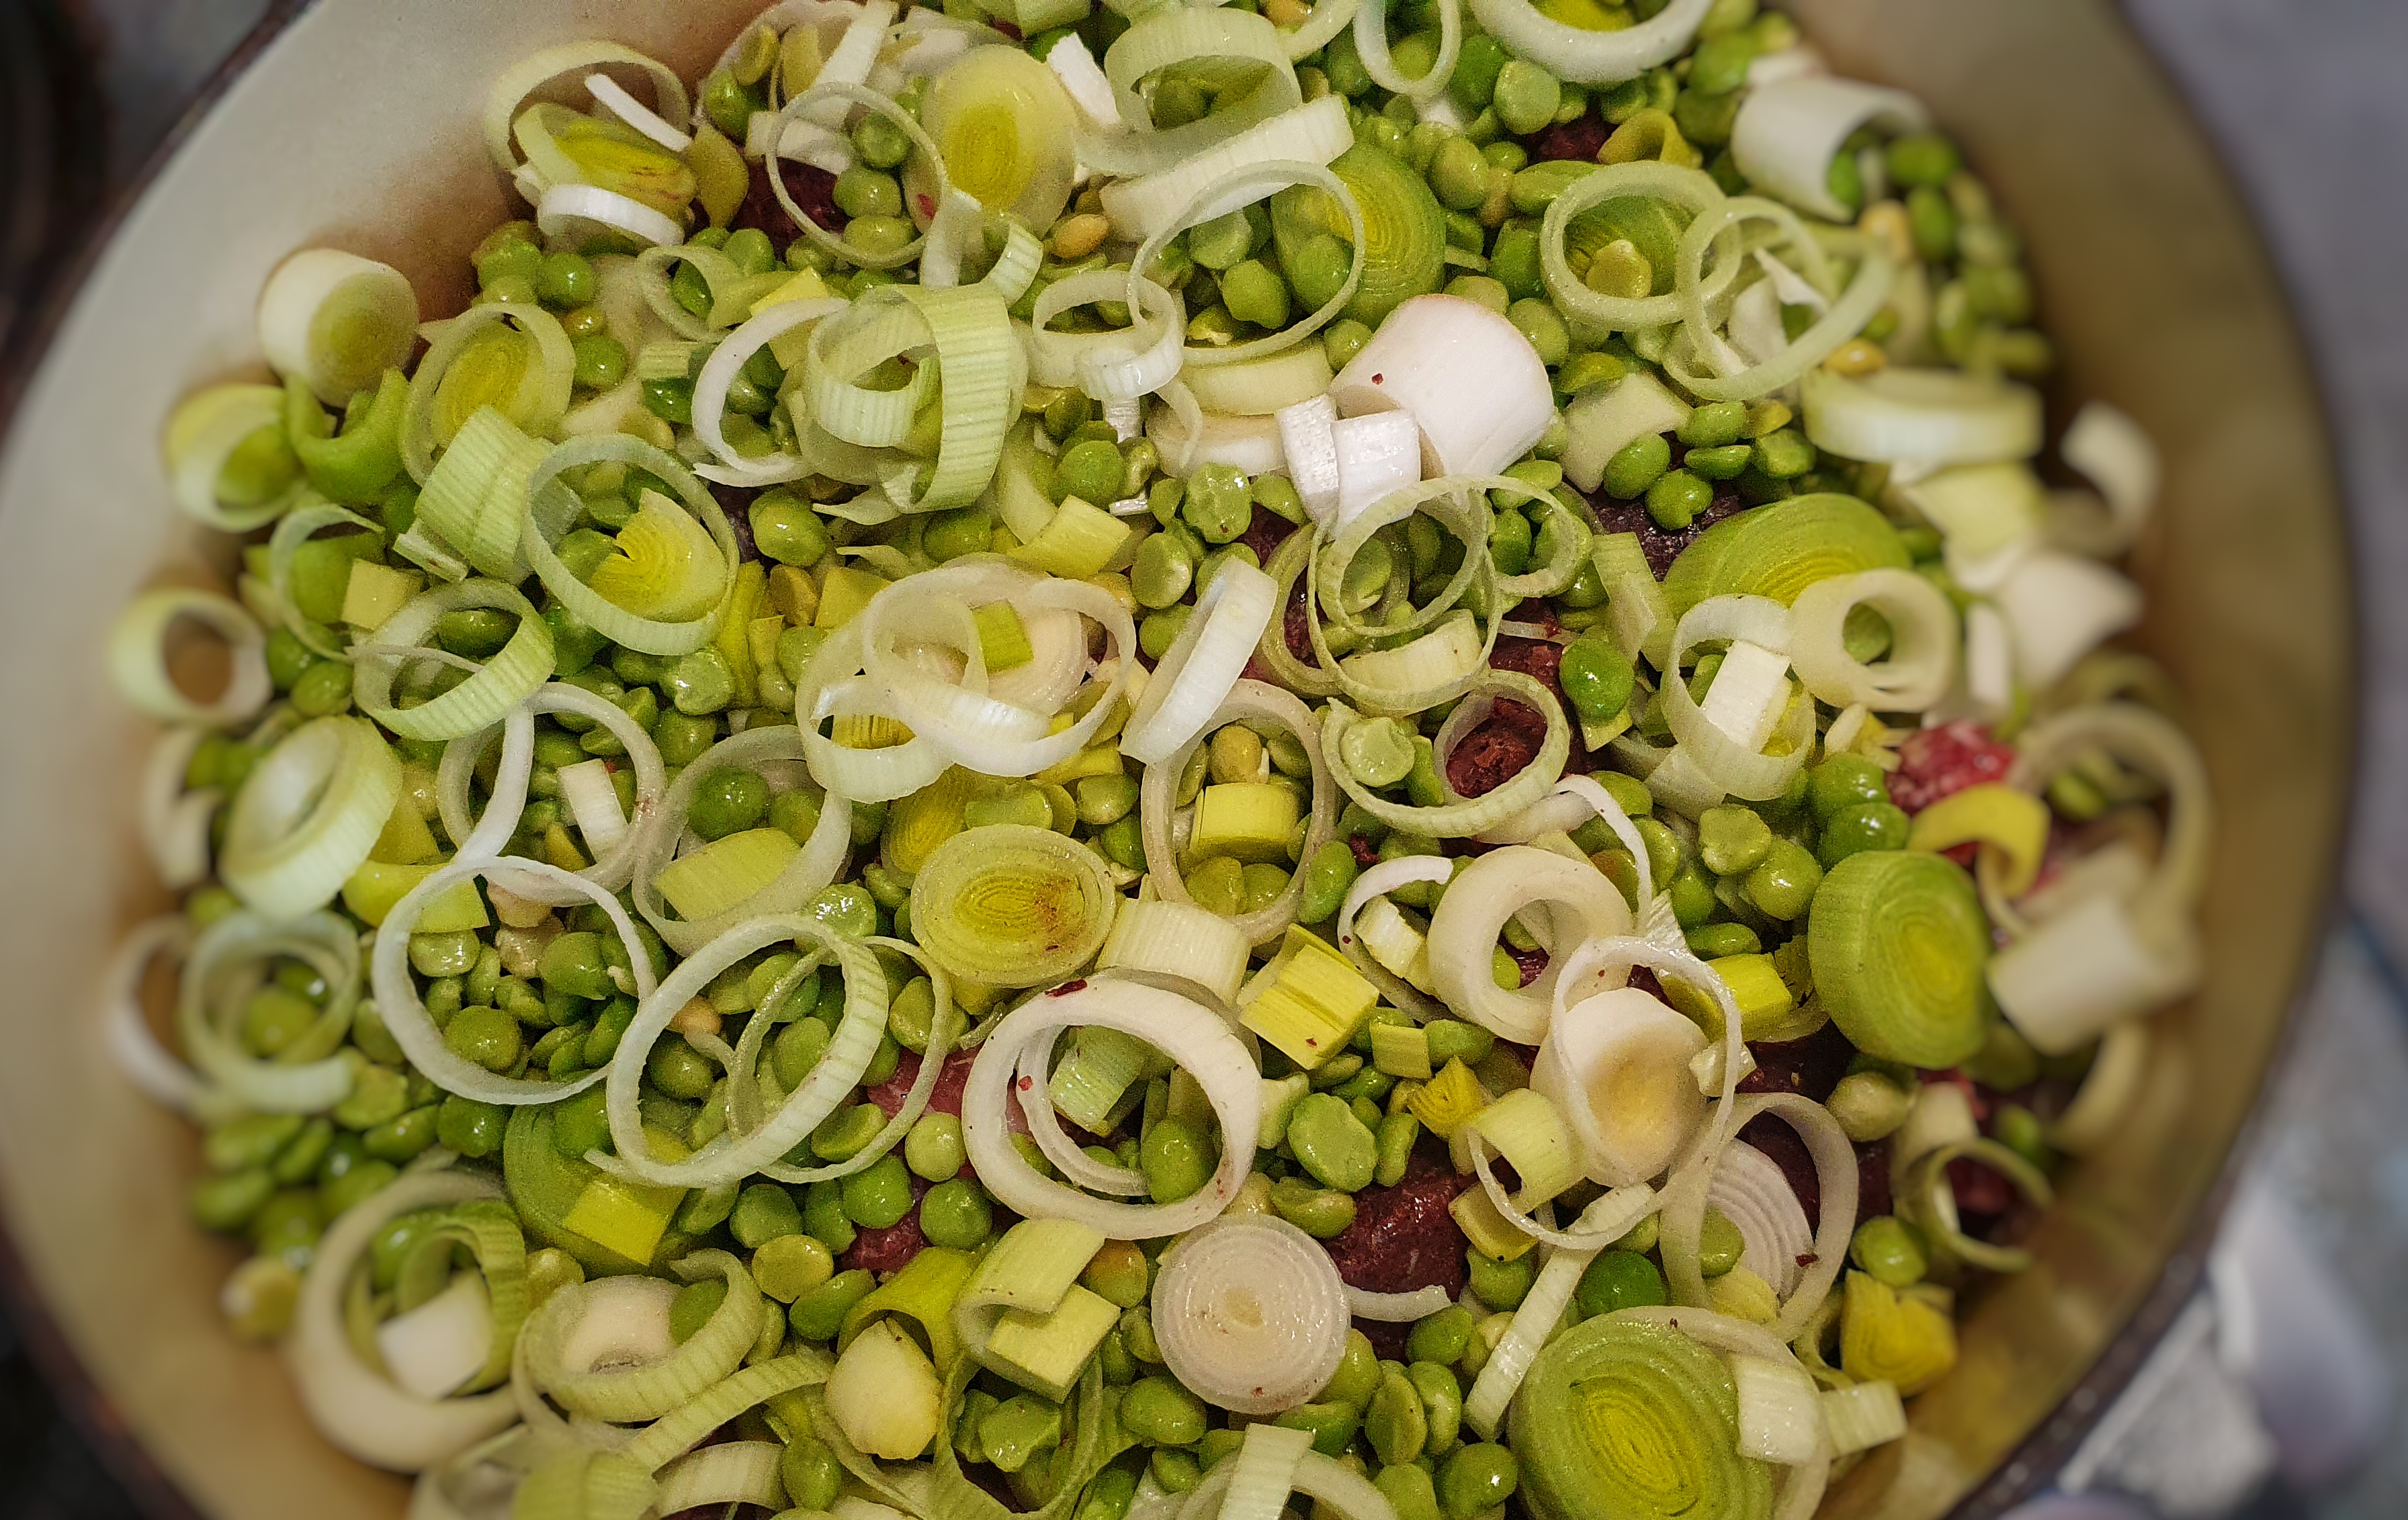
Preheat your oven to 160°C. Shake the meat, cut into neat chunks, with the cornflour, and scatter the pieces over the base of a large casserole, season with salt and pepper, then tuck in slices of the black pudding. Sprinkle with the onions or leeks and the drained pulses. Peel the potatoes and slice them into quarters lengthways. Arrange the quarters on top; I find it is impossible to do this neatly. Pour over enough stock to go halfway up the potatoes and season them with more salt and pepper.
Building up the layers…
Bake for 4 hours, topping up with more stock or water every hour or so.
Serve with steamed green vegetables or braised red cabbage.
Notes:
[1] Grigson, J. (1992). English Food (Third Edit). Penguin.
[2]The Buttery was my bricks-and-mortar restaurant in Levenshulme, Manchester, open between 2016 and 2017, though it did exist as a pop up restaurant and artisan market stall before that.
[3] For those not in the know, I got into this traditional cookery and food history malarky because I cooked every recipe (well, almost every recipe) in Jane’s wonderful book. This was my first blog Neil Cooks Grigson. Hear about it in this podcast episode from season 8:
Welcome to the first episode of season 9 of The British Food History Podcast! I am going to be adding a blog post to complement each new episode of the podcast, to help readers of the blog keep tabs on what is going on.
Today I am talking with Matthew Cockin and Grant Harper of Fruit Pig – the last remaining commercial craft producer of fresh blood black puddings in the UK.
Fruit Pig are sponsoring the 9th season of the podcast and Grant and Matthew are very kindly giving listeners to the podcast a unique special offer 10% off your order until the end of October 2025 – use the offer code Foodhis in the checkout at their online shop, www.fruitpig.co.uk.
We talk about how and why they started up Fruit Pig, battling squeamishness, why it’s so difficult to make fresh blood black puddings, and serving suggestions – amongst many other things
The podcast is available on all podcast apps, aandd now YouTube. Please give it a follow, and if you can, please rate and review. If you’re not a podcasty person, you can listen via this Spotify imbed:
Some serving suggestions
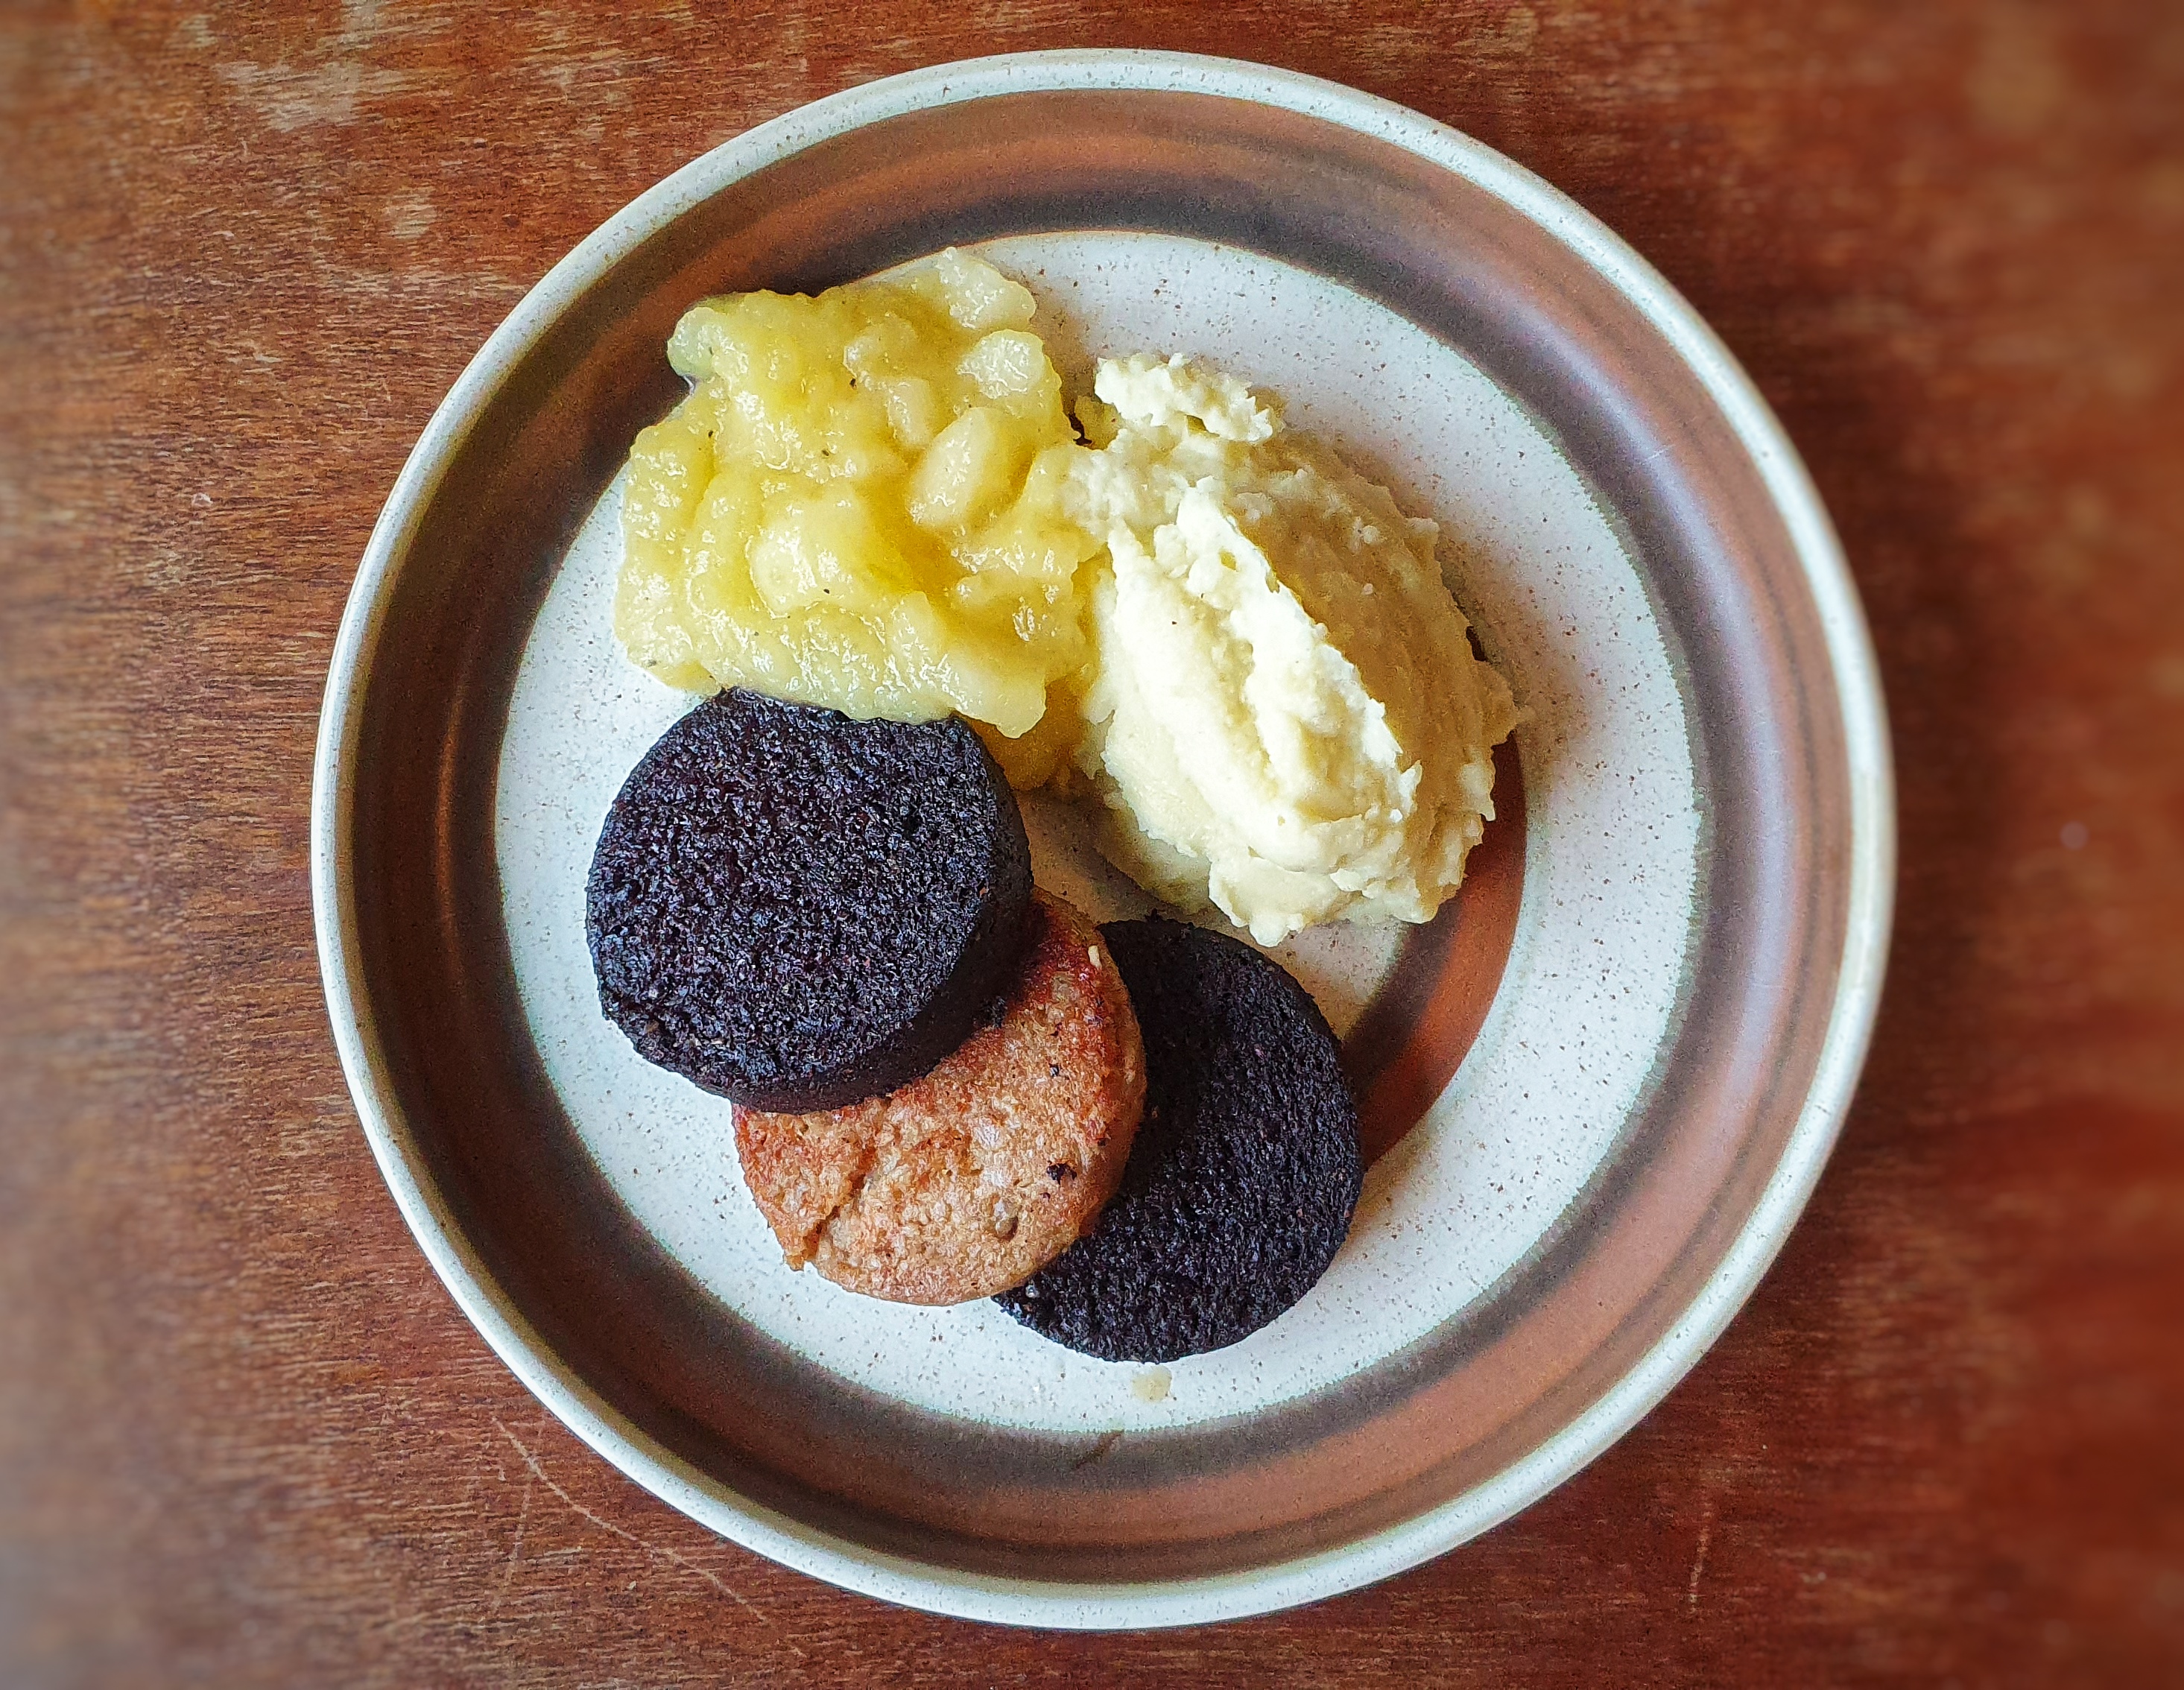
One other thing we talked about was serving suggestions, and of course a slice or two of black and white pudding as part of a full English breakfast is admirable. You can go one better and have the full triple of black pud, white and haggis for a full Scottish! Personally, I believe a slice of fried bread topped with a couple of slices of fried pudding and a poached egg is the breakfast of champions.
These puddings are not just for breakfast, though. In Lancashire, a favourite way of eating black pudding is to poach it again, remove it from the water, drain, split lengthways and spread it with mustard. I have eaten it this way when visiting Bury Market. But my favourite way of eating black and white pudding in a simple way, is to serve fried slices of pudding with mashed potatoes and apple sauce – hot or cold, not too sweet. Here’s how to make a good ‘savoury’ apple sauce:
Peel, core and slice 2 medium-sized Bramley apples, and 2 tart dessert apples (e.g. Cox’s Orange Pippin) and fry in a saucepan with 60 g salted butter and a good few grinds of pepper. When the Bramleys start to soften, add 2 level tablespoons of sugar and 4 or 5 tablespoons of water. Cover and cook on medium heat, stirring occasionally, until the apples are cooked through and the Bramleys have broken down to a puree. Taste and correct seasoning. You need something still very tart to cut through the rich puddings.
Keep a lookout for a proper recipe and some of my experiments with the fresh blood, Matthew and Grant kindly sent me.
If you can, support the podcast and blogs by becoming a £3 monthly subscriber, and unlock lots of premium content, including bonus blog posts and recipes, access to the easter eggs and the secret podcast, or treat me to a one-off virtual pint or coffee: click here.
Don’t forget, there will be postbag episodes in the future, so if you have any questions or queries about today’s episode, or indeed any episode, or have a question about the history of British food please email me at neil@britishfoodhistory.com, or leave a comment below.
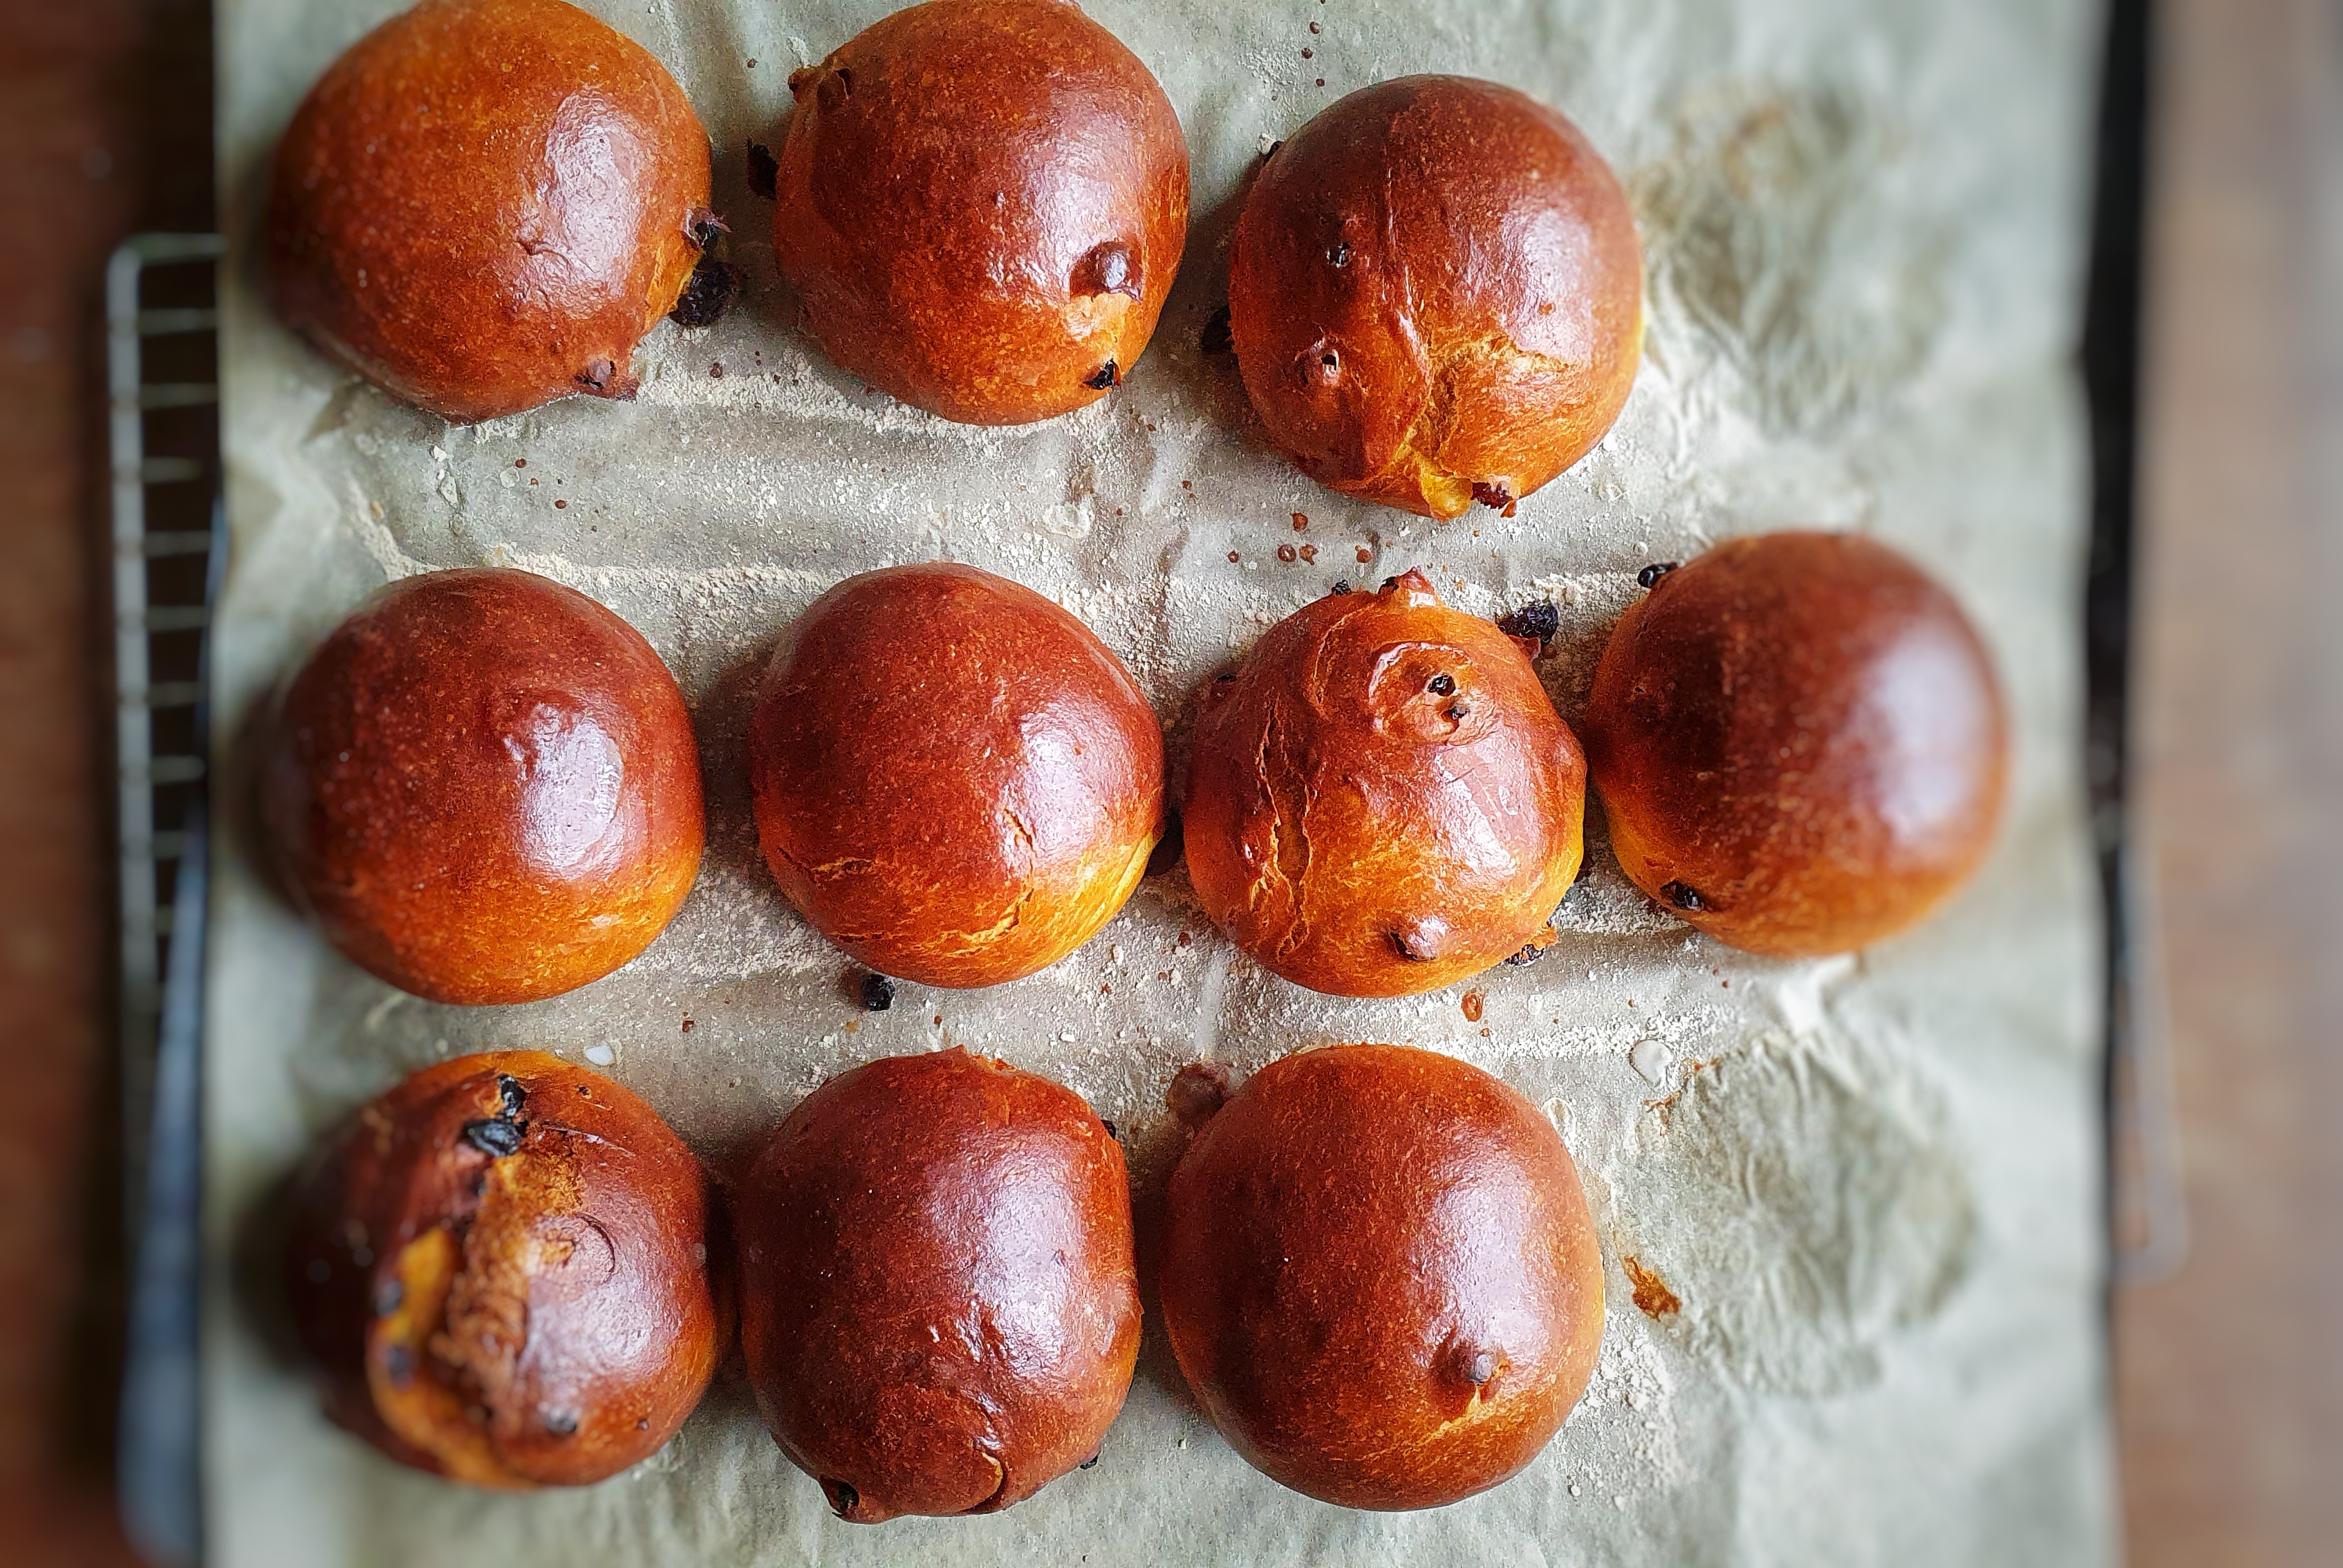
Saffron-scented buns, breads and cakes used to be enjoyed right across England from at least the 17th century. Today, however, they are typically found in bun form and are associated with Cornwall because, from around the 1780s, saffron was only grown in this area and Essex.[1]
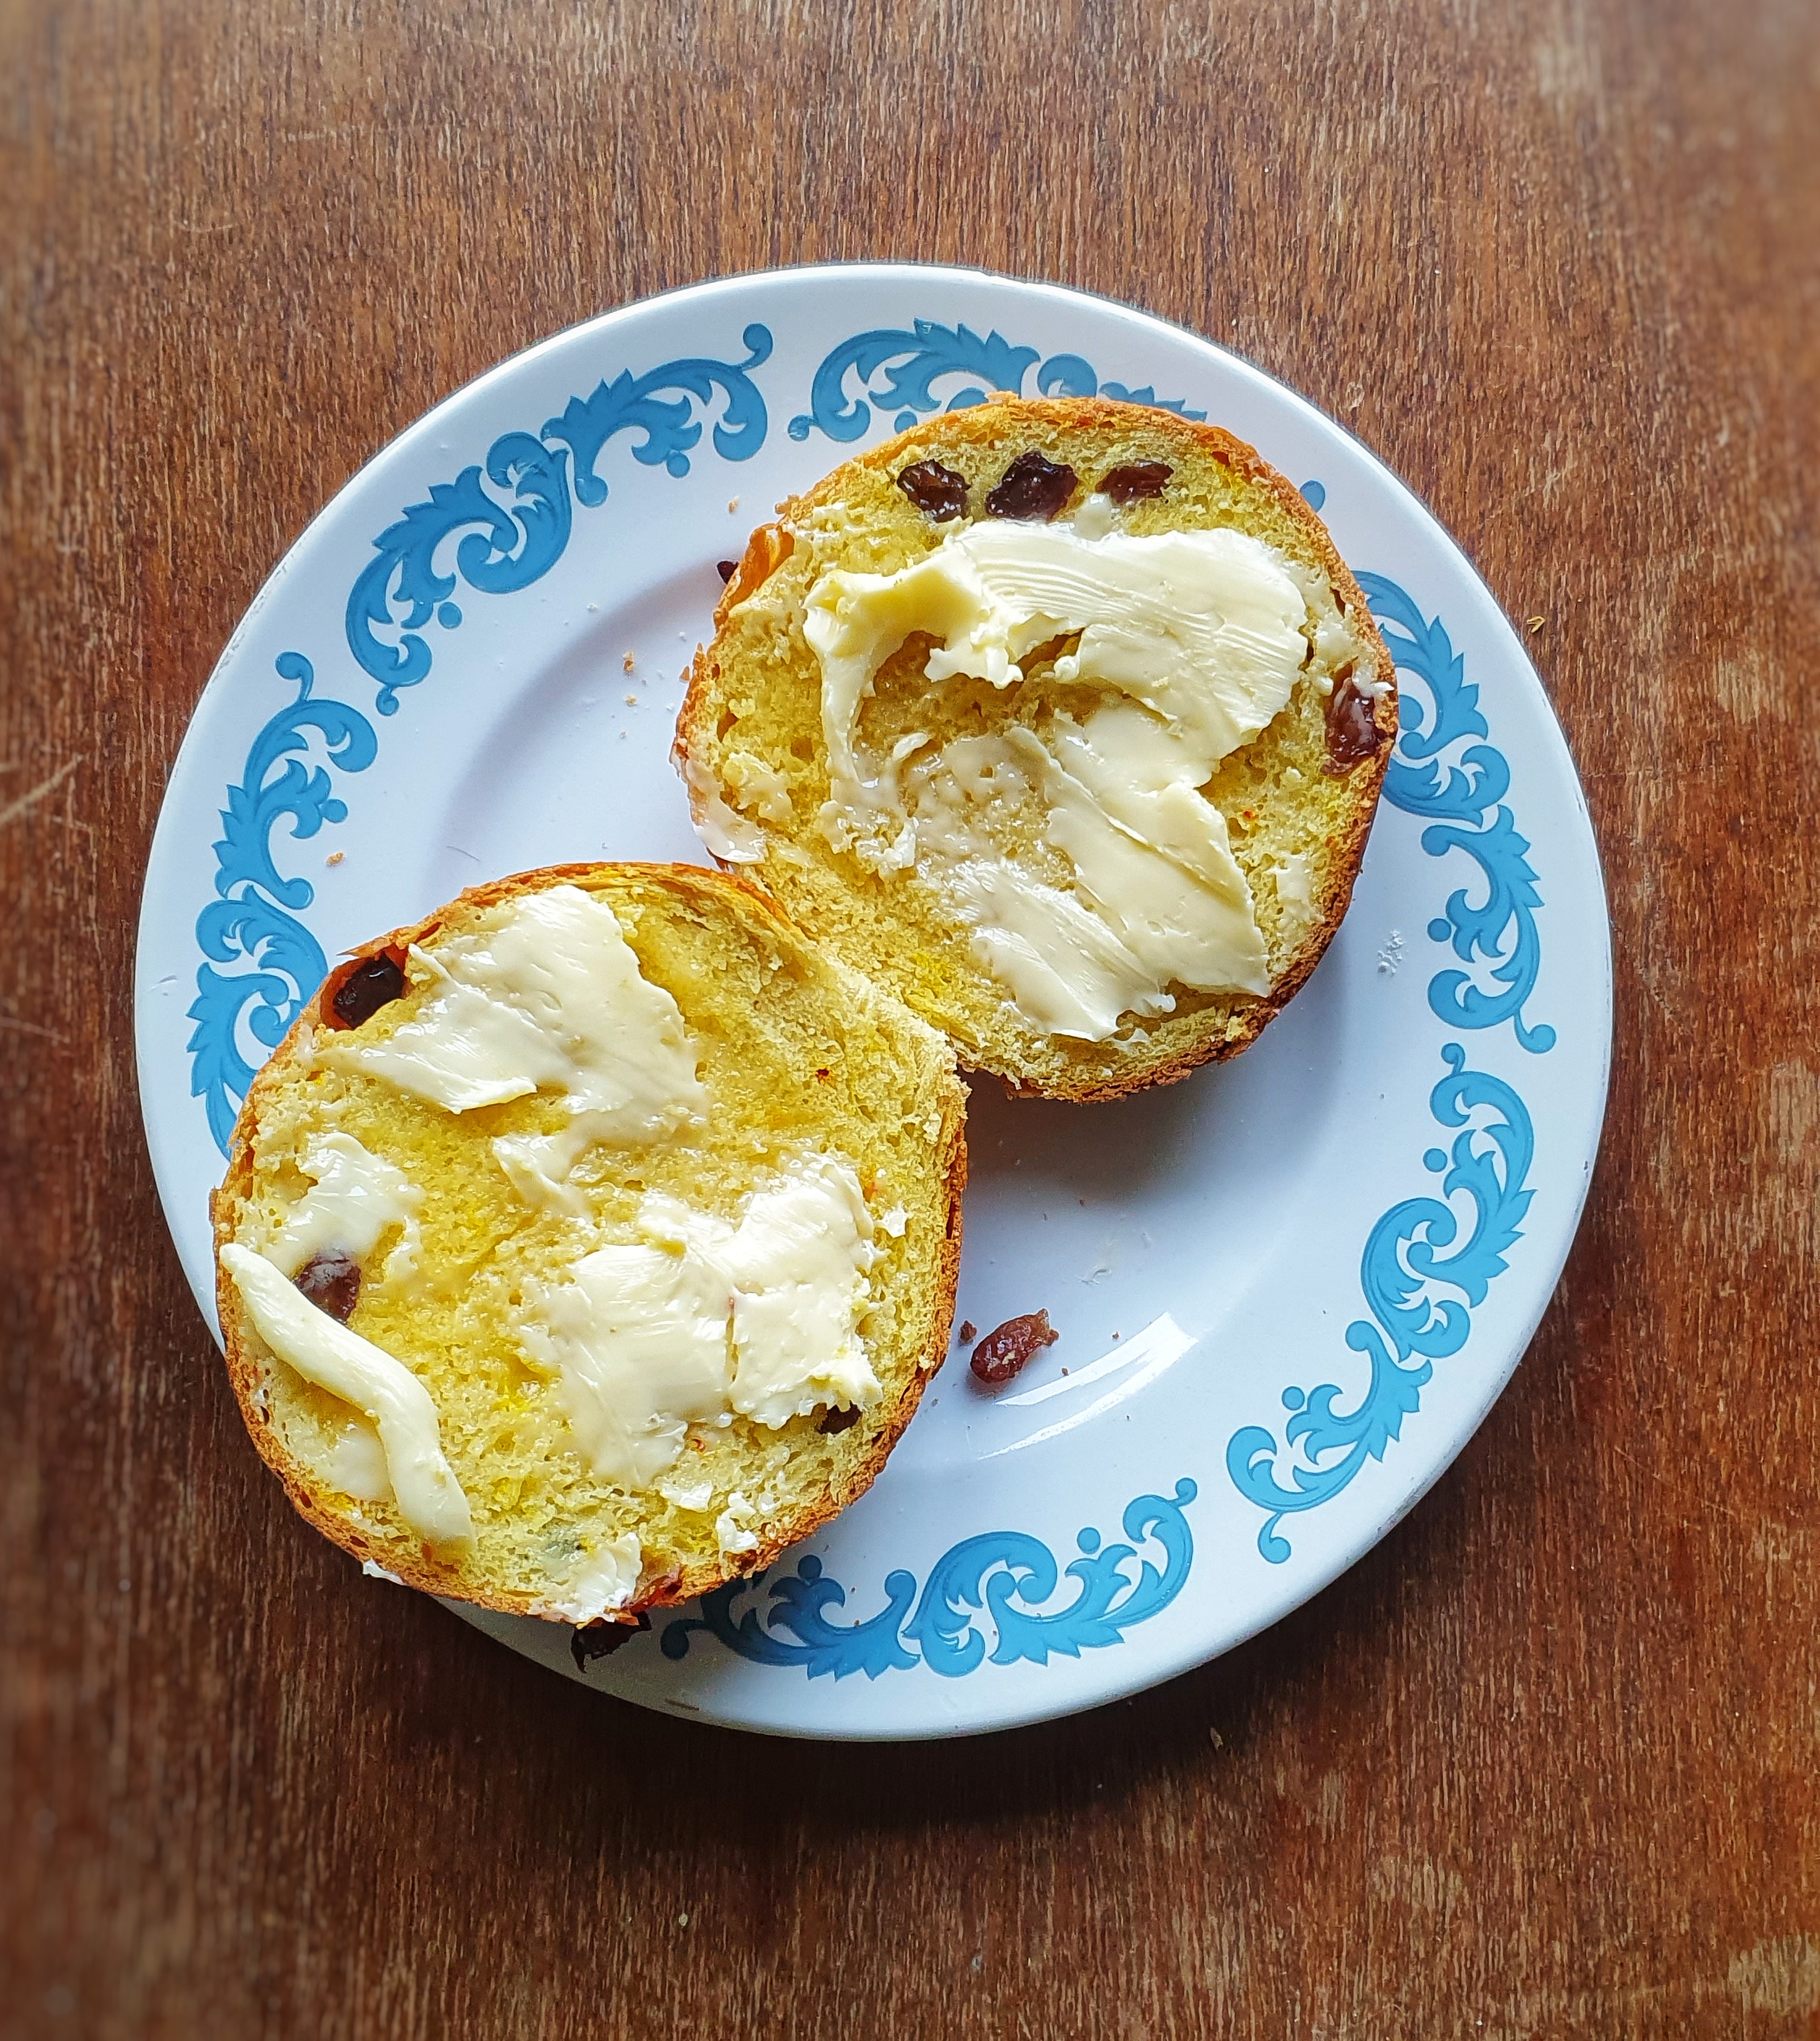
A modern-day saffron bun is a lovely egg yolk yellow and has that lovely, unique earthy flavour associated with the spice. Other ingredients usually include mixed spice, dried fruit and a little sugar, and e enriched with a good amount of egg and clotted cream, though as Sam Bilton points out in Fool’s Gold: A History of British Saffron, Sarah Harrison’s 18th-century recipe contains no fruit, and the only spice used aside from saffron is coriander seed.[2] Early recipes are usually for single, large cakes such as Sir Kenelm Digby’s ‘excellent cake’, which is baked in a hoop and requires ‘a Peck of fine flower’. It’s enriched with (amongst other things) ‘one pint of Sack…half a pint of Rose-water [and] half a quarter of an ounce of Saffron.’ It is then iced with sugar and egg whites flavoured again with rose water.[3] Rosewater seems to have been a key ingredient because it’s still used a century later in John Farley’s London Art of Cookery (1783) and again in Cassell’s Dictionary of Food a century after that.[4] Perhaps it should be brought back?
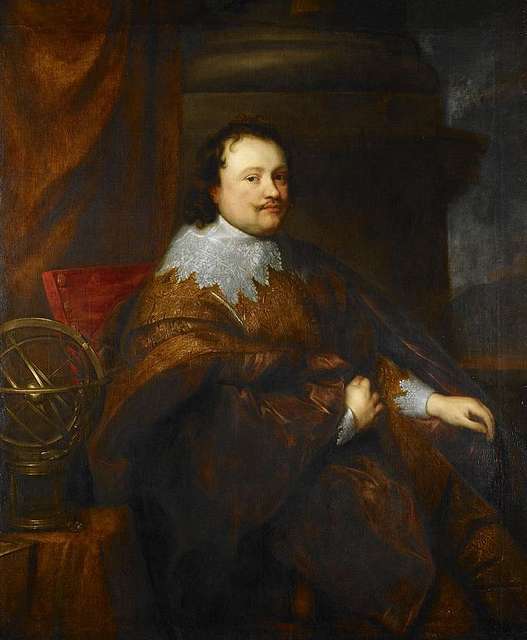
Sir Kenhelm Digby’s ‘excellent’ saffron cake also contained rose water
Because of their expensive and rich ingredients, saffron buns are associated with celebrations and feast days. On Good Friday (a day associated with spiced buns), they were cut with a cross and brushed with a saffron wash and eaten with clotted cream.[5] At Christmastime, they were made into miniature cottage loaf shapes. They were also a special taste of home: folk of Newquay, when putting together Christmas food parcels to be sent to fighters during the Great War, were sure to include saffron cakes and buns.[6]
If you want to know more about the history of baking, check out my book Knead to Know, published by Icon Books.
According to Cassell, aside from providing colour and flavour, saffron makes buns or cakes ‘wholesome and palatable’, aids digestion and will ‘drive out intestinal worms’ to boot, and suggests swapping the liquid used in your favourite bun or cake recipe for saffron-steeped hot water that has been allowed to cool to blood heat.[7]
Saffron is the most expensive spice in the world by weight, and there was (and still is) therefore pressure for food manufacturers to use an adulterant such as yellow food colouring or turmeric to offset costs. Real saffron buns are appropriately (but proportionally) more expensive than your regular fruit bun, and according to Elizabeth David, the strands are not strained from their soaking water as one might expect, ‘probably as a visible sign that true saffron has been used.’[8]
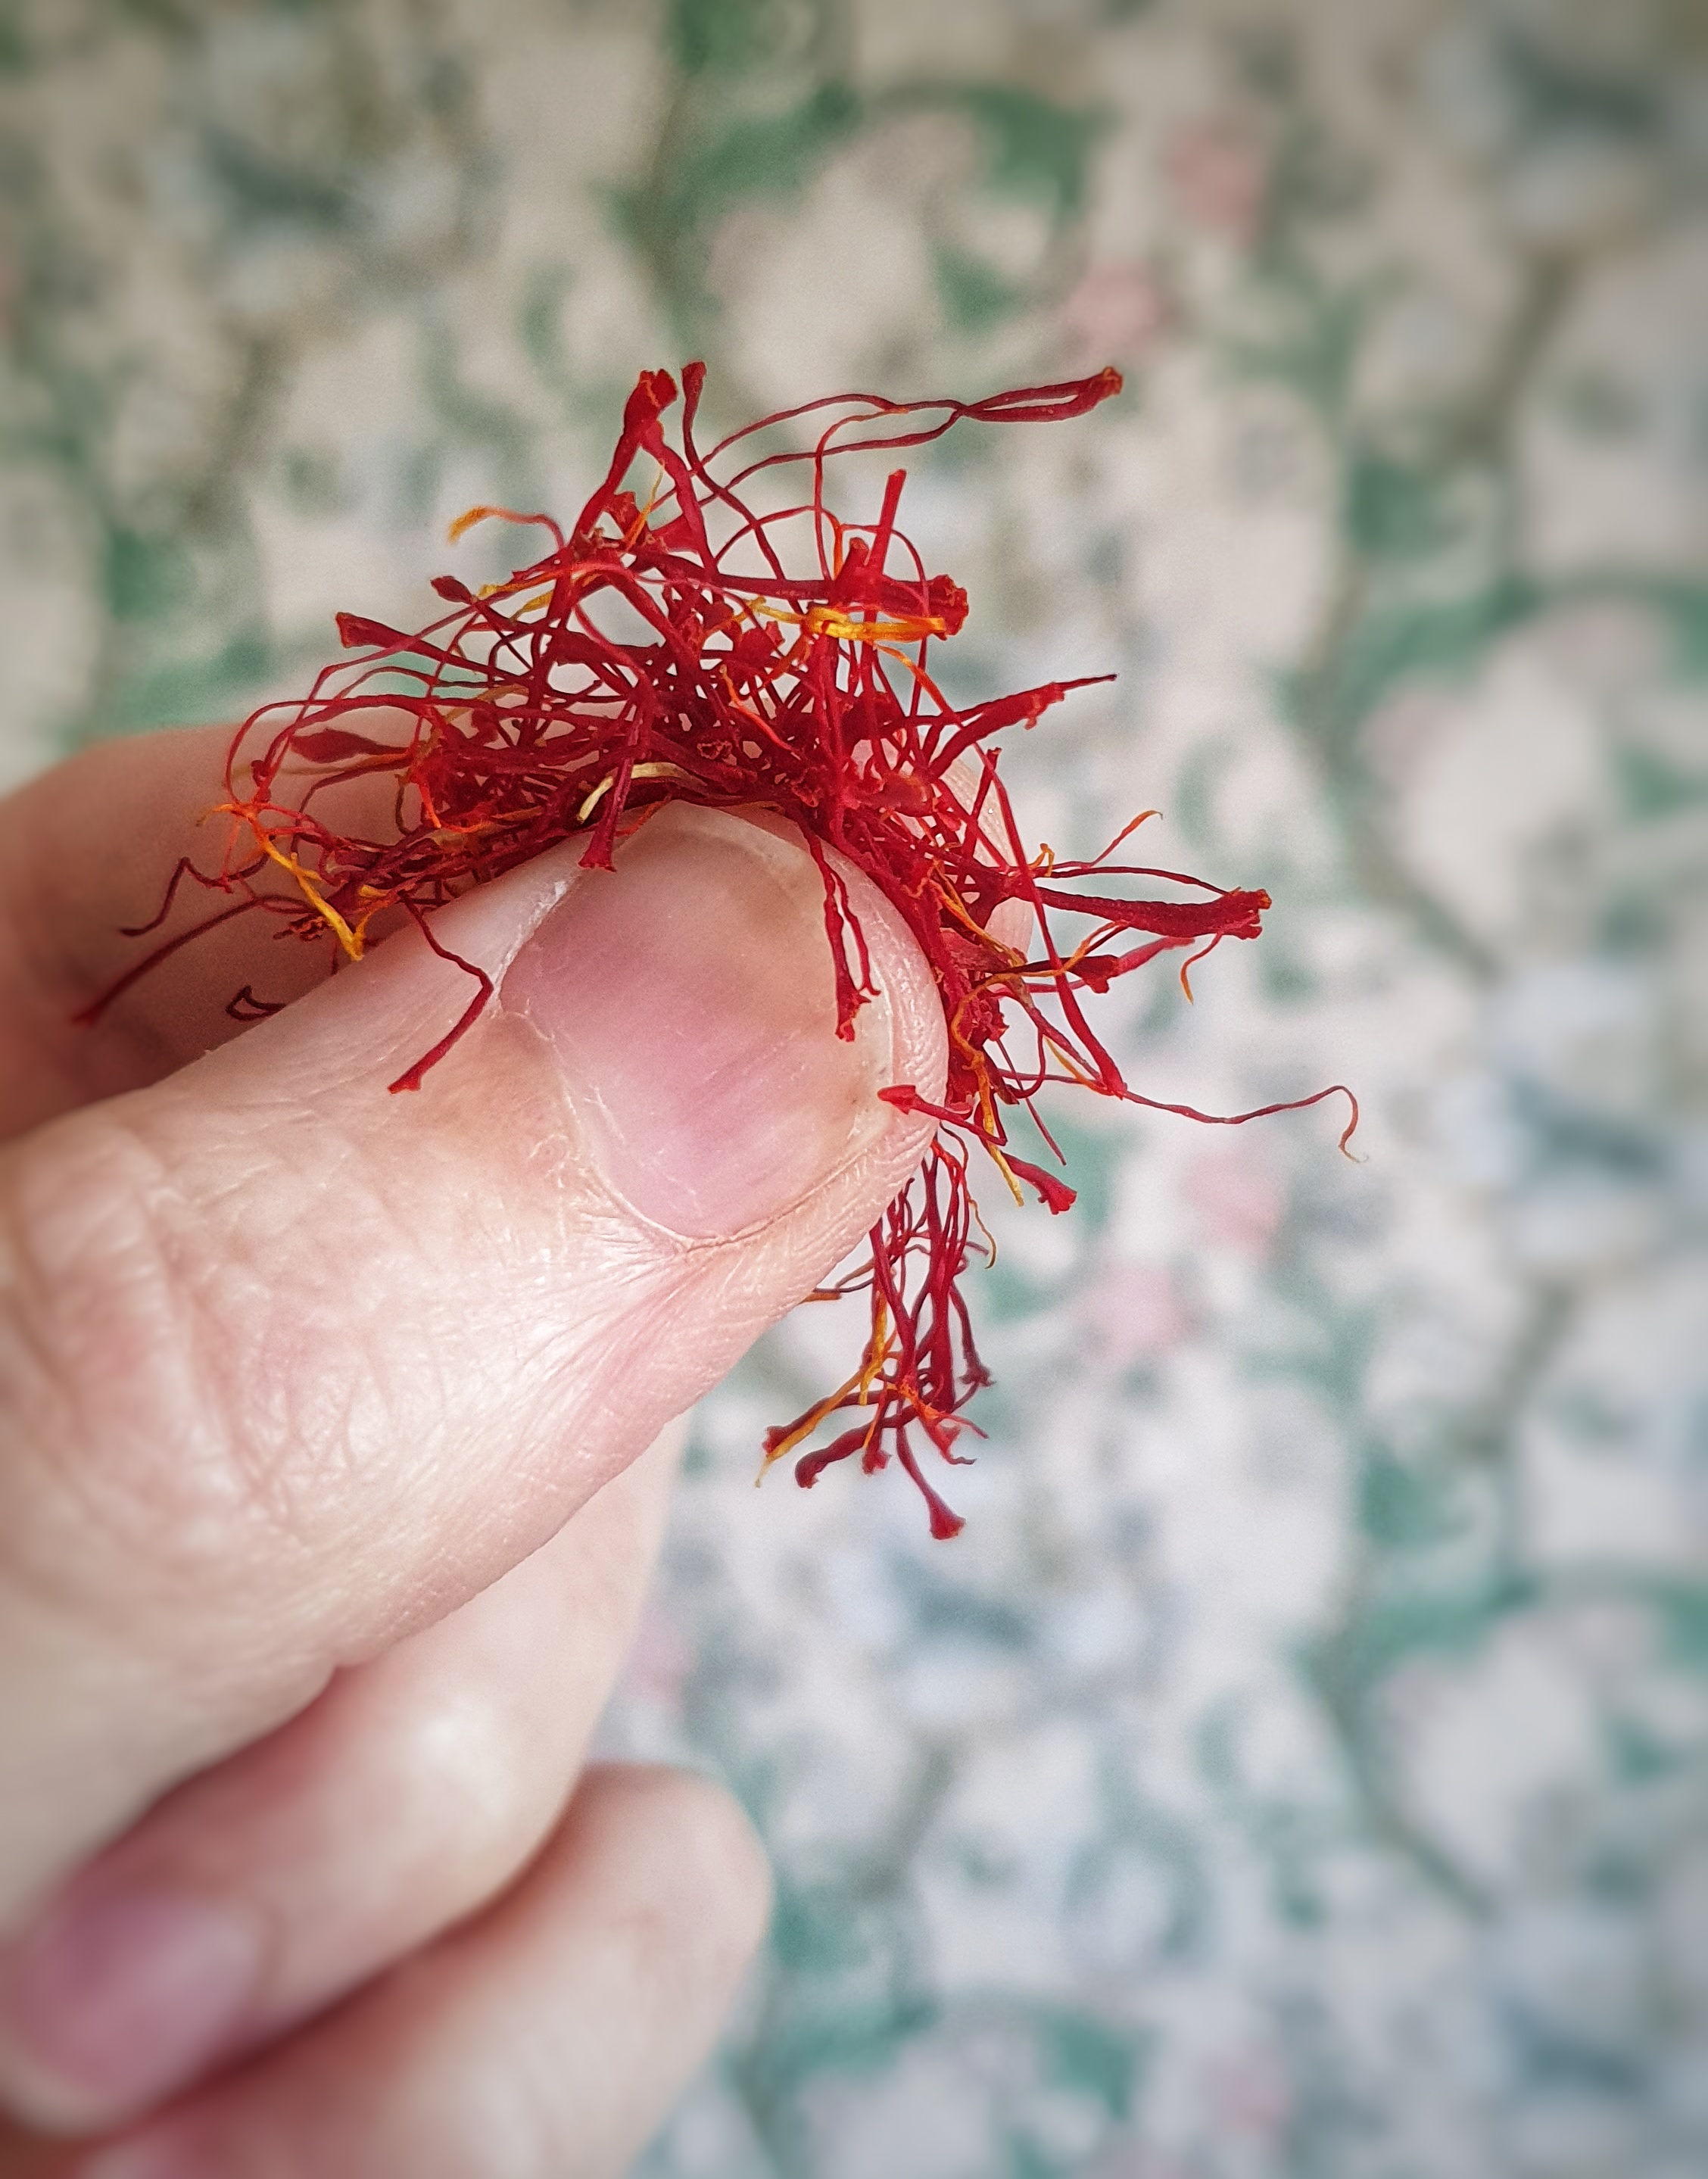
But how much saffron to use? Amounts can vary greatly, and Sam Bilton wrestles with this question: she spotted that Elizabeth David complained about people using too much saffron in their cooking – true, it can taste soapy when over-applied – but then asks for four pinches in her recipe for buns![9] Of course, the answer depends upon a few factors: the quality of your saffron, how long it has been sitting in the spice rack, and how much you enjoy the flavour of saffron. My recipe uses ‘a good 2-finger pinch’.
This is what ‘a good 2-finger pinch’ looks like
If you want to know more about the history of saffron in Britain, have a listen to this episode of The British Food History Podcast with guest Sam Bilton:
If you like the blogs and podcast I produce and would to start a £3 monthly subscription, or would like to treat me to virtual coffee or pint: follow this link for more information.Thank you.
Recipe
Makes 12 buns.
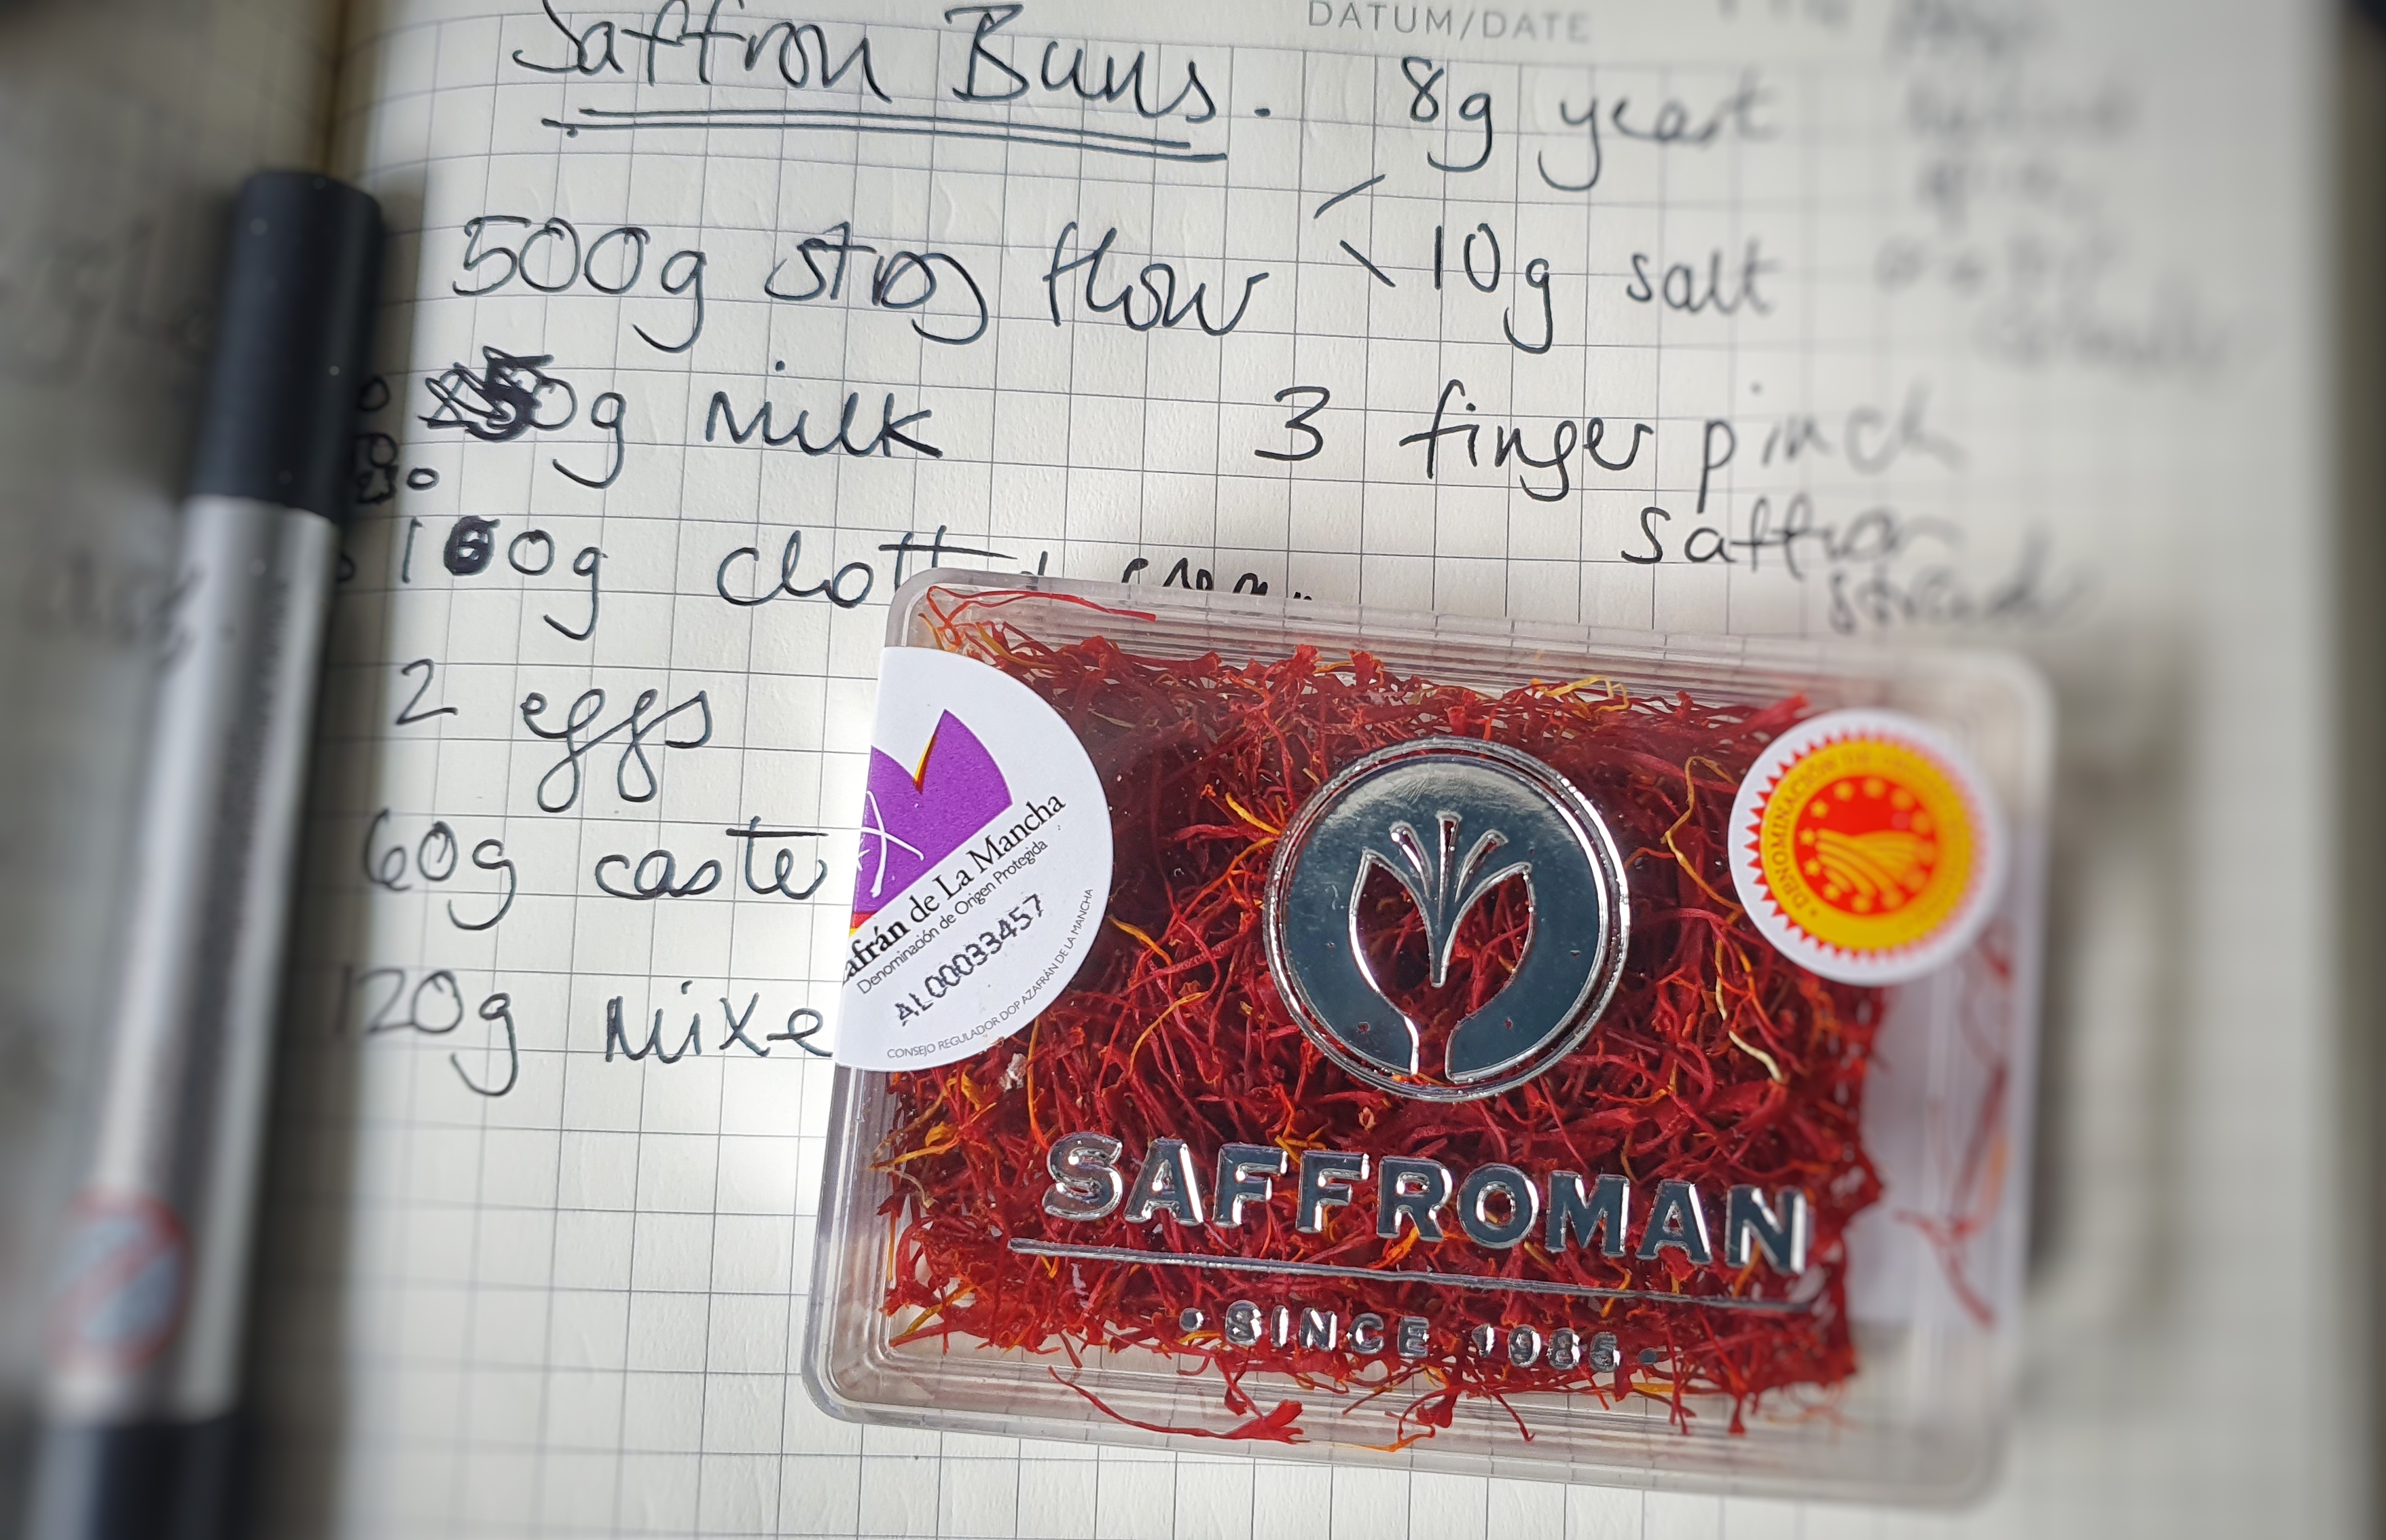
230 ml full-fat milk, plus extra for brushing.
A good 2-finger pinch of saffron
500 g strong white bread flour, plus extra for rolling
120 g mixed dried fruit (currants, raisins and sultanas)
Pour the milk into a small saucepan and bring to scalding point. Check to see if a skin has formed on the milk’s surface, if so, remove it before adding the saffron.[10] Whisk in the saffron strands and let the milk cool to ‘blood heat’ (about 40°C).
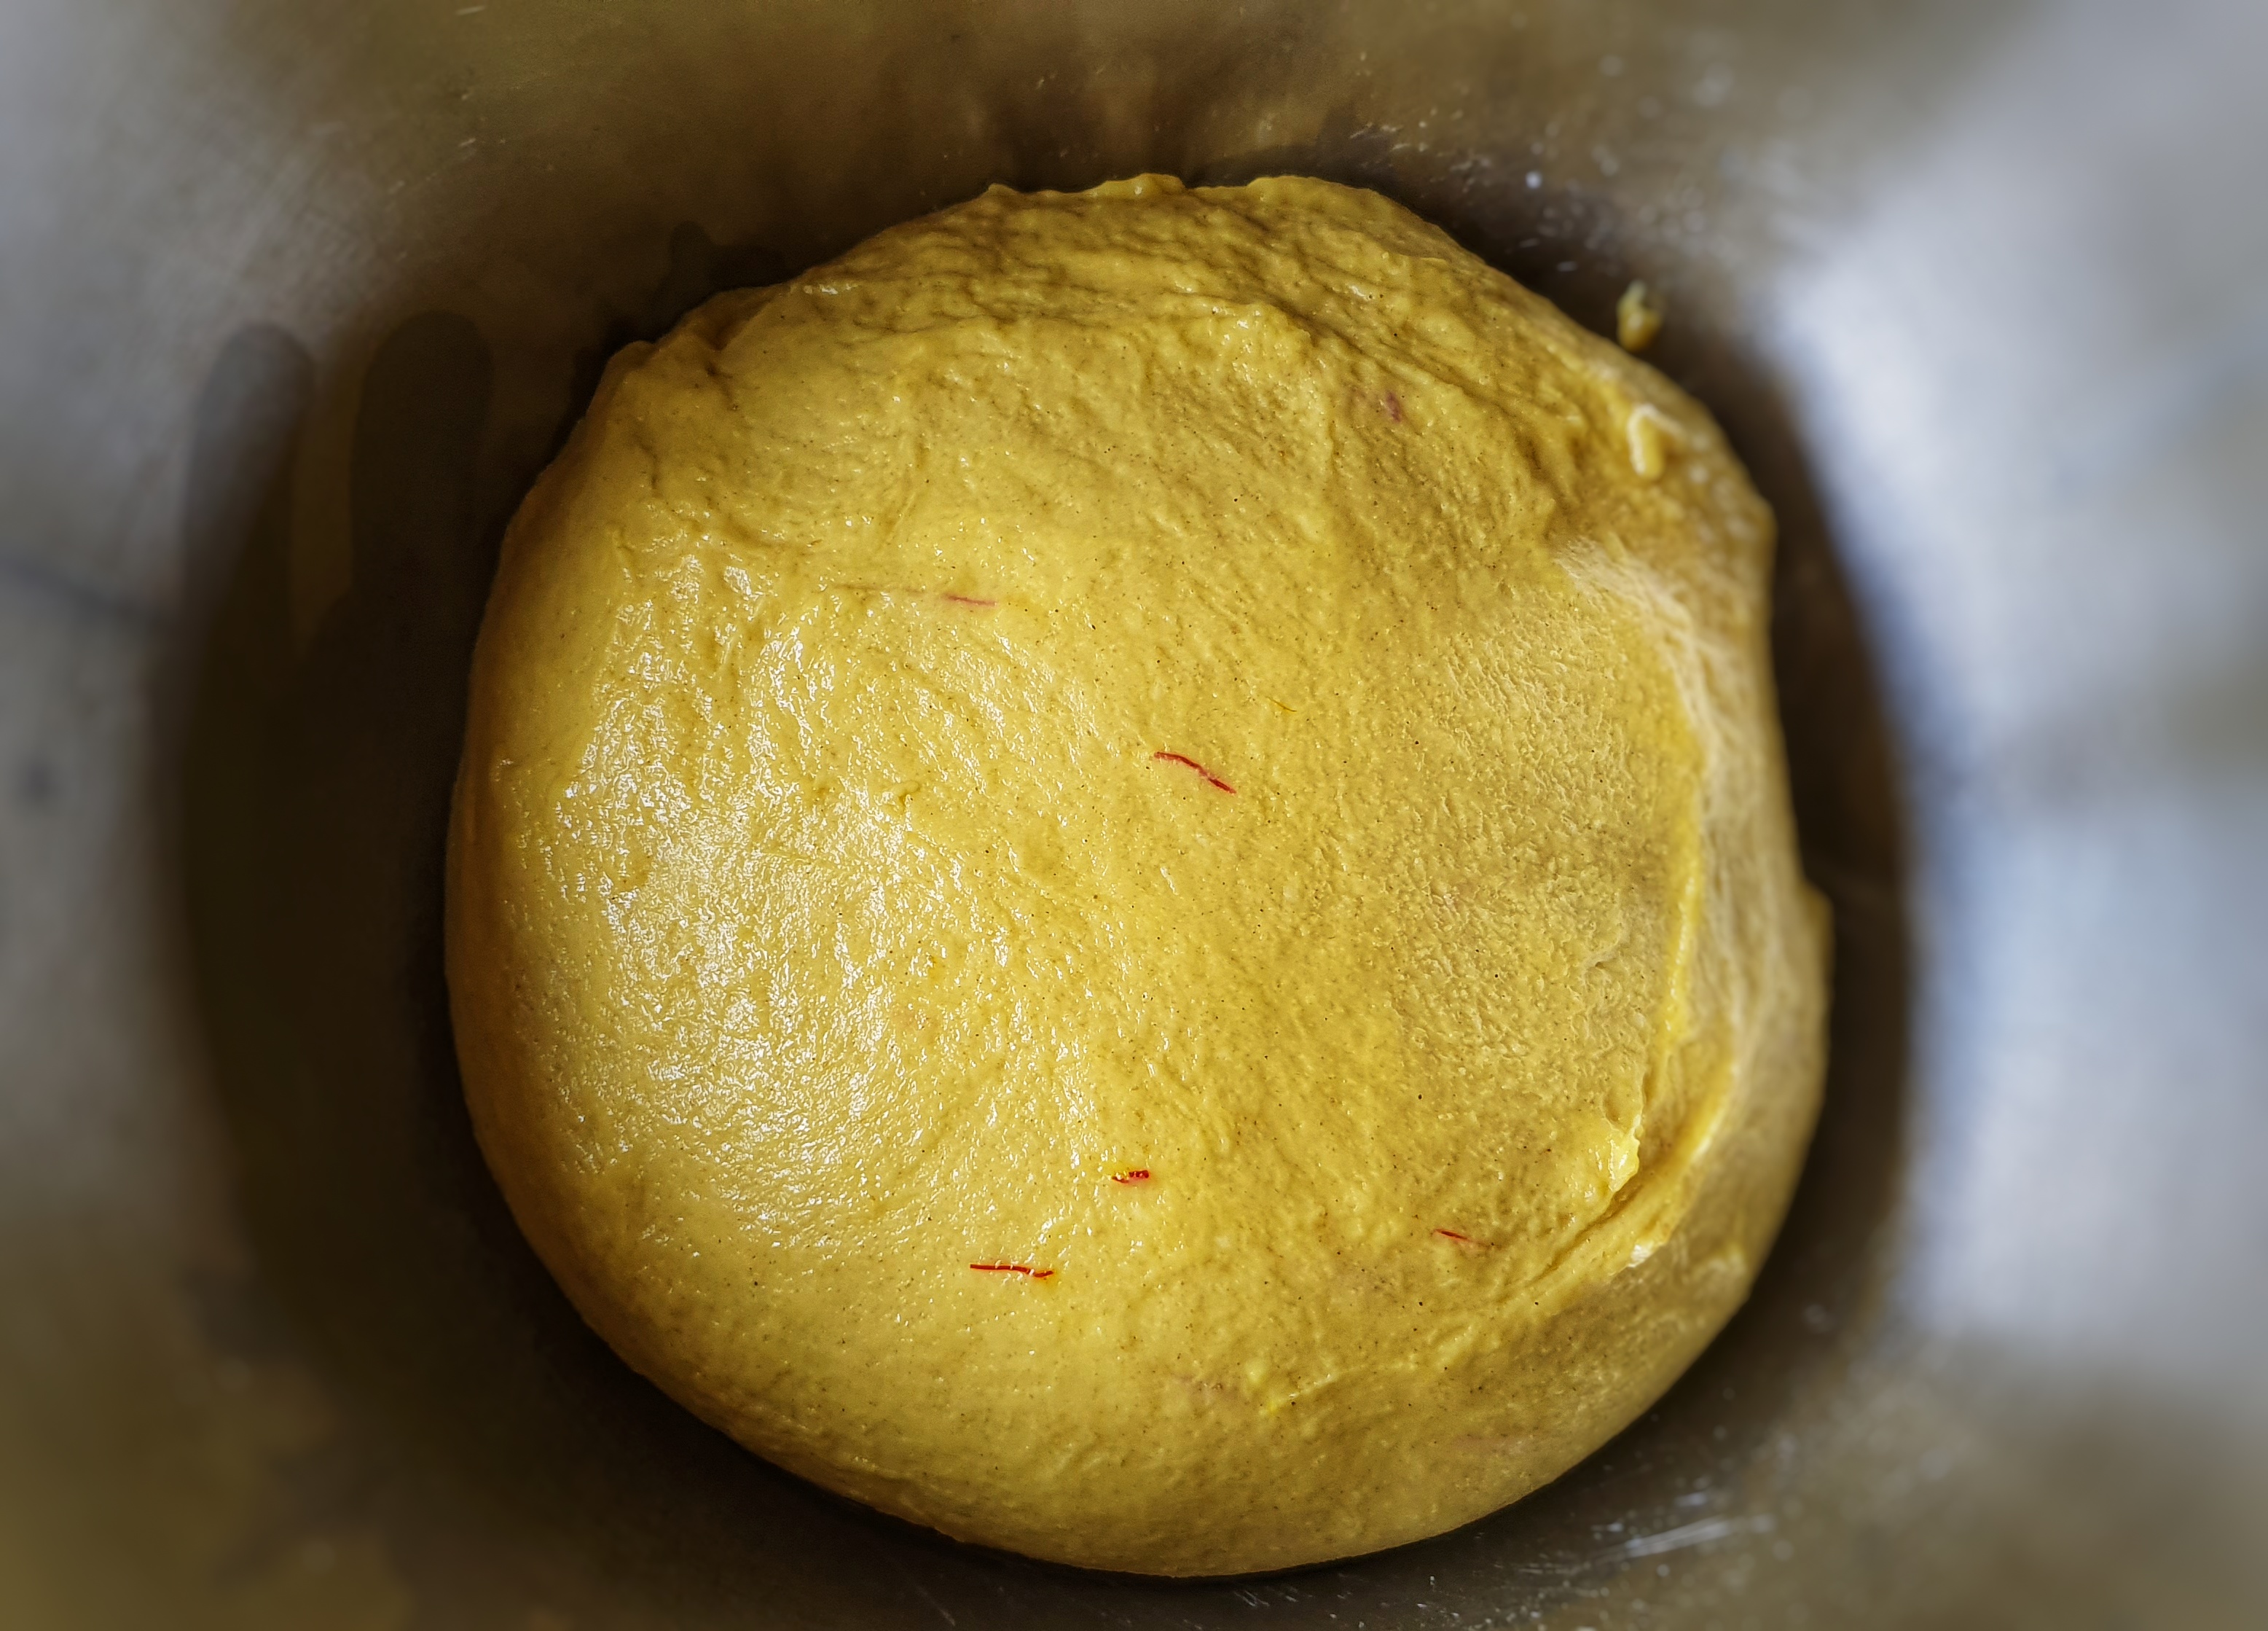
Mix the flour, yeast, salt, spice/s and sugar in the bowl of a tabletop mixer, make a well in the centre and add the eggs, clotted cream and saffron-infused milk. Attach a kneading hook, mix to combine on a slow speed and then turn up the speed a couple of notches and knead for around 6 minutes, until the mixture is smooth and elastic – it will still be a little sticky.
Add a little oil to a bowl and with oiled hands, gather up your dough into a ball and sit it in the bowl. Cover with cling film or a damp, clean tea towel until it doubles in size. Mine took 2 hours.
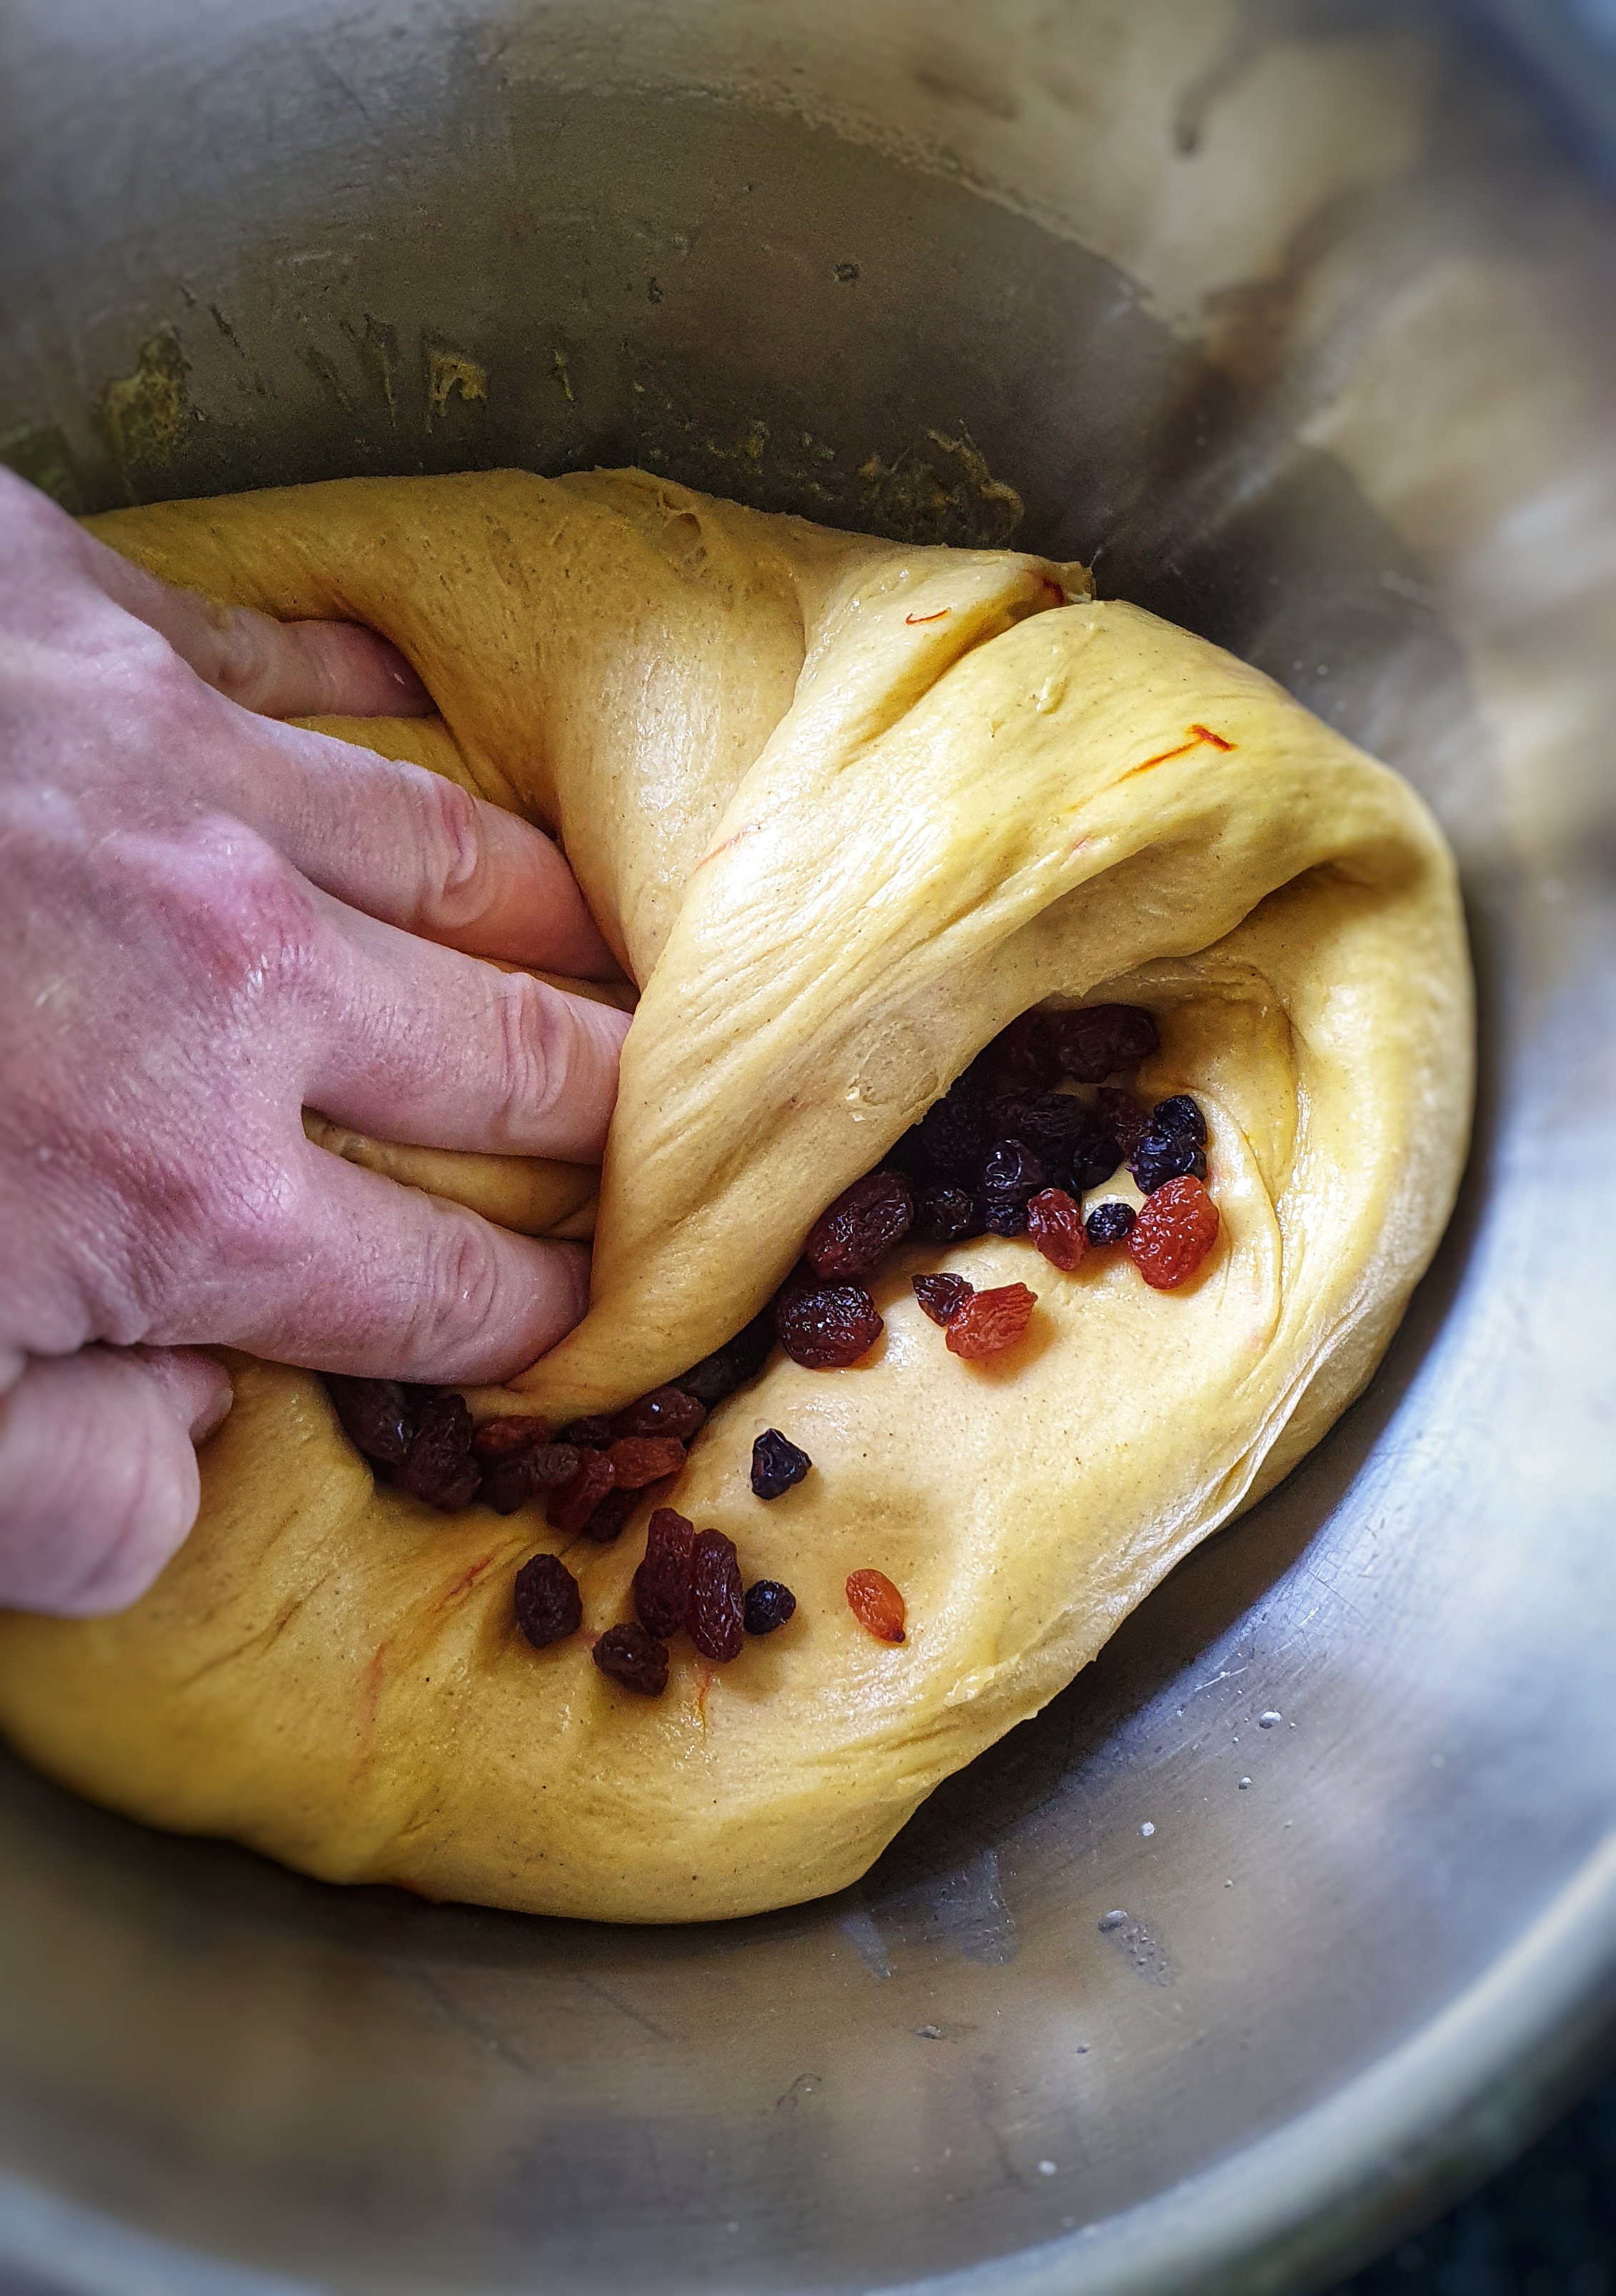
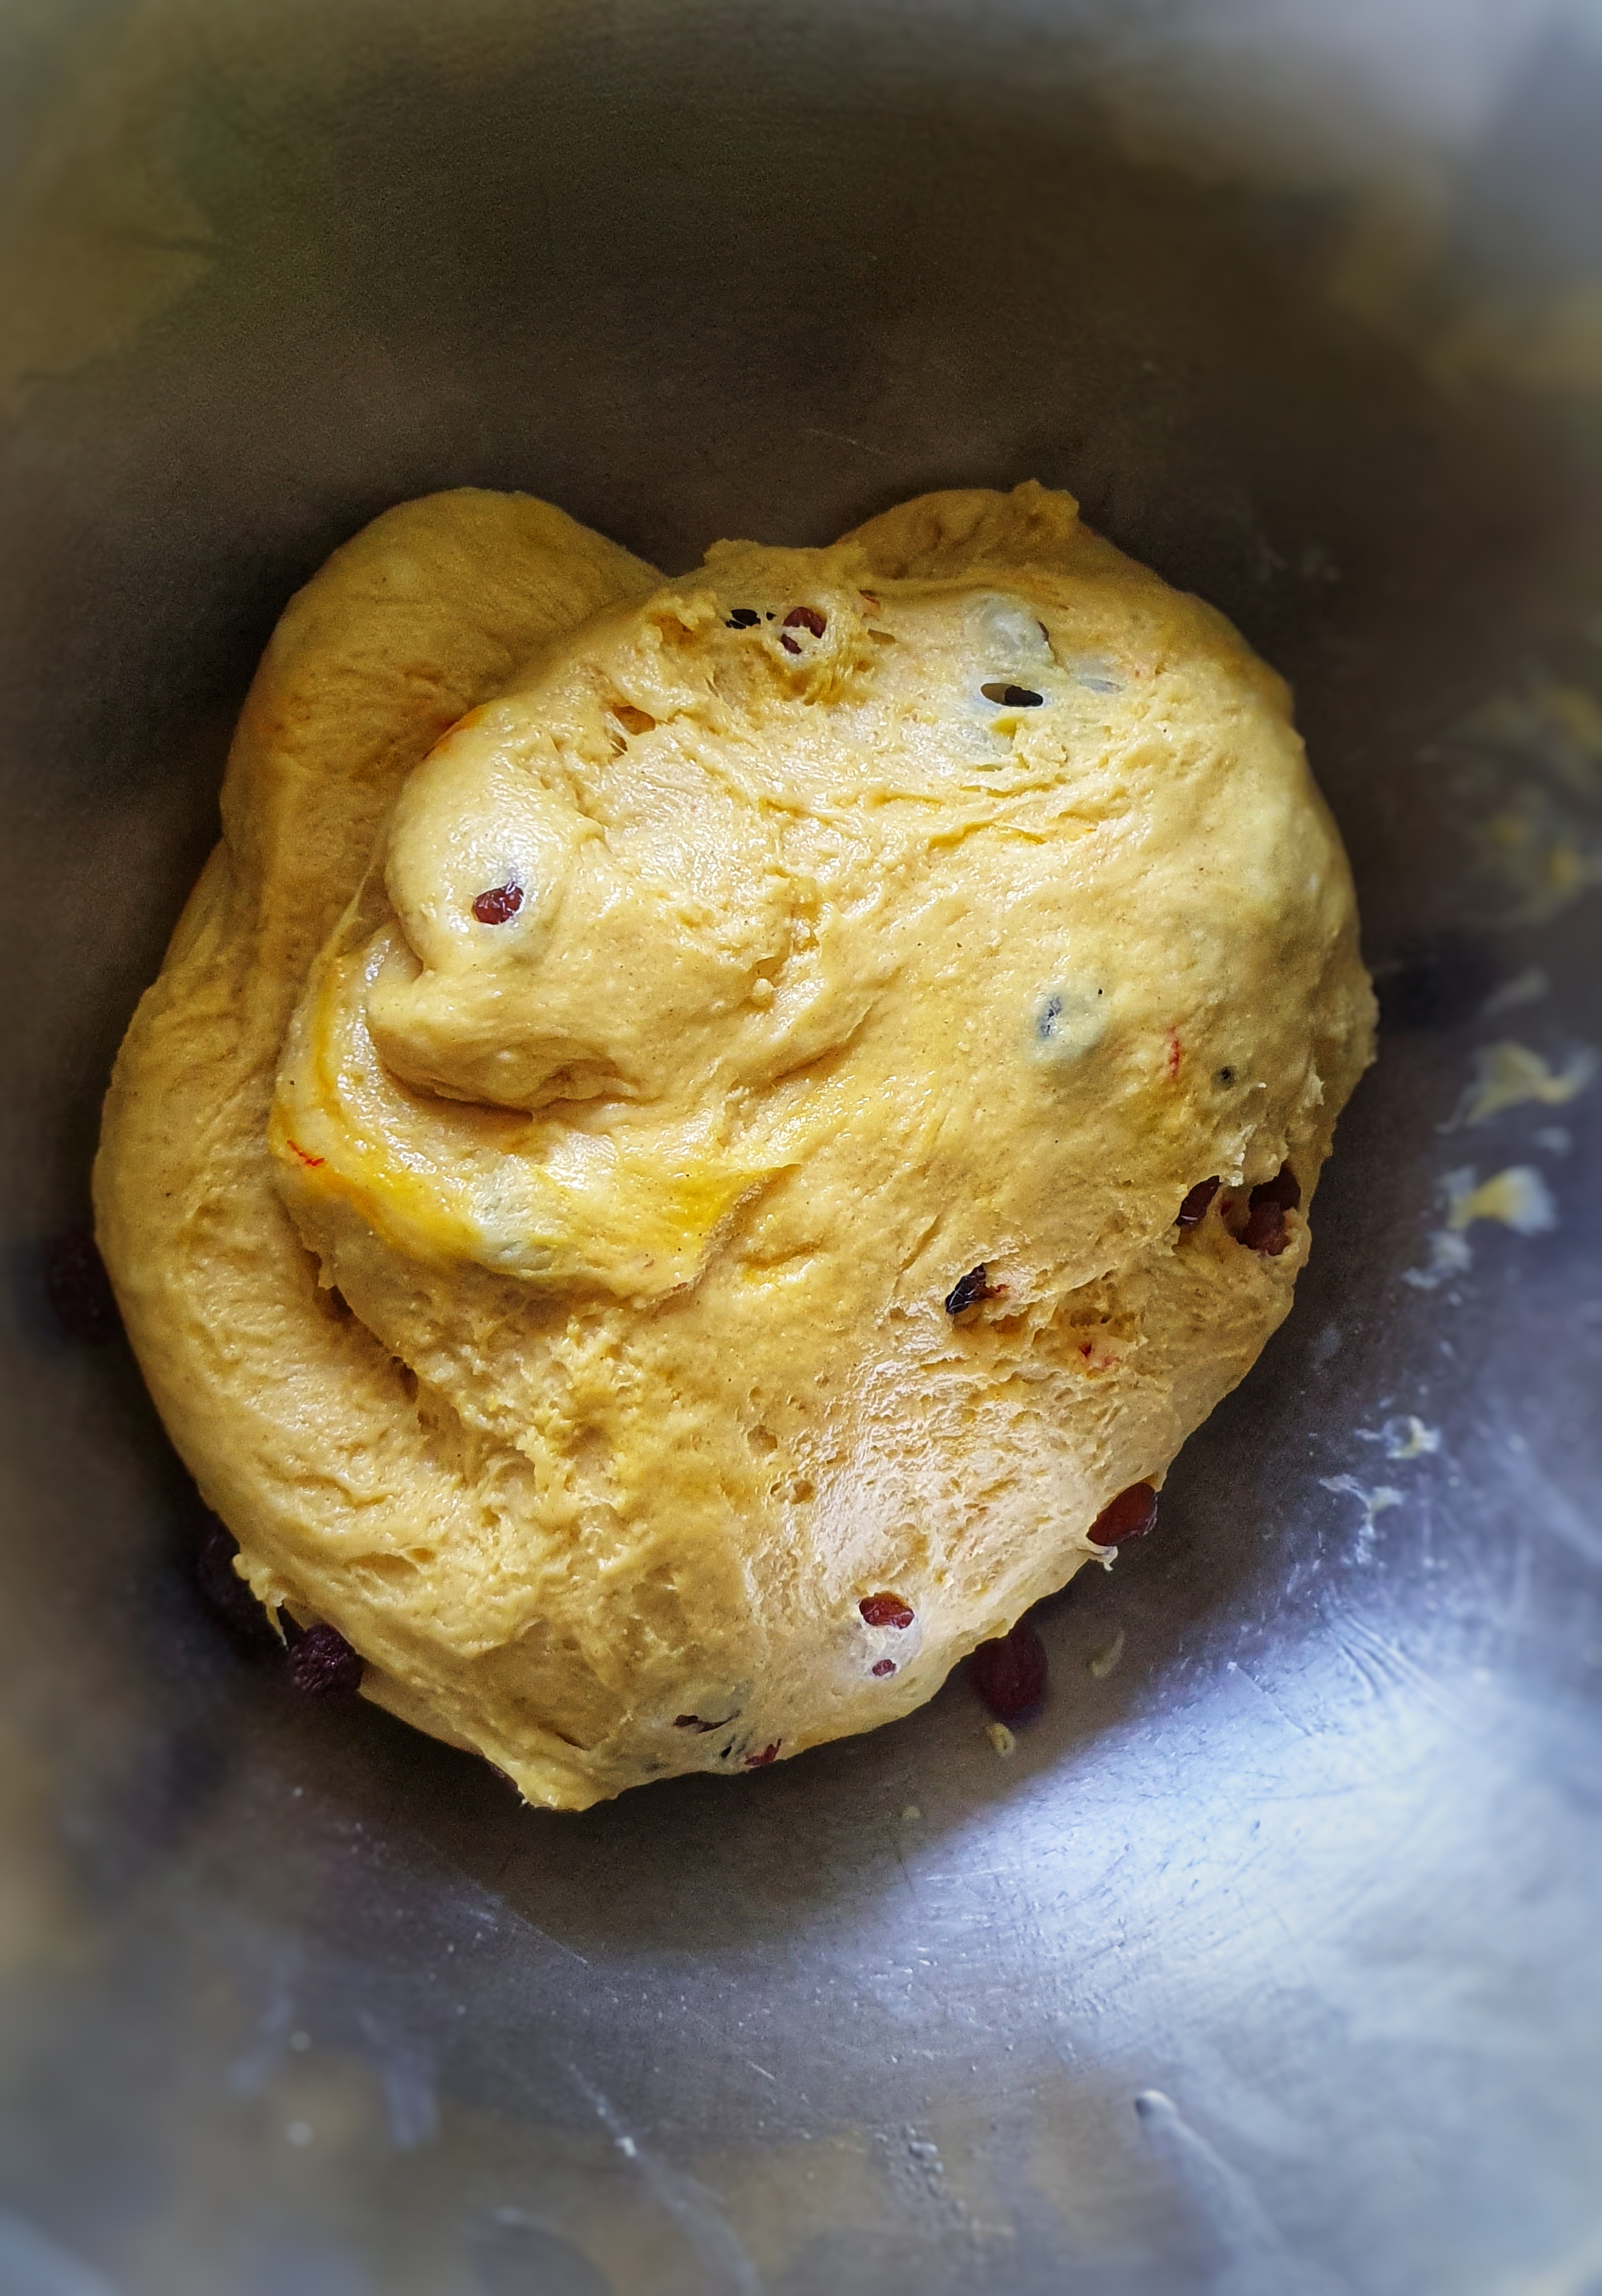
Knead the dried fruit into the dough, then divide into 12 (for precision weigh the dough), then line a baking tray with greaseproof paper.
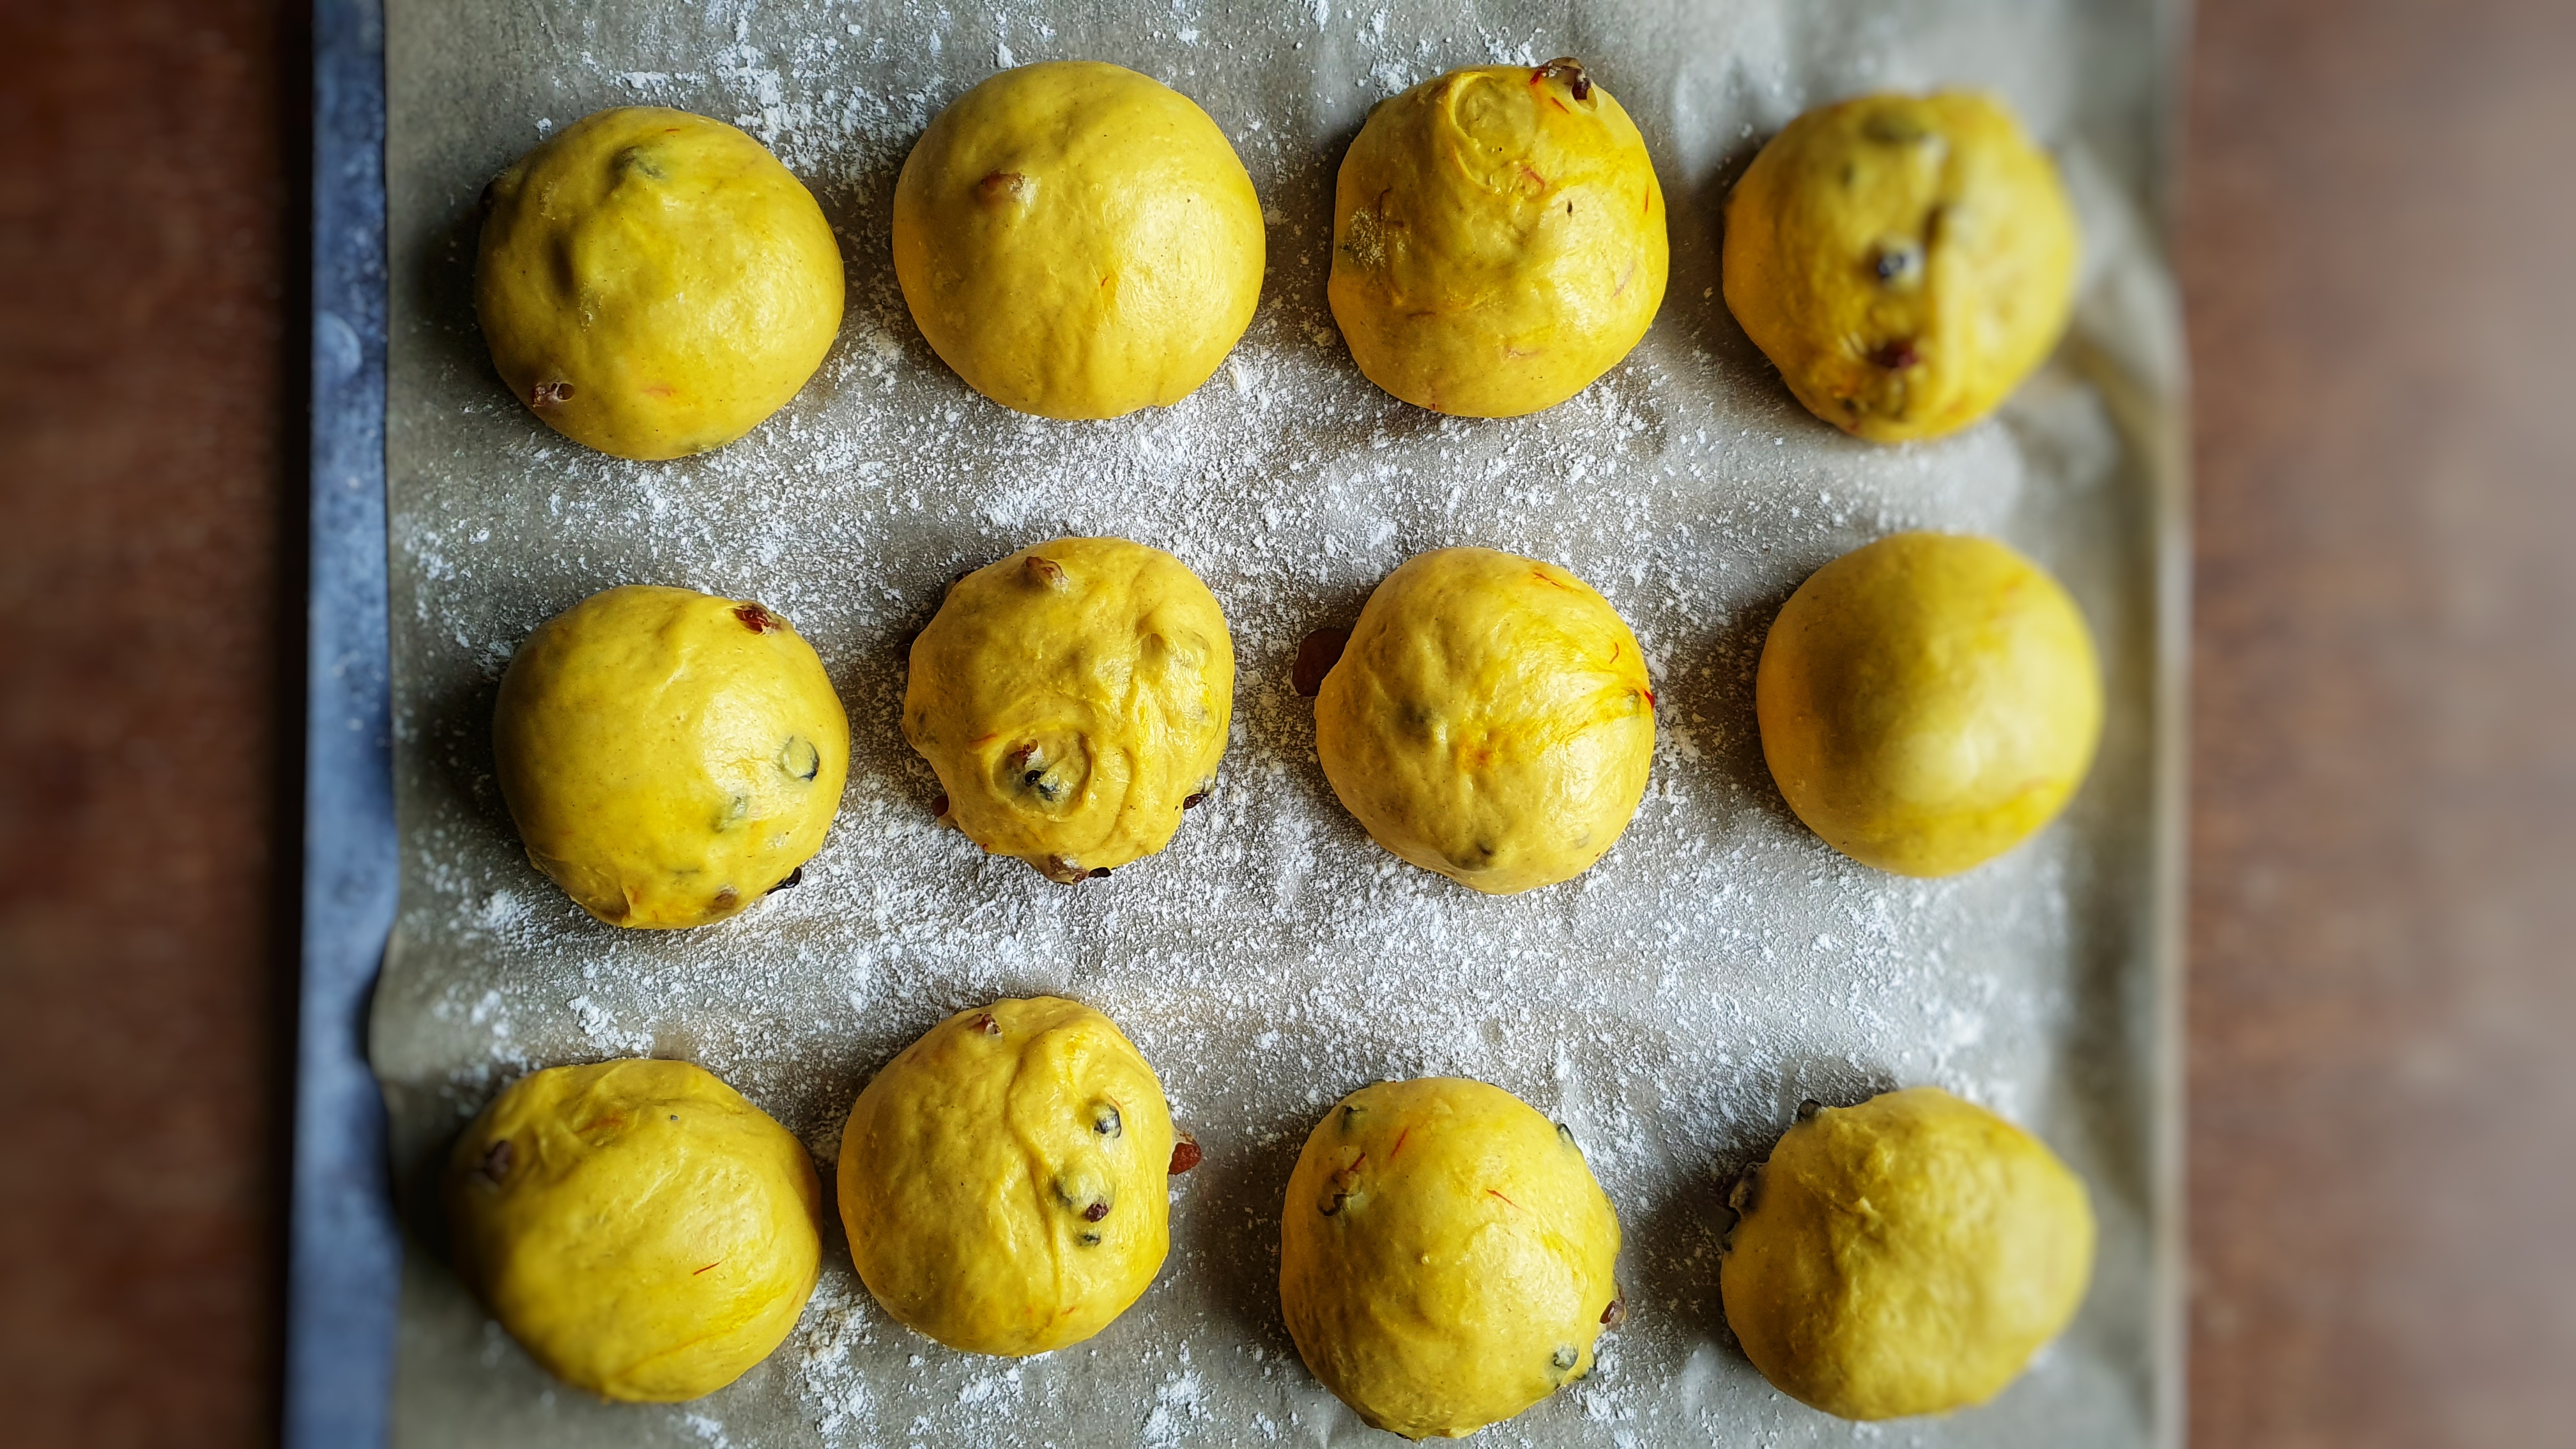
Roll each piece of dough into tight balls using a very small amount of flour to prevent it sticking and then arrange on the baking tray. Cover and allow to prove – this usually takes a third of the time as the first rising.[11]
Preheat the oven to 200°C and use the steam setting, or place a metal tray on the base of the oven and pour water into it.
Brush the buns with milk and place in the oven for 18 to 20 minutes. If they turn too golden brown, turn down the heat to 175°C.
When ready, remove from the oven and immediately brush with more milk and then throw a double layer of clean tea towels over them and allow to cool.
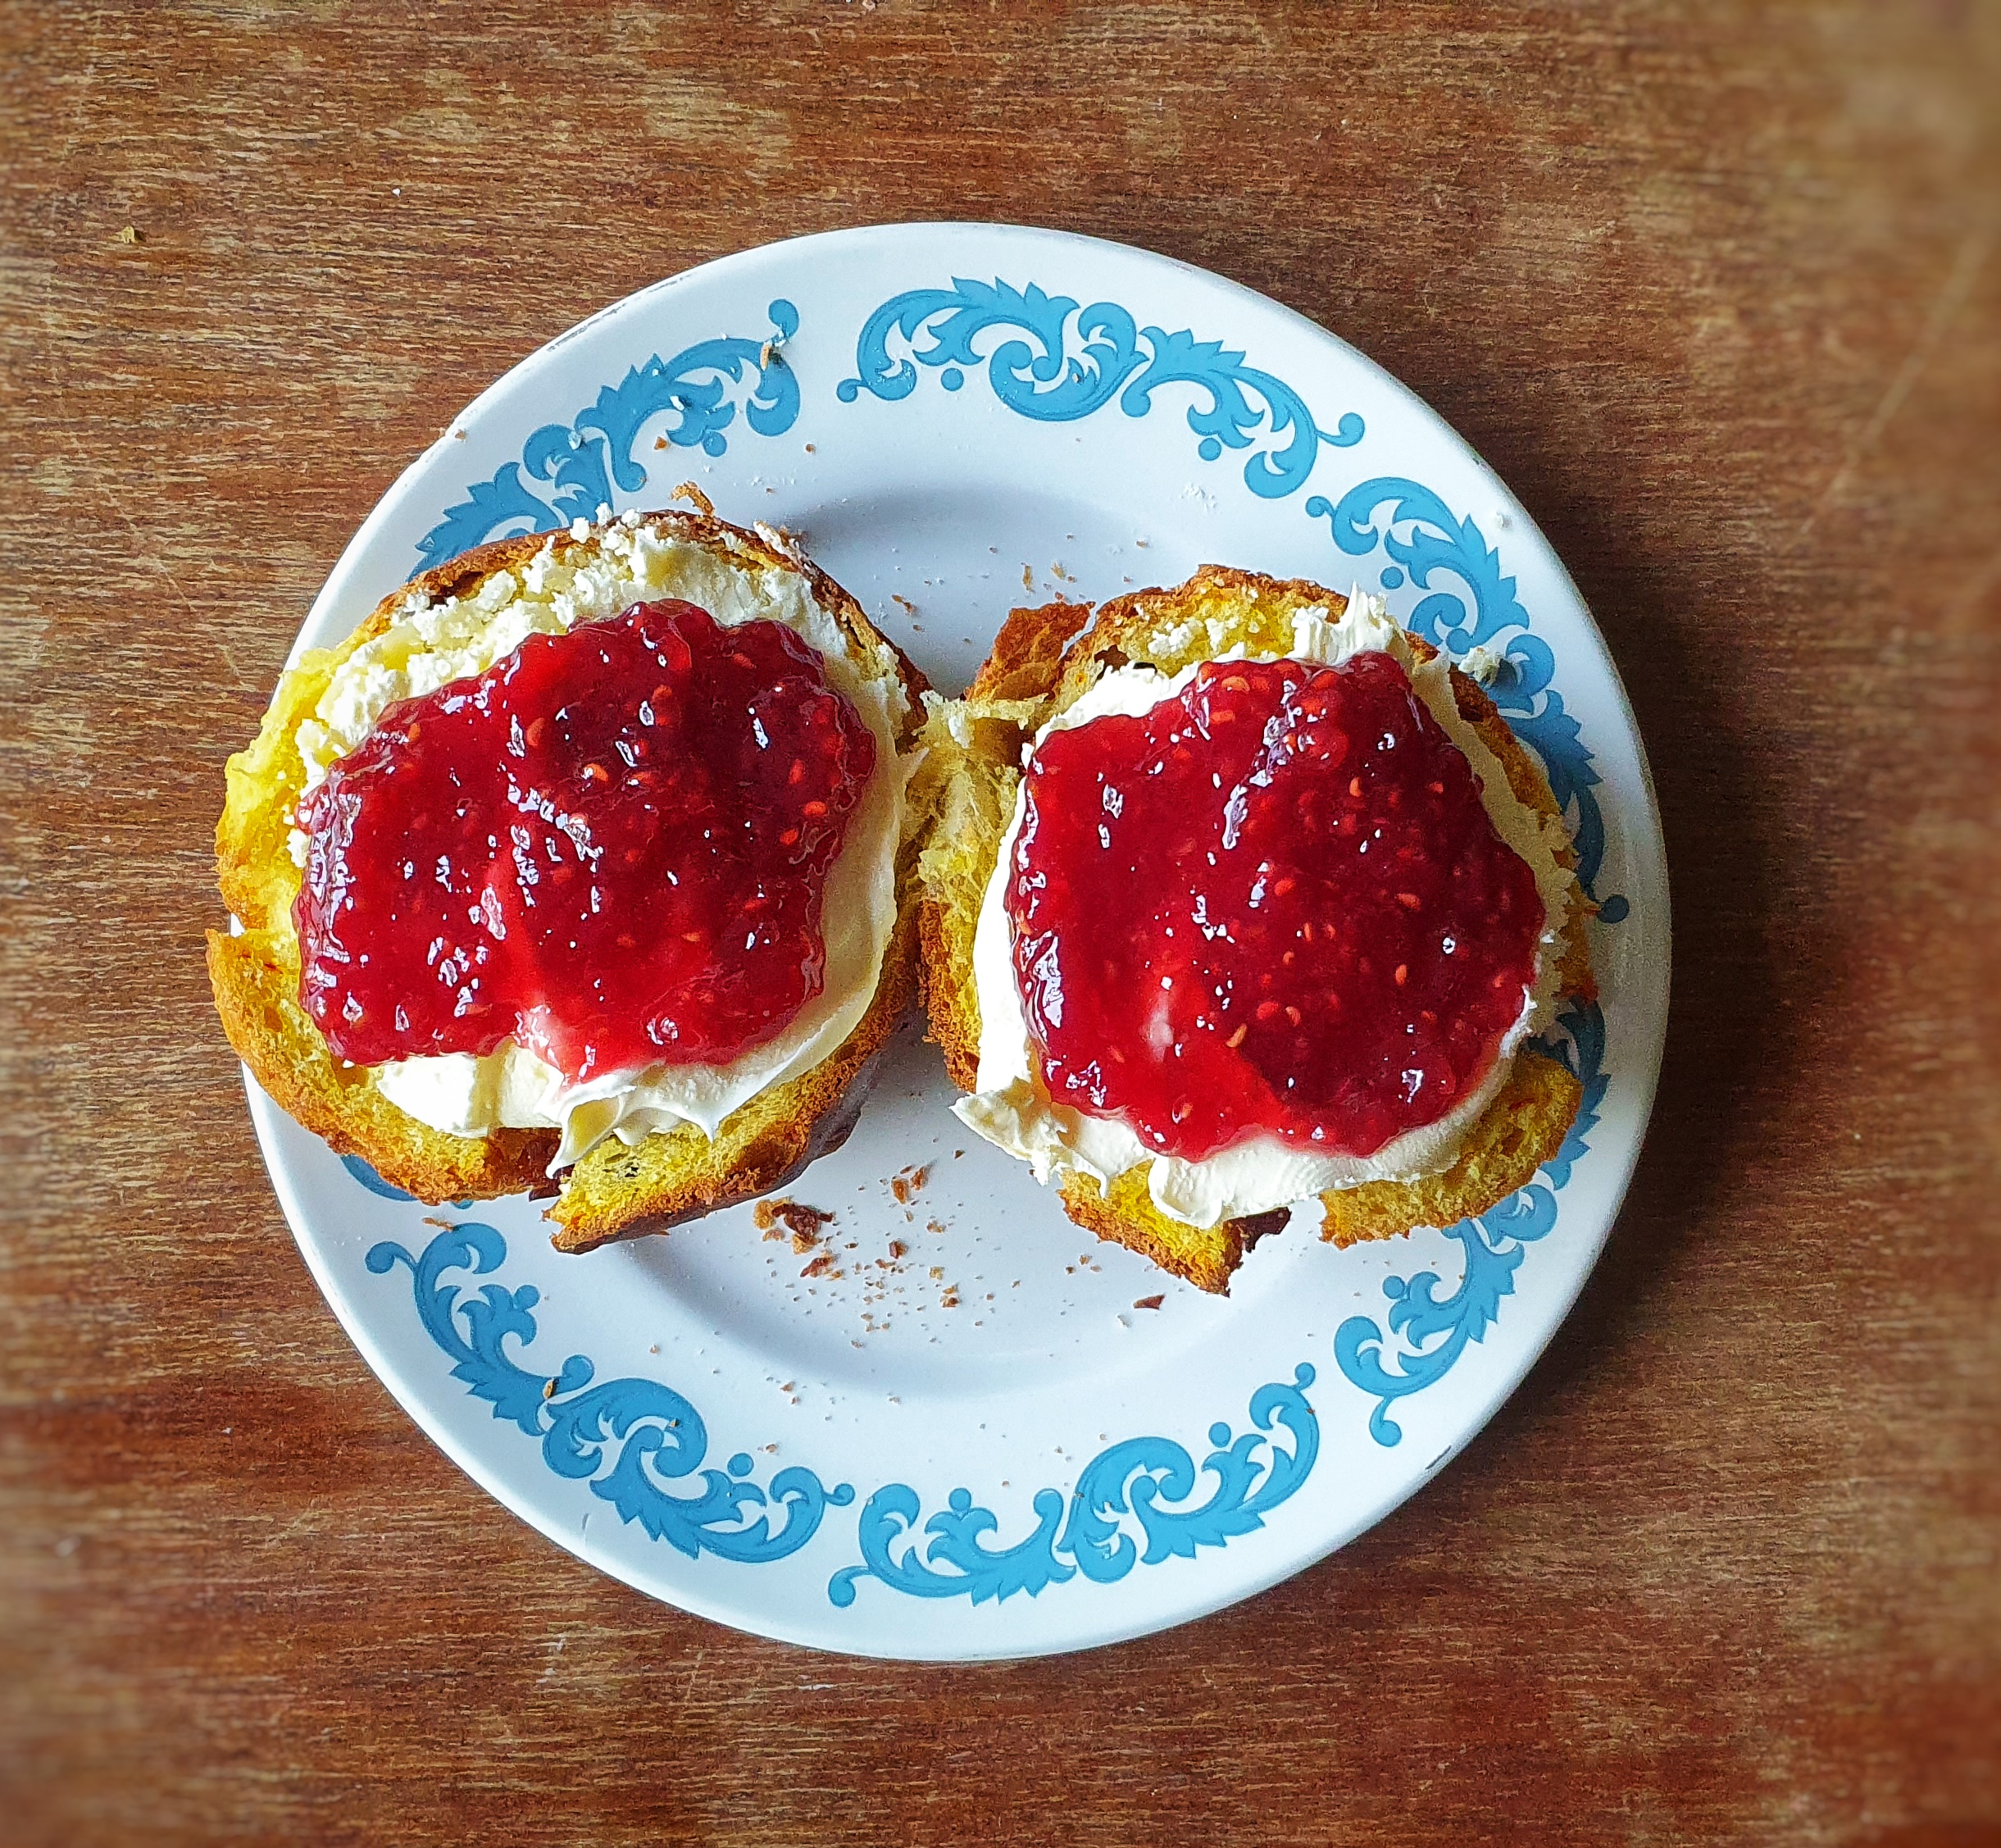
These are best eaten on the day they were made; any older than that, they should be toasted.
Notes:
[1] Davidson, A. (1999) The Oxford Companion to Food. Oxford University Press; Mason, L. and Brown, C. (1999) The Taste of Britain. Devon: Harper Press. It also prompts the question – why are there no famous Essex saffron bakes or dishes? Maybe there is.
[2] Bilton, S. (2022) Fool’s Gold: A History of British Saffron. Prospect Books.
[3] Digby, K. (1669) The Closet of Sir Kenelm Digby Opened (1997 reprint). Edited by J. Stevenson and P. Davidson. Prospect Books.
[4] Cassell (1883) Cassell’s dictionary of cookery. Cassell, Petter, Galpin & Co.; Farley, J. (1783) The London Art of Cookery, and Housekeeper’s Complete Assistant. Price.
[10] I speak from personal experience here: if you don’t remove the skin, the strands just get caught encapsulated in it.
[11] The best things to use to cover a whole tray of buns are a large shopping “bag for life”, an upturned plastic storage box or a damp, clean tea towel: take your pick.
At the Awards! L-R: Nina Lewis, Neil Buttery, Kate Travers, Martin Driscol and Kirsty Hopkinson
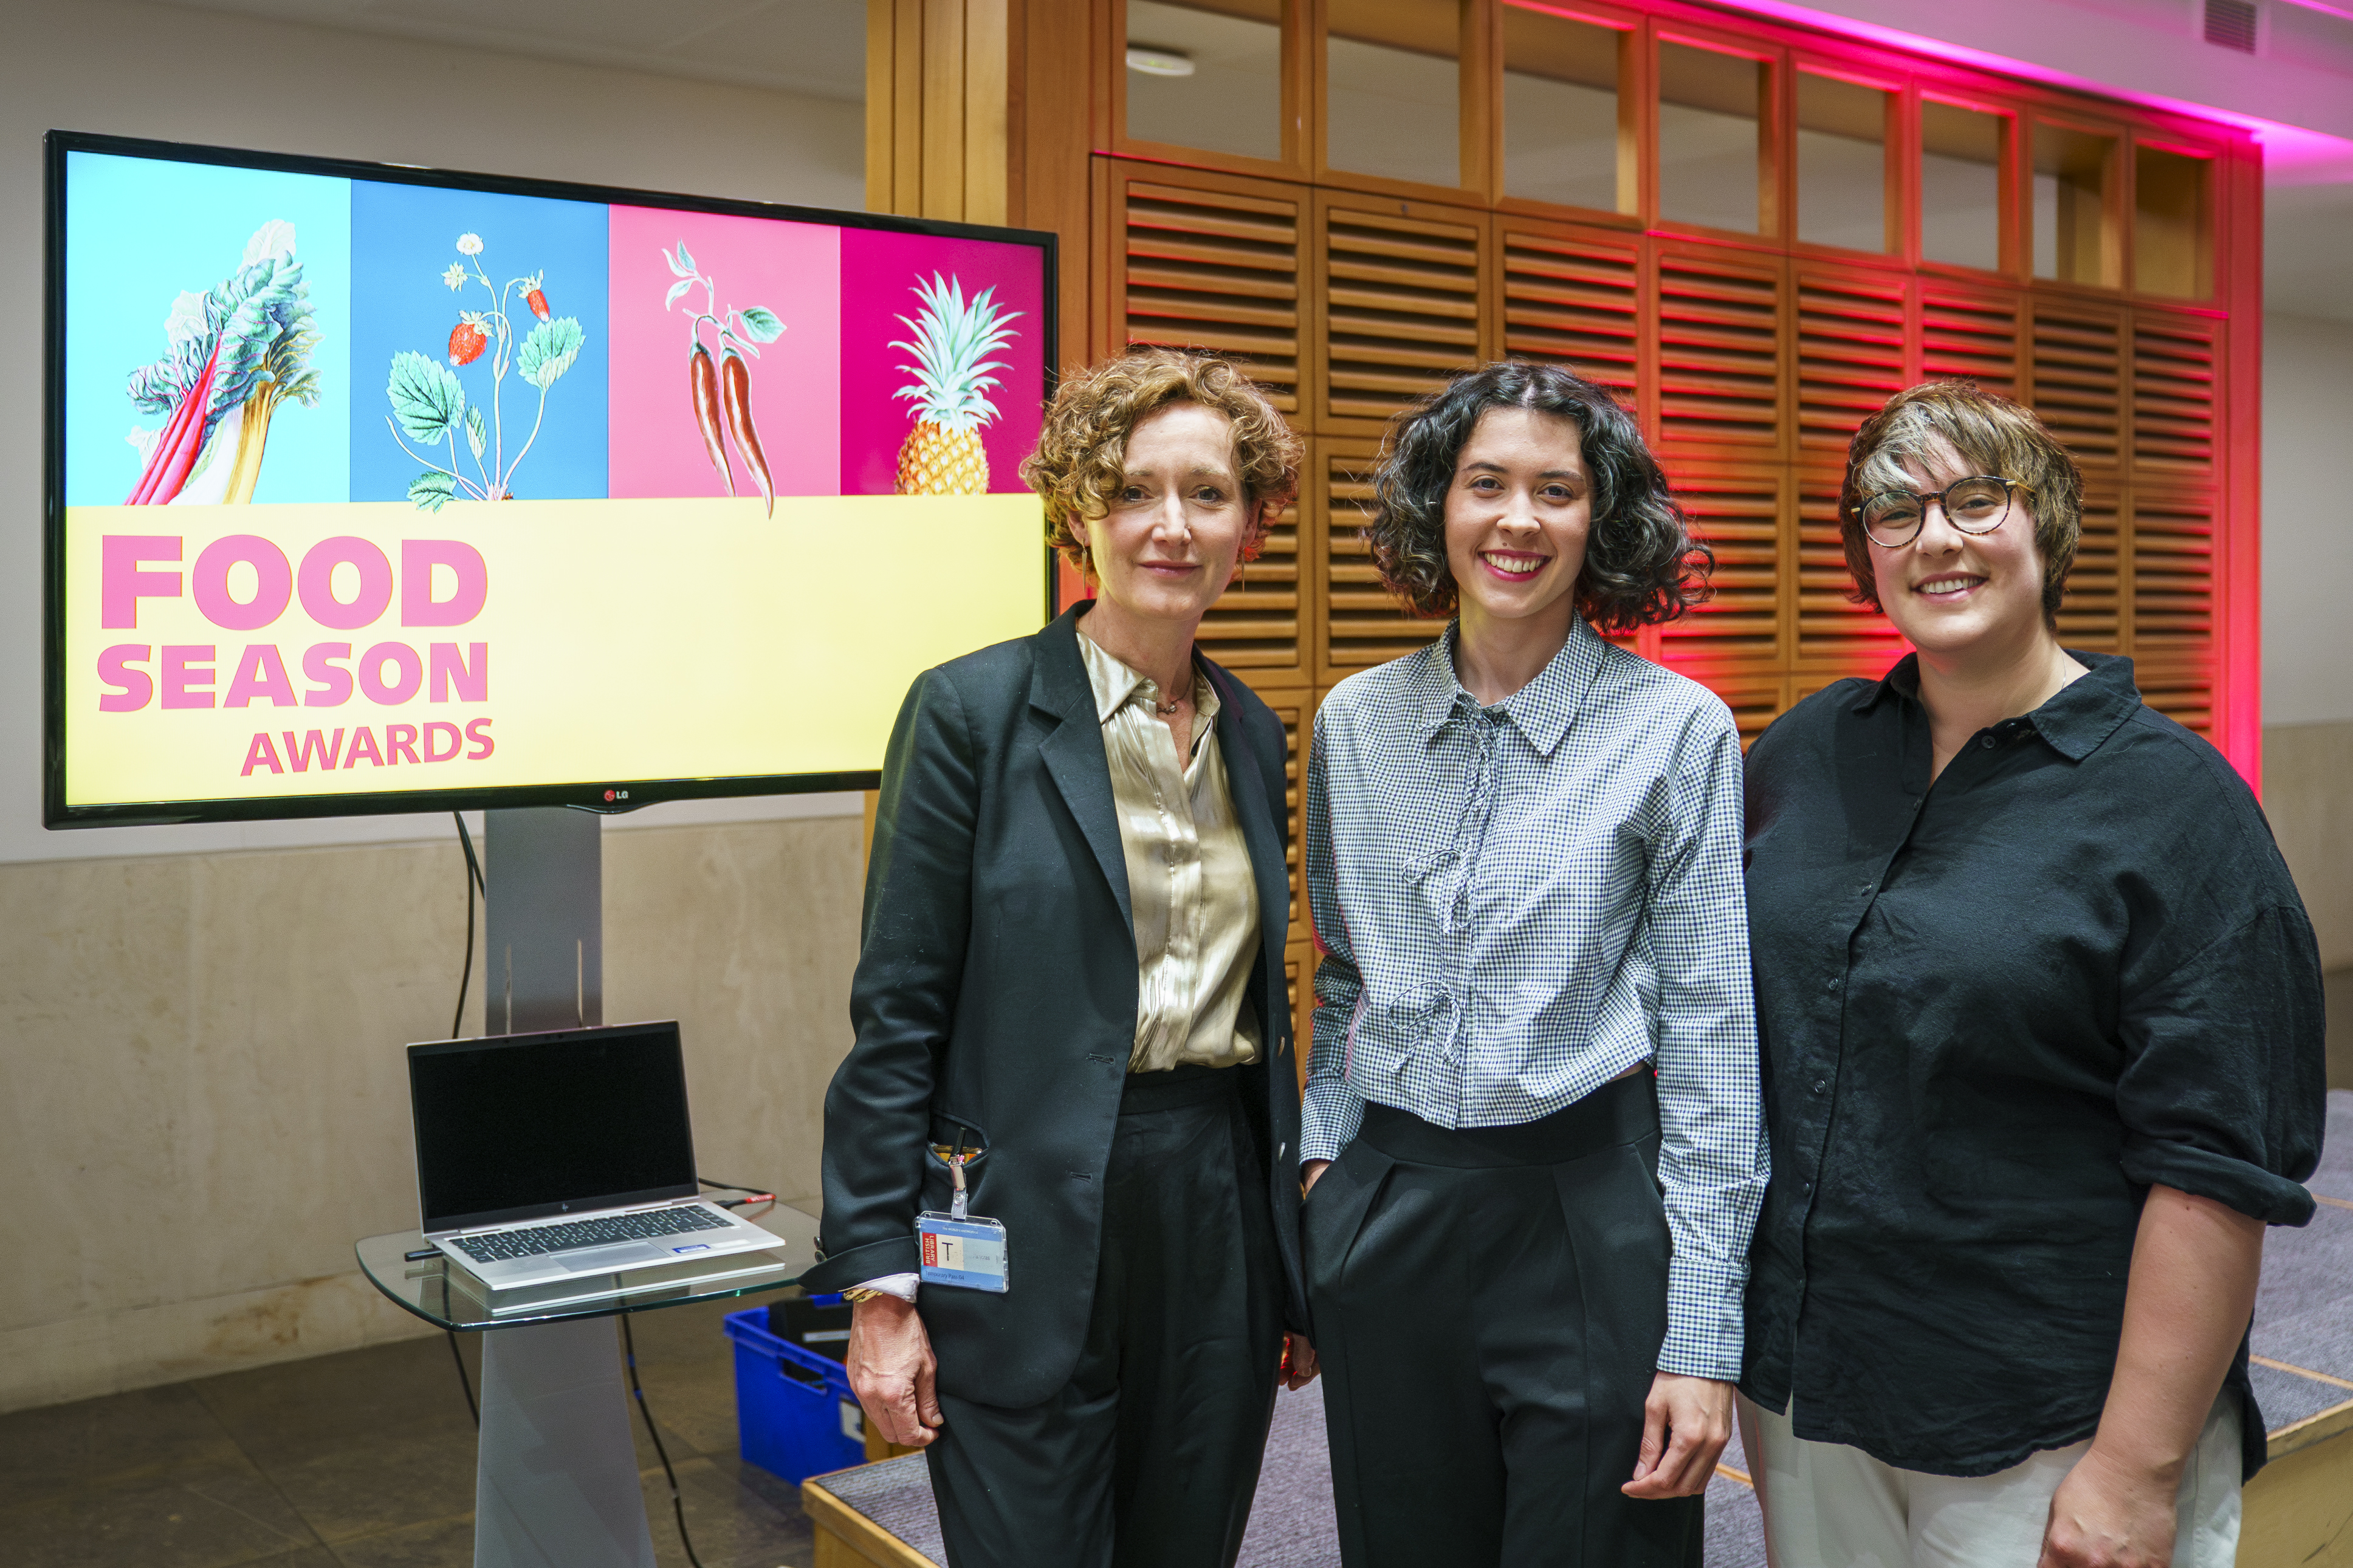
I have some very exciting news to share! The project that I worked on with the Museum of Royal Worcester in 2023-2024 won the Food on Display award at the inaugural British Library Food Season Awards on the 9th of June.
The judges were chef, writer and television presenter Nadiya Hussain, Food Historian and Curator at the Library, Polly Russell, Scent Designer and Food Historian Tasha Marks and Elly Magson, Senior Interpretation Manager at the Library. A big thank you to all of them, and we’re so glad the project has been recognised in this way.
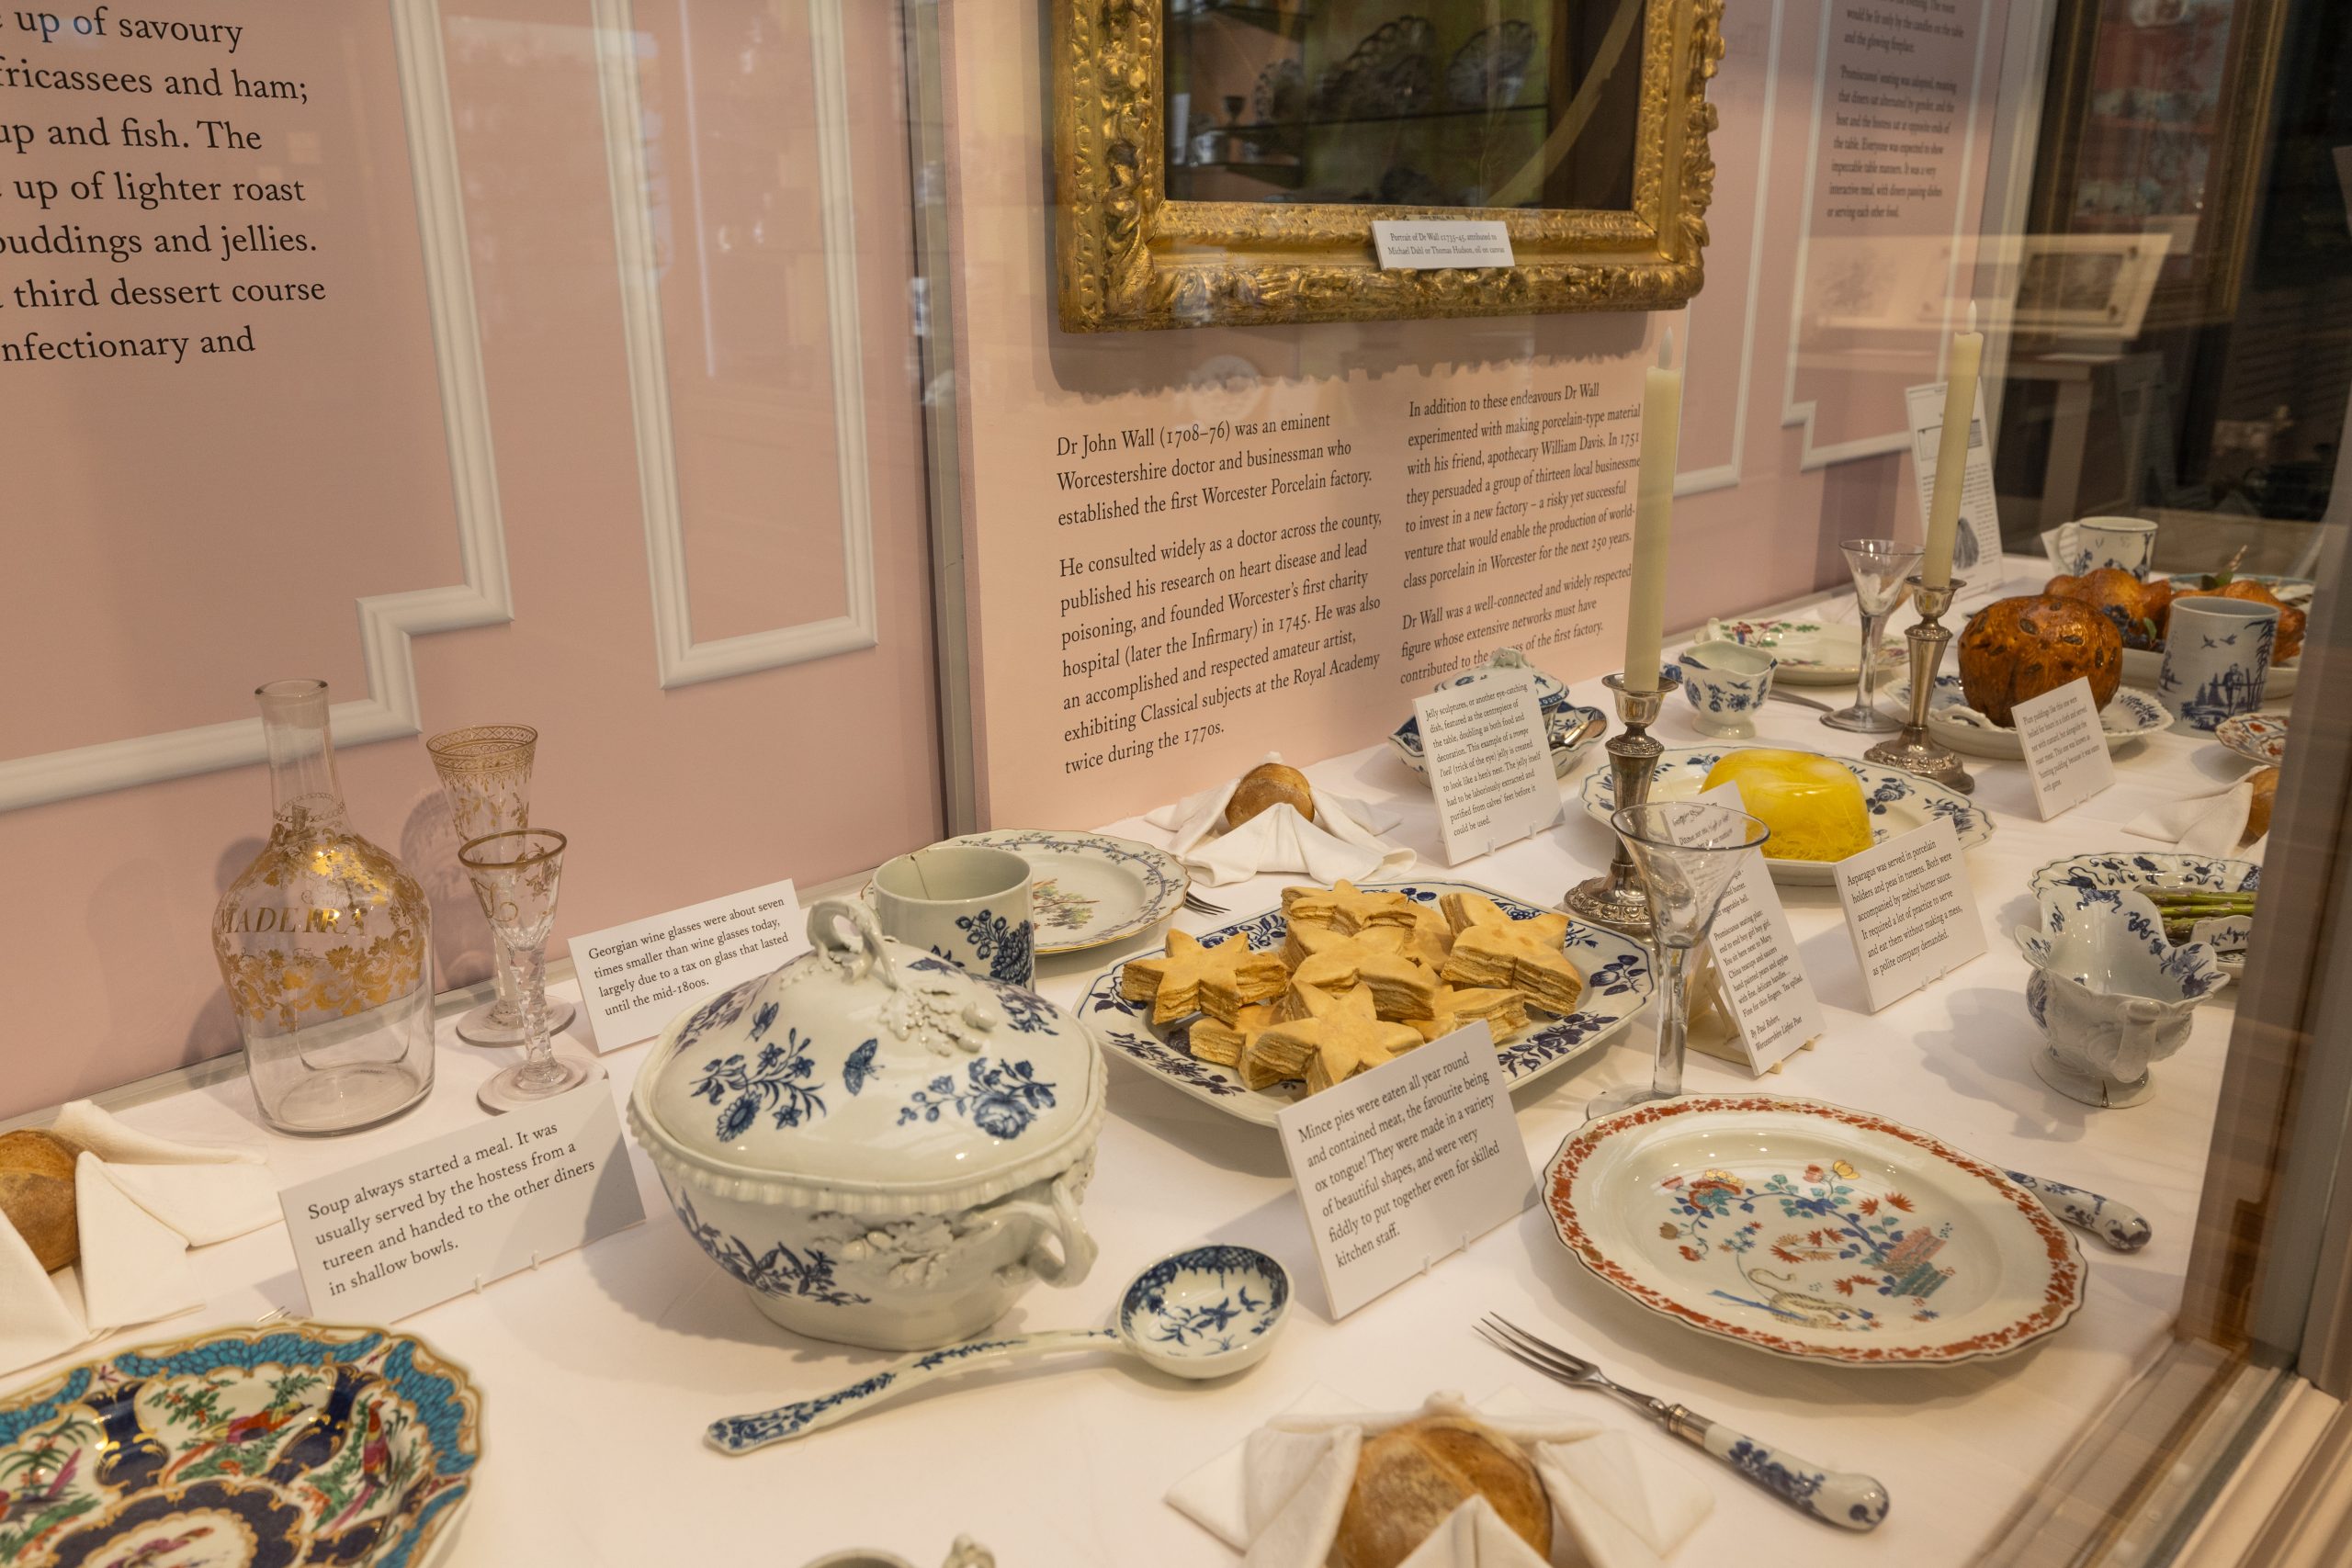
The judges were all drawn to the detail and creativity of Dr Wall’s Dinner at the Museum of Royal Worcester. The display and accompanying programme explored several interesting narratives around Georgian Dining, in a way that was both educational and visually striking. It was a wonderful example of how food can be used to animate a collection and reach different audiences.
Judges (L to R): Polly Russell, Elly Magson and Tasha Marks
There were several elements to the project, including the recreation of an 18th-century dining table, one that the founder of Worcester Porcelain – Dr Wall – might have enjoyed, including some very realistic fake food made by Kerry Samantha Boyes of the Fake Food Workshop in Kirkcudbright, Scotland. I also delivered some historical food workshops, making junkets with Key Stage 2 pupils; historical pies and pasties with the Hospitality & Catering students at the Heart of Worcester College; and plum pudding workshops with adults. A heady mix!
There was too the Worcestershire LitFest & Fringe, who, as a group, took inspiration and created original poems celebrating the ‘Language of porcelain and food’. Many of these are on display in the museum.
A huge thank you to everyone who was involved, especially Natasha Wilcockson who put in so much groundwork bringing together so many different people and keeping us all driving it forward.
The aim of the project wasn’t to show off the lovely porcelain – the museum was already a fantastic job – the aim was to explore the ways in which the porcelain was used and who was interacting with it: from the cooks in the kitchen to the guests sat around the table itself.
To kick off the project, I gave an online talk on the subject which can be watched here:
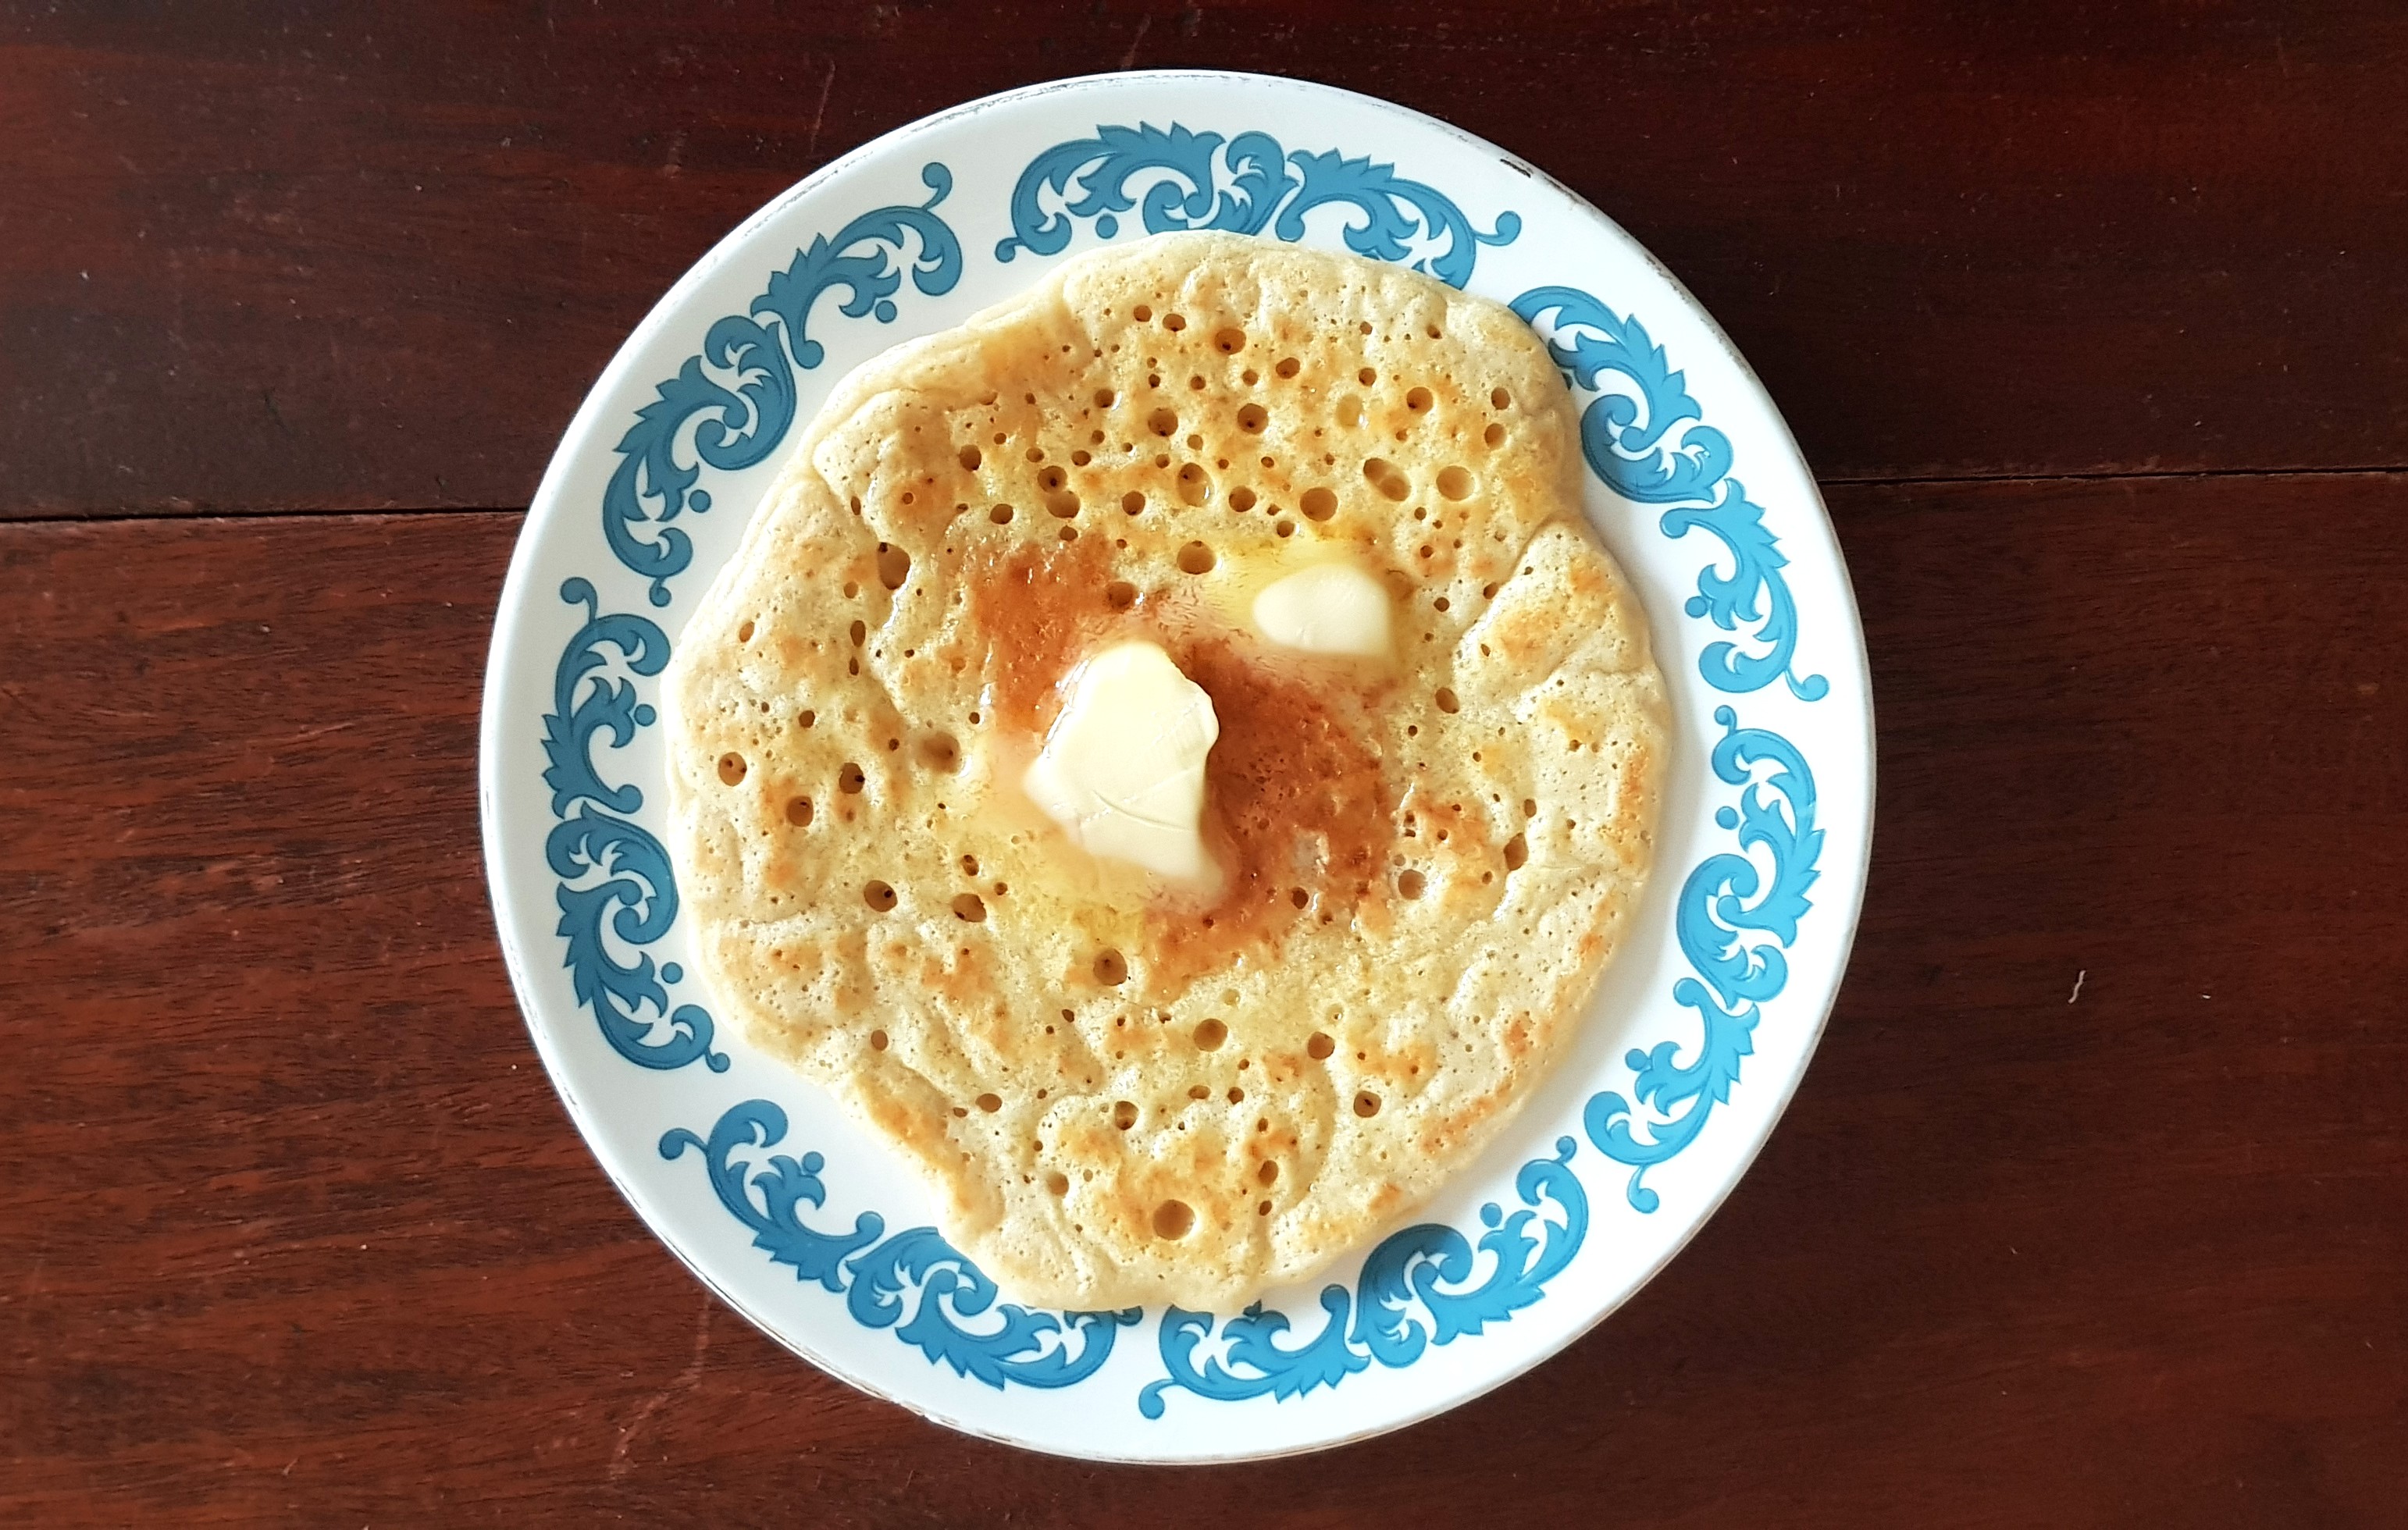
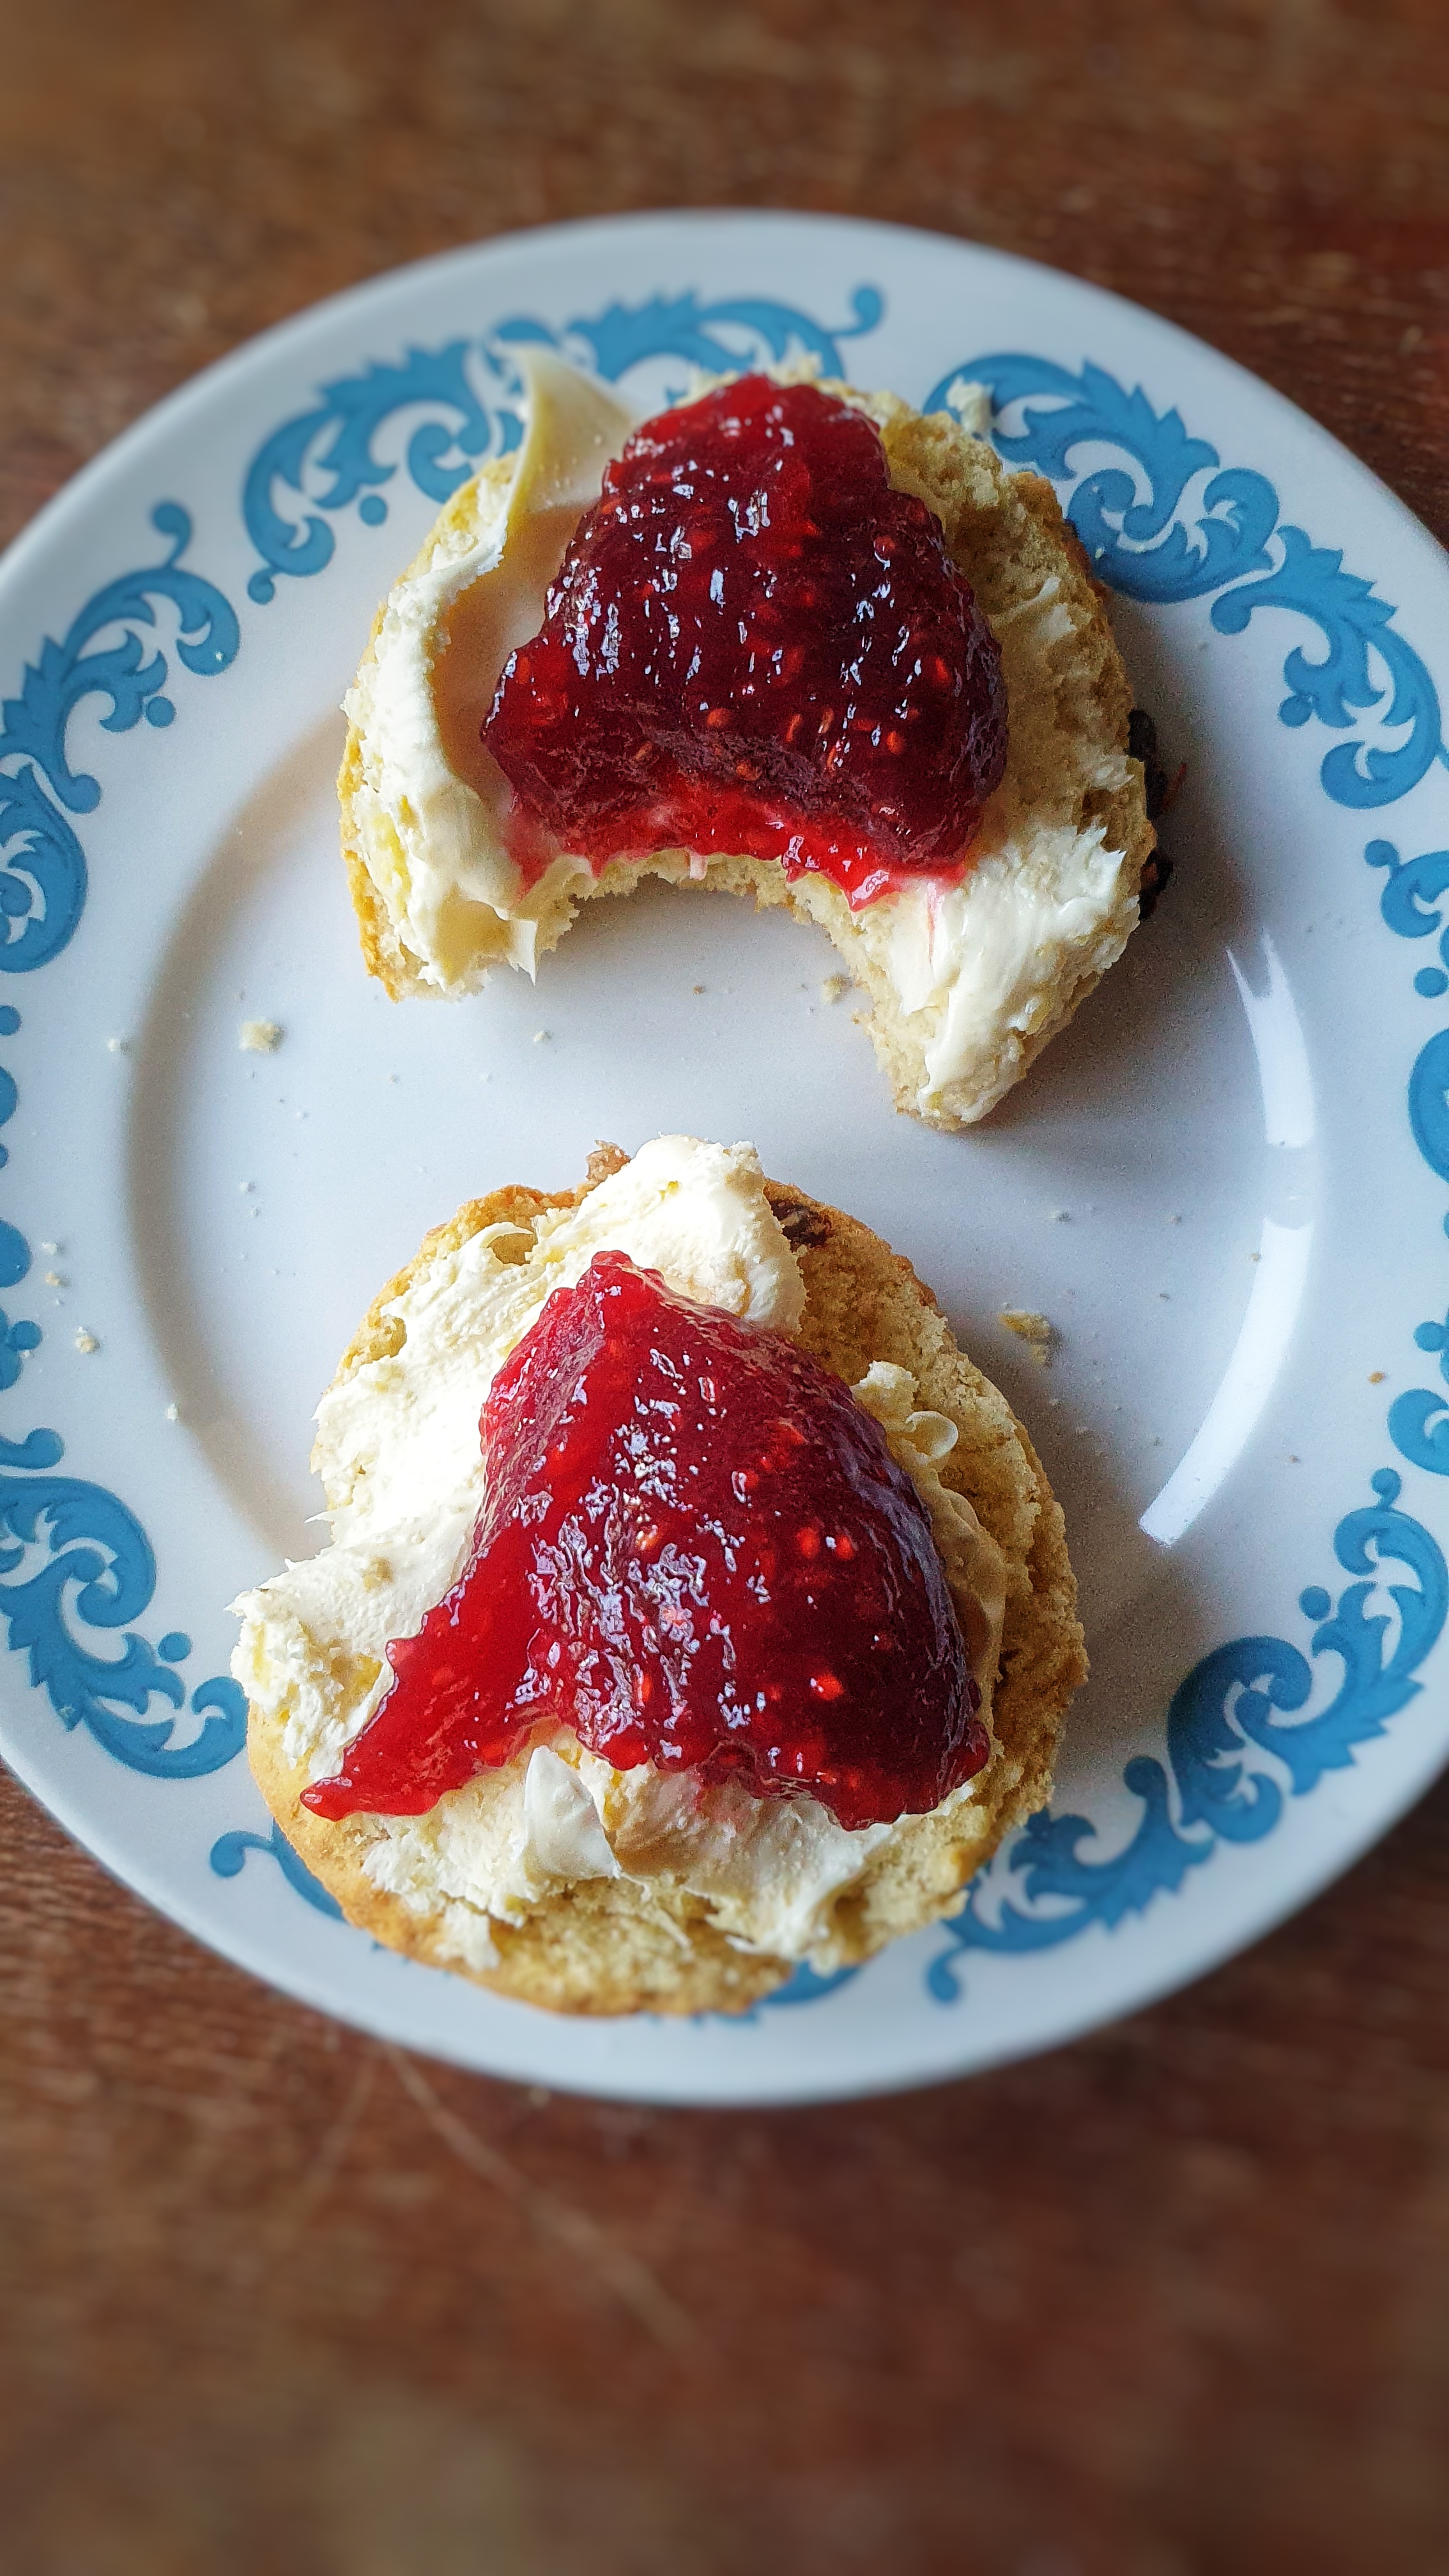
A couple of posts ago I gave you my recipe for scones. As with many foods, there is a variety of baked things that are called scones, which can cause a certain amount of confusion (see also: pudding[1], bun and cake[2]). My recipe is for what I think most people would consider a ‘proper’ scone: cakey, slightly dry and crumbly and therefore served spread with lashings of jam and butter or clotted cream. In other words, the scone one receives when ordering a cream tea. Despite its modern link with Devon and Cornwall, the scone most certainly originated in Scotland. These scones were baked not in ovens but on girdles/griddles or bakstones/bakestones, and there are two main types: those made from a runny batter and baked on a lightly greased griddle, often called drop scones today, or ‘Scotch’ pancakes outside of Scotland.[3] The second type is more cakelike; a dough that may be shaped into one large round and baked whole as a bannock, or cut into triangles as scones. The scones may also have been made by rolling out the dough and cutting out rounds. However they were shaped, these scones were cooked on a lightly-floured girdle.[4]
Wheaten bread may have been used in both types of scone, but more often they were made from oats or barley and sometimes peasemealin the very north of Scotland.[5] For delicious potato scones, some of the wheat flour is replaced with leftover mashed potatoes. Scones are typically chemically raised with bicarbonate of soda activated usually with soured buttermilk, but seeing as the word scone goes as far back as the early 16th century, this cannot have always been so; chemical raising agents were not widely available until the latter half of the 18th century. I do see recipes that use yeast and others with no leavening at all. I strongly suspect that the early scones would have been made with sourdoughs.
This is a sowans scone – made with the sour liquid poured off from fermenting sowans instead of the usual cultured buttermilk
Recipes begin to travel south and cross the border. Jane Grigson mentions a Northumbrian scone that is made with wholewheat flour and is leavened by yeast.[6] F. Marion McNeill, writing in the 1920s observes that ‘scones [are] popular in England now, but there are no recipes in Beeton’s book’, meaning – of course – the fantastically comprehensive Beeton’s Book of Household Management of 1861.[7] There are several recipes for scones in Cassell’s Dictionary of Cookery (1883) and Robert Wells’ Pastry & Confectioners’ Guide (1892).[8] Interestingly, none of them are baked in ovens despite many homes having ovens by this point in history.
However, in Good Things in England (1932), that wonderful collection of traditional English recipes by Florence White, there are recipes for scones baked both in ovens and on griddles. A variety of flours are being used too, including oatmeal and ‘Maize or Indian Meal’.[9] Baked scones – in England, at least – quickly take over and usurp not only the griddlecake variety of scones, but also the Devonshire/Cornish split in the cream tea.[10] But in the 21st century, these baked scones move even further away from their origins – egg is added for richness, milk is used over the now tricky to find buttermilk (in combination with baking powder).
For many folk, scones will be forever associated with the south-western peninsula of England, but it is important to remember, as Catherine Brown and Laura Mason put it in The Taste of Britain (1999): ‘Few English people would appreciate that [scones are] as Scottish as oatmeal porridge.’[11] I hope you appreciate it now!
If you like the blogs and podcast I produce and would to start a £3 monthly subscription, or would like to treat me to virtual coffee or pint: follow this link for more information.Thank you.
[2] These are discussed in my book Knead to Know: A History of Baking (2024).
[3] These griddlecakes are also the forerunner to the sublime fluffy American pancake
[4] Buttery, N. (2024). Knead to Know: A History of Baking. Icon Books; McNeill, F. M. (1968). The Scots Kitchen: Its Lore & Recipes (2nd ed.). Blackie & Son Limited.
[5] Buttery, N. (2018, April 17). Pease Pancakes. British Food: A History.
[6] Grigson, J. (1992). English Food (Third Edit). Penguin. I have – of course – cooked this recipe as part of my Neil Cooks Grigson project all the way back in 2008. I didn’t do a very good job of it and it requires a revisit. Read the original post here.
Hello everyone. I do hope your Bank Holiday Weekend is going swimmingly and that you are enjoying the sunshine (& showers!).
I have uploaded my ‘Knead to Know’ Zoom talk from September last year to my YouTube channel. I know there were several people who couldn’t make it on the night. It’s completely unedited except for the Q&A section at the end.
I talked about how I approached writing Knead to Know: A History of Baking by asking myself, “What is baking?”, a trickier and more philosophical question than you might think; the origins and history of the very first bakers; Early Medieval bread and bakers; Yorkshire Christmas Pyes; and the Denby Dale Pie.
If you like the blogs and podcast I produce and would to start a £3 monthly subscription, or would like to treat me to virtual coffee or pint: follow this link for more information.Thank you.