This post complements the special podcast episode I made for my £3 monthly subscribers on the topic of sourcing and cooking the organs of the central vervous system – brain, spinal cord and eyes – a most taboo topic. Inside you will find the episode itself as well as my method to prepare brains for cooking as well as a few recipes – should you get your hands on any.
If you are not a subscriber, you can become one on the Support the Blogs and Podcast tab of the blog, where you will access all of my Easter eggs, premium blog content and receive my weekly newsletter AND help support the running of everything too!
Subscribe to get access
Read more of this content when you subscribe today.
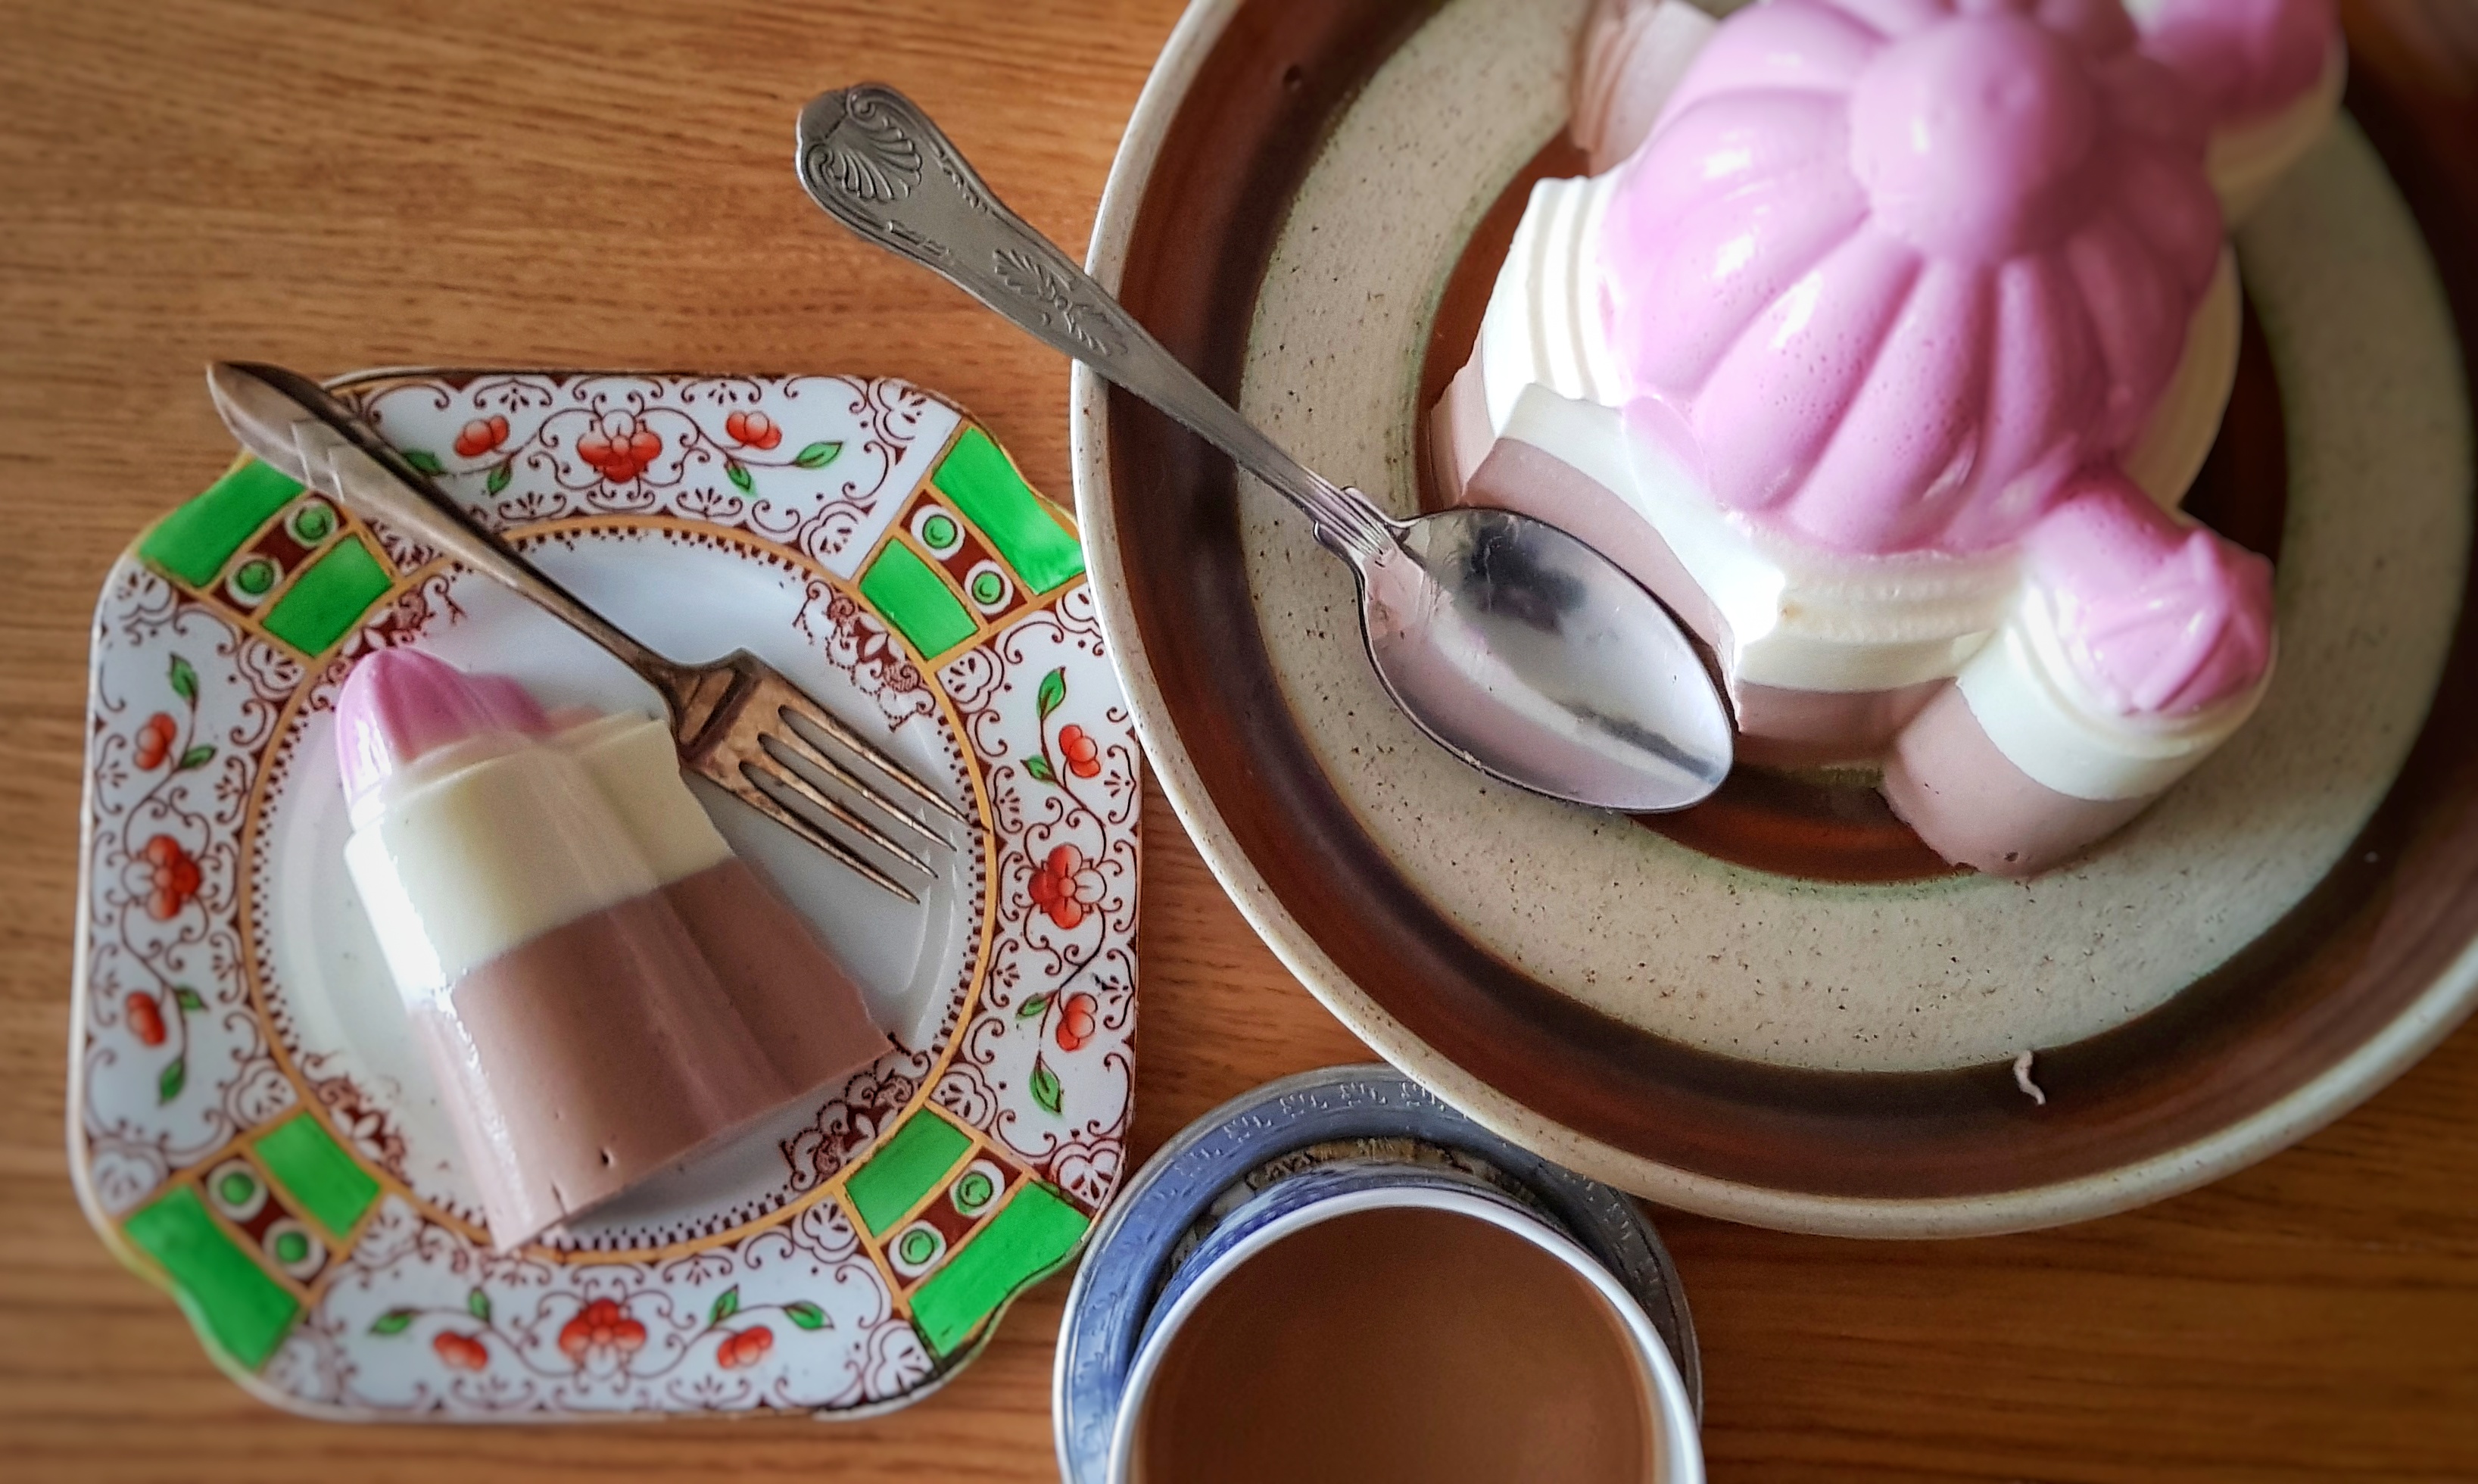
As promised on the ‘School Meals Service with Heather Ellis’ episode of the podcast, I have written a recipe for a stone-cold school dinners classic for my monthly subscribers. I went for the pink-sponge and custard because quite a few people have mentioned this as a favourite on social media, so it was the obvious choice. Heather Ellis said on Twitter that there were several different colours of these sponges: I also remember brown (though I don’t think it was chocolatey, just coloured brown). Others remembered white, and I wondered if yellow was perhaps a colour? Let me know your thoughts/memories.
Listen to the podcast episode here:
Subscribe to get access
Read more of this content when you subscribe today. A monthly subscription costs just £3 (about $3.80 USD). You get access to my premium blog content, my Easter eggs page (with ours of clips to listen to!) and my monthly newsletter.
This post complements the episode of The British Food History Podcast called ‘The School Meals Service with Heather Ellis’:
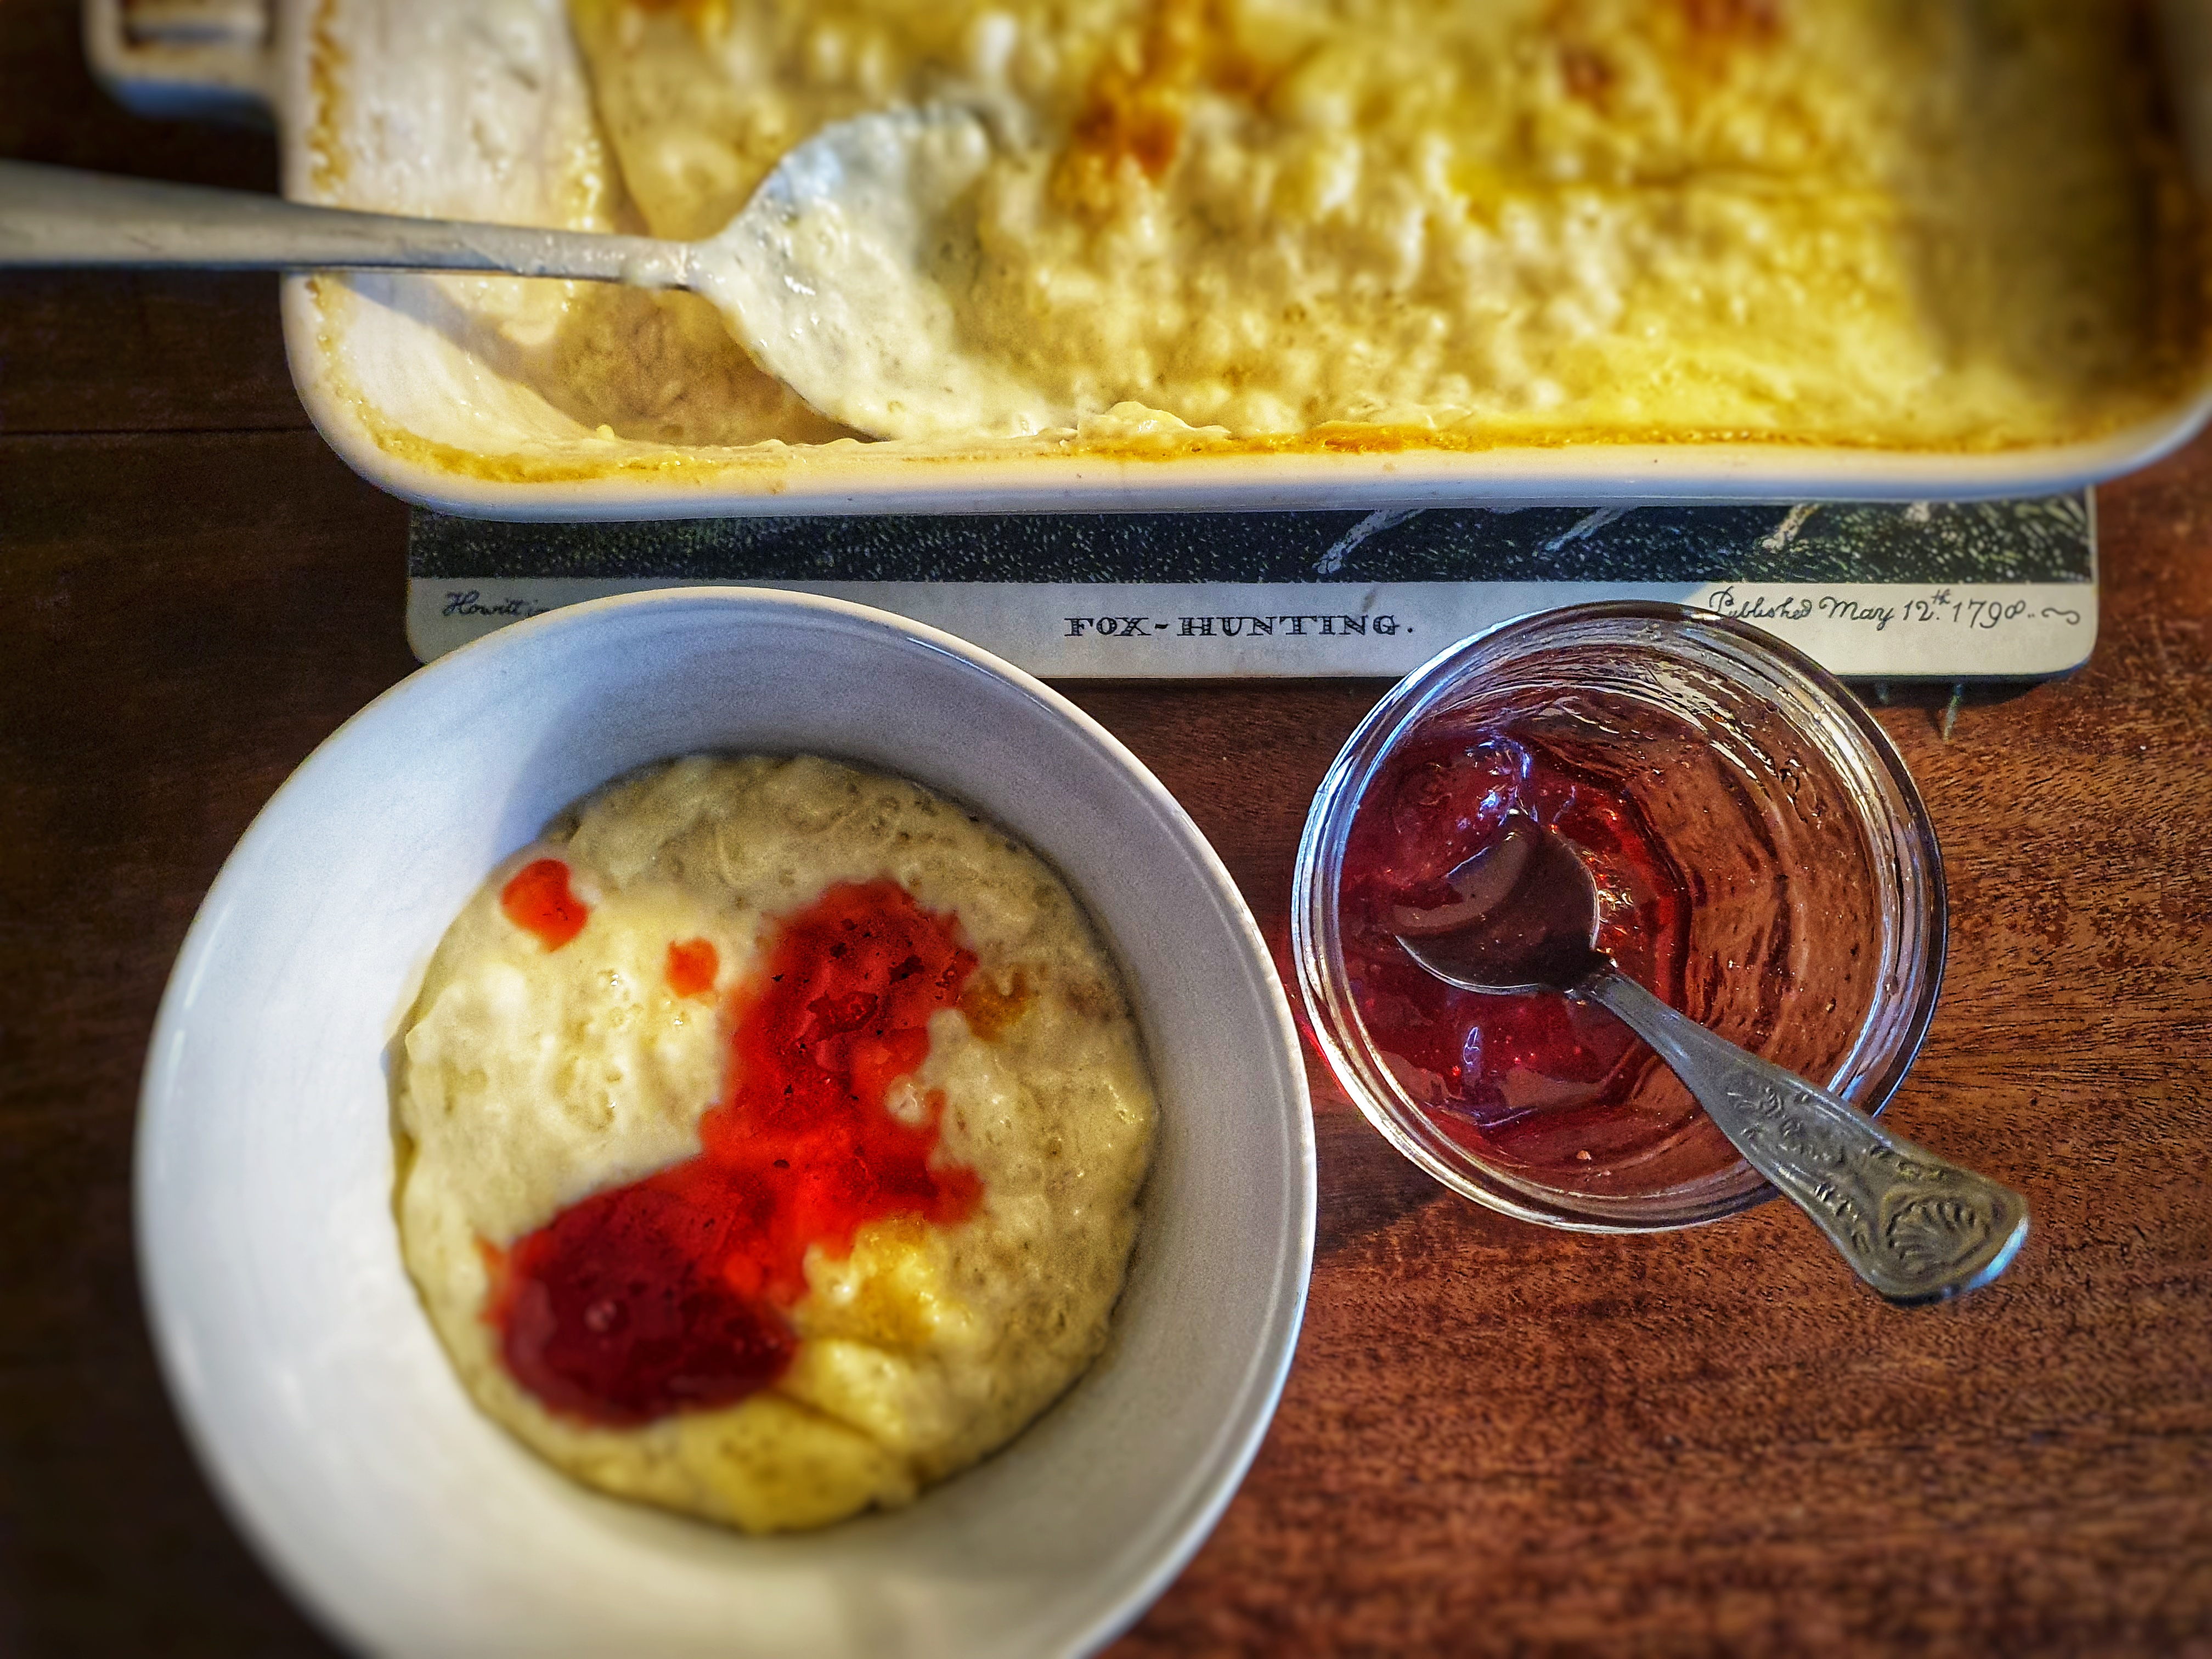
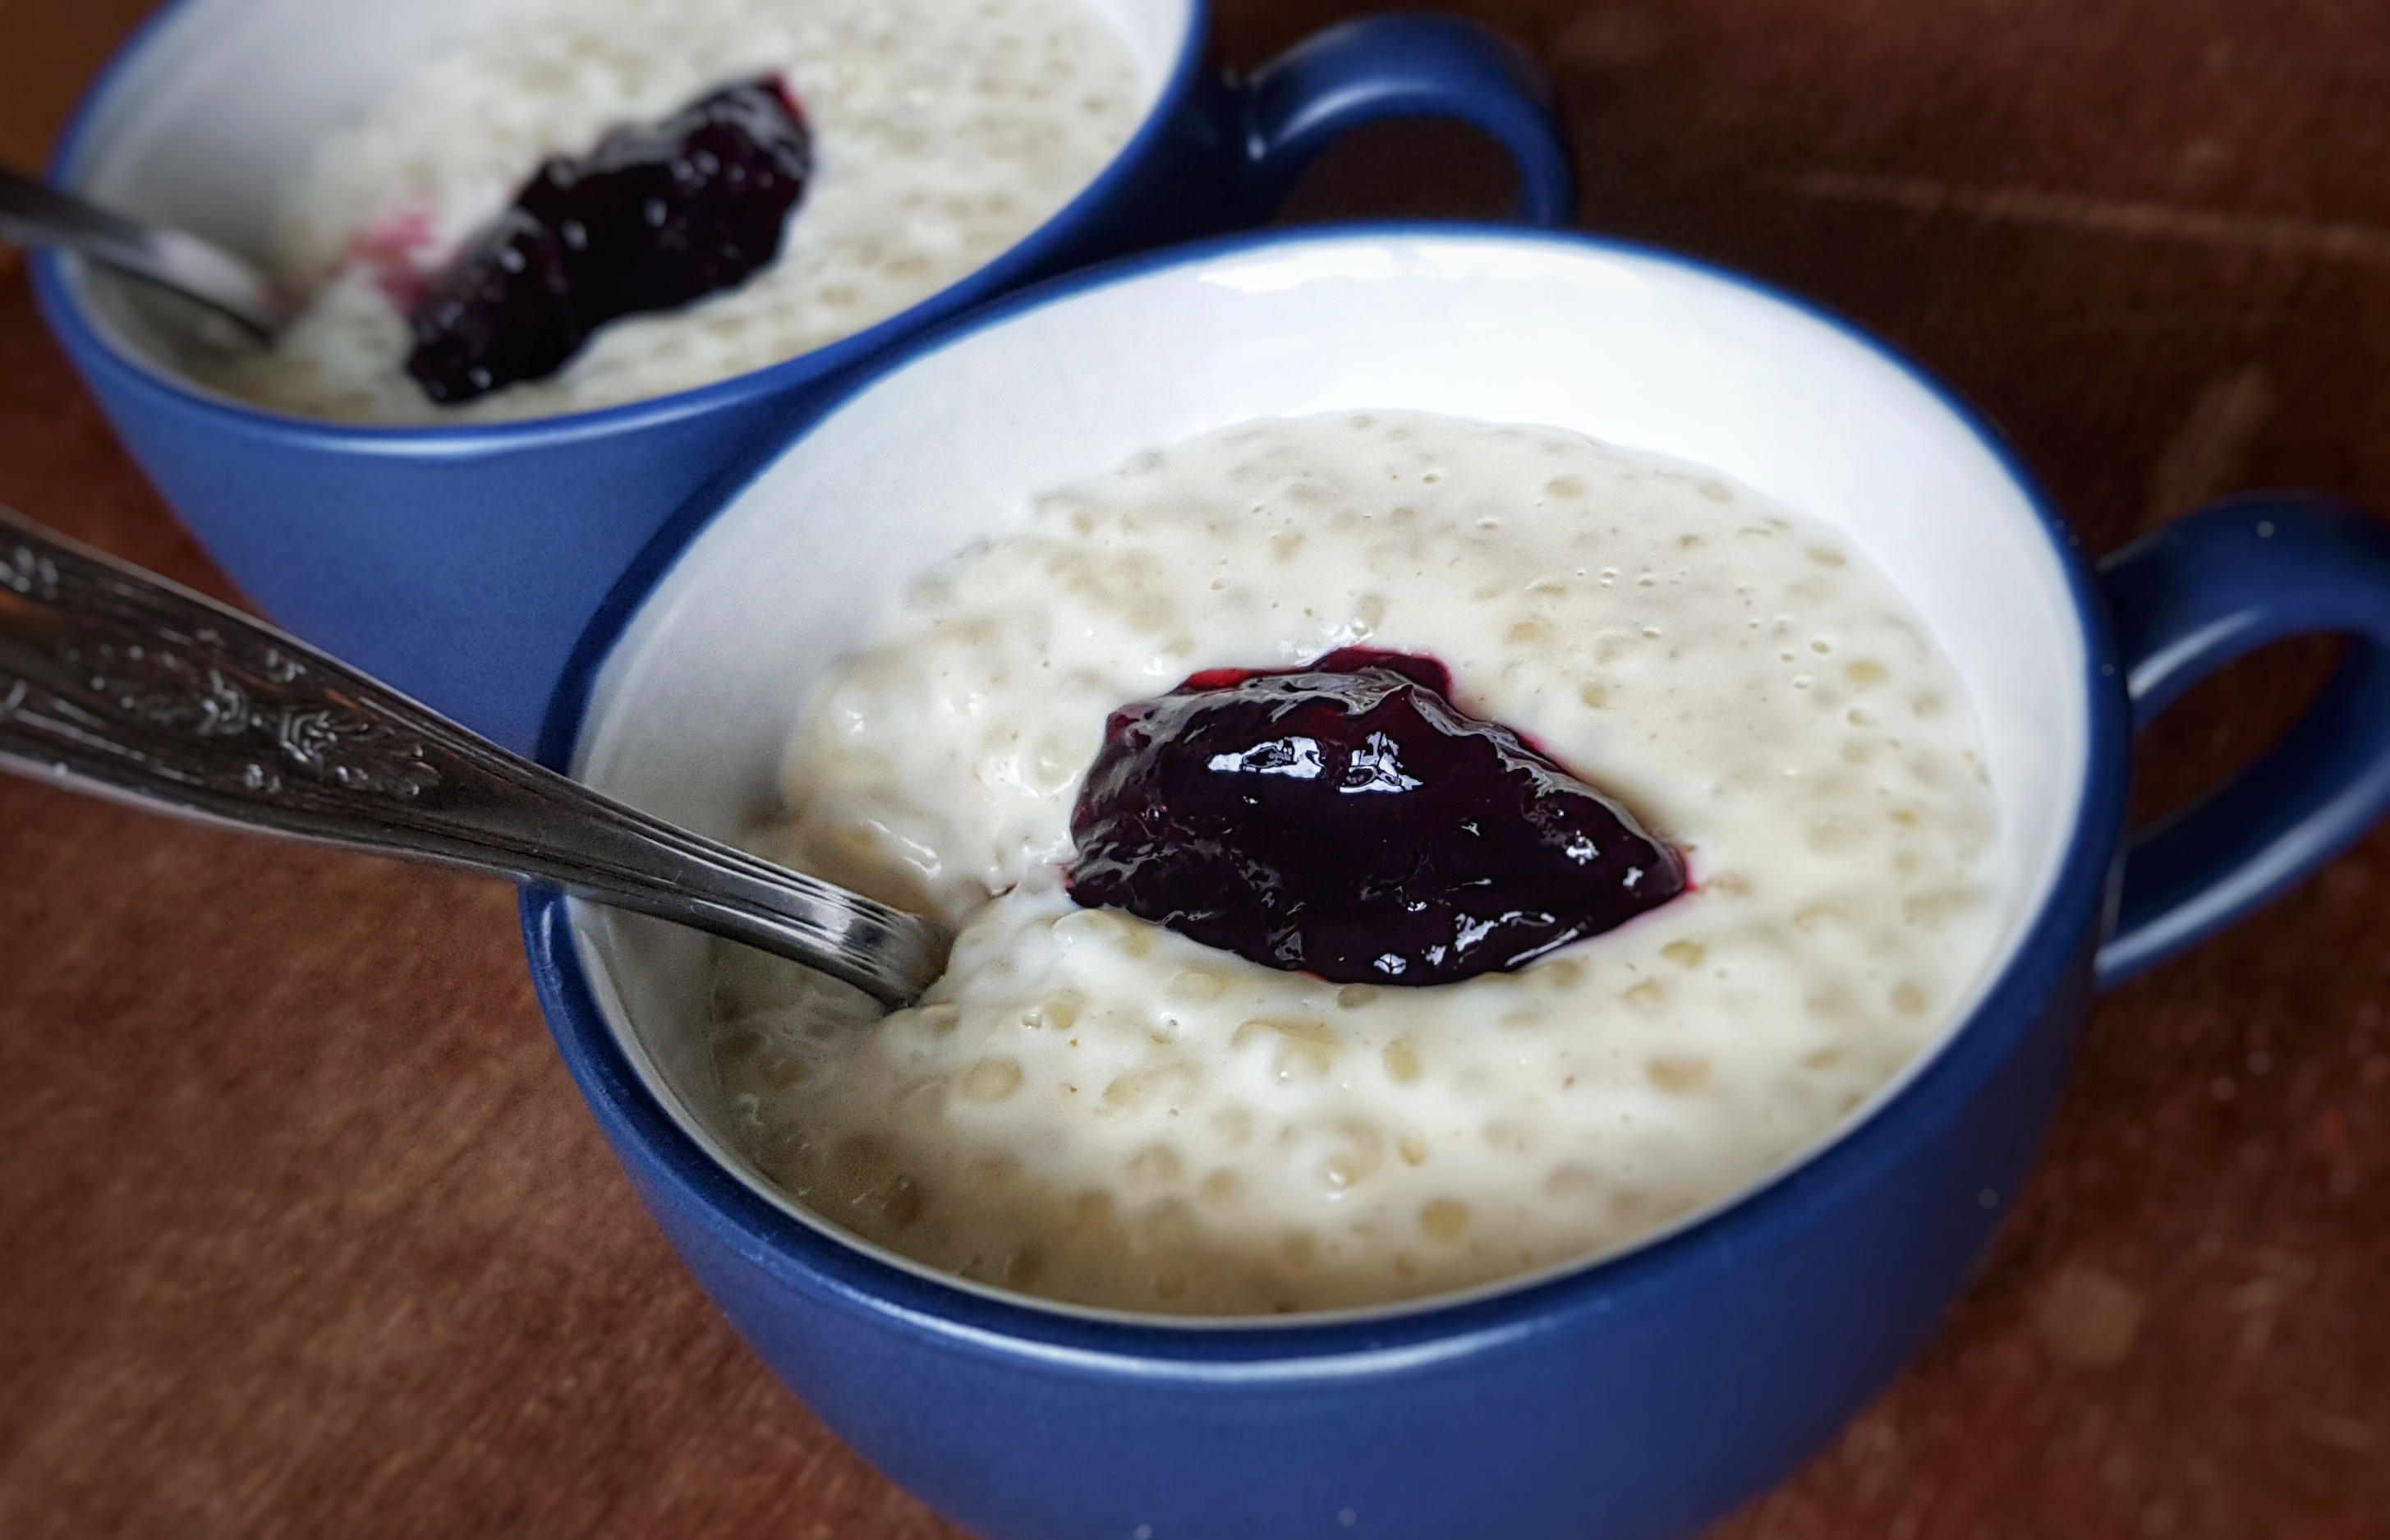
Speaking with Heather Ellis on the podcast about the School Meals Service and school dinners really fired off some food memories, good and bad. If it has in you too, please let the School Meals Project know about them – and let me know about them too – there’s a postbag episode of the podcast coming in just two or three weeks’ time. Three stuck in my mind: sago or tapioca pudding, pink sponge and custard, and Spam fritters. Of those, my favourite is sago/tapioca pudding – it genuinely is one I cook at home regularly. I know it was called frogspawn by children across the country, but if made well, it is delicious. Honest.
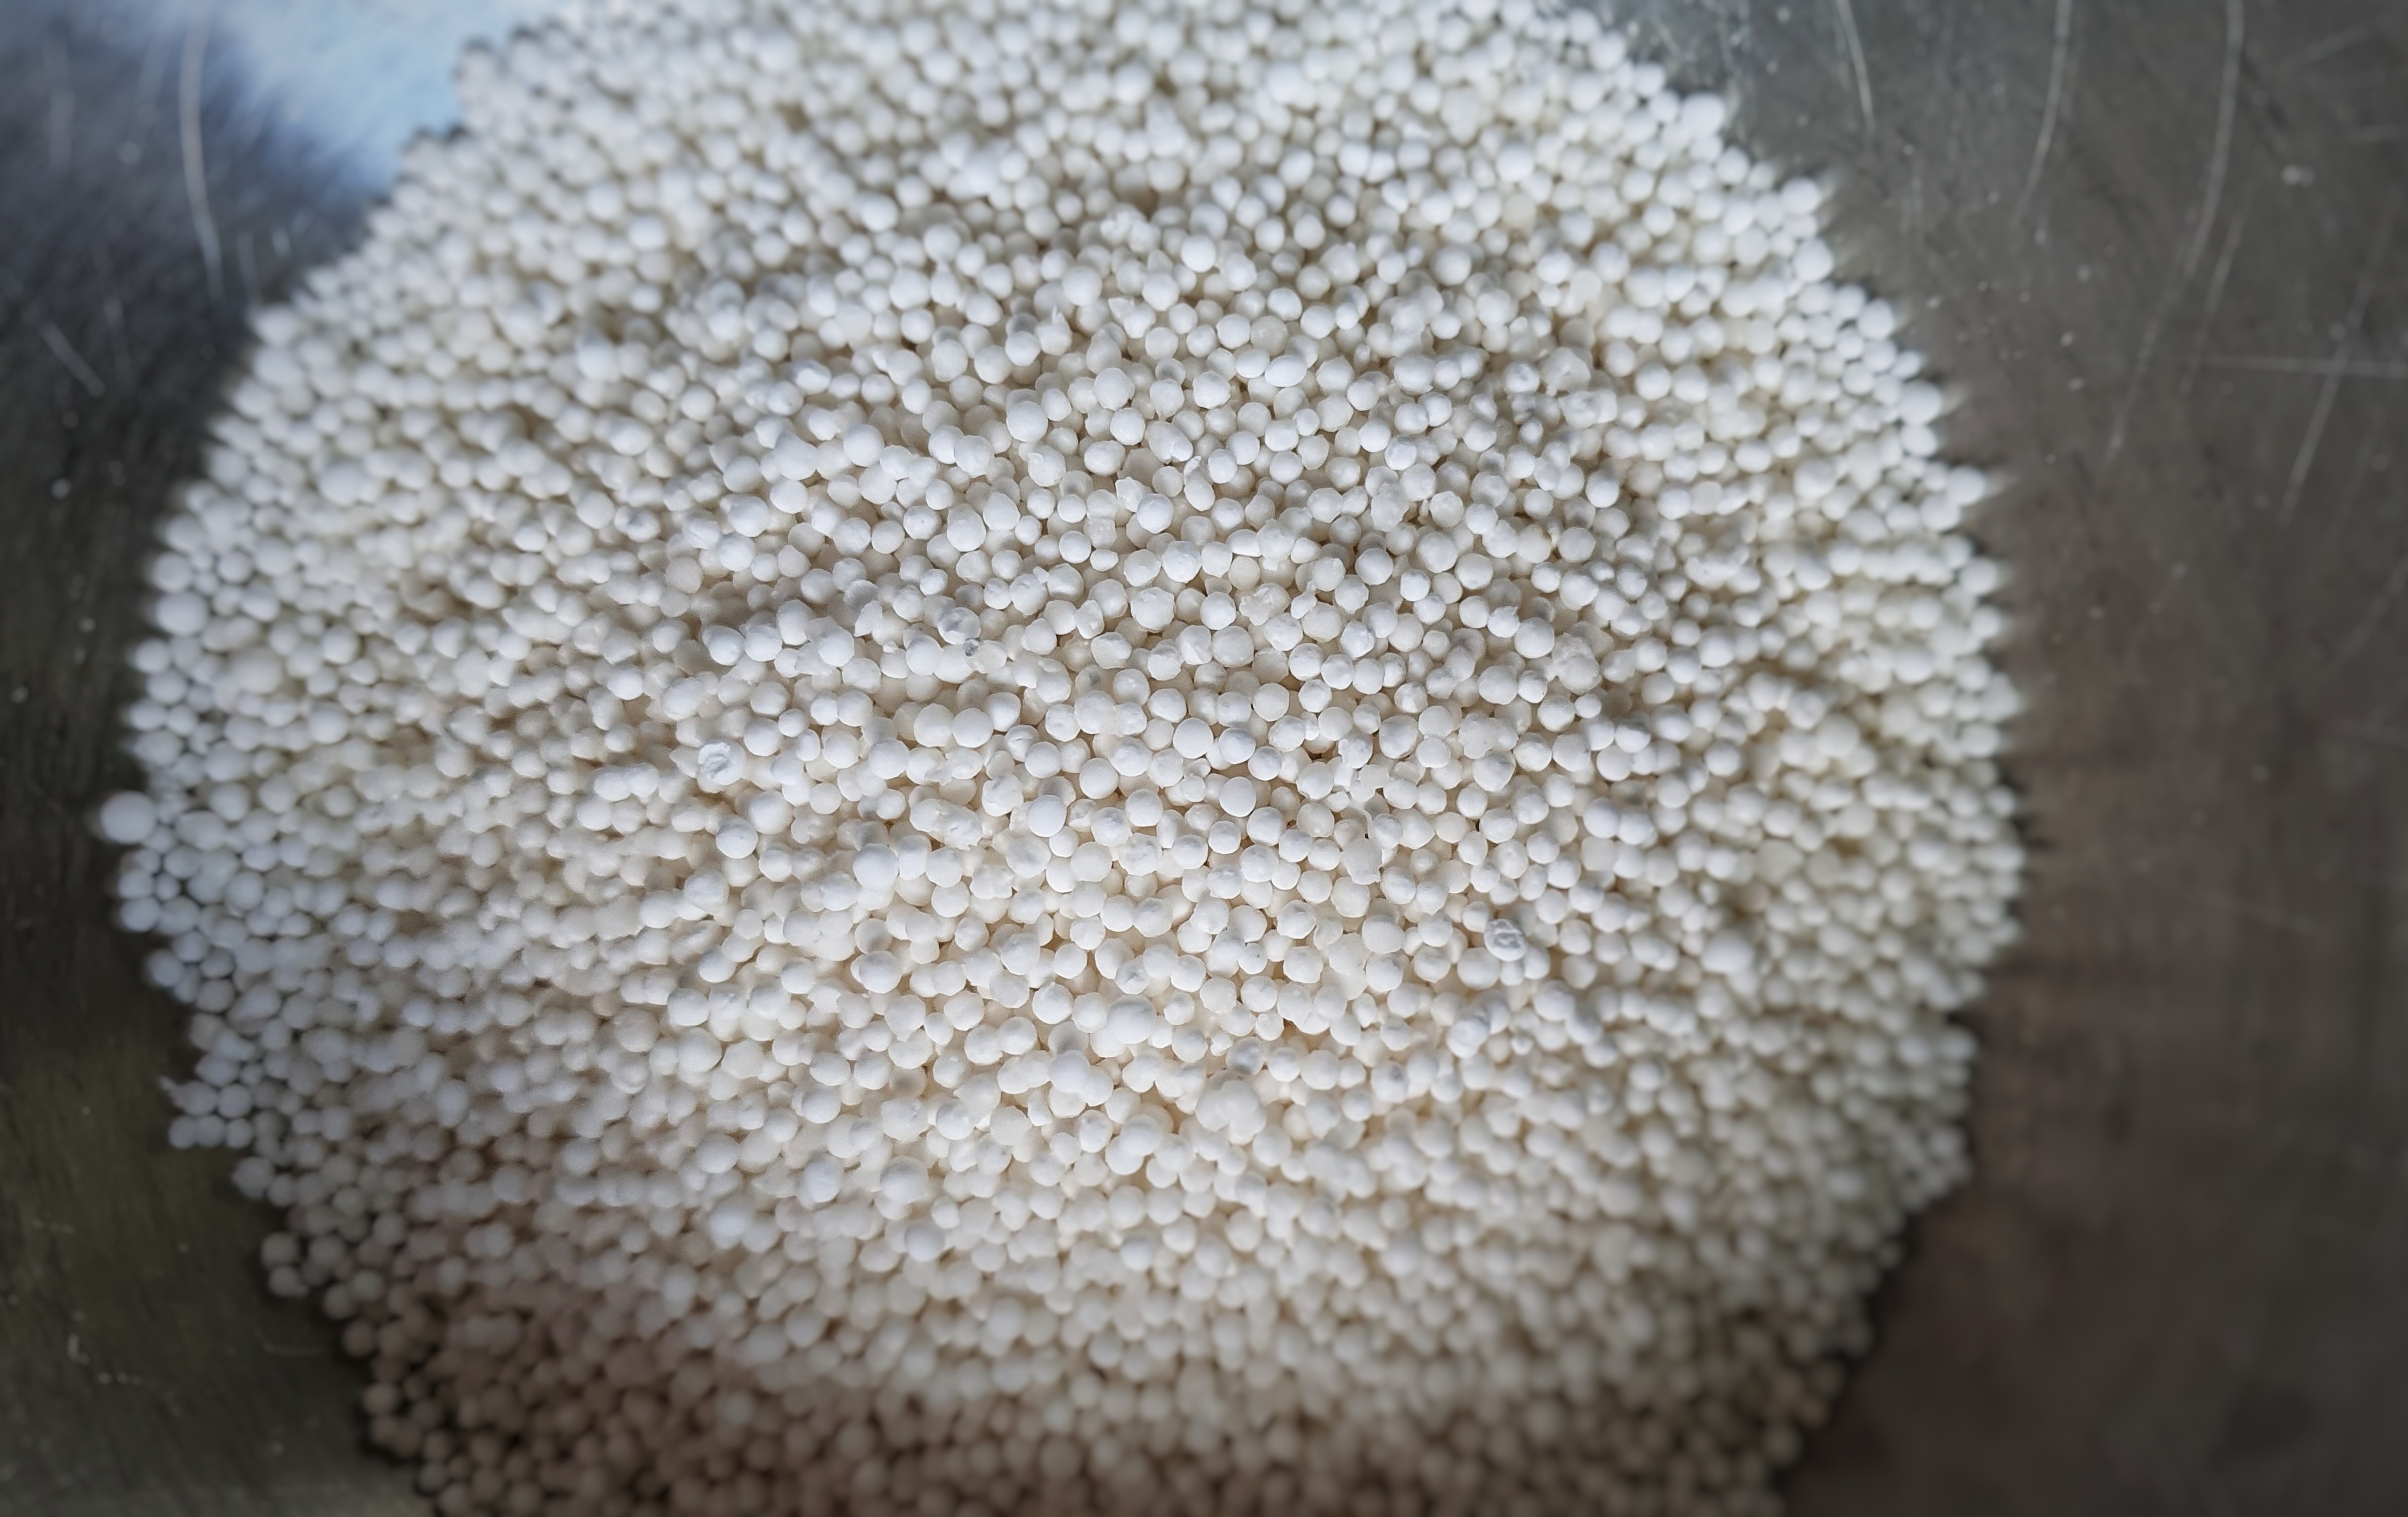
For anyone unfamiliar with it, it is one of a tribe of puddings known as milk puddings which are essentially a starchy ingredient cooked in milk and sweetened with sugar, but in my opinion, they need to also contain cream and flavourings such as bay leaves, vanilla or lemon rind. The best-known of these is rice pudding, but there are also semolina, macaroni and arrowroot puddings. They became popular in schools because they were an excellent way of providing children with their calcium. Sago and tapioca come in the form of small balls or pearls, which turn translucent when cooked in liquid – tapioca pearls are used to make the ‘bubbles’ in bubble tea.
Sago and tapioca can be used interchangeably in recipes and taste the same, but there is a difference between the two; sago comes from the sago palm and tapioca from the cassava plant. The former is found in India and some parts of East Africa, and the latter in the Americas. The starch is extracted from the plants’ pithy centres by grating and squeezing. It is then suspended in a little water to make a paste, which is then passed through a colander to form little pellets that are then dried.[1]
Both are very much associated with Empire, and recipes using sago begin to appear in 18th-century cookery books. In Sarah Harrison’s The House-keeper’s Pocket-book sago is simmered in water and flavoured with sugar, cinnamon and lemon.[2]Elizabeth Raffald has a complex, red-coloured sago pudding containing red wine, sugar, bone marrow and egg yolks. She does have a simpler version closer to what we would recognise today: sago simmered in milk and cream, and flavoured with sack, sugar, eggs and nutmeg.[3] Through the 18th and 19th centuries, the typical way to prepare the pudding would be to cook it on the hob and then bake it in pastry. Mrs Beeton uses sago in two more recipes: a sweet sago sauce for desserts and a sago soup.[4]
If you are unsure about making sago or tapioca pudding (or returning to it after eating the runny school kind of years past), the great food historian Alan Davidson provides some words of encouragement: ‘[I]t is sometimes despised by the ignorant, that is to say, persons who have no knowledge of how good they are when properly made.’ He casts down a caveat, however: ‘[The] texture delights a few cognoscenti in Britain but is repellent to the majority and has no doubt contributed to the virtual disappearance of the pudding from British tables.’[5] And I say that it is a crying shame. It is rarely included in cookery books anymore, not even those specialising in puddings. Justin Gellatly is a fan though, and there are a couple of recipes in Helen Thomas’s excellent Pudding Book, but that’s about it.[6]
If you like the blogs and podcast I produce and would to start a £3 monthly subscription, or would like to treat me to virtual coffee or pint: follow this link for more information.Thank you.
The typical way to cook the pudding these days is to either bake it I the oven or cook it on the hob, and I provide methods for both, though I prefer the latter. It is quick to make and, despite what other recipes say, requires no soaking – just a careful swish in some cold water.
I’ve left the amount of sugar to you. If you intend to eat the pudding with sweet jam, go for around 90 grams, if you are eating it on its own, or with tart fruit like rhubarb or gooseberry, perhaps use 120 grams of sugar.
Serves 6 to 8 people, depending upon greediness. If more appropriate, half the amounts.
Around 30 g butter (if baking)
120 g sago or tapioca pearls
90–120 g caster sugar
1 litre full-fat milk
150 ml double cream
Flavourings: 3 or 4 strips of pared lemon rind, a lightly-crushed fresh bay leaf, a few drops of vanilla extract (or replace caster sugar with vanilla sugar), almond extract, cocoa, etc.
Oven method:
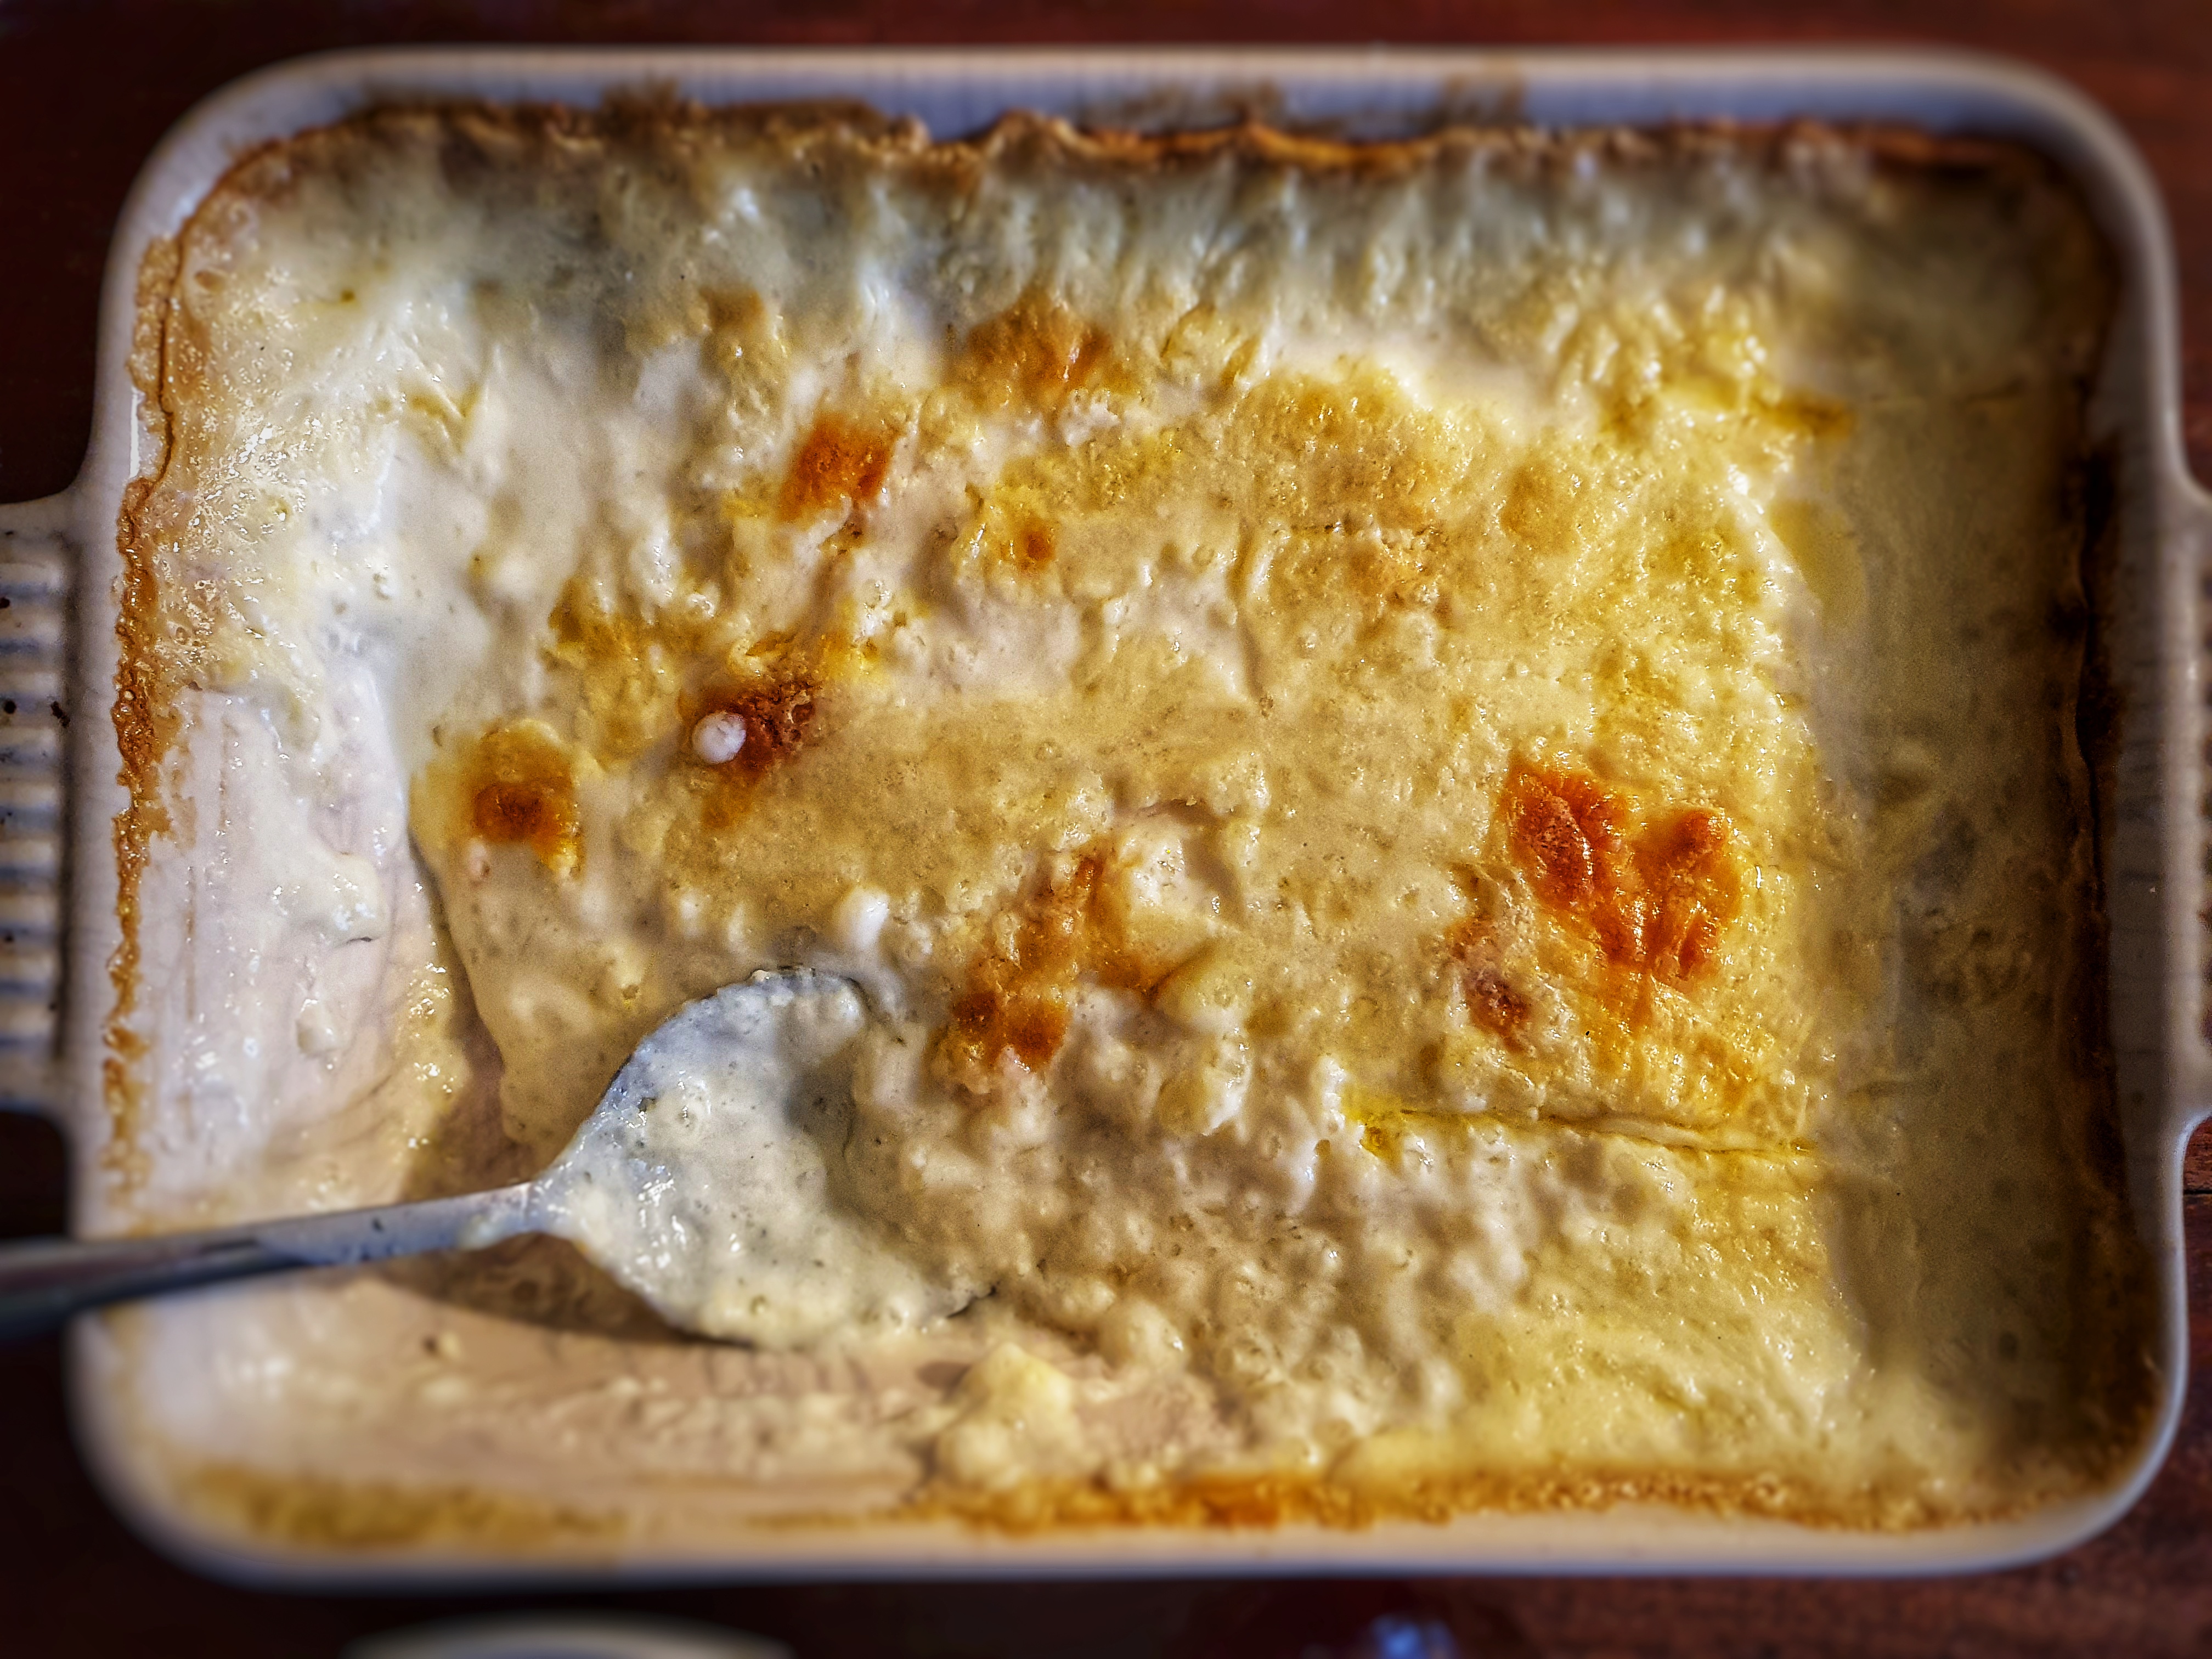
Preheat the oven to 160°C. In a baking dish of 1¼ litre capacity dot the bottom with small knobs of butter. Place the sago pearls in a jug and pour over plenty of cold water to release any starch. Pour through a sieve and then scatter the sago over the base of the dish with the sugar, milk, cream and flavourings. If using cocoa powder, whisk it into the milk before pouring into the dish. Place in the oven and bake for 60-90 minutes, stirring every now and again to disperse lumps. When the time is up, and you want a browner top, you could place it under a hot grill for a few minutes. Leave the pudding to stand for 10 minutes before serving.
Hob method:
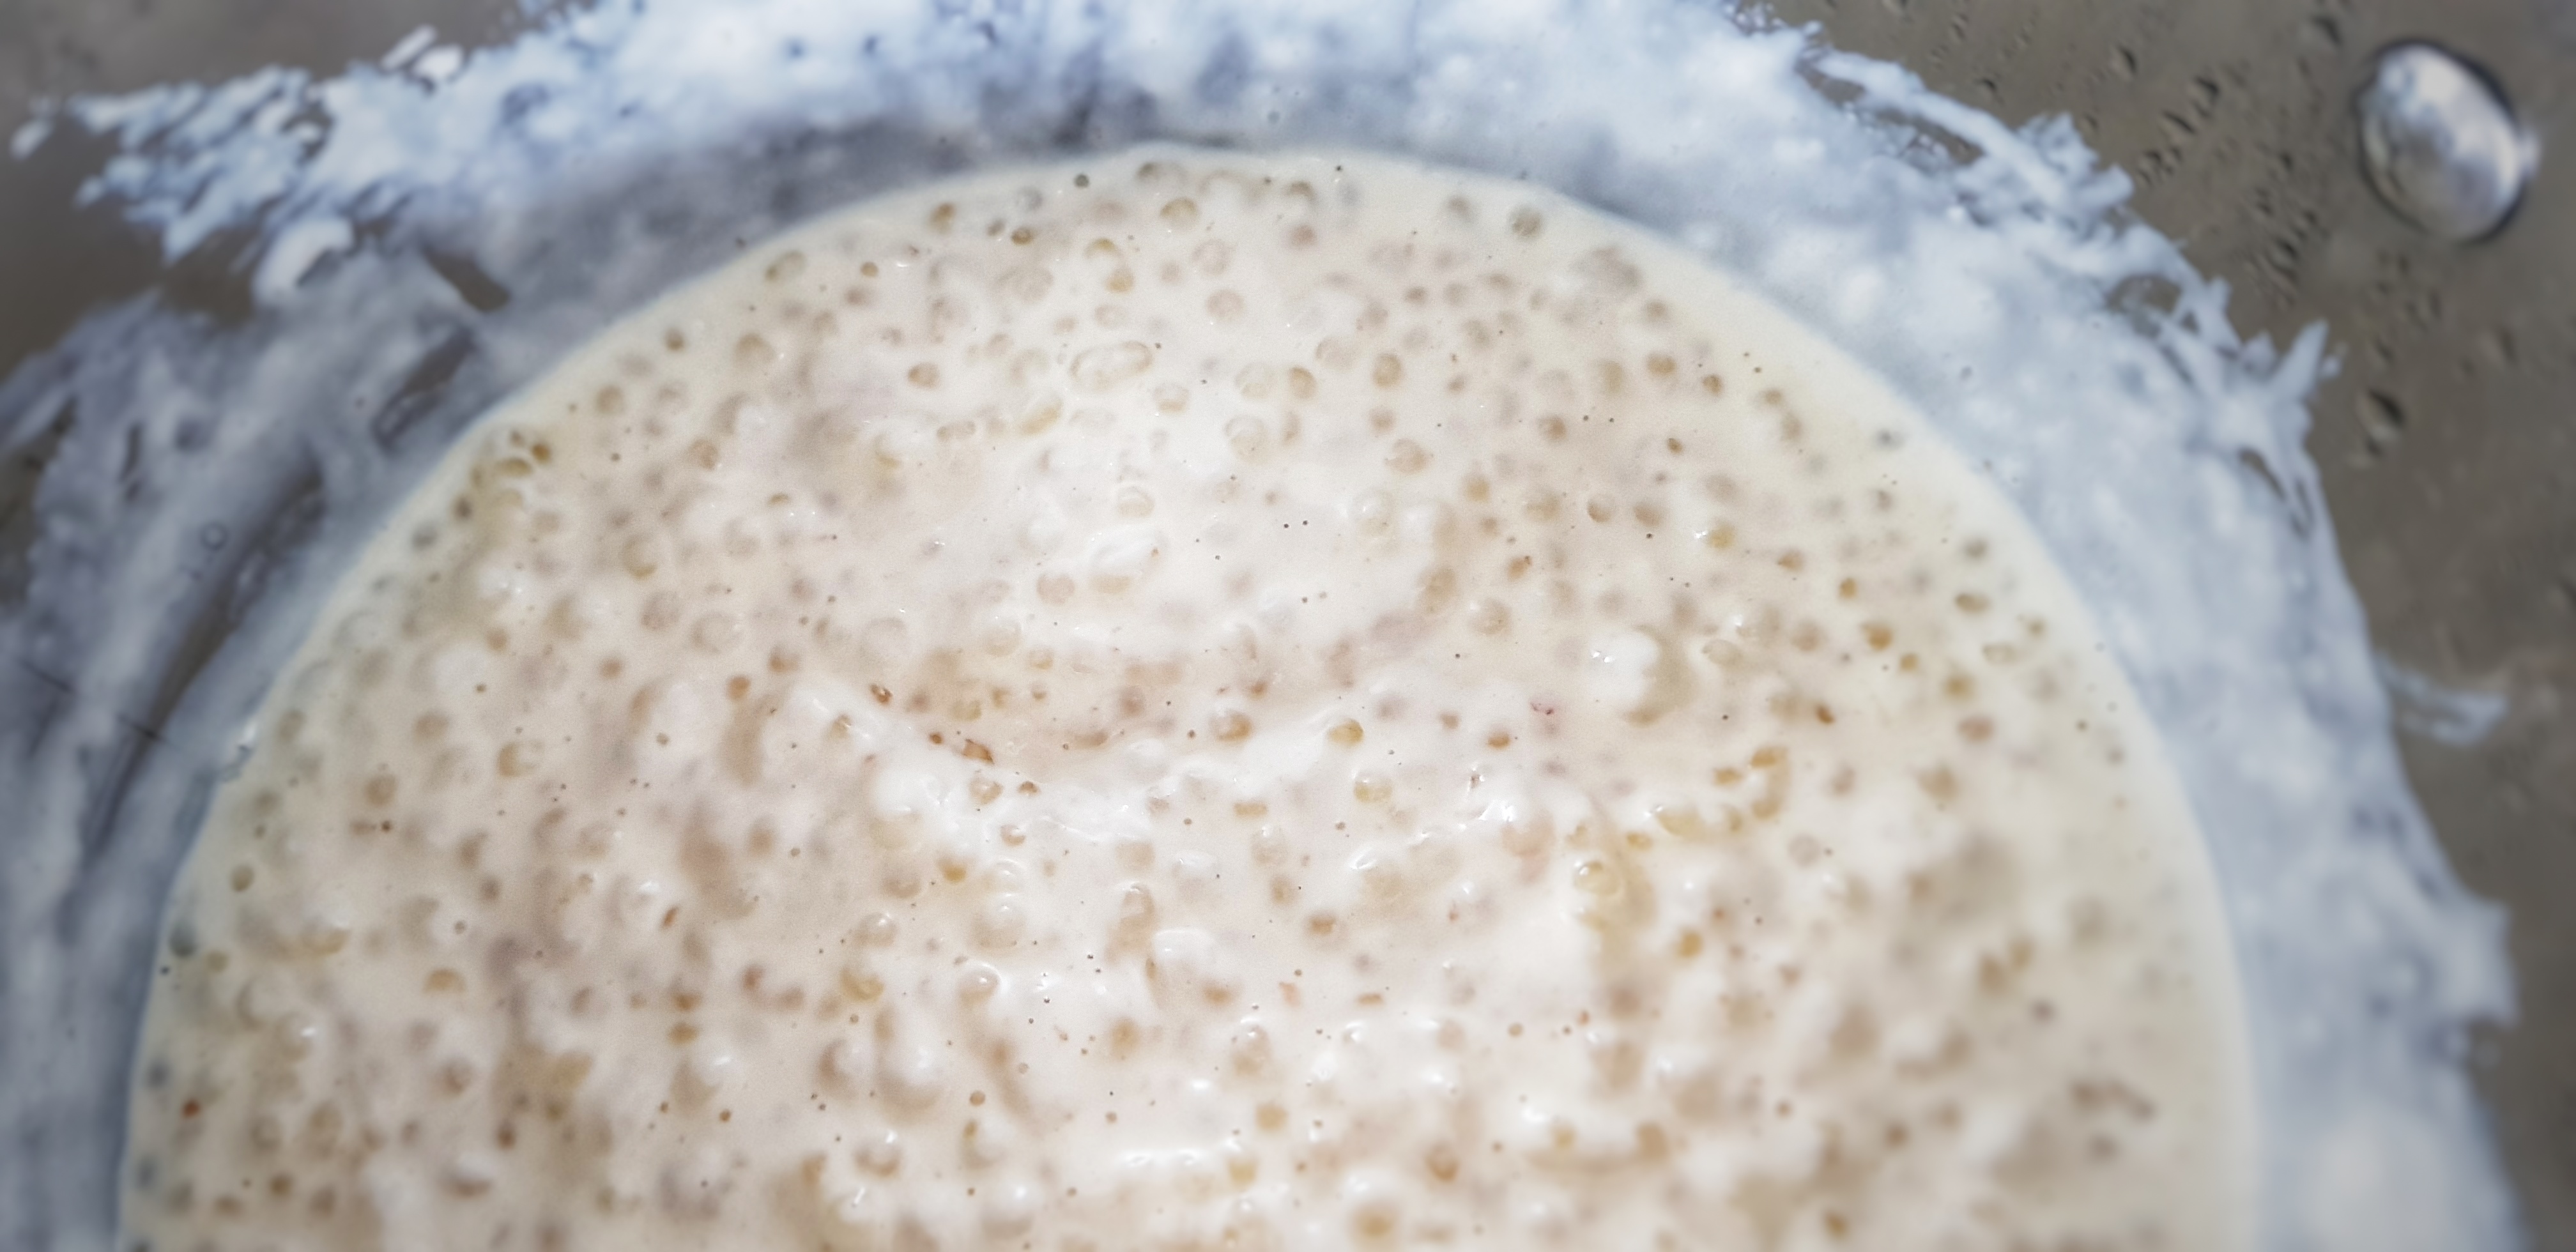
Wash the sago pearls as described above and place them in a saucepan with the remainder of the ingredients, bar the butter. Bring slowly to a simmer, stirring gently. Leave to simmer for around 15 minutes, stirring occasionally. After the 15-minute mark, keep a closer eye on it: cook a further 10 to 15 minutes, but stir more frequently, scraping any stuck bits from the base. Sago pearls stick and catch easily!
Stop cooking when the pearls are soft and gelatinous. Let the pudding stand for 10 minutes before serving. If it seems a little on the thick side, stir a little more milk through it.
References
[1] Beeton, I. (1861). The Book of Household Management. Lightning Source; Davidson, A. (1999). The Oxford Companion to Food. Oxford University Press.
[2] Harrison, S. (1751). The House-keeper’s Pocket-book And Compleat Family Cook (5th ed.). R. Ware.
[3] Raffald, E. (1769). The Experienced English Housekeeper (First Edit). J. Harrop.
[6] Gellatly, J. (2016). Bread, Cake, Doughnut, Pudding: Sweet and Savoury Recipes from Britain’s Best Baker. Penguin Books Limited; Thomas, H. (1980). The Pudding Book. Hutchinson & Co.
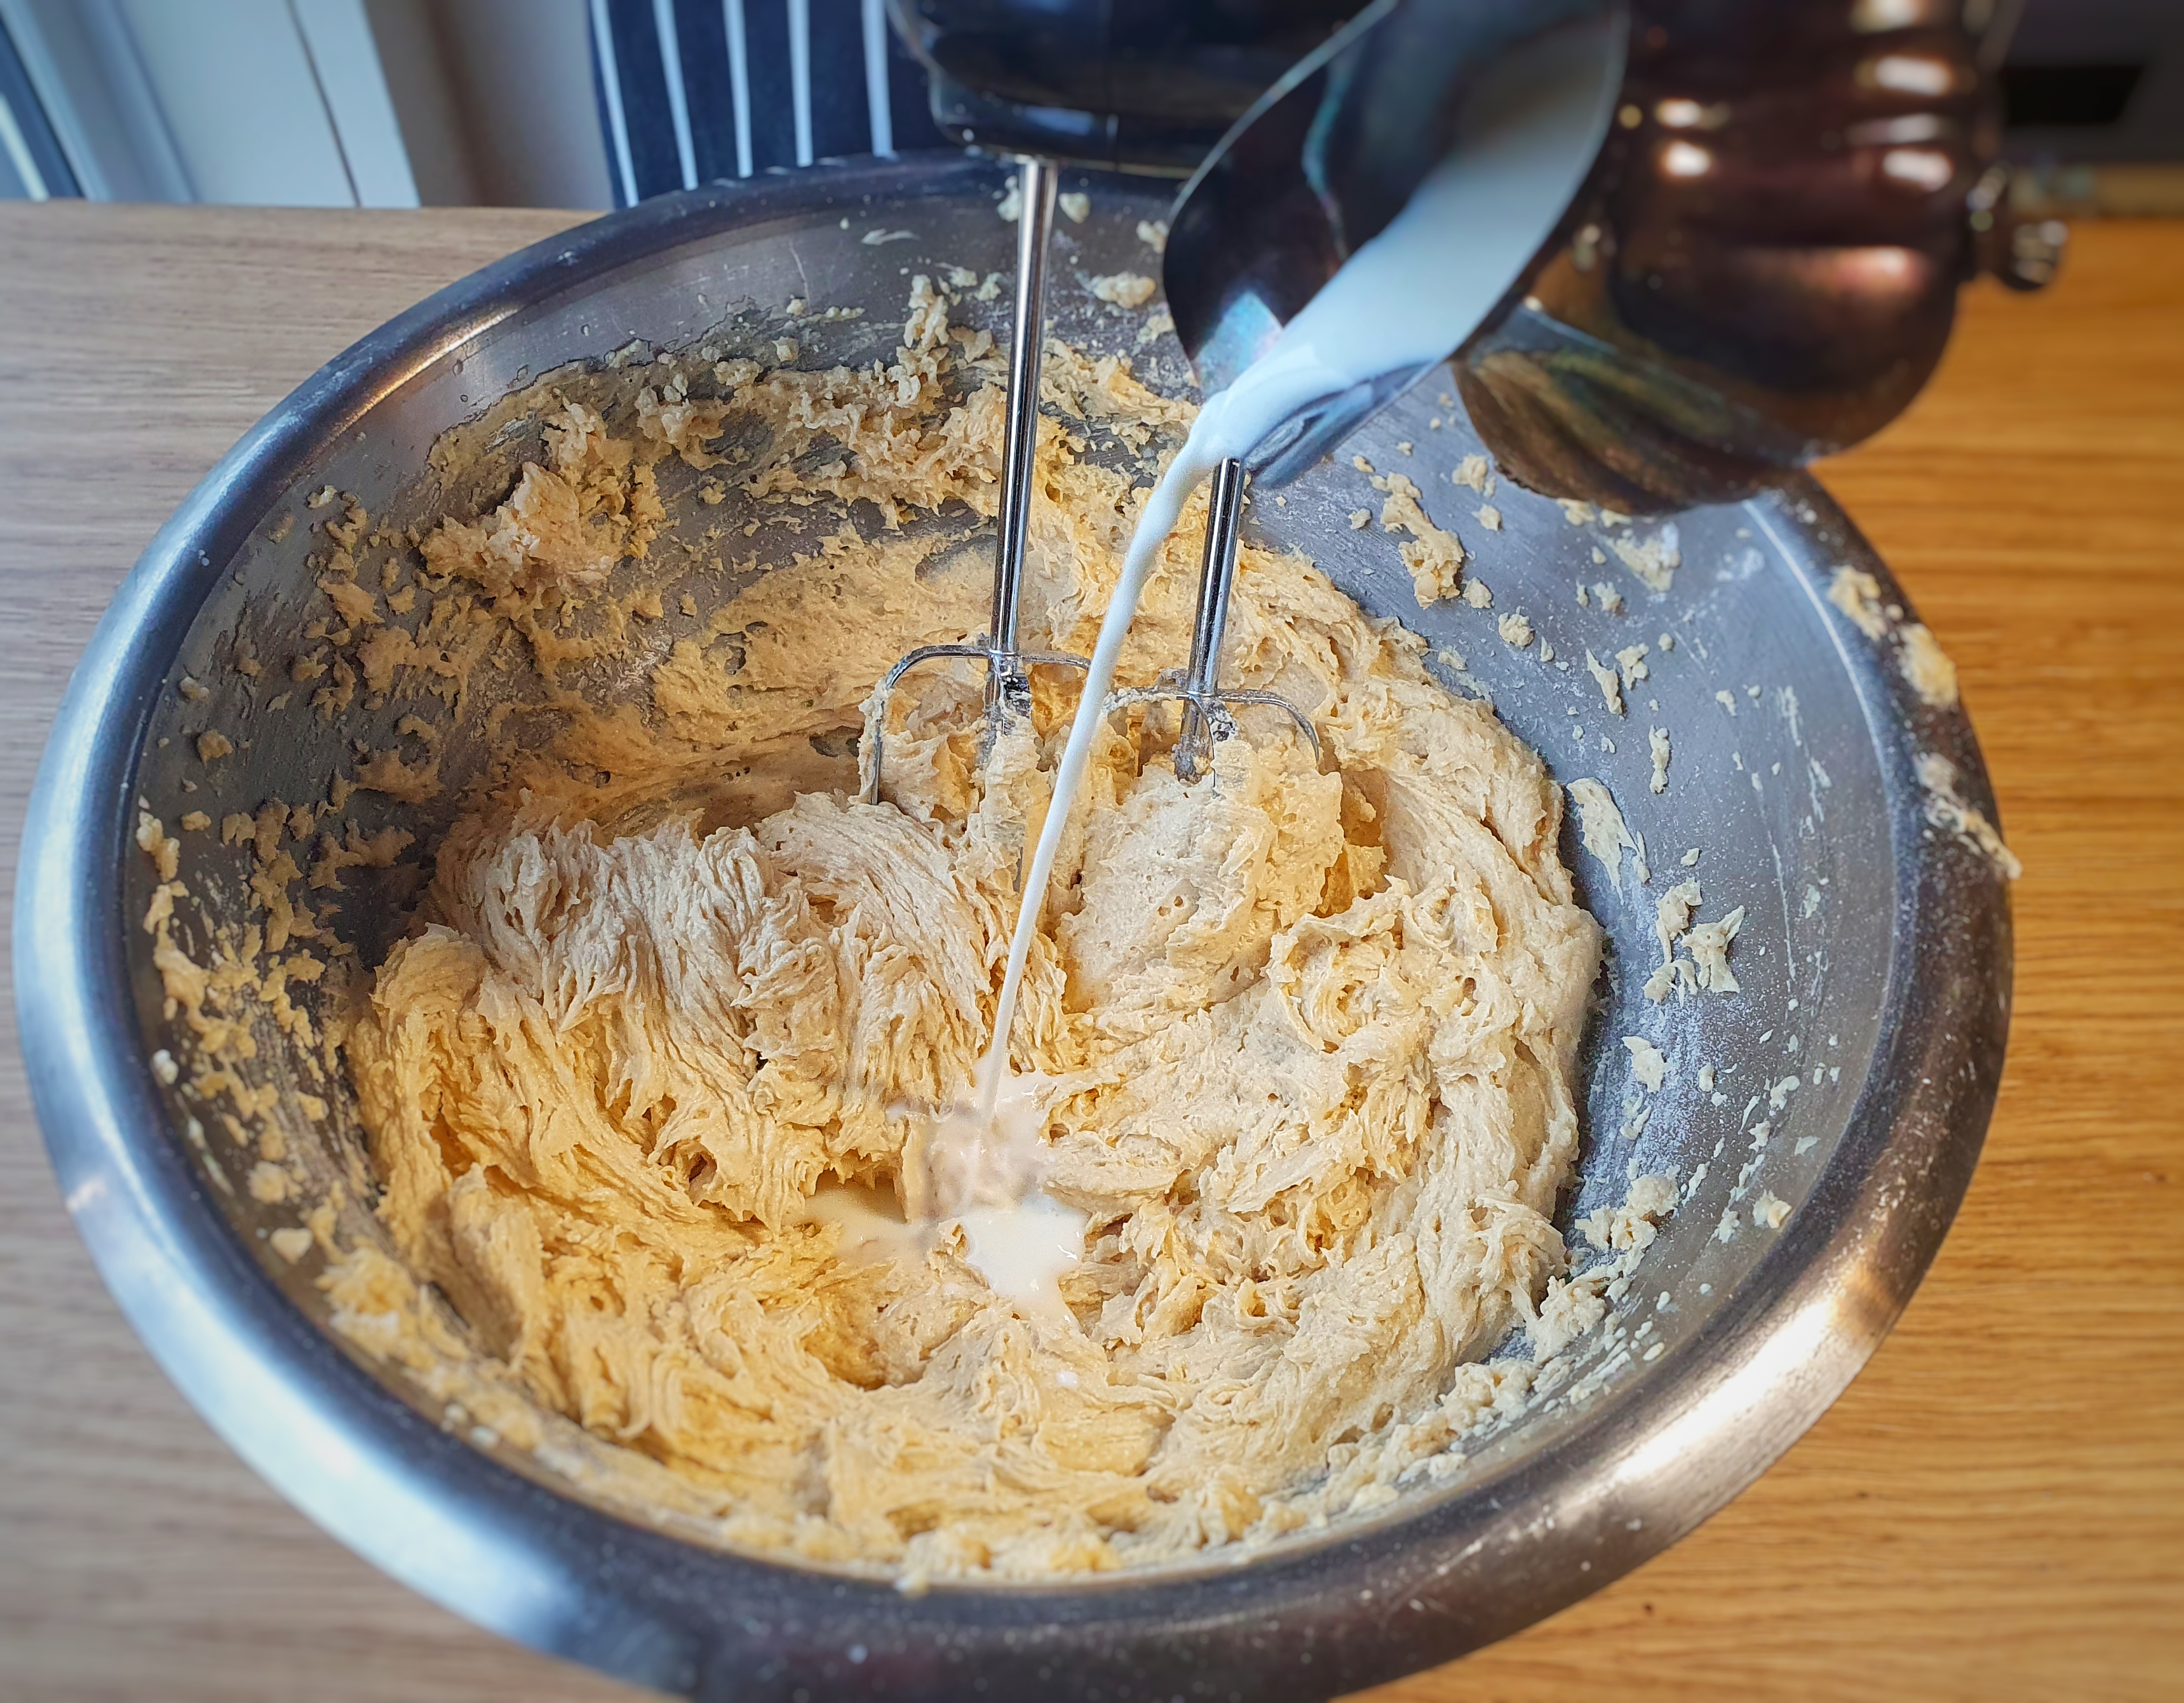
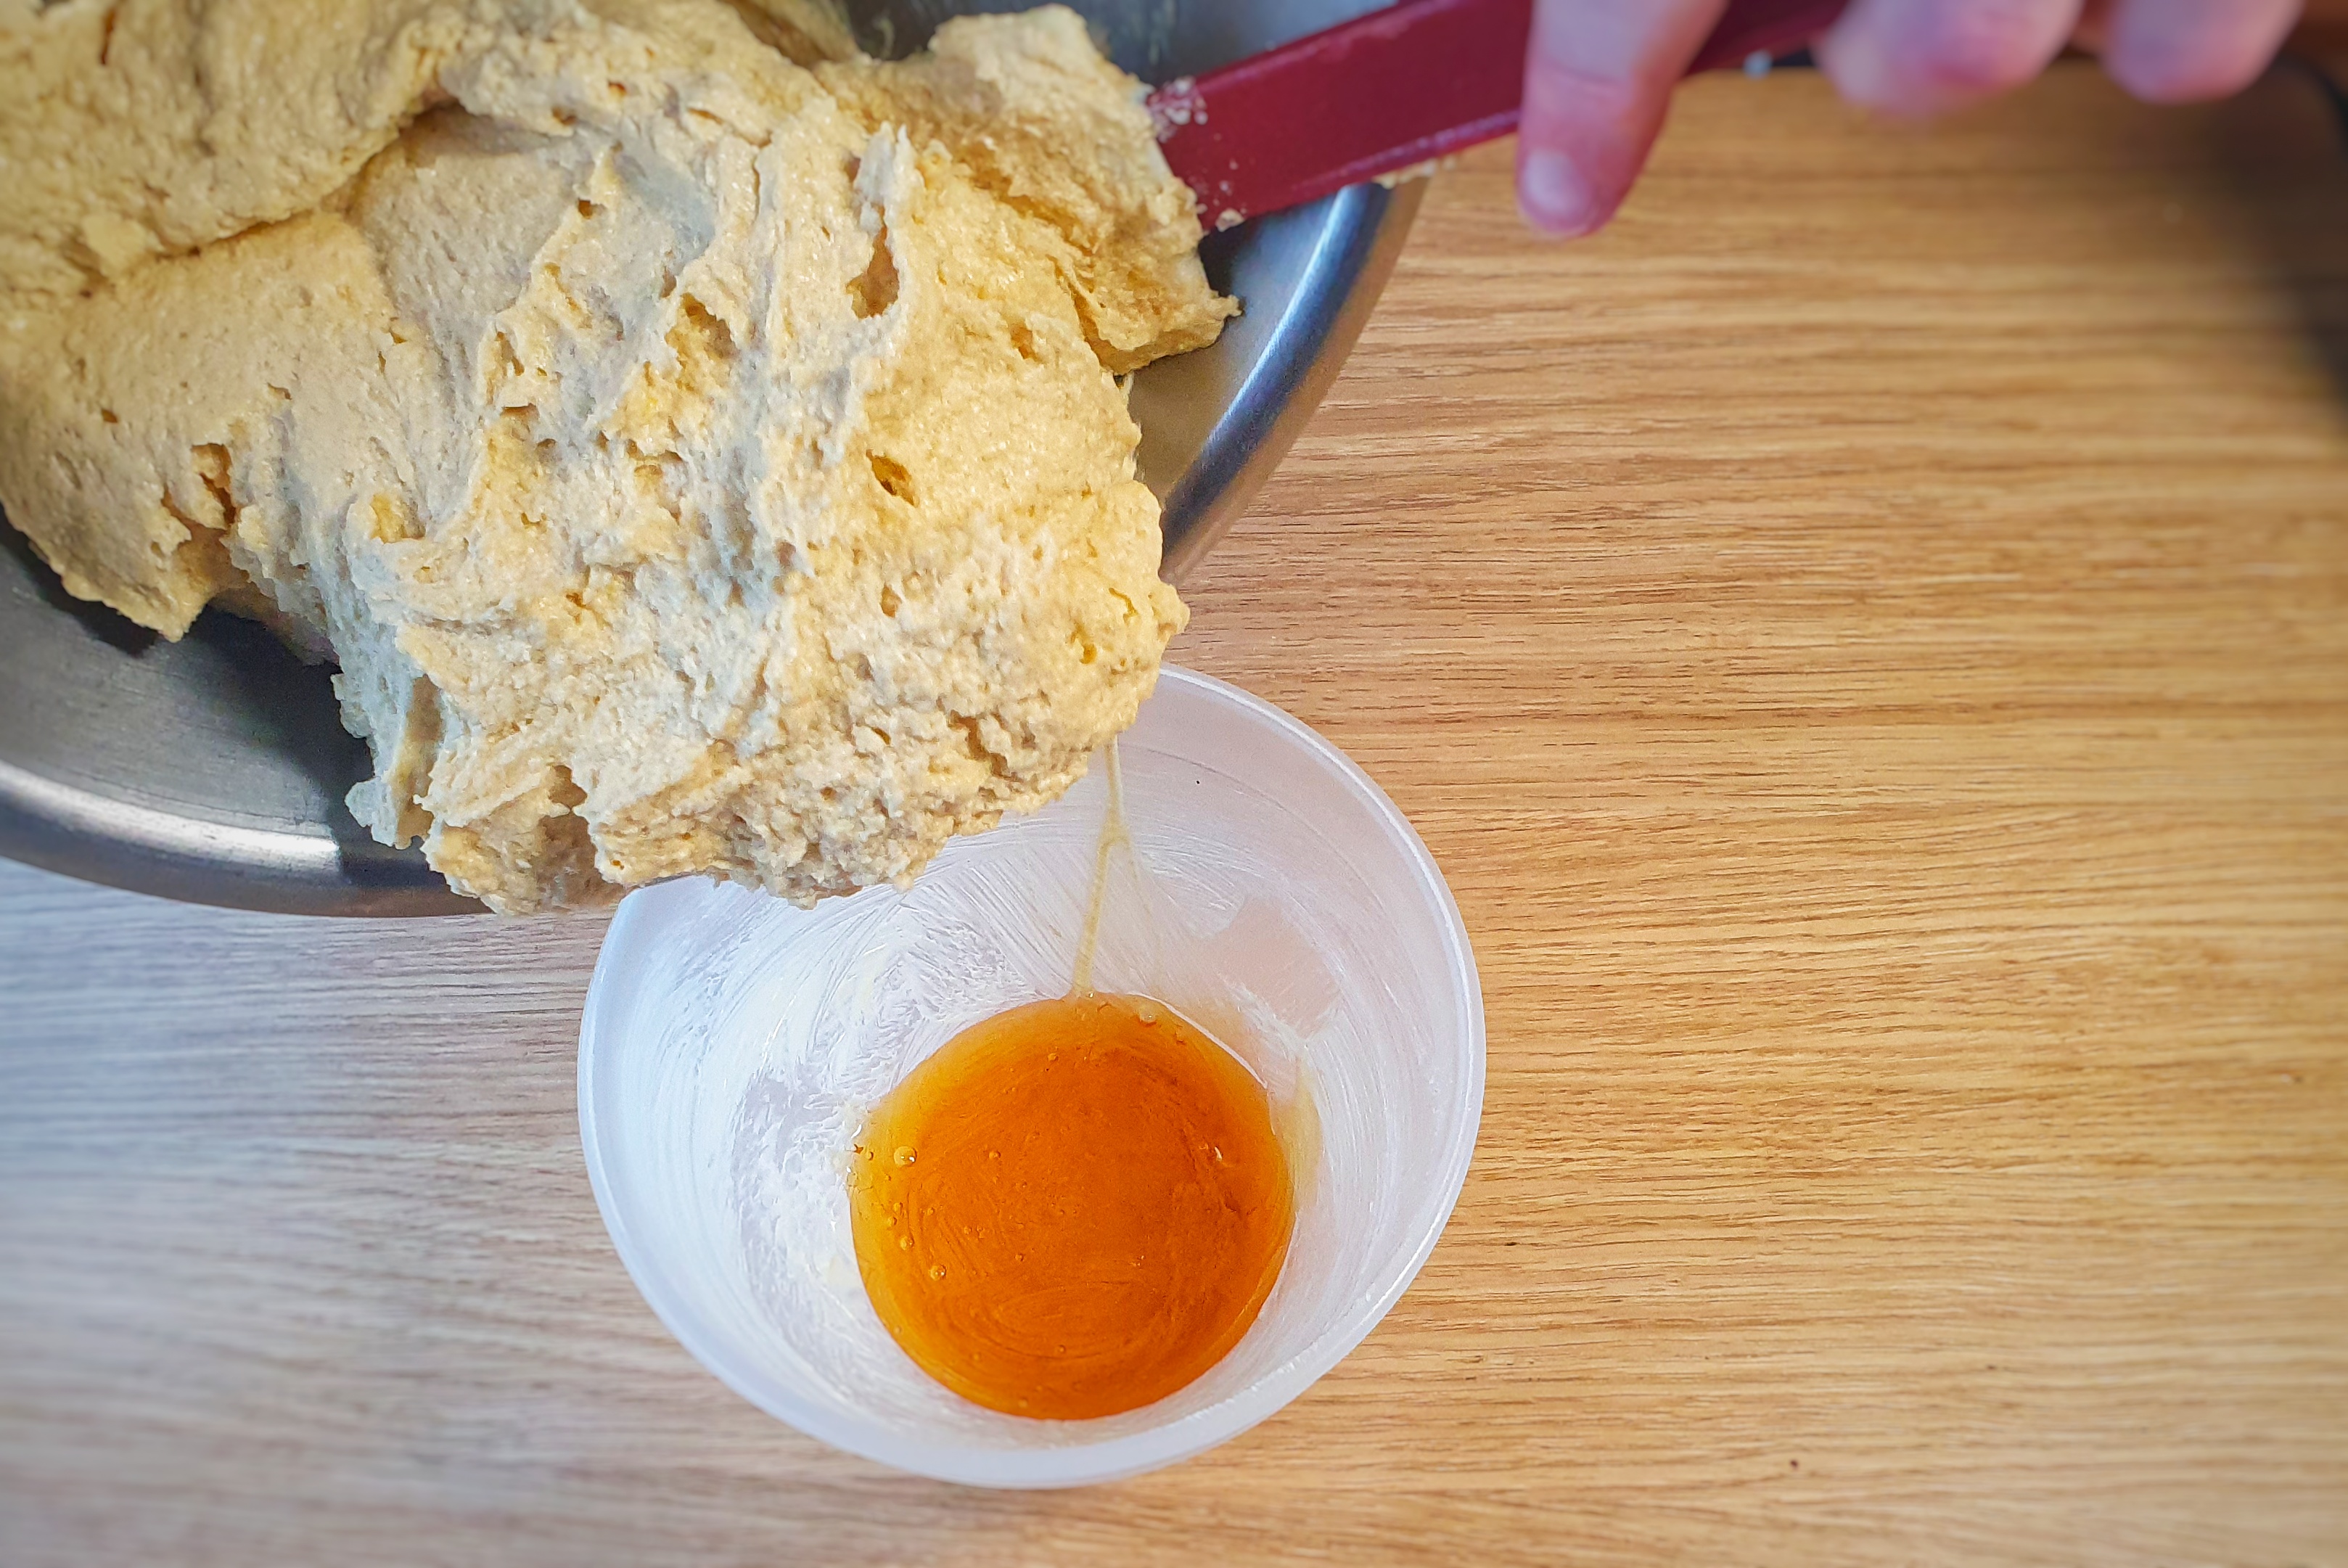
I have been meaning to give you this recipe for that most beloved of teatime treats, the humble malt loaf for ages; indeed, I have had a jar of malt syrup sitting in my food cupboard for at least three years I bought especially for this post. Well, hopefully, it’s a case of ‘the best things come to those who wait’.
For those of you unaware of this stalwart of the British teatime spread, let me explain what it is. It is a member of a tribe of baked goods known as tea loaves. They are tea loaves because they’re eaten at teatime, but also because they contain tea. They are easy to make and also contain dried fruit, and usually do not contain any butter, and should instead be eaten spread liberally with it. They are loaf-shaped but are a type of cake. A malt loaf specifically is made with malt syrup and black treacle, and like Yorkshire parkin, it needs to be left awhile to turn nice and sticky. Before we get to the recipe, let’s have a look at the history.
Looking into the origins of the malt loaf has been rather difficult; I can find a recipe for malt loaf in the June 1930 edition of the Derbyshire Times and Cheshire Herald. It sounds like a malt loaf: dark and sticky, but black treacle is used not malt syrup.1 It seems to be called a ‘malt’ loaf because of the brown, malted flour used, which is not the same. Other malt loaves certainly contained malt syrup; beloved British brands Hovis and Allinson made them. However, these loaves were of the regular sort: loaves of white bread ‘improved’ by the addition of malt syrup.2,3 The malt syrup improved the colour and flavour and produced a moister loaf. Again, not the same.
John Sorenson’s original Beswick shop (pic: Manchester Libraries)
And so, we must turn to the iconic Soreen malt loaf, which has been baked in Manchester since the 1930s. The recipe, which has supposedly never changed, was invented by Danish immigrant John Rahbak Sorenson who lived in Hulme, Manchester. He first opened a business selling bakery equipment, before starting his own bakery in Beswick, where he sold his ‘Sorenson Malt Loaf’. He sold the business in 1938, but the loaf continued to be baked, the only thing that changed was its name.4 Today, the factory resides in Trafford Park (home to Manchester United FC), where it cranks out 300,000 loaves of Soreen per day.5
Their recipe is a secret, but we do know that they use wholemeal flour; in fact, it is because of the inclusion of wholemeal flour that Soreen is marketed as a health food.4 That it is sticky with sugary syrups undoes this claim somewhat, but the combination of easily digested sugars and slow-release complex carbohydrates apparently make Soreen a favourite food for athletes.
Well, their recipe is a secret, but mine is not and it’s a tried-and-tested one. I used to make these sticky loaves for my little traditional market stall back in the day, and the recipe is based on one which appears in Gary Rhodes’ excellent book New British Classics.6 It is easy to make, but I must advise you about the flour: it must be sifted. It’s one of my most hated kitchen tasks, and I avoid it whenever possible, but in this case it is necessary. Wholemeal flour does tend to clump in the bag and seeing that the wet and dry ingredients need only the briefest of mixing, you need to be sure your flour is lump-free. That said, don’t forget to tip the bran left behind in the sieve back into the sifted flour.
Subscribe to get access
This recipes is for my £3 monthly subscribers. Read more of this content when you subscribe today and support the blogs and podcast. Subscribers get access to special blog posts, Easter eggs from my podcast, and a monthly newsletter. You can become a subscriber by following this link.
The good thing about being a lover of British puddings is that there is an almost infinite number to cook and try. All of the pudding recipes I have posted on the blog thus far have all been of the sweet variety, and they have all been fairly well known, but this year I am going to try and write some posts and recipes for savoury or obscure ones. First up is dock pudding which happens to tick both of those boxes. This pudding is one I have been meaning to cook for years, but I’ve only gotten around to it until now.
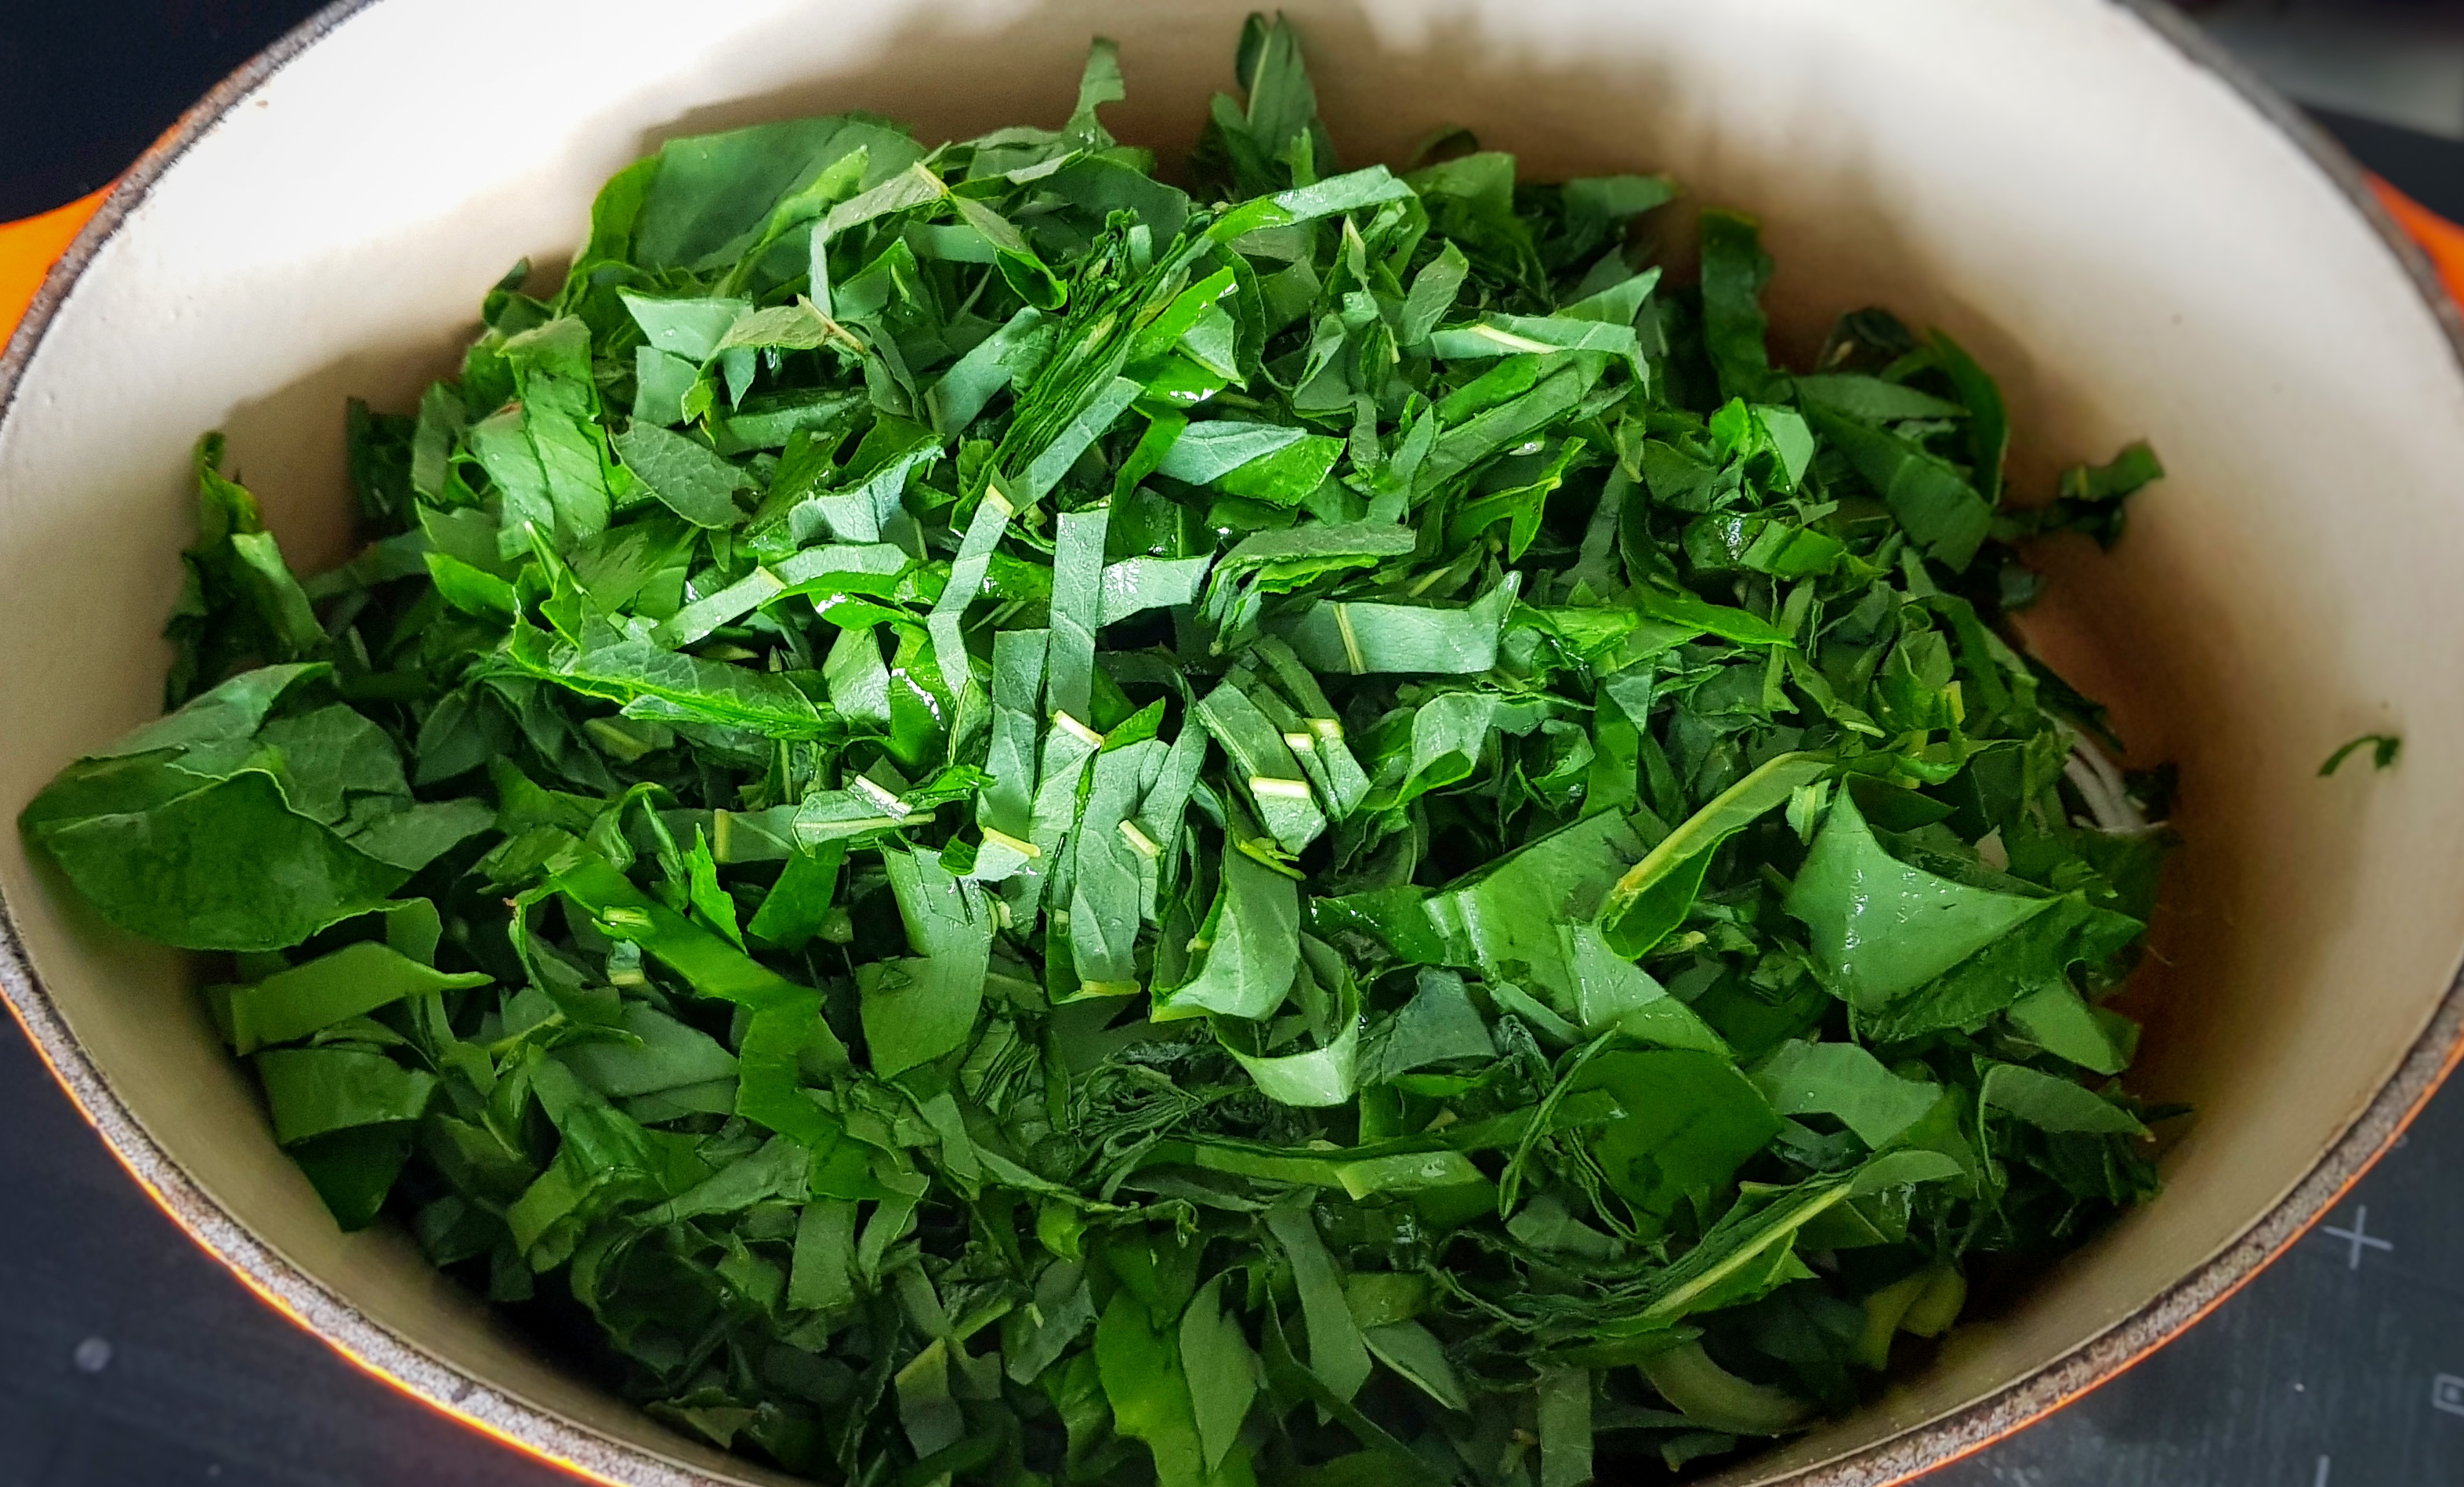
Dock pudding used to be very popular in Yorkshire, especially in the Calder Valley, West Yorkshire. The dock in question isn’t the common dock (the one you rub on nettle stings) but a particular species that goes under several names including bistort, passion dock and sweet dock, its Latin name is Polygonum bistorta.[1] It can be distinguished from the common dock by its yellowish spear-shaped leaves. The leaves are collected when young, alongside tender nettle tops, there is a recipe for it in Alexis Soyer’s classic 19th century work A Shilling Cookery For the People, where it is made with a mix of two-thirds passion dock, and one-third nettles.[2] These were supplemented or replaced with whatever greens were around: sorrel, raspberry leaves, chives, spinach, etc, the choice changing with the season. These are washed, sliced and cooked with onion or leek and oatmeal to make a very dark green porridge, which is fried in dollops in bacon fat, lard or beef dripping.[3] It has been likened to Welsh laverbread in colour and flavour, in that you will either love it or hate it.[4] It sometimes goes by the name herb pudding, which makes sense seeing as docks are only eaten in the springtime when they are tender. It is mixed with more oatmeal and water, tied in a cloth and boiled, cooled and fried in slices.
My patch of Passion dock
Technically, then, I could have used any green leaves, but I really wanted to make it with Passion dock; so called because it is found growing during Passion Week, the last week of Lent.[5] It was an extremely important food, the first fresh green vegetable after a winter of eating only pickled vegetables and salted meats. Many people were showing signs of scurvy by early spring, so few fresh vegetables were eaten. Dock is also said to be an excellent blood cleanser and good for the skin too, being a preventative of spots and pimples.[6]
Dock pudding was especially popular in the Victorian era, but was considered a famine food in the 20th century.[7] Very few people eat it now, but there is an outlier because the West Yorkshire town of Mytholmroyd has held the World Dock Pudding Championships every May since 1971.[8] I’m going to try my best to go next year.
If you like the blogs and podcast I produce and would to start a £3 monthly subscription, or would like to treat me to virtual coffee or pint: follow this link for more information.Thank you.
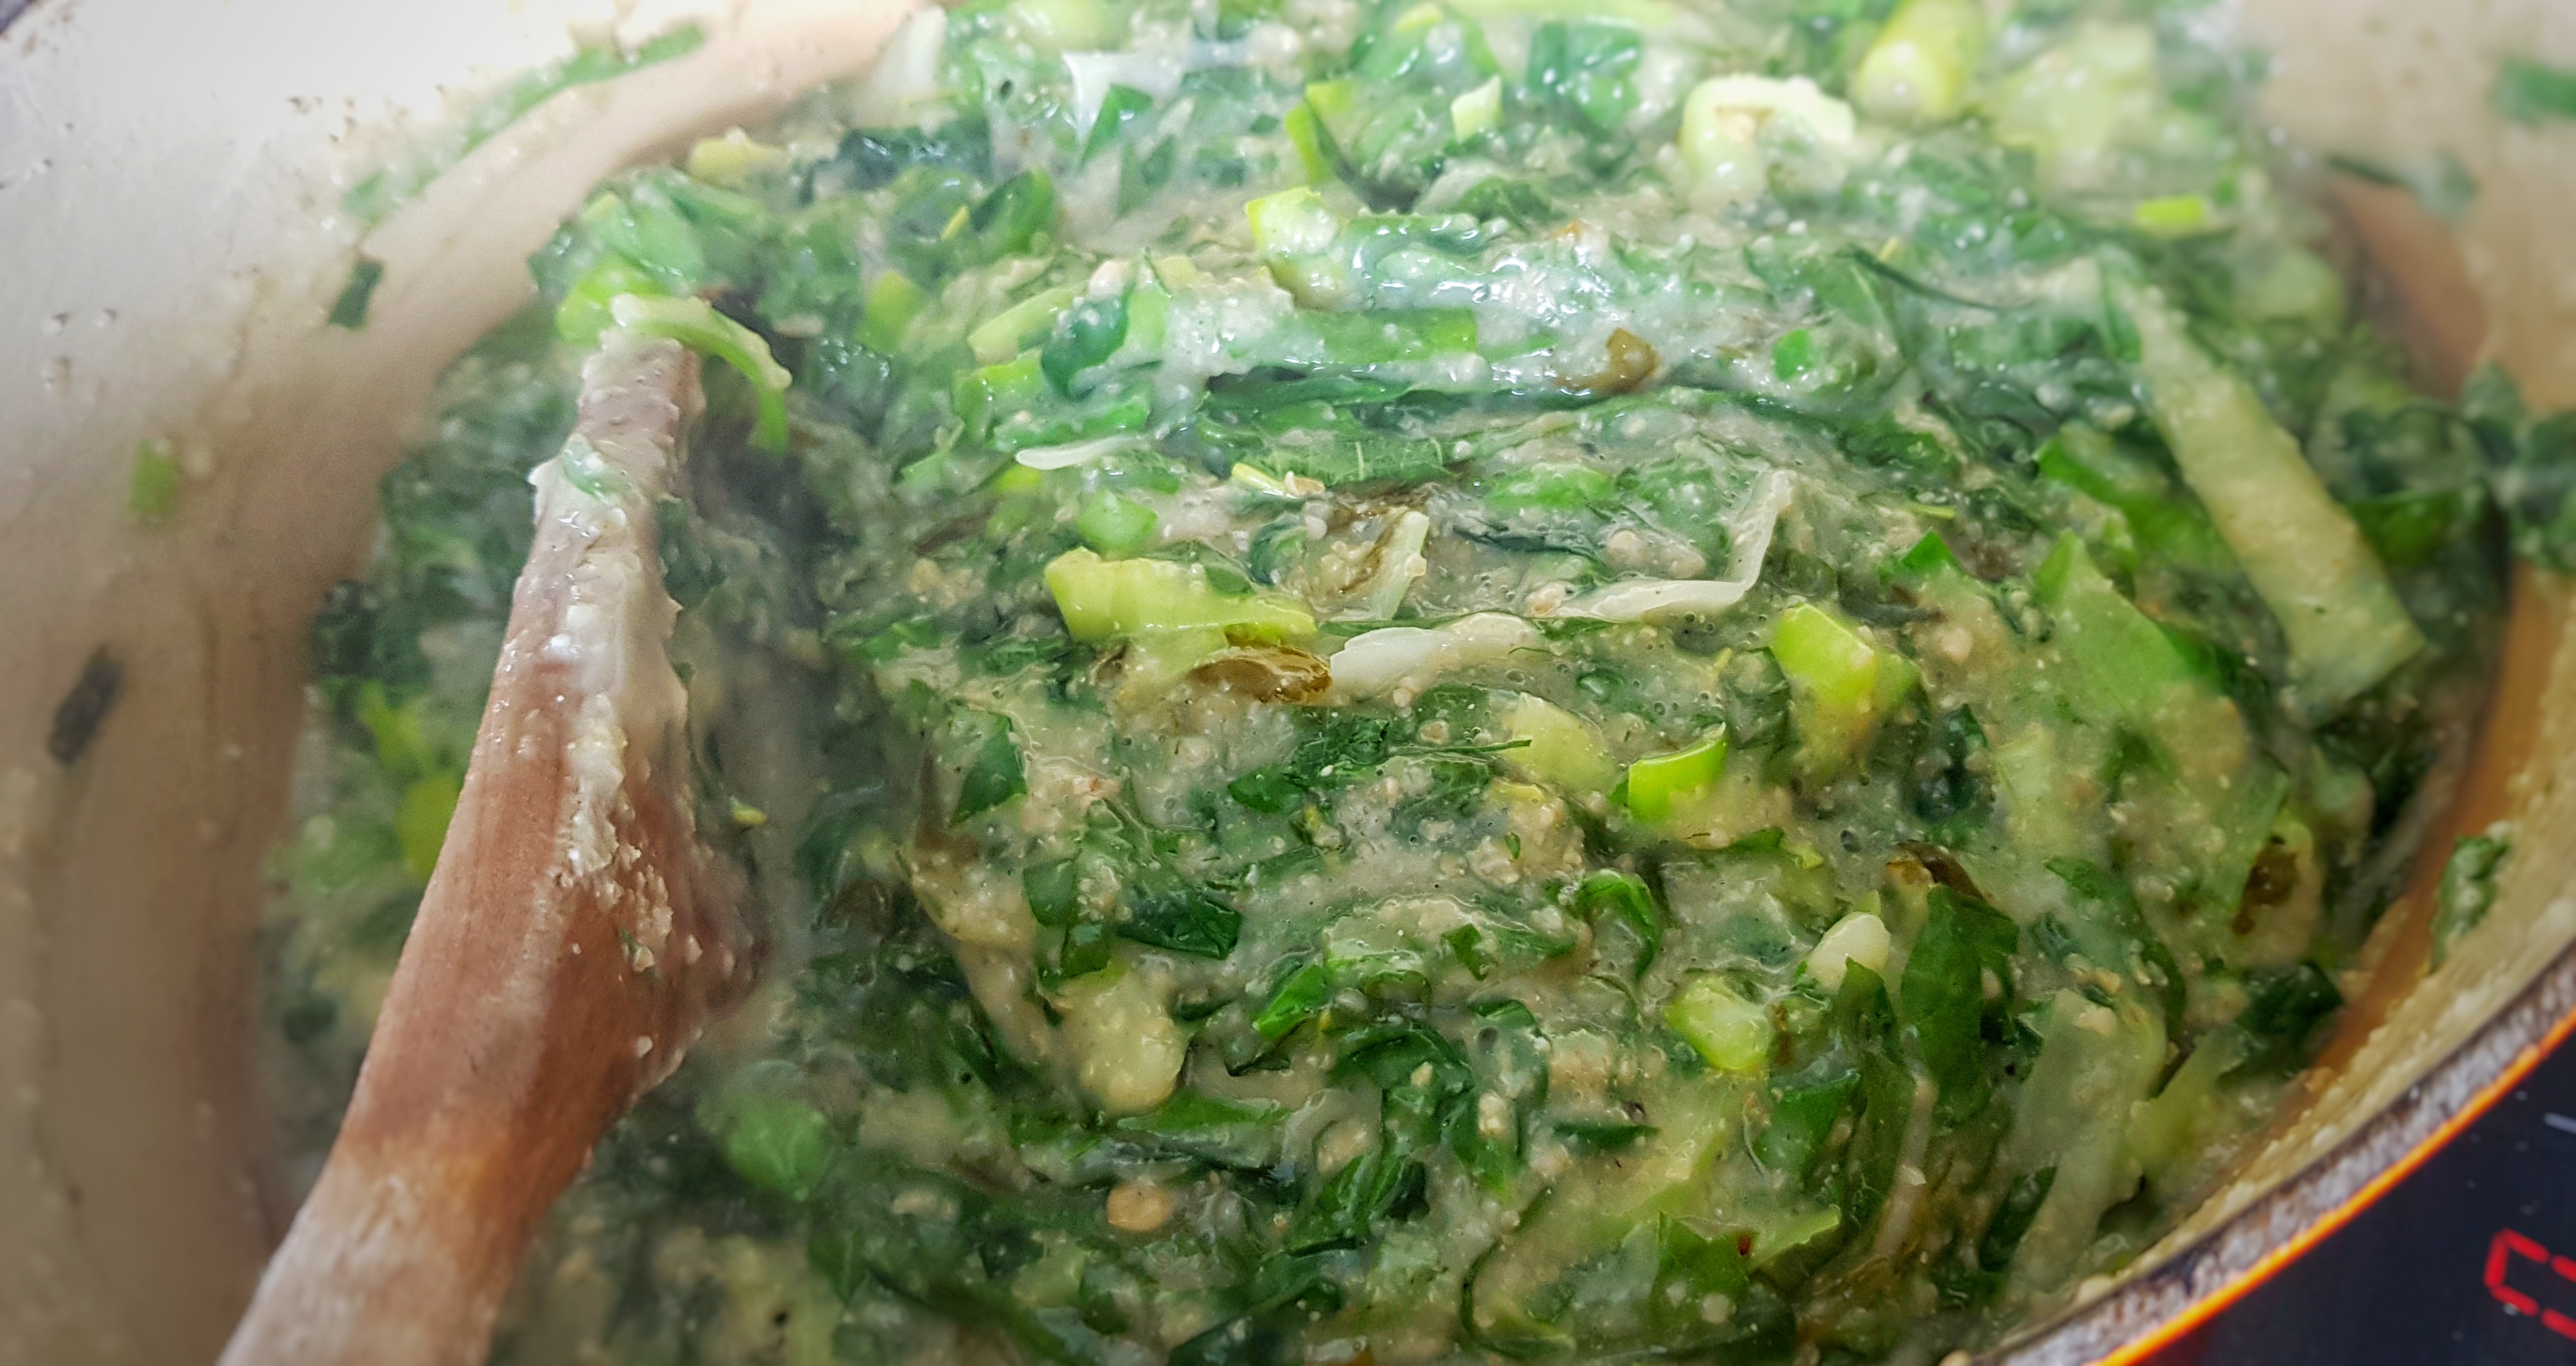
I found a patch of Passion dock growing in the Cheshire town of Lymm last year, but they were far too old and tough to pick, but I remembered this year. Oddly, I couldn’t find any nettles, but I did spot some sorrel and some wild garlic. I was in a bit of a rush, and didn’t have enough to make the very green sort of pudding, but I didn’t want to boil one (to save on fuel), so tried a common trick of cooking it in a saucepan, pouring and setting it in a tub so I could slice and fry it. This method is sometimes used for other savoury puddings such as black pudding or mealy pudding.
Makes 8 to 10 slices of pudding:
100 g trimmed, young leaves of any amount of the following: passion dock, nettles, spinach, sorrel or any other edible greens you like
1 leek or onion, sliced thinly
80 g oatmeal (not rolled oats)
1 tsp salt
Freshly ground black pepper
400 ml water
A smidge of flavourless oil such as sunflower or groundnut
8 rashers of streaky bacon
30 g lard or dripping, or 2 tbs of your favourite frying fat or oil
Your pudding needs to be cooked, cooled and set the day before you want to eat it (or several days before if you like). To do this, shred the leaves and add them to a pan with the leek or onion, oatmeal, salt, pepper and water. Bring to a simmer, stirring so that it doesn’t form lumps.
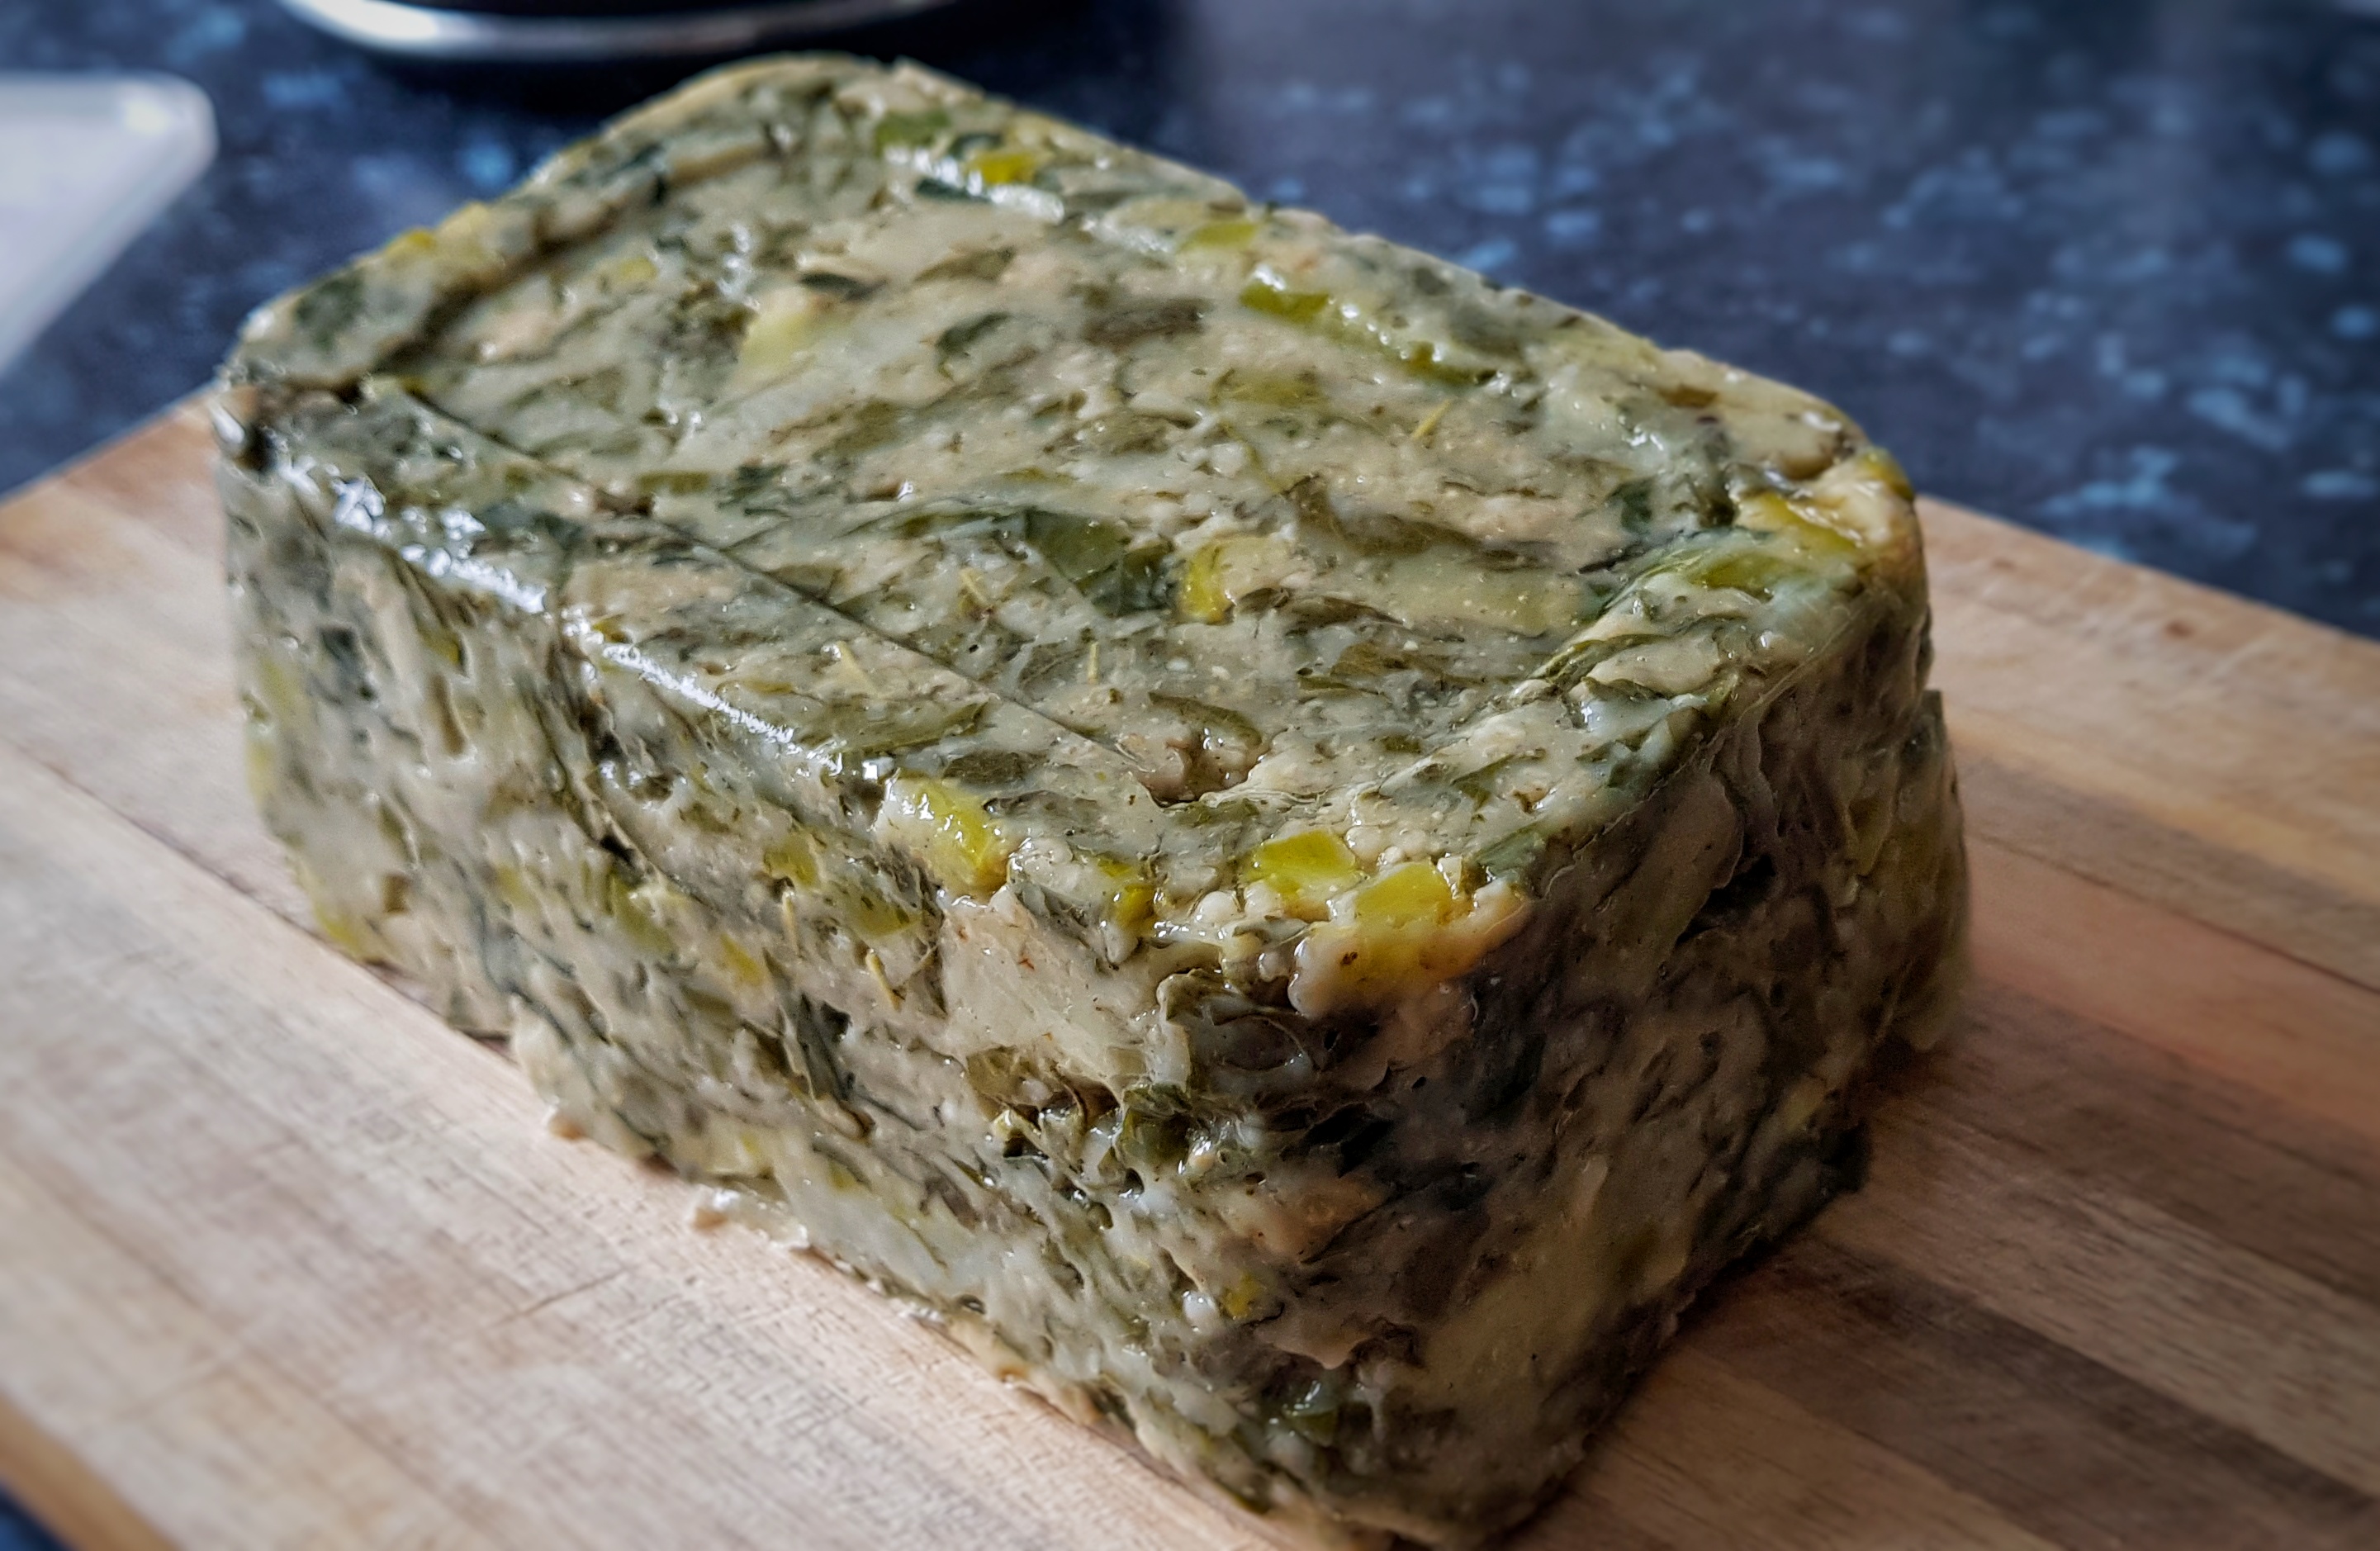
Cook for around 20 minutes and all of the vegetables are soft, then take off the heat. Now take a tub of around 1 litre capacity and brush with the oil. Pour the pudding into the tub, cover, cool and then refrigerate.
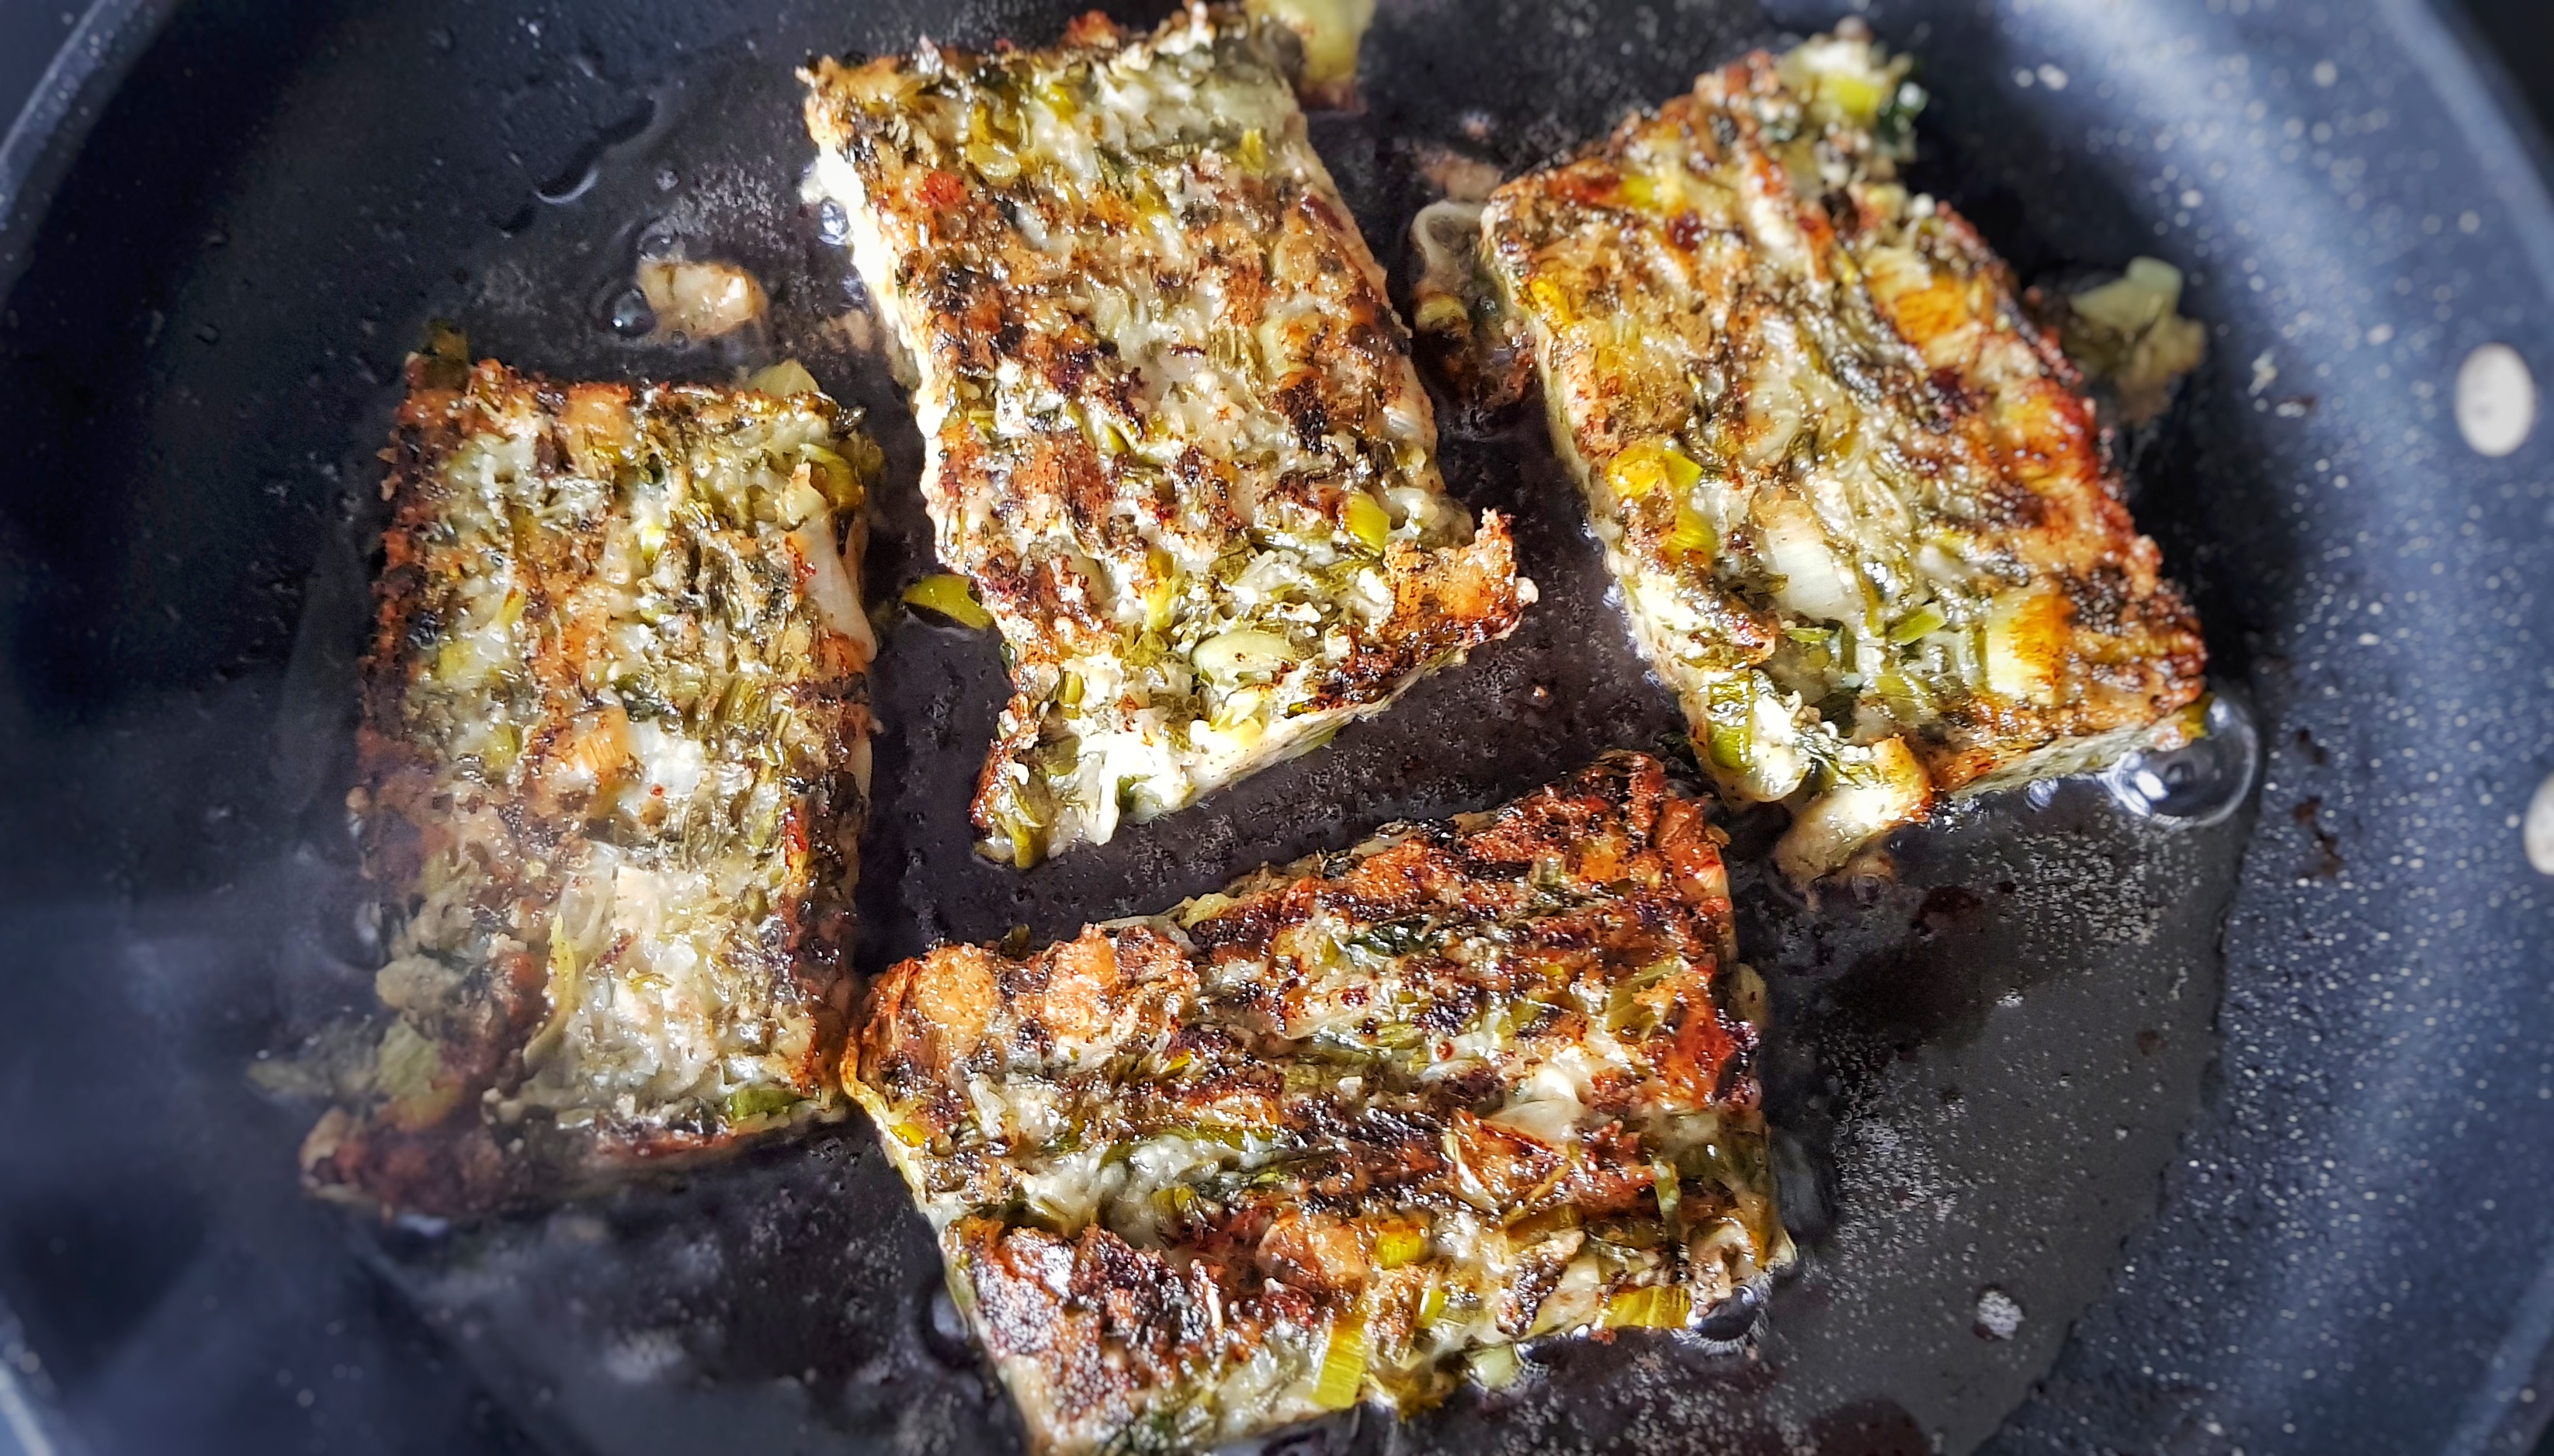
When you want to cook your pudding, first fry the bacon in your chosen frying fat or oil over a medium heat until very crisp. As they cook, prepare the pudding: turn out onto a board and cut even slices between 1 and 1.5 cm thick. It’s best to use a serrated knife for this task.
Remove the bacon rashers and keep warm as you fry the pudding slices: turn up the heat to medium-high and pop in the slices. It’s a bit like making bubble and squeak in that you need to wait and allow them to build up a good, crisp fried layer before you disturb them: a good 5 minutes. Turn over with a spatula and fry the other side for a further 4 or 5 minutes.
When ready, serve up with the bacon and whatever other breakfast things you like. I went with fried eggs.
Notes:
[1] Brears, P. (2014) Traditional Food in Yorkshire. Prospect Books.
[2] Soyer, A. A Shilling Cookery for the People: Embracing an Entirely New System of Plain Cookery and Domestic Economy. (Geo. Routledge & Co., 1855).
[3] Davidson, A. (1999) The Oxford Companion to Food. Oxford University Press.
[4] Mason, L. and Brown, C. (1999) The Taste of Britain. Devon: Harper Press.
[5] If you want to know more about the food of Passion Week, listen to this episode of the podcast:
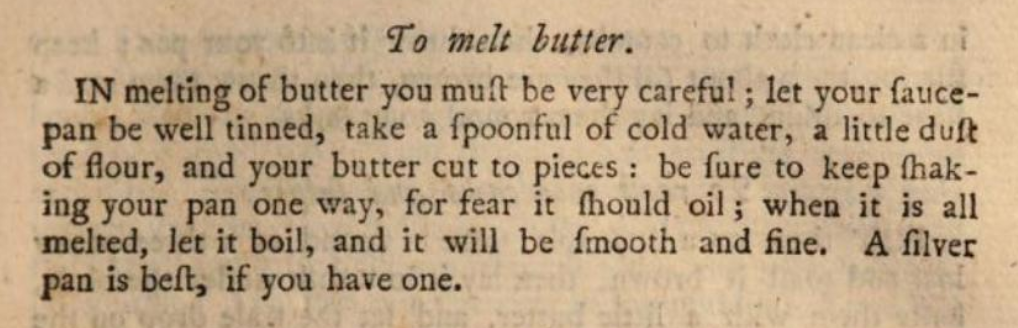
If you leaf through English cookery books of the 18th and 19th centuries, you will see much mention of ‘melted butter’ or ‘good melted butter’, such as this one, a recipe for egg sauce from Elizabeth Raffald’s The Experienced English Housekeeper (1769)[1]:
You would be completely forgiven if you took those words literally, however, what Elizabeth is referring to is butter sauce, ‘or’, as one-time chef to Queen Victoria Charles Elmé Francatelli put it, ‘as it is absurdly called, melted butter’.[2] It achieved this misleading moniker simply because of its ubiquity. In fact, it was so ubiquitous that Mrs Raffald doesn’t even include a recipe for it. Luckily for us, Hannah Glasse does in Art of Cookery[3]:
Used freely across three centuries, it became known as the ‘one sauce’ of England. The recipe, at least in its constituents, doesn’t really change: it is essentially a thin roux made with flour and water (or stock), enriched with melting cubes of butter, essentially a beurre blanc stabilised with flour – very useful for a sauce that was potentially left standing on a dining table for an hour. Jane Grigson likened it to a hollandaise thickened with flour instead of egg yolks.[4] It can certainly be used in place of either. Butter sauce forms the basis of several other sauces, it can be sharpened with lemon juice, enriched with cream, or flavoured with herbs. Sometimes it is flavoured with shellfish, and even gooseberries if it is to be served with mackerel.
Like many of our common foods, they are mistreated, corners are cut and fillers are added. As Francatelli observed, ‘it is too generally left to assistants to prepare as an insignificant manner; the rest is therefore seldom satisfactory.’[5] Indeed, my first meeting with it was back in the 1980s in the form of a boil-in-the-bag frozen cod steak in butter sauce. I certainly enjoyed it at the time, but upon making a ‘proper’ one decades later for my Neil Cooks Grigson blog,[6] I immediately saw that the sauce I had consumed as a child was a shadow of its former self. Writing in English Food at a time when the hold nouvelle cuisine had on the restaurant scene was beginning to wane, Jane Grigson hoped we might return to this sauce and appreciate it again.[7] We didn’t, but perhaps now is the time?
If you like the blogs and podcast I produce and would to start a £3 monthly subscription, or would like to treat me to virtual coffee or pint: follow this link for more information.Thank you.
My recipe, below, is adapted from Jane Grigson’s, which in turn, is adapted from Francatelli’s, so it has quite the pedigree. The only significant change I have made is to reduce the amount of flour. I’ve tinkered with amounts so that a full 250g pack of butter is used; no messing about with weights (and there is something quite satisfying about using a whole block of butter). Don’t let any memories of bad school meals put you off, and don’t let the amount of butter put you off either, it’s a surprisingly light and delicate sauce.
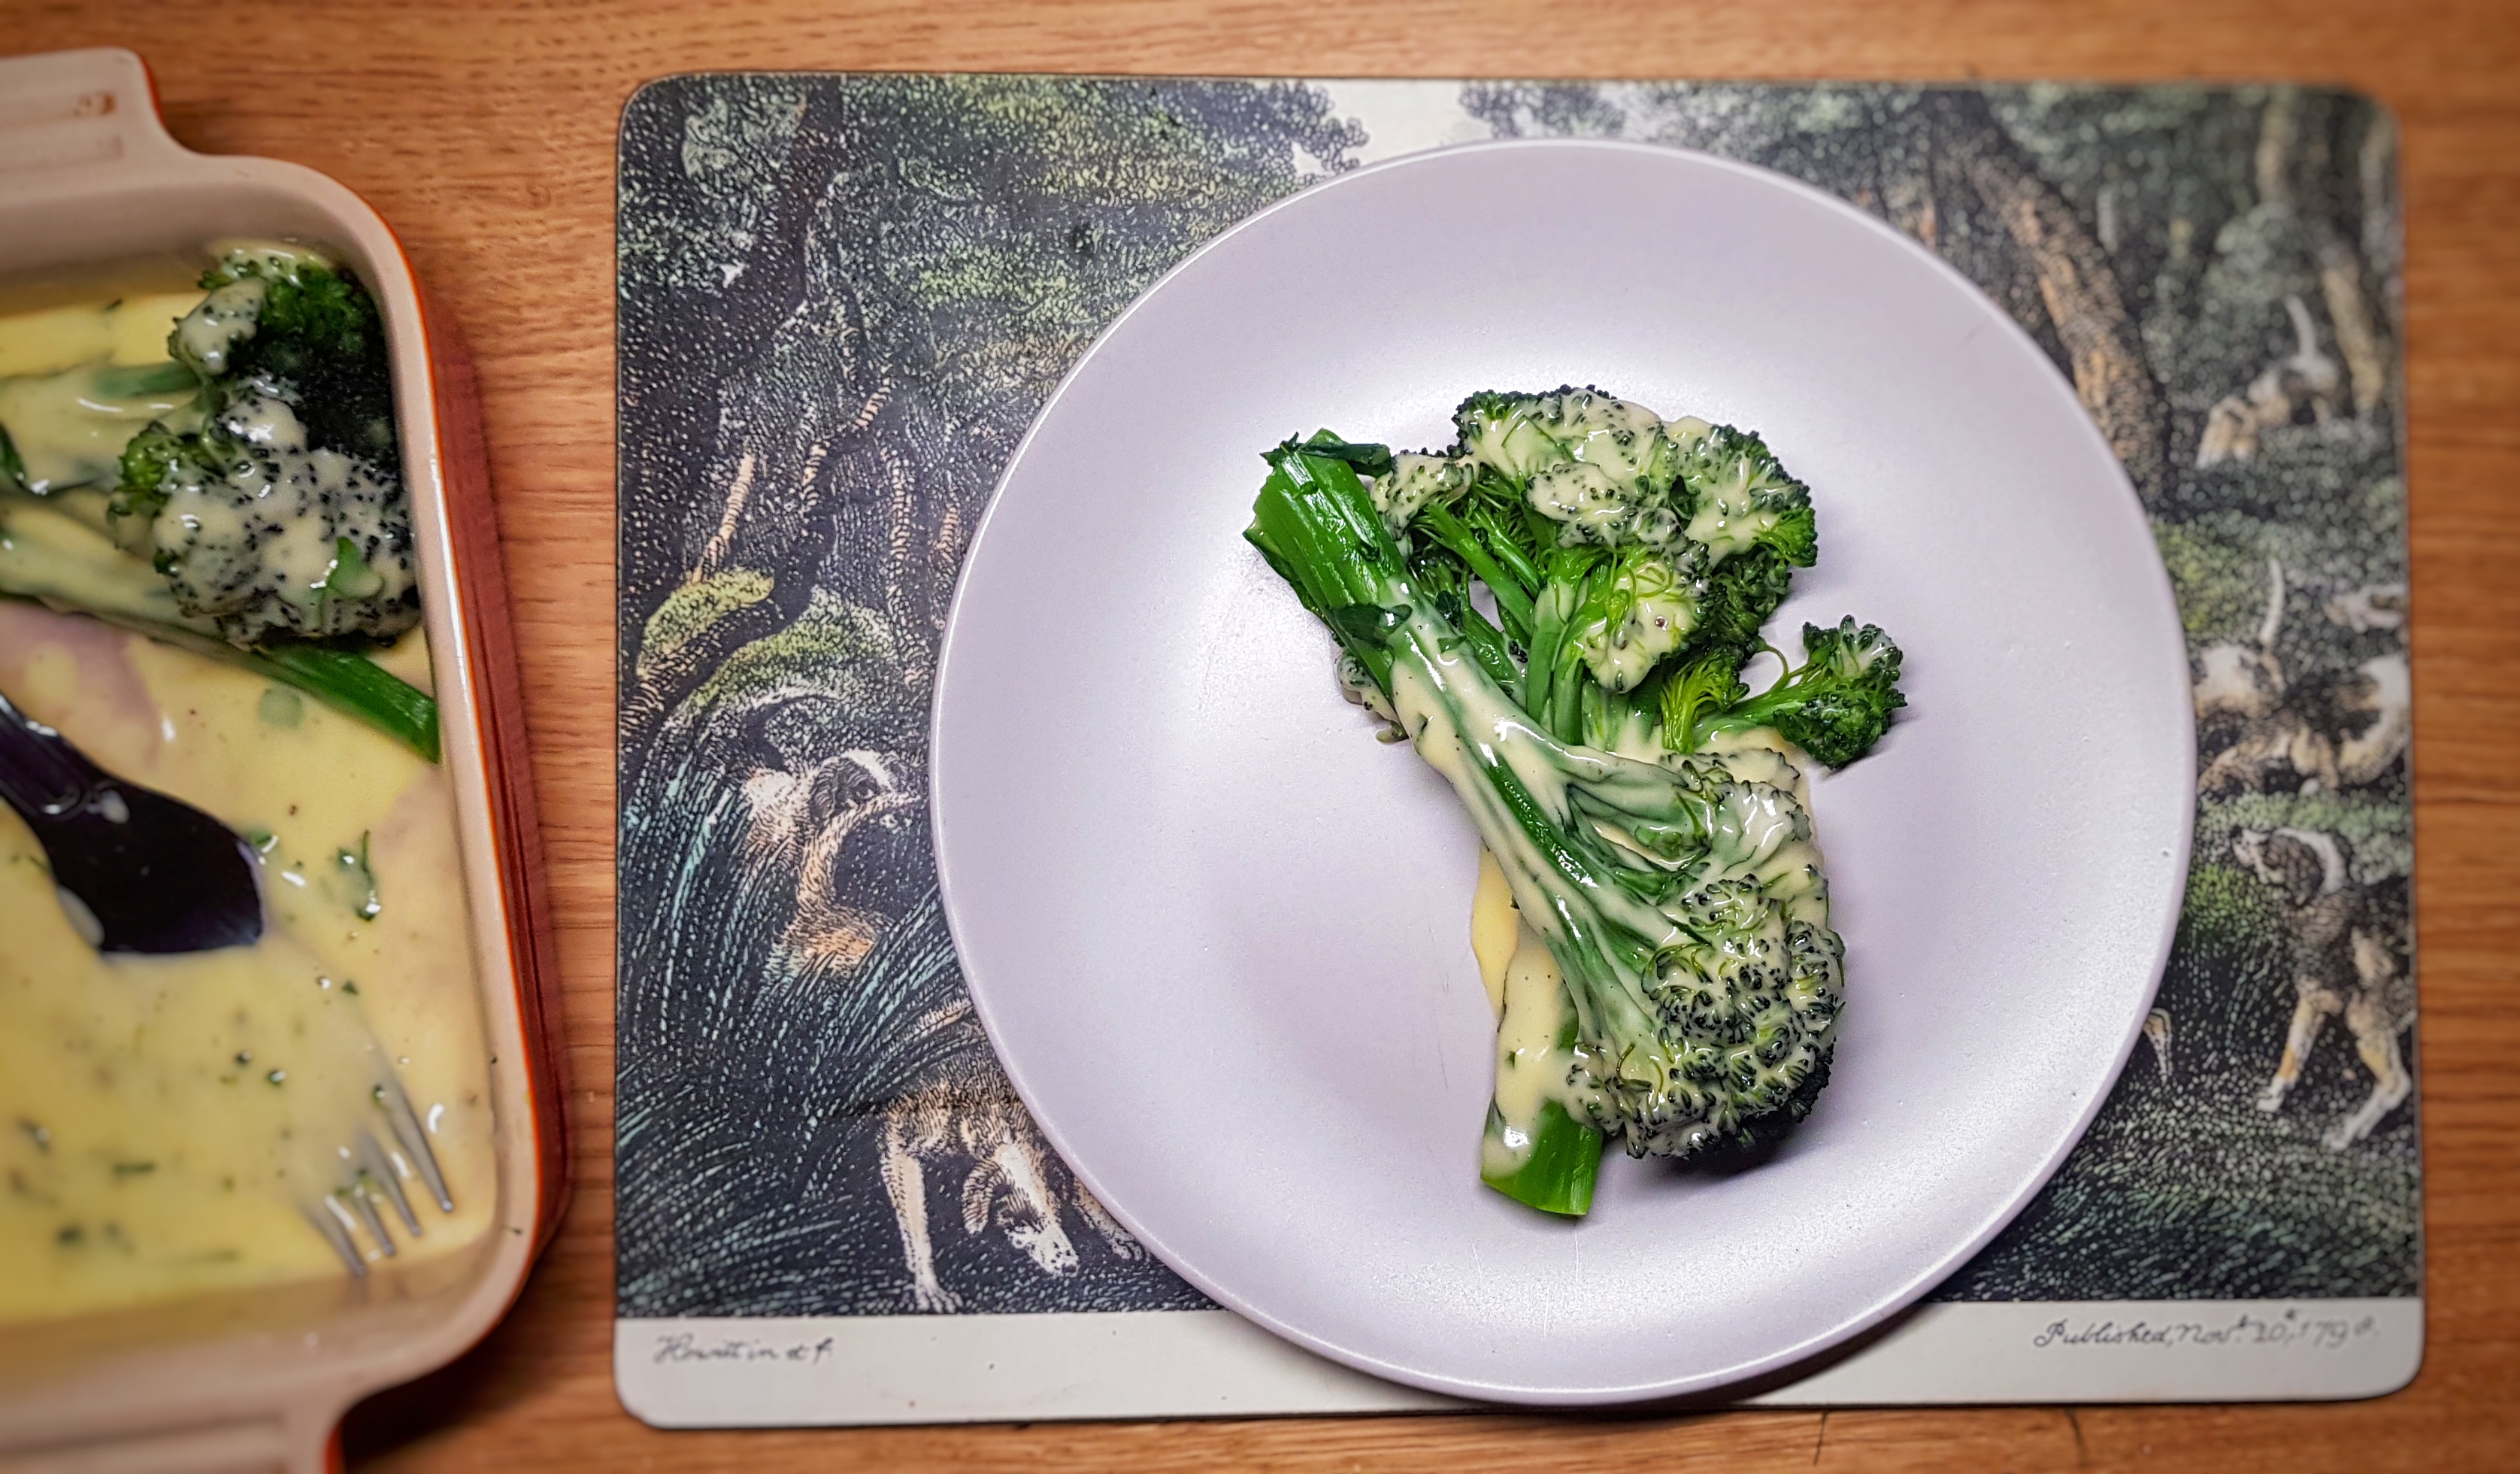
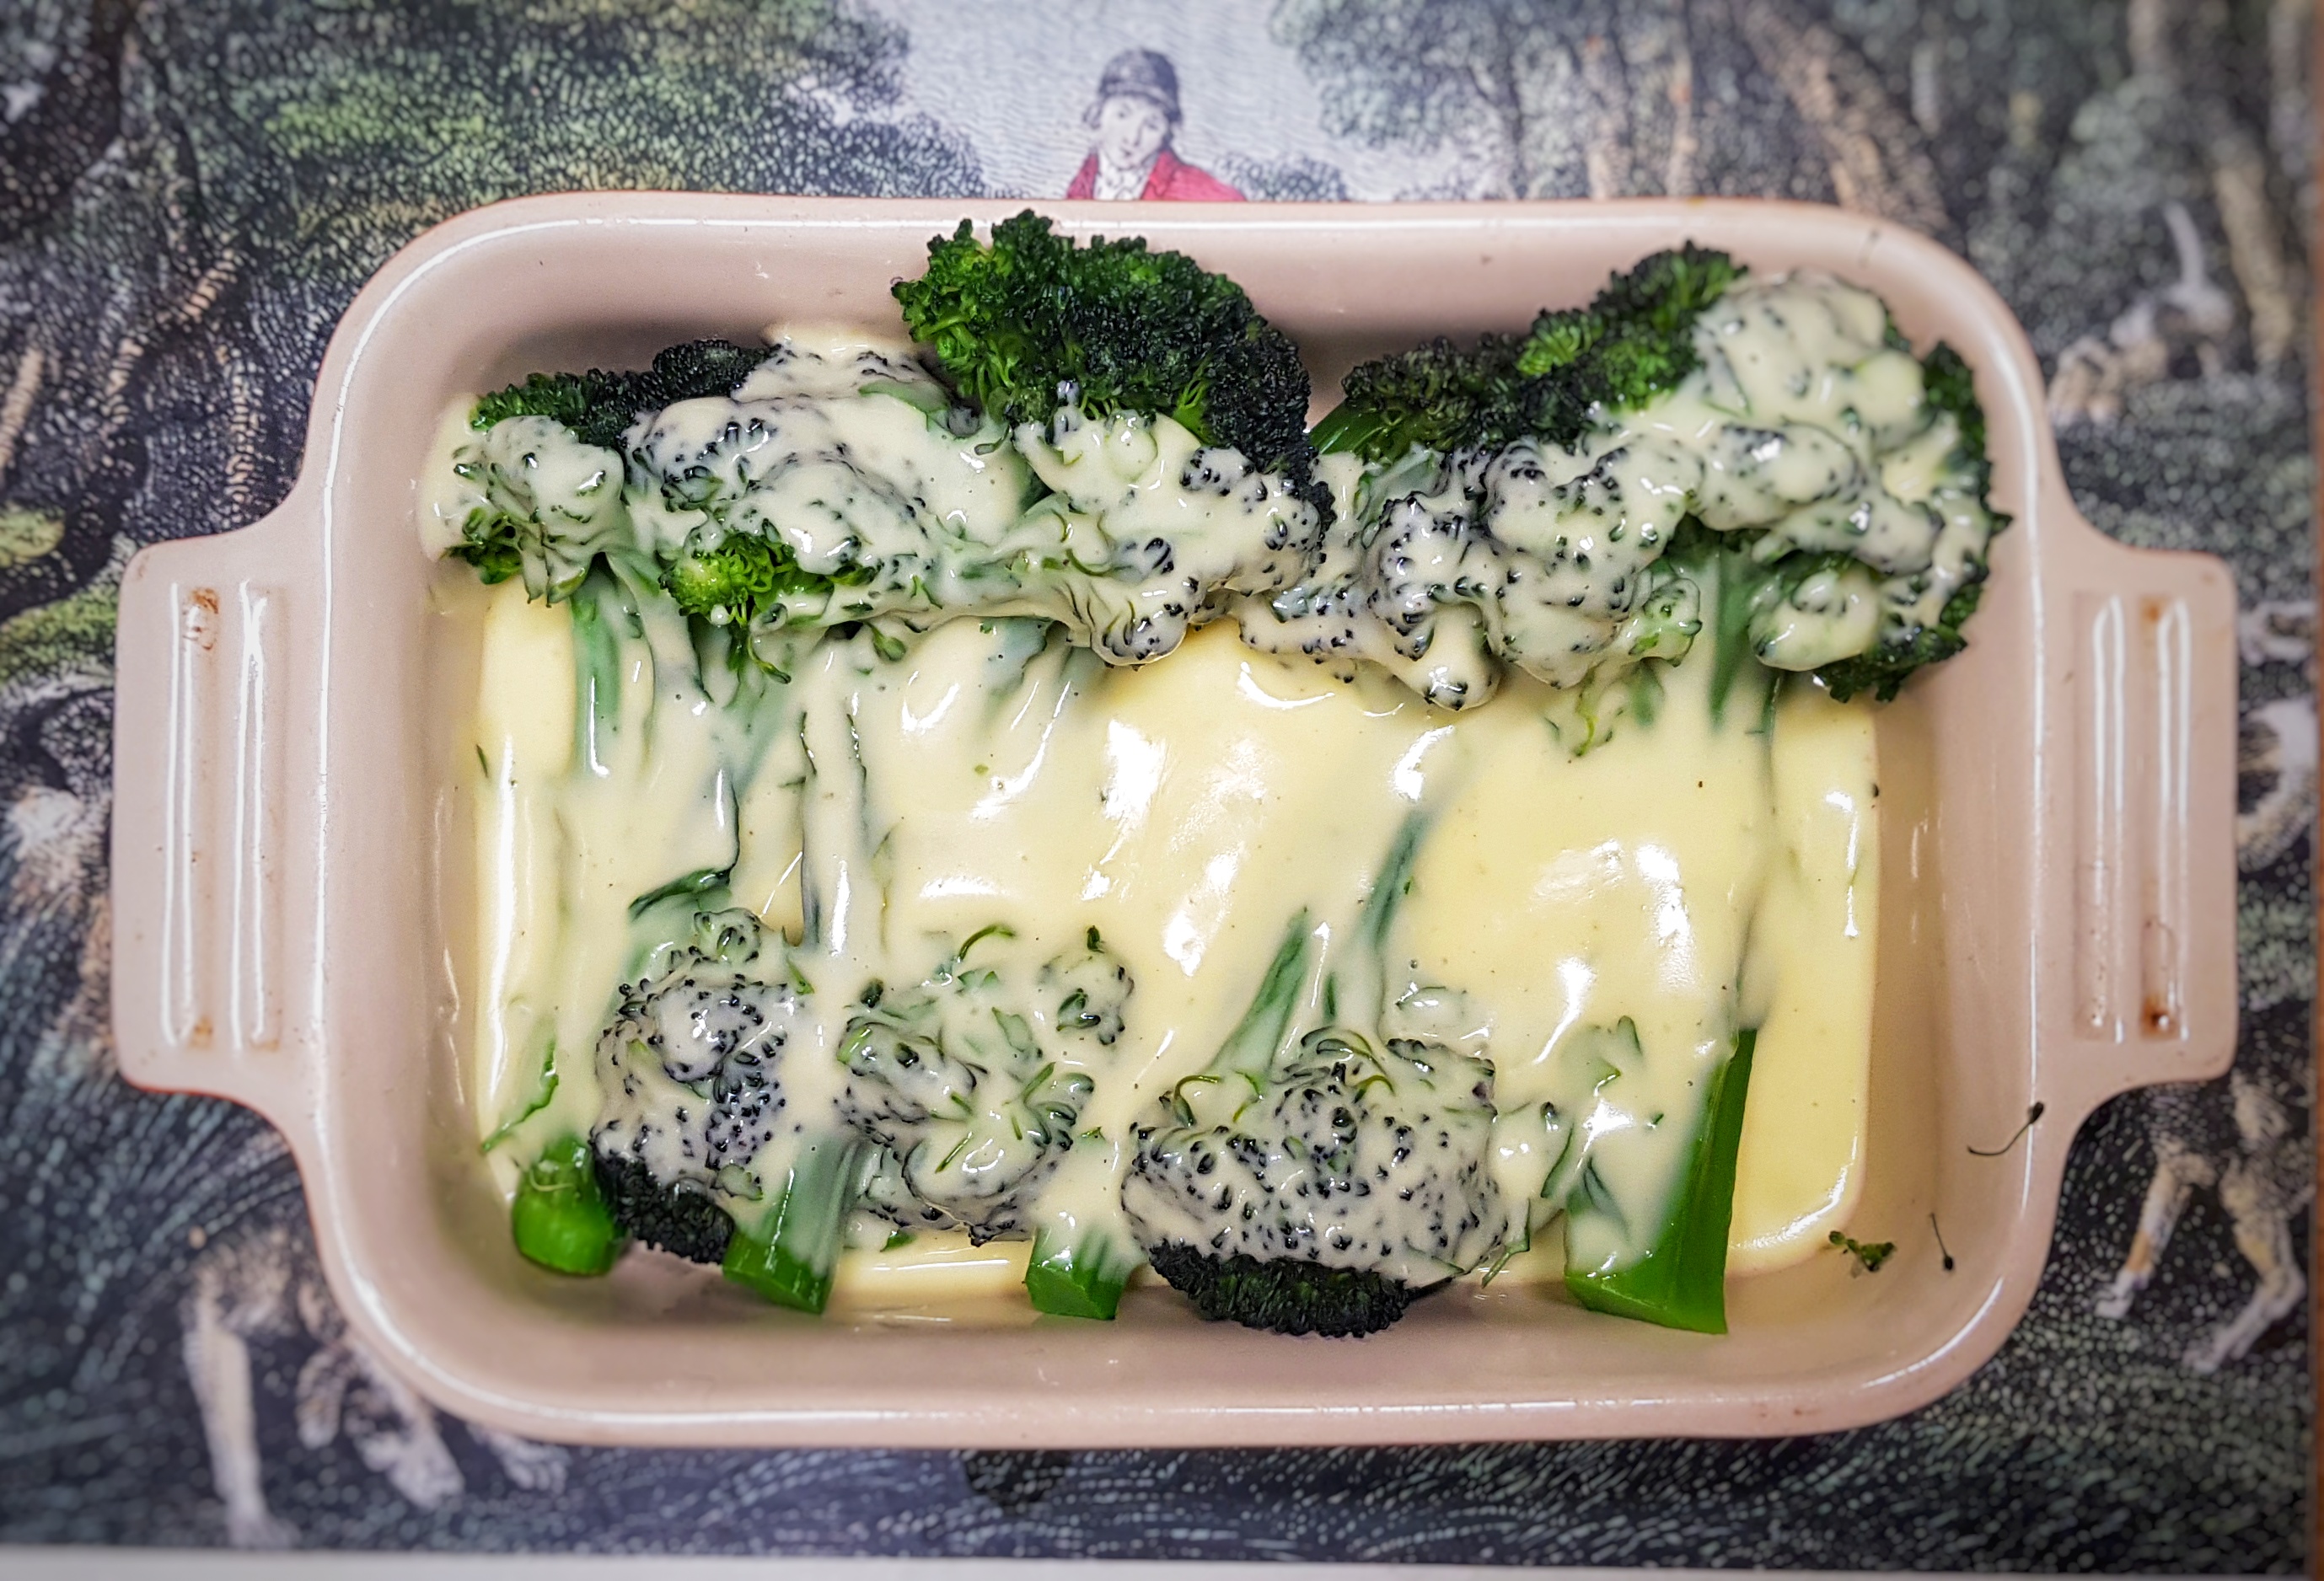
It’s simple to prepare, as long as you don’t let the diced butter become hot enough it melts fully. I love this sauce served with steamed vegetables such as asparagus, purple sprouting broccoli, leeks or new potatoes, as well as simple poached eggs, sole or salmon. If you have some poaching liquid or stock, it can replace the water used in the recipe.
I’ve provided some simple, classic variations below should you fancy trying them.
Serves 4 to 6:
250g very cold unsalted butter, diced
2 level tsp plain flour
120ml hot water
Salt
Ground black pepper
Pinch nutmeg and mace (optional)
Squeeze lemon juice
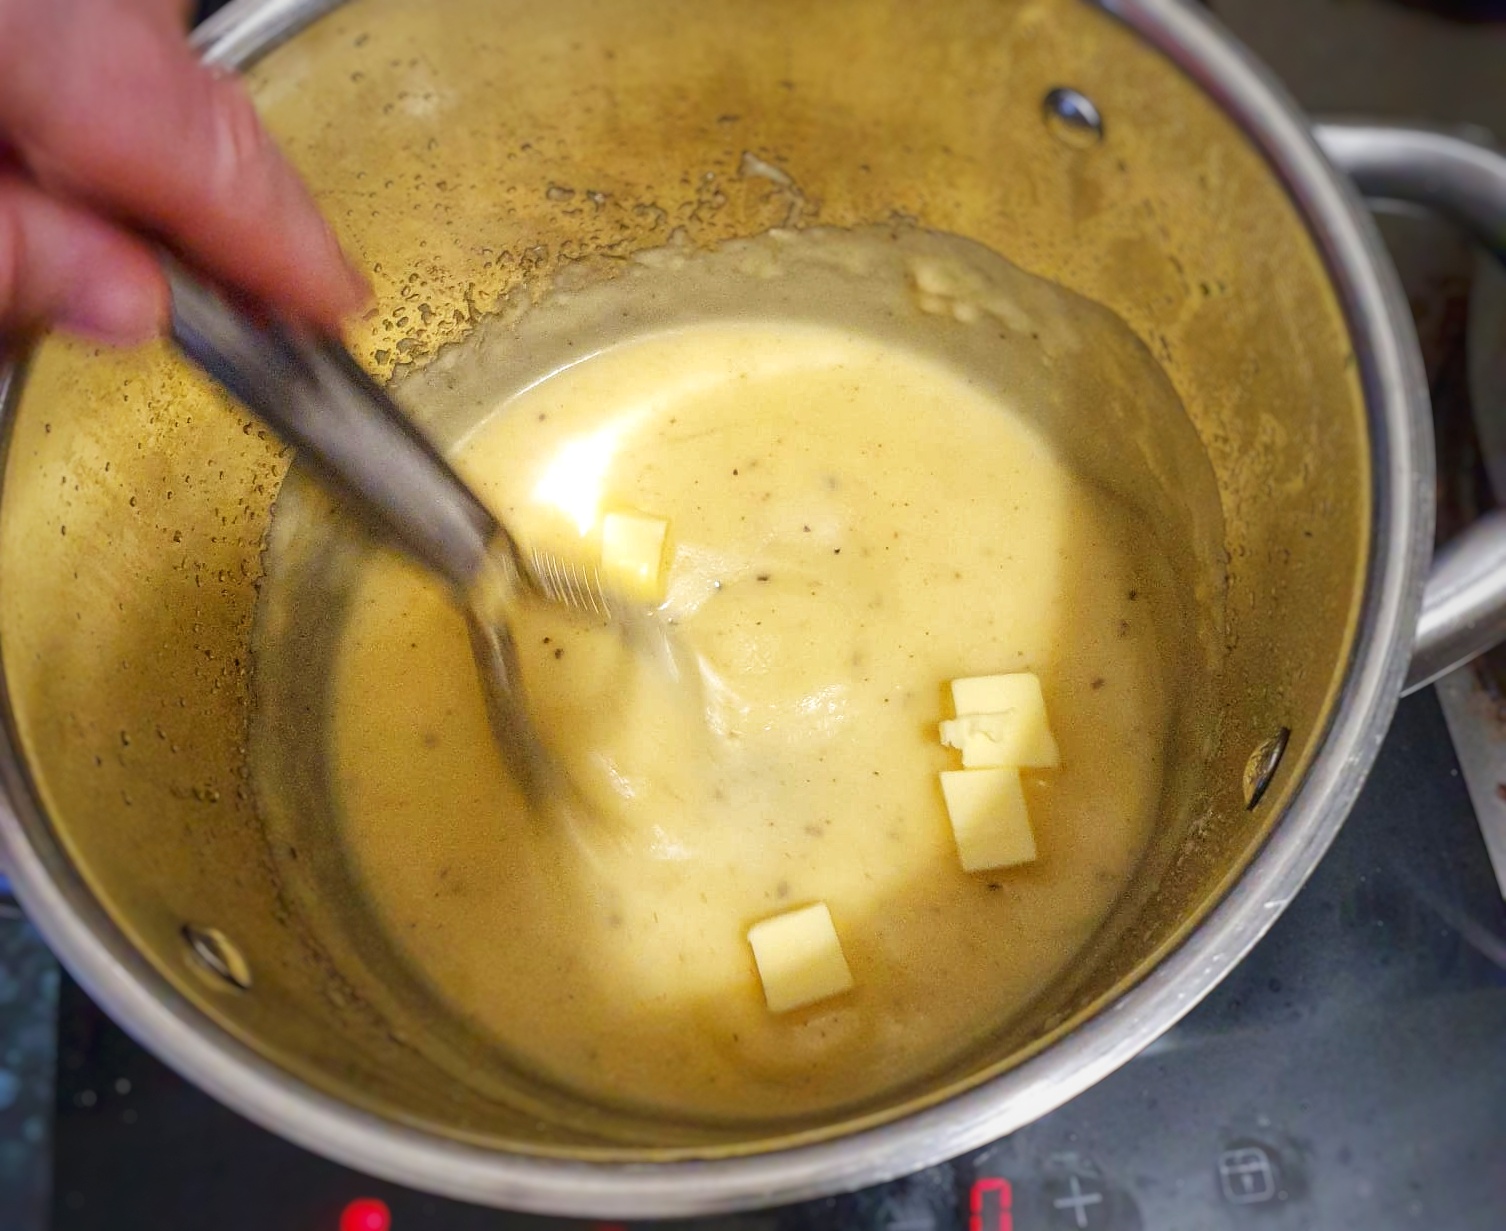
2 tbs cream (optional)
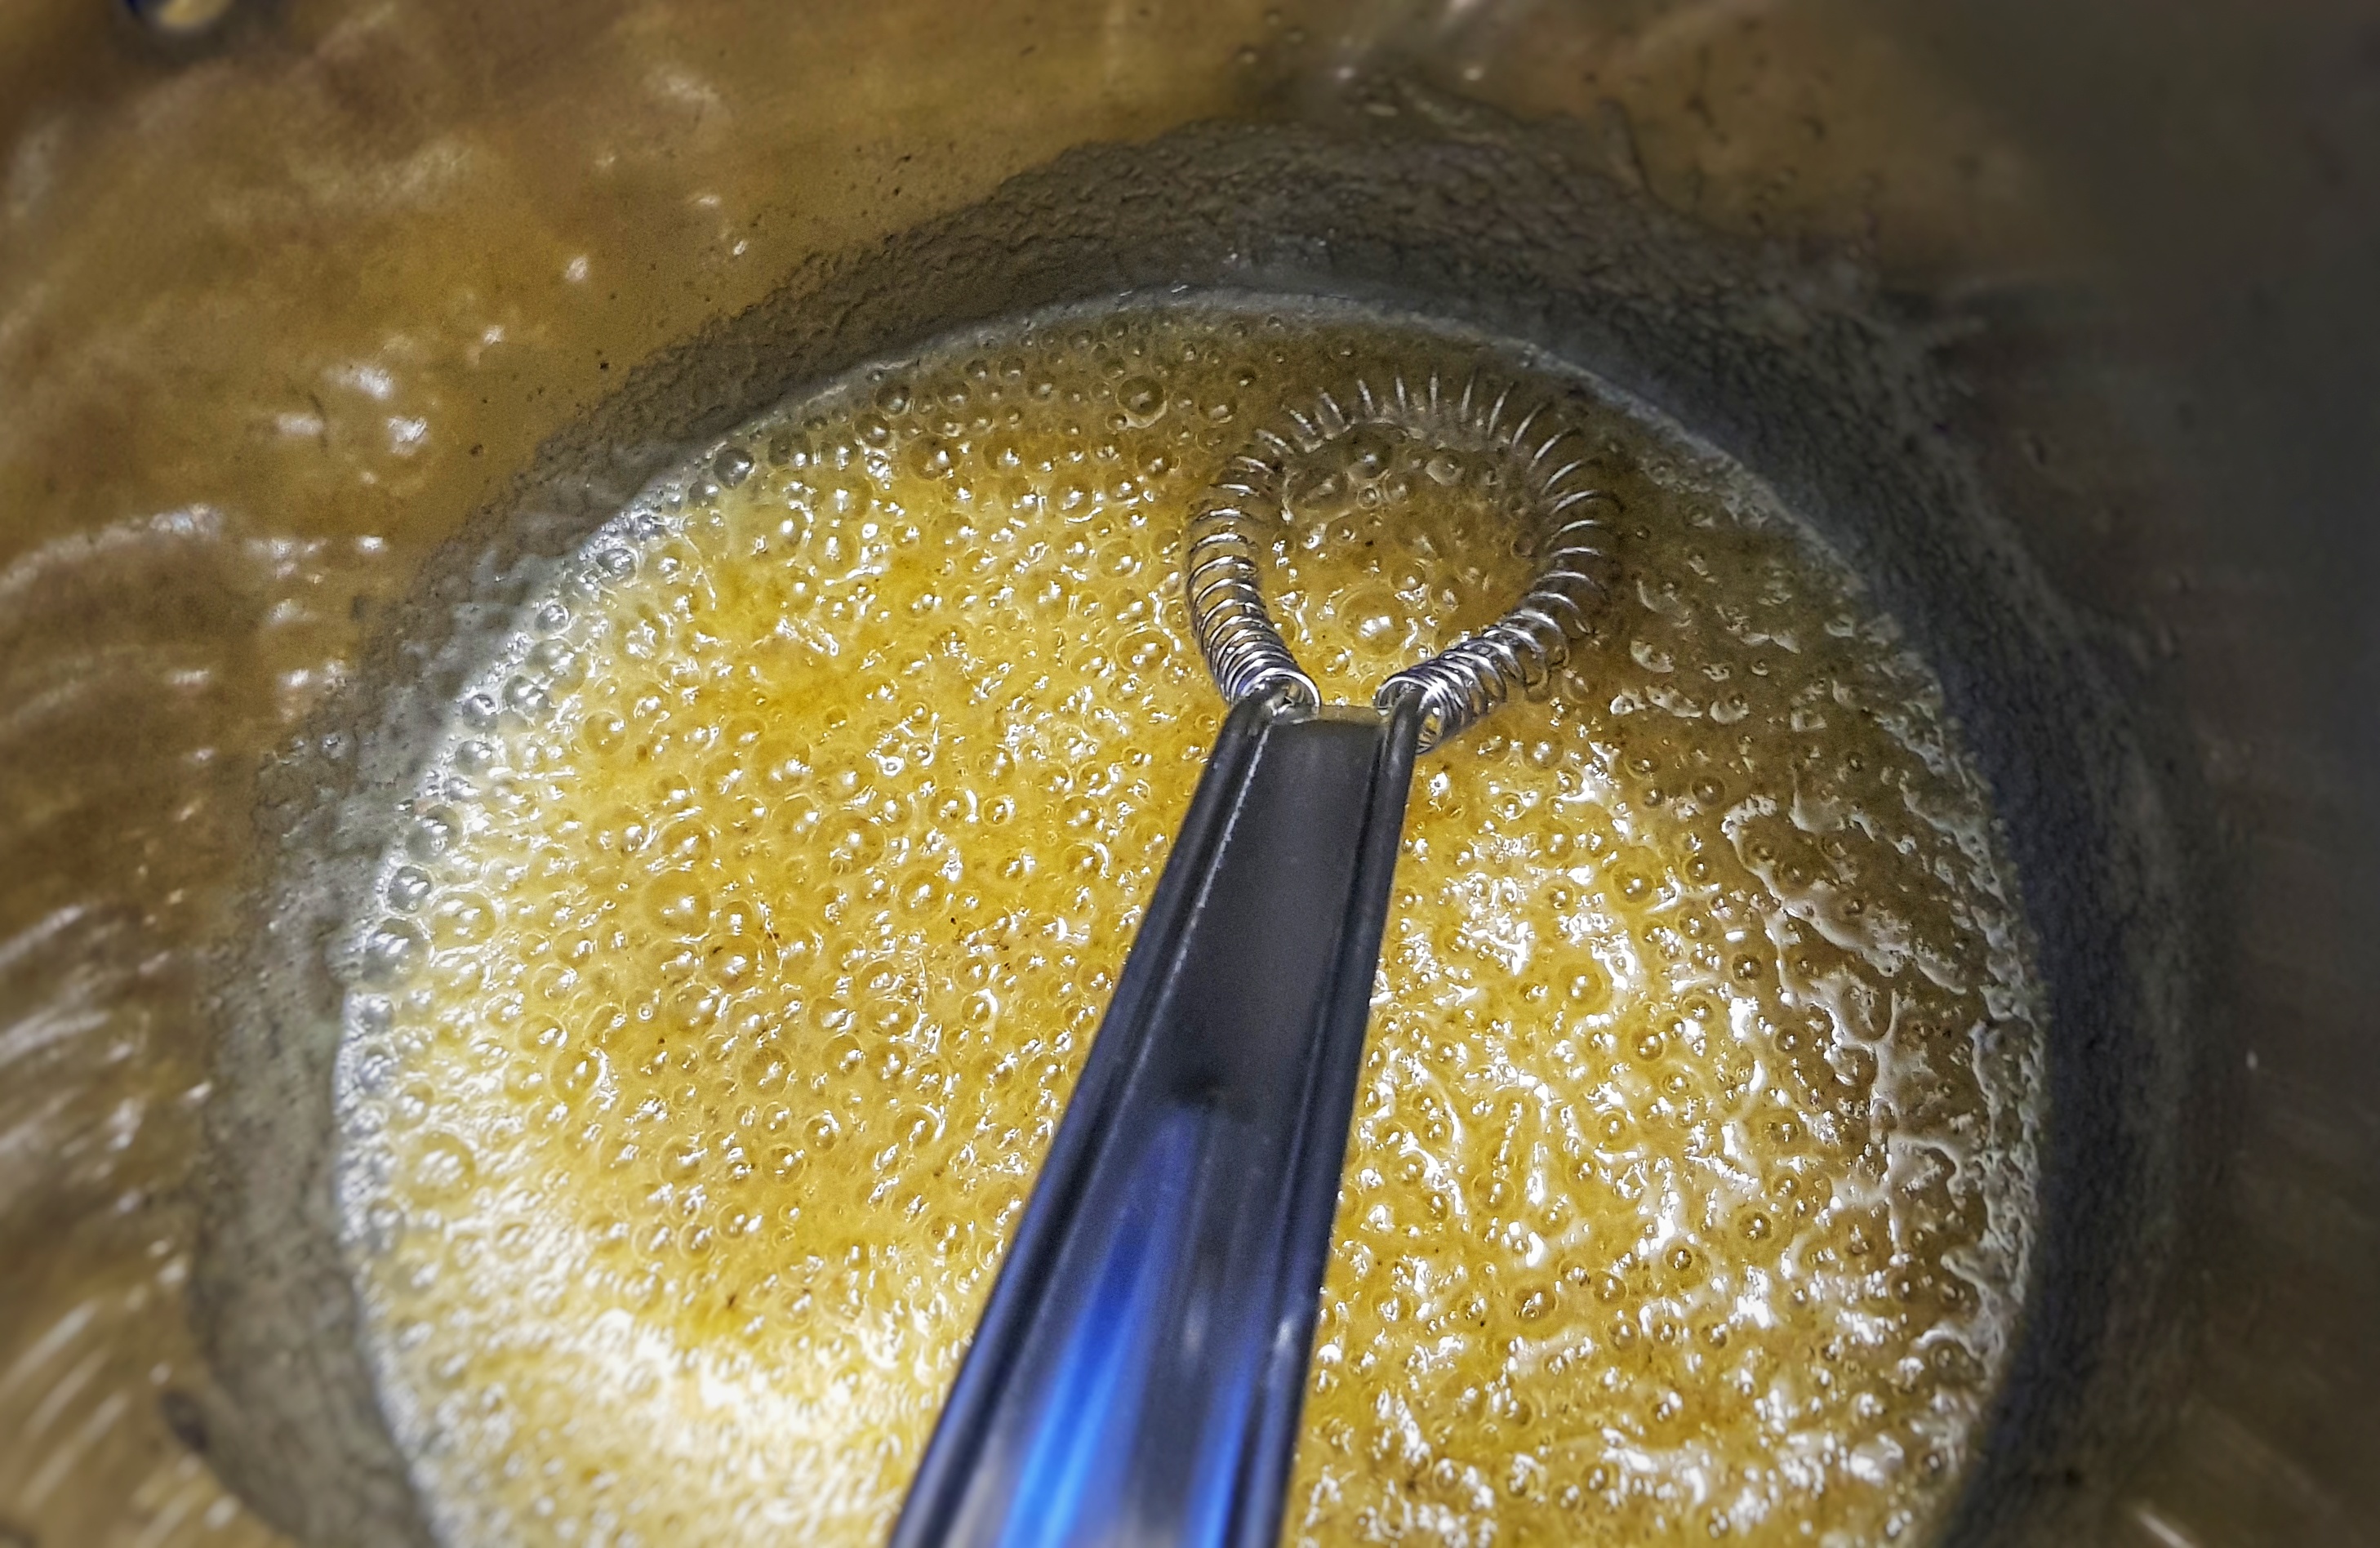
Put around one-third of the butter in a saucepan over a medium-low heat and allow it to melt, then stir in the flour with a wooden spoon, or better a small whisk, and allow to cook gently for a couple of minutes – on no account let it brown. If the flour fries and clumps a little, don’t worry. Now mix in the hot water by degrees, only adding more when the water in the pan has fully mixed into the flour and butter. Season with salt, pepper and nutmeg and mace, if using. Allow to gently simmer for 6 or 7 minutes over a low heat. Take the pan off the heat and let it cool for 2 minutes.
Now start beating into the sauce 3 or 4 cubes of butter so that they slowly melt and amalgamate into the sauce. Only when the cubes have disappeared, should you add more. Once you have done this a couple of times, the sauce will cool and the cubes won’t melt so easily, so put the pan over the lowest heat possible, and then continue to add more.
When the butter is used up, add a small squeeze of lemon, stir and check for seasoning. If you like, add cream.
Serve the sauce in a warm jug, or pour over vegetables or fish.
Variations:
Parsley sauce: add a tbs of finely chopped parsley. Eat with some delicately poached cod and stick two fingers up to Captain Birdseye.
Caper sauce: add a tbs of capers, whole or chopped. If you like, season with a little wine vinegar instead of lemon juice. A more piquant sauce to eat with richer foods: skate, brains and poached lamb or mutton.
Egg sauce: make the sauce as above, but when it is ready add the mashed yolks of 3 hard-boiled eggs and then the whites finely diced. Traditionally this is eaten with salt cod and parsnips in Lent.
Shrimp sauce (possibly the most delicious variation). Use a good handful of cooked brown shrimp in their shells (if you can get them) or small prawns. Remove the shells, and boil them in the water to make a rich stock. Use this instead of water. When the sauce is ready, stir in the shelled prawns or shrimps. This is delicious poured over poached turbot. You can also make this sauce with crab or lobster.
[3] Glasse, H. (1747) The Art of Cookery Made Plain and Easy. Prospect Books. The image is taken from the 1763 edition, but the recipe is unchanged from the original 1747 edition.
[4]Grigson, J. (1992) English Food. Third Edit. Penguin.
This post and it’s accompanying podcast episode are for £3 monthly subscribers. If you would like to become a subscriber and access this post and all the other premium content on the blog click the link below:
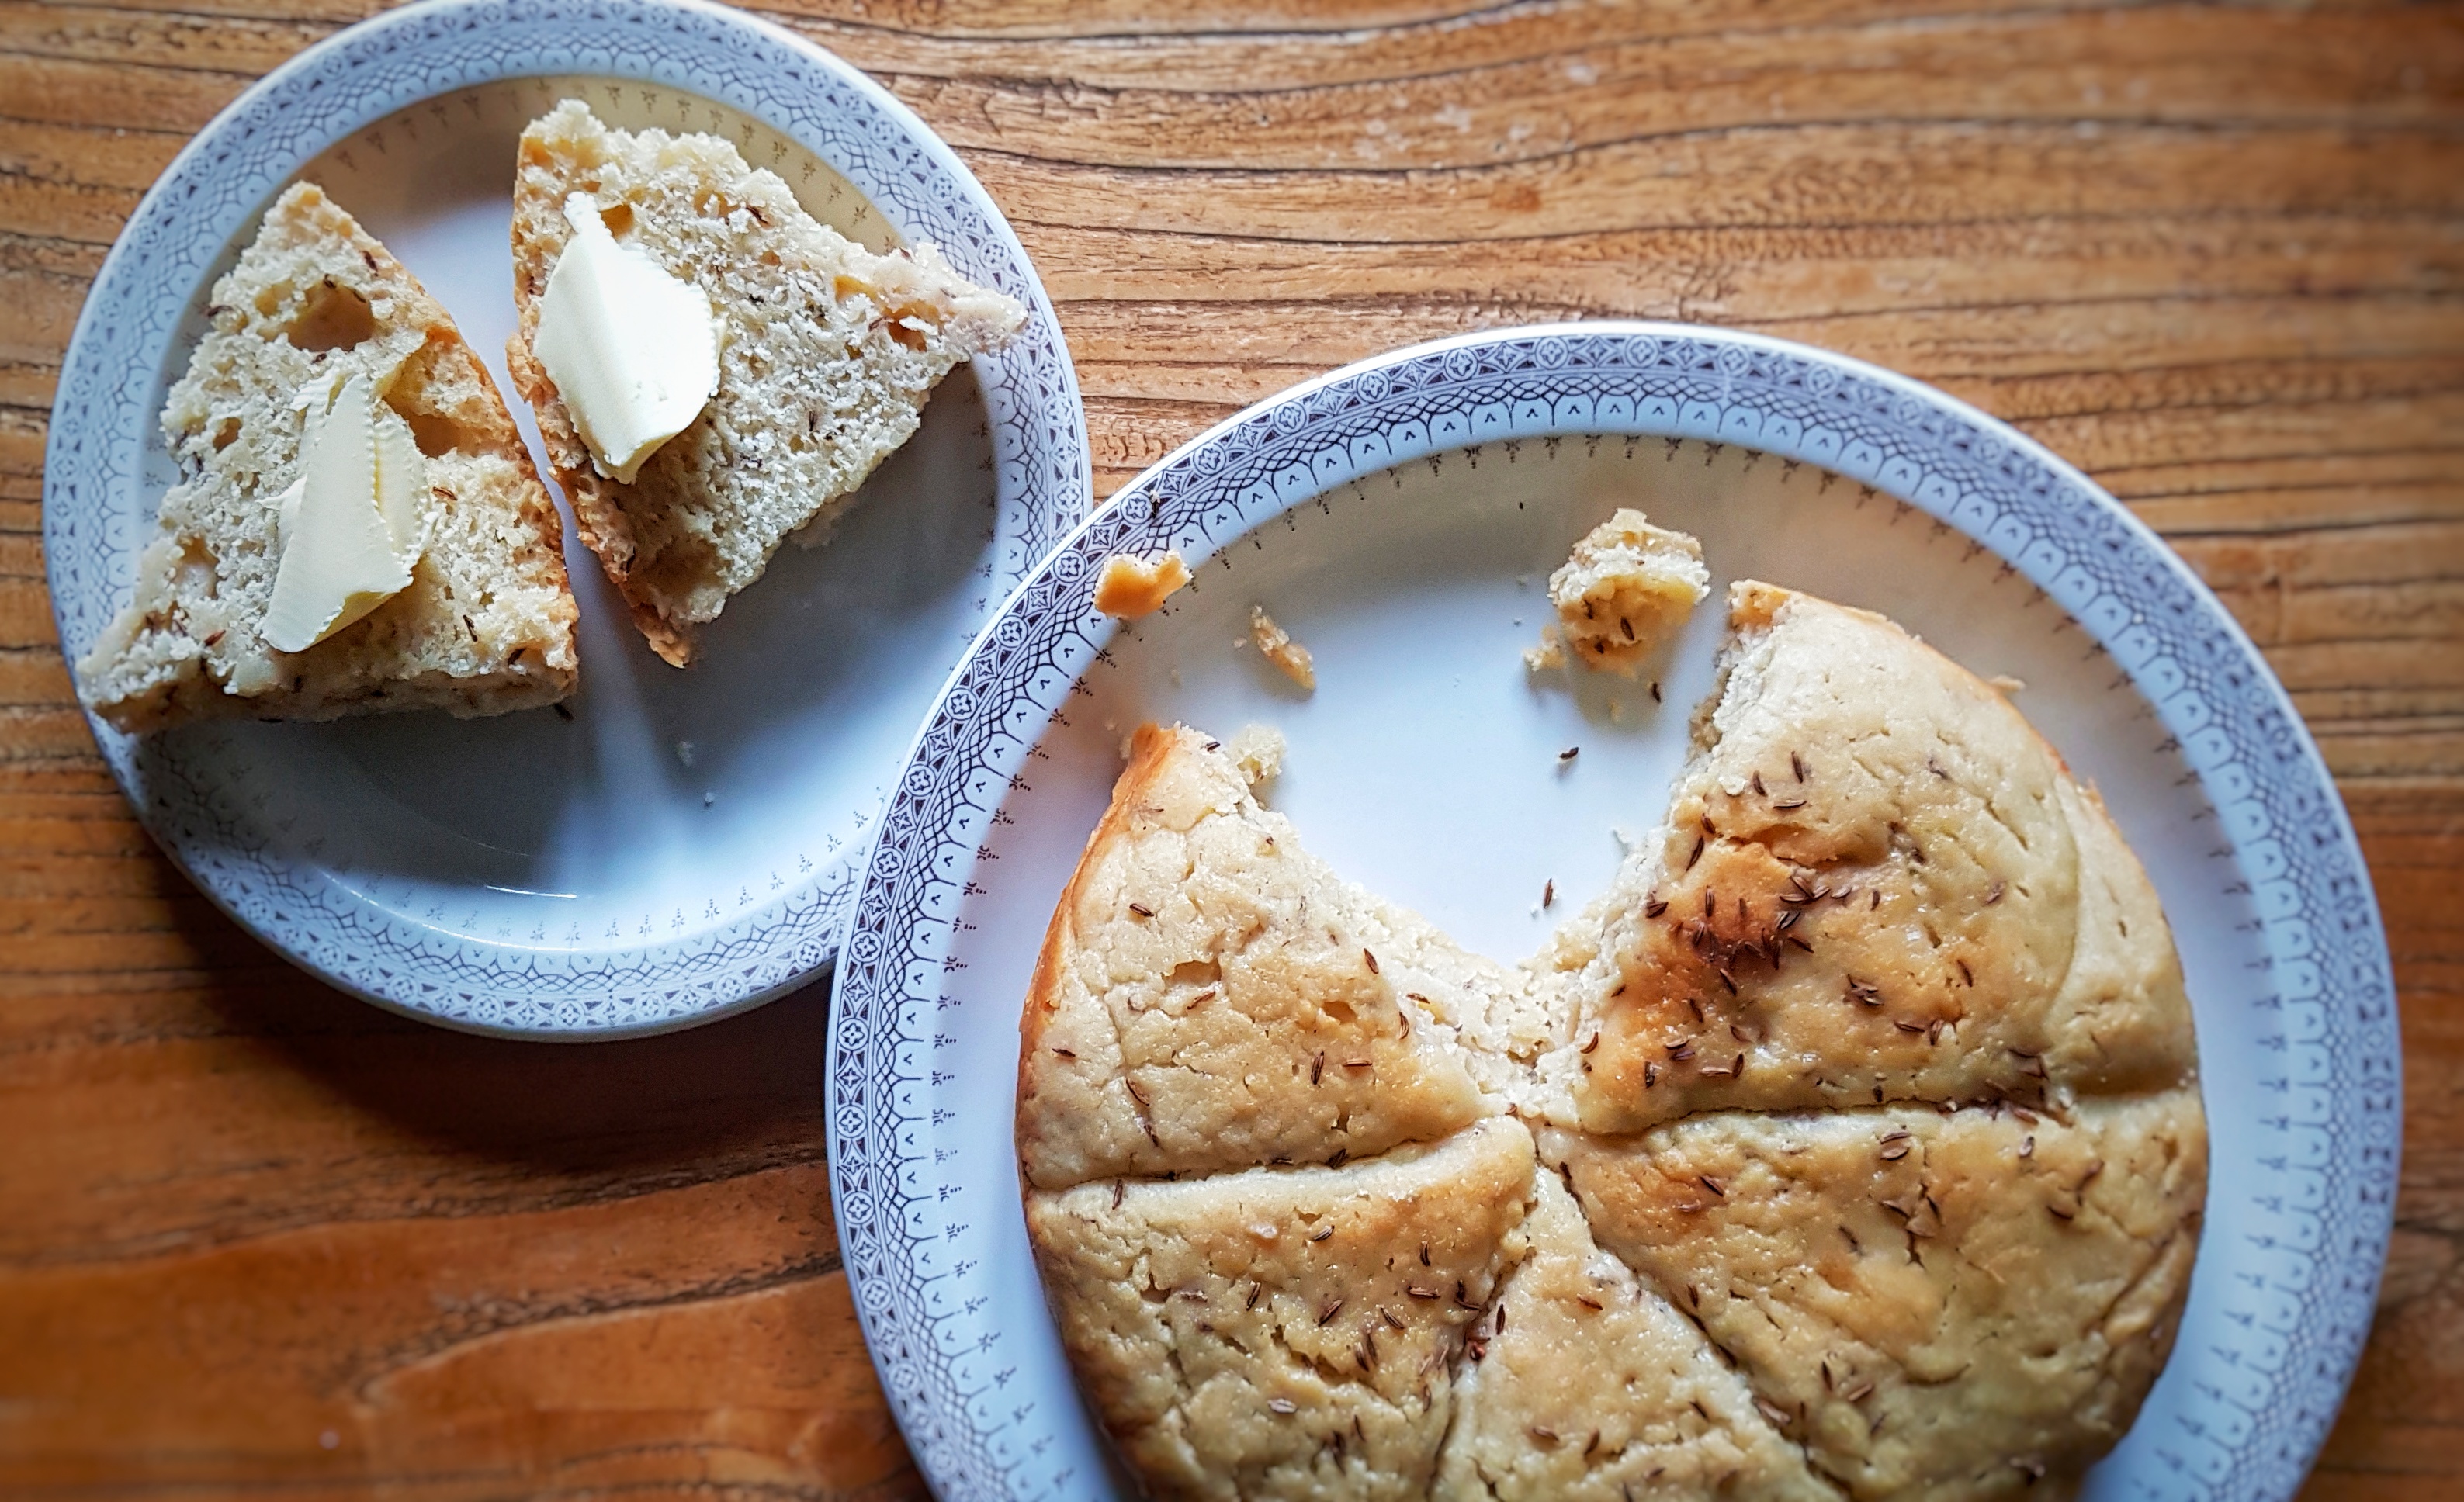
Wigs – whichever way you spell them – were a type of enriched, leavened teacake. They reached a peak in popularity in the eighteenth century but may have been cooked up as early as the fifteenth.[1] It seems that they were eaten up until 1900,[2] though as with many foods, they changed their form somewhat.
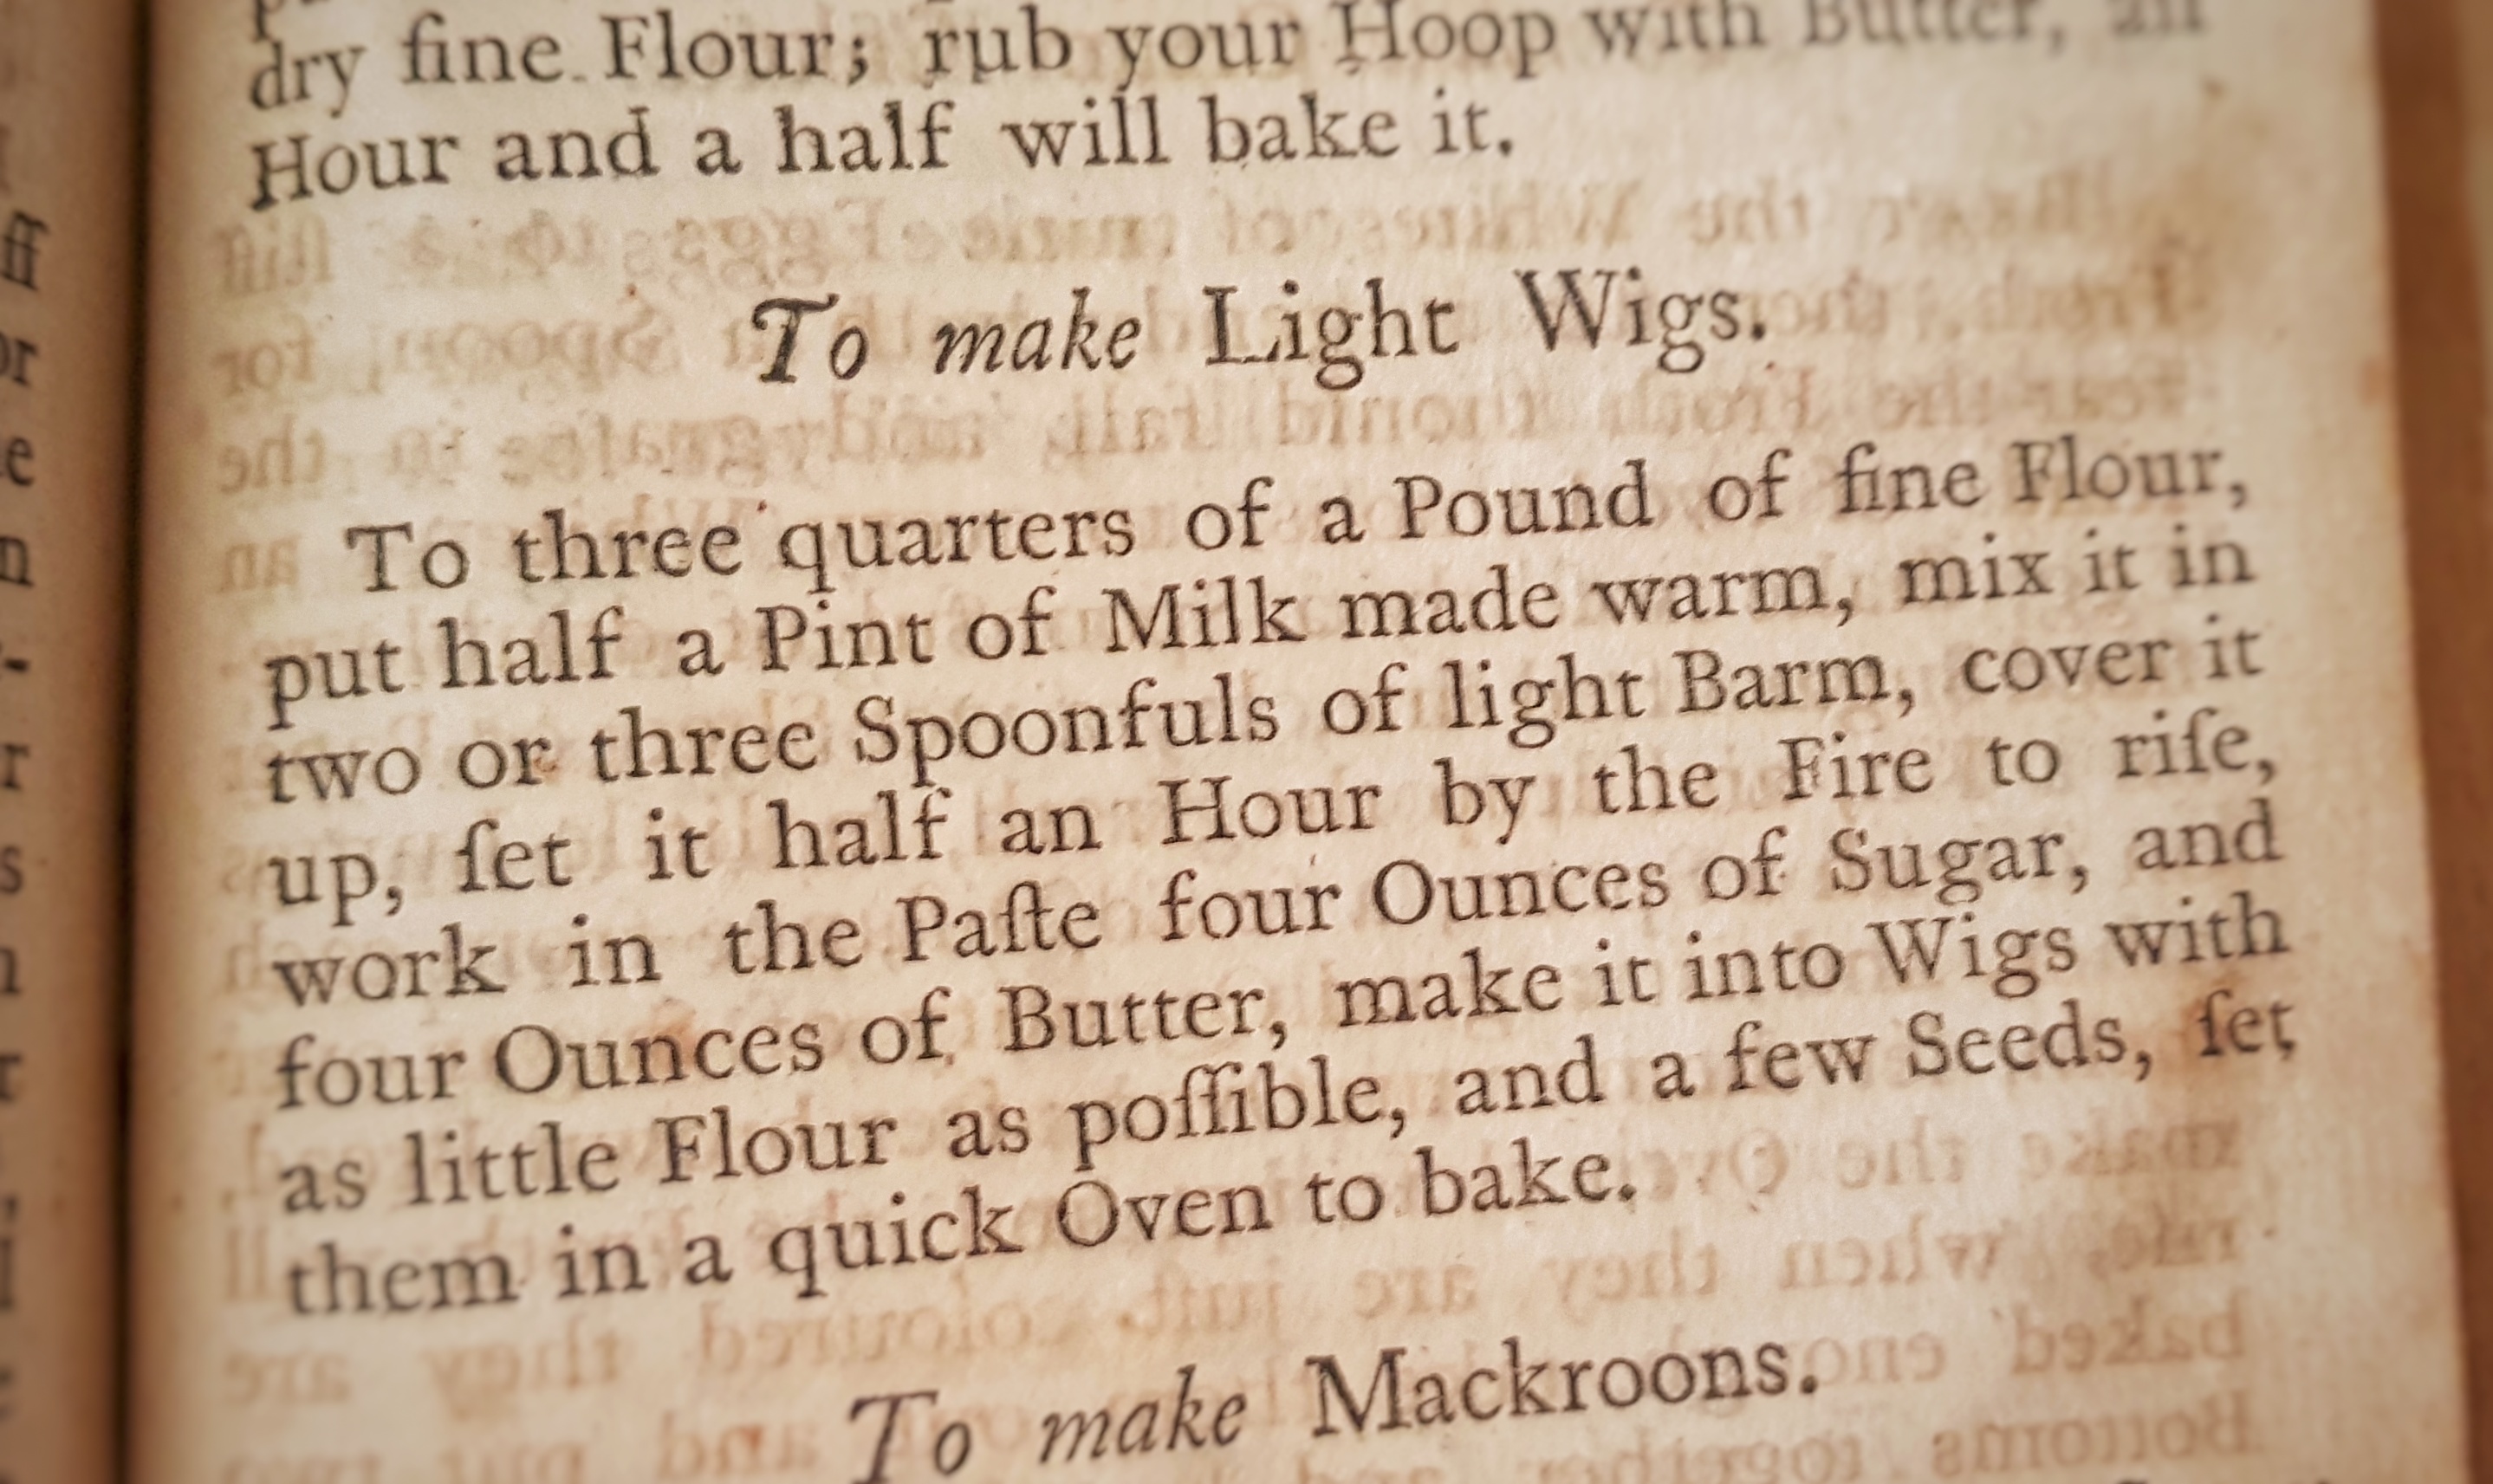
Elizabeth Raffald included a recipe ‘To make Light Wigs’ in her 1769 book The Experienced English Housekeeper,[3] so I thought I would devise an updated recipe for them using modern kitchen equipment, weights and measures.
This is her recipe taken from the first edition:
As is often the case, her recipes are a mixed bag of precision and vagueness, and this one is no different: we have proportions – the most important thing, I suppose – but little else concerning mixing, shaping and baking. And what are the seeds she mentions? Luckily, by cross-referencing other recipes and others’ research, we can build up a good idea of what they were like.
Let’s dissect the recipe sentence by sentence:
First of all, we have to make a simple dough of flour, milk and barm and prove it somewhere warm. Barm is the frothy yeast skimmed from fermenting vats of beer; it is from here we get our leaven. The bubbles of gas in low-gluten flour doughs with little elasticity (as would have been the case here) tend to pop quickly, so we have to assume that the dough was kneaded to develop what gluten was present.
Once proved, add the butter and sugar. It’s very common, even in modern recipes, to add the enriching ingredients after the first prove. Ingredients such as these get in the way of entangling gluten strands, and their heaviness slow proving even further. These days however with our robust fast-action yeasts, I find dough rises well with all of the ingredients mixed right from the start – though I hedge my bets a little by using a mix of plain and strong white flours.
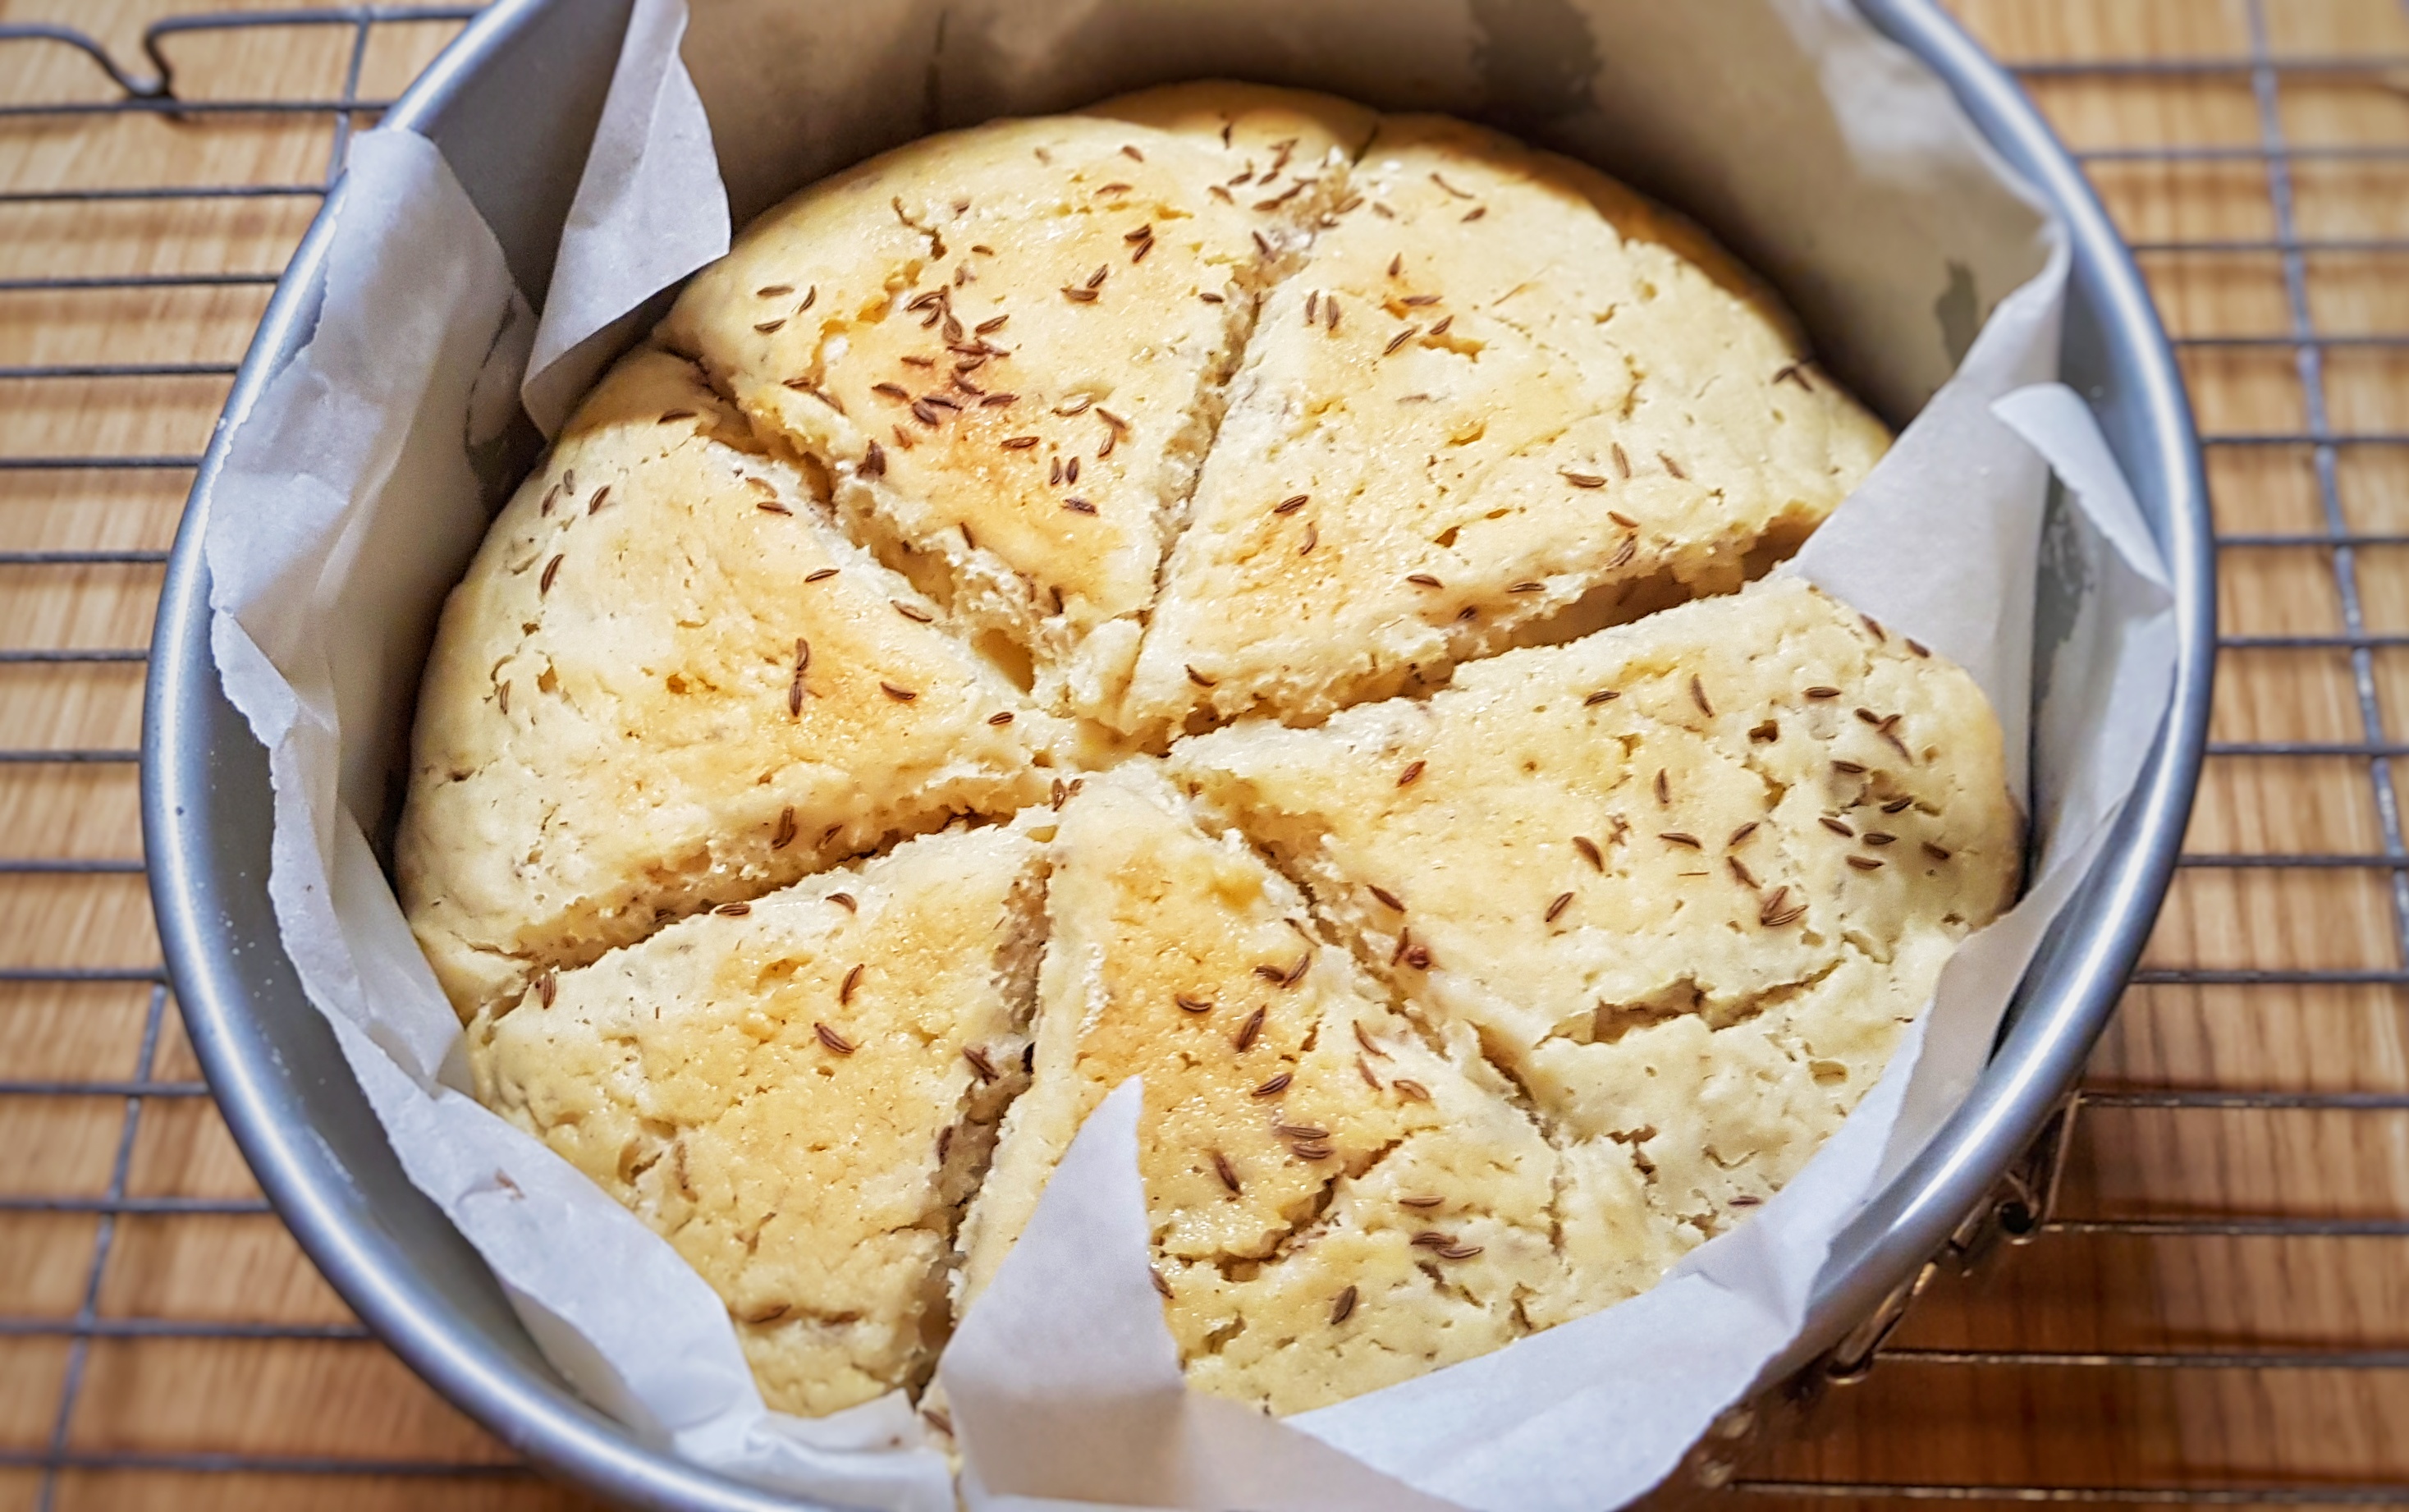
Elizabeth tells us to ‘make it into Wigs’ which isn’t useful for those of us in the twenty-first century. It does inform us that they were common enough in 1769 for Elizabeth to assume we would all know the correct shape. Another recipe given in Florence white’s Good Things in England says to make wigs ‘into any shape you please’.[4] Elizabeth David helps us out here by spotting that the word wig comes from the Dutch weig, meaning wedge-shaped.[5] She thinks the round of dough would be split into sixteenths, but I think sixths or eighths would be better.
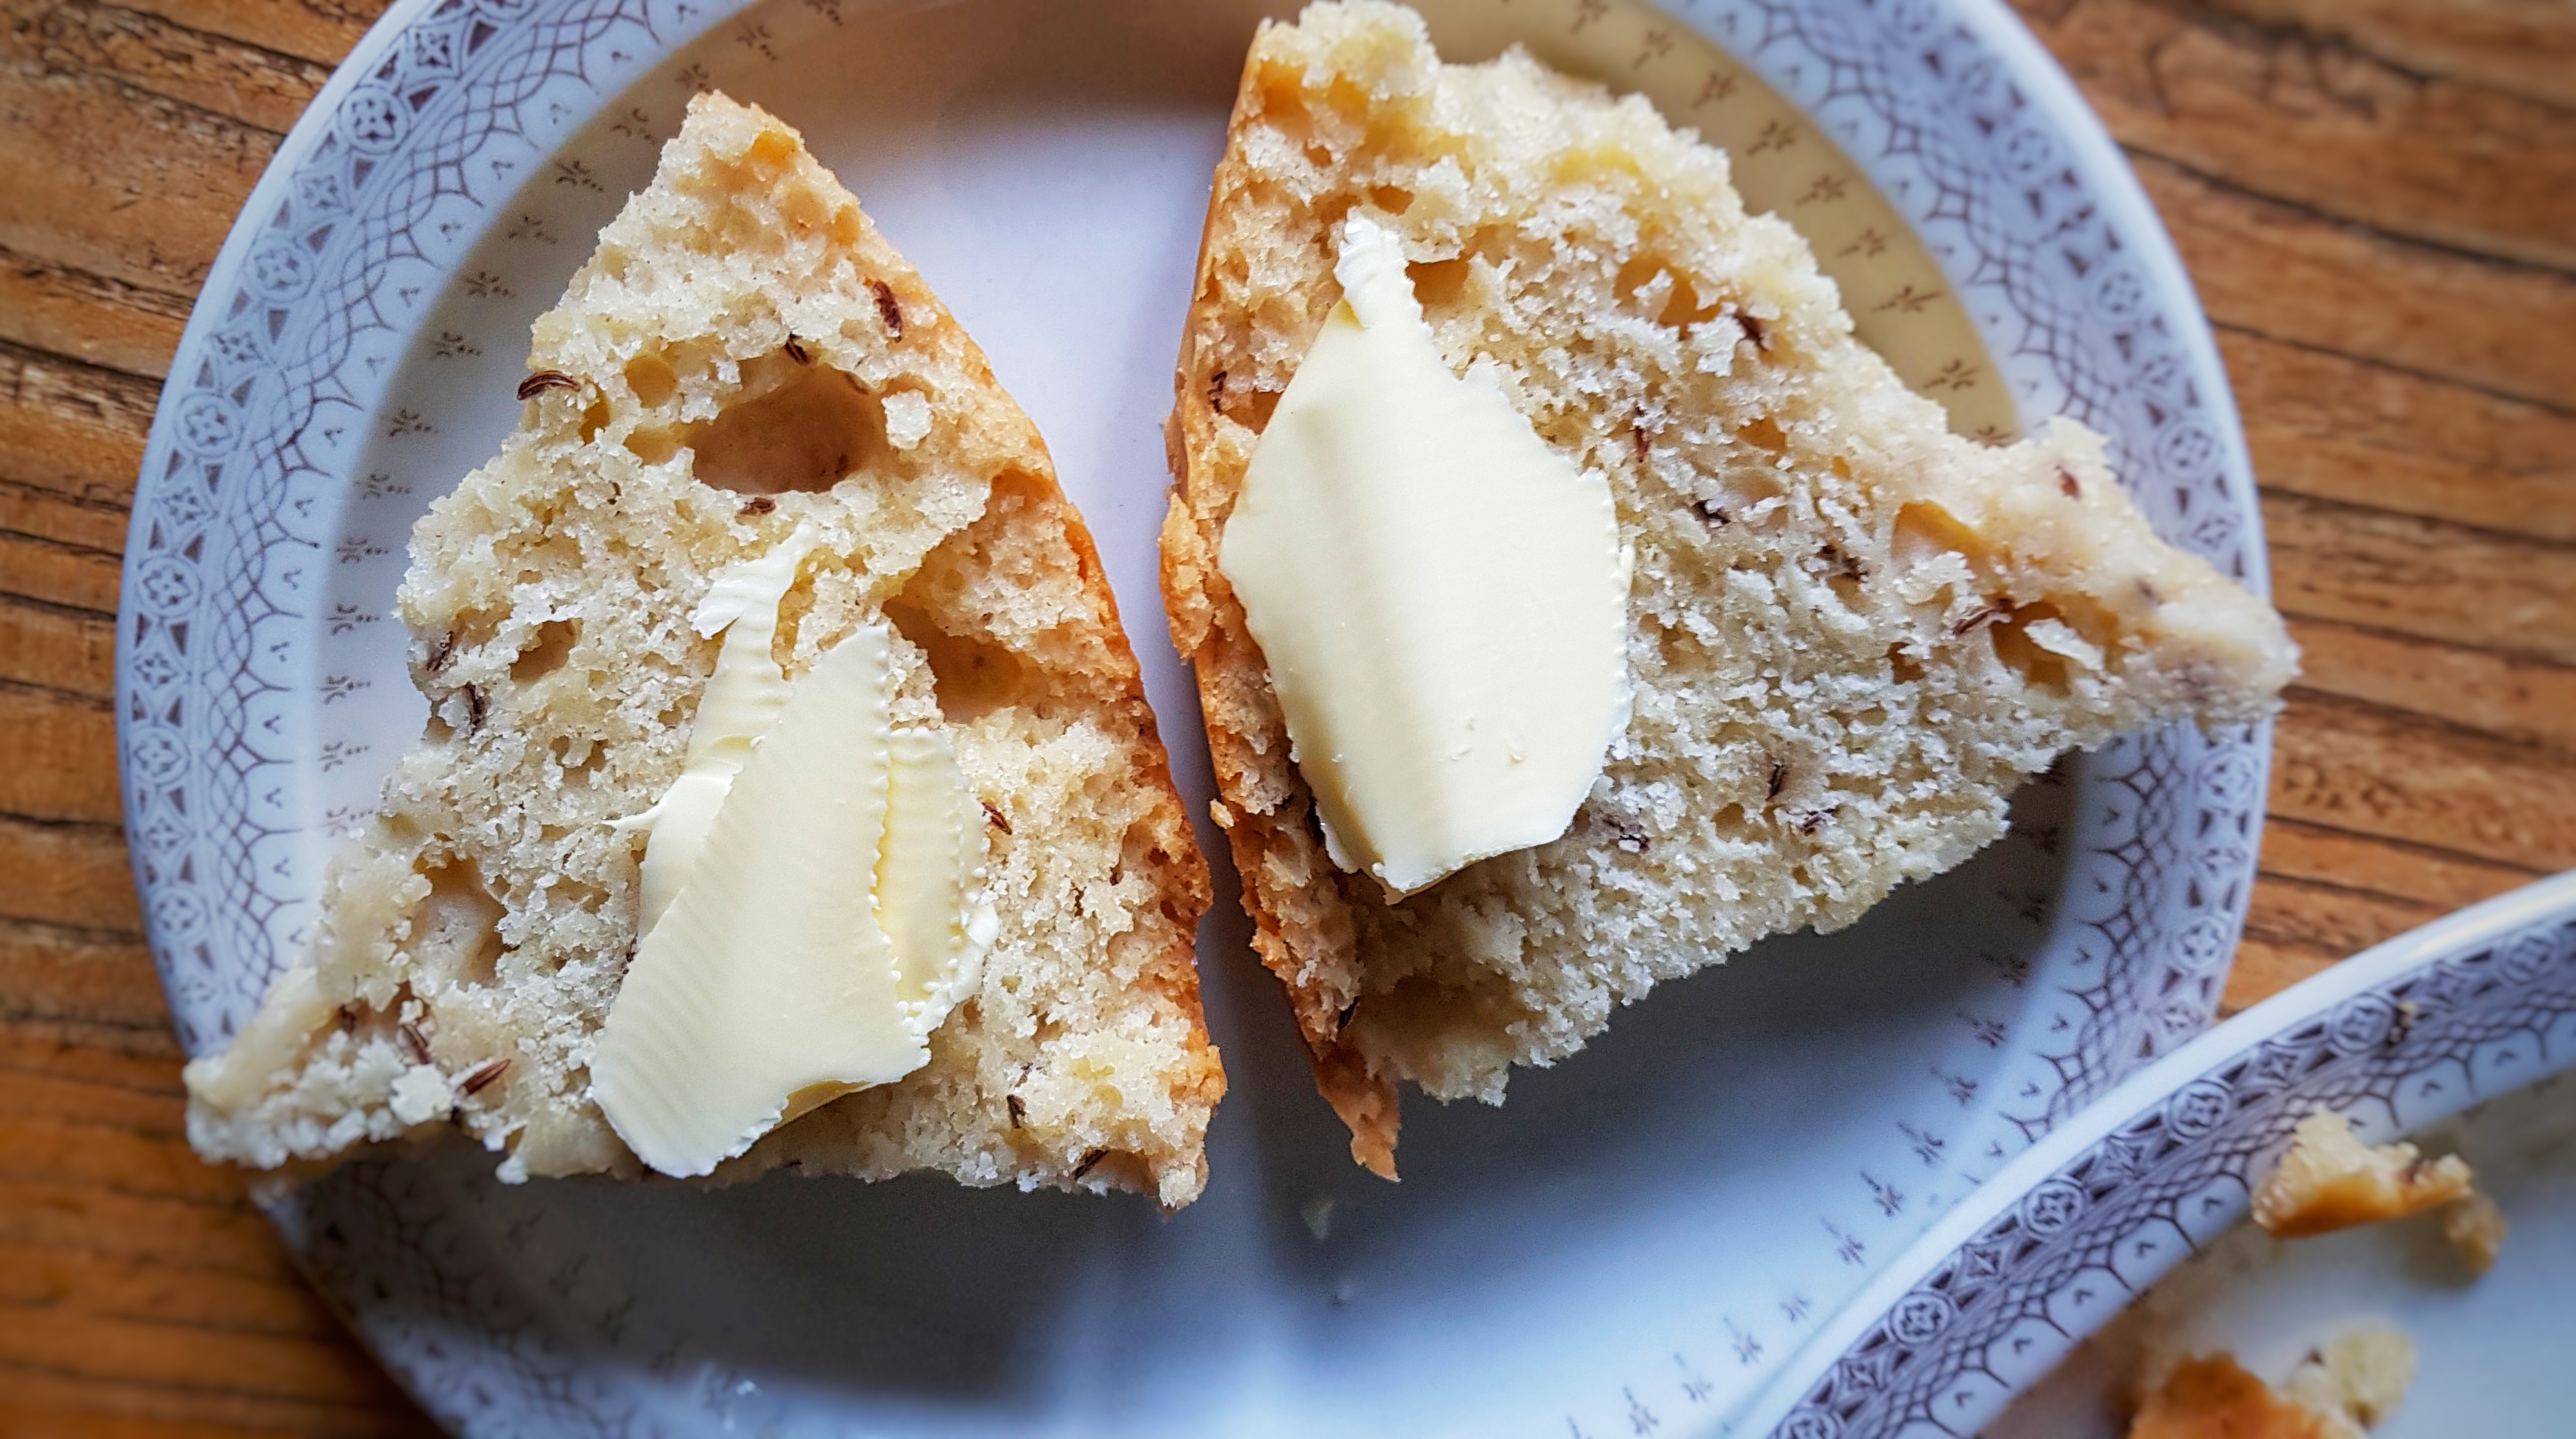
As for the seeds; all other recipes state caraway seeds for wigs. I like them so much I put them in and on the dough before baking.
There are richer versions of this basic recipe. Hannah Glasse’s ‘light Wigs’ are very similar to Elizabeth’s, but she also includes a richer version (‘very good Wigs’) containing egg, cream, spices and sack.[6] Some recipes ask you to egg wash the wigs and sprinkle coarsely crushed lumps of sugar over them.[7] I opt for a milk wash and granulated sugar.
If you like the blogs and podcast I produce and would to start a £3 monthly subscription, or would like to treat me to virtual coffee or pint: follow this link for more information.Thank you.
Wigs can be eaten buttered, and when cold eat like very sweet scones, when warm they are softer and stodgier, though not in a bad way. Elizabeth suggests toasting them and pouring stewed cheese over them – a recipe for which can be found in my book Before Mrs Beeton.
My recipe makes 1 round that can be divided into 6 or 8 wigs:
5g/1 tsp yeast
5g/1 level tsp salt
180g strong white flour
180g plain white flour
120g caster sugar
1 tbs caraway seeds
120g softened salted butter
200ml warm milk, plus extra for brushing
A smear of sunflower oil
Granulated sugar for sprinkling
In a bowl, mix the yeast, salt, flours, caster sugar, and most of the caraway seeds (keep a few behind to sprinkle on the top). Make a well in the centre and add the butter and milk. Mix preferably with the dough hook of a food mixer, if not a wooden spoon – the mixture is very sticky indeed, a good 7 or 8 minutes, or until the dough is smooth.
Oil a clean bowl and place the dough inside. Cover and allow to prove in a warm place for between 60 and 90 minutes. The dough is so enriched that it doesn’t double in volume like regular bread or bun dough, but it does need to have increased in volume noticeably.
As you wait, line a 21 cm/8 inch cake tin with greaseproof paper. Elizabeth asks us to shape the wigs ‘with as little Flour as possible’, but I find that a good strewing of flour is best. The dough needs to be brought into a tight dough ball; again not as tight as is usually possible, due to all of that sugar and butter. I find a couple of dough scrapers helped a great deal at this point.
Once gathered, plop the dough into the lined tin, cover and allow to prove for 30 to 45 minutes. Using a well-floured dough scraper split the dough into 6 or 8 wedges.
It was tricky to make the cuts: flour your dough scraper very well
When the proving time is almost up, preheat your oven to 175°C and place an ovenproof dish at the bottom of the oven. When the wigs are ready to go in, put the kettle on. When boiled, finish preparing the wigs by brushing the top with milk and scattering the reserved caraway seeds and a little granulated sugar over the top, then place on a baking tray.
Open the oven door, slide the wigs onto the centre shelf, then gingerly pull out the hot ovenproof dish and pour in a good amount of hot water, then quickly but carefully slide it back in and close the oven door.
Bake for around 45 minutes until well-risen and golden brown on top. Cool on a wire rack in its tin. Serve cold or warm with butter and sliced or toasted cheese.
Notes
[1] David, E. English Bread and Yeast Cookery. (Grub Street, 1977).
[2] By this point, wigs had become a fruit cake or scone, leavened with baking powder and sweetened with candied angelica, citron peel and glacé cherries. Hartley, D. (1954) Food in England. Little, Brown & Company.
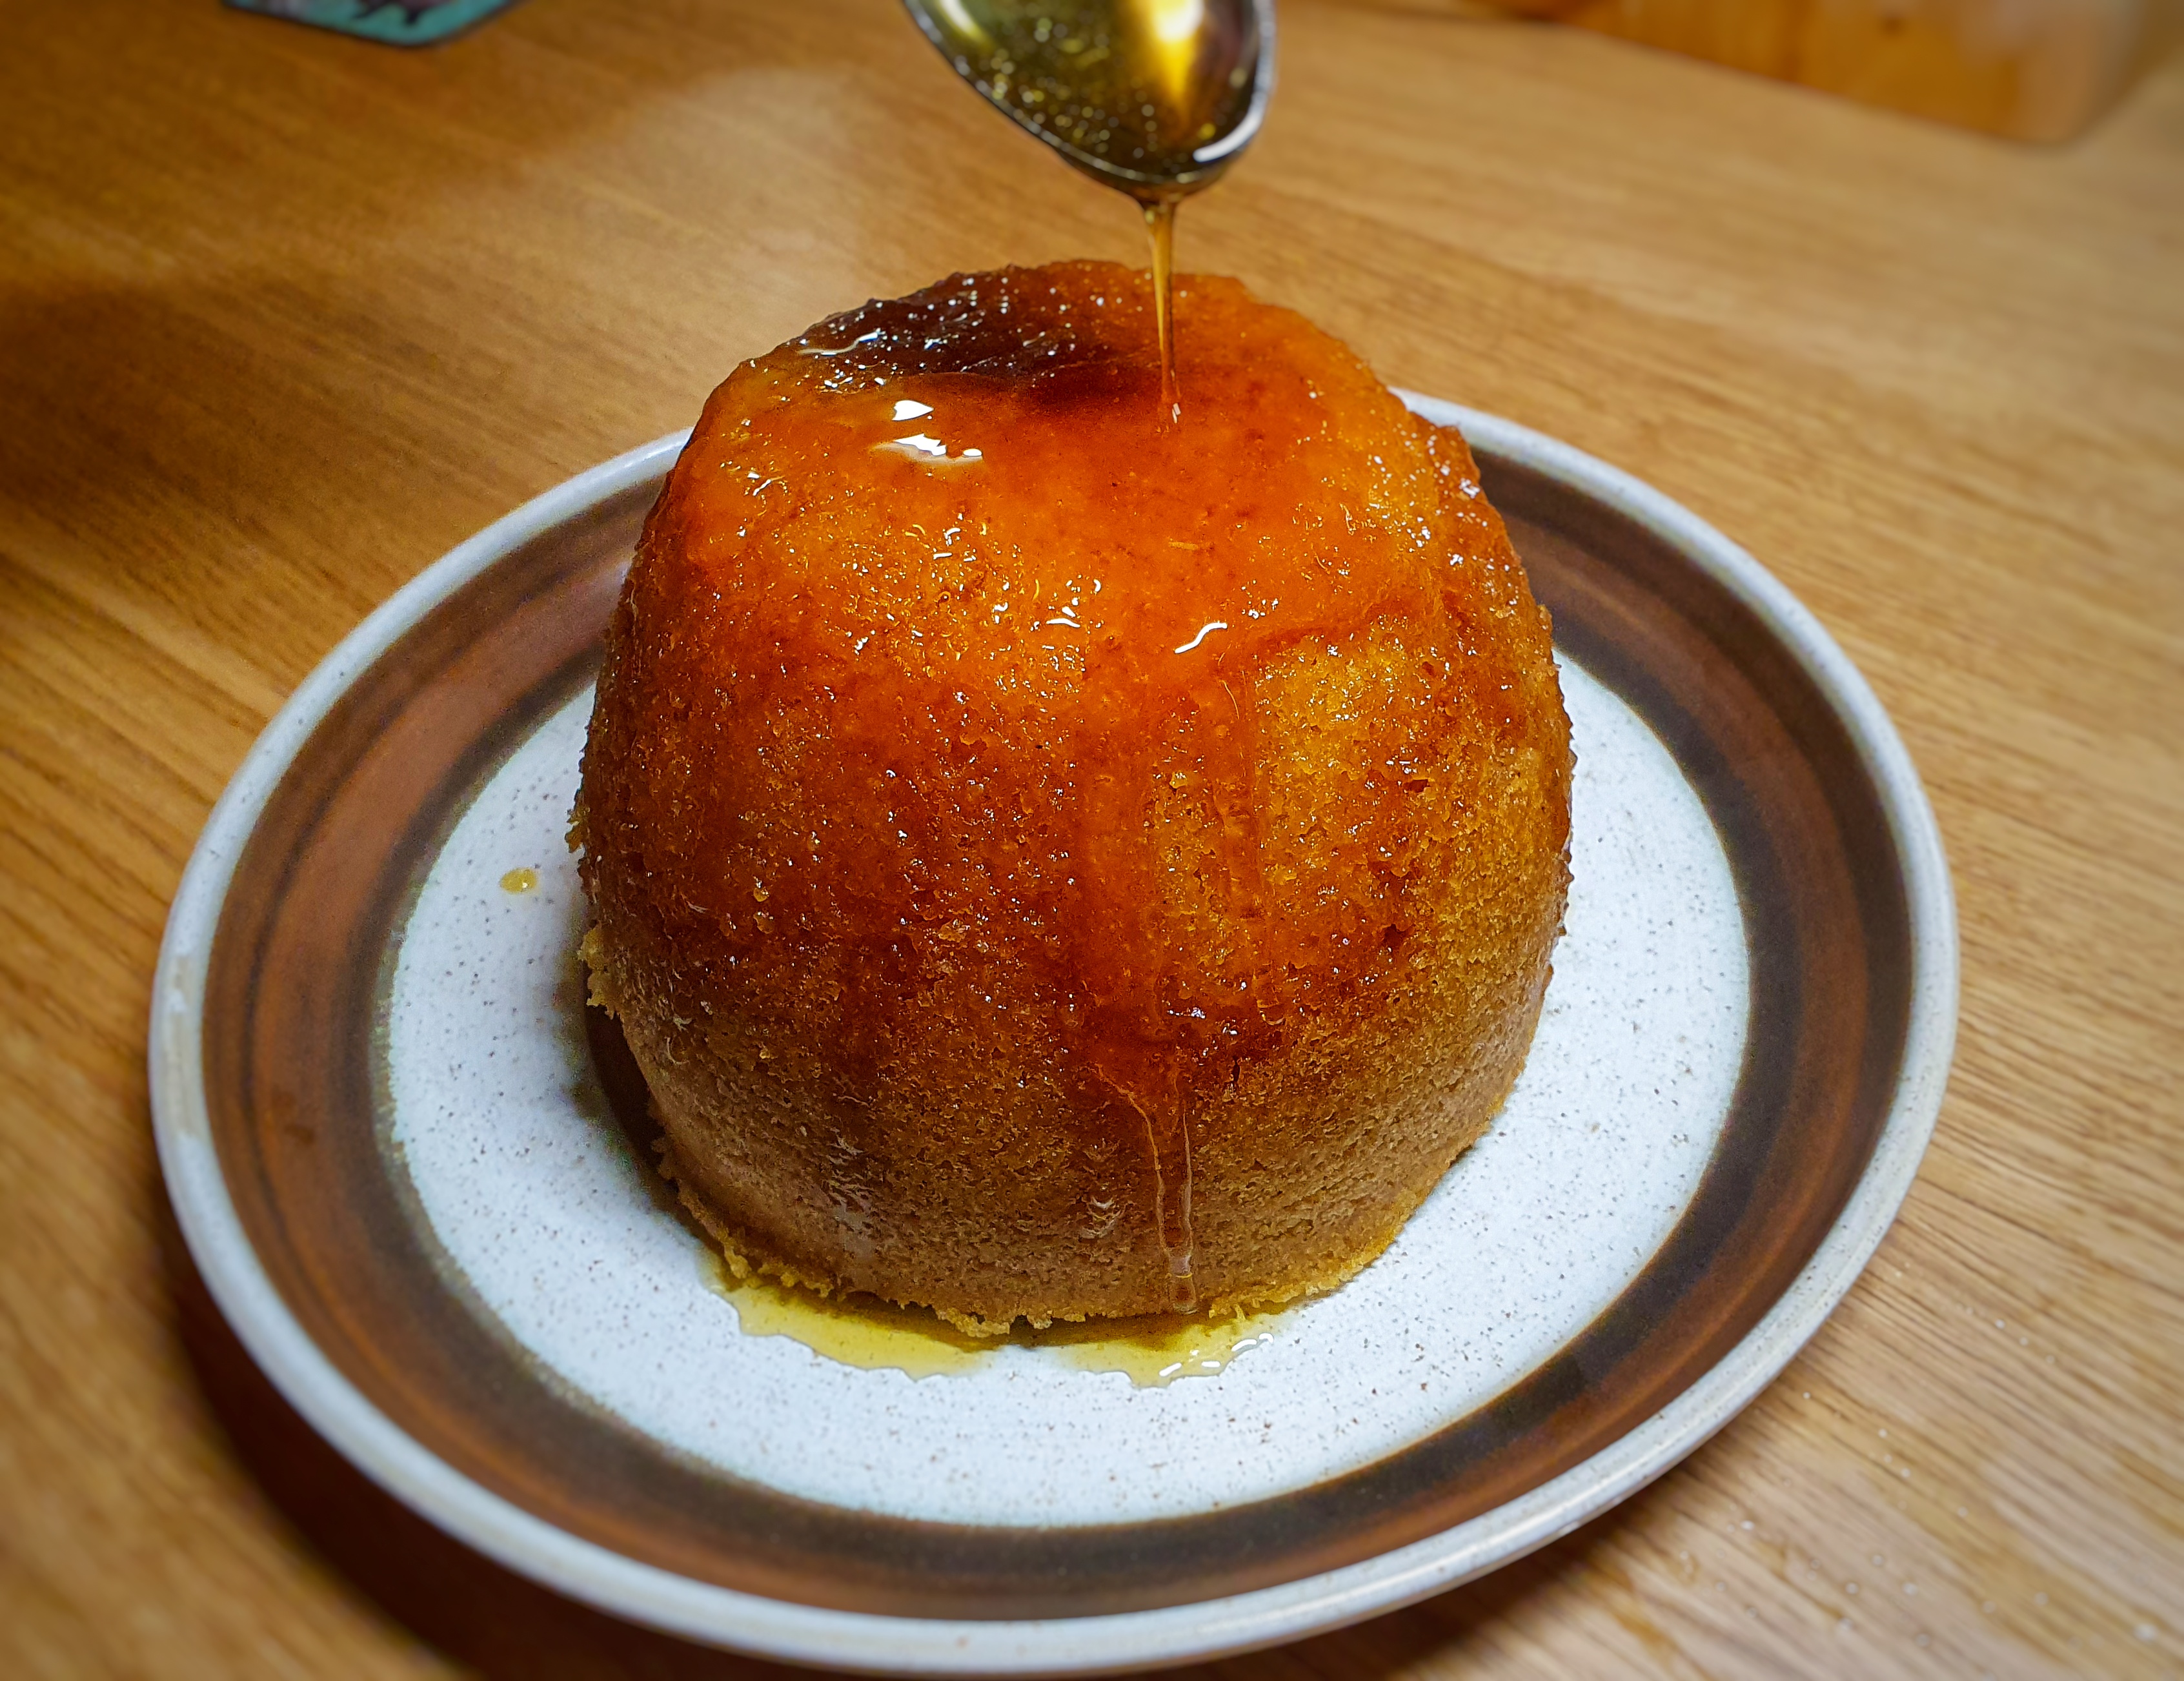
Last year I threatened to write some instructional posts that focus on technique rather than history. First up, a step-by-step guide to making a steamed sponge pudding, complete with instructions on how to cook one if you don’t have a steamer.
This recipe is for a basic sponge to fit a 2 pint / 1 litre mould or basin. It will serve 6 to 8 people; you can multiply up or down the amounts and cooking times very easily, though if you are making a really big one (1 ½ litres or more) you’ll need to add a teaspoon of baking powder. Any mould can be used, but a basin is best for sponges.
My old Pud Clubs always featured one steamed sponge pudding
There are an infinite number of variations, and I have included some examples for you after the basic recipe.
225g softened butter, plus extra for buttering the mould
175g caster sugar
4 eggs
225g self-raising flour, or gluten-free flour mix[1]
Pinch salt (if using unsalted butter)
30ml liquid: e.g. milk, lemon juice
Start by buttering your mould well; if you are using a basin with a lid, butter that too.
Now beat the butter and caster sugar with an electric mixer, or a wooden spoon, until light and fluffy. Beat in the eggs one at a time into the butter and sugar – use a high speed if using an electric mixer. When fully incorporated, add the next egg. If the mixture refuses to mix properly and curdles, add a tablespoon of flour and beat well.
When all four eggs have been added, tip in the flour (and salt if using) and mix on a low speed until just incorporated. Add the liquid and mix again. The mixture should now be of ‘dropping consistency’, i.e. if you take a large spoonful, the batter drops from it when you turn the spoon on its side. If it doesn’t, add a little more – just a couple of teaspoons may be all you need. If you’re not sure, err on the side of caution and don’t add more liquid.
A mixture with the correct ‘dropping’ consistency
Now it is time to fill the basin. If you like, place a circle of greaseproof paper in the bottom of the basin to prevent the pudding, or any topping, from sticking. This is more important if you are using a metal, porcelain or glass basin, plastic ones are typically see-through and can be massaged to help the pudding to release itself.
This is also the time to add any toppings, should there be any: see suggestions below. Once added, scrape the mixture into the basin and smooth the top.
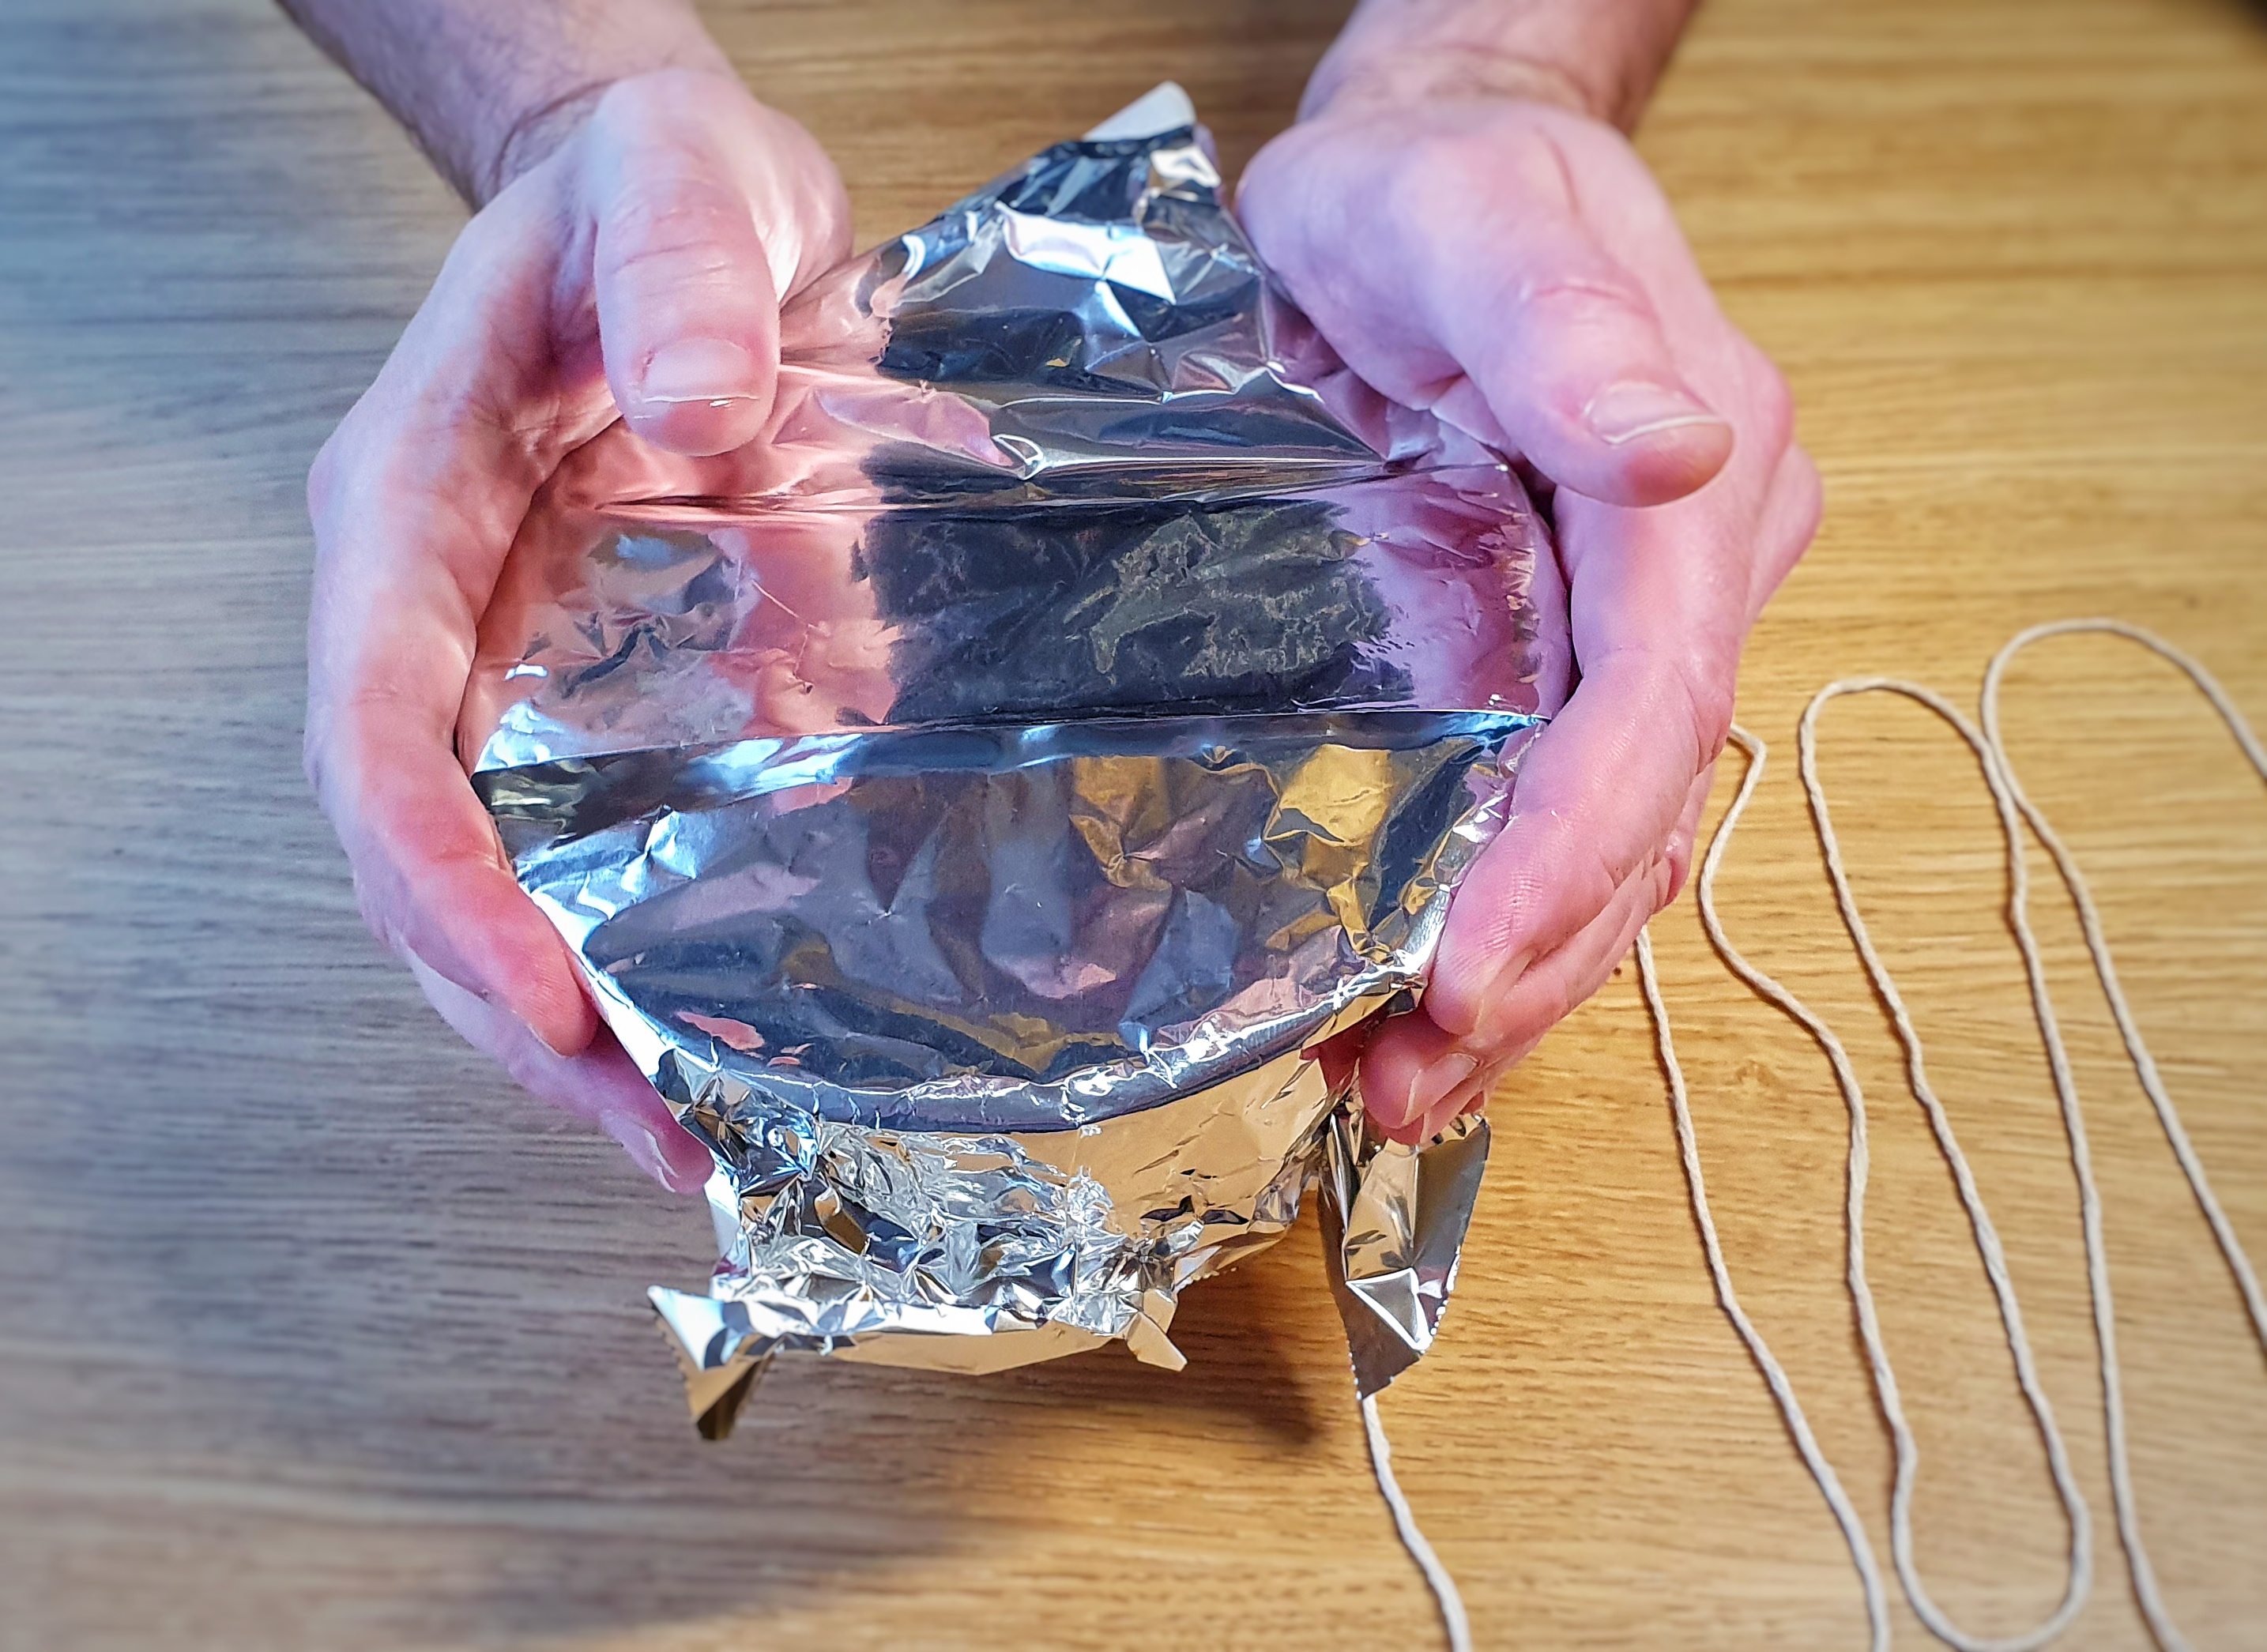
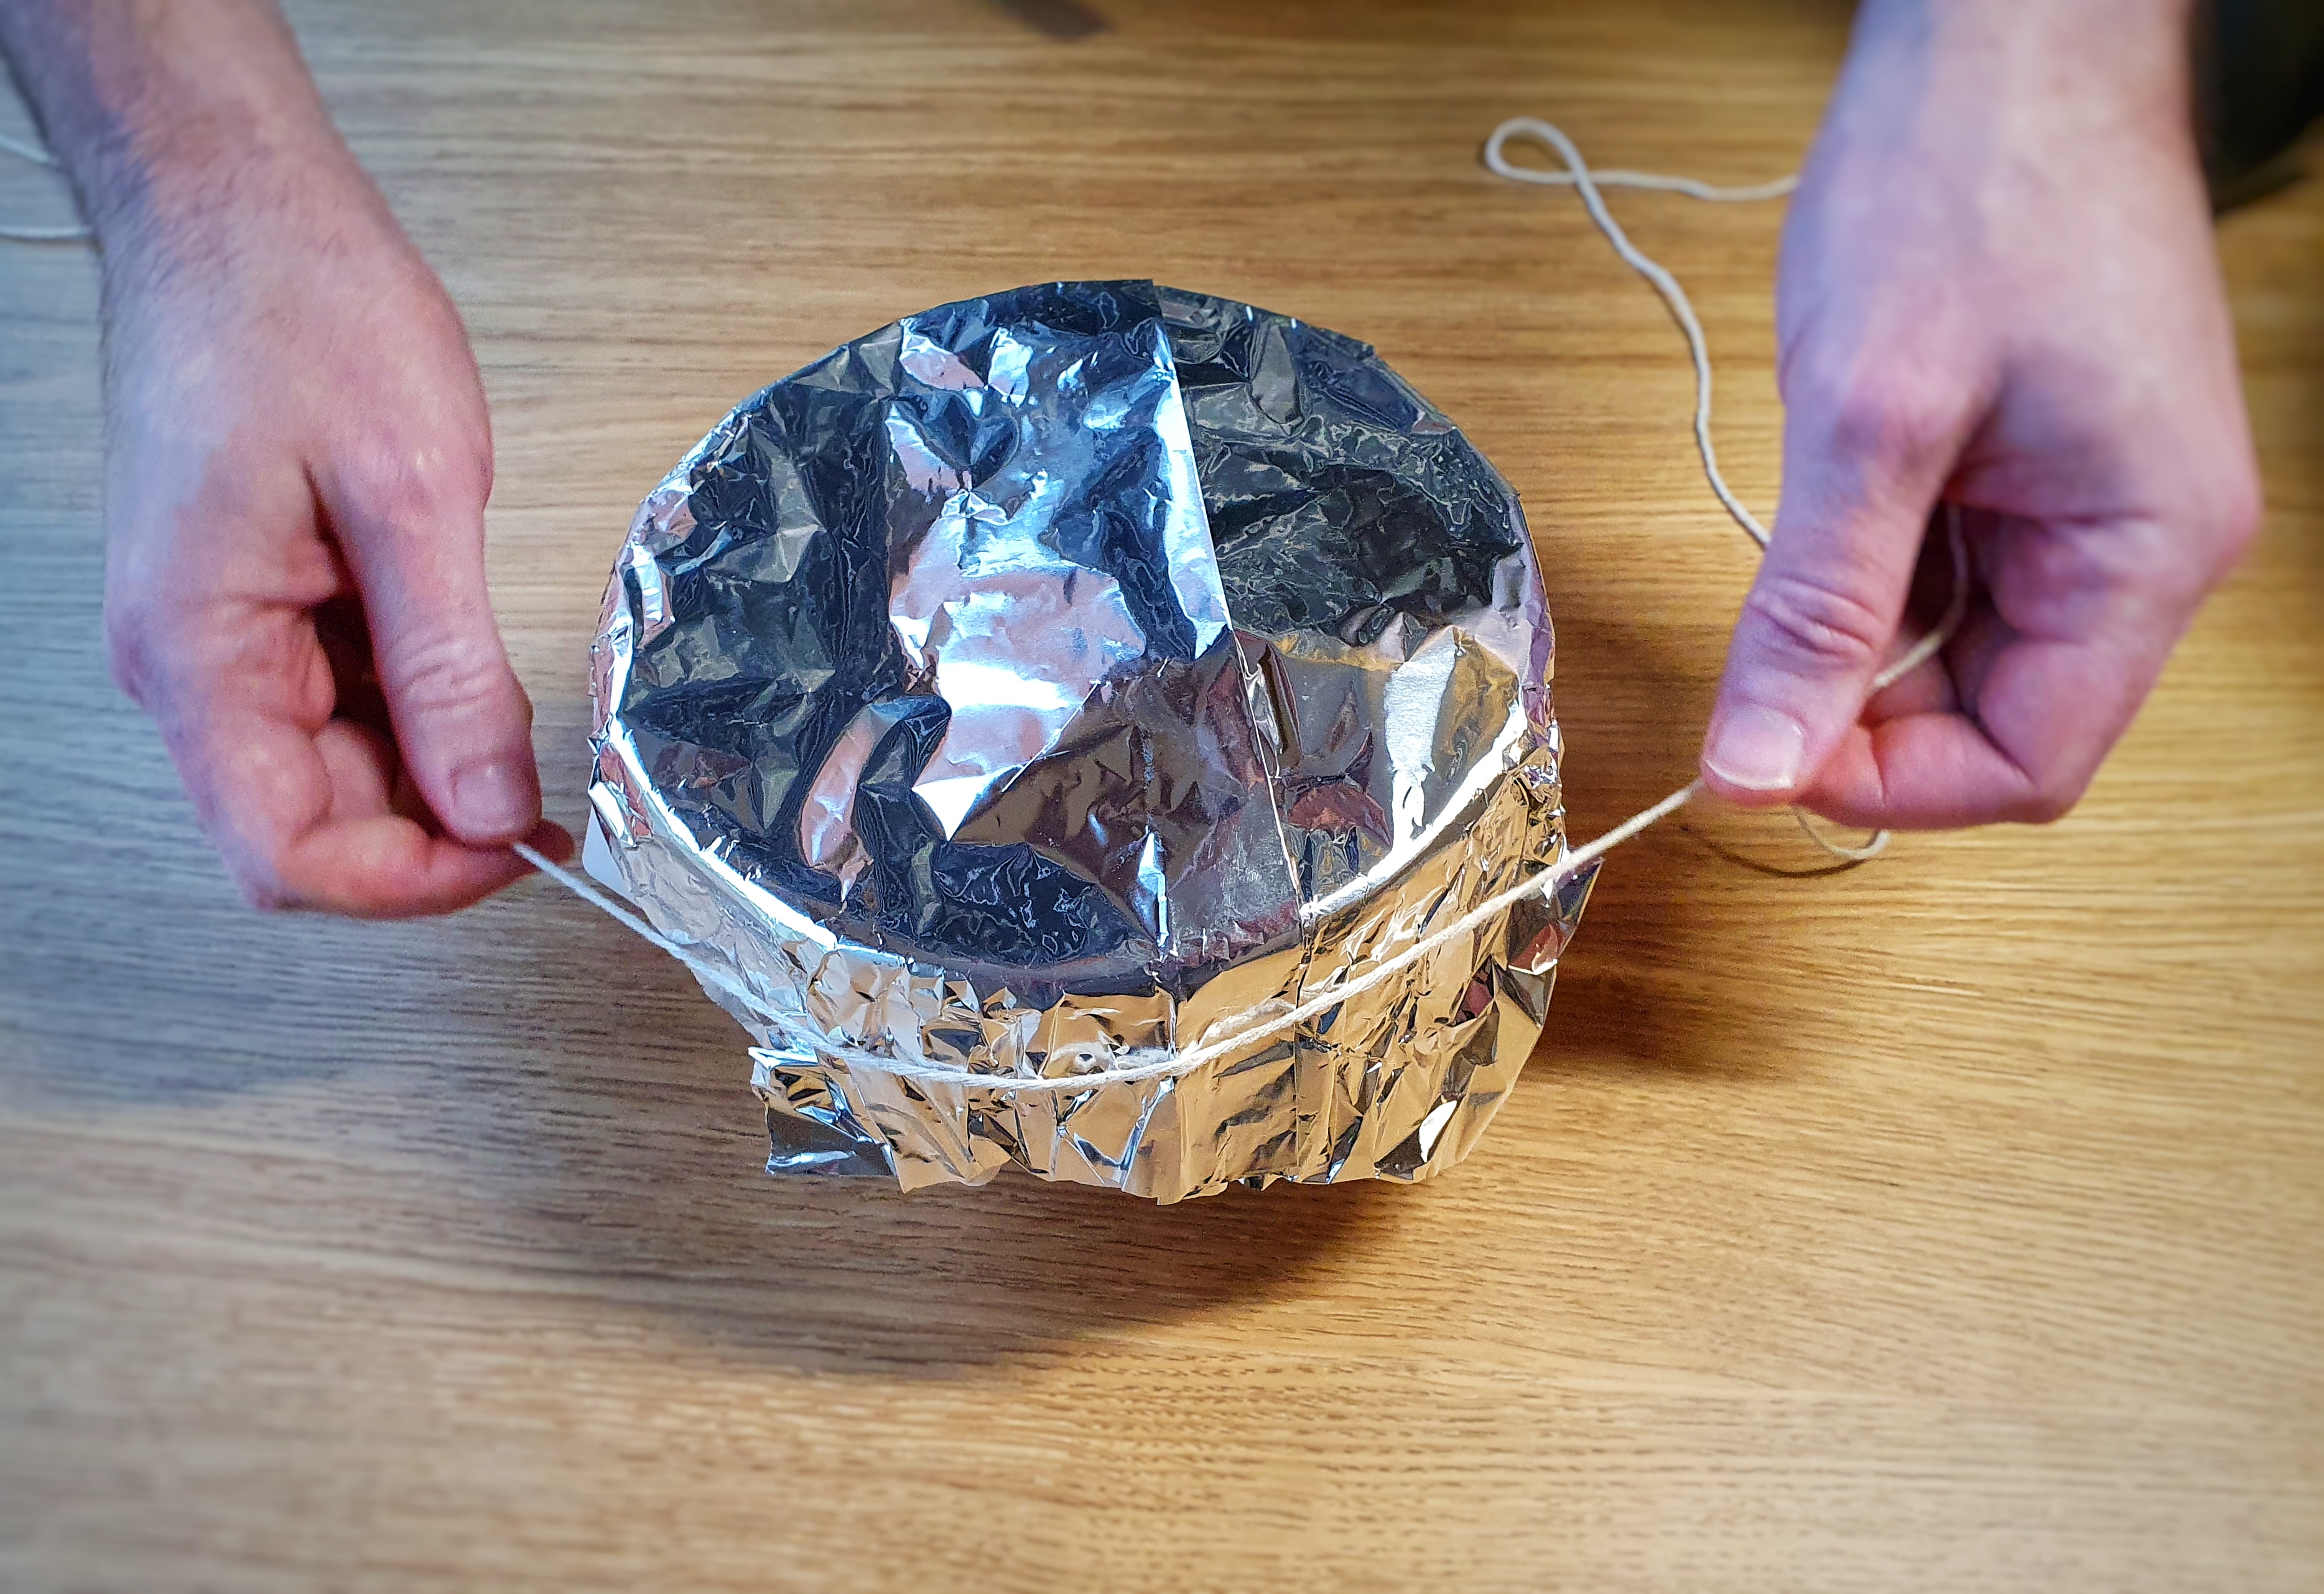
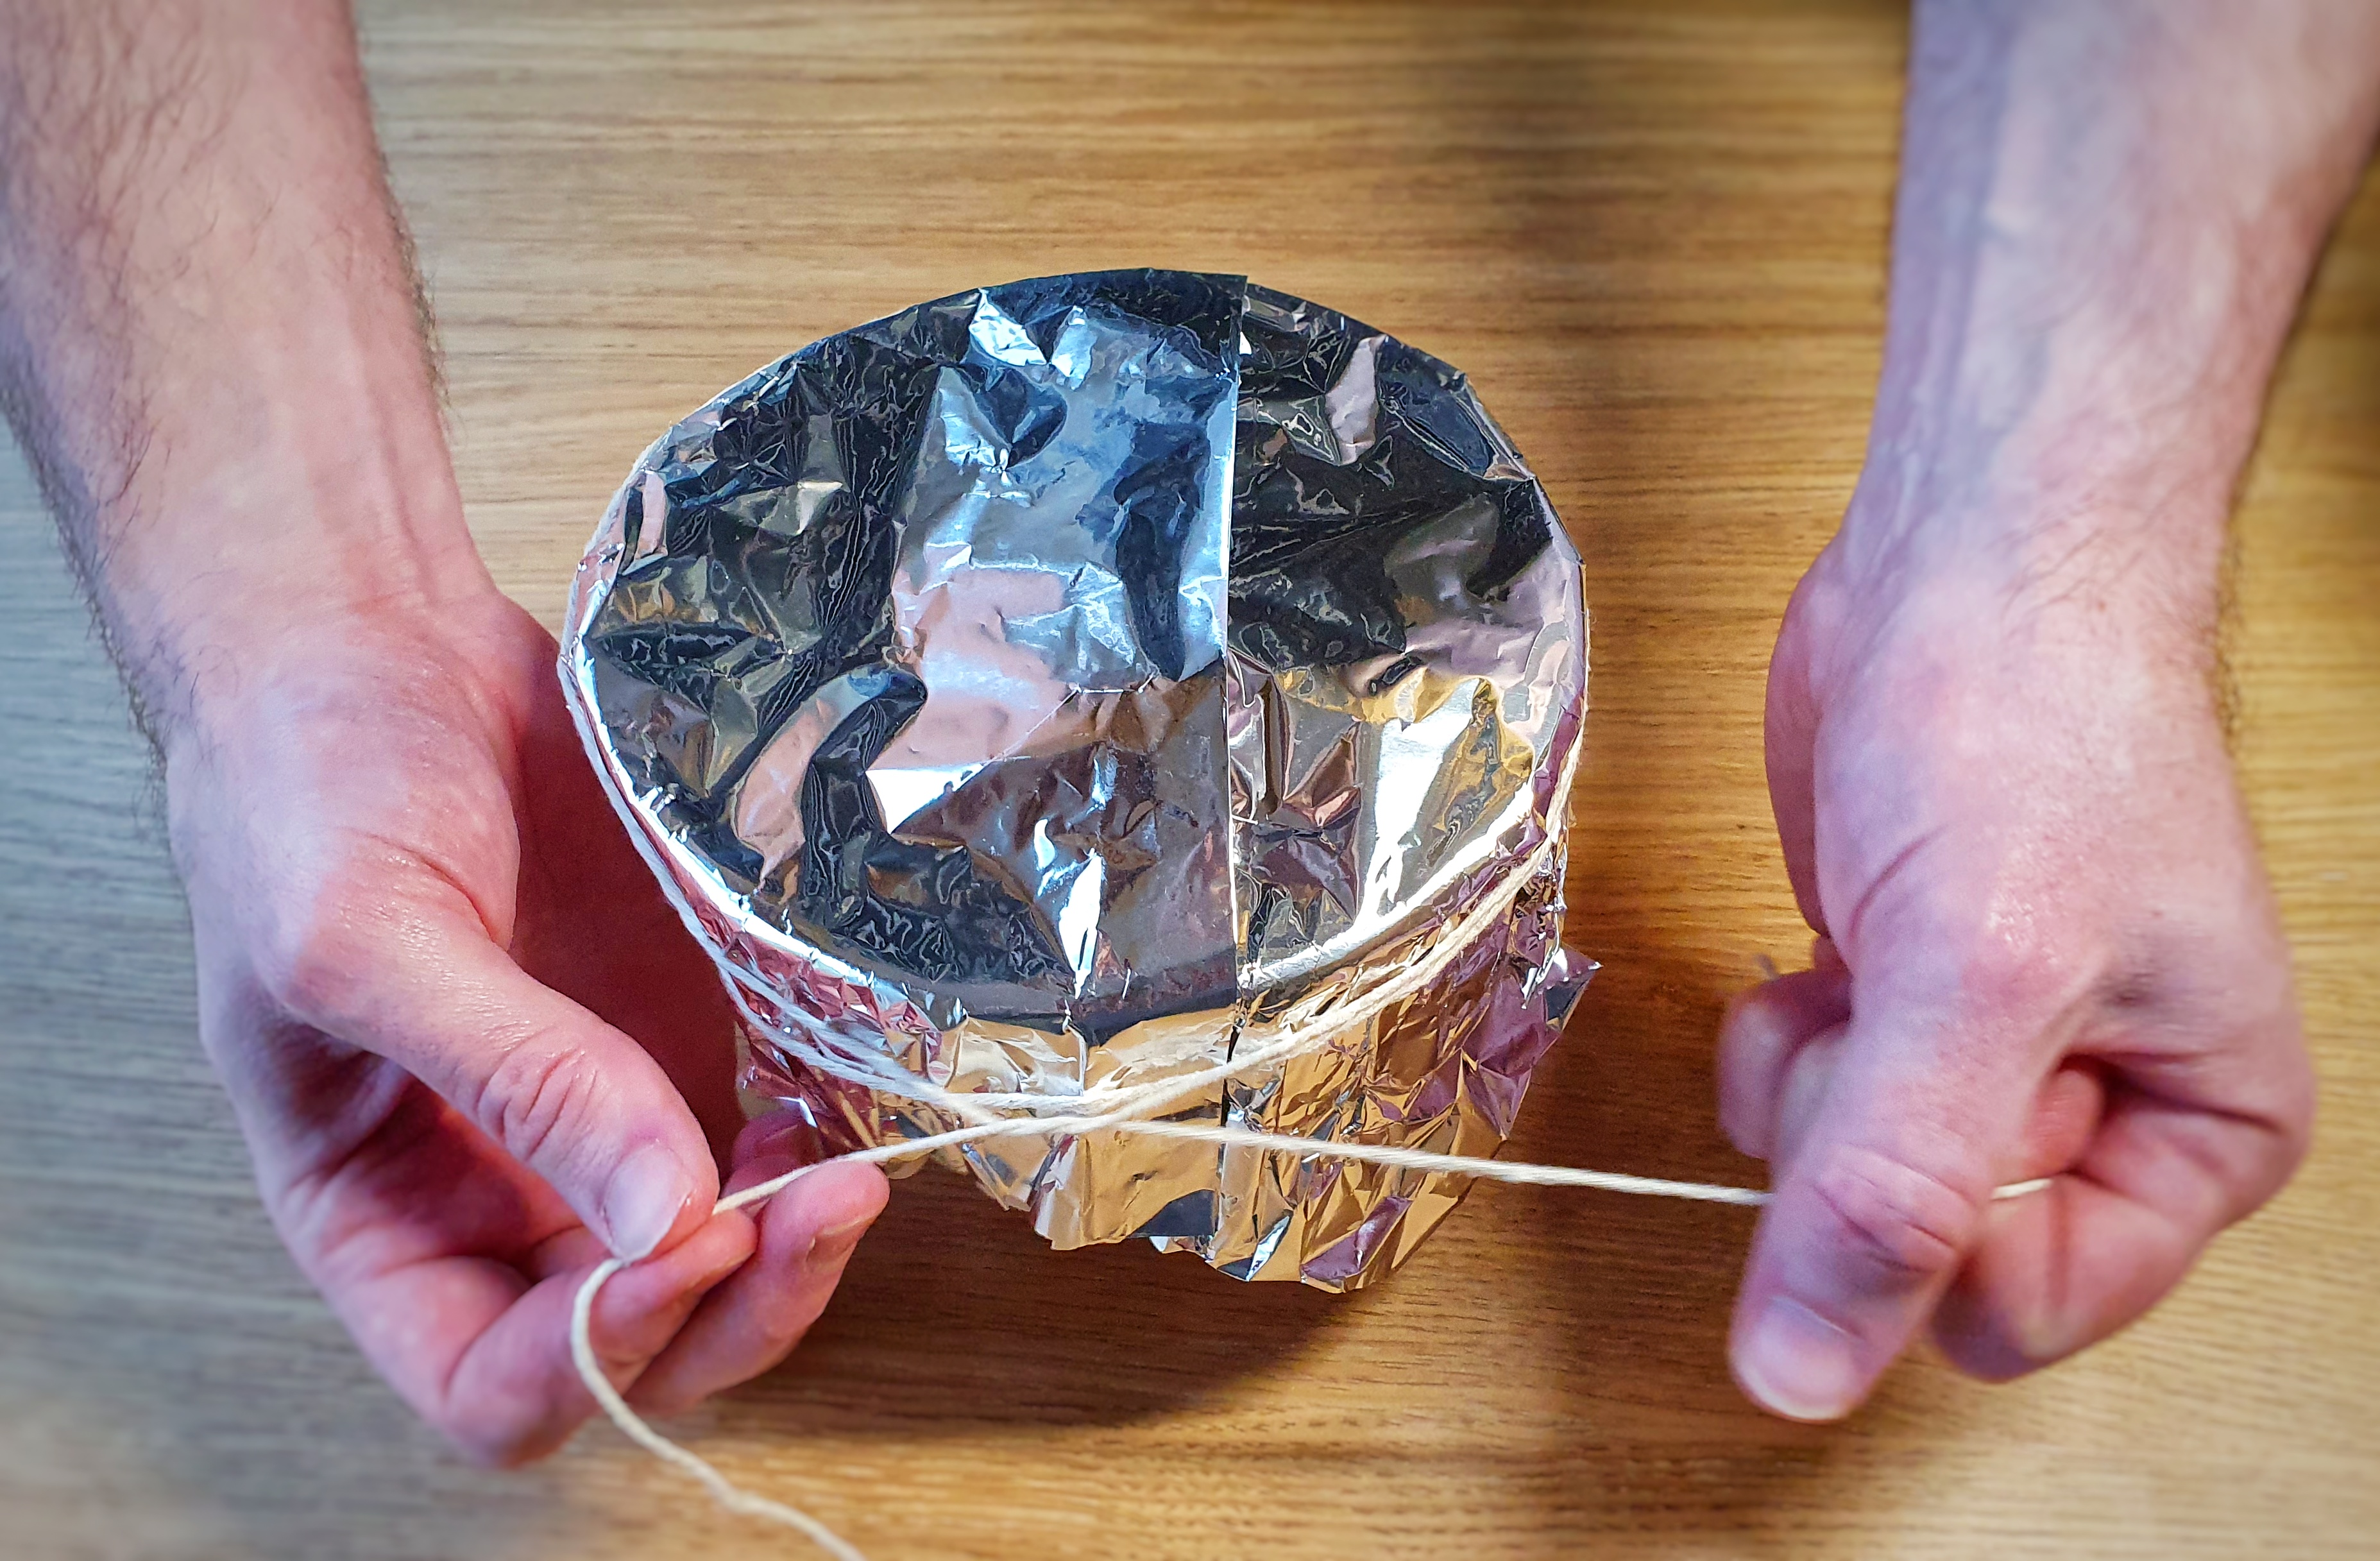
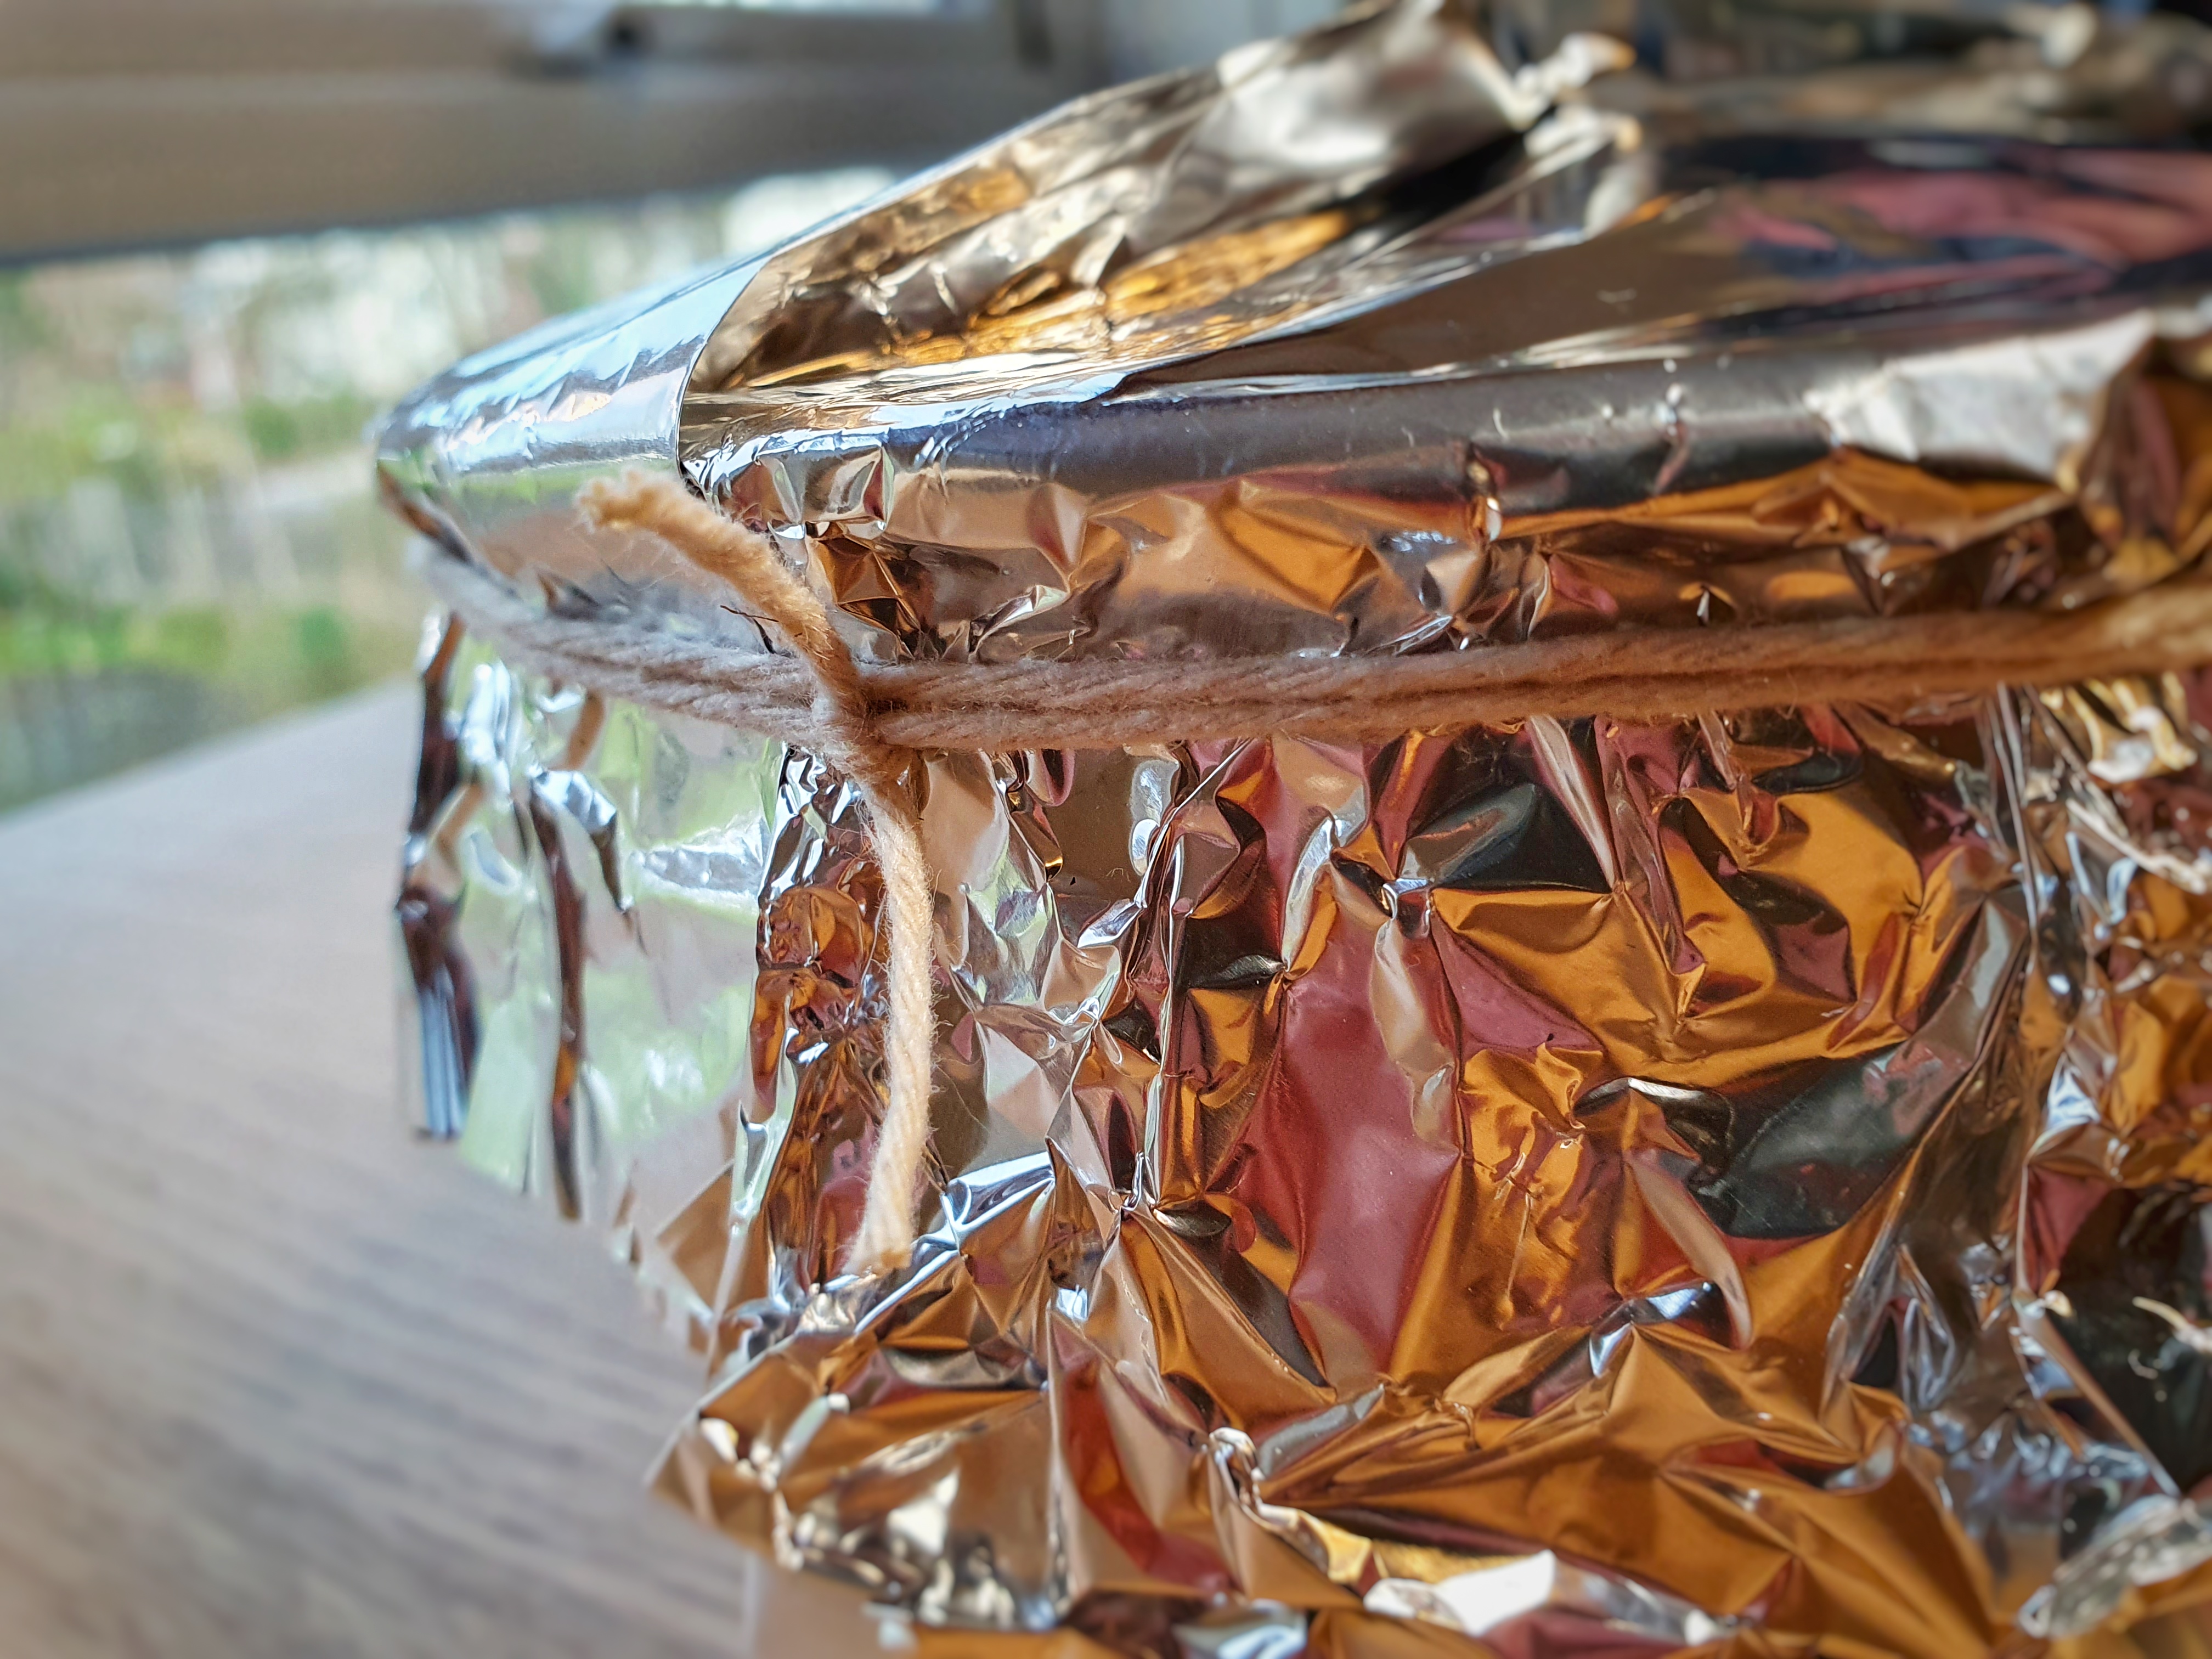
Put the lid on the basin, if it has one, or place a pleated double layer of greaseproof paper and kitchen foil – the pleat allows for any expansion – then secure it in place with string.
How to make a pleat in a piece of paper or foil
You may want to make a simple handle with the string too if you suspect the pudding will be tricky to remove from its steamer.
Tying on a lid: Scrunch down the paper and foil, then tie securely with string with a simple double knot
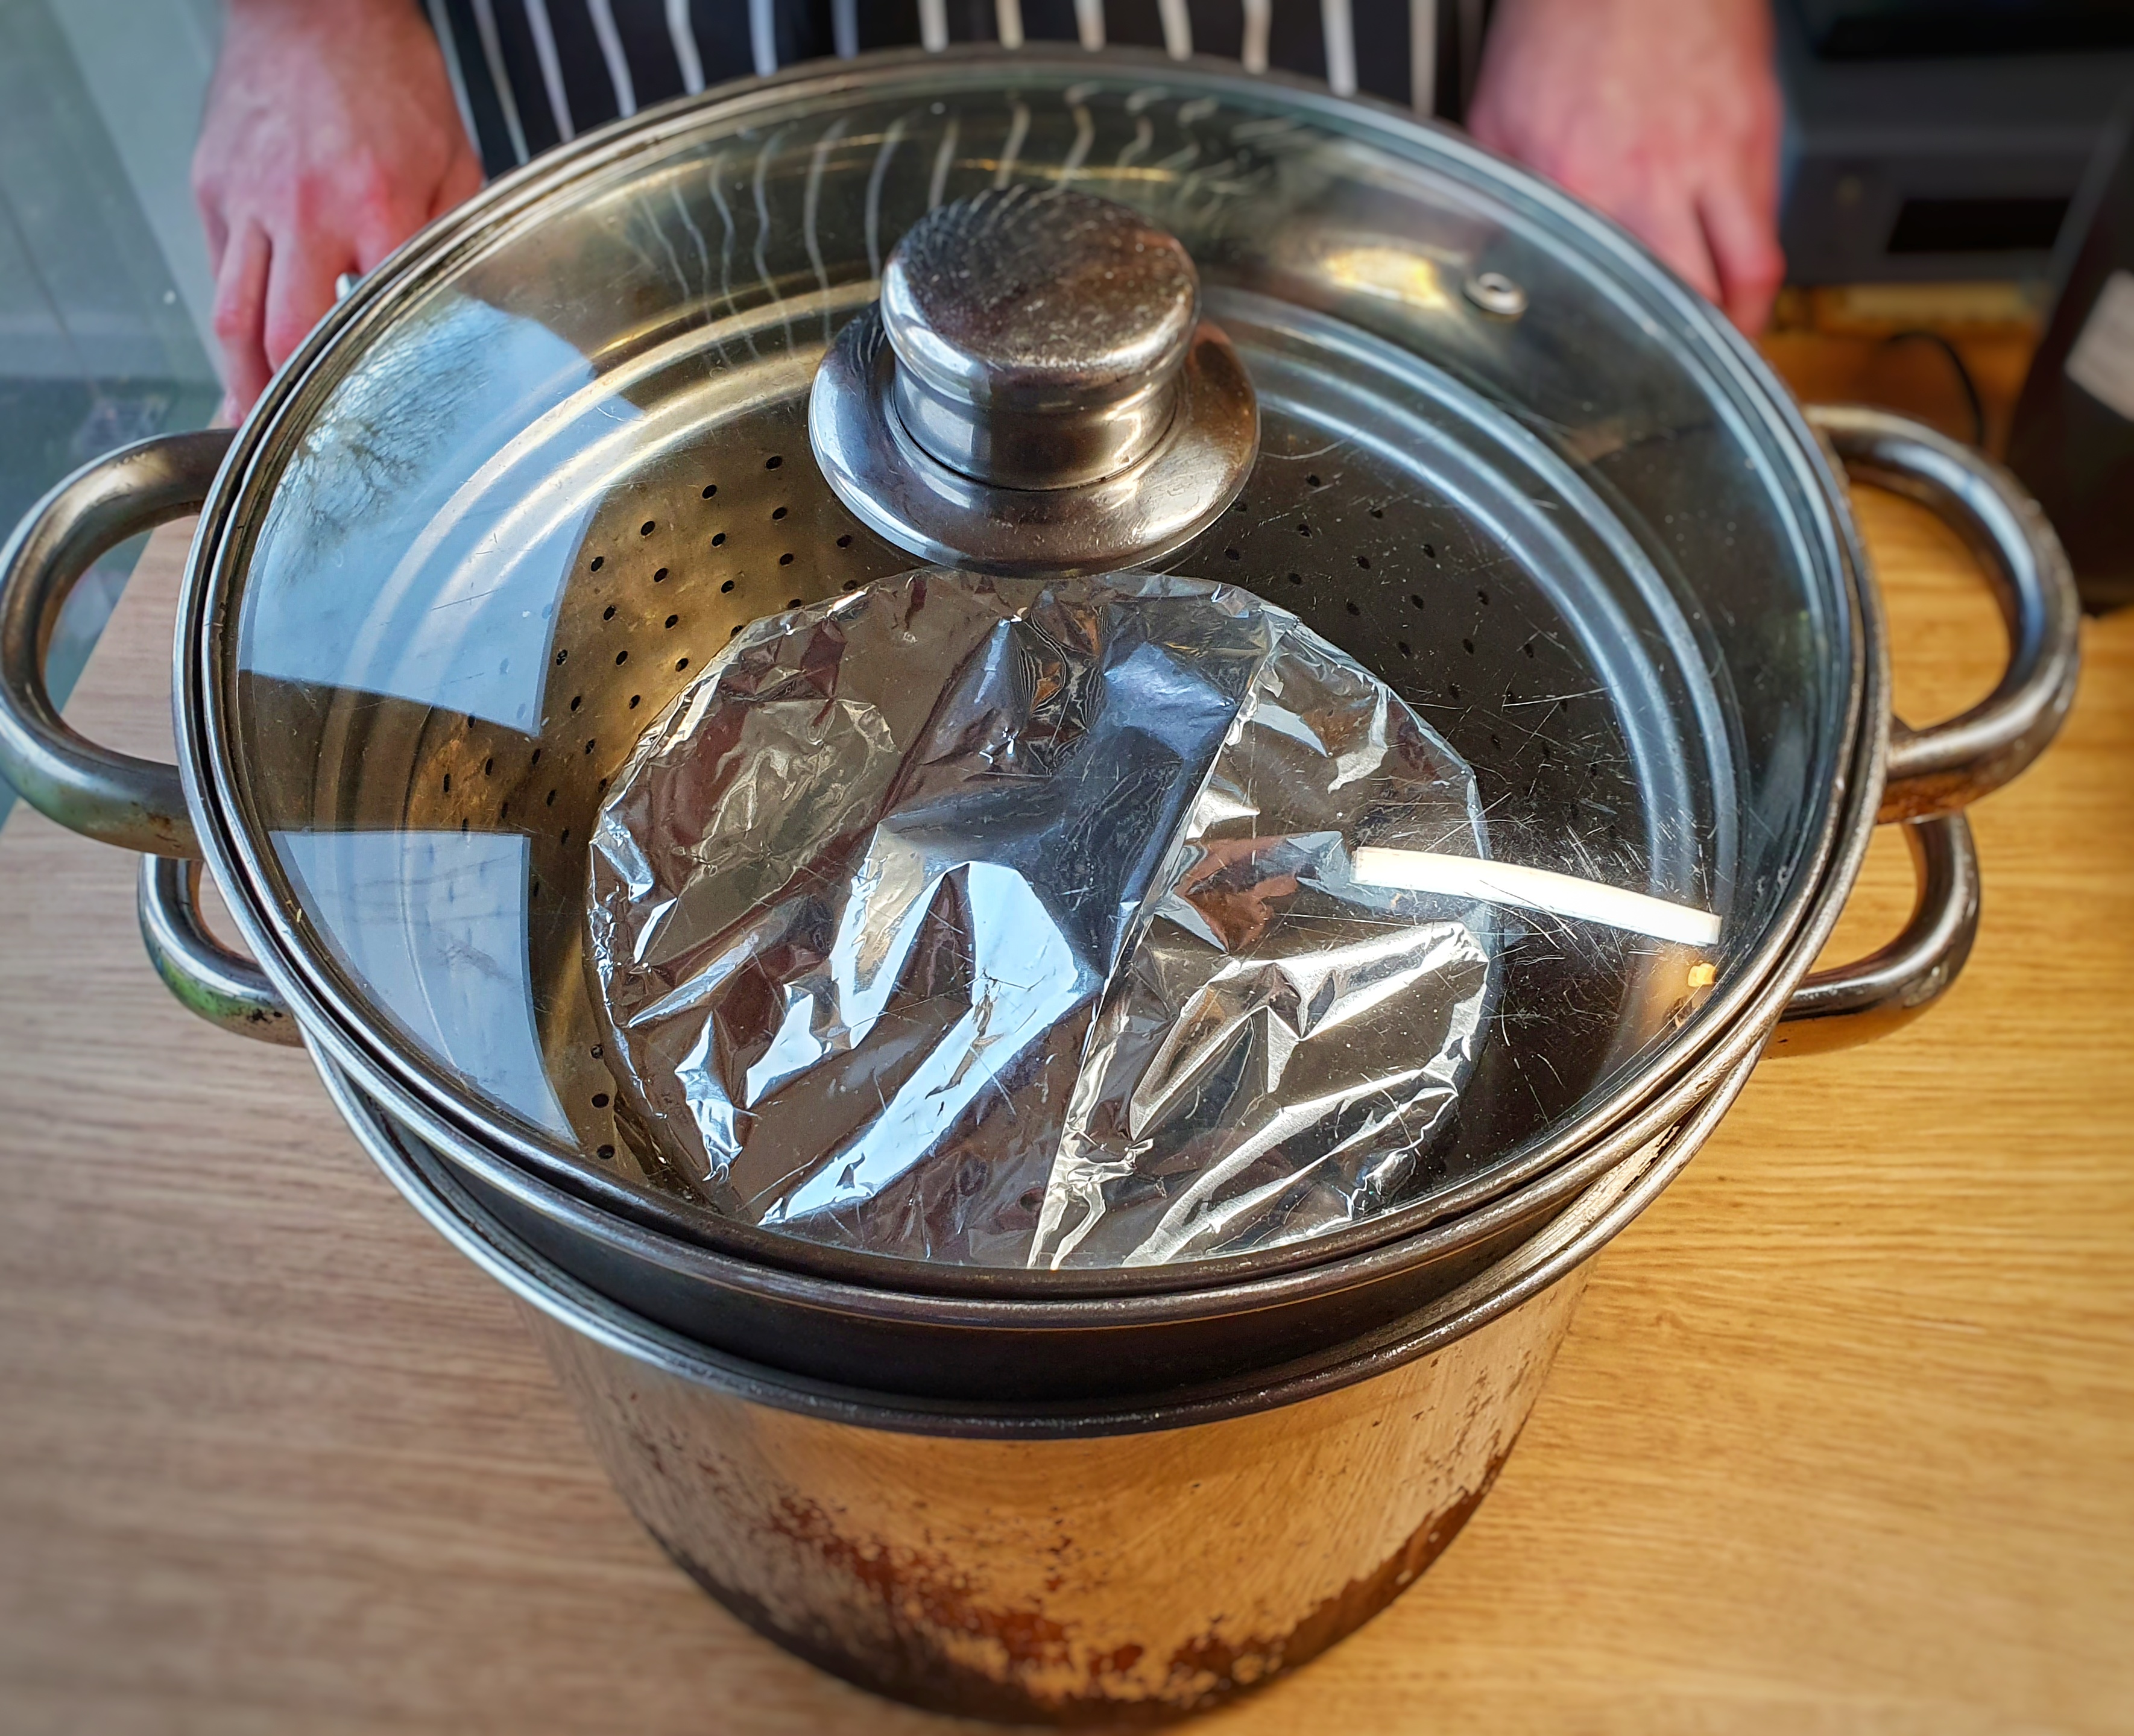
Now prepare the steamer. If you have one that fits the pudding basin, simply add boiling water straight from the kettle to the base to a depth of a few inches/ 10 cm deep, then place the basin in the steamer, sit it on the base and put on the lid. Turn the heat high and allow it to come to a rolling boil
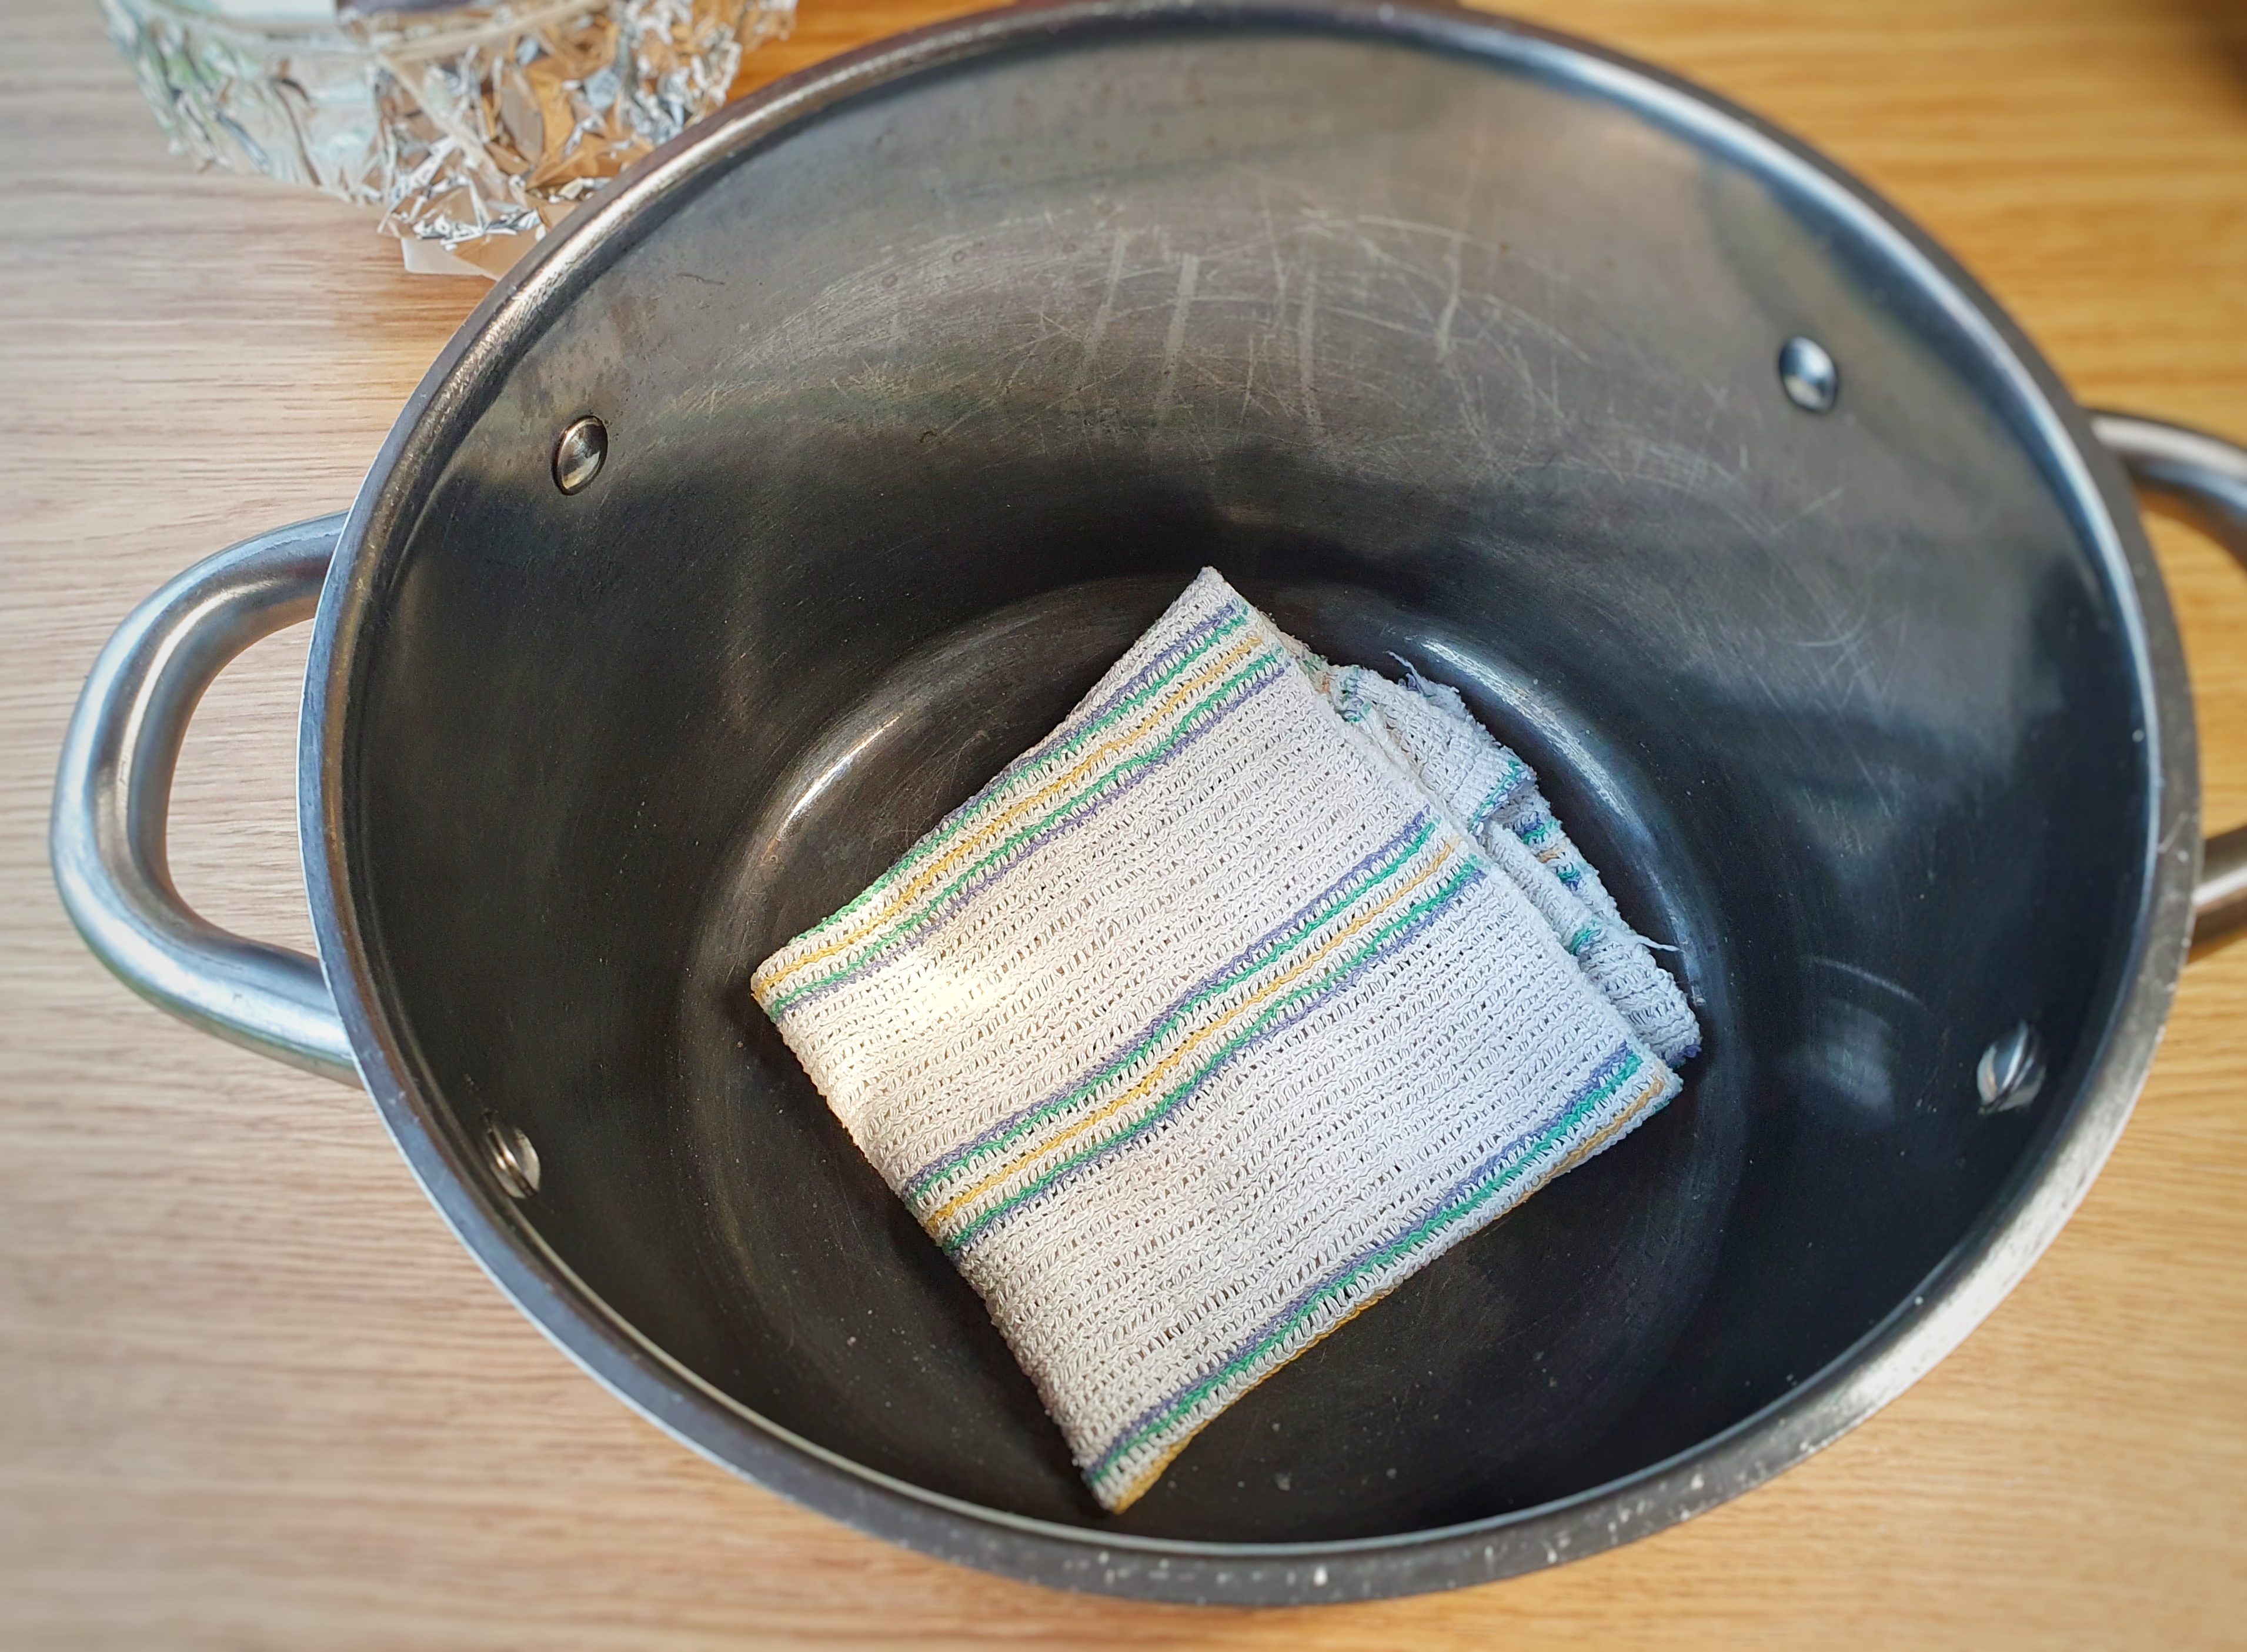
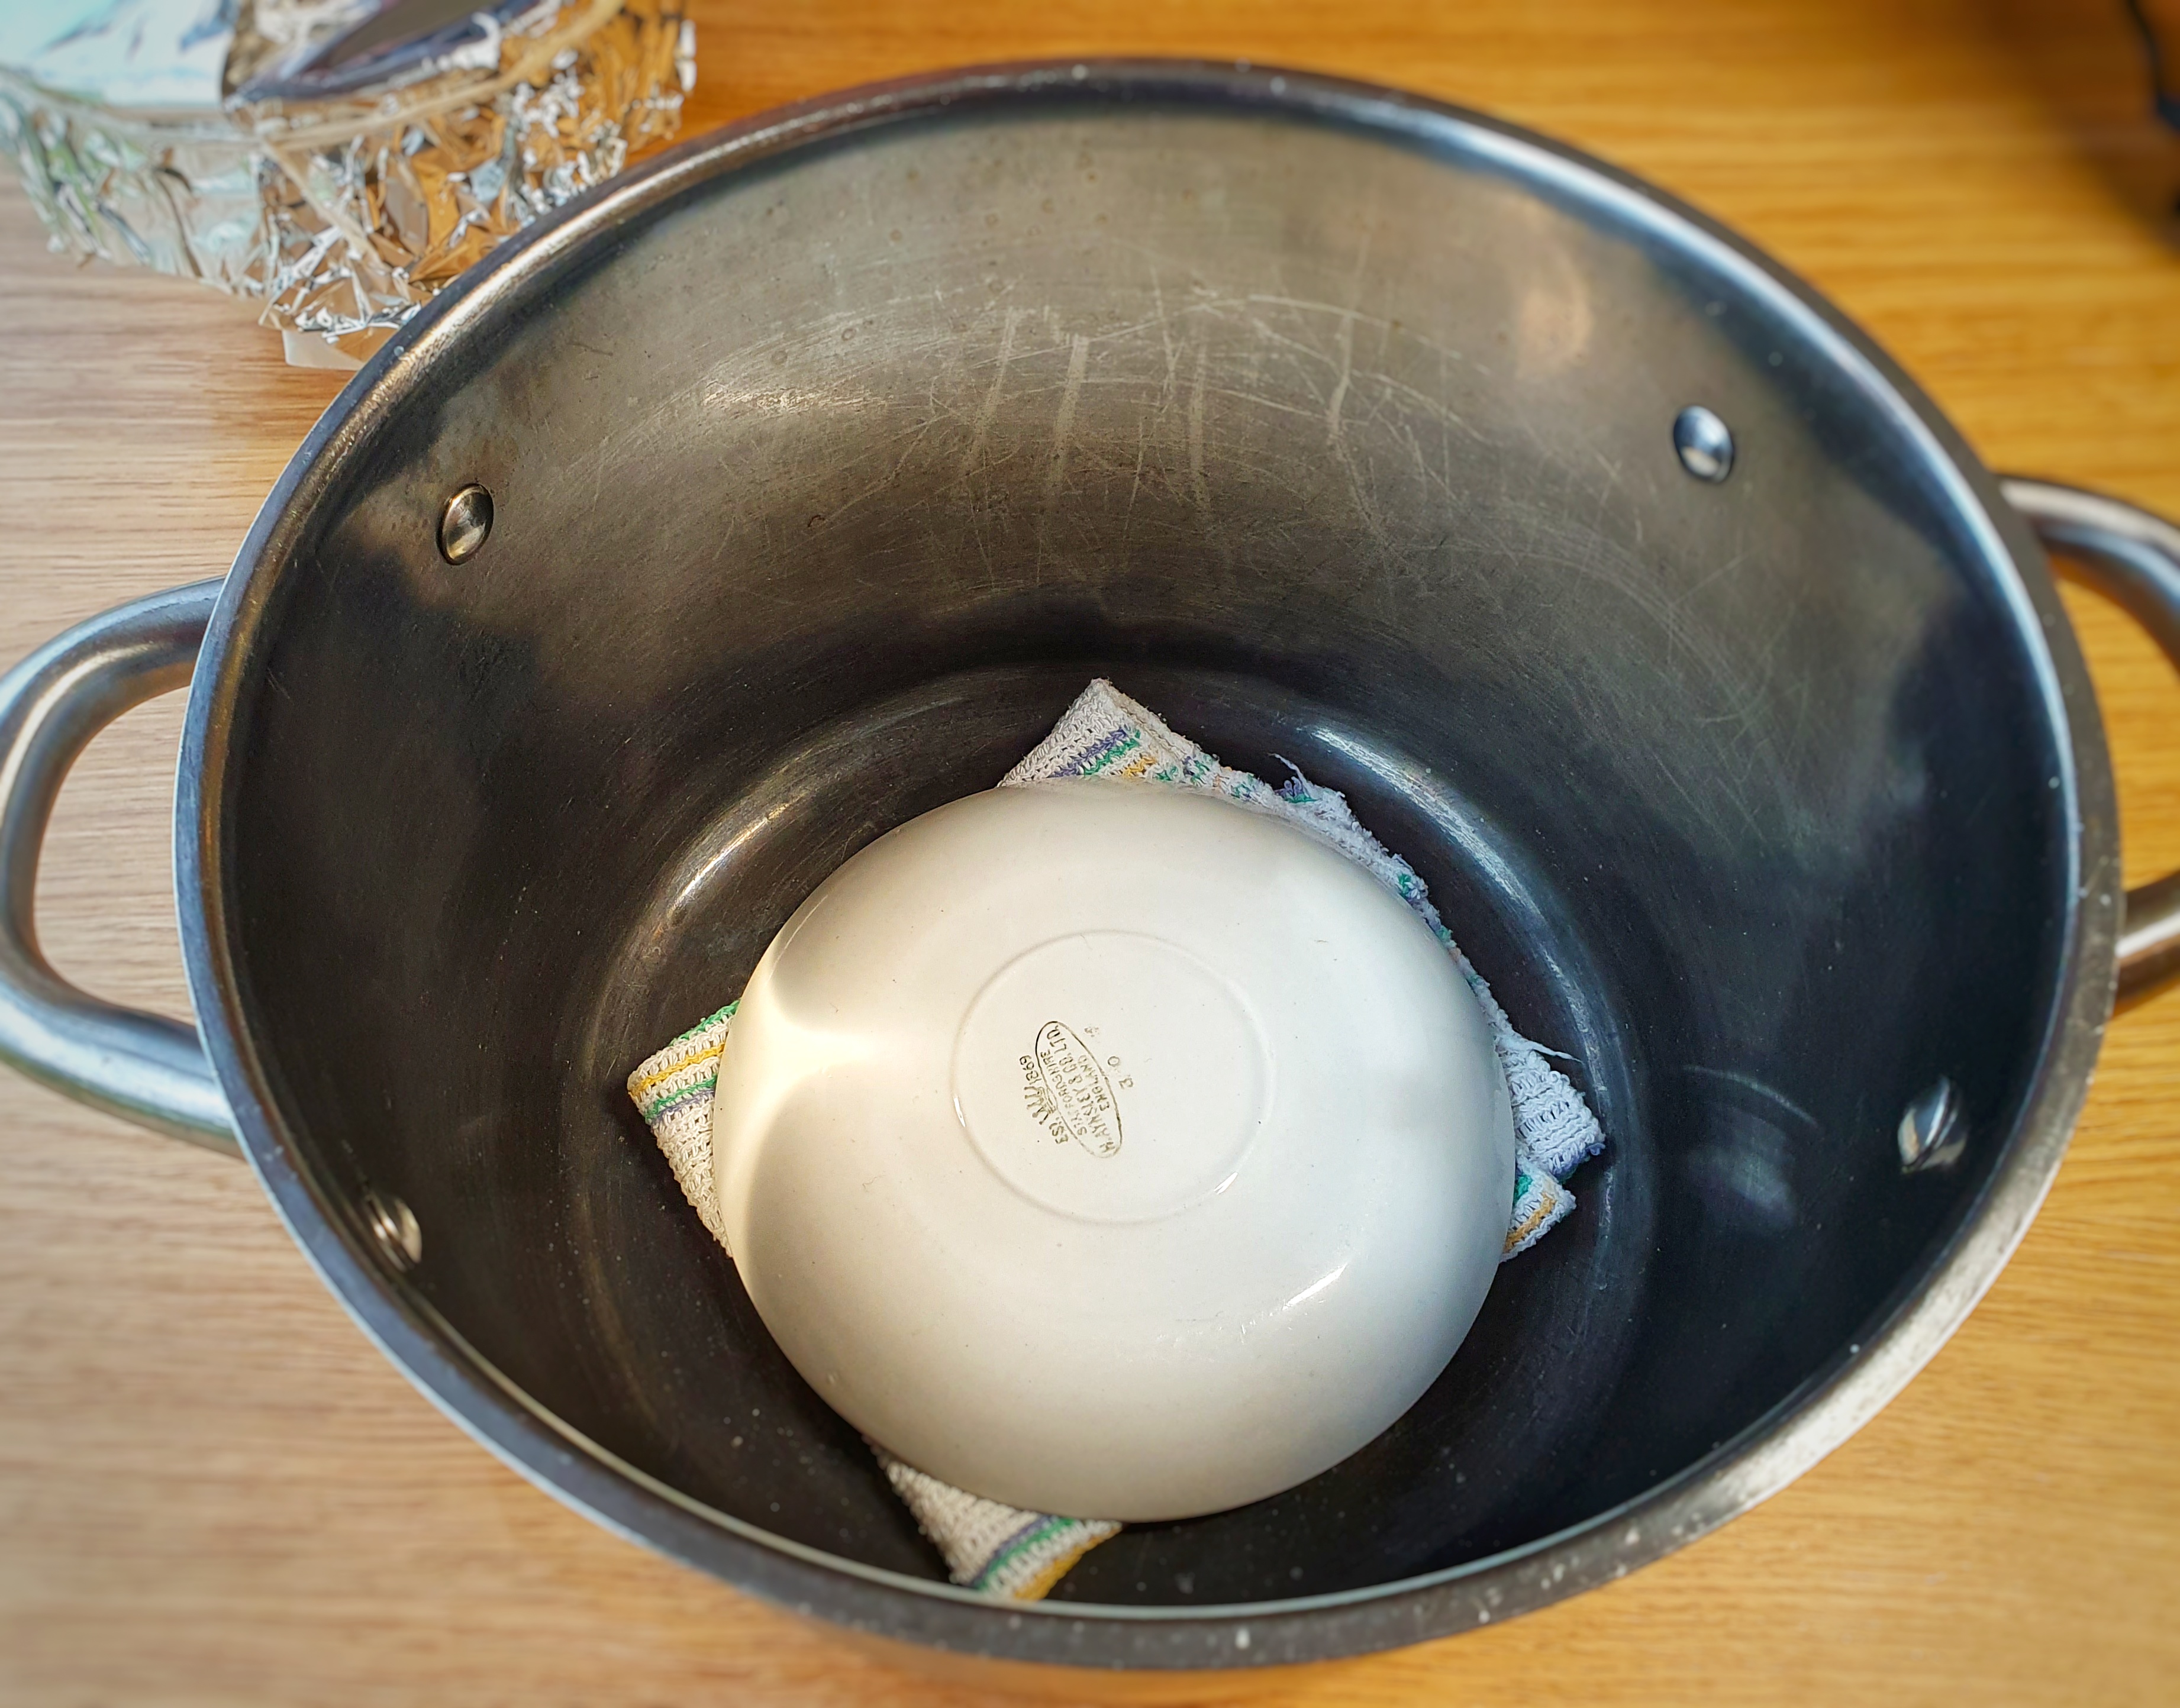
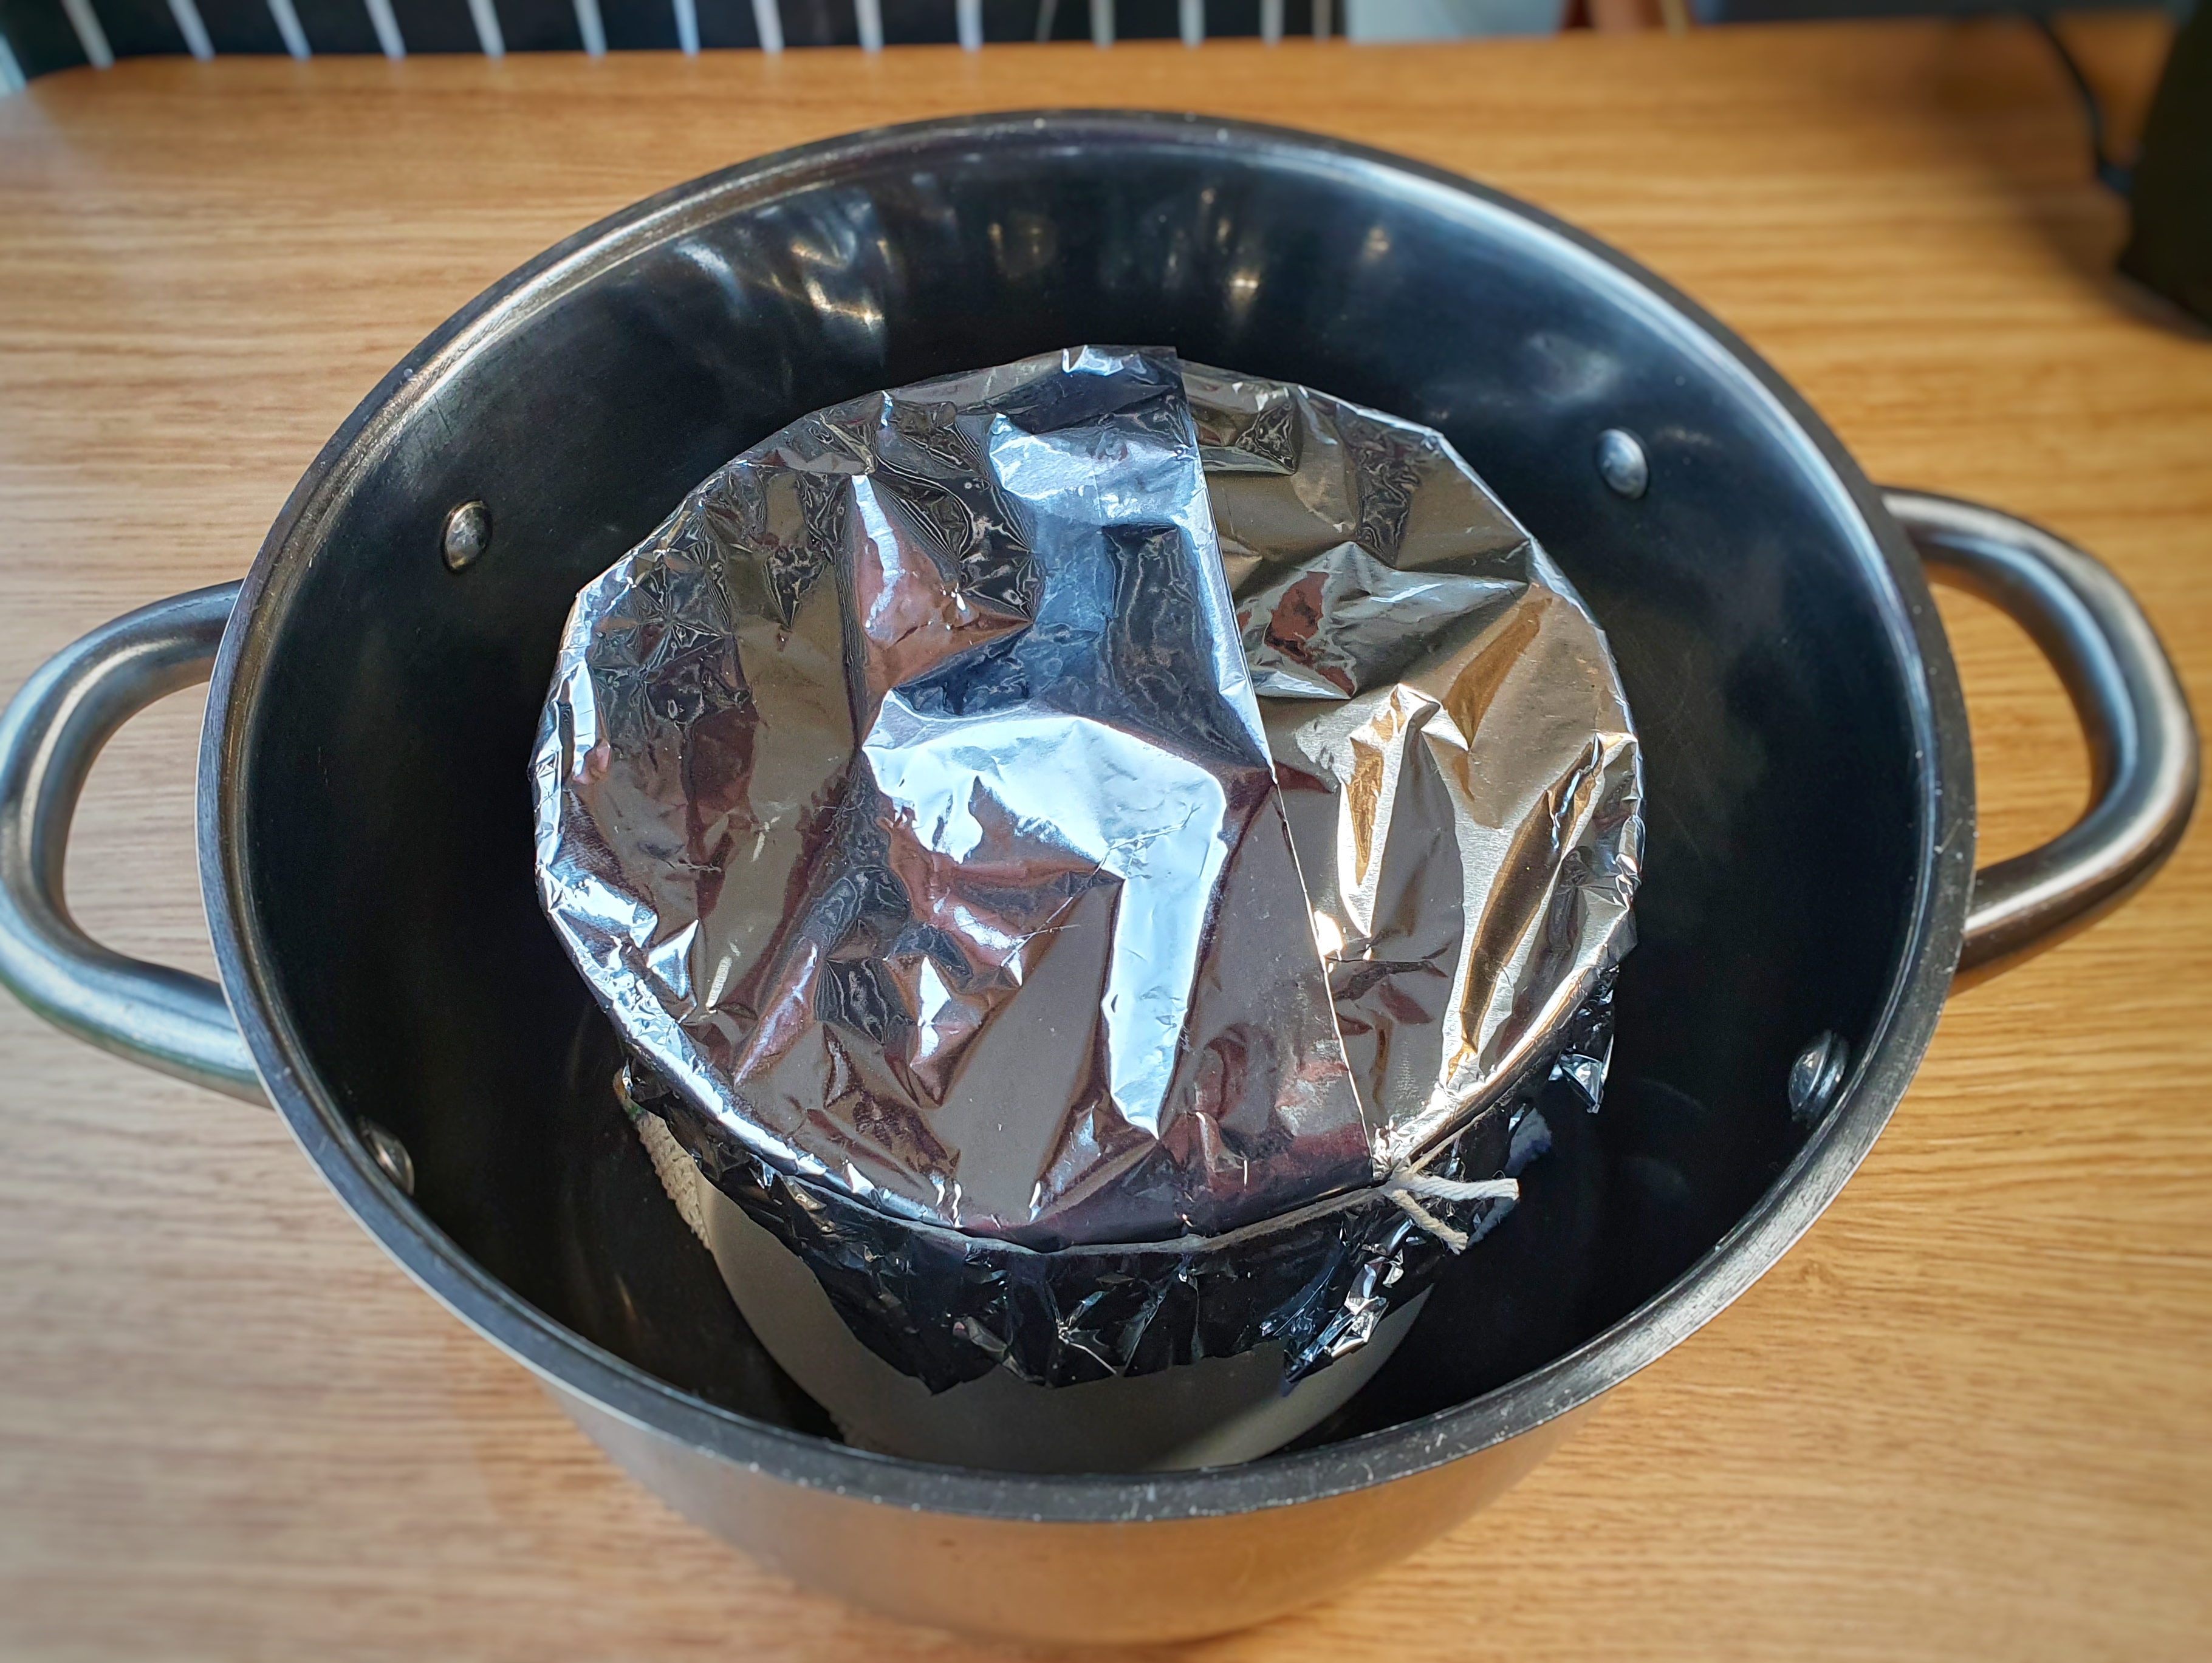
If you don’t have a steamer you can make one: Take a pan large enough to comfortably fit your basin. Before you add any water, place an upturned saucer on the base of the pan (add some scrunched material under the saucer to prevent clattering). Place the basin inside your pan and pour boiling water straight from the kettle into the basin to come around a third of the way up the basin. Cover and turn the heat to high to achieve a rolling boil.
The pudding inside my steamer (1); making your own steamer using a cloth and saucer (2-4)
Whichever way you have made your steamer, once a rolling boil has been reached keep the pudding boiling well for 20 minutes, then turn the heat to medium-low. The total cooking time for this size of pudding is 90 minutes.
Don’t be tempted to remove the lid as it drops the temperature. That said, it is also important that the pan or steamer doesn’t boil dry so do check after 45 mins or an hour if you think it may do. If so, top up with water straight from the kettle.
Turning the pudding out: one of the most satisfying kitchen tasks
When it is done, remove the basin from the steamer and leave for 10 minutes before turning it out onto a serving plate or dish, slide a knife around the inside edge to loosen it if you suspect it may be stubborn.
If you like the blogs and podcast I produce and would to start a £3 monthly subscription, or would like to treat me to virtual coffee or pint: follow this link for more information.Thank you.
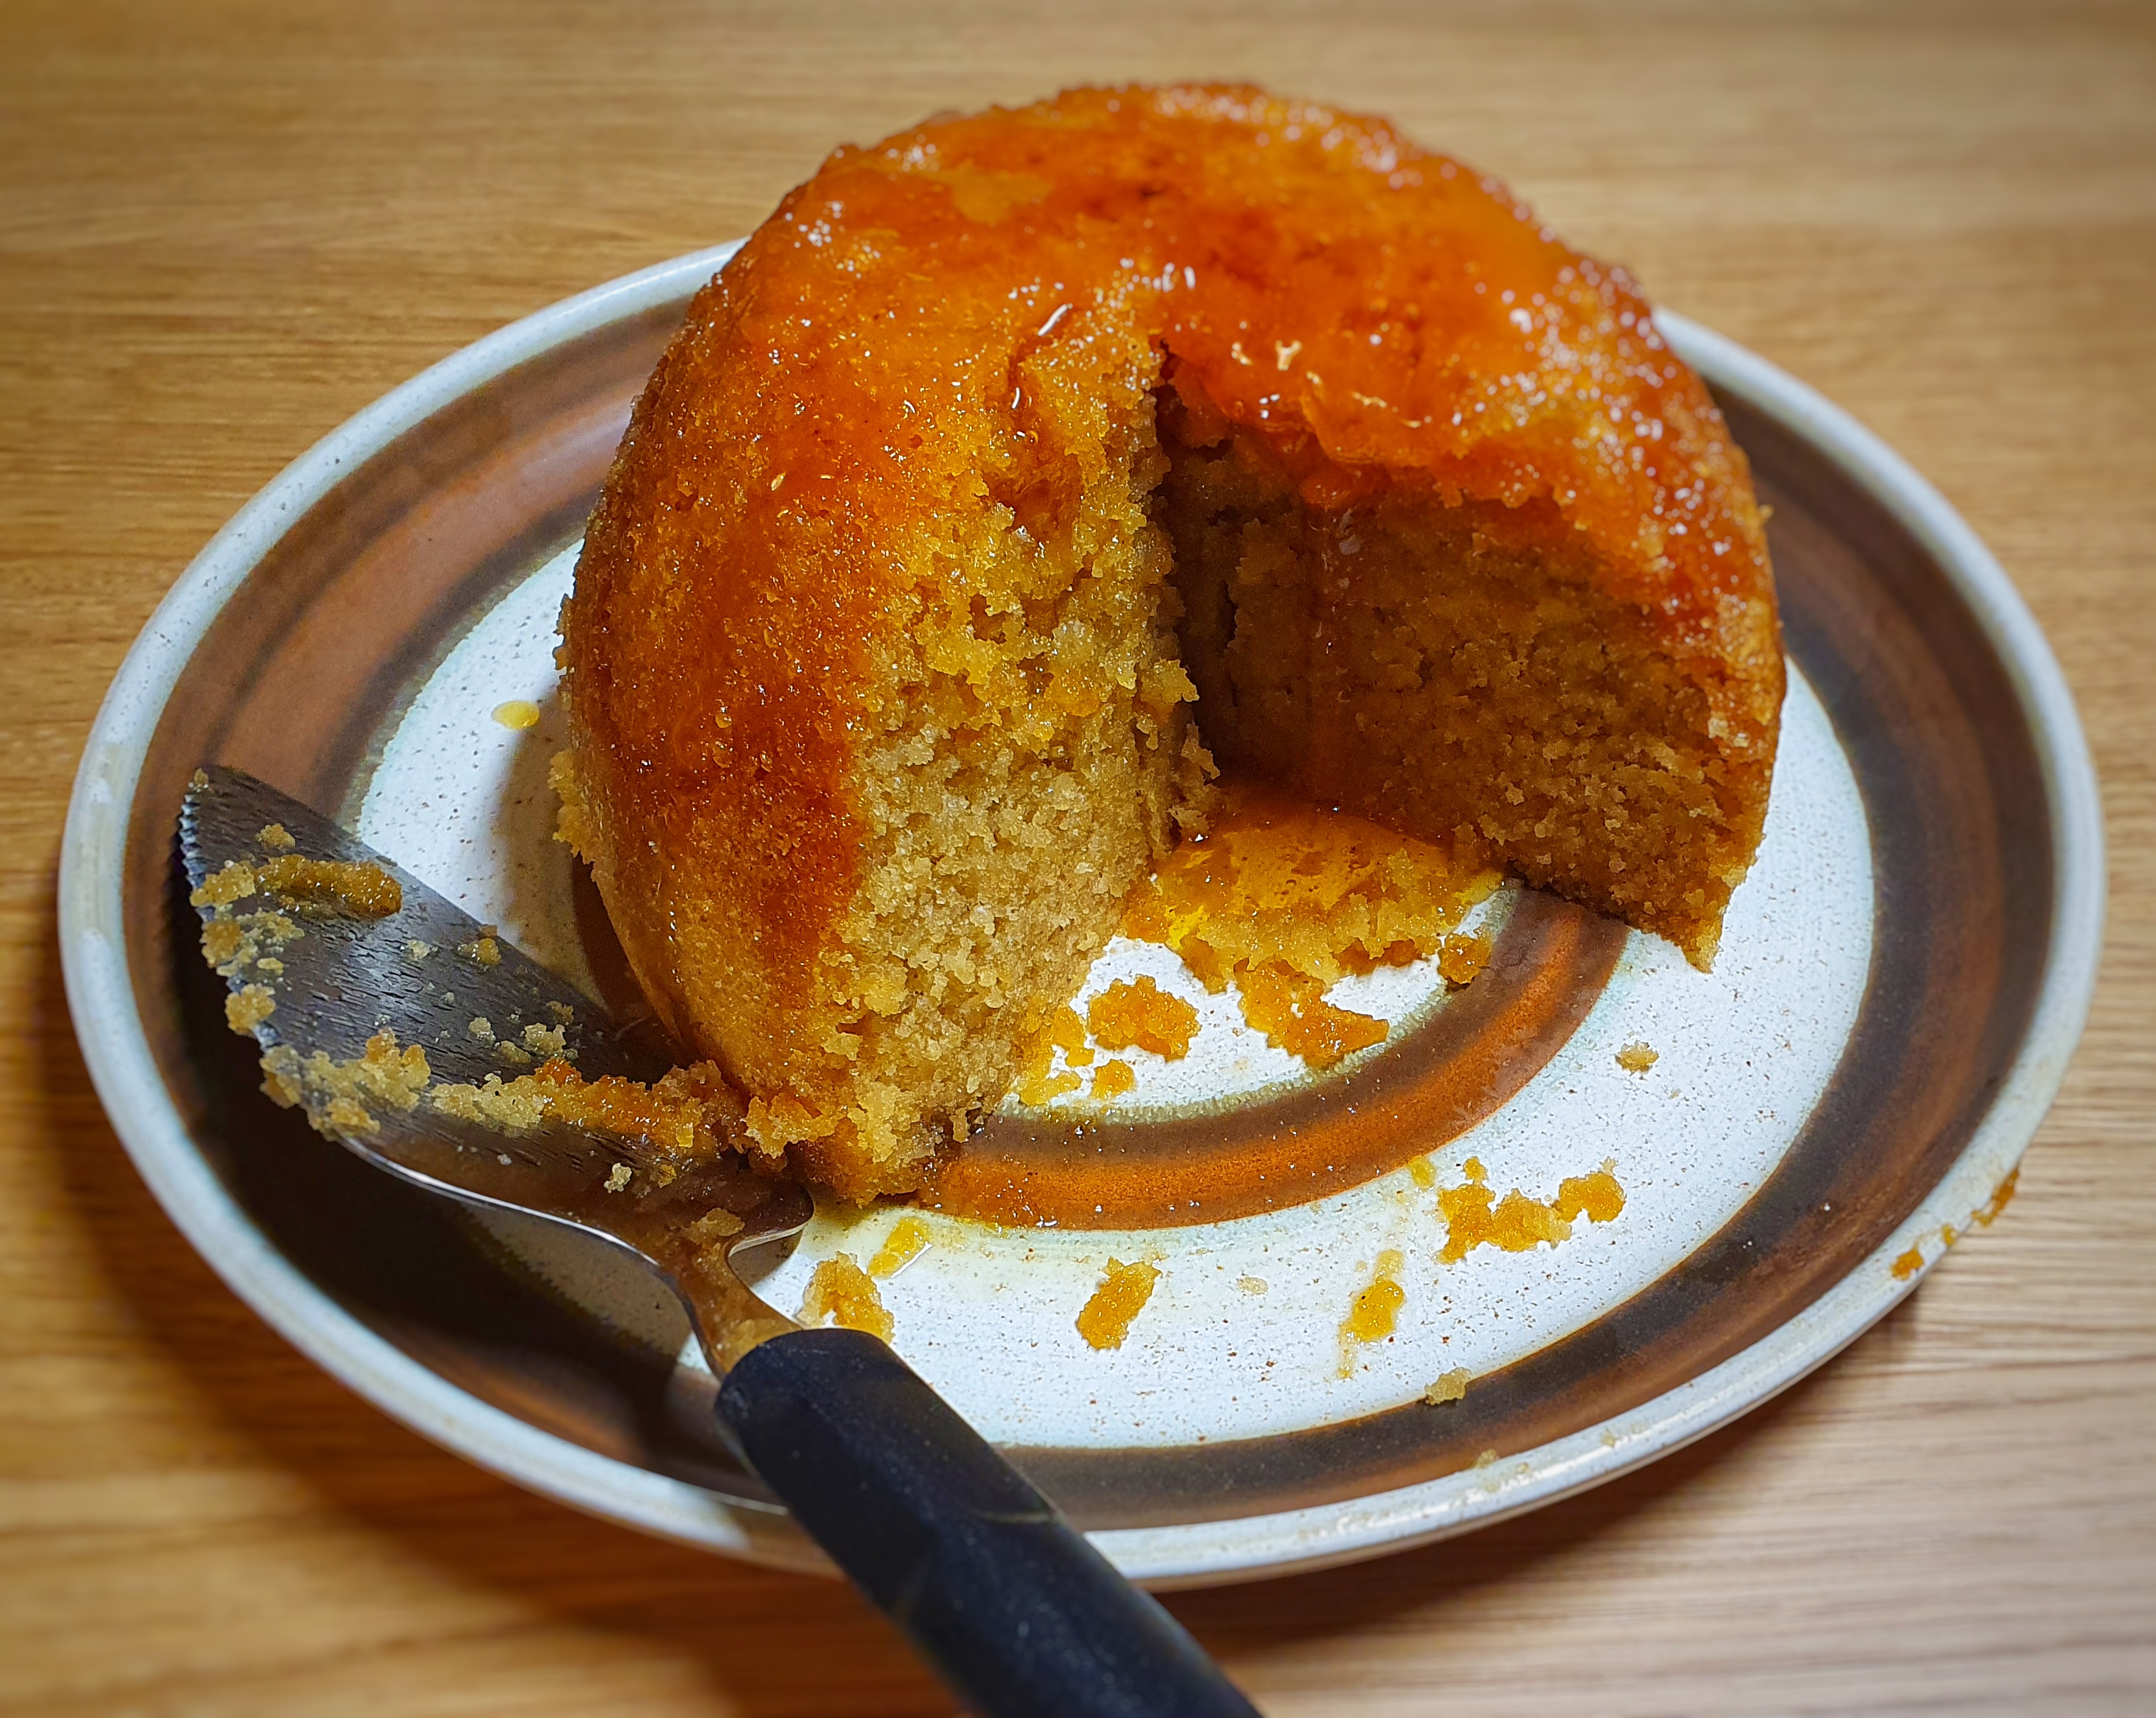
L: a simple steamed treacle sponge pudding. R: a sour cherry and almond sponge
Variations
You can add flavour by using different sugars or swapping 60g sugar for a syrup, by adding citrus zest, or by adding ½ tsp flavouring or extract.
Toppings can be used with aplomb: they need to be 1 or 2 cm in depth, about 100g, and added before the sponge mixture.
Treacle sponge: add 100g golden syrup (or a mixture of golden syrup and black treacle) to the base, use soft dark brown sugar for the sponge and add the zest of a lemon.
Jam or marmalade sponge: add 100g of your favourite jam or marmalade, add orange or lemon zest to the sponge mixture if liked.
Lemon: add a layer of lemon curd to the base, flavour the sponge with the zest of a lemon. Use lemon juice to thin the sponge mixture.
Bakewell: add 100g of morello cherry or raspberry jam to the base. For the sponge, add ½ tsp almond extract and swap 60g flour for ground almonds.
Rum and raisin: soak 100g raisins in 2 tbs spiced rum overnight, add to the mixture after the flour has been incorporated, thin the mixture with more rum.
Chocolate: substitute 60g of the flour for cocoa. Serve a chocolate sauce or chocolate custard separately.
Fruit: add 100g of any sweetened stewed fruit or fruit in syrup. Soft fruits like gooseberries, blackcurrants, etc., can be mixed with sugar and added raw.
Notes:
[1] I regularly make these puddings gluten free and the flour mixture I use is the following: 60g ground almonds, 175g gluten-free bread flour mix (I use Dove Farm), 1 level tablespoon gluten-free baking powder and 1 level teaspoon ground psyllium husk.
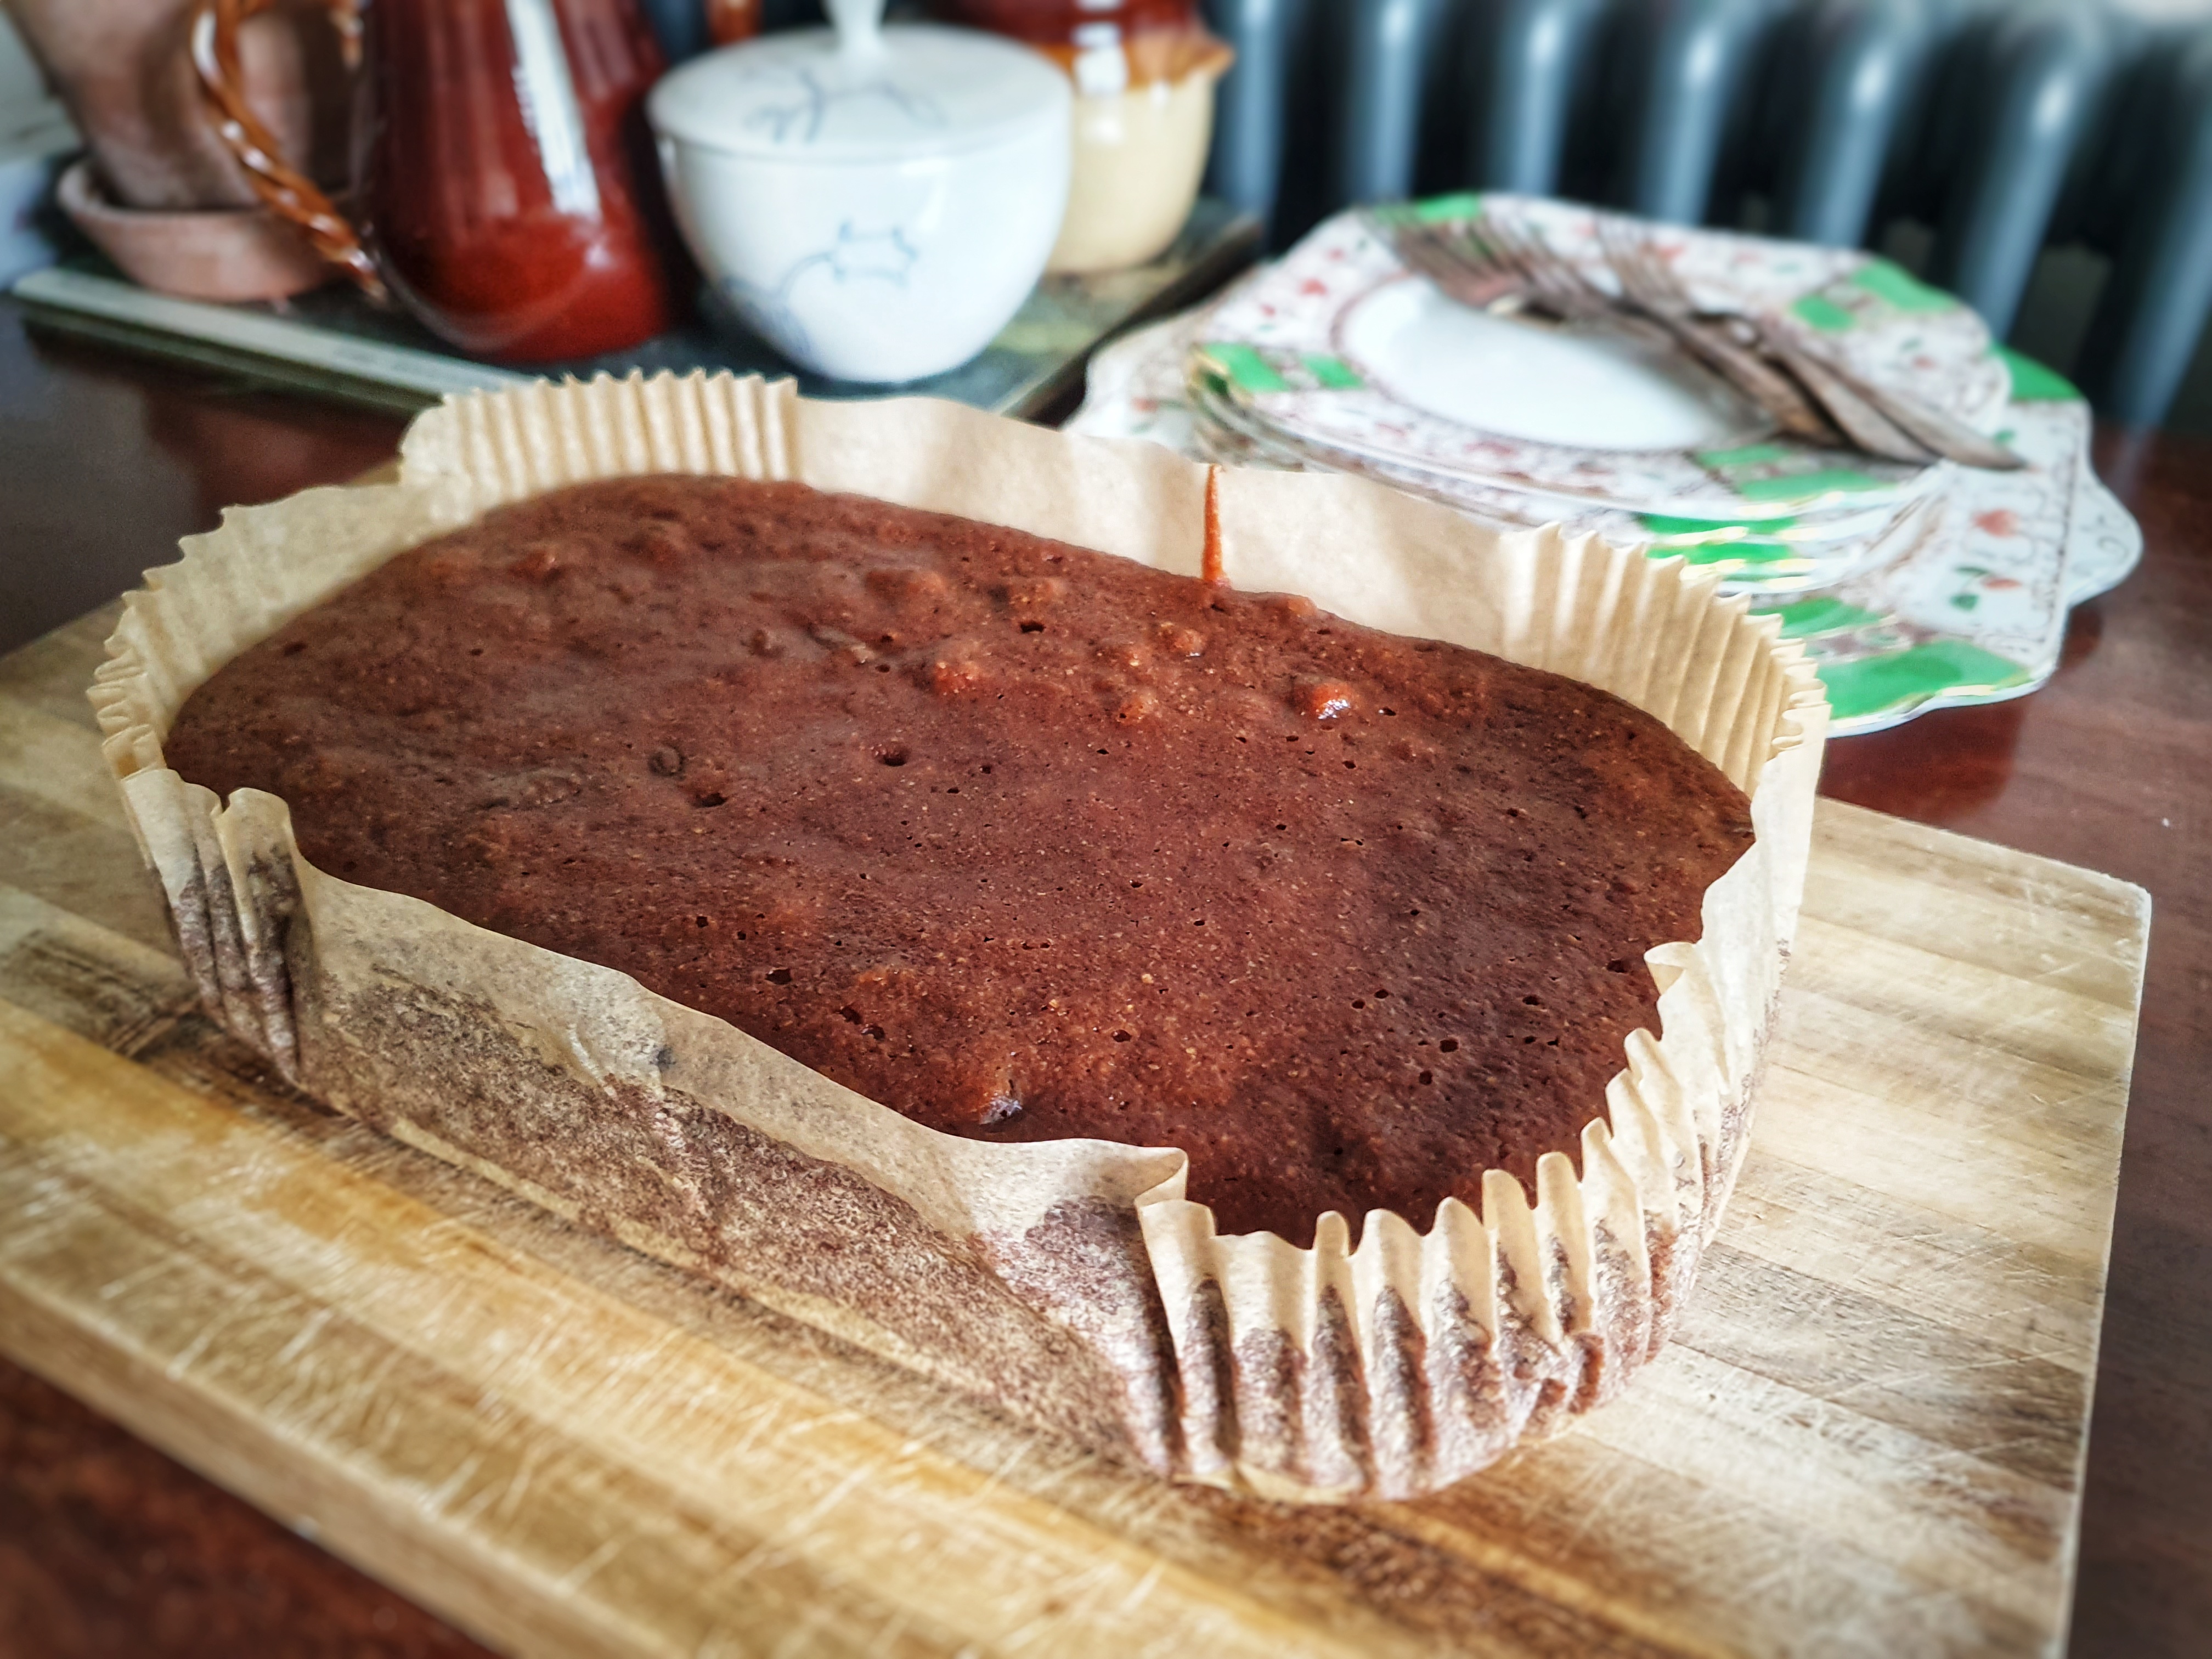
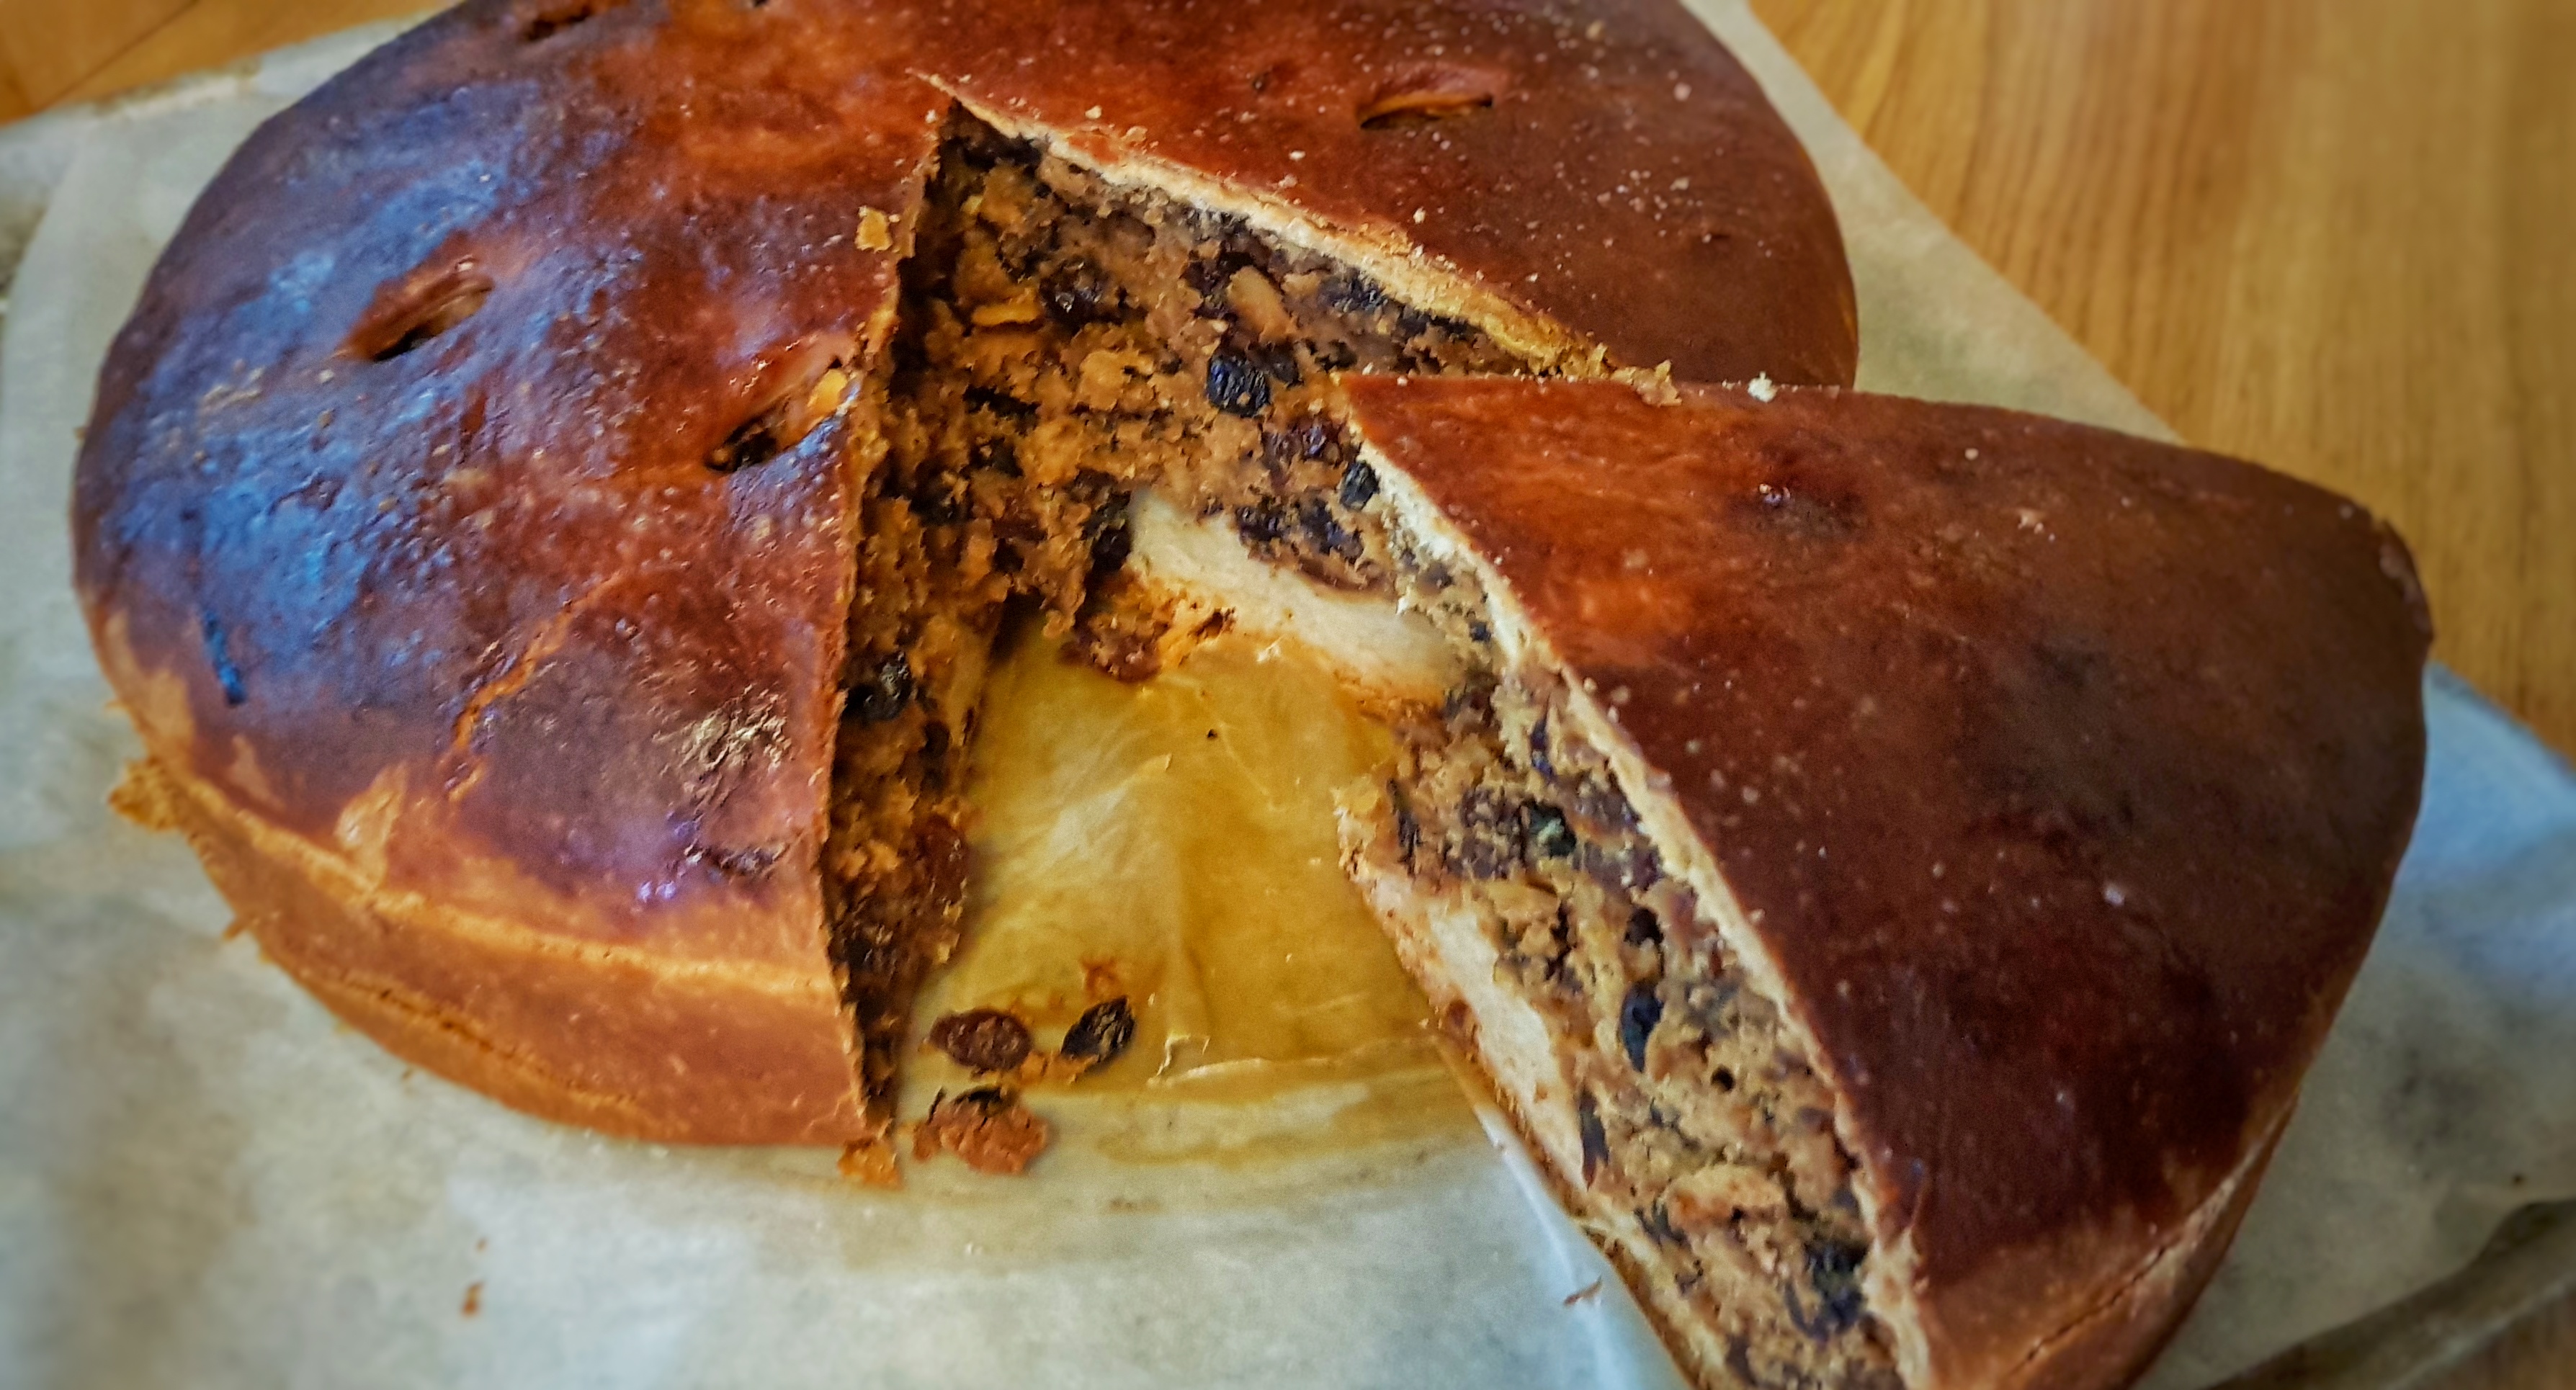
As promised, and carrying on from my last post, here is my recipe for the traditional yeast leavened black bun (Scotch bun). I must say I was really surprised with how well it turned out: it was enriched with so much stuff and was so huge, I thought the poor little yeast cells wouldn’t be able to do their job. I was wrong, but it did take two days to do two provings required before baking.
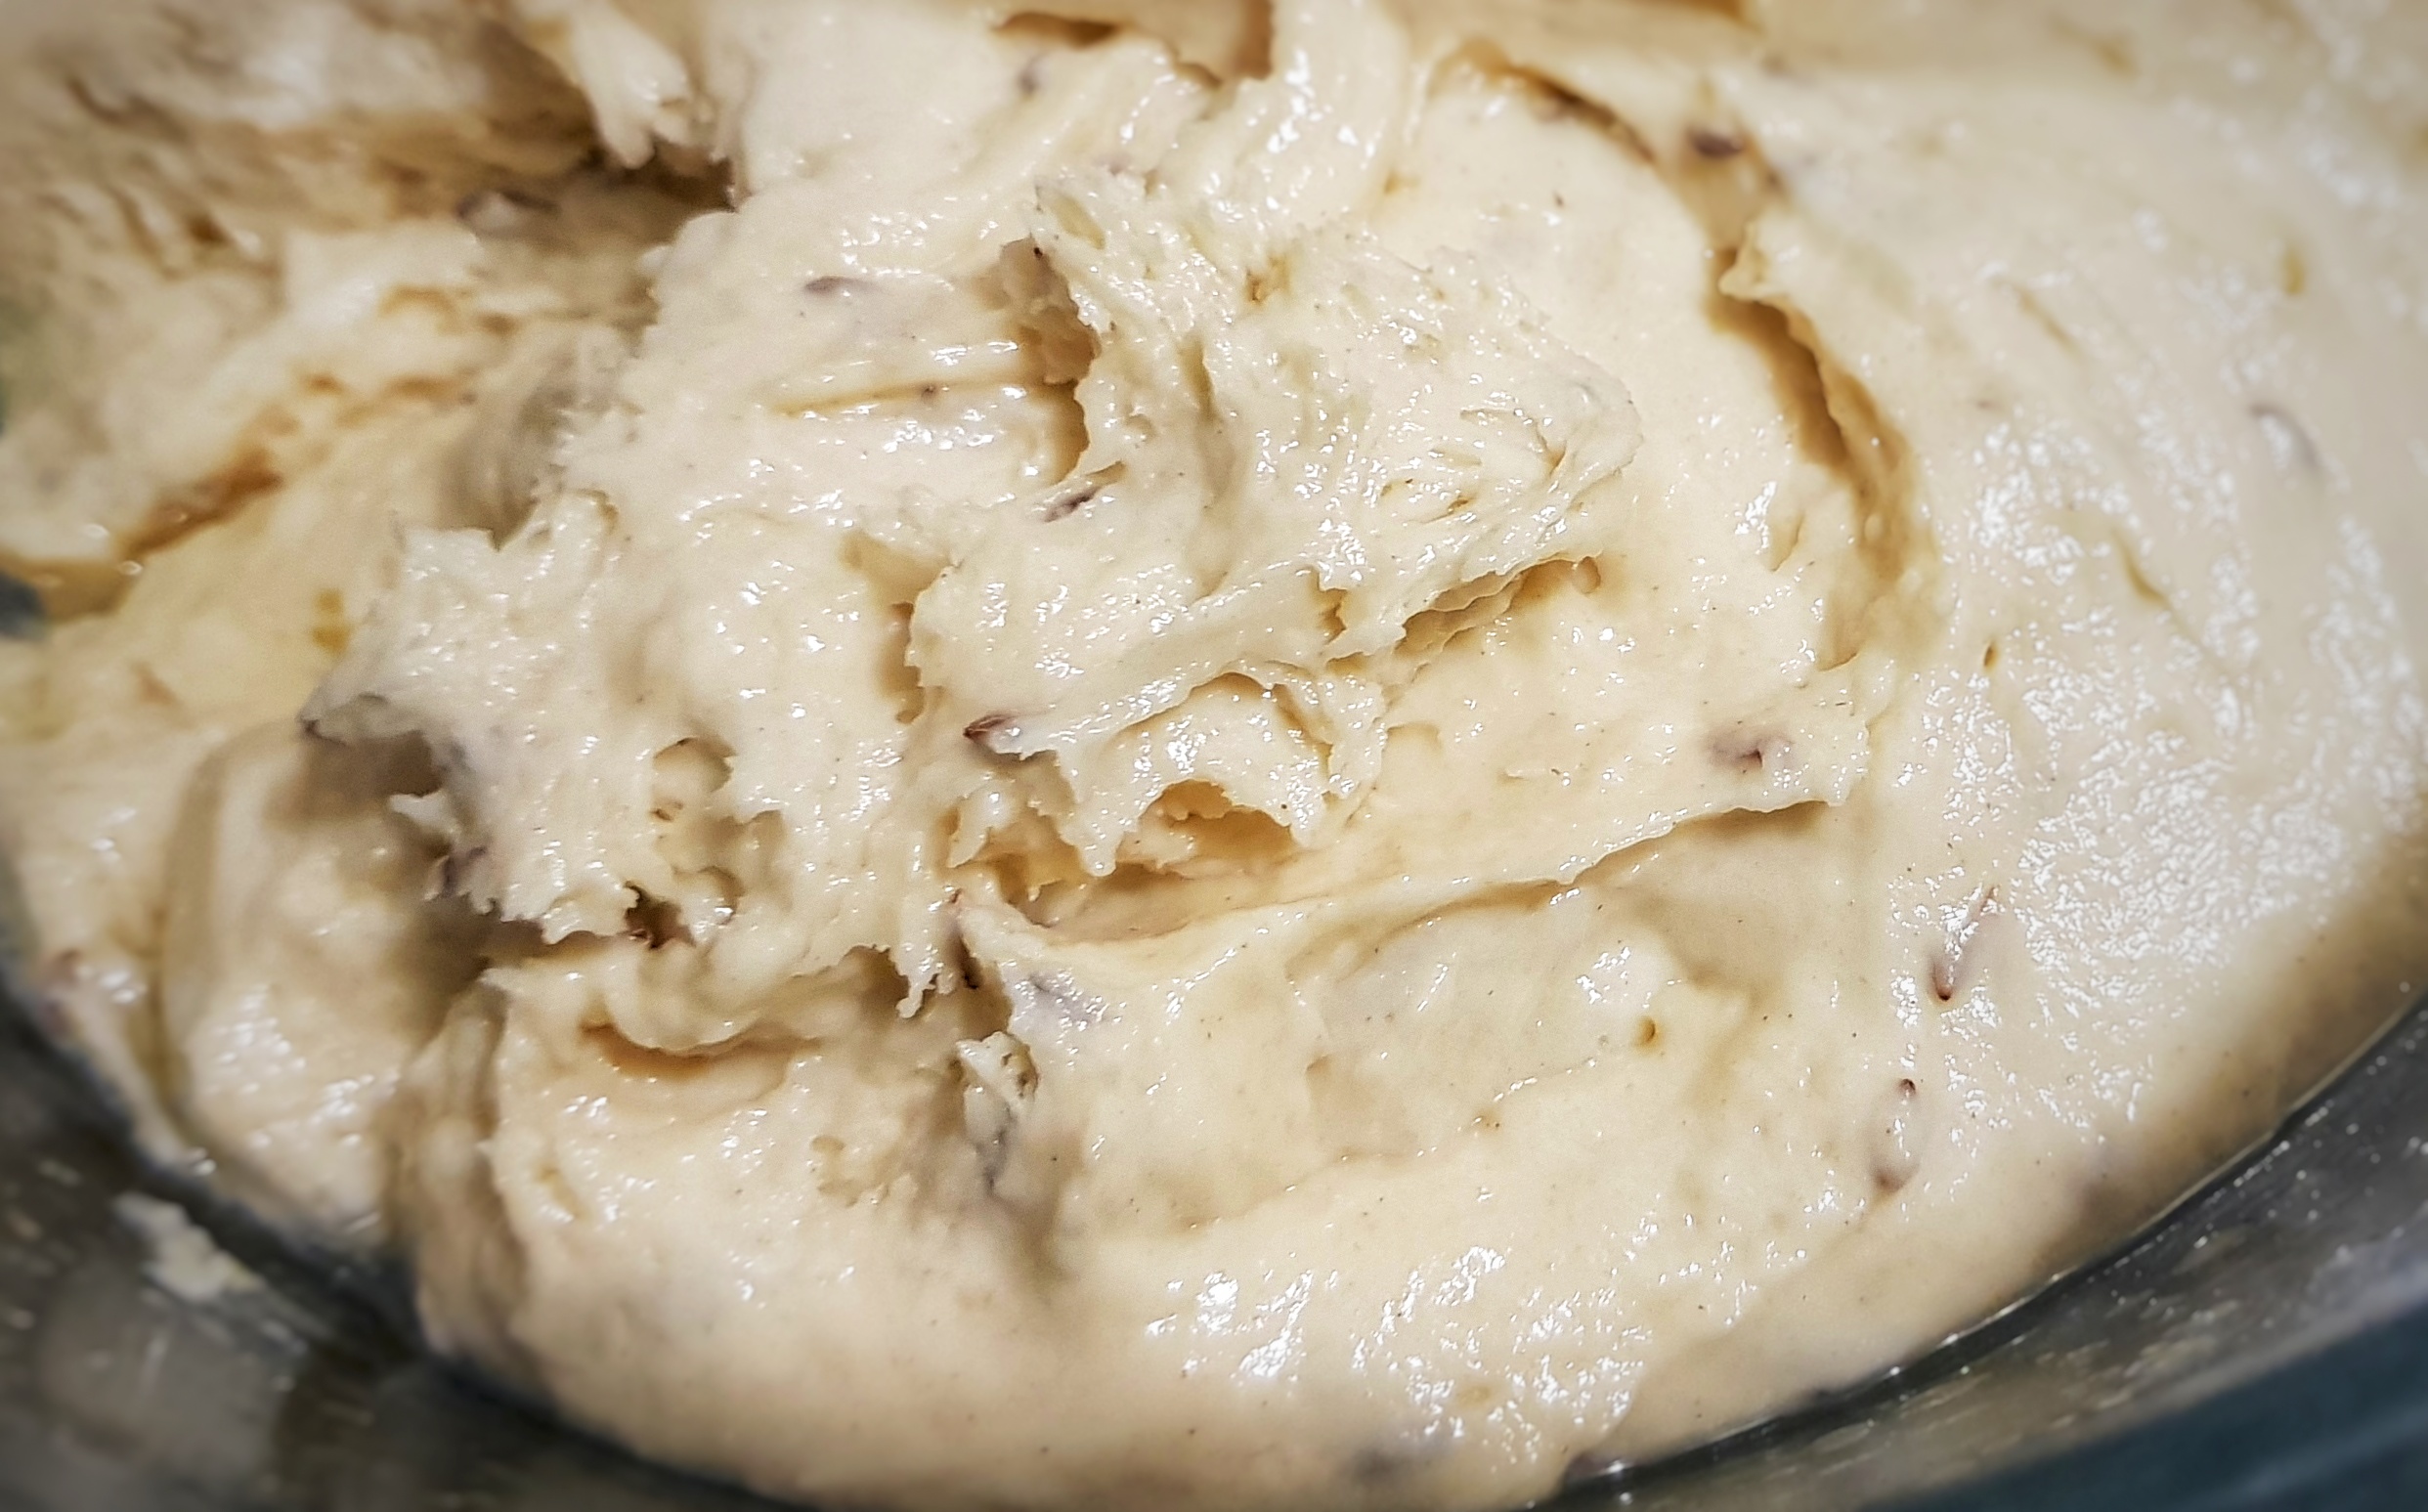
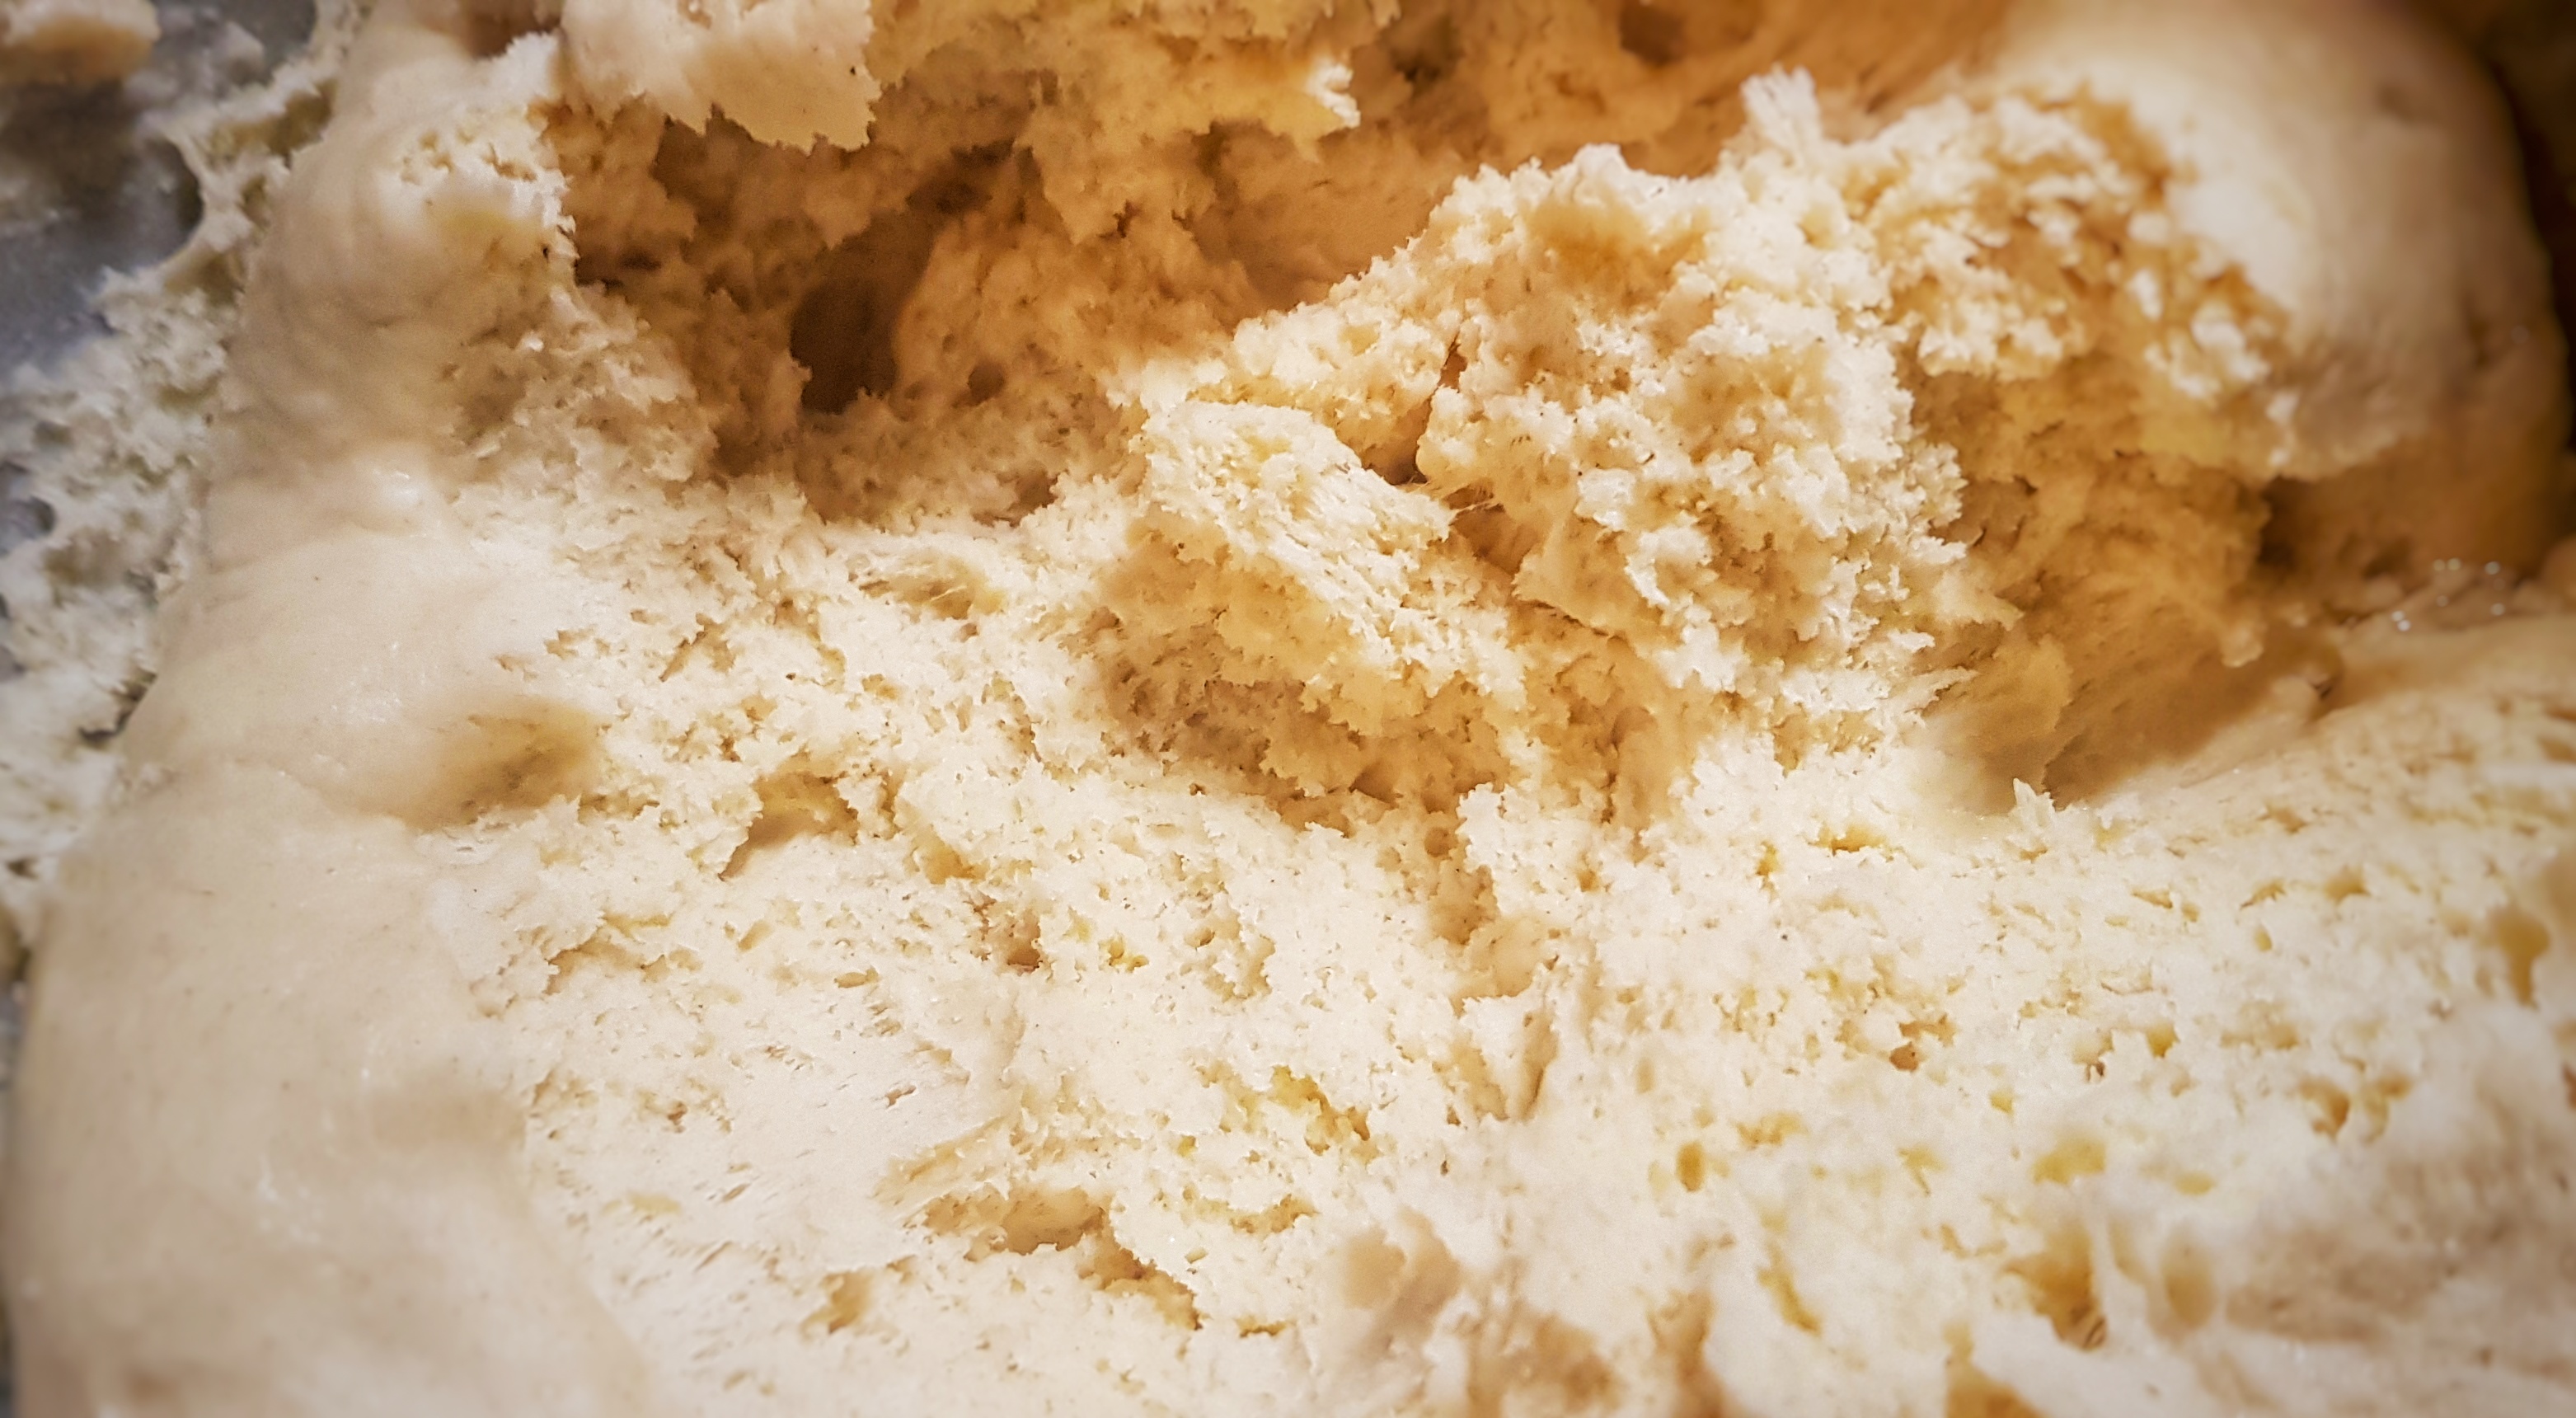
The white dough is essentially a sweet brioche made without eggs. When it was time to knock it back after its first rising, I was encouraged by the network of small yeasty bubbles that had formed inside the dough.
The tiny bubbles in my enriched basic dough
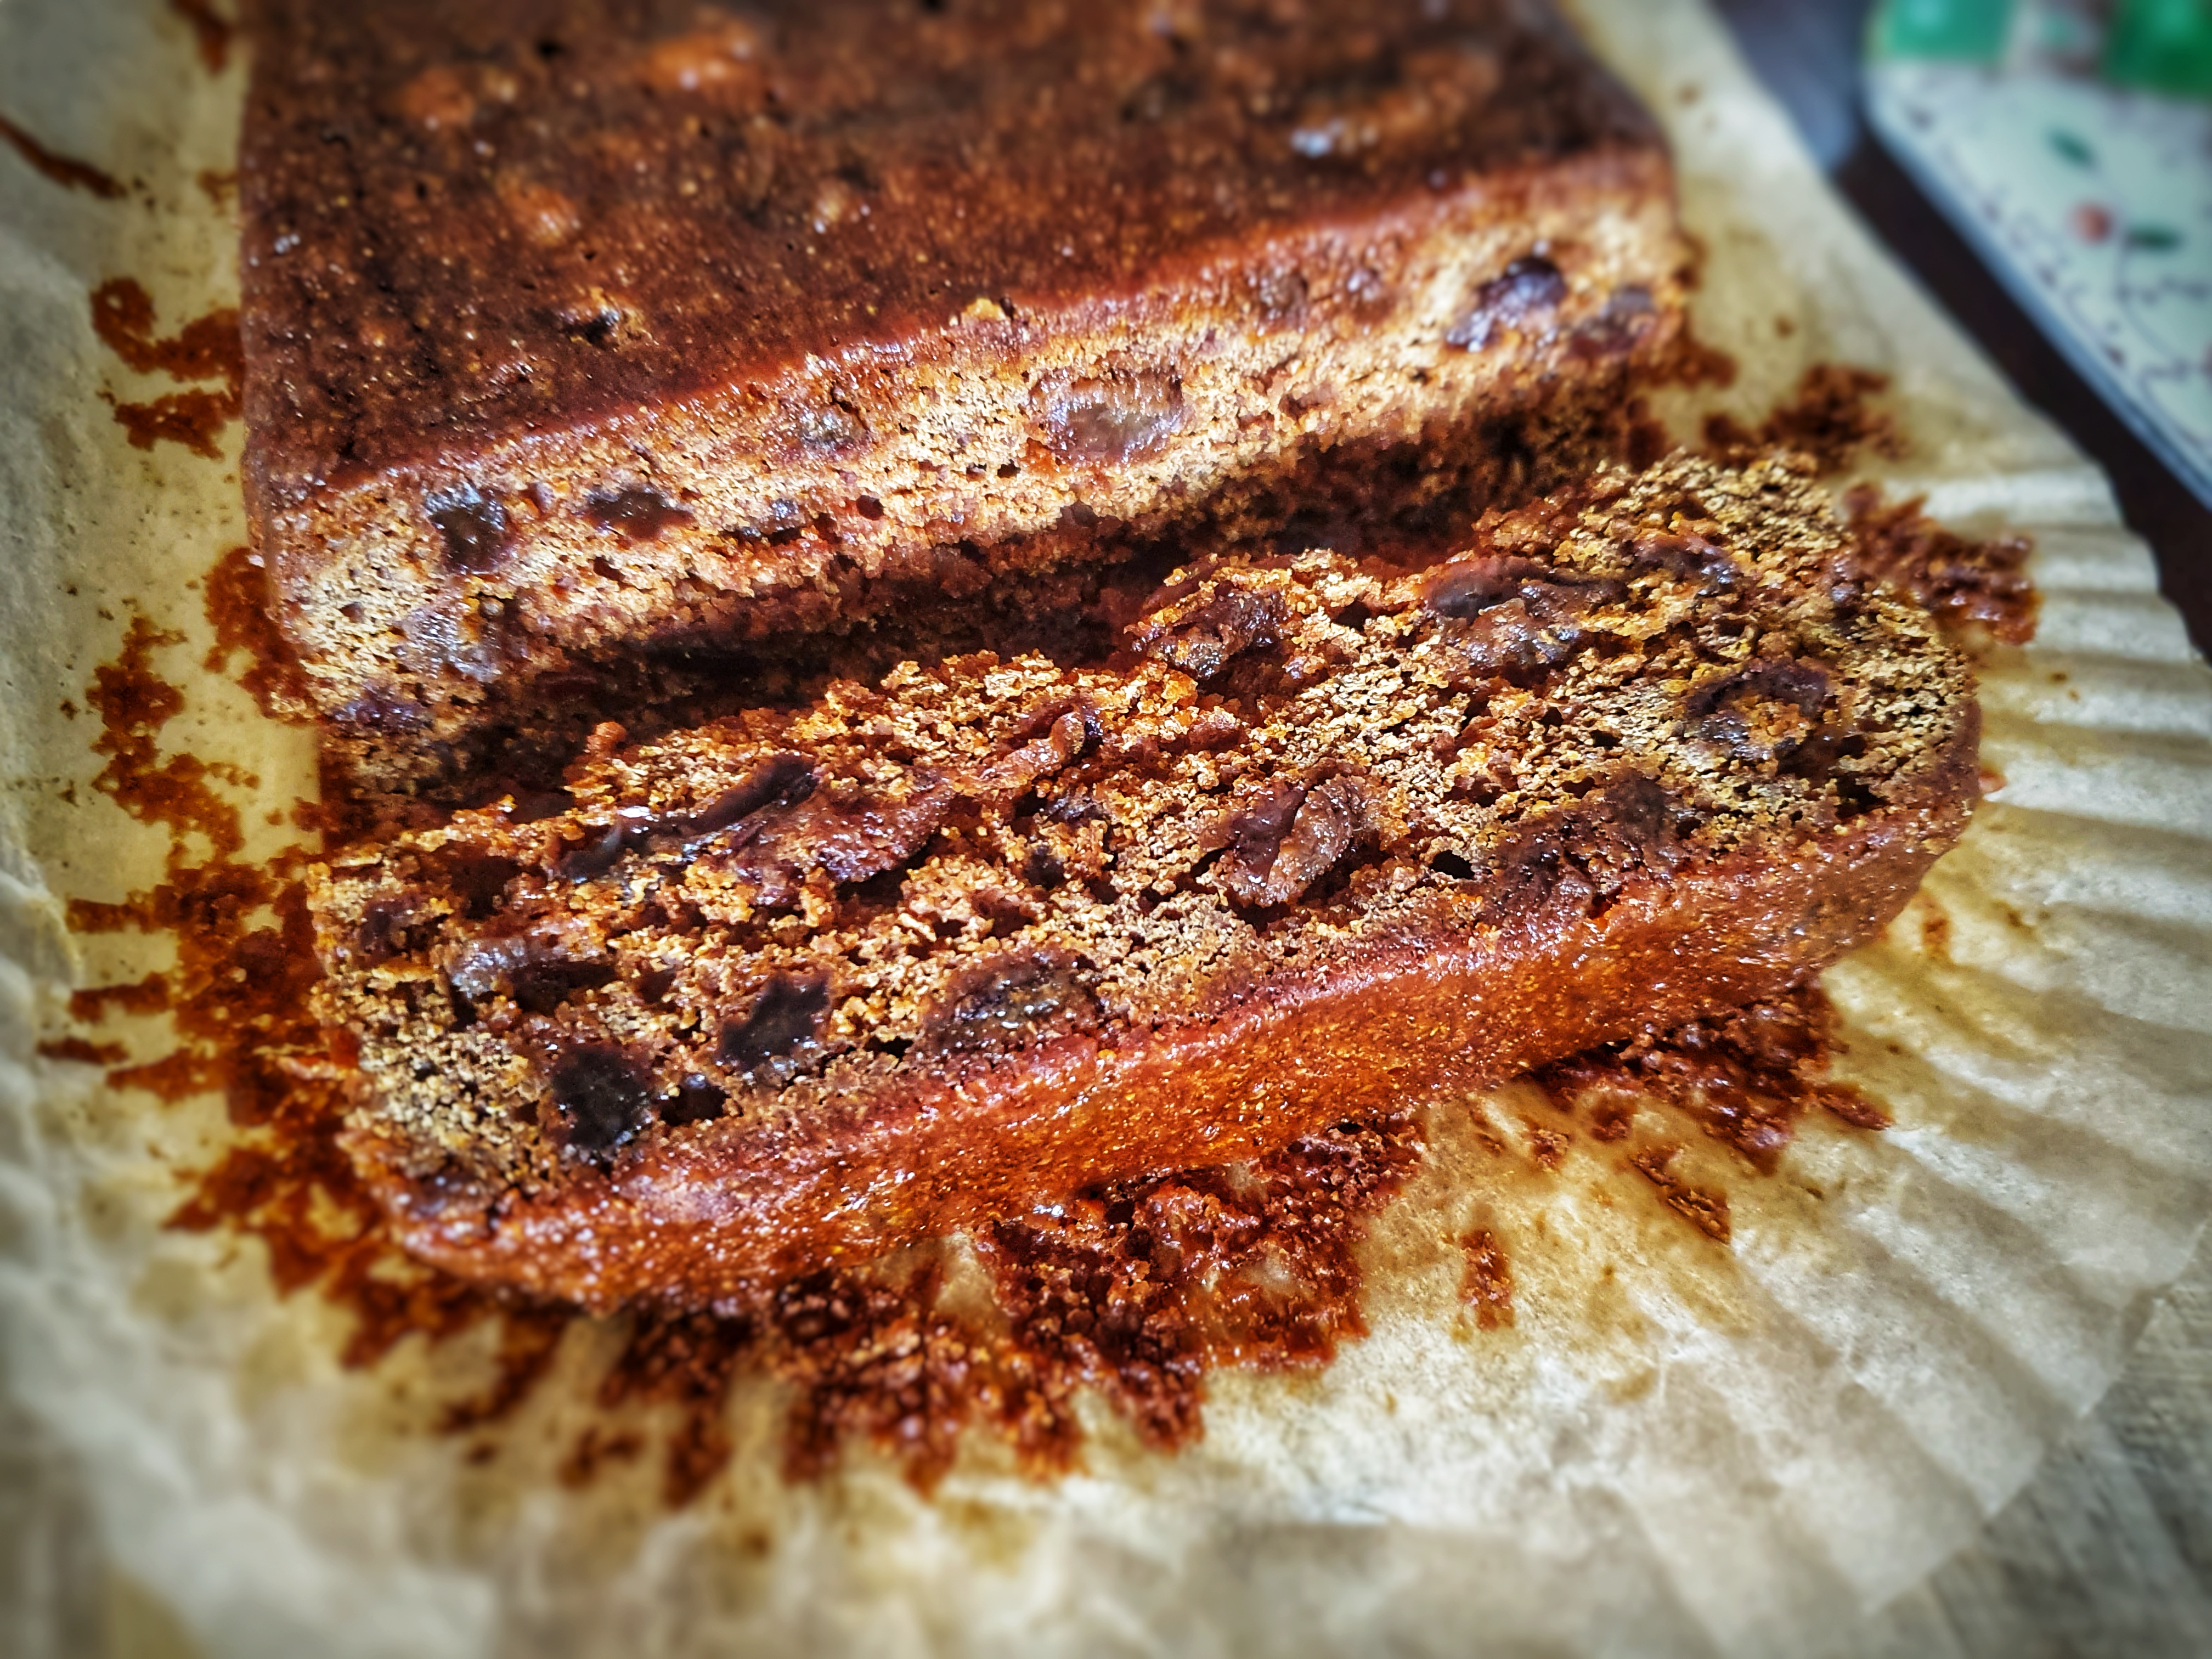
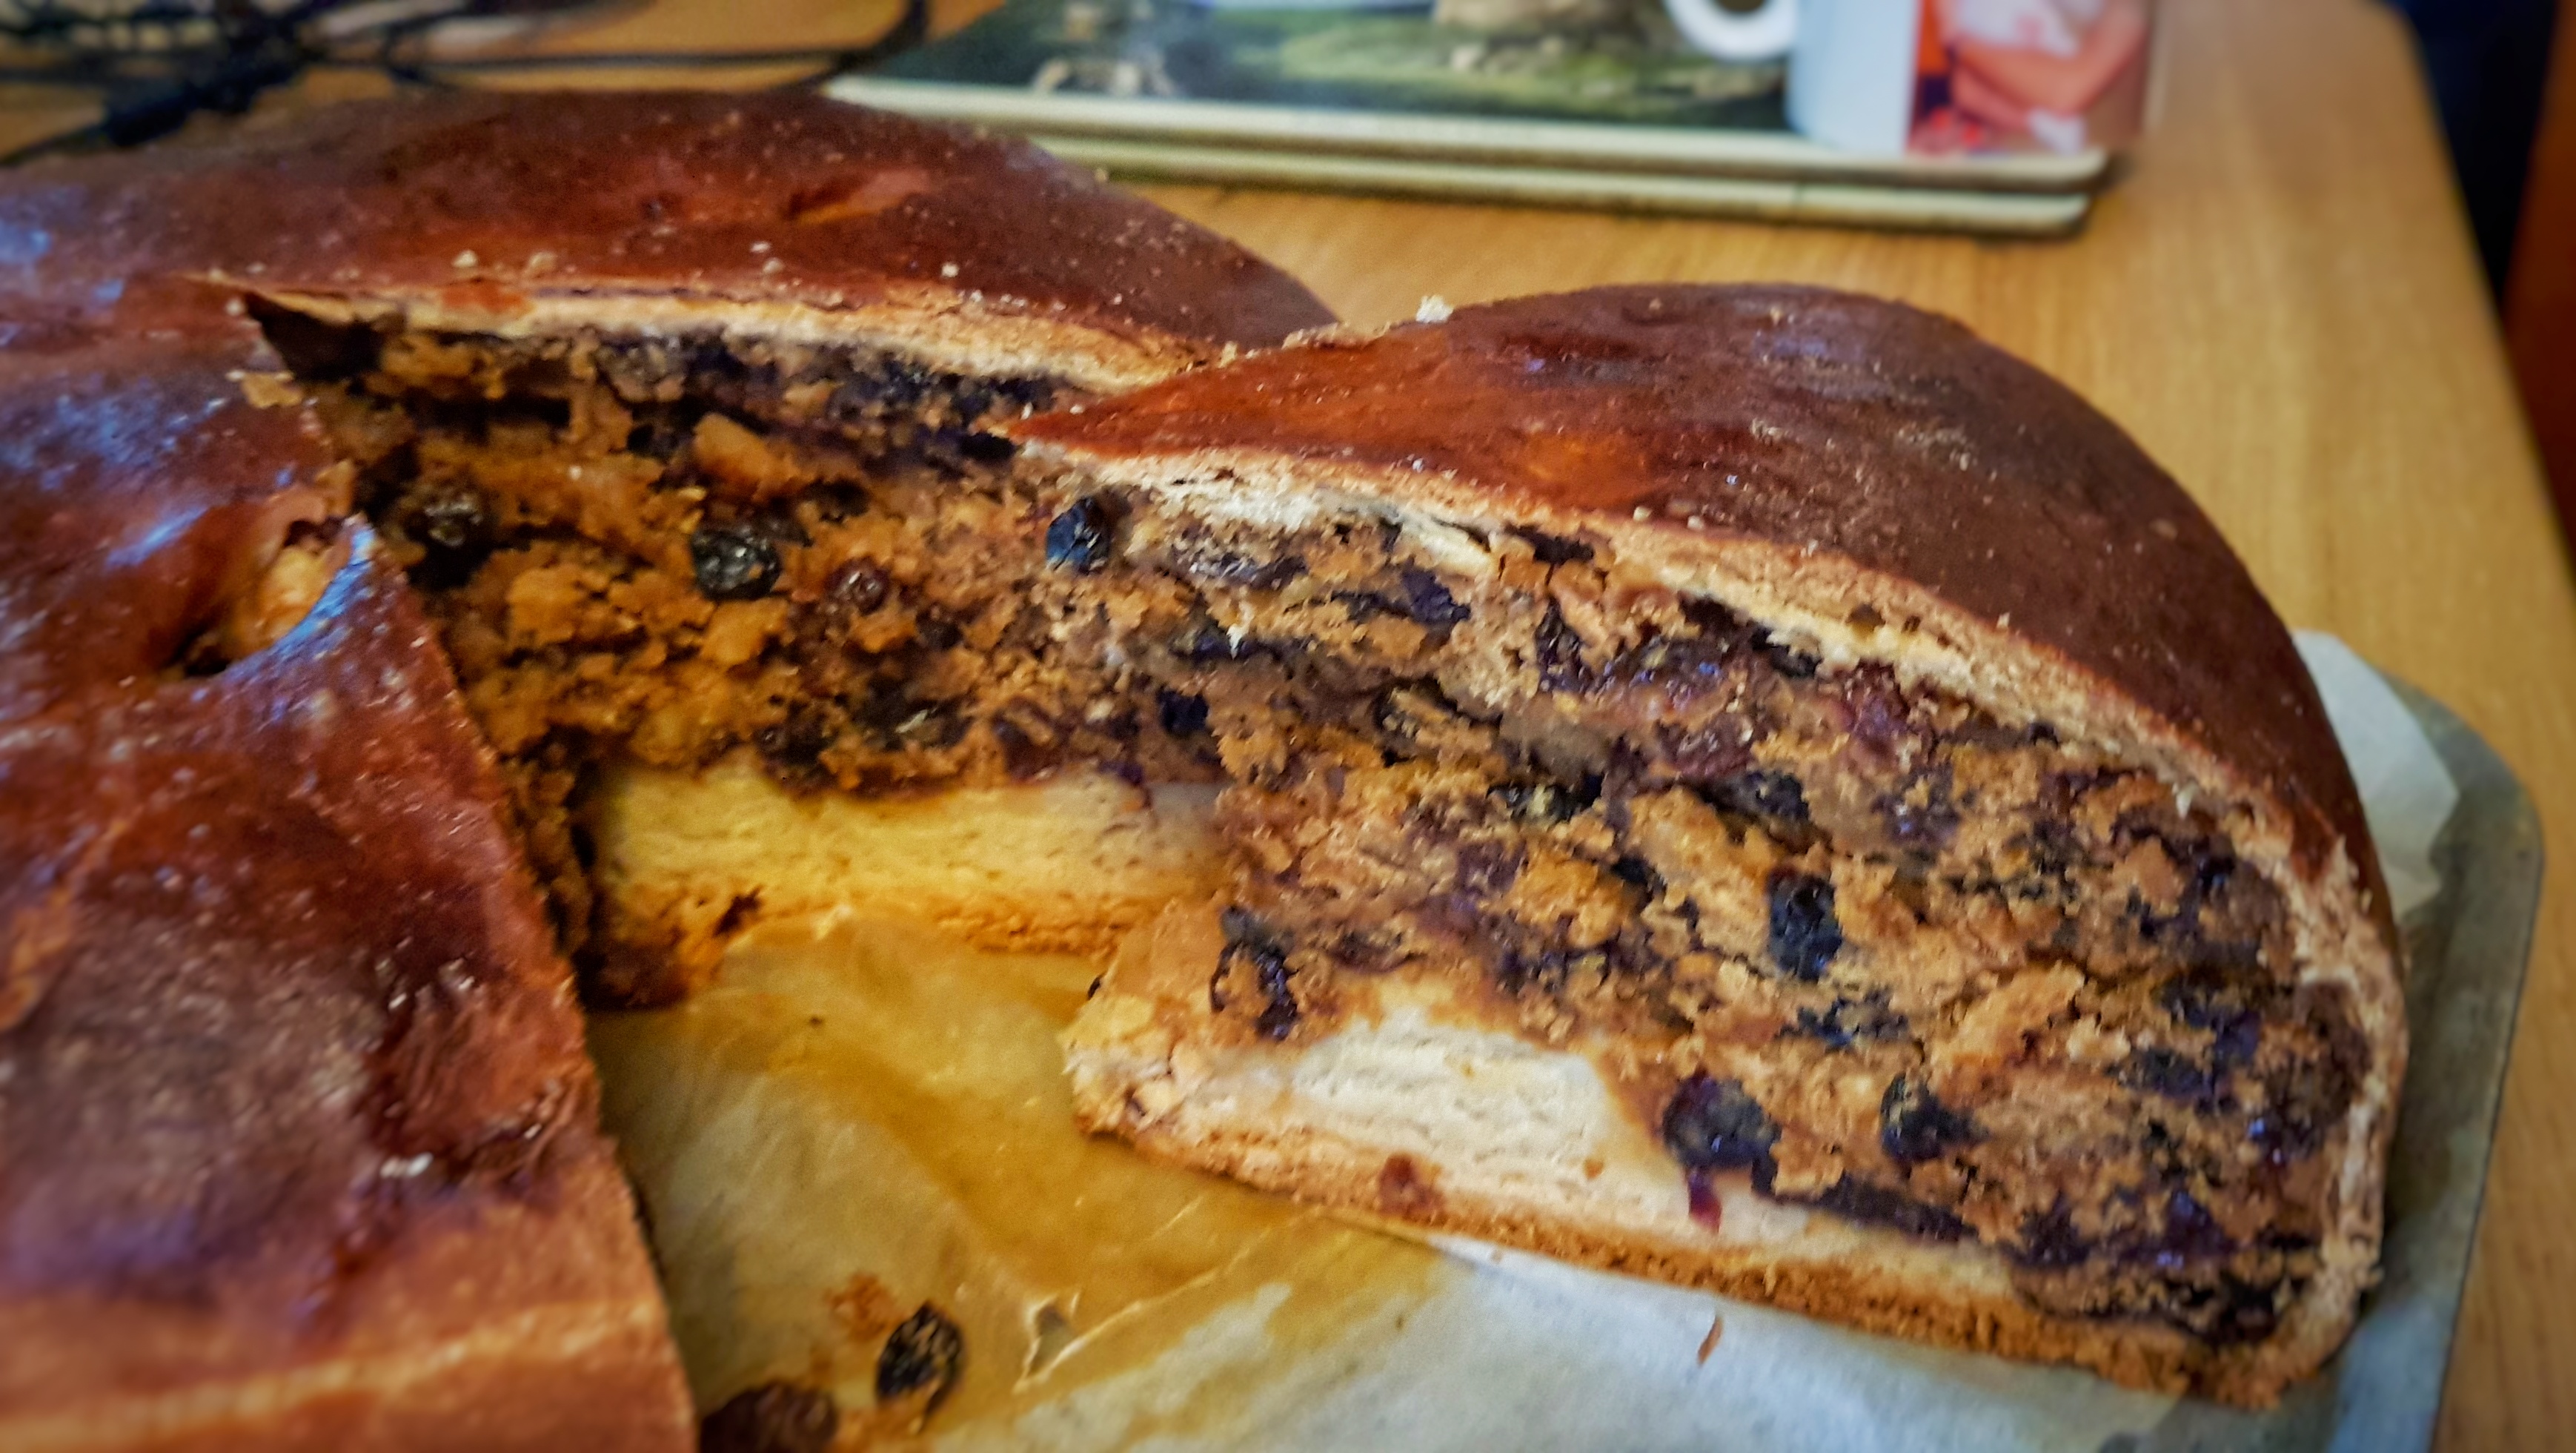
The bun was huge and made quite the centrepiece (though if you wanted to reduce the quantities and make a smaller one, go ahead). The cake inside was deliciously moist, and the brioche dough wonderfully buttery and thin and in such contrast with the treacle-black centre.
If you like the blogs and podcast I produce and would to start a £3 monthly subscription, or would like to treat me to virtual coffee or pint: follow this link for more information.Thank you.
It may have been big, but it kept well and was perfectly delicious well over a week after baking.
For the basic dough:
450 g plain white flour
450 g strong white bread flour
160 g caster sugar
10 g dried fast-action yeast
20 g salt
160 g softened butter
400 ml hand-hot full-fat milk
A smidge of flavourless oil
For the centre:
750 g basic dough
100 ml black treacle
400 g currants
400 g raisins
100 g candied peel
100 g slivered almonds
1 tsp mixed spice
½ tsp each ground cinnamon and allspice
2 eggs, plus 1 more for glazing
Butter for greasing
Granulated sugar
Two days before you want to bake your black bun, in the evening, make the basic dough. This is best done with an electric mixer, however don’t let me stop you attempting this by hand. Mix the dry ingredients – flours, yeast, sugar and salt – in your mixing bowl, make a well and add the butter and milk. Mix slowly with a dough hook until everything is mixed together, then turn the speed up a little and knead until smooth. Because it’s a low-gluten mixture and there’s all of that butter and sugar, it won’t be very elastic, but when it’s really smooth, you are done. It should take 8 to 10 minutes.
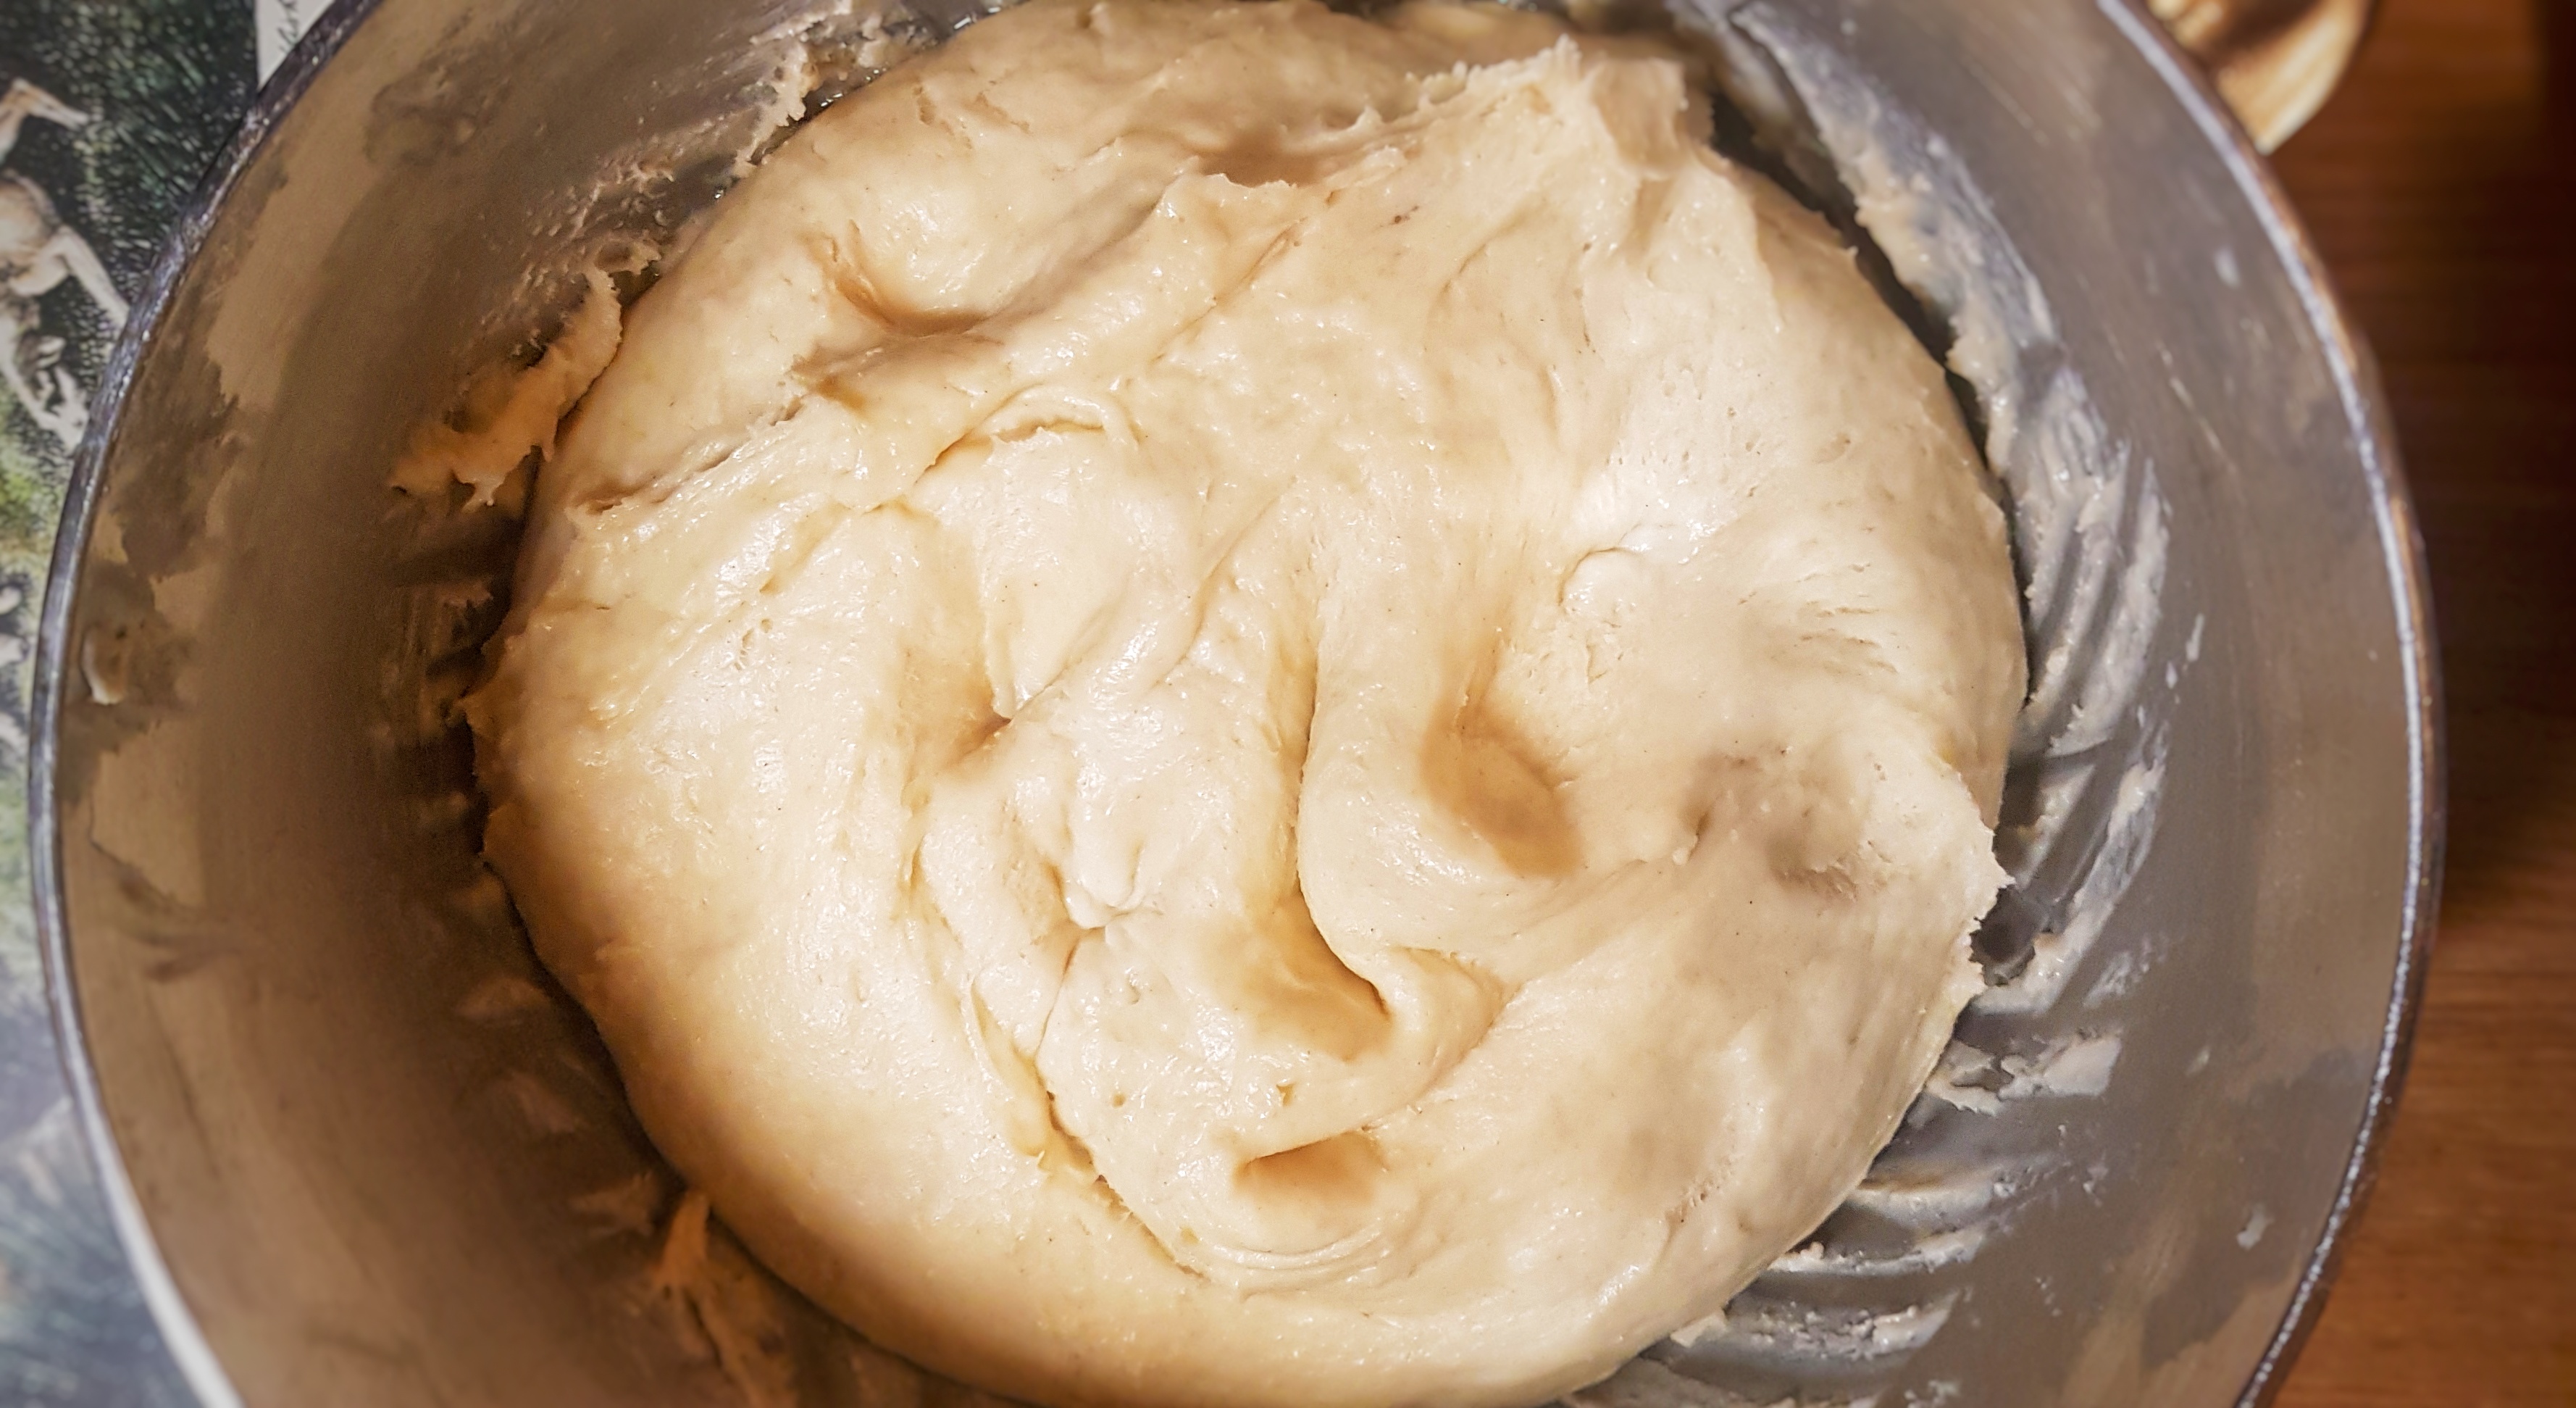
Paint the inside of a bowl with oil, then bundle up the sticky dough as best you can and cover with cling film. Leave to prove until around double in size. This took 18 hours: I use a low amount of yeast on purpose that the yeast ferments slowly. It may take less time for you if you used more yeast, and if your home is warmer than mine.
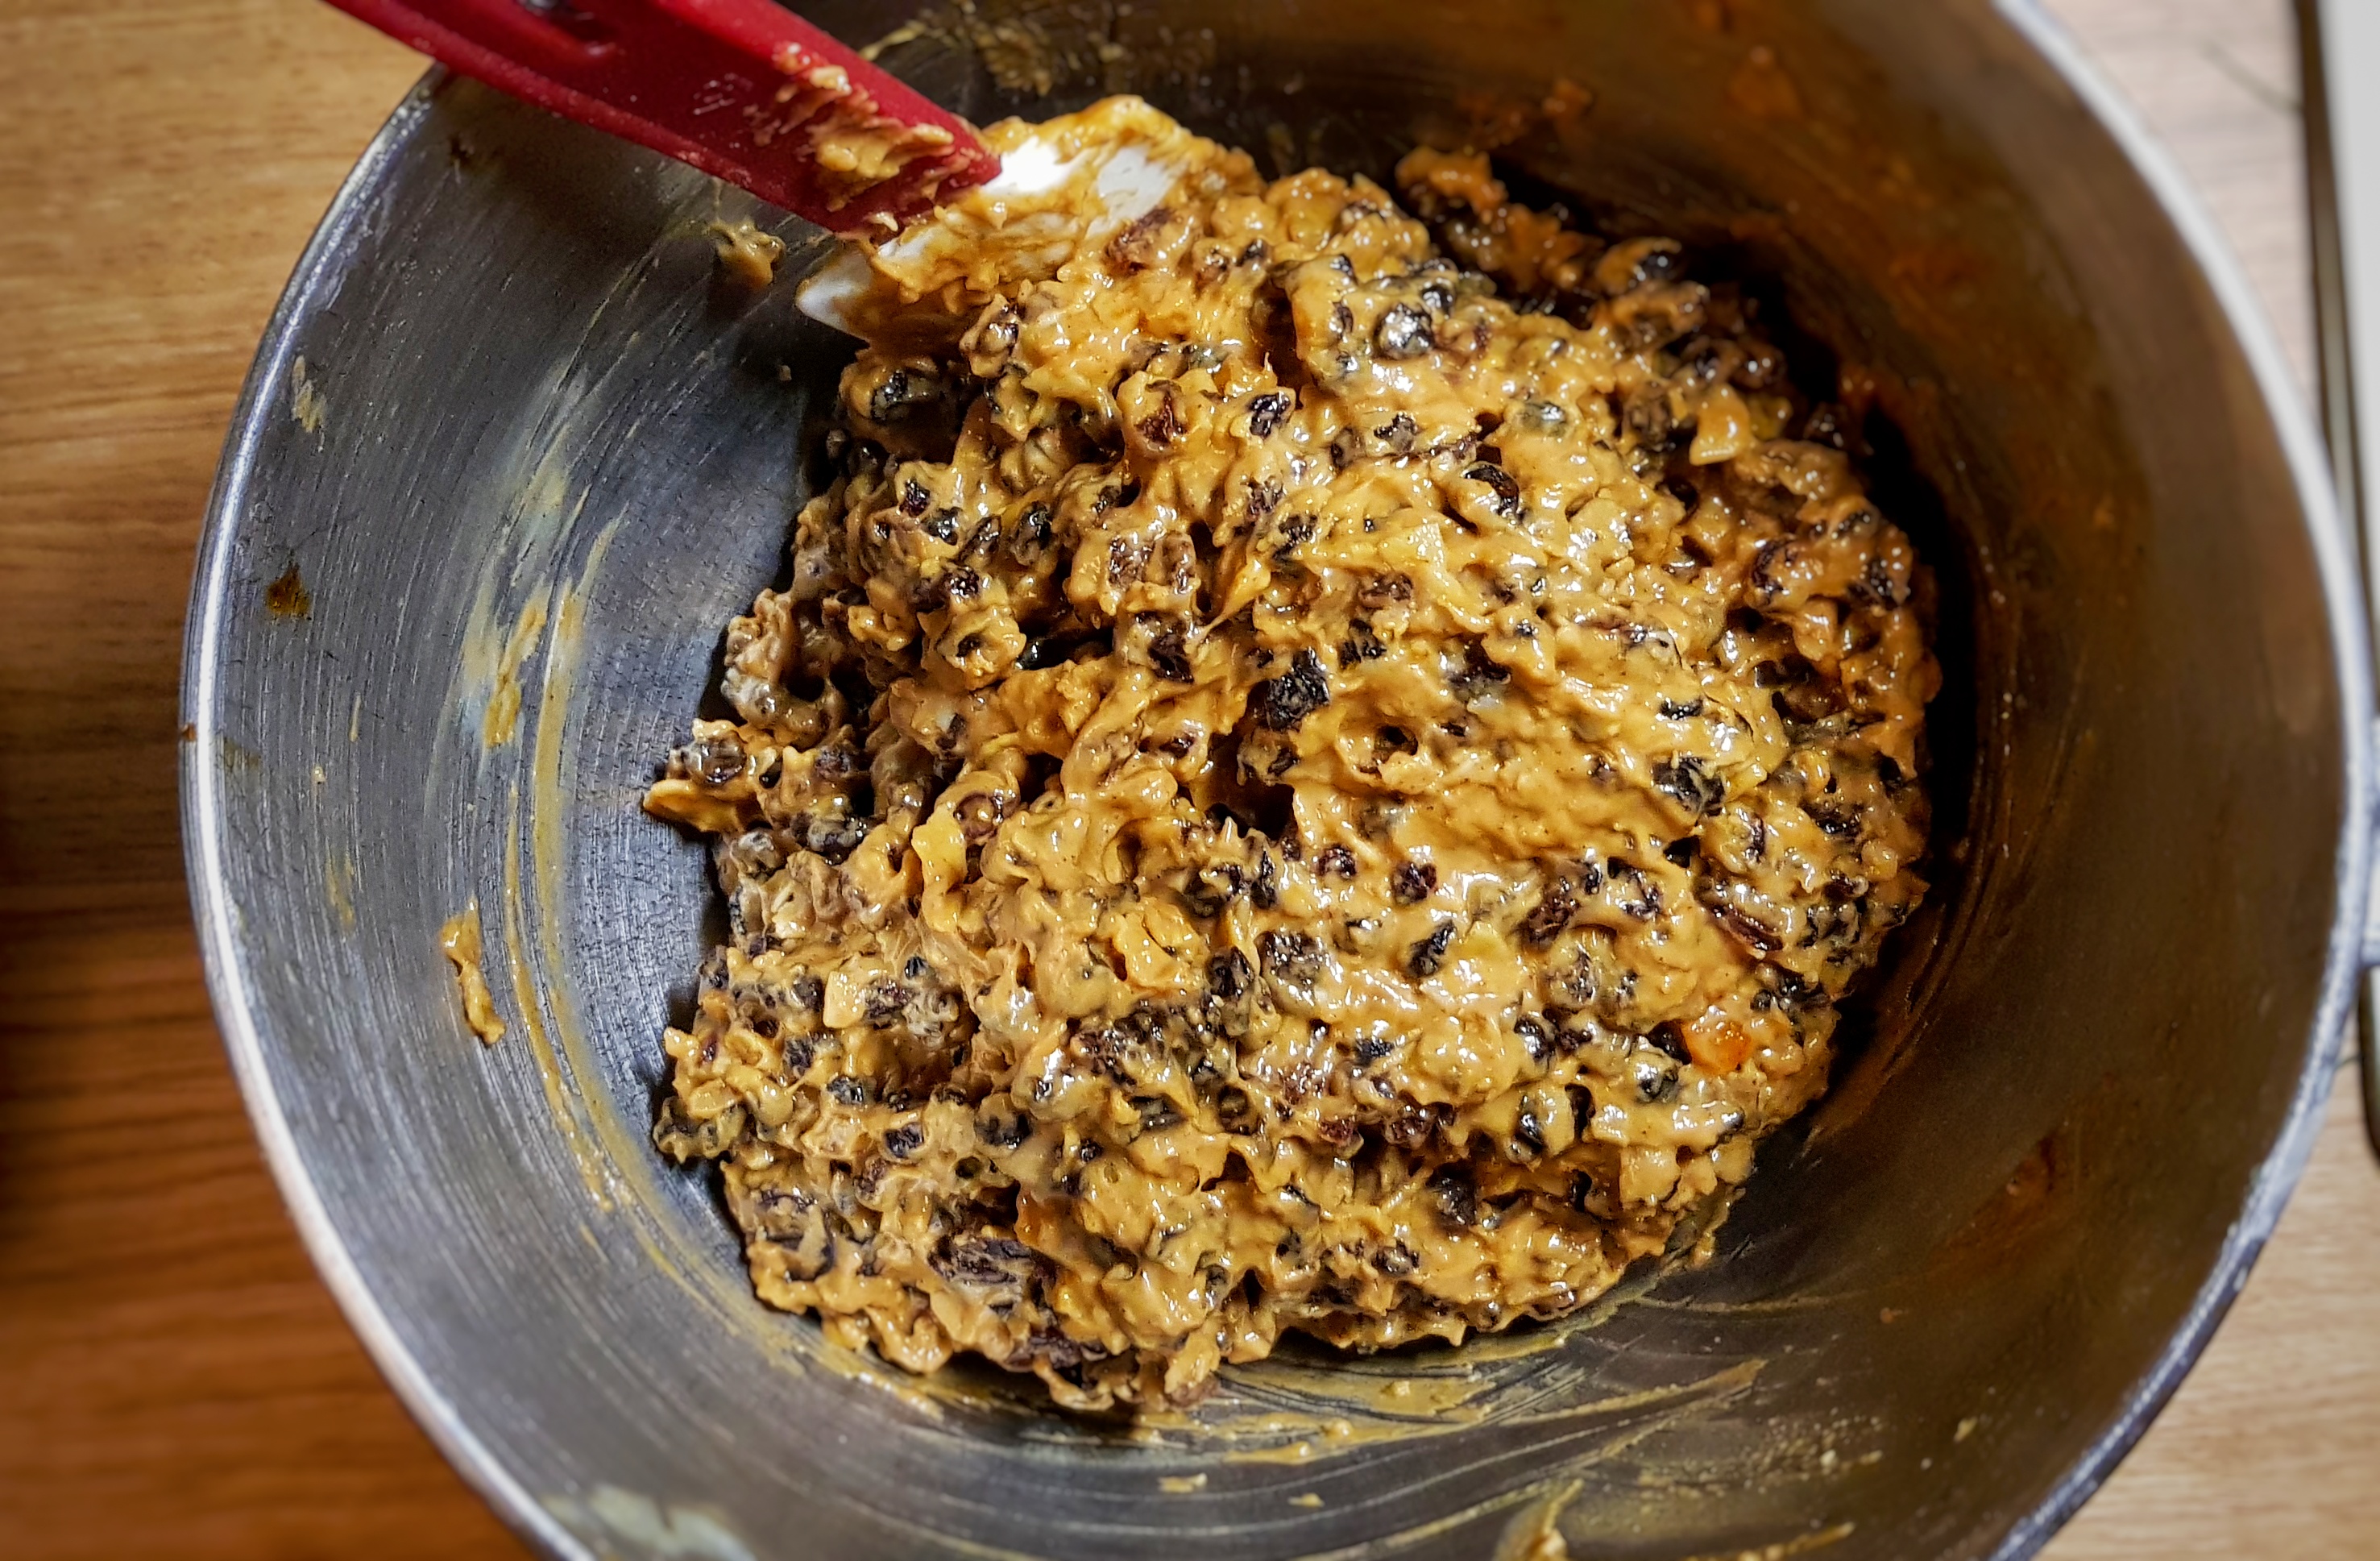
Knock back the dough and place 750 g of the dough in your food mixer, then add the treacle, dried fruits, candied peel, almonds, spices and eggs. Mix with a flat beater for a couple of minutes until everything looks smooth and like a Christmas cake batter. Set aside.
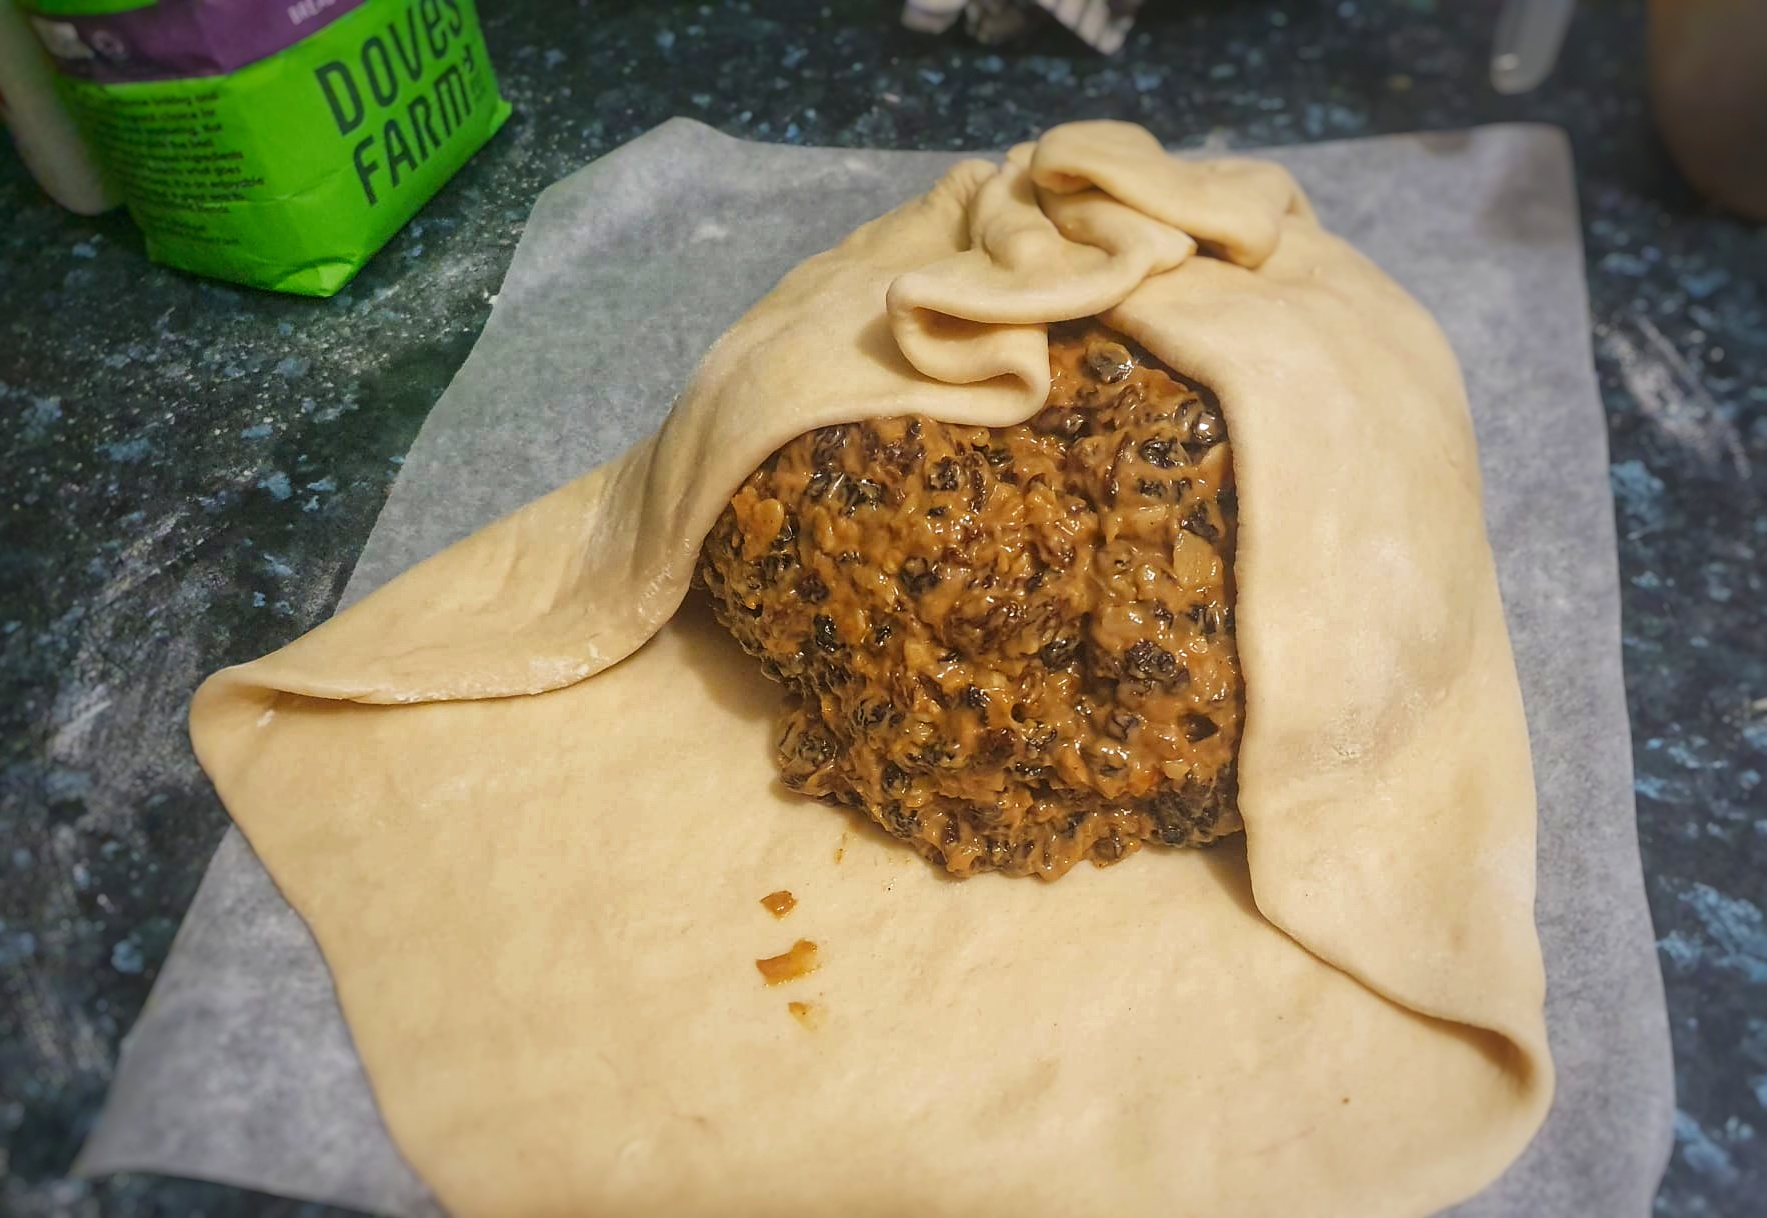
Take the remaining dough, form into a ball, place on a floured work surface and roll out into a large circle 32-35 cm in diameter. Make sure your pin is floured too; this will prevent sticking. With slightly wet hands, scoop the dark sticky dough and pop it in the centre of your circle. Now gather the dough so that the centre is completely covered – rather like a giant Eccles cake.
Cut away bits of the dough that have bunched up too much and glue any edges with a thin coat of beaten egg. Don’t worry if it looks a bit messy. Turn the bun over and flatten it with your hands, smoothing away any bulging bits to make a nice round shape.
Now liberally grease a 25 cm flan ring with butter and place on a baking sheet lined with greaseproof paper and then dusted with flour, and place the bun in the centre. Press the bun or lightly roll it with your rolling pin so that is just a centimetre off from touching the edge. Paint the top with egg and scatter over a little granulated sugar, then stab holes in the top with a thin, pointed knife right down to its base – this keeps it flat as it rises. Cover with a large plastic bag[1] and allow to prove until it has grown large enough to fill the ring. For me, this took 12 hours.
Preheat your oven to 175°C and place a heatproof tin on the bottom of the oven. When it’s time to bake the bun boil the kettle, then open the oven and slide your bun onto the middle shelf, gingerly slide the tin out enough so that you can pour in the hot water, slide it back in and close the door.
Bake at this temperature for an hour, then turn the heat down to 140°C and bake for a further 2½ hours. If the top is getting too brown, cover it with some kitchen foil.
Remove from the oven, and slide onto a cooling rack. Remove the ring when the bun is just warm.
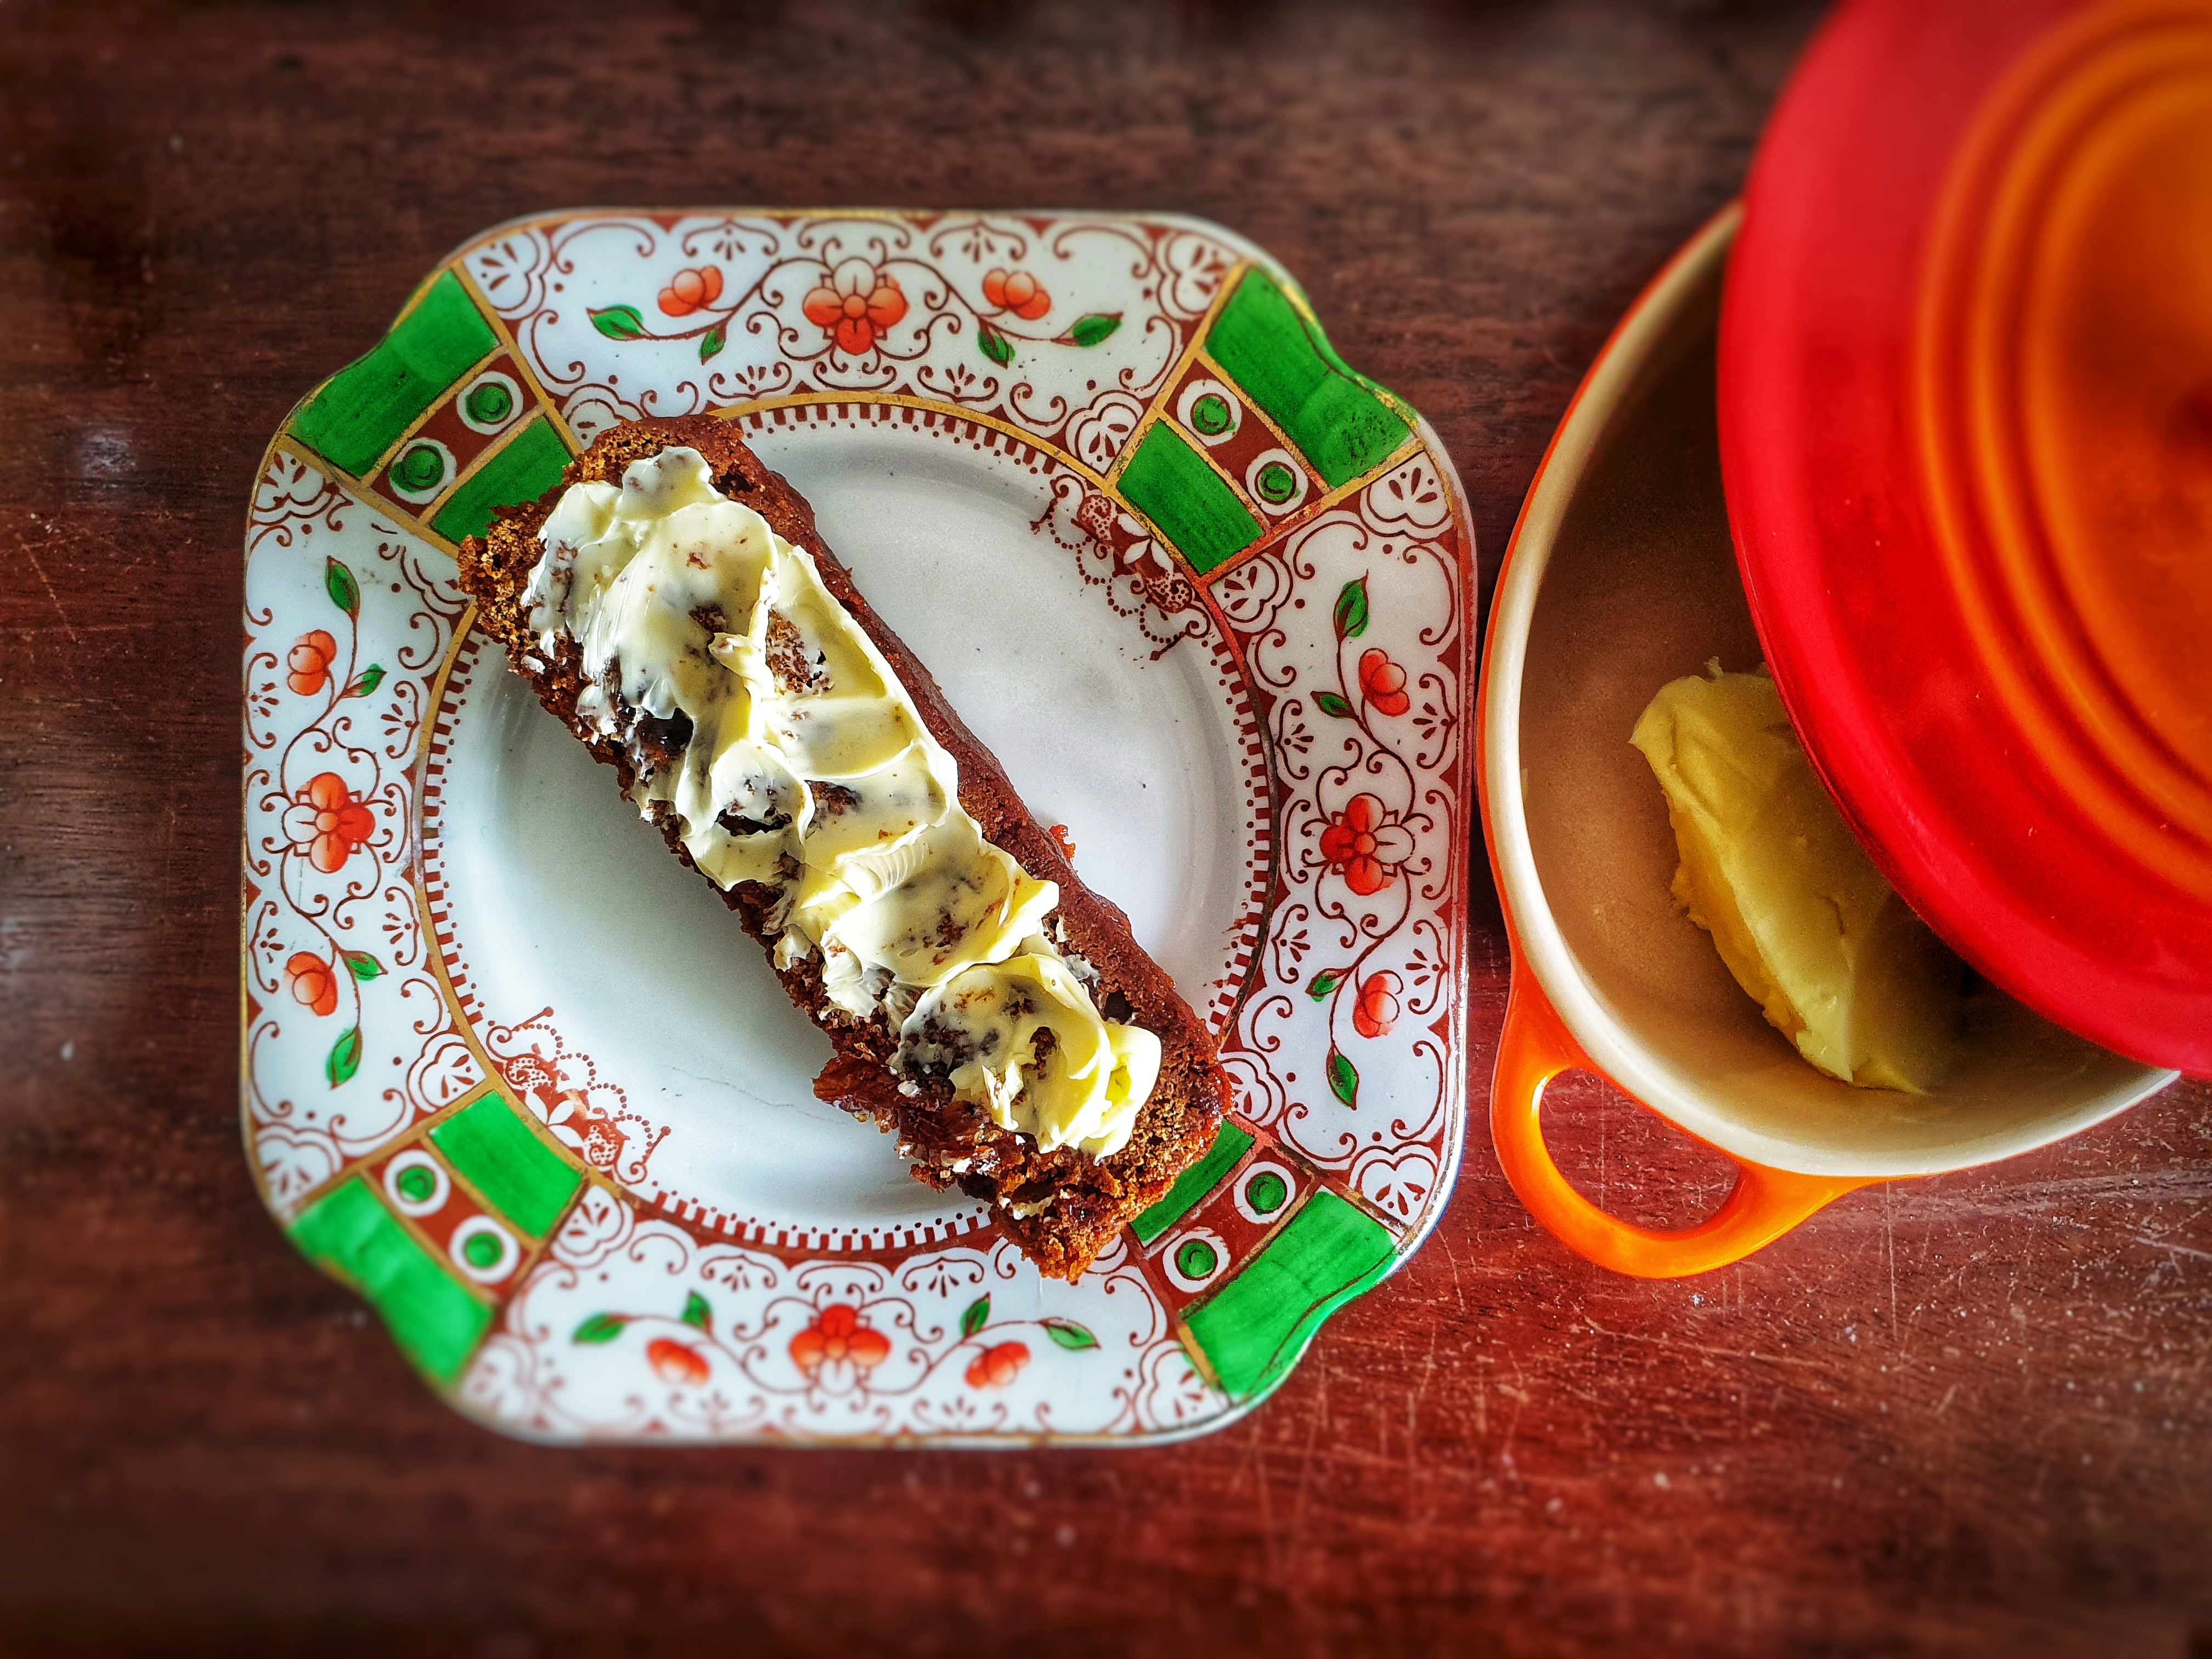
The black bun will keep for weeks in an airtight box or tub. It is delicious eaten with sharp cheese.
Notes:
[1] I find a supermarket ‘bag for life’ is best for this task. I have one that I use only for proving things like this. Turn it over and turn up the edges, as you would your trousers to make it a sturdy shape and hey presto!